
Revive Your Starter: Simple Steps to Bring a Dormant Starter Back


Welcome to BakeWithEase, your baking sanctuary! Ever stared at a jar of seemingly lifeless sourdough starter and wondered if all hope was lost? Fear not, fellow baker! This guide unveils simple, yet crucial steps to revive a dormant sourdough starter, breathing new life into your baking journey. Ready to witness the magic unfold? Let's get started!
- Revive Your Starter: Simple Steps to Bring a Dormant Sourdough Starter Back to Life
- Introduction: Understanding Dormant Sourdough Starters
- Assessing Your Dormant Sourdough Starter's Condition
-
Step-by-Step Guide: Reviving Your Dormant Sourdough
- Step 1: Gathering Your Supplies for Starter Revival
- Step 2: The Initial Feeding: Waking Up Your Dormant Starter
- Step 3: Discarding and Feeding: Establishing a Regular Schedule
- Step 4: Monitoring and Adjusting: Fine-Tuning Your Starter's Activity
- Step 5: Maintaining a Healthy, Active Sourdough Starter
- Troubleshooting Common Issues When Reviving a Sourdough Starter
- Baking with Your Revived Sourdough Starter
- Conclusion: Enjoying the Fruits of Your Labor - Delicious Sourdough Bread!
-
Frequently Asked Questions
- What does it mean for a sourdough starter to be dormant?
- How long can a sourdough starter stay dormant?
- What are the key signs that my sourdough starter needs reviving?
- How often should I feed my starter when reviving it?
- What is the best way to store my sourdough starter to prevent it from becoming dormant in the first place?
- Final Reflection: The Enduring Power of a Simple Starter
- Rediscover Your Baking Magic!
Revive Your Starter: Simple Steps to Bring a Dormant Sourdough Starter Back to Life
Introduction: Understanding Dormant Sourdough Starters
What is a Dormant Sourdough Starter?
A dormant sourdough starter is one that has been stored in a way that significantly slows down the activity of the wild yeast and bacteria cultures within it. Typically, this means storing the starter in a cold environment, such as a refrigerator, for an extended period without regular feeding. In this state, the microorganisms are still alive but are far less active than a starter kept at room temperature with daily or twice-daily feedings. Think of it as the starter taking a long nap.
When your starter is dormant, it won't show the vigorous bubbling, significant rise, or rapid doubling in size that you expect from an active starter ready for baking. Its texture might be thicker, and a layer of liquid, known as hooch, may have formed on top. This state is perfectly normal for starters that aren't being used frequently and is a common method for long-term storage, allowing bakers to take a break from daily maintenance while preserving their starter culture.
Why Starters Go Dormant: Factors and Causes
The primary reason a sourdough starter becomes dormant is a lack of regular feeding combined with a cool storage temperature. When you stop feeding your starter, the microorganisms consume the available flour and water. As these food sources become depleted, their activity naturally slows down. Storing the starter in a refrigerator, typically between 35°F and 40°F (around 2°C to 4°C), dramatically reduces the metabolic rate of the yeast and bacteria, preserving the remaining food for a longer time and preventing the rapid buildup of acidity and off-flavors that would occur at room temperature without feeding.
Other factors can contribute to a starter becoming sluggish or appearing dormant even at room temperature, although true dormancy usually implies cold storage. These can include inconsistent feeding schedules, using chlorinated water (which can inhibit microbial activity), or maintaining the starter in a location that is too cold (below 70°F or 21°C) for optimal activity. A starter might also become weak if it's fed too infrequently, leading to a significant build-up of acidic byproducts that stress the microorganisms.
The Importance of Reviving a Dormant Sourdough Starter for Baking
Reviving a dormant sourdough starter is a crucial step if you want to bake delicious sourdough bread, pastries, or other leavened goods using your established culture. A dormant starter simply doesn't have the necessary microbial activity to produce enough carbon dioxide to leaven dough effectively. Attempting to bake with a dormant starter would likely result in dense, flat loaves or baked goods.
Beyond simply providing leavening power, a healthy, active sourdough starter contributes significantly to the flavor and texture of your baked goods. The unique combination of wild yeasts and lactic acid bacteria in your starter develops complex flavors during fermentation that commercial yeast cannot replicate. Bringing your dormant starter back to life ensures you can continue to enjoy these distinct characteristics and leverage the unique microbial ecosystem you've cultivated, often over weeks, months, or even years. Reviving dormant sourdough starter is also a satisfying process, connecting you directly to the living culture that makes sourdough baking so rewarding.
Assessing Your Dormant Sourdough Starter's Condition
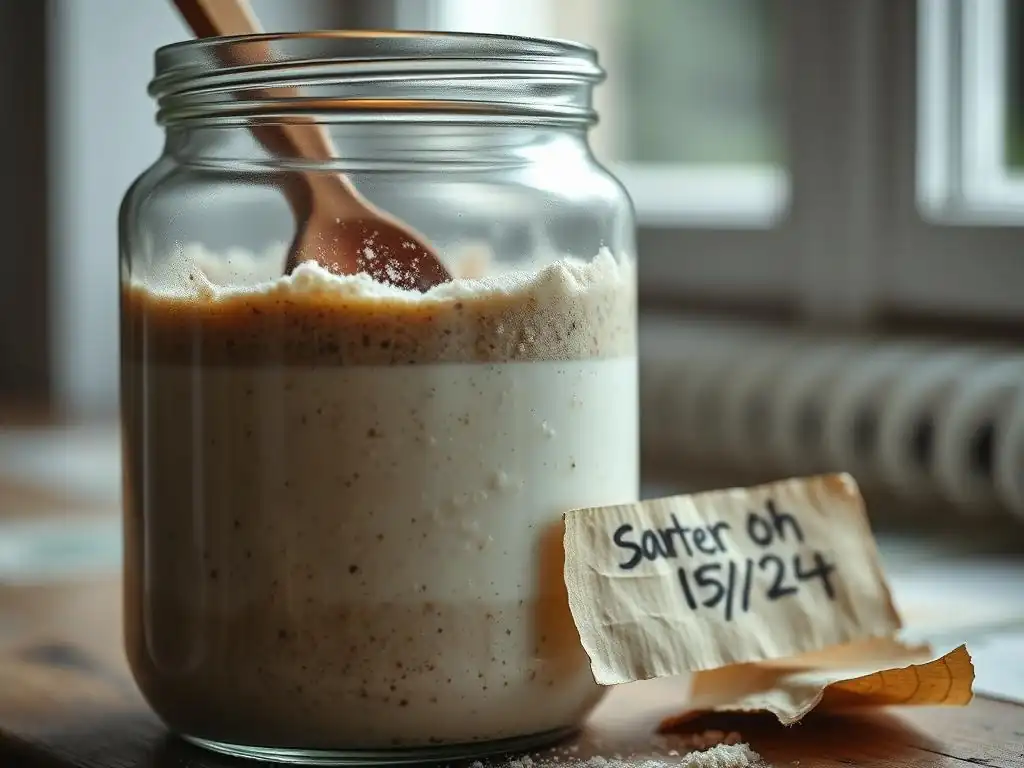
Visual Clues: Identifying a Healthy vs. Unhealthy Dormant Starter
Examining your dormant sourdough starter visually is the first step in determining its condition and whether it's ready to be revived. A healthy, but dormant, starter stored in the fridge will typically have a thick, paste-like consistency at the bottom of the jar. You might see a layer of liquid on top, which is hooch – a harmless byproduct of fermentation indicating the starter is hungry.
The color of the hooch can vary from pale yellow to dark gray or even black, with darker hooch usually signifying a longer period since the last feeding. Small bubbles might still be visible throughout the starter, even if there's no significant rise.
However, certain visual signs suggest a problem. Any visible mold growth, which can appear as fuzzy spots in various colors like white, green, orange, or black, is a definitive indicator that the starter is likely compromised and should be discarded. Pink or orange streaks within the starter can also signal contamination with undesirable bacteria, and such a starter should also be discarded for safety. A healthy dormant starter, even with hooch, should otherwise look like a thick, bubbly batter without these concerning signs.
The Smell Test: Recognizing Signs of Spoilage
The smell of your dormant sourdough starter provides valuable clues about its health. A healthy dormant starter, especially one with hooch, will typically have a strong, pungent aroma. The hooch itself often smells strongly of alcohol, similar to beer or nail polish remover, which is a normal byproduct of yeast fermentation under stress (lack of food). The starter underneath the hooch might smell sharply acidic, vinegary, or even cheesy, due to the lactic acid bacteria. While these smells can be intense, they are generally considered normal for a hungry, dormant starter.
An unhealthy starter, however, will often emit truly foul or putrid odors. Any smell resembling rotten eggs, garbage, or decay indicates that harmful bacteria have taken over the culture. As mentioned with visual cues, the presence of mold is often accompanied by unpleasant, musty smells. If your starter smells genuinely rotten or putrid, regardless of how it looks otherwise, it is best to err on the side of caution and discard it. A healthy starter, even when dormant and hungry, should not smell like it's literally going bad.
Step-by-Step Guide: Reviving Your Dormant Sourdough
Step 1: Gathering Your Supplies for Starter Revival
What You'll Need: Flour, Water, and a Clean Jar
To successfully revive dormant sourdough starter, you'll need a few basic items. First, ensure you have a clean jar or container large enough to accommodate the starter as it becomes active and grows – at least double the starter's volume is a good rule of thumb. You'll also need flour and water. It's best to use filtered or non-chlorinated water, as chlorine can inhibit microbial activity. If you only have tap water, letting it sit out uncovered for 24 hours can allow the chlorine to dissipate.
Measure your ingredients accurately, ideally using a kitchen scale for consistency. While volume measurements can work, weight is more precise and recommended for sourdough baking. You'll typically be working with a small amount of your dormant starter initially, perhaps just a tablespoon or two, to minimize waste during the revival process.
Choosing the Right Flour: Considerations for Feeding Your Starter
The type of flour you use for reviving your dormant sourdough starter can influence the speed and success of the process. All-purpose flour is a common and reliable choice for regular feeding once the starter is active. However, for the initial revival feeds, using a flour with a higher nutrient content can often help kickstart activity more quickly.
Flours like rye or whole wheat flour contain more nutrients and enzymes that the wild yeast and bacteria in your starter thrive on. Feeding with a small amount of rye or whole wheat flour for the first few days, followed by your regular all-purpose or bread flour, can sometimes accelerate the process of bringing a dormant starter back to life.
For example, you might feed with a mix of 50% rye and 50% all-purpose for the first feed, then transition to 100% all-purpose over the next few feeds. Consistency in the type of flour you use once the starter is active is also beneficial for maintaining its balance.
Step 2: The Initial Feeding: Waking Up Your Dormant Starter
Mixing the First Feeding: Ratios and Consistency
The initial feeding is crucial for waking up your dormant sourdough starter. Start by taking a small amount of your dormant starter from the jar – perhaps 20-30 grams (about 1-2 tablespoons), discarding the rest (or storing it separately if you prefer). In a clean jar, combine this small amount of starter with equal parts by weight of warm water (around 75-80°F or 24-27°C) and flour. A common starting ratio is 1:1:1, meaning 20g starter, 20g water, and 20g flour.
Mix these ingredients thoroughly until no dry flour remains and you have a smooth, thick batter consistency. It should be similar to pancake batter, not too stiff and not too runny. Scrape down the sides of the jar and loosely cover it. Avoid sealing it tightly, as the starter produces gases. Place the jar in a warm spot, ideally between 75°F and 80°F (24-27°C), to encourage activity. An oven with the light on (but the oven off) can be a good spot, but monitor the temperature to ensure it doesn't get too hot.
Observing for Activity: Signs of Life in Your Sourdough
After the initial feeding, it's time to observe your dormant starter for signs of life. Don't expect immediate dramatic changes; reviving a dormant starter takes patience. Within 12 to 24 hours, you should start seeing some subtle signs of activity. These might include tiny bubbles appearing on the surface or throughout the starter, a slight increase in volume (though likely not a full doubling yet), or a faint, pleasant sour smell developing.
Marking the level of the starter in the jar immediately after feeding can help you track any rise. Even a small rise, maybe 10-20%, within 24 hours is a positive sign that the microorganisms are waking up and beginning to ferment the new food. Continue feeding the starter at least once every 24 hours (or twice daily if you see rapid activity) using the same ratio, discarding most of the starter before each feed, until it consistently doubles in size within 4-8 hours after feeding.
Step 3: Discarding and Feeding: Establishing a Regular Schedule
Why Discarding is Necessary: Maintaining Balance and Removing Acidity
Discarding a portion of your sourdough starter before each feeding is a fundamental practice, especially when reviving a dormant starter. As the microorganisms consume the flour, they produce acids and other metabolic byproducts. Without discarding, these byproducts would accumulate, making the starter too acidic and eventually inhibiting the activity of the desirable yeast and bacteria. Discarding removes a significant portion of these accumulated acids and also helps maintain a manageable volume of starter, preventing it from overflowing your jar.
Furthermore, discarding ensures that the remaining active microorganisms have a fresh supply of food. When you feed a small amount of active starter with a larger proportion of fresh flour and water, you are essentially diluting the old, acidic environment and providing abundant resources for the yeast and bacteria to multiply and thrive. This process is essential for strengthening the starter and encouraging the vigorous activity needed for baking.
Establishing a Feeding Schedule: Twice Daily or Once Daily?
The frequency of feeding when reviving dormant sourdough starter depends primarily on the ambient temperature and the speed at which your starter becomes active. In warmer environments (75-80°F / 24-27°C), a starter will become hungry and peak more quickly, necessitating more frequent feedings, typically every 12 hours. This twice-daily schedule helps maintain the starter at its peak activity level.
If your environment is cooler (70-74°F / 21-23°C), or if the starter is still showing slower activity, feeding once every 24 hours might be sufficient. The key is to feed the starter when it shows signs of having peaked and begun to fall, indicating it has consumed most of its food. Observe your starter: if it doubles in size within 4-6 hours, a twice-daily feeding schedule is likely necessary.
If it takes 8-12 hours or longer to double, once a day might be fine initially. Continue feeding regularly until the starter consistently doubles or triples in size within 4-8 hours, smells pleasantly sour, and is full of bubbles.
Step 4: Monitoring and Adjusting: Fine-Tuning Your Starter's Activity
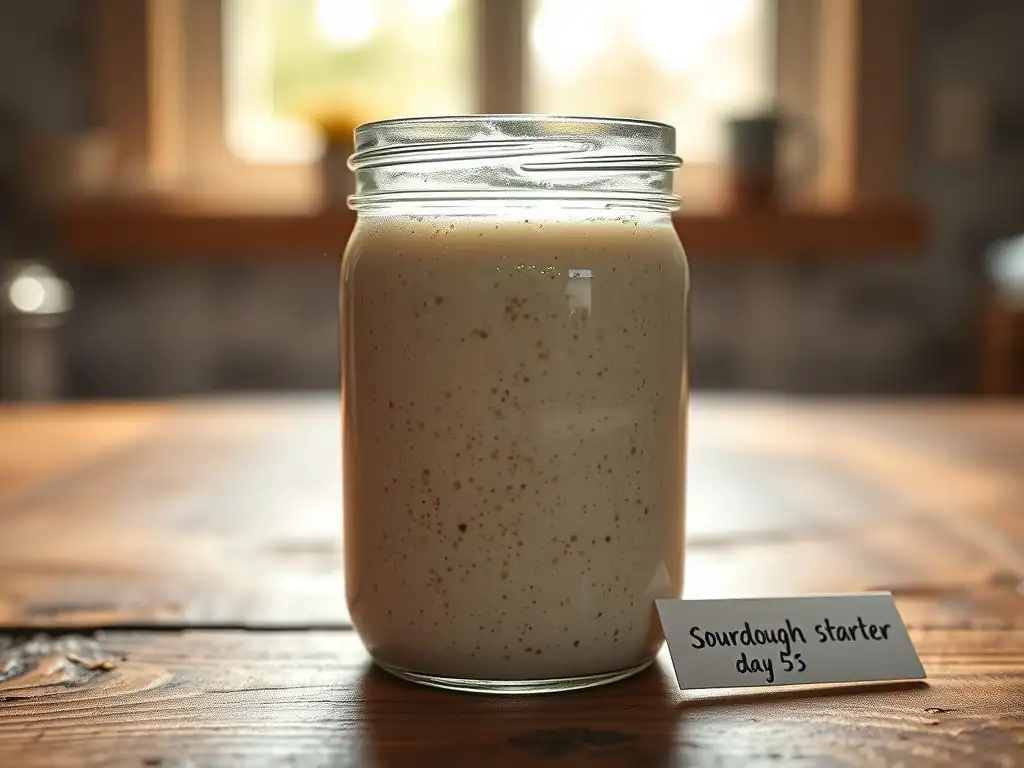
Recognizing Peak Activity: When Your Starter is Ready to Bake
Knowing when your revived sourdough starter has reached peak activity is essential for successful baking. A starter at its peak has consumed most of its fresh food, produced a significant amount of carbon dioxide, and is bubbling vigorously. Visually, a strong, active starter will typically at least double, often triple, in volume within 4-8 hours after being fed, depending on the feeding ratio and temperature. It will have a bubbly, airy texture throughout and a domed top before it starts to slowly fall back down as the food runs out.
A common test for peak activity is the "float test." Take a small dollop of your starter (about a teaspoon) and gently drop it into a glass of water. If the starter is sufficiently active and full of trapped gas bubbles, it will float on the surface. If it sinks, it's either not yet at its peak or has already passed its peak and needs another feeding. Using your starter when it's at or just past its peak ensures maximum leavening power for your dough.
Adjusting Feeding Ratios: Optimizing for Your Environment
Once your dormant sourdough starter is showing consistent activity, you can adjust your feeding ratios to fine-tune its behavior based on your environment and how quickly you need it to be ready for baking. A 1:1:1 ratio (starter:water:flour by weight) is a good starting point, but it results in a very active starter that peaks relatively quickly (often within 4-6 hours in a warm environment).
If you need your starter to peak more slowly, perhaps to fit your baking schedule, you can use a higher ratio of fresh flour and water to starter. For example, feeding with a 1:2:2 ratio (e.g., 20g starter, 40g water, 40g flour) or even 1:3:3 will provide more food for the microorganisms, causing them to take longer to consume it all and reach peak activity (perhaps 8-12 hours or more). Experimenting with ratios like 1:1:1, 1:2:2, or 1:3:3 allows you to control the speed at which your starter becomes ready, making it easier to incorporate into your baking routine.
Step 5: Maintaining a Healthy, Active Sourdough Starter
Long-Term Maintenance: Feeding and Storage Tips
Once you've successfully revived your dormant sourdough starter and it's consistently active, maintaining its health is key. If you bake frequently (daily or every few days), you can keep your starter at room temperature and feed it once or twice daily using your preferred ratio (e.g., 1:1:1 or 1:2:2). Store it in a clean jar with a loose-fitting lid or cloth cover to allow airflow while preventing contaminants.
If you bake less often, storing your starter in the refrigerator is the most practical approach for long-term maintenance. Feed your active starter, let it sit at room temperature for 1-2 hours to start the fermentation process, and then place it in the fridge. In the refrigerator (around 38-40°F or 3-4°C), the starter's activity slows dramatically.
You can typically feed a refrigerated starter once every week or two. To bake with it, take it out of the fridge, discard most of it, and feed it 1-3 times at room temperature until it's active and reliably doubles within 4-8 hours again.
Dehydrating Your Starter for Long-Term Storage
For ultimate long-term storage or to create a backup, you can dehydrate a portion of your active sourdough starter. Spread a thin layer (about 1/8 inch thick) of healthy, active starter onto parchment paper or a silicone baking mat. Let it air dry completely at room temperature until it is brittle and easily breaks into flakes or powder. This process can take 24-48 hours or longer depending on humidity.
Once fully dry, crumble the starter into small pieces or powder and store it in an airtight container in a cool, dark place. Dehydrated starter can remain viable for years. To rehydrate and revive dormant sourdough starter from this state, simply mix a small amount (e.g., 10-20g) of the dried flakes with an equal weight of warm water and let it sit for a few hours to soften. Then, begin feeding it daily with flour and water, discarding most before each feed, just as you would when reviving from refrigeration, until it becomes active again.
Troubleshooting Common Issues When Reviving a Sourdough Starter
Problem: No Activity After Several Feedings
Possible Causes and Solutions
If you've been feeding your dormant sourdough starter for several days and see little to no activity (no bubbles, no rise), there could be several reasons. The starter might be too cold; yeast and bacteria are most active between 75-80°F (24-27°C). Try moving the starter to a warmer location, like near a warm appliance or in a proofing box set to a low temperature. Ensure you are using non-chlorinated water, as chlorine can inhibit microbial growth.
Another common cause is a very weak starter culture, possibly from prolonged dormancy or previous neglect. Try feeding with a small amount of rye or whole wheat flour for a few cycles, as these flours provide more nutrients. Ensure you are discarding enough of the old starter before feeding; feeding a tiny amount of new flour into a large volume of old, acidic starter won't provide enough fresh food. Stick to a ratio like 1:1:1 or 1:2:2 (starter:water:flour). Patience is key; sometimes it takes a week or even longer of consistent feeding to revive a very sluggish starter.
Problem: Mold Growth or Unpleasant Odors
Determining if the Starter is Salvageable
As mentioned earlier, mold growth (fuzzy spots of any color) or genuinely foul, putrid smells (like rot or garbage) are usually signs that your sourdough starter is contaminated with undesirable and potentially harmful microorganisms. While a layer of hooch and a strong acidic or alcoholic smell are normal for a dormant or hungry starter, mold and putrid odors are not.
Unfortunately, if you see mold or smell rot, it is generally recommended to discard the entire starter and begin again. While some sources suggest scooping off mold, it's difficult to be certain that spores haven't spread throughout the culture. The risk of introducing harmful bacteria or mold into your baked goods outweighs the effort of trying to salvage a compromised starter. It's disheartening, but starting fresh ensures the safety and quality of your sourdough.
Problem: Slow or Weak Rise
Tips for Strengthening a Weak Sourdough Starter
If your revived starter is showing some activity but isn't reliably doubling or tripling in size within a predictable timeframe (e.g., it takes over 12 hours to show a small rise), it might be weak. This could be due to inconsistent feeding, suboptimal temperature, or simply needing more time to build up a strong microbial population.
To strengthen a weak sourdough starter, ensure you are feeding it consistently, ideally every 12 hours if possible, at a warm temperature (75-80°F / 24-27°C). Use a feeding ratio that provides plenty of food, such as 1:1:1 or 1:2:2 (starter:water:flour). Incorporating a small amount of rye or whole wheat flour (e.g., 10-20% of the total flour weight per feed) can give the microorganisms a boost.
Be patient; it may take several days of consistent, optimal feeding for a weak starter to gain the strength needed for reliable leavening. Observing it double or triple in size within 4-8 hours after feeding is a good indicator of sufficient strength.
Baking with Your Revived Sourdough Starter

Signs Your Starter is Ready for Baking
Knowing exactly when your revived dormant sourdough starter is ready to be used in baking is crucial for achieving a good rise. Your starter is ready when it consistently exhibits signs of peak activity. This means that after a feeding (using your regular maintenance ratio, like 1:1:1 or 1:2:2), the starter should reliably double or ideally triple in volume within a predictable timeframe, typically 4 to 8 hours depending on your temperature and ratio.
Visually, a ready-to-bake starter will be full of bubbles throughout, have a noticeably airy texture, and will have peaked in its rise before beginning to slowly deflate. The smell should be pleasantly tangy and yeasty, not overwhelmingly acidic or alcoholic. The float test is a simple and effective way to confirm readiness: drop a small spoonful into water, and if it floats, it's likely ready to go. Using your starter at its peak ensures maximum leavening power for your bread dough.
Conclusion: Enjoying the Fruits of Your Labor - Delicious Sourdough Bread!
Frequently Asked Questions
What does it mean for a sourdough starter to be dormant?
A dormant sourdough starter is simply a starter that has been inactive due to lack of feeding. The yeast and bacteria are still alive but not actively fermenting. It's like they're in a state of hibernation.
How long can a sourdough starter stay dormant?
A sourdough starter can typically stay dormant in the refrigerator for several weeks without significant damage. However, the longer it sits, the longer it will take to revive it fully.
What are the key signs that my sourdough starter needs reviving?
Key signs include a layer of hooch (a dark liquid) on top, a lack of bubbles after feeding, and a sour, vinegary smell. Don't worry, these are usually reversible!
How often should I feed my starter when reviving it?
When reviving a dormant starter, it's recommended to feed it twice a day – every 12 hours – until it doubles reliably after each feeding. This helps to re-establish the yeast and bacteria population.
What is the best way to store my sourdough starter to prevent it from becoming dormant in the first place?
The best way is to feed it regularly, even when not baking, or to store it in the refrigerator with occasional feedings (every 1-2 weeks). Proper storage keeps the microbial activity healthy.
Final Reflection: The Enduring Power of a Simple Starter
The art of sourdough baking, once a lost skill, is experiencing a vibrant resurgence, and at the heart of it all lies the humble starter. Its seemingly simple nature belies a complex ecosystem of wild yeasts and bacteria, a living testament to patience and nurturing. Understanding how to revive a dormant starter isn't just about baking bread; it's about understanding the delicate balance of life itself.
The journey of reviving a seemingly lifeless starter mirrors our own personal journeys of renewal and resilience. We all face periods of dormancy, times when our passions wane or our spirits feel depleted. But just as a neglected starter can be coaxed back to life with a little care, so too can we find our way back to vitality and purpose. The greatest glory in living lies not in never falling, but in rising every time we fall.
This quote resonates deeply with the process of reviving a sourdough starter, and indeed, with the challenges we face in our own lives.
Now, consider your own "dormant starters"—those passions, projects, or relationships that have fallen by the wayside. What small steps can you take today to revive them? Perhaps it's a single act of nurturing, a small investment of time, or simply a renewed intention to reconnect. Remember the resilience of your starter, and remember the resilience within yourself. The journey of revival is always worth the effort, and the rewards are far sweeter than any loaf of bread.
Rediscover Your Baking Magic!
Thanks for taking the time to learn how to revive your sourdough starter! We hope you now feel empowered to tackle even the most stubborn of dormant starters. Ready to put your newfound knowledge into action?
- Prioritize your starter's revival: Follow the steps outlined in the article to nurse it back to bubbly health. Remember consistency is key!
- Share your success (or challenges!): Let us know in the comments how your starter revival goes. We love hearing your baking stories!
- Experiment with a new recipe: Now that your starter is thriving, why not try a new sourdough bread recipe? We have plenty of inspiring ideas on BakeWithEase.com!
What unique flavor will your revived starter bring to your next bake?