
From Sluggish to Spirited: Reviving a Slow Sourdough Starter

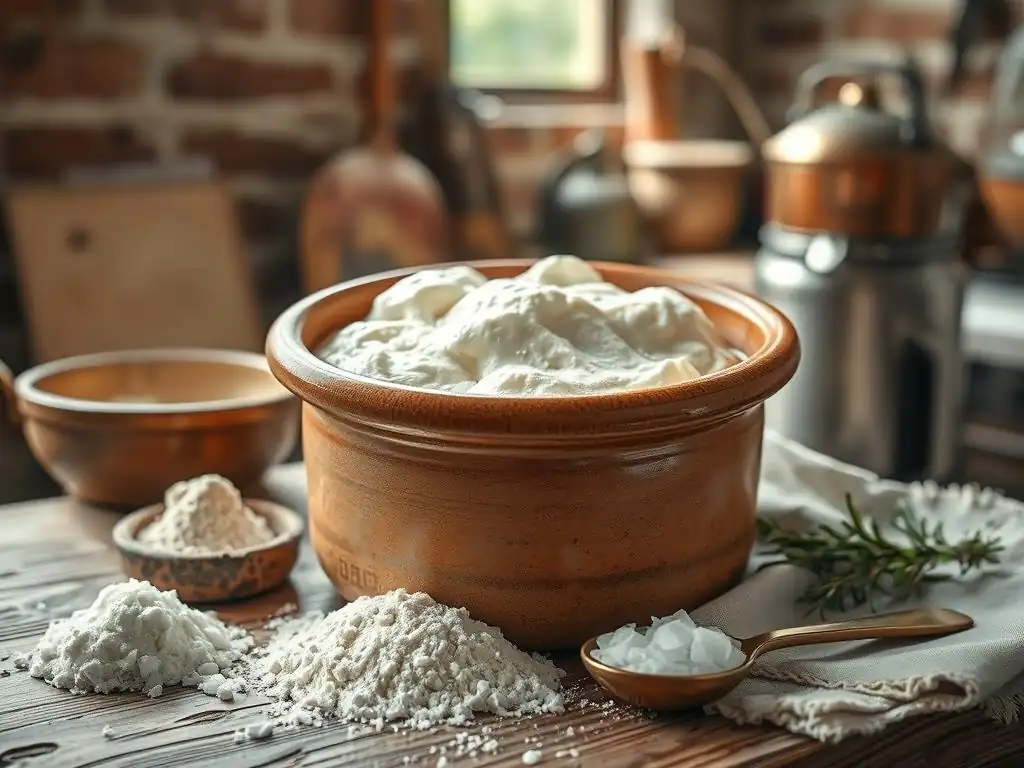
Welcome to BakeWithEase! Is your sourdough starter acting a little sluggish? Don't despair! Before you toss it, discover our expert tips and tricks for reviving a slow sourdough starter and bringing it back to its bubbly, active best. Unlock the secrets to perfect fermentation and prepare to bake incredible loaves. Ready to breathe new life into your starter? Let's get baking!
- Understanding a Sluggish Sourdough Starter: Identifying the Problem
-
The Reviving Process: Step-by-Step Guide to Boosting Starter Activity
- Step 1: Assessing Your Sourdough Starter's Condition: Visual Inspection, Smell Test, Float Test
- Step 2: Adjusting the Feeding Ratio for Optimal Revival: Moving from 1:1:1 to 1:2:2
- Step 3: Maintaining the Ideal Temperature for Fermentation: 75-80°F (24-27°C)
- Step 4: Choosing the Right Flour for Revitalization: Focusing on High-Protein Flour
- Step 5: Observing and Monitoring Starter Activity: Tracking Rise and Fall
- Advanced Techniques for Boosting Sourdough Starter Strength
- Maintaining a Healthy and Active Sourdough Starter Long-Term
- Troubleshooting: Common Issues and Solutions When Reviving a Starter
- Baking with a Revived Sourdough Starter: Putting it to the Test
-
Frequently Asked Questions
- What causes a sourdough starter to become sluggish?
- How often should I feed my sourdough starter to revive it?
- What is the ideal temperature for reviving a sourdough starter?
- What type of flour is best for reviving a sluggish sourdough starter?
- How long does it typically take to revive a sluggish sourdough starter?
- Final Reflection: The Enduring Spirit of the Sourdough Starter
- Rediscover Your Starter's Zing!
Understanding a Sluggish Sourdough Starter: Identifying the Problem
What Causes a Sourdough Starter to Become Sluggish?
A sourdough starter, at its core, is a living ecosystem of wild yeasts and beneficial bacteria. When this delicate balance is disrupted, the starter can become sluggish or inactive. One of the most common culprits is infrequent feeding. Just like any living organism, the microbes need a consistent food source – flour and water – to thrive and reproduce. If left unfed for too long, the population of active microorganisms dwindles, and the starter loses its ability to rise effectively. Think of it like a neglected garden; without water and nutrients, the plants wither.
Another significant factor leading to a sluggish sourdough starter is temperature. These microbes are most active within a specific temperature range, generally between 75°F and 80°F (24°C to 27°C). Temperatures significantly outside this range can slow down or even halt fermentation. Too cold, and the microbes become dormant; too hot, and they can die off or be outcompeted by less desirable organisms. Additionally, using chlorinated tap water can inhibit microbial activity, and inconsistent feeding ratios (not providing enough food relative to the starter mass) can starve the active population.
Recognizing the Signs of a Weak or Inactive Starter
Identifying a weak or inactive starter is the first step in reviving sluggish sourdough starter. A healthy, active starter fed regularly at peak activity should typically double or even triple in size within 4 to 8 hours of feeding at room temperature (around 70-75°F or 21-24°C). A sluggish starter, however, will show minimal or no significant rise. You might notice only a few small bubbles on the surface or sides, rather than the robust, bubbly texture of a vigorous starter.
Beyond the lack of rise, an inactive starter might have a thin, watery consistency on top (hooch), which is a sign that the microbes have consumed all the available food and are producing alcohol and acid. While a little hooch is normal, excessive amounts indicate severe underfeeding. The smell can also be an indicator; a healthy starter smells pleasant, often slightly tangy or yeasty. A sluggish or unhealthy starter might have a strong, unpleasant alcoholic or acetone-like smell (nail polish remover), another sign of stress and underfeeding.
Ruling Out Common Sourdough Starter Issues: Contamination, Inconsistent Feeding, Temperature Fluctuations
Before embarking on the revival process, it's crucial to rule out other potential issues that could be mistaken for mere sluggishness. Contamination, though less common, can happen. Look for any signs of mold (fuzzy patches, typically green or black). If mold is present, unfortunately, the starter is likely beyond saving and should be discarded to avoid introducing harmful microorganisms into your baking. A healthy starter is acidic enough to ward off most unwanted invaders, but a weak one is vulnerable.
Inconsistent feeding is perhaps the most frequent cause of a sluggish sourdough starter. Are you feeding it at roughly the same time each day (or twice a day if needed)? Are you using a consistent ratio of starter, flour, and water? Wild fluctuations in feeding times or ratios can stress the microbes.
Similarly, temperature fluctuations can dramatically impact activity. Leaving your starter in a drafty spot, near a cold window, or in a kitchen with wildly varying temperatures throughout the day can slow it down considerably. Ensure your feeding routine is consistent and your starter's environment is stable before assuming it needs a full revival protocol.
The Reviving Process: Step-by-Step Guide to Boosting Starter Activity

Step 1: Assessing Your Sourdough Starter's Condition: Visual Inspection, Smell Test, Float Test
The first step in reviving sluggish sourdough starter is a thorough assessment. Begin with a visual inspection. What does it look like? Is there a thick layer of hooch? Is the texture bubbly or flat? Note the consistency. Next, perform a smell test. Gently swirl the starter and take a whiff. Does it smell pleasantly tangy, like yogurt or ripe fruit? Or is it strongly alcoholic, acidic, or even like nail polish remover? A strong, unpleasant smell is a key indicator of stress.
Finally, perform the float test. This test helps determine if your starter is currently active enough to leaven bread, but it's also a good gauge of current vitality. Take a small spoonful of your starter at its peak (or what you hope is its peak after feeding) and gently drop it into a glass of water.
If it floats, it contains enough trapped gas to be considered active. If it sinks, it likely needs more time, better conditions, or a more rigorous revival protocol. While a sinking starter doesn't mean it's dead, it confirms it's not currently strong enough for baking and needs attention.
Step 2: Adjusting the Feeding Ratio for Optimal Revival: Moving from 1:1:1 to 1:2:2
One of the most effective ways to boost a sluggish sourdough starter's activity is to increase the amount of food you give it relative to the starter mass. Many bakers maintain their starter on a 1:1:1 ratio (1 part starter: 1 part flour: 1 part water by weight). To revive a weak starter, switch to a 1:2:2 ratio, or even 1:3:3 if it's particularly stubborn.
For example, instead of feeding 25g starter with 25g flour and 25g water, try feeding 25g starter with 50g flour and 50g water. This provides a much larger meal for the existing microbes, allowing their population to grow more significantly.
This increased feeding ratio provides a surplus of carbohydrates for the yeasts and bacteria to consume, encouraging more vigorous fermentation and reproduction. By providing more food, you extend the period of peak activity and give the microbial population a chance to build strength. Continue feeding at this higher ratio until you consistently see your starter doubling or tripling within 4-8 hours after feeding. It might take several days or even a week of consistent feeding at this ratio to see a significant improvement.
Increasing the Frequency of Feedings: Twice Daily Feeding Schedule
In addition to adjusting the ratio, increasing the frequency of feedings can rapidly accelerate the revival process for a sluggish sourdough starter. While a healthy, mature starter can often be maintained with once-daily feeding, a weak starter benefits greatly from being fed twice a day, roughly 10-12 hours apart. This ensures the microbes always have access to fresh food and don't reach the point of starvation where they produce excessive hooch or die off.
Feeding twice daily, combined with the enriched 1:2:2 (or higher) ratio, provides a continuous cycle of growth and activity. You are essentially flooding the starter with resources, allowing the active microbial population to rebound quickly. Feed your starter in the morning and again in the evening. Discard a portion before each feeding to maintain a manageable amount and ensure you're always feeding a significant amount of fresh flour and water relative to the starter. This consistent, ample nutrition is key to bringing a slow starter back to life.
Modifying the Water-to-Flour Ratio: Using More Water to Improve Hydration
Sometimes, a sluggish sourdough starter can benefit from a slight adjustment in its hydration level. While 100% hydration (equal weights of flour and water) is standard, increasing the water slightly can make the starter's texture looser and potentially more accessible for the microbes to consume the flour. For instance, instead of a 1:2:2 ratio (1 part starter: 2 parts flour: 2 parts water), you could experiment with a 1:2:2.2 ratio (1 part starter: 2 parts flour: 2.2 parts water).
A slightly higher hydration results in a thinner starter. This looser consistency can make it easier for the yeast and bacteria to move around and access the food particles in the flour. It might also encourage more vigorous bubbling. Be cautious not to make it too watery, as this can dilute the microbial population too much and lead to separation. A small increase in hydration (e.g., from 100% to 110%) is usually sufficient to test if this helps your specific starter's revival. Observe the starter's consistency and activity after a couple of feedings with slightly increased water.
Step 3: Maintaining the Ideal Temperature for Fermentation: 75-80°F (24-27°C)
Temperature is a critical factor in the activity level of your sourdough starter. Wild yeasts and lactic acid bacteria thrive within a specific temperature range. For optimal fermentation and rapid revival of a sluggish sourdough starter, aim to keep it consistently between 75°F and 80°F (24°C to 27°C). Temperatures below this range will significantly slow down microbial activity, while temperatures much above 80°F can stress the microbes or favor less desirable bacteria.
Maintaining a stable, warm environment provides the ideal conditions for the yeast and bacteria to reproduce quickly and efficiently. This consistent warmth is like giving your starter a cozy, growth-friendly home. Without adequate warmth, even consistent feeding might not be enough to bring a very slow starter back to full strength. Finding a warm spot is often the missing piece for bakers struggling with inactive starters, especially in cooler climates or seasons.
The Impact of Temperature on Sourdough Starter Activity
Temperature directly influences the metabolic rate of the microorganisms in your starter. At cooler temperatures (below 70°F / 21°C), the yeast and bacteria become sluggish, their activity slows down considerably, and fermentation proceeds at a snail's pace. This is why refrigerating a starter puts it into a dormant state for storage. Conversely, temperatures that are too high can accelerate fermentation too rapidly, potentially leading to a quick peak and collapse, or worse, killing off the beneficial microbes.
Maintaining a steady temperature within the optimal range (75-80°F) ensures that the yeast are actively producing carbon dioxide (for rise) and the bacteria are producing lactic and acetic acids (for flavor and structure). This consistent warmth encourages robust reproduction and a healthy, balanced microbial population. A sluggish sourdough starter often just needs a warmer, more stable environment to wake up and start performing as expected.
Tips for Creating a Warm Environment: Using a Seedling Mat, Placing Near a Warm Appliance
Finding a spot in your home that consistently stays within the 75-80°F range can be tricky, especially in cooler seasons. One highly effective method is using a seedling heat mat. These mats are designed to provide gentle, consistent warmth for plant propagation and work perfectly for keeping a starter warm. Place the starter jar directly on the mat, perhaps with a towel underneath if it feels too warm. Monitor the temperature inside the jar with an instant-read thermometer initially to ensure it's not getting too hot.
Alternatively, look for naturally warm spots in your kitchen. Placing the starter near a warm appliance, like on top of the refrigerator (where heat from the motor rises), inside a turned-off oven with the light on (the light bulb provides gentle heat), or near a water heater can work. Avoid direct sunlight, which can cause temperature spikes. The goal is steady warmth. Experiment with different locations in your home to find a spot that maintains the desired temperature range consistently.
Step 4: Choosing the Right Flour for Revitalization: Focusing on High-Protein Flour
The type of flour you feed your starter can significantly impact its health and activity, especially when you are reviving sluggish sourdough starter. While all-purpose flour can maintain a healthy starter, switching to a flour with a higher protein content can provide more "food" for the microbes and help boost activity. Bread flour, which typically has a protein content of 12-14%, is an excellent choice. The increased protein provides more complex carbohydrates for the yeast and bacteria to break down.
Using a higher protein flour during the revival phase gives your starter a nutrient-rich meal. The starches in the flour are the primary food source, and a more robust flour can support more vigorous fermentation. Many bakers find that their starters become significantly more active and reliable when fed with bread flour compared to lower-protein flours like pastry flour. This nutritional boost can be just what a sluggish starter needs to regain its strength and vitality.
The Role of Flour in Starter Health
Flour is not just food; it's the environment for your starter's ecosystem. Different flours contain varying amounts of starches, sugars, proteins, and minerals, all of which influence the microbial activity. Whole grain flours, like whole wheat or rye, contain more nutrients and naturally occurring wild yeasts and bacteria compared to refined white flour. These extra nutrients can sometimes help kickstart a sluggish starter.
However, whole grain flours also ferment more quickly and can be more acidic, potentially leading to a faster decline in activity if not fed frequently. A balance is often best. Using a mix of bread flour and a small percentage of rye or whole wheat flour can provide both sustained energy from the bread flour's starches and a boost from the nutrients and microbes in the whole grains. Consistency is key once you find a flour combination that works for your starter.
Experimenting with Different Flour Types: Whole Wheat, Rye, Bread Flour
Don't be afraid to experiment with different flours when reviving sluggish sourdough starter. Many experienced bakers swear by using rye flour to boost a struggling starter. Rye flour is particularly rich in nutrients and enzymes that help break down starches, making them readily available food for the microbes. Adding a small amount of rye flour (even just 10-20% of the total flour weight) to your regular bread flour feeding can sometimes provide a noticeable boost in activity.
Whole wheat flour also offers more nutrients than white flour and can help strengthen a starter. However, like rye, it ferments quickly. Bread flour provides a steady supply of complex carbohydrates for sustained activity. Consider feeding with 100% bread flour initially, then perhaps try a mix like 80% bread flour and 20% rye or whole wheat for a few feedings to see if that accelerates the revival. Pay attention to how your starter responds to different flours and stick with what yields the best results.
Step 5: Observing and Monitoring Starter Activity: Tracking Rise and Fall
Consistent observation is crucial when reviving sluggish sourdough starter. You need to track its progress to know if your efforts are working. After each feeding, note the time and mark the level of the starter in its jar with a rubber band or marker. Check back periodically to see if it's rising. How quickly does it start to rise? How much does it rise at its peak? How long does it stay at its peak before starting to fall?
Keeping a simple log or even just mental notes helps you understand your starter's behavior. A healthy, active starter will typically double or triple predictably within a few hours of feeding at its ideal temperature. A sluggish starter might show minimal movement initially. As you implement the revival steps (adjusting ratio, frequency, temperature, flour), you should start to see more vigorous bubbling and a more significant rise. Celebrate these small victories!
Recognizing the Signs of a Successful Revival: Doubling in Size, Bubbly Texture
You'll know your efforts in reviving sluggish sourdough starter are paying off when you start consistently seeing specific signs of vitality. The most obvious is a significant increase in volume – your starter should at least double in size, ideally tripling, within 4-8 hours after being fed at room temperature (around 75°F). The texture should become light and airy, filled with numerous small and large bubbles throughout, not just on the surface.
Another key sign is the smell transitioning from potentially strong or unpleasant to a pleasant, tangy, slightly yeasty aroma. When you stir it, it should feel less dense and more aerated. The float test should also consistently yield positive results when you test the starter at its peak height. Seeing these signs consistently over several feedings indicates that the microbial population has rebounded and your starter is on its way back to being a strong, reliable culture for baking.
Troubleshooting Common Problems During Revival: Adjusting Feeding Schedule, Temperature Control
Even during revival, you might encounter setbacks. If your starter seems to rise a little but then quickly collapses and develops a lot of hooch, it might still be underfed. Try increasing the feeding ratio again (e.g., from 1:2:2 to 1:3:3) or ensuring you are feeding it exactly when it peaks or just as it starts to fall. If there's minimal activity despite increased feeding, temperature is the most likely culprit. Double-check that your starter is consistently in the 75-80°F range. Use a thermometer to be sure.
If you see signs of mold (fuzzy spots), discard the starter immediately and start fresh. Unpleasant odors that persist despite regular feeding might indicate an imbalance; consistent feeding at a warm temperature often resolves this, but sometimes starting over is necessary. Be patient; reviving sluggish sourdough starter can take anywhere from a few days to two weeks depending on how inactive it was. Keep feeding consistently, maintain the temperature, and observe.
Advanced Techniques for Boosting Sourdough Starter Strength

The Pineapple Juice Method: An Alternative Revitalization Technique
For particularly stubborn or new starters that struggle to become active, some bakers use the "pineapple juice method." This technique leverages the slightly acidic pH of pineapple juice to create an environment initially less favorable to certain undesirable bacteria, potentially giving the beneficial lactic acid bacteria and yeasts a head start. Instead of using water for the first few feedings, substitute unsweetened pineapple juice.
To use this method, discard most of your sluggish sourdough starter, leaving just a small amount (e.g., 25g). Feed it with your chosen flour (bread or rye works well) and unsweetened pineapple juice in your preferred ratio (e.g., 1:2:2). Continue feeding with pineapple juice for 1-3 days, or until you see noticeable activity like bubbling.
Once activity picks up, gradually transition back to using water over a few feedings (e.g., 50% juice, 50% water, then 25% juice, 75% water, then 100% water). Be aware that this method can sometimes introduce a slightly fruity smell initially, which should disappear with subsequent water feedings.
Using Honey or Malt Extract to Encourage Activity
Another method for giving a sluggish sourdough starter a boost is adding a small amount of sugar in the form of honey or non-diastatic malt extract. These provide readily available simple sugars that the yeast can quickly consume, potentially stimulating activity. Add just a tiny amount – perhaps 1/4 teaspoon of honey or malt extract per feeding along with your flour and water.
Honey contains natural enzymes and sugars that can be a quick energy source for the yeast. Non-diastatic malt extract, derived from barley, also provides sugars and adds a pleasant malty flavor over time. Use these sparingly and only for a few feedings during the revival process. Once your starter is active, discontinue adding them, as consistent sugar additions aren't necessary for a healthy, mature starter and can alter its balance. This is a temporary measure to encourage a burst of activity.
Autolyse: Pre-Hydrating Flour for Enhanced Fermentation
While autolyse is typically a bread-making technique, the principle of pre-hydrating flour can also be applied to starter feeding to potentially enhance microbial access to starches. Autolysing involves mixing the flour and water component of your feeding together and letting it rest for 30-60 minutes before adding the starter.
By allowing the flour to hydrate fully before introducing the starter, the enzymes naturally present in the flour begin breaking down some of the complex starches into simpler sugars. This creates a more accessible food source for the yeast and bacteria when the starter is eventually added. To try this, weigh out your flour and water for the feeding (e.g., 50g flour, 50g water for a 1:1:1 feed, or 100g flour, 100g water for a 1:2:2 feed).
Mix them together until no dry flour remains, cover, and let sit for an hour. Then, add your portion of starter (e.g., 50g or 25g respectively) and mix thoroughly. This can sometimes lead to a more vigorous fermentation.
Maintaining a Healthy and Active Sourdough Starter Long-Term
Consistent Feeding Schedules for Sustained Activity
Once you've successfully revived your sluggish sourdough starter, the key to preventing future inactivity is consistency. Establish a regular feeding schedule based on how you store your starter. If you keep it at room temperature, daily feeding (or even twice daily if it's very warm) is necessary. Feed it around the same time each day, ideally when it has peaked or is just starting to fall from its peak. This ensures the microbes always have fresh food before they run out.
If you store your starter in the refrigerator to reduce feeding frequency, establish a schedule for bringing it out and feeding it. A common practice is to feed it once a week. Take it out, let it warm up for a few hours, feed it its regular ratio (e.g., 1:1:1 or 1:2:2), let it become active, and then return it to the fridge after it has peaked and started to cool down slightly. Consistent feeding, whether daily or weekly, is the cornerstone of a healthy, reliable starter.
Proper Storage Techniques to Prevent Sluggishness: Refrigeration, Freezing
Choosing the right storage method for your starter is crucial for maintaining its health and preventing it from becoming sluggish again. For frequent bakers who use their starter daily or every other day, keeping it at room temperature with daily feedings is ideal. This maintains a high level of activity.
For less frequent bakers, refrigeration is the best option. Storing your starter in the fridge at around 40°F (4°C) significantly slows down microbial activity, allowing you to feed it much less often, typically once a week. Ensure the starter is well-fed and active before refrigerating it. Freezing is an option for long-term storage (months), but it can sometimes weaken the starter, requiring a revival process once thawed. Dehydrating your starter is another excellent long-term storage method that preserves activity well. Choose the method that best fits your baking habits.
Recognizing and Addressing Issues Before They Escalate: Maintaining a Regular Feeding Schedule
Preventing a sluggish sourdough starter is easier than reviving one. The best defense is vigilance and a consistent routine. Pay attention to your starter's behavior during its peak activity after feeding. Is it still doubling predictably? Does it smell right? Is the texture bubbly? Minor changes in rise time or texture can be early warning signs that it's becoming less active.
If you notice slightly slower activity or a thin layer of hooch appearing sooner than usual, don't wait for it to become completely sluggish. Increase your feeding ratio slightly (e.g., from 1:1:1 to 1:1.5:1.5) or ensure it's in a warm spot for a few feedings. Addressing minor dips in activity promptly by adjusting feeding ratio, frequency, or temperature can prevent your starter from becoming severely inactive and save you the effort of a full revival process.
Troubleshooting: Common Issues and Solutions When Reviving a Starter

My Starter Still Isn't Rising: What to Do Next?
If you've followed the steps for reviving sluggish sourdough starter – using a 1:2:2 or 1:3:3 ratio, feeding twice daily, maintaining a warm temperature (75-80°F), and using good flour – and your starter still isn't rising significantly after a week or two, consider these possibilities. First, double-check your temperature; are you absolutely sure it's warm enough consistently? Use a reliable thermometer. Second, review your water source; is it possible your tap water has high levels of chlorine or chloramine? Let tap water sit out overnight to allow chlorine to dissipate, or switch to filtered or bottled water.
Third, consider the age of your starter. Very young starters (less than a month old) can go through a phase of inactivity before becoming robust. Patience is key. If it's an older starter that's simply been neglected, it might need more time with the intensive feeding regimen. If all else fails and you've ruled out mold, sometimes the microbial balance has shifted too much, and starting fresh with a new starter might be less frustrating than continuing to try and revive a severely weakened one.
Dealing with Mold or Unpleasant Odors
Mold is an unfortunate but clear sign that your starter is contaminated and cannot be saved. Mold typically appears as fuzzy patches of green, black, or sometimes orange or pink. Do not try to scrape it off; mold indicates that undesirable microorganisms have taken hold throughout the culture. Dispose of the moldy starter and thoroughly clean the jar and utensils before starting a new batch.
Strong, unpleasant odors like acetone (nail polish remover) or excessive alcohol are signs of stress, usually underfeeding. The microbes have consumed all the food and are producing byproducts. While these odors are unpleasant, they don't necessarily mean the starter is dead. Increase the feeding ratio (e.g., 1:3:3) and frequency (twice daily) and ensure a warm temperature. These odors should diminish as the starter becomes more active and the microbial balance is restored with consistent feeding. A very strong, rotten smell, however, could indicate other bacterial issues and might warrant starting over.
Preventing Future Sluggishness: Best Practices
The best way to avoid needing to revive sluggish sourdough starter in the future is to establish and maintain good habits from the start.
- Consistent Feeding: Whether daily or weekly (for refrigerated starters), stick to a schedule.
- Appropriate Ratio: Use a feeding ratio (like 1:1:1 or 1:2:2) that keeps your starter active based on its storage temperature and your feeding frequency.
- Ideal Temperature: Store your starter in a location with a stable temperature, ideally around 70-75°F (21-24°C) if at room temp, or consistently in the fridge.
- Good Quality Flour: Use unbleached flour and consider incorporating some whole grain flour for added nutrients.
- Cleanliness: Use clean jars and utensils to prevent contamination.
- Observation: Pay attention to your starter's look, smell, and rise after feeding. Catching signs of sluggishness early makes revival much easier.
- Regular Baking: The more you use your starter, the more opportunities you have to feed it and observe its health.
Following these best practices will help ensure your starter remains vigorous and ready to bake whenever inspiration strikes.
Baking with a Revived Sourdough Starter: Putting it to the Test
Simple Recipe to Test Starter Strength: Sourdough Pancakes
Once your sluggish sourdough starter shows consistent signs of vitality – doubling or tripling reliably within 4-8 hours after feeding – it's time to test its strength in a simple recipe. Sourdough pancakes are perfect for this. They don't rely on the starter for the primary rise (baking soda/powder usually helps), but they use a good amount of starter, allowing you to see how it performs and contribute flavor.
A basic recipe might call for 100g active sourdough starter, 100g flour, 150g milk, an egg, a tablespoon of sugar, a pinch of salt, and a teaspoon of baking powder mixed in just before cooking. Mix the starter, flour, milk, egg, sugar, and salt the night before and let it sit at room temperature. The next morning, stir in the baking powder and cook on a hot griddle. The flavor contributed by your revived starter will be evident, and you'll see how well it integrates into a batter.
Tips for Achieving a Great Rise in Your Sourdough Bread: Proper Hydration, Scoring Techniques
Moving from pancakes to bread requires a truly strong starter. When you're ready to bake bread with your revived sluggish sourdough starter, focus on a few key techniques for a good rise. Proper dough hydration is crucial; many sourdough recipes use 70-80% hydration (water weight relative to flour weight). Higher hydration can lead to a more open crumb but is harder to handle. Start with a manageable hydration level.
Develop good dough strength through proper mixing and folding (or kneading). This builds the gluten structure needed to trap the gases produced by the starter. Allow for adequate bulk fermentation (the first rise) and proofing (the final rise), guided by the dough's volume increase and texture, not just time, as fermentation times vary based on starter strength and temperature. Finally, proper scoring just before baking allows the dough to expand in a controlled manner, contributing to oven spring and a beautiful crust.
Celebrating Your Revived Starter!
Congratulations! If you've successfully gone through the process of reviving sluggish sourdough starter, you've demonstrated patience and learned valuable skills in understanding and caring for your culture. A healthy, active starter is a rewarding part of the sourdough baking journey, offering unique flavors and textures to your baked goods.
Take a moment to appreciate the transformation from a sad, inactive jar to a bubbly, vigorous culture. Now that it's strong, remember to maintain consistent feeding and observation to keep it healthy. Share your success with other bakers, bake something delicious to celebrate, and enjoy the fruits (or rather, the bread!) of your labor. Your spirited starter is now ready to bring life to countless loaves, pastries, and more!
Frequently Asked Questions
What causes a sourdough starter to become sluggish?
A sourdough starter becomes sluggish primarily due to a lack of consistent feeding and the accumulation of unfavorable byproducts that inhibit yeast and bacteria activity. Temperature fluctuations can also play a role.
How often should I feed my sourdough starter to revive it?
To revive a sluggish starter, feed it twice a day (every 12 hours) with equal parts flour and water. This provides a consistent source of food for the microorganisms.
What is the ideal temperature for reviving a sourdough starter?
The ideal temperature for reviving a sourdough starter is between 70-75°F (21-24°C). This range encourages optimal yeast and bacteria activity.
What type of flour is best for reviving a sluggish sourdough starter?
Whole wheat flour or rye flour, mixed with unbleached all-purpose flour can be beneficial. These flours provide more nutrients to help boost the starter's activity during the revival process.
How long does it typically take to revive a sluggish sourdough starter?
It can take anywhere from 3-7 days of consistent feeding and proper temperature to revive a sluggish starter. Patience is key!
Final Reflection: The Enduring Spirit of the Sourdough Starter
The seemingly simple act of reviving a sluggish sourdough starter mirrors the resilience of life itself. A dormant starter, seemingly lifeless, can be coaxed back to vibrant health with patience and care, a testament to the power of nurturing even the smallest of things. This isn't just about baking bread; it's about understanding the delicate balance of life and the rewarding process of revitalization.
The journey of reviving a sourdough starter has profoundly impacted my understanding of the interconnectedness of nature and nurture. It's a microcosm of larger processes, reflecting the cyclical nature of growth and decay, and the importance of attentive observation. The best things in life are worth waiting for,
a phrase often used in baking, rings especially true here. The patience required to revive a starter teaches a valuable lesson about perseverance and the beauty of slow, deliberate action, a lesson easily transferable to other aspects of life.
Now, consider your own "sluggish starters"—those projects, relationships, or even personal goals that seem dormant. What small steps can you take to nurture them back to life? What patience and attention are they asking for? Remember the resilience of your sourdough starter, and apply that same unwavering care to the other areas of your life that need a little extra love and attention. The rewards, like the taste of freshly baked sourdough, will be well worth the effort.
Rediscover Your Starter's Zing!
Thanks for taking the time to learn how to revive your sourdough starter! We hope you gained valuable insights into nurturing your bubbly friend back to health. Now, let's put that knowledge into action.
- Prioritize your starter: Give it the attention it deserves! Schedule regular feedings and observe its activity closely over the next few days. Note the changes, no matter how small. This consistent care is key.
- Share your success (or challenges!): Let us know how your revival is going in the comments below. We love hearing from our baking community!
- Explore advanced techniques: Consider experimenting with different flour types or hydration levels to see how they impact your starter's performance.
Ready to see your starter bubbling with life again? What small change will you make today to ensure its continued vitality?