
Troubleshooting Pizza Dough: Sticky, Tough, or Not Rising? Solved!

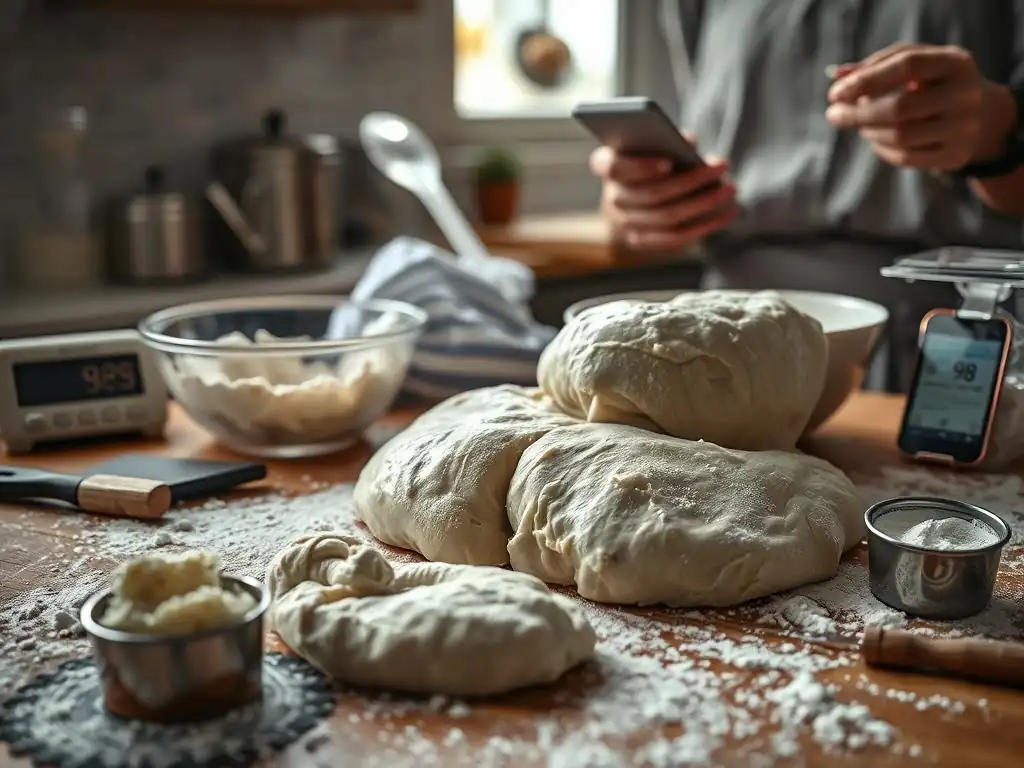
Welcome to BakeWithEase, your trusted companion in the wonderful world of baking! Ever wrestled with sticky pizza dough? It's a common baking conundrum, and we're here to unravel the secrets to achieving that perfect pizza base. Get ready to dive into our comprehensive guide, designed to help you troubleshoot even the stickiest of situations and unlock the art of perfectly pliable pizza dough. Let's get baking!
- Troubleshooting Pizza Dough: Sticky, Tough, or Not Rising? Solved! - BakeWithEase
- Introduction: Common Pizza Dough Problems and How to Fix Them
- Sticky Pizza Dough Troubleshooting: Causes and Solutions
- Tough Pizza Dough: Diagnosing and Correcting the Issue
- Pizza Dough Not Rising: Reasons and Remedies
- Achieving the Perfect Pizza Dough Consistency: A Summary
- Frequently Asked Questions
- Final Reflection: The Humble Rise of Perfect Pizza Dough
- Unlock Your Perfect Pizza Dough!
Troubleshooting Pizza Dough: Sticky, Tough, or Not Rising? Solved! - BakeWithEase
Introduction: Common Pizza Dough Problems and How to Fix Them
BakeWithEase Presents: Your Guide to Perfect Pizza Dough
Welcome back to the BakeWithEase kitchen! There's nothing quite like the satisfaction of making your own pizza from scratch. The aroma of baking dough, the bubbling cheese – it's pure comfort. However, the journey to a perfect pizza isn't always without its bumps.
Many home bakers encounter frustrating issues with their pizza dough, whether it's too sticky to handle, stubbornly tough after baking, or simply refuses to rise. These common problems can be discouraging, but they are almost always solvable with a little understanding of the science behind baking and a few simple techniques. Don't let a challenging dough derail your pizza night; we're here to help you troubleshoot and master your dough-making skills.
This guide from BakeWithEase dives deep into the most frequent pizza dough dilemmas. We'll explore the root causes of sticky, tough, and flat dough, providing clear, actionable steps to fix them. Our goal is to empower you with the knowledge to not only rescue a problematic dough but also to prevent these issues from occurring in the first place. By understanding the roles of ingredients like flour, water, and yeast, and the importance of techniques like kneading and proofing, you'll build the confidence to create consistently excellent pizza dough every time. Let's turn those dough disasters into delicious successes!
Understanding the Challenges of Homemade Pizza Dough
Homemade pizza dough involves a delicate balance of ingredients and processes. Flour provides the structure through gluten development, water activates the gluten and yeast, yeast produces gas for leavening, and salt adds flavor and controls yeast activity. The challenge lies in managing these components and the physical manipulation (kneading) and resting periods (proofing).
For instance, the hydration level – the ratio of water to flour – significantly impacts dough consistency. A dough with 60% hydration (e.g., 300g water to 500g flour) will behave very differently from one with 70% hydration (e.g., 350g water to 500g flour). Environmental factors like room temperature also play a crucial role in yeast activity and dough development.
Furthermore, the type of flour used greatly affects the outcome. Bread flour, with its higher protein content (typically 12-14%), develops strong gluten networks ideal for chewy crusts but can become tough if overworked. All-purpose flour (around 10-12% protein) offers a more tender result but requires careful handling to avoid stickiness. The act of kneading, whether by hand or machine, is essential for developing gluten, which gives the dough structure and elasticity.
However, both under-kneading and over-kneading can lead to poor texture. Proofing, the time allowed for the dough to rise, is equally critical for developing flavor and achieving a light, airy crust. Skipping or rushing this step can result in a dense or flat pizza base. Navigating these variables is key to mastering homemade pizza dough.
Sticky Pizza Dough Troubleshooting: Causes and Solutions
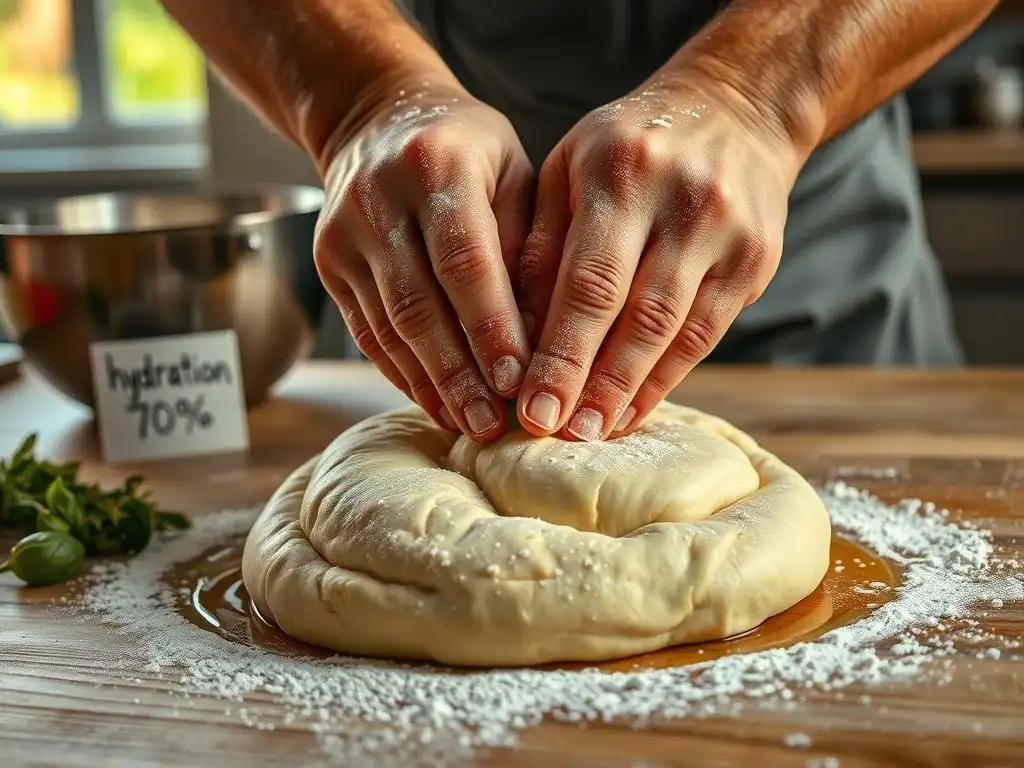
Why is My Pizza Dough So Sticky? Identifying the Culprits
One of the most common and frustrating issues home bakers face is extremely sticky pizza dough. It clings to your hands, the counter, and everything else it touches, making it incredibly difficult to knead or shape. This often leads bakers to add excessive amounts of flour, which can then result in a tough crust.
Pinpointing the exact cause is the first step in effective sticky pizza dough troubleshooting. The stickiness is usually a symptom of an imbalance in the dough's composition or insufficient gluten development. Understanding the specific reasons will guide you towards the right fix, ensuring your dough is manageable and produces a delicious pizza.
Several factors contribute to dough stickiness. Primary culprits include incorrect ingredient measurements, particularly the flour-to-water ratio, and insufficient kneading. Environmental factors like high humidity can also make dough feel stickier than usual. Sometimes, it's simply a matter of the dough needing more time to rest and for the flour to fully absorb the liquid. Identifying whether the stickiness is due to a fundamentally wet dough or a dough that hasn't been properly developed is crucial for effective sticky pizza dough troubleshooting and correction.
Too Much Water: Adjusting Hydration Levels in Pizza Dough
A primary reason for excessively sticky pizza dough is too much water relative to the amount of flour. This results in a dough with a high hydration level, which can be challenging to handle, especially for beginners. While higher hydration doughs (like those above 70%) can yield wonderfully light and airy crusts, they require advanced techniques and experience to manage without them turning into a sticky mess.
For standard pizza dough recipes, a hydration level between 60% and 65% is typically recommended, offering a good balance between manageability and a tender crumb. Using slightly too much water, say adding 330ml instead of 300ml to 500g of flour (66% vs 60%), might seem minor but can significantly impact stickiness.
Accurately measuring your ingredients, especially liquids, is paramount. Using kitchen scales for both flour and water is highly recommended over volume measurements (cups), as flour can compact differently depending on how it's scooped. For example, a cup of flour can weigh anywhere from 120g to 150g.
If your recipe calls for 500g of flour and 300g (ml) of water, but you accidentally add 350g of water, your hydration jumps from 60% to 70%, making the dough much wetter and stickier. When troubleshooting sticky pizza dough, first verify your measurements. If you suspect excess water, the solution involves carefully incorporating more flour during the kneading process, adding only a tablespoon at a time until the dough becomes more manageable, but avoid adding too much, which can make the dough tough.
Inaccurate Flour Measurement: The Importance of Precision
Just as too much water causes sticky pizza dough, using too little flour relative to the liquid will also result in a wet, unmanageable consistency. This is particularly common when measuring flour by volume (using cups) rather than by weight. Scooping flour directly from the bag with a measuring cup tends to compact the flour, meaning you end up with more flour by weight in the cup than the recipe intends.
Conversely, spooning flour lightly into a cup and leveling it off results in less flour by weight. This variability makes cup measurements notoriously unreliable for baking, where precision is key. A recipe designed for 500g of flour might call for roughly 4 cups, but depending on your scooping method, you could easily be using only 450g or as much as 550g, throwing off the hydration balance.
For consistent results and to effectively troubleshoot sticky pizza dough, investing in a simple digital kitchen scale is highly recommended. Measuring ingredients by weight ensures you are using the exact ratio intended by the recipe developer.
If you're using a recipe that provides volume measurements, try to find a conversion chart or weigh your typical cup measurement to get an approximation of the weight the recipe likely intended. If you suspect too little flour was used initially, add small amounts of flour (a tablespoon at a time) during kneading to reach the desired consistency, being careful not to add so much that the dough becomes dry or tough.
Under-kneading: Developing Gluten for a Less Sticky Dough
Sticky pizza dough can also be a symptom of insufficient kneading. Kneading is the process that develops the gluten network within the dough. Gluten, formed by the proteins glutenin and gliadin when they come into contact with water and are agitated, creates a strong, elastic structure that can trap the gases produced by the yeast.
When dough is under-kneaded, the gluten network is weak or undeveloped. This means the flour hasn't fully absorbed the water, and the dough lacks the internal structure needed to hold itself together, resulting in a sticky, shaggy mass that tears easily. Think of it like trying to build a house with insufficient framework – it won't hold its shape.
Proper kneading transforms the dough from a sticky, rough mixture into a smooth, elastic ball. As you knead, the gluten strands align and strengthen, allowing the dough to become less sticky and more manageable. The dough will gradually pull away from your hands or the sides of the mixer bowl.
A good test for sufficient kneading is the "windowpane test": gently stretch a small piece of dough; if you can stretch it thinly enough to see light through it without it tearing, the gluten is well-developed. If your dough is sticky and tears easily when stretched, it likely needs more kneading. Continue kneading until it passes the windowpane test or feels smooth and elastic, which might take 8-15 minutes by hand or 5-10 minutes in a stand mixer, depending on the recipe and speed.
Solutions for Handling Sticky Pizza Dough
Once you've identified why your dough is sticky through effective sticky pizza dough troubleshooting, you can apply specific techniques to make it manageable. It's important to resist the urge to dump in a large amount of flour all at once, as this can drastically change the dough's hydration and lead to a tough crust. Instead, focus on gradual adjustments and proper handling methods. These solutions aim to either reduce the perceived stickiness, improve the dough's structure, or make it easier to work with despite its hydration level.
Managing sticky dough is a skill that improves with practice. Techniques like adding flour strategically, using specific kneading methods that minimize contact, or incorporating oil can make a significant difference. Remember that some level of stickiness is normal, especially with higher hydration doughs; the goal is to make it manageable, not necessarily completely non-sticky like playdough. With the right approach, sticky pizza dough troubleshooting becomes a routine part of your baking process, leading to better results.
Adding Flour Strategically: A Step-by-Step Guide
When your pizza dough is too sticky due to excess moisture or insufficient initial flour, adding more flour is the logical step. However, this must be done carefully and strategically to avoid making the dough tough. The key is to add just enough flour to make the dough manageable without significantly altering its hydration and texture. Start by lightly flouring your work surface and your hands. Transfer the sticky dough onto the floured surface.
Begin kneading the dough gently. If it's still excessively sticky and clinging everywhere, sprinkle a small amount of flour – think a tablespoon or two, not a cup – directly onto the dough and continue kneading. As you knead, the dough will absorb the added flour. Observe the dough's consistency.
If it's still too sticky, repeat the process: lightly flour the surface again, add another small amount of flour to the dough, and continue kneading. Keep adding flour incrementally, kneading thoroughly after each addition, until the dough is no longer overwhelmingly sticky and you can work with it without it gluing itself to your hands and the counter. This gradual approach allows you to control the dough's consistency precisely and avoid over-flouring.
Kneading Techniques for a Less Sticky Result
The way you knead can greatly influence how sticky the dough feels and whether it becomes manageable. When dealing with sticky pizza dough, traditional kneading techniques where you fold the dough onto itself can become quite messy. Instead, try methods that minimize contact area and leverage gravity or friction. One effective technique is the "stretch and fold" method, particularly useful for high-hydration or sticky doughs.
Instead of vigorous pushing, wet your hands slightly and grab the edge of the dough, stretching it upwards and folding it back over the center. Rotate the bowl or dough and repeat this stretch and fold motion multiple times (e.g., 4-8 folds). Let the dough rest for 10-15 minutes, then repeat the stretch and fold process. This method develops gluten with less hands-on mess and allows the dough to become less sticky during the rest periods as the flour hydrates further.
Another technique, especially helpful when the dough is moderately sticky, is using a bench scraper. Instead of handling the dough directly, use a metal or plastic bench scraper to scoop the dough from the surface, fold it over, and push it back onto itself. This allows you to knead the dough while minimizing direct contact with the sticky surface.
Alternatively, if you are kneading by hand on a counter, try a more vigorous, almost slapping motion, lifting the dough and slapping it back down, then folding it over. This dynamic movement can help develop gluten quickly and reduce stickiness through aeration. Experiment with these techniques to find what works best for your sticky pizza dough troubleshooting needs.
Using Oil to Manage Sticky Dough
While adding flour is the primary method for adjusting hydration, using a small amount of oil can be a helpful aid when handling sticky pizza dough. Oil doesn't change the dough's hydration level, but it reduces friction and prevents the dough from sticking to surfaces and your hands. This can make a particularly wet or sticky dough much easier to manage during kneading and shaping.
Before you start kneading a sticky dough, lightly oil your hands and your work surface instead of flouring them. This creates a barrier that prevents the dough from sticking. As you knead, you can re-oil your hands or the surface as needed. If using a stand mixer, you can add a tablespoon of olive oil to the mixing bowl along with the dough.
This helps prevent the dough from climbing the hook and sticking to the sides. Using oil is particularly useful for no-knead or high-hydration doughs where the goal is to maintain a wet consistency but make it workable. It's a simple yet effective trick in your sticky pizza dough troubleshooting toolkit.
Tough Pizza Dough: Diagnosing and Correcting the Issue
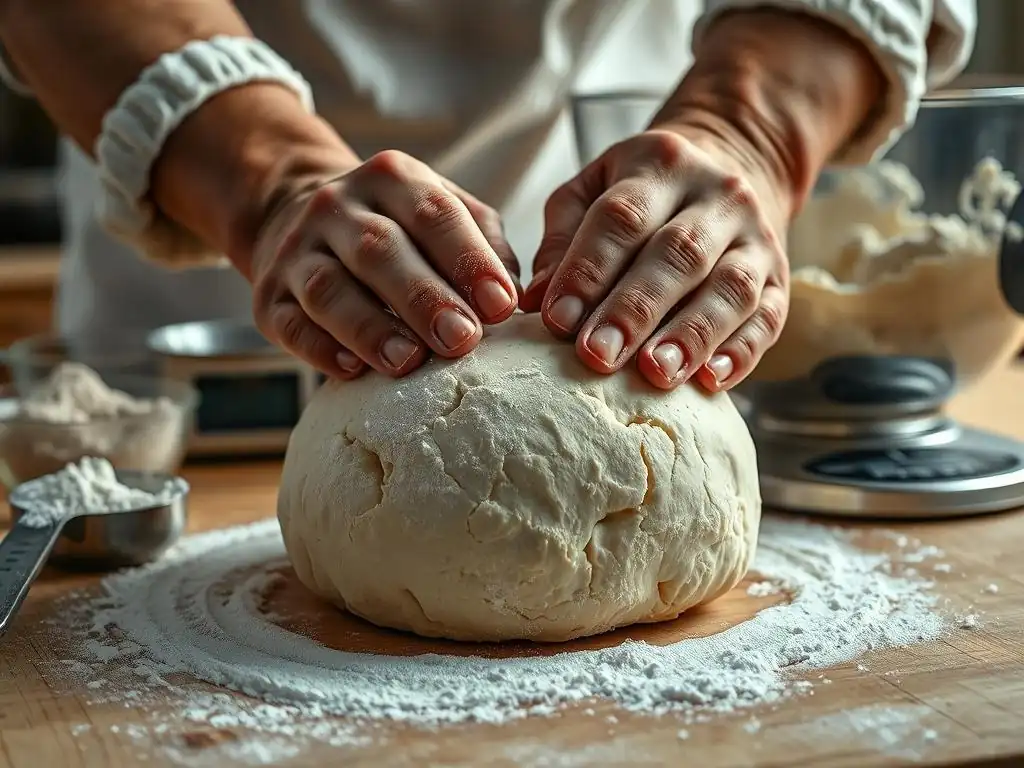
Beyond stickiness, another common complaint is tough pizza dough. Instead of stretching easily into a thin crust, it resists, snaps back, and results in a dense, chewy (in a bad way) or cracker-like texture after baking. Toughness is usually related to the gluten structure being either too developed or not relaxed enough. Understanding the causes helps you adjust your technique for a more tender crust.
Toughness in pizza dough can stem from several factors related to handling and resting times. It's often a sign that the gluten has been overworked or hasn't had sufficient time to relax after kneading. Identifying whether the issue is mechanical (over-kneading) or time-related (insufficient rest) is key to fixing it.
What Makes Pizza Dough Tough? Common Causes
Tough pizza dough is frequently a result of how the dough is handled after the ingredients are mixed. The development of gluten is essential for structure and chew, but too much development or working the dough too much right before shaping can create a rigid network that resists stretching and bakes up dense. The goal is a balance: enough gluten for structure, but relaxed enough for a tender bite.
Common causes include excessive kneading, using flour with very high protein content without proper rest, and most frequently, not allowing the dough enough time to relax after kneading or between shaping steps. These factors all contribute to a tight gluten network that makes the dough difficult to work with and leads to a tough final product.
Over-kneading: The Gluten Development Threshold
While under-kneading results in sticky pizza dough and poor structure, over-kneading can make the dough tough. Kneading develops the gluten network, making the dough strong and elastic. However, there's a point of diminishing returns.
If you continue to knead well past the point where the gluten is fully developed (indicated by the windowpane test), the gluten strands can become excessively tightened or even start to break down in a way that results in a less desirable texture. Think of it like overstretching a rubber band until it loses its elasticity and becomes brittle. Dough that has been over-kneaded often feels very tight and resistant, almost rubbery, and will snap back immediately when you try to stretch it.
Over-kneading is more common when using a stand mixer, especially at high speeds, as the process is faster and less tactile than hand kneading. A dough can go from perfectly kneaded to over-kneaded in just a minute or two in a powerful mixer. For instance, a recipe calling for 8 minutes of machine kneading might be optimal, but going for 12 minutes "just to be sure" could easily lead to over-development.
If your dough feels excessively tight and difficult to stretch after mixing, it's a strong indicator of over-kneading. While you can't reverse over-kneading, giving the dough a very long rest period (an hour or more at room temperature, or even overnight in the fridge) can help the gluten relax slightly, potentially salvaging some of the texture.
Using the Wrong Type of Flour: Choosing the Right Flour for Pizza
The type of flour used significantly impacts the dough's texture and propensity for toughness. Flours vary in their protein content, which directly relates to their gluten-forming potential. High-protein flours, like bread flour (typically 12-14% protein), develop strong, elastic gluten networks, yielding a chewy crust often desired for Neapolitan-style pizza. However, these flours require thorough kneading to develop that strong network and sufficient rest time to relax it. If you use bread flour and don't knead it enough or don't let it rest adequately, the partially developed but tight gluten will result in a tough dough and crust.
Using a lower-protein flour like all-purpose flour (around 10-12% protein) generally results in a more tender crust because it forms a less intense gluten network. While you can make excellent pizza dough with all-purpose flour, it might not develop the same level of chewiness as bread flour. If you consistently get tough dough when using bread flour, consider switching to a blend of bread and all-purpose flour, or even just all-purpose flour, especially if you struggle with kneading or resting times. Ensure the flour you choose is fresh; old flour can behave unpredictably.
Insufficient Resting Time: Allowing Gluten Relaxation
Perhaps the most common reason for tough, resistant pizza dough is not allowing it enough time to rest and relax, particularly after kneading and before shaping. Kneading tightens the gluten network, making the dough elastic but also tense. Trying to stretch or shape the dough immediately after vigorous kneading is like trying to stretch a muscle that hasn't warmed up – it resists and snaps back. This resistance makes shaping difficult and results in a thick, uneven crust that bakes up tough.
Dough needs time to rest after kneading (bulk fermentation) and often again after being portioned into balls (proofing). During these rest periods, enzymes in the dough help break down the gluten slightly, allowing it to relax and become more pliable. A bulk fermentation of at least 1-2 hours at room temperature is standard, and many recipes benefit from a cold fermentation in the refrigerator for 24-72 hours, which develops flavor and further relaxes the gluten.
After portioning, letting the dough balls rest for 30-60 minutes at room temperature before shaping is crucial. If your dough is fighting you when you try to stretch it, stop, cover it, and let it rest for another 15-20 minutes. This pause allows the gluten to relax, making it much easier to shape into a thin crust without tearing or snapping back, ultimately preventing a tough pizza.
Fixing Tough Pizza Dough
Fixing tough pizza dough primarily involves giving the gluten network time to relax. While you can't reverse over-kneading, you can mitigate its effects through extended rest periods. If the toughness is due to insufficient rest, simply giving the dough more time is the most effective solution.
The key strategies involve adjusting resting and proofing times, considering alternative methods like autolyse, and ensuring your kneading time is appropriate for the flour type and method used. Patience is your greatest ally when dealing with tough dough.
Resting and Proofing Techniques for Tender Dough
If you've encountered tough pizza dough, the most effective remedy is almost always more rest time. After kneading, the dough should undergo bulk fermentation. For standard dough, this is typically 1-2 hours at room temperature in a lightly oiled bowl, covered. The dough should increase significantly in size (often double). Even more beneficial for tenderness and flavor is cold fermentation in the refrigerator. Placing the dough in the fridge for 24-72 hours allows for a slow fermentation and significant gluten relaxation. Dough fermented cold is typically much easier to stretch and results in a more tender, flavorful crust.
After bulk fermentation (whether at room temperature or cold), portion the dough into individual balls. It is critical to let these dough balls rest and proof for at least 30-60 minutes at room temperature before attempting to shape them. This secondary rest allows the gluten network, which was disturbed and tightened during portioning, to relax again.
If you try to shape a dough ball right out of the fridge or immediately after portioning, it will be very resistant and spring back, leading to a tough crust. If your dough is still resisting after 30-60 minutes, cover it again and let it rest for another 15-30 minutes. The dough is ready to shape when it feels pliable and stretches relatively easily without tearing or snapping back excessively.
The Autolyse Method: Improving Dough Texture
The autolyse method is a technique that can significantly improve dough texture, making it more extensible (easier to stretch) and potentially preventing toughness, especially with higher-protein flours. It involves mixing just the flour and water from the recipe and letting this mixture rest for 20 minutes to an hour before adding the salt and yeast and beginning the main kneading process.
During the autolyse rest period, the flour fully hydrates, and enzymatic activity begins to break down proteins, starting the gluten development process without any mechanical work. This pre-hydration and initial gluten development make the subsequent kneading much more efficient and effective, often reducing the required kneading time. Dough that undergoes autolyse is typically easier to handle, less sticky (once kneading begins), and results in a more extensible and tender final product. If you consistently struggle with tough dough, incorporating a 30-minute autolyse into your recipe might be a valuable technique to explore.
Adjusting Kneading Time for Optimal Results
Ensuring your dough is kneaded just the right amount is key to avoiding toughness. As discussed, over-kneading builds excessive gluten tension. The optimal kneading time varies depending on the flour used (higher protein flour may need slightly longer but is also more prone to over-kneading), the hydration level, and the kneading method (hand vs. machine). For hand kneading, 8-15 minutes is a common range. For machine kneading, 5-10 minutes on medium speed is typical.
Instead of strictly following a recipe's time, learn to assess the dough's development by feel and appearance. The dough should transform from a shaggy, sticky mass into a smooth, elastic ball that is less sticky (though still potentially slightly tacky, especially for higher hydration doughs). It should pass the windowpane test, stretching thinly without tearing.
If your dough feels very tight and resistant after the recommended kneading time, stop. It's better to slightly under-knead and rely on rest time for gluten development than to over-knead and guarantee toughness. Pay attention to how the dough feels; it should be pliable and smooth, not stiff or resistant.
Pizza Dough Not Rising: Reasons and Remedies
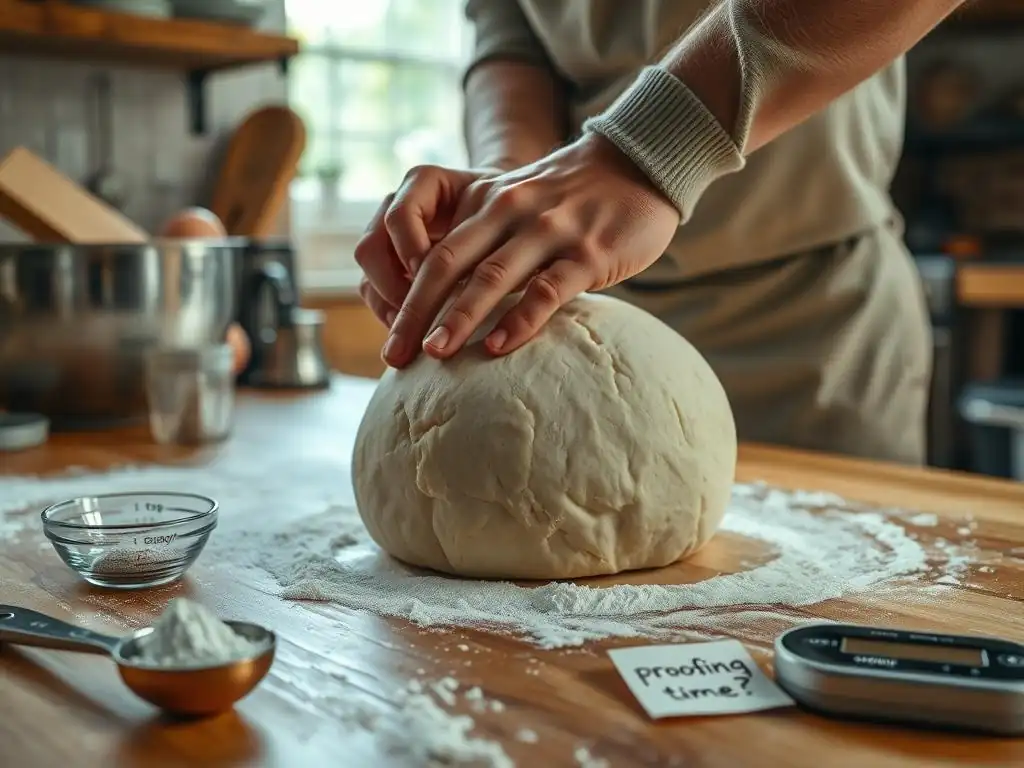
One of the most disheartening pizza dough problems is when it simply doesn't rise. You mix the ingredients, leave it to ferment, and hours later, it looks exactly the same. Proper rising (proofing) is essential for a light, airy crust with good texture and flavor. A flat dough results in a dense, often tough, and unappealing pizza base.
Lack of rise is almost always related to yeast activity. Either the yeast is inactive, the conditions aren't right for it to thrive, or there's an ingredient issue inhibiting it. Troubleshooting involves examining your yeast, water temperature, and proofing environment.
Why Isn't My Pizza Dough Rising? Potential Problems
Yeast is a living organism that produces carbon dioxide gas as it feeds on sugars in the dough. This gas gets trapped by the gluten network, causing the dough to expand or rise. If the yeast isn't active or happy, it won't produce gas, and the dough won't rise. Identifying the specific reason for yeast inactivity is crucial for successful troubleshooting.
The primary reasons for a lack of rise include using inactive or dead yeast, using water that is too hot or too cold to activate the yeast effectively, or providing a proofing environment that is too cold for the yeast to be active. Sometimes, too much salt or sugar can also inhibit yeast, but inactive yeast and temperature are the most frequent culprits.
Inactive Yeast: Testing and Reactivating Your Yeast
The most common reason for pizza dough not rising is inactive or dead yeast. Yeast is a living organism with a limited shelf life. If your yeast is old, has been stored improperly (like in an opened packet in the pantry for months), or has been exposed to excessive heat or moisture, it may no longer be viable. Using dead yeast will result in a flat dough, as there's nothing to produce the necessary gas for leavening.
Before committing a whole batch of dough to potentially dead yeast, it's wise to perform a simple test, often called "proofing the yeast." In a small bowl, combine warm water (around 105-115°F or 40-46°C – warm to the touch but not hot) with a pinch of sugar (yeast's food) and the amount of yeast called for in your recipe (or a packet). Stir gently and let it sit for 5-10 minutes.
If the yeast is active, the mixture should become foamy and bubbly, indicating the yeast is alive and feeding. If there's no activity, your yeast is likely dead, and you'll need to get fresh yeast before trying the recipe again. This simple test saves you the frustration of a failed dough batch.
Incorrect Water Temperature: Activating Yeast Effectively
Yeast activity is highly dependent on temperature. Using water that is too cold will slow down yeast activity to a crawl, potentially leading to a very long or non-existent rise within a typical timeframe. Conversely, water that is too hot will kill the yeast organisms, rendering them incapable of producing gas. The ideal temperature range for activating most dry active or instant yeasts is between 105°F and 115°F (40°C and 46°C). This temperature range is warm enough to wake up the yeast and encourage activity without being so hot that it harms them.
Using a thermometer to check your water temperature is the most accurate way to ensure it's within the optimal range. Water straight from the tap can vary significantly in temperature. If your water is too cold, the yeast will be sluggish.
If it's too hot, you'll kill the yeast before it even gets started. If you suspect water temperature was the issue with a flat dough, ensure future batches use water within the recommended range. For those using instant yeast mixed directly with dry ingredients, the overall dough temperature after mixing should still be conducive to yeast activity (ideally around 75-80°F or 24-27°C), which is influenced by water temperature, flour temperature, and room temperature.
Cold Environment: Creating an Ideal Proofing Environment
Yeast thrives in warm environments. If your kitchen is cold, especially during cooler months or if you keep your home cool, the yeast activity will be significantly slowed down, resulting in a very slow or stalled rise. While cold fermentation in the refrigerator is desirable for flavor, bulk fermentation or proofing at room temperature requires a sufficiently warm spot for the dough to rise effectively within the time specified by most recipes (typically 1-2 hours for bulk rise at room temperature).
The ideal temperature for proofing dough is generally between 75°F and 85°F (24°C and 29°C). If your kitchen is cooler than this, you'll need to find a warmer spot for your dough. Common warm proofing spots include: inside a turned-off oven with the light on (the light generates enough heat), on top of the refrigerator (heat rises), or in a microwave that has been briefly run with a cup of water to create a warm, steamy environment (remove the water before adding the dough).
Ensure the dough is covered to prevent a skin from forming. If your dough is not rising, consider if the environment is too cold and move it to a warmer location.
Getting Your Pizza Dough to Rise: Troubleshooting Tips
If you've followed the steps and your dough still isn't rising as expected, don't despair! There are specific troubleshooting tips you can employ to encourage yeast activity and get your dough expanding. These methods focus on providing the yeast with the optimal conditions they need to thrive and produce gas.
Remember that rising times are estimates; environmental factors and even the specific flour used can influence how quickly dough rises. Focus on the dough's appearance and feel rather than watching the clock too rigidly.
Proofing in a Warm Place: Techniques and Tools
As highlighted earlier, temperature is critical for yeast activity. If your dough is not rising, the first step is to ensure it's in a sufficiently warm environment. The ideal range is 75-85°F (24-29°C). If your ambient temperature is below this, create a warmer microclimate for your dough.
Simple techniques include placing the covered dough bowl in a turned-off oven with just the oven light on. The heat from the bulb is usually enough to create a cozy proofing environment. Another method is to heat a cup of water in the microwave until it boils, then place the covered dough bowl into the microwave with the hot water cup (leaving the water cup in).
Close the door, but do not turn the microwave on. The steam and heat from the water will warm the air inside. You can also use a proofing box if you bake frequently, or simply place the dough near a warm spot like a sunny window (avoid direct scorching sunlight) or on top of a warm appliance.
Ensure the dough is covered with plastic wrap or a damp towel to prevent drying. Giving the dough a warm place to rest is often the key to kickstarting a stalled rise.
Checking Yeast Expiration Dates: Ensuring Yeast Viability
Inactive yeast is a major culprit for flat dough. Always check the expiration date on your yeast packet or jar. Yeast loses viability over time, especially once opened. For active dry yeast, storing it in an airtight container in the refrigerator or freezer can extend its life significantly beyond the printed date, but it's still best to use it within a few months once opened. Instant yeast is typically more stable but also benefits from cold storage after opening.
If your yeast is past its expiration date, or if you're unsure how long it's been open, it's safest to buy a fresh packet. Even if the date is current, improper storage (like being left in a hot car or exposed to moisture) can kill the yeast. Performing the yeast proofing test (mixing yeast, warm water, and sugar) is the most reliable way to confirm its viability before adding it to your flour. If it doesn't foam within 10 minutes, get fresh yeast. A small investment in fresh yeast can save you the disappointment of a failed dough.
Using a Starter (Optional): Adding Flavor and Rise with Sourdough
While most home pizza recipes use commercial yeast, incorporating a sourdough starter can provide leavening, contribute incredible flavor, and offer a different approach if you're struggling with commercial yeast rise. A sourdough starter is a live culture of wild yeasts and bacteria. Once established and active, a healthy starter is a powerful leavening agent.
Using a starter requires maintaining the culture and understanding its fermentation patterns, which are slower and more temperature-dependent than commercial yeast. However, the resulting crust has a unique tang and often a wonderful open crumb structure. If you're interested in exploring this route, ensure your starter is active and bubbly before using it in your dough.
A "float test" (dropping a small piece of starter into water – if it floats, it's ready) can help gauge its readiness. While a starter introduces more variables than commercial yeast, it offers a rewarding path for achieving both rise and complex flavors in your pizza dough.
Achieving the Perfect Pizza Dough Consistency: A Summary
Mastering homemade pizza dough involves understanding the interplay of ingredients, temperature, and technique. Sticky, tough, or flat dough are common hurdles, but none are insurmountable. By learning to identify the root cause of each problem – whether it's hydration issues, gluten development, or yeast activity – you can apply targeted solutions to get your dough back on track.
Remember that practice makes perfect. Your first few attempts might not be flawless, but each batch teaches you more about how dough behaves. Pay attention to how the dough feels at different stages, from mixing through kneading and proofing.
BakeWithEase's Pro Tips for Consistently Great Pizza Dough
Here are some pro tips from BakeWithEase to help you achieve consistently great pizza dough:
- Measure by Weight: Use a digital scale for both flour and water for accuracy. This is the single best way to control hydration and avoid sticky pizza dough issues.
- Know Your Flour: Understand the protein content of the flour you're using and how it affects kneading and resting times.
- Check Your Yeast: Always proof your active dry yeast in warm, sugary water to ensure it's alive before adding it to your dry ingredients.
- Control Water Temperature: Use water between 105-115°F (40-46°C) for activating yeast.
- Don't Rush Kneading: Knead until the dough is smooth, elastic, and passes the windowpane test, but stop before it becomes overly tight or rubbery.
- Prioritize Rest: Allow sufficient bulk fermentation and proofing time. Cold fermentation in the fridge is highly recommended for flavor and texture.
- Listen to the Dough: If the dough resists stretching, stop and let it rest for another 15-20 minutes. Patience prevents toughness.
- Use Oil for Handling: A little oil on your hands or work surface can make sticky dough much easier to manage.
- Find a Warm Proofing Spot: Ensure your dough is rising in a warm environment (75-85°F or 24-29°C) if your kitchen is cool.
Key Takeaways: Preventing Common Pizza Dough Issues
Successfully troubleshooting pizza dough problems boils down to a few key principles:
- Accuracy: Precise measurement of ingredients, especially the flour-to-water ratio, is fundamental to preventing sticky pizza dough.
- Development: Proper kneading develops the gluten structure needed for good texture, but avoid over-kneading, which leads to toughness.
- Relaxation: Sufficient rest time after kneading and before shaping is essential for the gluten network to relax, ensuring a tender, easy-to-stretch dough. Insufficient rest is a major cause of tough dough.
- Activity: Active yeast and the right temperature environment are critical for the dough to rise properly. Inactive yeast or incorrect temperatures lead to flat dough.
By paying attention to these factors and applying the sticky pizza dough troubleshooting tips and other remedies discussed, you'll be well on your way to consistently making delicious, perfectly textured pizza crusts right in your own kitchen. Happy baking!
Frequently Asked Questions
What causes pizza dough to be too sticky?
Sticky dough is often caused by too much hydration (too much water relative to flour) or not enough kneading. A humid environment can also contribute to stickiness.
How can I fix sticky pizza dough?
The easiest fix is to add small amounts of flour, one tablespoon at a time, while kneading. Ensure the flour is fully incorporated before adding more.
My pizza dough is tough, not sticky. What could be the problem?
Tough pizza dough can be due to over-kneading, which develops too much gluten. Also, using the wrong type of flour can lead to a tough texture.
Why isn't my pizza dough rising?
Dough that isn't rising usually indicates a problem with the yeast. It could be expired, not properly activated, or the dough might be in too cold of an environment.
What kind of flour is best for pizza dough?
Bread flour is generally recommended for pizza dough because of its high gluten content, which contributes to a chewy and strong crust. All-purpose flour can be used but may yield a less chewy result.
Final Reflection: The Humble Rise of Perfect Pizza Dough
The quest for the perfect pizza dough is a journey shared by countless home cooks, a testament to the enduring power of this simple yet complex culinary creation. From the sticky pitfalls of over-hydration to the frustrating flatness of under-proofed dough, the challenges are real, and the rewards – a perfectly crisp, chewy crust – are undeniably worth the effort. This article has explored the common problems encountered in pizza dough making, offering practical solutions to help you navigate the process with confidence.
The pursuit of the perfect pizza dough transcends mere culinary skill; it's a reflection of our desire to create something beautiful and delicious from humble ingredients. It's about the satisfaction of transforming simple flour, water, and yeast into something extraordinary. The process itself, with its careful measurements and attentive observation, mirrors the patience and dedication required in many aspects of life. The best things in life are worth waiting for,
and a perfectly risen pizza dough is a testament to that truth.
Now, it's your turn. Consider the lessons learned here – the importance of precise measurements, the nuances of hydration, the magic of proper proofing. Don't be discouraged by a sticky mess or a stubbornly flat crust. Instead, embrace the learning process, experiment with different techniques, and remember that even the most experienced pizzaiolos have faced their share of doughy disasters. The next time you tackle pizza dough, approach it with newfound confidence and the knowledge that the journey to perfection is as rewarding as the final slice itself. Go forth and conquer your dough!
Unlock Your Perfect Pizza Dough!
Thanks for taking the time to explore the world of pizza dough with us! We hope you now feel more confident in tackling those pesky dough problems. Ready to take your pizza game to the next level?
- Bake your dream pizza tonight! Grab those ingredients and put your new knowledge to the test. Experiment with different flours or hydration levels – you’ll be surprised by the results!
- Share your pizza-making journey! Let us know (and other BakeWithEase readers) how your dough turned out – we love seeing your creations!
- Explore more of our baking resources: Dive into our other articles on yeast, proofing, and other essential baking techniques to expand your skills even further.
Ready to share your delicious success (or even your dough-based disasters!)? What unexpected ingredient or technique will you try in your next pizza masterpiece?