
Custard Tart Glaze: How to Get That Perfect Shine

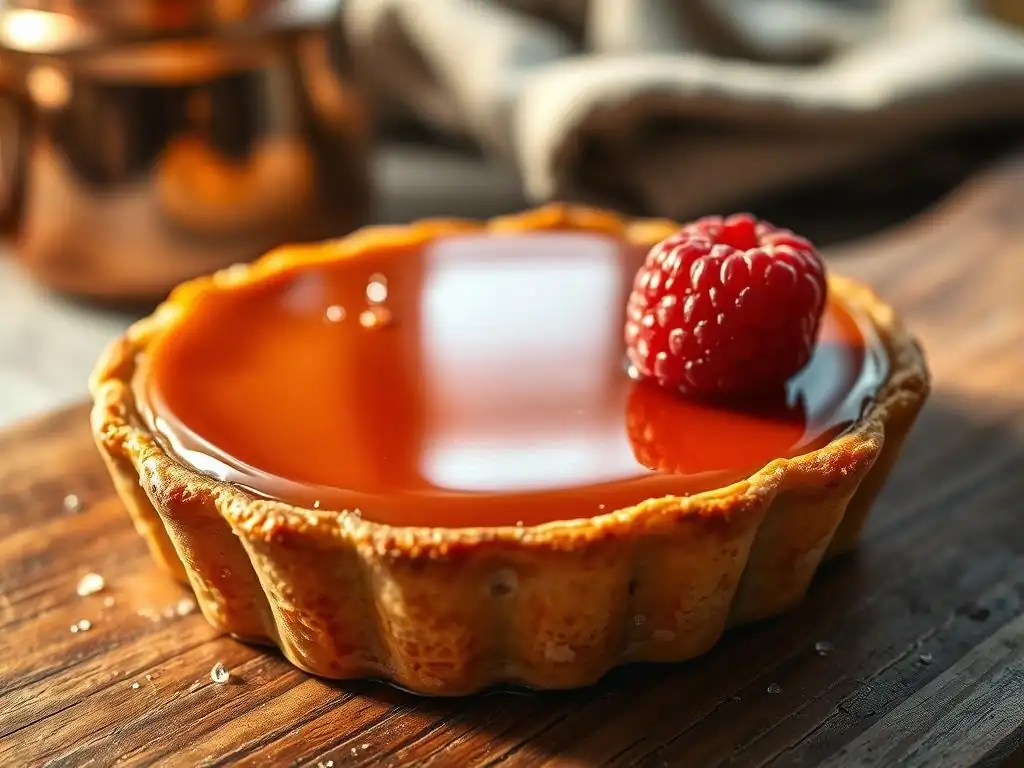
Welcome to BakeWithEase, your trusted guide to baking bliss! Ever wondered how to achieve that mesmerizing, professional-looking shine on your pastries? We're diving deep into the secrets behind the perfect custard tart glaze. Discover the simple techniques and ingredients you need to elevate your baking game and create desserts that are as stunning as they are delicious. Ready to unlock the secrets to a truly unforgettable finish? Let's get started!
- Custard Tart Glaze: How to Get That Perfect Shine on Your BakeWithEase Tart
- Understanding the Importance of a Perfect Custard Tart Glaze
- Achieving the Perfect Shine: Different Glaze Options for Custard Tarts
- Step-by-Step Guide to Applying Custard Tart Glaze for Maximum Shine
- Troubleshooting Common Custard Tart Glaze Problems
- Tips and Tricks for a Superior Custard Tart Glaze Finish
- Storing Your Glazed Custard Tart to Maintain Its Shine
- Mastering the Art of the Perfect Custard Tart Glaze: Final Thoughts
-
Frequently Asked Questions
- What makes a custard tart glaze "perfect"?
- What are the common ingredients used in a custard tart glaze?
- How do I prevent my custard tart glaze from being too sticky?
- What's the best way to apply the glaze to the custard tart for an even finish?
- Can I use a different type of jam other than apricot for my custard tart glaze?
- Final Reflection: The Enduring Allure of a Perfect Glaze
- Unlock Your Custard Tart's Inner Glow!
Custard Tart Glaze: How to Get That Perfect Shine on Your BakeWithEase Tart
Understanding the Importance of a Perfect Custard Tart Glaze
Why a Shiny Glaze Elevates Your Custard Tart Presentation
A perfectly glazed custard tart isn't just about taste; it's a feast for the eyes. The visual appeal of a dessert significantly impacts how it's perceived and enjoyed. A glossy, reflective surface on your tart signals freshness, quality, and artisanal care.
Think of the classic French fruit tart – its vibrant colors are often sealed and enhanced by a gleaming glaze, making it look irresistible. For your BakeWithEase custard tart, achieving that perfect custard tart glaze creates a professional, inviting finish that makes your hard work truly shine. It transforms a simple tart into a showstopper, perfect for special occasions or simply elevating an everyday treat.
Beyond mere aesthetics, a shiny glaze contributes to the overall experience by creating a sense of anticipation. That lustrous sheen promises a delightful texture and flavor beneath. When presenting your baked goods, especially delicate items like custard tarts, the finish is paramount. A dull or uneven surface can make the tart look dry or less appealing, even if the filling and crust are perfect. Mastering the art of a perfect custard tart glaze ensures your creation looks as good as it tastes, leaving a lasting impression on anyone who enjoys a slice.
The Role of Glaze in Protecting and Enhancing Flavor
While shine is a key visual benefit, a perfect custard tart glaze serves practical purposes too. It acts as a protective barrier for the delicate custard filling and any fruit or toppings. This layer helps prevent the surface from drying out, cracking, or absorbing unwanted odors from the refrigerator. It locks in moisture, keeping the custard tender and smooth for a longer period. This is particularly important for tarts that might be prepared a few hours in advance of serving.
Furthermore, certain glazes, like apricot or berry-based options, can subtly enhance the flavor profile of the tart. An apricot glaze, for example, adds a hint of sweet and slightly tangy fruitiness that complements the rich, creamy custard and buttery pastry. Even neutral glazes, while not adding flavor, provide a smooth mouthfeel that can improve the overall texture experience. Thus, applying a perfect custard tart glaze is not just about looks; it's a crucial step in preserving quality and adding another layer of subtle complexity to your BakeWithEase creation.
Achieving the Perfect Shine: Different Glaze Options for Custard Tarts
Apricot Glaze: The Classic Choice for Custard Tarts
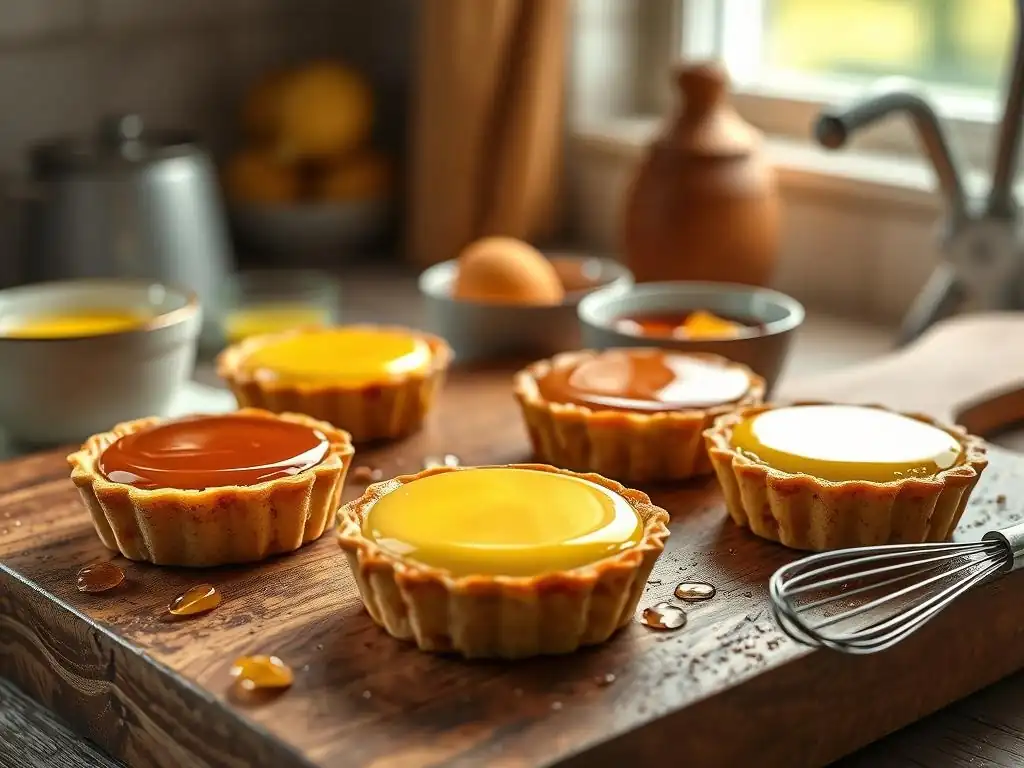
Apricot glaze is arguably the most traditional and widely used option for achieving a beautiful, glossy finish on tarts, including those with a custard base or fruit toppings. Made primarily from apricot jam or preserves, sugar, and water, it provides a warm, golden hue and a reliable shine. Its popularity stems from its ease of preparation and the complementary flavor it offers, pairing particularly well with fruit tarts, but also adding a pleasant counterpoint to rich custard. Professional bakeries often rely on apricot glaze for its consistent results and ability to make colors pop.
The process typically involves heating apricot jam with a small amount of water or a fruit juice until it becomes a pourable consistency, then straining it to remove any fruit solids or chunks. This straining step is critical for achieving that smooth, mirror-like finish. While it adds a distinct apricot flavor, which is generally desirable, it might not be the best choice if you want the pure flavor of the custard or other toppings to be the sole focus. However, for a classic look and reliable shine, apricot glaze remains a top contender for a perfect custard tart glaze.
Pros and Cons of Apricot Glaze
- Pros:
- Provides a high, consistent shine.
- Easy to prepare from readily available ingredients (apricot jam).
- Adds a pleasant, slightly tangy flavor that complements many tarts.
- Traditional choice, offering a classic look.
- Cons:
- Imparts an apricot flavor, which may not be desired for all tart types.
- Can be tricky to strain perfectly, potentially leaving small particles.
- May require careful heating to avoid burning the sugar.
Preparing Apricot Glaze for Optimal Shine
To prepare a perfect apricot glaze, start with about half a cup of good quality apricot jam or preserves. Combine it in a small saucepan with 2-3 tablespoons of water or orange juice. Heat gently over medium-low heat, stirring constantly, until the jam melts and the mixture is smooth and liquid. Avoid boiling vigorously, as this can cause the sugar to caramelize too much and thicken it excessively. Once melted, press the mixture through a fine-mesh sieve into a clean bowl using the back of a spoon.
Discard any solids left in the sieve. The resulting liquid should be a clear, smooth syrup. If it seems too thick, stir in another teaspoon of hot water. Let it cool slightly before using; it should be warm but not hot enough to melt the custard. This straining step is essential for achieving that flawless, perfect custard tart glaze appearance.
Egg Wash: A Simple and Effective Custard Tart Glaze
While often associated with giving pastry crusts a golden sheen, an egg wash can also function as a simple glaze for certain types of tarts, particularly those where the crust is the primary visible surface or where a very subtle sheen is desired before baking. An egg wash is typically made by whisking an egg (whole, yolk only, or white only) with a small amount of liquid, like water, milk, or cream.
When applied to pastry before baking, the protein in the egg coagulates and browns, creating a natural, slightly glossy finish. It's a quick and easy method, requiring no extra cooking steps for the glaze itself.
Using an egg wash as a glaze before baking works best on the exposed pastry edges or lattice tops of a custard tart. It provides a less intense shine than cooked glazes but offers a beautiful, natural-looking sheen that enhances the baked crust's appearance.
For a perfect custard tart glaze effect using egg wash, ensure the application is thin and even to prevent patchiness. The type of egg wash used (whole egg, yolk, or white) will influence the final color and gloss level, with yolk providing the deepest color and highest shine, and white providing the least color but a delicate crispness.
Achieving an Even Egg Wash Application
Achieving an even application of egg wash is key to a uniform, perfect custard tart glaze on the crust. Use a soft pastry brush, preferably one with natural bristles, as they tend to hold and distribute the liquid more evenly than silicone brushes for this purpose. Dip the brush lightly into the whisked egg wash, then gently tap off any excess on the side of the bowl.
Apply the wash in thin, even strokes, following the direction of the pastry grain if possible. Avoid overloading the brush, as this can lead to drips, pooling, and an unevenly colored or shiny finish. For lattice tops or intricate designs, use the tip of the brush to carefully coat all surfaces.
For the edges of the tart crust, brush horizontally around the perimeter, ensuring the entire edge is coated without letting the wash drip down the sides of the pan. A second thin coat can be applied after the first has dried slightly, if a deeper color or more pronounced shine is desired, but be careful not to apply too much, as this can result in a thick, unattractive layer. Consistency in application ensures the pastry bakes to a uniform golden-brown with a beautiful, subtle sheen, contributing to the overall appeal of your perfect custard tart glaze finish.
Baking Temperatures and Egg Wash Glossiness
The baking temperature plays a significant role in how an egg wash performs and the level of glossiness it achieves on your pastry. High temperatures can cause the egg wash to brown very quickly, potentially before the pastry is fully baked, leading to a darker, less shiny finish that might even look slightly scorched. Baking at moderate temperatures, typically between 350°F and 400°F (175°C to 200°C), allows the egg wash to gradually cook and set, resulting in a more even, golden color and a better shine.
For optimal glossiness, some bakers recommend starting the tart in a slightly hotter oven (e.g., 400°F/200°C) for the first 10-15 minutes to help the egg wash set quickly and develop color, then reducing the temperature to finish baking the tart. Alternatively, baking at a consistent moderate temperature throughout will still yield a good result. Ensure the egg wash is applied before baking.
The protein denaturation and Maillard reaction during baking are what create the color and gloss. Experimenting with your oven and specific egg wash mixture will help you find the perfect balance for your desired perfect custard tart glaze effect on the pastry.
Neutral Glaze: A Versatile Option for a Professional Finish
Neutral glaze, also known as clear glaze or patissier's glaze, is a professional-grade option used extensively in bakeries to give tarts, pastries, and fruit toppings a brilliant, transparent shine without adding any flavor of its own. It's typically made from sugar, water, pectin or gelatin, and sometimes glucose syrup or corn syrup for added shine and elasticity. Because it is flavorless, it's ideal when you want the true taste of your custard tart and any fruit or decorations to stand out, while still achieving a dazzling, perfect custard tart glaze.
This type of glaze is particularly useful for tarts with delicate flavors or vibrant fruit arrangements where an apricot or berry glaze would mask the natural taste and color. It provides a crystal-clear, high-gloss finish that makes colors appear more vivid and appealing. Neutral glaze is usually warmed gently before application to make it liquid and easy to spread. Once cooled, it sets to a firm but not brittle jelly-like layer, providing both shine and protection. It's a staple for achieving that polished, professional look on various desserts.
Advantages of Using Neutral Glaze
Using a neutral glaze offers several distinct advantages for achieving a perfect custard tart glaze. Firstly, its lack of flavor means it won't interfere with or alter the taste of your custard or any other components of the tart. This makes it incredibly versatile, suitable for a wide range of fillings and toppings. Secondly, it provides a very high level of shine, often superior to homemade fruit glazes or egg washes, giving your tart a truly professional, mirror-like finish.
Additionally, neutral glaze acts as an excellent protective barrier. It seals the surface, preventing oxidation of fruit (like apples or bananas) and keeping the custard moist. It also sets relatively firmly upon cooling, which can help stabilize delicate fruit arrangements on top of the tart. For intricate designs or when showcasing the natural beauty of ingredients, a neutral glaze is often the superior choice for achieving a flawless, perfect custard tart glaze that highlights rather than hides.
Where to Find and How to Use Neutral Glaze
Neutral glaze can be purchased ready-made from specialty baking supply stores, online retailers, and sometimes in the baking aisle of larger supermarkets. It's often sold in tubs and has a jelly-like consistency at room temperature. To use it, scoop out the desired amount and gently warm it in a small saucepan over low heat or in the microwave in short bursts until it becomes liquid and pourable. Be careful not to overheat it, as this can affect its setting properties.
Once liquefied, the neutral glaze should be applied while still warm (but not hot) using a pastry brush, gently brushing it over the surface of the cooled custard tart and any toppings. Ensure an even layer for a uniform shine. For the best results, work quickly but carefully before the glaze starts to cool and set.
Any excess glaze can usually be re-warmed and reused. Allow the glazed tart to chill in the refrigerator for at least 15-30 minutes to allow the glaze to fully set and achieve its maximum shine and firmness, resulting in a stunning, perfect custard tart glaze finish.
Jelly Glaze: Adding Flavor and Shine
Jelly glaze is another simple and effective way to add both shine and a burst of flavor to your custard tart, particularly if it features fruit. Similar to apricot glaze, it's made from fruit jelly (like currant, raspberry, or apple jelly) heated and strained. The key difference is the variety of flavors available, allowing you to match the glaze flavor to the fruit or overall profile of your tart. For instance, a raspberry jelly glaze would be wonderful on a custard tart topped with fresh raspberries, enhancing their color and adding a complementary sweetness and tang.
This method is straightforward and uses common pantry ingredients. The resulting glaze provides a good level of shine, though it might be slightly less transparent than a neutral glaze depending on the type and quality of jelly used. It's a great option for home bakers looking for a flavored perfect custard tart glaze that's easy to prepare and customize. The straining step is crucial here too, ensuring no fruit pieces or cloudiness detract from the desired glossy finish.
Selecting the Right Jelly for Glaze
Selecting the right jelly is crucial for a successful jelly glaze. Opt for clear or semi-clear jellies rather than preserves or jams, as these contain fewer fruit solids and will yield a smoother, shinier glaze after straining. Red currant jelly is a classic choice, offering a beautiful reddish hue and a tart flavor that cuts through sweetness. Apple jelly provides a very neutral, clear glaze with just a hint of sweetness. Raspberry or strawberry jelly can add lovely color and flavor if they complement your tart's components.
Consider the color and flavor profile of your custard tart when choosing the jelly. If you have a plain custard tart and want a specific fruit flavor, choose a jelly that aligns with that. If the tart has multiple fruits, a more neutral flavor like apple or red currant might be best. Aim for high-quality jelly for the best results; cheaper jellies might contain more additives that affect clarity and shine. The goal is a smooth, vibrant, and flavorful layer that contributes to a perfect custard tart glaze.
Making a Jelly Glaze for Custard Tarts
To make a jelly glaze, measure about half a cup of your chosen fruit jelly into a small saucepan. Add 1-2 tablespoons of water or complementary fruit juice (like apple or cranberry juice). Heat the mixture gently over low heat, stirring constantly, until the jelly is completely melted and the mixture is smooth. Be careful not to boil it vigorously. Once melted, pass the liquid through a fine-mesh sieve into a clean bowl to remove any seeds, pulp, or impurities.
The strained glaze should be a clear, pourable liquid. If it seems too thick, stir in a little more hot water, a teaspoon at a time, until the desired consistency is reached. Let the glaze cool slightly until it is warm but not hot.
It should still be liquid enough to brush easily. Brush the warm glaze evenly over the cooled custard tart and any fruit toppings. Allow the tart to sit at room temperature or chill briefly in the refrigerator to let the jelly glaze set and firm up, revealing its beautiful shine and completing your perfect custard tart glaze finish.
Step-by-Step Guide to Applying Custard Tart Glaze for Maximum Shine
Step 1: Preparing Your Custard Tart for Glazing
Before you even think about applying glaze, your custard tart needs to be properly prepared. This initial step is critical for ensuring the glaze adheres correctly and provides that flawless, perfect custard tart glaze finish you're aiming for. Rushing this stage can lead to a patchy or dull result, undermining all your baking efforts. Proper cooling and ensuring a clean surface are the cornerstones of successful glazing.
Neglecting preparation can result in the glaze not setting properly, sliding off, or picking up crumbs and imperfections from the tart's surface. Taking the time to ensure the tart is in the optimal condition for glazing is a small effort that yields significant rewards in terms of the final appearance and quality of your perfect custard tart glaze. It sets the stage for a smooth application and a stunning result.
Cooling the Tart Properly
Proper cooling is non-negotiable for applying most glazes, especially those that set upon cooling like apricot, neutral, or jelly glazes. The custard tart must be completely cooled to room temperature, or even slightly chilled, before glazing. Applying a warm glaze to a warm tart can cause the glaze to become too thin, run off the sides, or fail to set properly, resulting in a sticky mess and a lack of shine. Applying a glaze that sets (like gelatin-based neutral glaze) to a warm surface might also prevent it from gelling effectively.
Allow the tart to cool on a wire rack away from direct heat. For faster cooling or before applying a setting glaze, you can chill the tart in the refrigerator for 30-60 minutes. Ensure the top surface of the custard and any fruit is cool to the touch. This ensures the glaze will adhere, spread evenly, and set correctly, giving you that desired smooth, perfect custard tart glaze finish.
Ensuring a Clean Surface
A clean surface is paramount for a smooth, perfect custard tart glaze. Before glazing, gently inspect the top of your cooled tart for any crumbs, stray pastry bits, or condensation. Use a very soft brush (like a clean, dry pastry brush or even a clean makeup brush dedicated to baking) to gently sweep away any loose particles. If there is any condensation on the surface, gently blot it with a clean paper towel without disturbing the custard.
Any debris or moisture on the surface will prevent the glaze from adhering evenly, creating bumps or dull spots. A clean surface allows the glaze to spread smoothly and create a seamless, reflective layer. This simple step takes only a moment but makes a significant difference in achieving a professional-looking, perfect custard tart glaze.
Step 2: Preparing Your Chosen Glaze
Once your tart is ready, the next crucial step is preparing the glaze itself. Whether you've chosen apricot, neutral, jelly, or even an egg wash (applied before baking), the preparation needs to be precise to ensure the correct consistency and smoothness. The goal is a glaze that is liquid enough to spread easily but not so thin that it runs off the tart.
Proper glaze preparation ensures you have the right texture and temperature for optimal application. Skipping steps like straining or not heating the glaze correctly can lead to a lumpy, uneven, or ineffective glaze that won't give you that sought-after perfect custard tart glaze shine.
Achieving the Right Consistency
The consistency of your glaze is vital for a perfect application. For cooked glazes (apricot, neutral, jelly), it should be warm enough to be liquid and pourable, but not hot. It should have a slightly syrupy consistency – thick enough to coat the back of a spoon but thin enough to spread easily without being gloopy. If it's too thick, it will be hard to spread evenly and may set too quickly. If it's too thin, it will run off the tart and provide minimal shine.
If your cooked glaze cools and thickens too much while you're working, gently warm it again over low heat or in the microwave for a few seconds until it reaches the correct consistency. For egg wash, the consistency is naturally thin; ensure it's well-whisked with no streaks of yolk or white for even color and sheen. Getting the consistency just right is a key factor in achieving a smooth, perfect custard tart glaze.
Straining for a Smooth Finish
For cooked glazes made from jam or jelly (apricot, jelly glaze), straining is a non-negotiable step for achieving a truly smooth, professional, perfect custard tart glaze. Even smooth jams or jellies can contain tiny seed fragments, fruit fibers, or undissolved sugar crystals that will show up as imperfections on your finished glaze.
Pass the warmed, liquid glaze through a fine-mesh sieve into a clean bowl. Use the back of a spoon to push the liquid through, leaving any solids behind. This process results in a clear, lump-free liquid that will set into a perfectly smooth, reflective layer on your tart. Don't skip this step if you want that mirror-like shine.
Step 3: Applying the Glaze Evenly
With the tart prepared and the glaze ready, it's time for application. This step requires a steady hand and careful technique to ensure the glaze is spread uniformly across the entire surface. Uneven application is a common cause of dull or patchy glazes.
Mastering the application technique is crucial for a consistently shiny, perfect custard tart glaze. Whether you're using a brush or another method, the goal is a thin, even coating that covers the entire desired area without pooling or dripping excessively.
Brushing Techniques for a Uniform Layer
Using a pastry brush is the most common method for applying cooked glazes. Dip a clean, soft-bristled pastry brush into the warm, strained glaze, ensuring the brush is coated but not dripping. Starting from the center of the tart and working outwards, gently brush the glaze over the custard and any toppings. Use smooth, even strokes. Avoid excessive back-and-forth brushing, as this can create streaks or lift up the surface of the custard or fruit.
For the edges, brush the glaze right up to the crust. If glazing the crust itself (with egg wash before baking, or a cooked glaze after), use careful strokes to cover the desired area. The key is to apply enough glaze to cover the surface fully but not so much that it pools excessively, especially around the edges or in any depressions. A uniform layer is essential for a consistent, perfect custard tart glaze shine.
Avoiding Pooling and Streaks
Pooling and streaks are common issues that can ruin the appearance of your perfect custard tart glaze. To avoid pooling, especially around the edges where the custard meets the crust or around fruit, use a brush to gently redistribute any excess glaze. You can also use the edge of a small offset spatula to carefully wick away excess glaze from corners or edges.
To prevent streaks, ensure your glaze is the correct consistency and temperature (warm but not hot). Apply with smooth, confident strokes and avoid overworking the glaze. If you see streaks forming, try to smooth them out quickly before the glaze starts to set. For large, flat surfaces, sometimes pouring the glaze onto the center and gently tilting the tart can help spread it evenly before finishing with a brush for edge-to-edge coverage. Careful application is key to a streak-free, perfectly shiny custard tart glaze.
Step 4: Baking or Setting the Glaze
The final step is allowing the glaze to set properly, which may involve baking (for egg wash) or chilling (for cooked glazes). This step locks in the shine and protects the tart's surface.
Ensuring the glaze sets correctly is the last piece of the puzzle for achieving a durable and brilliant perfect custard tart glaze. Each glaze type requires a different setting process.
Setting the Glaze in the Oven (If Applicable)
If you are using an egg wash on the pastry crust or lattice top of your custard tart, the glaze sets during the baking process. As mentioned earlier, the heat of the oven causes the egg proteins to coagulate and brown, creating the characteristic golden color and subtle sheen. Ensure your oven temperature is appropriate for baking the tart itself; the egg wash will set as the tart bakes.
For most tarts, this occurs within the typical baking time, often 30-50 minutes depending on size and recipe, at temperatures usually between 350°F and 400°F (175°C to 200°C). Keep an eye on the crust to prevent it from browning too quickly. If it starts to get too dark before the custard is set, you can loosely tent the tart with foil. The oven's heat is the catalyst for this type of perfect custard tart glaze.
Allowing the Glaze to Set Naturally
For cooked glazes like apricot, neutral, or jelly glaze, setting occurs as the glaze cools. After applying the warm glaze to your cooled tart, you need to allow it time to firm up. For best results and maximum shine, place the glazed tart in the refrigerator for at least 15-30 minutes.
Chilling helps the glaze set quickly and firmly, resulting in a more durable and shinier finish. Avoid covering the tart tightly until the glaze is completely set, as condensation can make it dull. Once set, the glaze will transform from a liquid or syrupy state into a firm, jelly-like layer with a beautiful, reflective surface, completing your perfect custard tart glaze.
Troubleshooting Common Custard Tart Glaze Problems
Dull or Uneven Glaze: Causes and Solutions
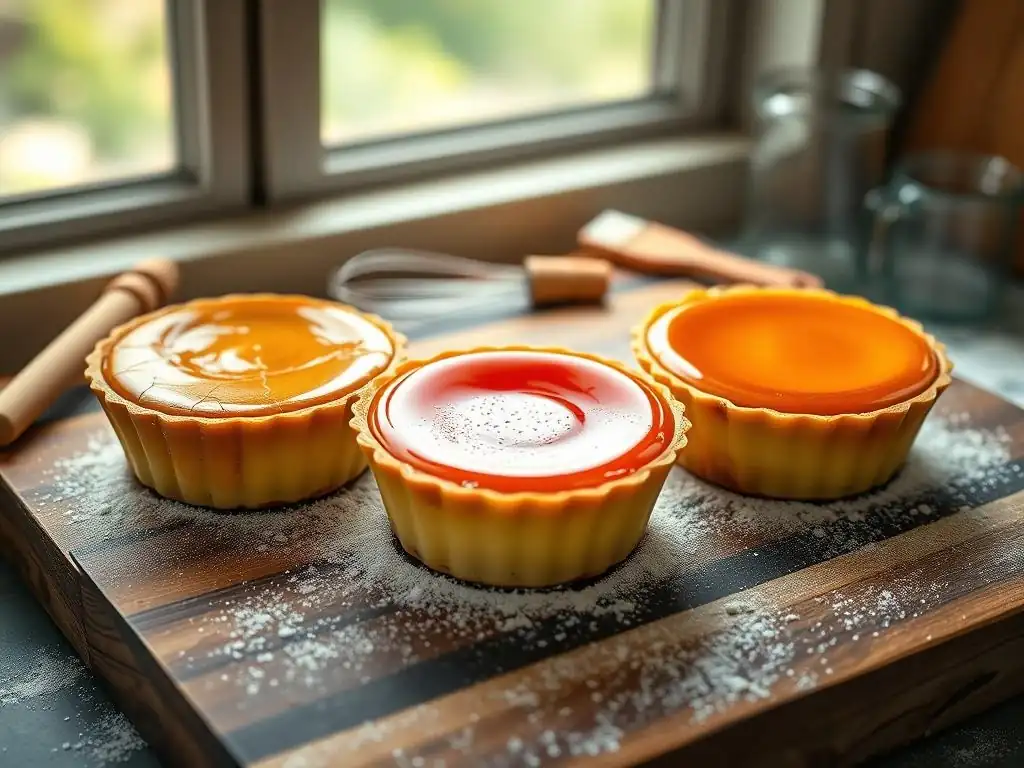
Achieving a consistently shiny, perfect custard tart glaze can sometimes be tricky, and a dull or uneven finish is a common frustration. This can happen for several reasons, often related to preparation or application technique. Identifying the root cause is the first step to fixing it for your next bake.
Understanding why your glaze isn't shining as expected allows you to adjust your process. Fortunately, most issues leading to a dull or uneven perfect custard tart glaze are preventable with proper technique and attention to detail during preparation and application.
Identifying the Reasons for a Lackluster Finish
Several factors can contribute to a dull or uneven perfect custard tart glaze. Applying the glaze to a tart that is still warm can prevent it from setting correctly and reduce shine. Insufficient heating or straining of cooked glazes can leave particles or inconsistencies that disrupt the smooth, reflective surface. Applying the glaze too thinly might result in a weak, barely noticeable sheen.
Other causes include applying the glaze unevenly with patchy strokes, or condensation forming on the tart or glaze while it's setting, especially if covered too soon or placed in a humid environment. Using low-quality jam or jelly with poor gelling properties can also result in less shine.
Corrective Measures for a Shiny Result
If your glaze is dull or uneven, you might be able to apply a second, thin coat of warmed glaze after the first has set slightly, ensuring the second coat is applied smoothly and evenly. For cooked glazes, make sure you are heating them just enough to become liquid and straining them thoroughly. Always apply the glaze to a fully cooled or chilled tart.
To prevent condensation, ensure the tart is completely cool before glazing and avoid covering it tightly until the glaze is fully set, preferably after chilling in the refrigerator. Using a high-quality glaze ingredient (like good jam or professional neutral glaze) and practicing your application technique will also help achieve a consistently brilliant, perfect custard tart glaze.
Sticky Glaze: Preventing and Fixing the Issue
A sticky perfect custard tart glaze can be unpleasant to the touch and can make the tart difficult to slice cleanly. Stickiness usually indicates that the glaze hasn't set properly or contains too much sugar relative to its gelling agent.
Preventing a sticky glaze involves controlling the sugar concentration and ensuring proper setting conditions. Fixing a sticky glaze after it has been applied can be difficult, but understanding the causes helps prevent future occurrences and contributes to achieving a truly perfect custard tart glaze.
Understanding the Factors Contributing to Stickiness
Excessive stickiness in cooked glazes often results from too much sugar in the glaze mixture relative to the amount of water or gelling agent (like pectin in jam or gelatin in neutral glaze). If the glaze is heated too much or reduced too significantly, the sugar concentration increases, leading to a stickier texture upon cooling. Insufficient cooling or chilling time can also result in a glaze that feels tacky rather than firm.
Humidity can also play a role; in very humid conditions, sugar-based glazes can absorb moisture from the air, making them sticky. Using a recipe that is improperly balanced or not following the heating instructions carefully can contribute to this issue.
Techniques to Reduce Stickiness
To prevent stickiness in cooked glazes, ensure you follow the recipe ratios closely and avoid over-reducing the mixture when heating. If using a store-bought neutral glaze, warm it just until liquid; don't cook it further. Always allow the glazed tart to cool and set completely, preferably in the refrigerator for at least 30 minutes. Chilling helps the gelling agents firm up properly.
If your glaze is already applied and sticky, you might try chilling the tart for a longer period. In humid conditions, storing the tart in an airtight container in the refrigerator can help minimize moisture absorption. For future glazes, consider adding a tiny amount more water when heating, or if using a recipe, ensure the sugar-to-liquid ratio is balanced for proper setting. Achieving a non-sticky yet shiny finish is part of mastering the perfect custard tart glaze.
Cracking Glaze: How to Maintain a Smooth Surface
Cracking glaze can detract from the appearance of your perfect custard tart glaze, making it look less professional and potentially compromising its protective barrier. Cracks usually occur when the glaze layer is too thick or brittle, and the underlying tart shifts or is sliced.
Preventing cracks involves controlling the glaze thickness and allowing it to set correctly. While repairing cracks is difficult, understanding the causes helps ensure your next perfect custard tart glaze remains smooth and intact.
Preventing Cracks in the Glaze
To prevent cracking, avoid applying your cooked glaze in an excessively thick layer. A thin, even coat is less prone to cracking than a thick, brittle one. Ensure the glaze is heated just enough to be liquid; overheating can sometimes make glazes more brittle upon cooling. Allow the glaze to set fully before moving or slicing the tart.
If your tart contains fruit, ensure the fruit is stable before glazing. For tarts that need to be transported, a slightly more flexible glaze (sometimes achieved by adding a tiny amount of corn syrup to cooked glazes) can help. Using a good quality neutral glaze designed for tarts is often the most reliable way to prevent cracking, as they are formulated to be somewhat flexible when set.
Repairing Minor Cracks
Repairing cracks in a set glaze is challenging and often noticeable. For very minor cracks, you might try gently warming a tiny amount of the leftover glaze and carefully dabbing or brushing it over the crack to fill it in. However, this often results in a visible patch.
The best approach is prevention. By applying the glaze correctly, ensuring proper setting, and handling the tart gently once glazed, you minimize the risk of cracks forming in your perfect custard tart glaze. If significant cracking occurs, it might be best to accept it or, for presentation purposes, consider a different finish for your next tart.
Tips and Tricks for a Superior Custard Tart Glaze Finish
Using a Turntable for Even Glaze Application
For cooked glazes applied with a brush, using a cake decorating turntable can greatly simplify achieving a perfectly even perfect custard tart glaze. Place the cooled tart on the turntable. As you gently brush the glaze onto the surface, slowly rotate the turntable with your other hand.
This allows you to apply the glaze smoothly and consistently across the entire surface without having to lift and reposition the tart or reach awkwardly. It helps maintain uniform stroke direction and glaze thickness, leading to a much more professional and even shine, particularly on large or round tarts.
Adjusting Glaze Thickness for Different Effects
The thickness of your cooked glaze can be adjusted slightly to achieve different effects. A thinner glaze provides a lighter, more subtle sheen and uses less product. This works well for tarts where you want just a hint of gloss. A slightly thicker glaze (achieved by using less water when heating or allowing it to reduce slightly) will give a more pronounced, glass-like shine.
Experiment with the amount of liquid you add when heating your jam or jelly. Start with the lower amount recommended and add more a teaspoon at a time until you reach the desired consistency. Remember that thicker glazes are more prone to cracking, so find a balance that provides the shine you want without becoming too brittle for a durable, perfect custard tart glaze.
Adding a Second Coat for Enhanced Shine
For an even deeper, more intense shine with cooked glazes, you can sometimes apply a second coat. Apply the first coat evenly and allow it to set slightly (5-10 minutes in the refrigerator). Then, gently warm your leftover glaze again if needed, and apply a second thin, even layer over the first.
Be careful not to disturb the first layer. This technique can enhance the reflectivity significantly, giving you a truly spectacular perfect custard tart glaze. However, applying too many layers or layers that are too thick can increase the risk of stickiness or cracking, so use this technique judiciously.
Storing Your Glazed Custard Tart to Maintain Its Shine
Proper Storage Techniques to Prevent Dullness
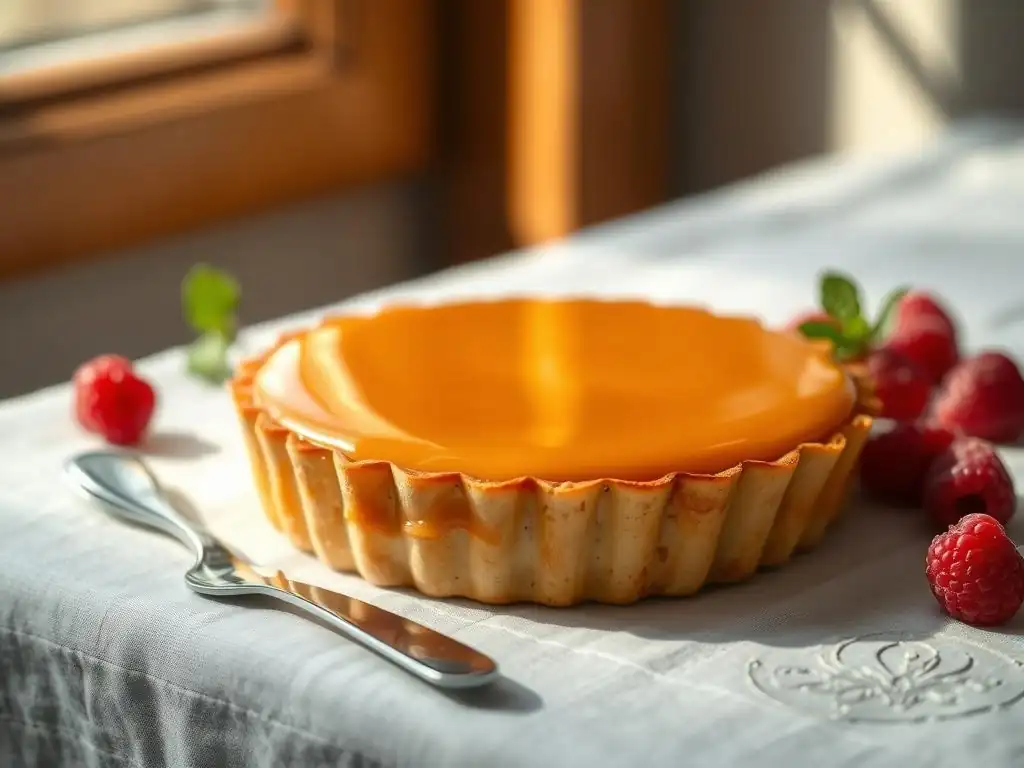
Proper storage is essential for maintaining the beautiful shine of your perfect custard tart glaze. Exposure to air, moisture, or extreme temperature changes can cause the glaze to become dull or sticky. Once the glaze is fully set (after chilling), the tart should be stored in the refrigerator.
The best way to store it is in an airtight container. If the tart is too large for a container, cover it loosely but completely with plastic wrap, trying not to let the wrap touch the glazed surface if possible. This protects the glaze from drying out or absorbing odors while minimizing condensation.
Protecting Your Tart from Moisture and Humidity
Moisture is the enemy of a shiny glaze. Condensation forming on the glaze, either from covering the tart too soon while it's still warm or from temperature fluctuations, can make it cloudy or sticky. High humidity in the environment can also affect sugar-based glazes.
Always ensure the tart is fully cooled and the glaze is completely set before covering and refrigerating. If your refrigerator tends to create condensation, placing a paper towel loosely over the tart before sealing the container might help absorb excess moisture. Storing in an airtight container acts as a barrier against both drying air and external humidity, helping preserve that perfect custard tart glaze.
Mastering the Art of the Perfect Custard Tart Glaze: Final Thoughts
Embrace Experimentation and Find Your Perfect Glaze
Mastering the perfect custard tart glaze is a skill that improves with practice. Don't be discouraged if your first attempt isn't flawlessly shiny. Experiment with different glaze types – try apricot, then maybe a neutral glaze, or a jelly glaze that complements your filling. Adjust the consistency slightly, practice your application technique, and pay close attention to cooling and setting times.
Each glaze type offers a unique look and subtle differences in handling. Finding your personal perfect custard tart glaze might involve trying different brands of jam or neutral glaze, or adjusting the water-to-glaze ratio to suit your preference and environmental conditions. Embrace the learning process and enjoy discovering what works best for you and your BakeWithEase tarts!
Enjoy Your Beautifully Glazed Custard Tart!
Ultimately, the goal of achieving a perfect custard tart glaze is to enhance the enjoyment of your delicious homemade dessert. Take pride in the beautiful, professional finish you've created. Whether it's a classic apricot sheen, a crystal-clear neutral glaze, or a vibrant jelly top, that perfect shine signifies care and attention to detail.
Now that you've put in the effort to bake a wonderful tart and give it a stunning finish, it's time to slice, serve, and savor your creation. Share it with friends and family, or simply enjoy a slice yourself, admiring the gleam before you take the first bite. Congratulations on achieving a truly perfect custard tart glaze!
Frequently Asked Questions
What makes a custard tart glaze "perfect"?
A perfect custard tart glaze achieves a high shine, is evenly applied, and complements the flavor of the custard without being overpowering.
What are the common ingredients used in a custard tart glaze?
Common ingredients include apricot jam, water or fruit juice, and sometimes lemon juice for added brightness. These are often heated and strained.
How do I prevent my custard tart glaze from being too sticky?
Avoid over-reducing the glaze. Proper straining removes any solids that might contribute to stickiness. Also, thinning with a little water can help.
What's the best way to apply the glaze to the custard tart for an even finish?
Use a pastry brush with soft bristles and apply the glaze in thin, even layers. Avoid pooling or drips for a professional appearance.
Can I use a different type of jam other than apricot for my custard tart glaze?
Yes, you can! Peach jam or quince jelly are good alternatives, but ensure they complement the custard's flavor. Consider the color of the jam as well.
Final Reflection: The Enduring Allure of a Perfect Glaze
The pursuit of the perfect custard tart glaze is more than just a culinary quest; it's a reflection of our desire for beauty, precision, and the ultimate expression of culinary artistry. A flawlessly glossy surface speaks volumes about the care and attention poured into the creation, elevating a simple dessert into a masterpiece. In a world increasingly focused on instant gratification, the dedication required to achieve that mirror-like shine resonates deeply.
The quest for the perfect glaze transcends the kitchen; it mirrors our own human striving for excellence in all aspects of life. The subtle nuances of temperature, the precise timing of the application, the delicate balance of ingredients – these all mirror the challenges and rewards we face in pursuing our own goals. Perfection is not attainable, but if we chase perfection we can catch excellence.
– Vince Lombardi. This quote perfectly encapsulates the spirit of this endeavor; while absolute perfection might remain elusive, the journey itself is profoundly rewarding.
Consider the impact of that final, gleaming glaze. It's the finishing touch that transforms a good tart into something truly memorable. It's the detail that elevates the ordinary to the extraordinary. Now, I invite you to apply this same dedication and attention to detail to your own passions and pursuits. What seemingly small detail in your life, when perfected, could transform the ordinary into something truly special? Embrace the process, savor the journey, and let the pursuit of excellence illuminate your path.
Unlock Your Custard Tart's Inner Glow!
Thanks for taking the time to explore the secrets of a perfect custard tart glaze! We hope you've gained valuable insights and are ready to elevate your baking game. Now it's time to put your newfound knowledge into practice.
- Master the Glaze: Try making the glaze recipe today! Pay close attention to the temperature and consistency for optimal results. This is your chance to shine!
- Share Your Success: Post a picture of your glistening creation on social media and tag us @BakeWithEase – we'd love to see your masterpiece!
- Explore Glaze Variations: Experiment with different flavor extracts or citrus zests to personalize your glaze. What unique twist will you create?
Ready to transform your custard tarts from ordinary to extraordinary? What innovative glaze flavor will you try first?