
Simple Transfers: Getting Images Onto Your Cake

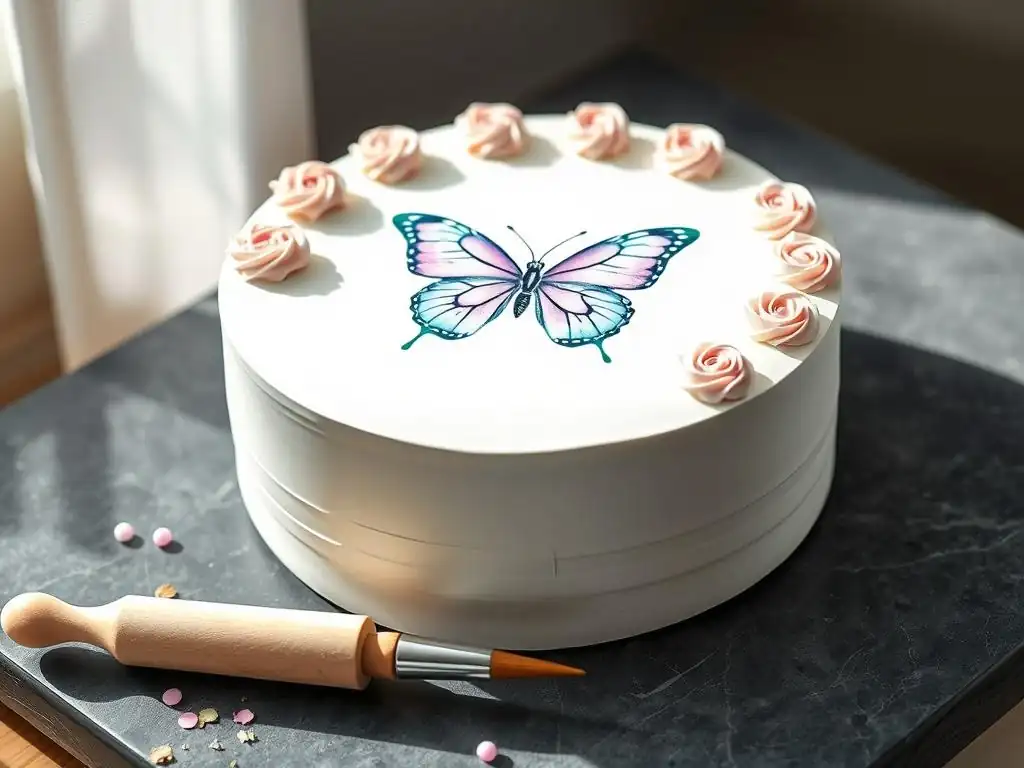
Welcome to BakeWithEase, where creating stunning desserts becomes delightfully simple! Ever dreamt of adorning your cakes with intricate designs or personalized images? In this article, we'll unlock the secrets to mastering the cake image transfer frosting stencil technique. Discover how to transform ordinary cakes into edible masterpieces, and prepare to impress with your newfound decorating prowess. Ready to elevate your baking game? Let's get started!
- Cake Image Transfers: Elevate Your Cake Decorating
- Introduction to Cake Image Transfers
- Understanding Cake Image Transfer Methods
-
Step-by-Step Guide: The Icing Sheet Method
- Preparing Your Image for Printing
- Printing Your Image: Choosing Edible Ink and Icing Sheets
- Applying the Image to Your Cake: A Detailed Walkthrough
- Working with Buttercream: Essential Tips for a Smooth Transfer
- Removing the Backing Sheet: Ensuring a Clean Release
- Troubleshooting Common Problems: Bubbles and Tearing
- Using a Frosting Stencil for Image Creation
- Exploring Edible Images and Wafer Paper
- Advanced Techniques
- Tips for Perfecting Your Skills
- Maintaining and Storing Your Decorated Cake
- Conclusion: Unleash Your Creativity
-
Frequently Asked Questions
- What exactly is a cake image transfer using a frosting stencil?
- What kind of frosting works best for cake image transfers with stencils?
- Can I use any image for a cake image transfer with a frosting stencil?
- Where can I find suitable frosting stencils for cake image transfers?
- How do I prevent the frosting from smudging when removing the stencil?
- Final Reflection: The Sweet Art of Edible Imagery
- Unleash Your Inner Cake Artist: Image Transfers Made Easy!
Cake Image Transfers: Elevate Your Cake Decorating
Introduction to Cake Image Transfers
Cake image transfers are a fantastic way to add a personal touch or complex design to your baked creations without needing advanced freehand decorating skills. Imagine turning a cherished photo, a favorite character, or an intricate pattern into a beautiful centerpiece on your cake. This technique opens up a world of possibilities, making professional-looking results accessible to home bakers. Whether you're celebrating a birthday, anniversary, or any special occasion, a custom image transfer can make your cake truly unforgettable.
Enhance Your Cake Designs with Image Transfers
Adding images to cakes dramatically elevates their visual appeal. Instead of relying solely on piping techniques or fondant shapes, you can incorporate detailed graphics, photographs, or complex illustrations. This allows for a level of customization that's hard to achieve otherwise. For example, a simple sheet cake can be transformed into a themed masterpiece just by adding a vibrant, full-color image. It's particularly popular for milestone birthdays, corporate events requiring logos, or cakes celebrating hobbies and passions.
Beyond simple photos, image transfers enable the reproduction of intricate patterns or even fine art onto your cake surface. This can include delicate floral designs, geometric patterns, or even replicating famous paintings. The precision offered by methods like using an icing sheet or a frosting stencil for cake image transfers means you can achieve clean lines and detailed elements that might be challenging or time-consuming to pipe by hand. This capability is especially valuable for complex designs where consistency is key across the entire cake.
Mastering the Art of Cake Image Transfers
Mastering cake image transfers involves understanding the different methods available and practicing the specific techniques for each. It's not just about sticking a picture on a cake; it's about preparing the cake surface correctly, handling the edible materials with care, and ensuring a smooth, seamless application. For beginners, starting with simpler designs and smaller transfers can help build confidence before tackling larger or more complex images. Patience is also key, as some methods require waiting for frosting to chill or crust properly.
The journey to mastering this art involves learning about edible inks, understanding how moisture affects different edible papers, and knowing the best type of frosting or covering (like fondant) for your chosen transfer method. Troubleshooting common issues, such as air bubbles under an icing sheet or bleeding colors with a frosting stencil, is also part of the learning process. With practice, you'll develop a feel for the materials and techniques, allowing you to consistently produce stunning, professional-quality results on your cakes.
Benefits of Using Image Transfers: Personalization and Intricate Designs
The primary benefit of using cake image transfers is the unparalleled level of personalization they offer. You can literally put a photo of the guest of honor onto their birthday cake, include inside jokes depicted visually, or incorporate specific themes with characters or logos that aren't readily available as pre-made decorations. This makes each cake unique and deeply meaningful to the recipient, creating a memorable focal point for any celebration. According to industry trends, personalized cakes consistently command higher prices and customer satisfaction.
Furthermore, image transfers allow for the creation of incredibly intricate designs that would be difficult, if not impossible, to execute with traditional piping or sculpting methods. Think of detailed lace patterns, complex illustrations, or photorealistic images. Methods like using an icing sheet printed with edible ink can reproduce fine details down to a resolution of 300 dpi or higher, depending on the printer. This allows for sharp, clear images and patterns that add a sophisticated touch to your cake decoration, expanding the creative possibilities far beyond what hand-decoration techniques alone can achieve.
Understanding Cake Image Transfer Methods
Getting an image onto a cake isn't a one-size-fits-all process. There are several distinct methods, each with its own advantages, ideal uses, and specific techniques. Understanding these different approaches is the first step in choosing the best one for your desired design, skill level, and the type of cake you're decorating. From edible paper to stencils, the choice of method significantly impacts the final look and the ease of application.
What is a Cake Image Transfer?
A cake image transfer is simply the process of applying a pre-made or created image onto the surface of a cake, typically onto frosting, fondant, or ganache. The image itself is usually created using edible materials, such as edible ink printed on edible paper, or by using a template like a frosting stencil to apply edible color or frosting in a specific pattern. The goal is to seamlessly integrate the image into the cake's decoration, making it appear as though it's part of the cake itself, rather than just sitting on top.
This technique differs from simply placing a non-edible toy or figurine on a cake. With an image transfer, the image is fully edible and adheres directly to the cake's covering. The methods vary in complexity and the type of image they can produce, ranging from full-color photographs using icing sheets to single or multi-color patterns using a cake image transfer frosting stencil. The choice depends on factors like the desired detail level, color requirements, and the surface texture of the cake.
Comparison of Image Transfer Methods: Icing Sheets, Stencils, and Freehand
When it comes to transferring images onto cakes, the three main methods are using icing sheets (also known as frosting sheets), using stencils, and freehand painting/piping. Icing sheets are thin layers of edible material (often made from sugar, starch, and gums) onto which images are printed using edible ink printers. They are excellent for transferring complex, full-color images like photos or detailed illustrations directly onto a cake surface. Application is relatively straightforward, often involving peeling a backing and laying the sheet onto moist frosting or fondant.
Using a cake image transfer frosting stencil involves placing a cut-out template onto the cake surface and applying frosting, royal icing, or edible dust/spray through the openings. This method is ideal for repeating patterns, silhouettes, or simple graphic designs. Stencils offer precision for specific shapes and lines but are generally limited to one or a few colors applied distinctly.
Freehand painting or piping uses edible food coloring or thinned frosting to draw directly onto the cake surface, offering maximum artistic freedom but requiring significant drawing or piping skill and practice to achieve clean, detailed images. Each method offers a different balance of ease of use, detail capability, and artistic control.
Essential Tools and Materials: Icing Smoother, Scalpel, and Edible Markers
Successful cake image transfers, regardless of the method, often require a few essential tools beyond basic baking equipment. An icing smoother is crucial for creating a perfectly smooth surface on your buttercream or ganache, which is vital for a seamless transfer without bumps or air pockets. For applying icing sheets, a sharp scalpel or craft knife is invaluable for precisely cutting out images if they aren't printed to size or shape, allowing for intricate designs or fitting the image around cake contours.
Edible markers or food coloring pens are useful for touching up edges, adding small details after a transfer, or even outlining a design before using a frosting stencil for cake image transfers. Other materials depend on the specific method: edible ink cartridges and a dedicated edible printer for icing sheets; various frosting types (like buttercream or royal icing) for stencil work; and food-safe brushes and edible paints (food coloring diluted with clear alcohol or extract) for freehand techniques. Having the right tools on hand makes the process significantly smoother and improves the final result.
Step-by-Step Guide: The Icing Sheet Method
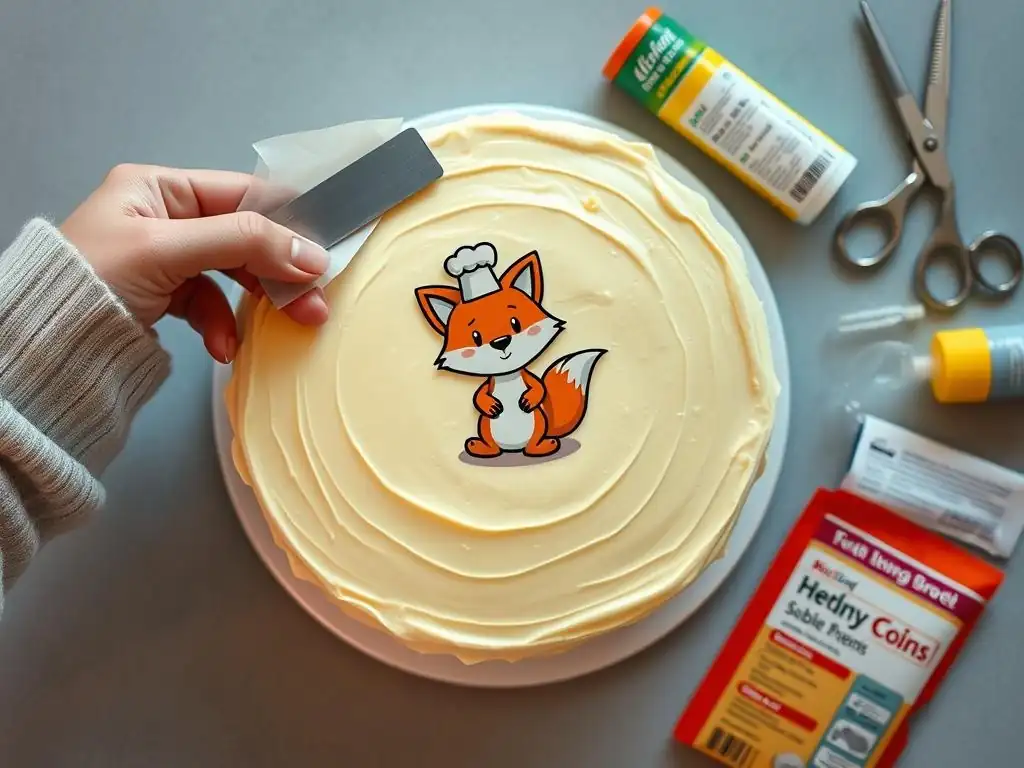
The icing sheet method is arguably the most popular way to transfer detailed images, especially photographs, onto cakes. It involves printing an image onto a thin, flexible sheet of edible material using edible inks, and then applying that sheet directly onto the cake's surface. This process, while relatively simple, requires careful execution at each step to ensure the image transfers cleanly and looks professional.
Preparing Your Image for Printing
Before you print, the image needs to be properly prepared. This involves using photo editing software to size the image correctly for your cake. Consider the shape and dimensions of the cake (e.g., an 8-inch round cake, a 9x13 inch rectangle) and resize the image accordingly, leaving a small margin if necessary. Ensure the image resolution is high enough (ideally 200-300 dpi) for a clear print, as lower resolutions can result in pixelated or blurry images. You can also add text overlays, borders, or combine multiple images at this stage.
It's also important to consider the colors. Edible inks may print slightly differently than standard printer inks due to their composition and the edible paper's properties. Vibrant colors generally transfer well, but subtle shades or pastels might appear slightly muted. A test print on plain paper (from your edible printer, if possible, or a standard printer to check size/layout) can be helpful. Save your final image file in a standard format like JPEG or PNG.
Printing Your Image: Choosing Edible Ink and Icing Sheets
Printing edible images requires a dedicated printer that has never been used with regular ink. Standard printer inks are toxic and not safe for consumption. You'll need an edible ink printer (often a modified inkjet printer model) and food-grade edible ink cartridges. Edible inks are made from food colorings and are specifically formulated for printing on edible paper. Using the correct ink for your printer model is crucial for proper function and color accuracy.
You also need edible icing sheets (sometimes called frosting sheets). These are thin layers of icing, typically on a plastic backing sheet that you peel off before application. They come in various sizes (common sizes include 8x10 inches or pre-cut circles) and can be stored at room temperature in a sealed bag for several months.
When printing, ensure the edible sheet is fed correctly into the printer, usually face down depending on the printer model, following the printer's instructions for media type (often listed as "photo paper" or a specific edible paper setting). Print quality settings should be set to high for the best results.
Applying the Image to Your Cake: A Detailed Walkthrough
Applying the printed icing sheet is a critical step. The cake surface should be freshly frosted with buttercream, ganache, or covered in fondant. For buttercream, apply the icing sheet while the frosting is still slightly moist, or allow it to crust slightly (15-20 minutes) for easier handling, then mist the surface lightly with water or edible glue before applying the sheet. For fondant, lightly brush the area where the image will go with water or edible glue.
Carefully peel the edible image from its plastic backing sheet. This is easiest if the sheet is at room temperature or slightly chilled (placing it in a freezer for 30-60 seconds can sometimes help, but be careful of condensation). Position the image over the desired spot on the cake. Starting from the center, gently smooth the image outwards with your hands or a clean, soft cloth, removing any air bubbles. Work slowly and carefully to avoid wrinkles or tears. Once applied, the icing sheet will begin to meld with the cake surface.
Working with Buttercream: Essential Tips for a Smooth Transfer
Transferring icing sheets onto buttercream requires specific attention. The buttercream surface must be as smooth as possible; use a bench scraper or icing smoother after chilling the cake briefly to get sharp edges and a flat top. Allow the buttercream to develop a slight crust. This usually takes about 15-30 minutes at room temperature, depending on the humidity and buttercream recipe (butter-based buttercreams crust well; shortening-based less so). You should be able to lightly touch the surface without getting frosting on your finger.
Applying the sheet to a slightly crusted surface prevents it from sinking into soft frosting and makes it easier to reposition slightly if needed (though minimal repositioning is best). Once the sheet is on the crusted surface, the moisture from the buttercream will gradually soften and adhere it. If your buttercream is very dry or crusted heavily, a very light mist of water or edible glue on the cake surface just before applying the sheet will help it stick without causing colors to run excessively.
Removing the Backing Sheet: Ensuring a Clean Release
The plastic backing sheet on an icing sheet is essential during printing and handling but must be removed before placing the image on the cake. The ease of removal depends on the brand of icing sheet, the humidity, and the temperature. If the sheet is too cold, it can be brittle; if too warm or humid, it can stick to the backing.
Often, the easiest way to remove the backing is to place the printed sheet image-side down on a clean, dry surface and gently peel the backing away from the icing sheet, starting from a corner. Some people find that slightly warming the backing sheet (e.g., holding it over a warm, dry surface for a few seconds, not near steam or moisture) can help release the icing layer.
If it's stubborn, placing the sheet in a very cold, dry place (like a freezer) for 30 seconds to a minute can make the backing stiffen and peel away cleanly. Handle the peeled icing sheet with care as it is very thin and fragile.
Troubleshooting Common Problems: Bubbles and Tearing
Two common issues when applying icing sheets are air bubbles and tearing. Air bubbles often occur if the sheet isn't smoothed down evenly from the center outwards or if the cake surface wasn't perfectly smooth. To fix small bubbles, you can try gently pushing the air towards the edge. For persistent bubbles, especially larger ones, a sterile pin can be used to carefully prick the bubble and release the air, then gently smooth the area. This works best if done soon after application.
Tearing usually happens if the icing sheet is handled roughly, is too cold and brittle, or if the backing sheet wasn't fully removed. To repair a small tear, you can sometimes carefully align the torn edges on the cake surface. For larger tears or pieces that break off, you might need to use a tiny amount of edible glue or even a bit of matching colored buttercream applied with a fine brush to try and blend the area, though large tears can be difficult to make invisible. Prevention through careful handling and proper temperature is key.
Using a Frosting Stencil for Image Creation
Using a frosting stencil is another excellent method for transferring designs onto cakes, particularly for patterns, text, or silhouettes. Unlike icing sheets which transfer a pre-printed image, a frosting stencil acts as a template, allowing you to apply edible material directly through cut-out areas to create the design on the cake surface. This technique is versatile and can be used with various edible mediums.
What is a Frosting Stencil?
A frosting stencil is a thin sheet of food-grade plastic or acetate with a design cut out of it. These stencils come in countless patterns, from geometric shapes and floral motifs to letters, numbers, and specific images. When placed on a cake, the cut-out areas expose the cake's surface (or a base layer of frosting), while the solid parts of the stencil shield the rest of the cake. This allows you to spread frosting, royal icing, or dust edible colors over the stencil, transferring the design onto the cake beneath.
Frosting stencils are durable, reusable, and relatively easy to clean. They are a popular tool for adding repeating patterns around the sides of a cake or creating a central design on the top. Using a cake image transfer frosting stencil allows for sharp, defined lines and consistent application of your chosen medium, making it easier to achieve professional-looking results, especially for designs that are difficult to pipe freehand.
Selecting the Right Stencil for Your Design
Choosing the right frosting stencil depends on the design you want to achieve and the type of cake covering you're working with. Stencils vary in size, complexity, and material thickness. For detailed patterns or text, look for stencils made from thinner, more flexible material (like Mylar) that lie flat against the cake surface, minimizing bleed. For simple geometric patterns or textures, slightly thicker stencils can also work.
Consider the size of the stencil relative to your cake. A stencil designed for a 6-inch cake top won't fit an 8-inch cake without repositioning, which can be tricky with patterns. Also, think about the medium you'll use. Some stencils are better suited for royal icing (which is thicker), while others work well with thinned buttercream or even airbrushing. For creating a cake image transfer frosting stencil design, ensure the cut-out areas are appropriate for the consistency of your frosting and the level of detail you need.
Applying Frosting: Achieving Clean Lines and Detail
Applying frosting through a stencil requires a specific technique to achieve clean lines and prevent bleeding under the stencil. The cake surface should be firm and chilled, whether it's buttercream, ganache, or fondant. Place the stencil flat against the surface, holding it firmly in place (or using pins for the sides of the cake). Use an offset spatula or scraper to apply a thin, even layer of frosting (royal icing or firm buttercream works best) over the stencil, ensuring all the cut-out areas are filled.
Scrape off the excess frosting at a slight angle using a clean scraper, leaving only the frosting that has been pushed into the stencil openings. This scraping step is crucial for achieving a flat design flush with the cake surface. Once the excess is removed, carefully lift the stencil straight up and away from the cake. Lifting it straight prevents smudging the design. For best results, clean the stencil between applications if you are repeating a pattern.
Techniques for Multiple Colors with Stencils
While single-color designs are common with frosting stencils, you can also create multi-colored images using this method. One technique involves using separate stencils for different parts of the design or different colors. For example, you might have one stencil for green leaves and another for red flowers. Apply the first color, carefully remove the stencil, let the frosting set slightly, and then align and apply the second stencil with the next color.
Alternatively, for stencils with distinct, separated areas for different colors within a single template (less common for intricate images, more for geometric blocks), you can carefully apply different colored frostings to the respective areas using small spatulas or even piping bags with small tips. Scrape carefully to avoid mixing colors. For more complex multi-color cake image transfer frosting stencil designs, airbrushing edible colors through the stencil can offer more control and blending possibilities, applying different colors to different sections of the stencil before lifting.
Exploring Edible Images and Wafer Paper
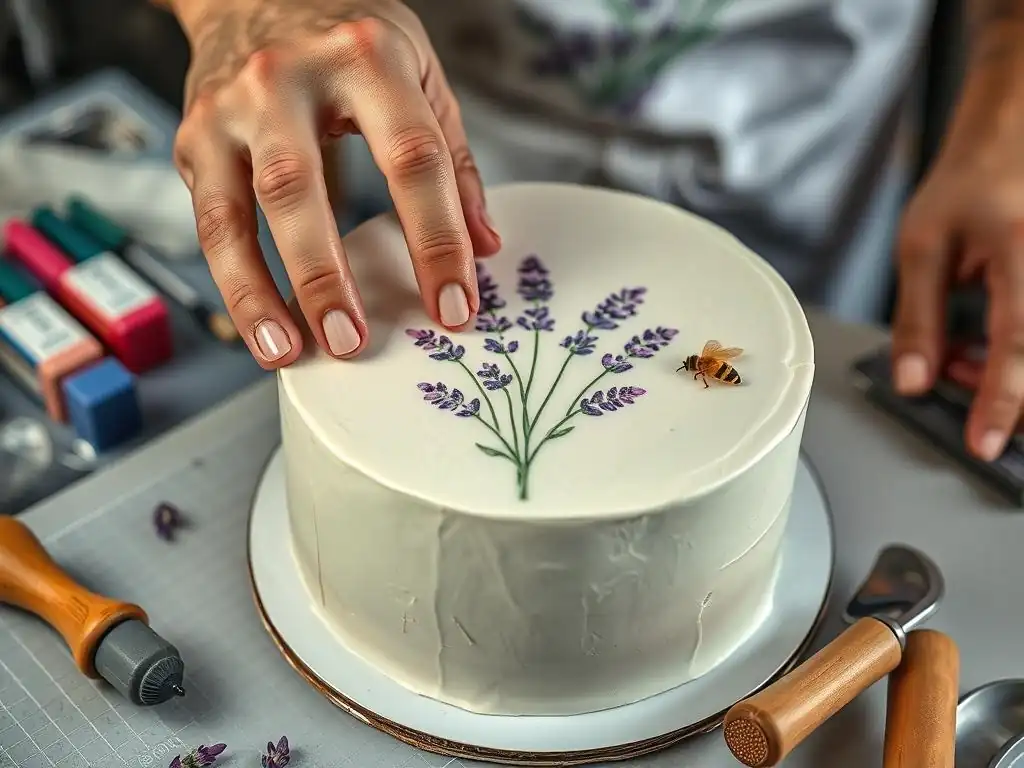
Beyond icing sheets, other forms of edible paper are used for cake image transfers, notably edible images and wafer paper. While often used interchangeably with icing sheets, 'edible images' can sometimes refer more broadly to any pre-printed design on edible paper, and wafer paper is a distinct material with different properties and uses. Understanding these options expands the possibilities for your cake decorating projects.
Advantages of Edible Images: Ease of Use and Vibrant Colors
"Edible images," particularly those printed on high-quality icing sheets, offer significant advantages, primarily ease of use and vibrant color reproduction. For bakers who don't own an edible printer, purchasing pre-printed edible images of popular characters, logos, or generic designs is incredibly convenient. These are widely available from specialty suppliers or online marketplaces. The process is often as simple as buying the design you need and applying it directly to your cake.
Icing sheets, being thicker and more opaque than wafer paper, hold printed colors exceptionally well, resulting in bright, vivid images with good detail. They blend well with buttercream or fondant surfaces, often appearing almost painted on once applied correctly. This makes them ideal for prominent designs on the top or sides of a cake where color accuracy and impact are important, such as transferring a detailed photograph or a brightly colored cartoon character onto a child's birthday cake.
How to Apply Edible Images to Frosting or Fondant
Applying pre-printed edible images (on icing sheets) is similar to applying your own prints. Ensure your cake surface (buttercream or fondant) is smooth and prepared. For buttercream, a slight crust helps. For fondant, a very light mist of water or edible glue is needed. Peel the backing off the edible image. This is crucial; forgetting to peel the backing is a common beginner mistake!
Carefully position the edible image on the cake. Start from one edge or the center and smooth it down gently with your hand or a soft cloth, working out towards the edges to eliminate air bubbles and wrinkles. Once the image touches the surface, it will begin to adhere, so precise placement is important. Avoid excessive handling once it's down. If applying to the side of a cake, work from one end to the other, smoothing as you go, or apply to a strip of fondant first and then wrap the fondant around the cake.
Working with Wafer Paper: Tips for Beginners
Wafer paper, also known as rice paper (though it contains no rice), is a thinner, slightly translucent edible paper made from potato starch, water, and oil. It's less expensive than icing sheets and is often used for printing images, creating edible flowers, or adding textured effects. Wafer paper doesn't blend into frosting in the same way icing sheets do; it tends to remain slightly visible as a distinct layer.
For beginners working with wafer paper for image transfers, print on the smoother side if it has one. Wafer paper is very sensitive to moisture; too much and it will curl or dissolve. Apply it to dry surfaces like firm fondant or crusted buttercream. Use minimal edible glue or piping gel brushed thinly only where you want the paper to stick. It works well for upright decorations inserted into frosting or for creating delicate, slightly translucent elements. Because it's less vibrant than icing sheets, it's often better for line art, patterns, or vintage-style images rather than full-color photos.
Preventing Cracking and Fading of Edible Images
To prevent edible images (especially on icing sheets) from cracking or fading, proper storage and handling are key. Store unapplied edible sheets flat in their original sealed packaging at cool room temperature, away from direct sunlight or humidity. Humidity can make them sticky and hard to peel, while dryness can make them brittle and prone to cracking.
Once applied to the cake, cracking can occur if the cake structure shifts significantly or if the image dries out excessively in very low humidity. Fading is primarily caused by exposure to UV light (sunlight) or certain types of artificial light over time. To minimize fading, keep the decorated cake away from direct light sources.
Some food colorings used in edible inks are more prone to fading than others. Applying a thin, even layer of piping gel or edible lacquer over the image after it's applied can sometimes offer a slight protective barrier, but it can also alter the image's appearance, so test first if possible.
Advanced Techniques
Once you're comfortable with basic cake image transfer methods like using icing sheets and frosting stencils, you can explore more advanced techniques to create unique and complex designs. These methods often involve combining different approaches or using specialized tools to achieve stunning visual effects that go beyond a simple flat image application.
Combining Techniques for Unique Effects
Combining different image transfer techniques can lead to highly creative and unique cake designs. For example, you could use an icing sheet for a central focal image, then use a cake image transfer frosting stencil around the sides of the cake with a complementary pattern or border. Another approach is to apply an icing sheet image and then use edible markers or food paints to add hand-drawn details or enhancements directly onto the edible paper once it's on the cake.
You could also combine wafer paper elements with an icing sheet design. For instance, print a background scene on an icing sheet and then create dimensional elements like trees or characters from wafer paper to stand up on the cake, layering the edible materials. This blend of flat transfers with dimensional edible elements adds depth and visual interest, creating a truly bespoke cake decoration that utilizes the strengths of multiple techniques.
Creating Layered Image Transfers
Layering image transfers involves applying multiple edible images or stenciled designs on top of each other to create depth, shadows, or complex scenes. With icing sheets, this might mean printing different elements (e.g., a background, a character, foreground elements) on separate sheets, cutting them out precisely, and applying them in layers onto the cake surface, slightly overlapping them to build up the image. This technique requires careful cutting and precise placement.
For stenciled designs, layering could involve using multiple stencils or applying the same stencil multiple times with slight offsets or different colors to create shaded effects or layered patterns. For instance, stencil a pattern in one color, let it set, and then apply the same stencil again, slightly shifted, with a darker shade of the same color to create a shadow effect. This adds sophistication to cake image transfer frosting stencil work and allows for more intricate visual textures.
Using Airbrushing to Enhance Images
Airbrushing with edible colors is a powerful advanced technique that can be used in conjunction with image transfers. You can airbrush a base color or gradient onto the cake before applying an icing sheet to create a background effect. Alternatively, you can apply an icing sheet and then use airbrushing with a stencil (like a cake image transfer frosting stencil) over the top to add shadows, highlights, or blend the edges of the image into the cake's covering.
Airbrushing can also be used to add subtle shading or color variations directly onto an applied edible image, enhancing its depth and realism. For wafer paper, airbrushing is often used to add color to the delicate structures created from it. Mastery of airbrush control is needed to avoid blowing the edible paper or applying too much moisture. This technique allows for smooth color transitions and fine detail work, taking your cake image transfers to the next level.
Tips for Perfecting Your Skills
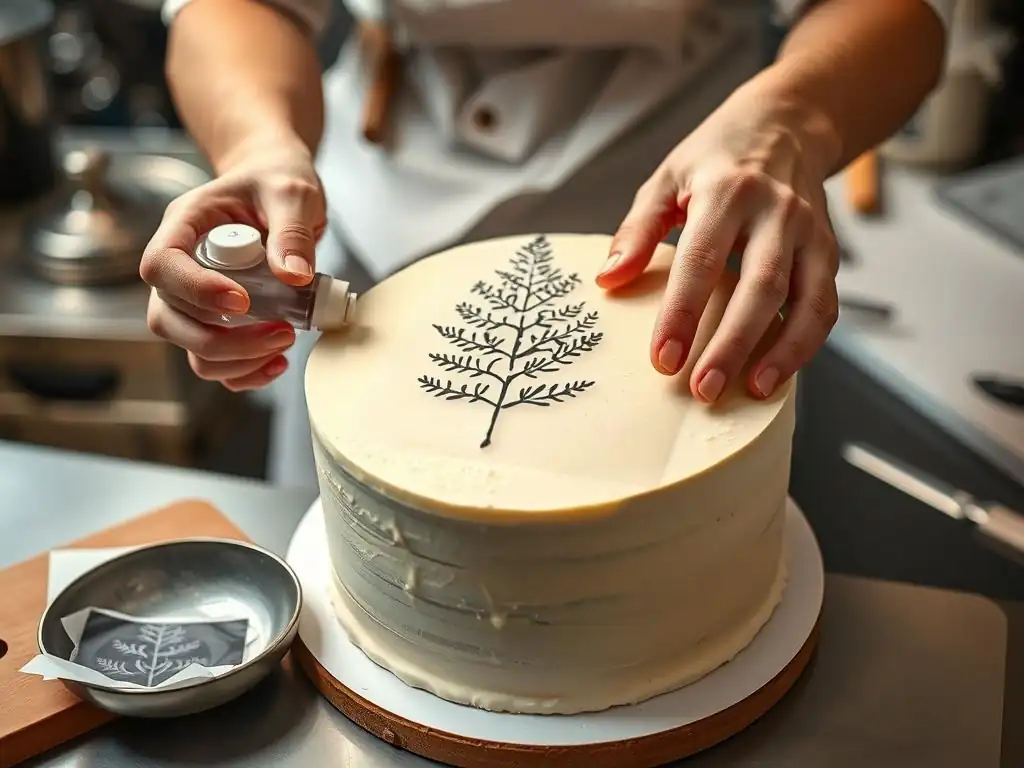
Perfecting any cake decorating skill, including image transfers, comes down to practice, experimentation, and learning from every attempt. Don't expect your first cake image transfer frosting stencil design or icing sheet application to be flawless. Embrace the learning process and use these tips to improve your results over time.
Practicing Techniques on Parchment Paper
Before attempting a new transfer technique directly on a finished cake, practice on a flat surface covered with parchment paper. For icing sheets, you can practice peeling the backing and smoothing the sheet onto a thin layer of shortening spread on parchment. This gives you the feel of the material and how to handle it without risking your beautifully frosted cake.
When using a cake image transfer frosting stencil, practice applying frosting and scraping it off on parchment paper or an overturned baking sheet. Use frosting tinted to a dark color on a light surface (or vice-versa) so you can clearly see the lines and check for bleeding under the stencil. Practice lifting the stencil cleanly. This allows you to refine your technique and find the right consistency of frosting or icing before working on the actual cake.
Experimenting with Different Frosting Types
The type and consistency of your cake covering significantly impact the success of image transfers. Practice applying icing sheets to different types of buttercream (American, Swiss meringue, Italian meringue), ganache, and fondant. Each will react differently to the moisture in the edible sheet. American buttercream, with its higher sugar content, tends to crust well, providing a good surface. Ganache can be smooth but might need chilling. Fondant offers a very smooth, non-porous surface but requires a slight adhesive.
For stencils, experiment with different consistencies of royal icing and buttercream. Royal icing provides the crispest lines but can be harder to work with. Buttercream is softer but needs to be firm enough not to squish under the stencil. Understanding how each frosting type behaves will help you choose the best one for your desired finish and transfer method, including using a cake image transfer frosting stencil effectively.
Learning from Mistakes: Continuous Improvement
Every mistake is a learning opportunity in cake decorating. If an icing sheet bubbles, try adjusting your smoothing technique or the cake surface preparation next time. If a stenciled design bleeds, consider if the frosting was too soft, the cake wasn't chilled enough, or the stencil wasn't held firmly. Keep notes on what worked and what didn't.
Analyze photos of your cakes (if you take them) to spot areas for improvement. Perhaps the edges of your edible image weren't fully adhered, or the color saturation wasn't as expected. Continuous improvement comes from identifying issues and adjusting your approach for the next project. Don't be discouraged by imperfections; they are part of the journey to mastering cake image transfers.
Maintaining Image Clarity
Maintaining the clarity and vibrancy of your cake image transfer, whether from an icing sheet or a cake image transfer frosting stencil, involves careful handling and storage. Avoid touching the surface of the edible image or stenciled design unnecessarily once applied. Fingerprints can smudge edible ink or frosting.
Protect the cake from excessive moisture, which can cause edible images to run or bleed, and from direct sunlight, which can cause fading. If transporting the cake, ensure it is covered and stable to prevent anything from touching or smudging the transferred image. By taking these precautions, you help ensure that the image remains sharp, clear, and visually appealing until the cake is served.
Maintaining and Storing Your Decorated Cake
Proper storage of a decorated cake, especially one featuring a cake image transfer, is essential to maintain its appearance and freshness. The specific requirements can vary slightly depending on the type of cake, the frosting used, and the image transfer method employed. However, some general principles apply to ensure your edible artwork stays pristine.
How to Properly Store a Cake with an Image Transfer
Once your cake image transfer is complete and the cake is fully decorated, the best way to store it is usually in an airtight container. This protects the cake from drying out and shields the edible image from environmental factors like dust or excess humidity. If you don't have a container large enough, a cake box wrapped securely in plastic wrap can work.
Refrigeration is often necessary, especially for cakes with perishable fillings or frostings like cream cheese or fresh fruit. Store the cake in the refrigerator until a few hours before serving. When taking it out, allow it to come to room temperature gradually in its container to minimize condensation, which can affect edible images, particularly those on wafer paper or sensitive to moisture.
Preventing Smudging During Transportation
Transporting a cake with a delicate image transfer requires extra care. Ensure the cake is placed on a sturdy board that is larger than the cake itself. Use a non-slip mat or place the cake box securely on a flat surface in your vehicle where it won't slide or tip. For long distances or hot weather, a cake carrier designed to keep cakes cool and stable is highly recommended.
If the cake uses a cake image transfer frosting stencil design that is raised (like with royal icing), be extra cautious not to let the lid of the carrier or anything else touch the surface. For icing sheets, avoid stacking anything on top of the cake box. Drive carefully, avoiding sudden stops or sharp turns. Arriving with your transferred image intact is the goal!
Storage Instructions for Buttercream vs. Fondant
The base covering of your cake influences storage slightly. Cakes covered in fondant, which is less porous than buttercream, often fare well stored at cool room temperature for a couple of days, as long as there are no perishable fillings. However, if the cake beneath or its filling requires refrigeration, then refrigerate the whole cake. Fondant can sometimes develop condensation when moved from cold to warm environments, which can make edible images on icing sheets appear spotty temporarily; this usually evaporates.
Buttercream cakes, especially those made with real butter, are best stored in the refrigerator. Ensure the buttercream is firm before covering and refrigerating. When taking a buttercream cake with an image transfer out of the fridge, allow it to sit at room temperature for 1-2 hours before serving. This allows the flavors and texture of the cake and buttercream to soften and become more enjoyable. Be mindful of condensation on the edible image as the cake warms up.
Conclusion: Unleash Your Creativity
Adding images to your cakes using various transfer methods is a skill that significantly expands your decorating capabilities. Whether you opt for the detailed photo reproduction of icing sheets or the precise patterns achievable with a cake image transfer frosting stencil, you now have the knowledge to transform your cakes into personalized works of art.
Cake Image Transfers: A Rewarding Skill
Mastering cake image transfers is incredibly rewarding. It allows you to bring unique visions to life, celebrate special moments with highly personalized designs, and impress friends and family with professional-looking results. The ability to transfer virtually any image onto a cake means your creative possibilities are nearly endless. It's a skill that combines technology (for printed images) with artistic application, offering a satisfying challenge for any intermediate baker looking to elevate their craft.
From simple logos to complex collages, cake image transfers empower you to tell stories and capture memories on edible canvases. The techniques, including using a cake image transfer frosting stencil for patterns or edible sheets for photos, become easier and more intuitive with practice. Don't hesitate to experiment and find the methods that best suit your style and the types of cakes you love to create.
Further Resources for Cake Decorating
To continue your journey in cake decorating and image transfers, explore various resources available. Look for tutorials online (many baking websites and YouTube channels offer step-by-step guides), consider taking a local cake decorating class that covers transfer techniques, or find books specifically focused on edible imaging and advanced decorating methods.
Joining online baking communities or forums can also provide valuable insights, tips, and support from fellow bakers. You can ask questions, share your creations, and learn from the experiences of others who are also working with techniques like using a cake image transfer frosting stencil or applying edible images. With dedication and a willingness to learn, you can continually refine your skills and create increasingly stunning cakes.
Frequently Asked Questions
What exactly is a cake image transfer using a frosting stencil?
It's a technique that allows you to easily transfer images onto your cake using a frosting stencil. This method uses frosting as the medium to create the desired design.
What kind of frosting works best for cake image transfers with stencils?
A stiff frosting, such as buttercream or royal icing, is ideal. This ensures the image holds its shape and doesn't bleed when applied.
Can I use any image for a cake image transfer with a frosting stencil?
While you can use many images, simpler designs with clear lines work best. Intricate designs can be difficult to execute cleanly with a stencil.
Where can I find suitable frosting stencils for cake image transfers?
You can find them at baking supply stores, craft stores, or online retailers. Look for stencils specifically designed for cake decorating and frosting.
How do I prevent the frosting from smudging when removing the stencil?
Apply even pressure when spreading the frosting and gently lift the stencil straight up. Chilling the frosted area slightly can also help prevent smudging.
Final Reflection: The Sweet Art of Edible Imagery
The ability to seamlessly transfer images onto cakes is no longer a niche skill; it's a burgeoning art form transforming home baking and professional pastry alike. From personalized birthday cakes to intricate wedding masterpieces, the demand for visually stunning edible designs is higher than ever. This accessibility, fueled by readily available materials and increasingly simple techniques, democratizes cake decorating, allowing anyone with a creative spark to craft truly unique confections.
The impact of easily accessible image transfer techniques extends beyond mere aesthetics; it's a powerful tool for self-expression and connection. It allows bakers to personalize their creations, adding a deeply personal touch to celebrations and gifts. This resonates deeply with me, as I've witnessed firsthand the joy evoked by a cake adorned with a cherished photograph or a meaningful design. A cake is a celebration of life, and the ability to personalize it adds another layer of meaning and joy.
This simple statement encapsulates the profound effect these techniques have on the act of baking and sharing.
Now, it's your turn. Consider the images that hold meaning for you – a cherished memory, a beloved pet, a favorite quote. Imagine transforming that image into a delectable edible masterpiece. Don't be intimidated by the process; embrace the opportunity to express your creativity and share a piece of yourself with others through the simple, yet profoundly impactful, art of cake image transfer. Let your next cake be a testament to your unique vision and the power of edible artistry.
Unleash Your Inner Cake Artist: Image Transfers Made Easy!
Thanks for taking the time to explore the world of image transfers with us! We hope you now feel confident in adding a personalized touch to your baking masterpieces. Ready to get started?
- Try your first image transfer today! Grab your favorite image, icing, and edible printer (or edible image paper from your local craft store), and let’s create something amazing.
- Share your creation: We'd love to see your cake art! Post your photos on social media using #BakeWithEaseImageTransfers – let's inspire each other!
- Explore our other cake decorating techniques: Dive into our archive of articles for more inspiration and tips to elevate your baking game.
What incredible image will you transfer onto your next cake?