
Your Guide to a Simple Basic Sourdough Schedule

Welcome to BakeWithEase, your trusted companion on your baking journey! Are you ready to unlock the magic of sourdough? Finally demystify the process with our Easy Sourdough Starter Schedule Guide, and say goodbye to complicated routines. Discover the simple steps that will have you baking artisan bread in no time. Intrigued? Let's get started!
- The Beginner's Guide to a 7-Day Sourdough Schedule
- Introduction to Sourdough Baking for Beginners
- Understanding the Fundamentals of Sourdough
- 7-Day Sourdough Starter Schedule: A Step-by-Step Approach
- Creating Your Basic Sourdough Bread Dough
- Shaping and Proofing Your Sourdough Loaf
- Baking Your Sourdough Bread to Perfection
- Troubleshooting Common Sourdough Issues
- Maintaining Your Sourdough Starter Long-Term
- Conclusion: Mastering the 7-Day Sourdough Schedule
-
Frequently Asked Questions
- What is the most important factor in maintaining a healthy sourdough starter?
- How long does it typically take to create a usable sourdough starter from scratch?
- What are some signs that my sourdough starter is not healthy or ready to bake with?
- Can I adjust the sourdough starter schedule to fit my own schedule?
- What type of flour is best for creating and maintaining a sourdough starter?
- Final Reflection: The Transformative Power of a Simple Sourdough Schedule
- Unleash Your Inner Baker: Start Your Sourdough Journey Today!
The Beginner's Guide to a 7-Day Sourdough Schedule
Introduction to Sourdough Baking for Beginners
Embarking on the sourdough journey can feel daunting, but with a clear roadmap, it becomes an incredibly rewarding experience. This guide is designed to simplify the process, offering a practical, step-by-step approach to cultivating your very own live sourdough starter from scratch in just one week. We'll walk you through the daily tasks, observations, and troubleshooting tips you'll need to successfully bring your starter to life, setting the stage for countless delicious loaves. Follow this easy sourdough starter schedule guide and unlock the secrets to naturally leavened bread.
Whether you're new to baking or looking to expand your skills beyond commercial yeast, understanding the rhythm of sourdough is key. This schedule provides a foundation, helping you build confidence as you interact with a living culture. By the end of seven days, you'll have a bubbly, active starter ready to leaven your first basic sourdough loaf, proving that making sourdough is accessible and enjoyable for everyone.
Why Sourdough? Flavor, Health, and Satisfaction
Sourdough bread boasts a complex, tangy flavor profile that is simply unmatched by loaves made with commercial yeast. This distinctive taste develops through the fermentation process, where wild yeasts and lactic acid bacteria consume sugars in the flour, producing organic acids. These acids contribute not only to flavor but also to the bread's structure and keeping qualities. The unique tang can range from mild to pronounced, depending on the starter's hydration, feeding schedule, and the type of flour used.
Beyond its incredible taste, sourdough offers potential health benefits. The fermentation process helps break down phytic acid, a compound found in grains that can inhibit mineral absorption. This can make the nutrients in the flour more bioavailable. Furthermore, the slow fermentation can lead to a lower glycemic index compared to standard bread. For many bakers, there's immense satisfaction in creating something so fundamental and delicious from just flour, water, and salt, guided by an easy sourdough starter schedule guide.
Understanding the Fundamentals of Sourdough
Key Ingredients: Flour, Water, Salt, and Starter
The magic of sourdough bread lies in its simplicity, relying on just four core ingredients. Flour provides the structure and the food source for the wild yeast and bacteria. While many types of flour can be used, a mix of all-purpose and whole wheat or rye is often recommended for starting a starter, as these contain a higher concentration of wild microbes. The proteins in the flour, particularly gluten, develop during mixing and fermentation, creating the network that traps gases and allows the bread to rise.
Water is essential for hydrating the flour, activating the gluten, and creating the environment for microbial activity. The type of water can matter; chlorinated water can sometimes inhibit starter growth, so filtered or bottled water is often preferred, especially in the initial stages. Salt is crucial for flavor, controlling fermentation speed, and strengthening the gluten structure.
While not added to the starter itself, it plays a vital role in the final bread dough. Finally, the sourdough starter is the living culture – a symbiotic community of wild yeasts and lactic acid bacteria – that acts as the leavening agent, giving sourdough its lift and characteristic flavor.
Essential Equipment: Scale, Bowl, and Dutch Oven
Precision is key in sourdough baking, and a digital kitchen scale is arguably the most critical piece of equipment. Unlike volume measurements (cups), weighing your ingredients ensures consistent hydration ratios and feeding proportions for your starter and dough. Even small variations in flour or water weight can significantly impact the outcome, especially when following a specific easy sourdough starter schedule guide. Aim for a scale that measures in grams for the most accuracy.
You'll also need a non-reactive bowl for mixing your starter and dough. Glass, ceramic, or plastic bowls work well. Avoid using metal bowls, particularly aluminum or copper, as they can react with the acidic starter. For baking, a Dutch oven is highly recommended. This heavy pot with a tight-fitting lid creates a steamy environment similar to a professional bakery oven. The trapped steam allows the dough to expand fully before the crust hardens, resulting in a beautiful oven spring and a crackling crust. A 5-quart or larger Dutch oven is typically sufficient for baking standard-sized loaves.
7-Day Sourdough Starter Schedule: A Step-by-Step Approach
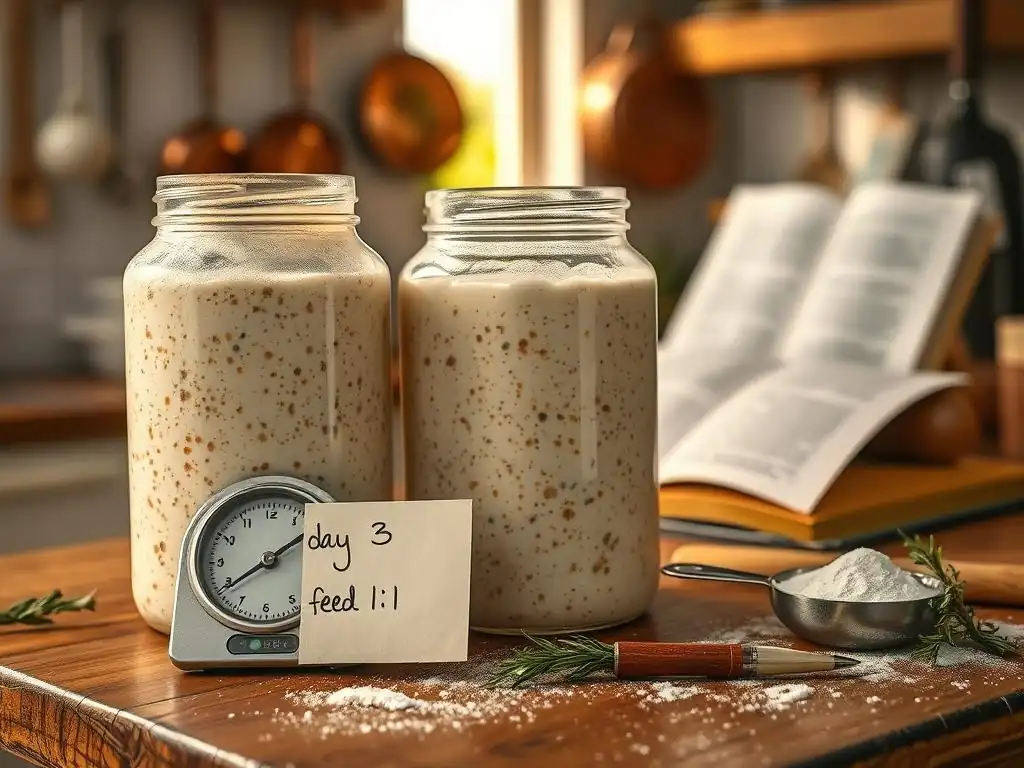
Day 1: Mixing the Initial Sourdough Starter
Combining Whole Wheat Flour and Water
To begin your sourdough starter journey, you'll combine equal weights of flour and water. A common starting point is 50 grams of whole wheat or rye flour and 50 grams of lukewarm water. Whole grain flours often contain more naturally occurring microbes, giving your starter a good boost in the initial stages.
Mix these two ingredients together in a clean jar or non-reactive container until no dry flour remains. The mixture will be thick and pasty. Cover loosely with a lid, plastic wrap, or a damp cloth secured with a rubber band to allow air circulation while preventing it from drying out.
Place the jar in a warm spot, ideally between 70-78°F (21-26°C). This temperature range is conducive to microbial activity. Labeling the jar with the date is helpful for tracking progress. You likely won't see much activity on day one, and that's perfectly normal. The wild yeasts and bacteria need time to wake up and begin multiplying. Patience is your most important ingredient during this initial phase of your easy sourdough starter schedule guide.
Maintaining a Consistent Temperature
Temperature plays a significant role in the speed and success of your sourdough starter's development. A consistent, warm environment around 75°F (24°C) is ideal for encouraging rapid growth and activity. If your kitchen is cooler, finding a warmer spot, such as near a warm appliance (like a refrigerator or oven, but not on a hot surface), inside an oven with the light on (check temperature first! ), or in a proofing box, can help. Temperatures below 70°F will slow down the process considerably, potentially requiring more than seven days to achieve a ready starter.
Conversely, temperatures much higher than 80°F can also be detrimental, potentially favoring undesirable bacteria or killing off the beneficial microbes. Monitoring the ambient temperature where your starter is stored is important. If your kitchen temperature fluctuates widely, finding a more stable location will contribute significantly to the consistent development of your starter over the next week. This consistency is key to following a successful easy sourdough starter schedule guide.
Day 2-7: Feeding and Observing Your Starter
Recognizing Bubbles and Increased Volume
From day two onwards, you'll begin regular feedings and observations. Within the first few days, you might notice small bubbles forming on the surface or within the starter, particularly after feeding. This is a sign that microbial activity is starting. By day 3 or 4, you might observe a slight increase in volume between feedings. This indicates that gas is being produced by the yeast. Don't be discouraged if activity is slow initially; every starter develops at its own pace, influenced by temperature, flour type, and hydration.
As the week progresses, the activity should become more vigorous and predictable. A healthy, developing starter will consistently show significant signs of life: bubbling throughout the mixture, a noticeable increase in volume (often doubling or even tripling), and a slightly tangy or yeasty aroma. These visual cues are crucial indicators that your starter is on the right track according to your easy sourdough starter schedule guide.
Consistent Feeding Schedule: 12 or 24 Hours
Consistency in feeding is paramount during the first week. Starting on day two, you will feed your starter once every 24 hours. This means at roughly the same time each day, you'll discard a portion of the starter and feed the remainder with fresh flour and water.
As your starter becomes more active, typically around day 4 or 5, you might notice it peaking (reaching its maximum volume) and then starting to fall significantly within 12-18 hours of feeding. At this point, you can transition to feeding twice a day, roughly every 12 hours, to ensure it stays active and healthy.
A common feeding ratio is 1:1:1 by weight (starter:flour:water). For example, if you keep 50 grams of starter, you would feed it with 50 grams of flour and 50 grams of water. Sticking to a regular schedule, whether 24 or 12 hours, helps cultivate a strong and predictable microbial community within your starter, which is essential for successful baking later on. This regular rhythm is a cornerstone of any easy sourdough starter schedule guide.
Discarding Part of the Starter Before Feeding
Discarding a portion of your sourdough starter before each feeding is a necessary step, especially in the initial stages. This practice serves several purposes: it manages the volume of your starter (which would otherwise grow exponentially), it concentrates the population of the active yeast and bacteria relative to the amount of food (fresh flour and water), and it helps maintain a healthy microbial balance. Without discarding, the small amount of fresh food you add would be quickly consumed by a large population, leading to a sluggish or inactive starter.
Typically, you'll keep a small amount of starter, such as 50-100 grams, and discard the rest before adding your fresh flour and water according to your feeding ratio. For instance, if you have 150 grams of starter from the previous day, you might discard 100 grams, leaving 50 grams to feed. The discarded starter isn't waste; it can be used in various recipes like pancakes, waffles, crackers, or quick breads, or simply composted. Regular discarding is a fundamental part of maintaining a vigorous starter on any easy sourdough starter schedule guide.
Day 7: Determining Starter Readiness
Monitoring Consistent Rise and Fall
By day seven, your sourdough starter should be showing consistent and predictable signs of activity. After feeding, it should reliably double or even triple in volume within a few hours (typically 4-8 hours, depending on temperature and feeding ratio). Crucially, it should then visibly fall back down as the food source becomes depleted.
This consistent cycle of rising and falling indicates a strong, active population of yeast producing gas and bacteria producing acids. If your starter is still showing only minimal activity or inconsistent rises by day seven, it may need a few more days of regular feeding to strengthen.
Observing this peak and subsequent fall is a key indicator of readiness. The starter is typically at its most potent for leavening bread dough when it is at or just past its peak volume, before it starts to deflate. This consistent behavior after feeding is the primary visual cue that your starter is mature and ready to be used for baking, marking a successful completion of your easy sourdough starter schedule guide's first week.
Performing the Float Test
A common test to determine if your starter is ready for baking is the float test. To perform this test, gently take a small spoonful of your active starter when it is at its peak activity (ideally having doubled or tripled in volume since its last feeding). Carefully drop this spoonful into a glass of room temperature water. If the starter floats on the surface of the water, it indicates that it contains enough trapped gas from the yeast activity to make it buoyant. This is a good sign that it's ready to leaven your bread dough.
If the spoonful of starter sinks to the bottom of the glass, it suggests that it doesn't yet have enough gas production to float. This doesn't necessarily mean your starter is unhealthy, but it might indicate that it needs a bit more time to develop strength or that it's past its peak and has started to deflate.
While the float test is a helpful indicator, observing the consistent rise and fall of your starter over several feedings is generally a more reliable method for determining overall maturity and readiness for baking, especially when following an easy sourdough starter schedule guide.
Creating Your Basic Sourdough Bread Dough
Autolyse: Hydrating the Flour
The autolyse is a simple yet powerful technique used in sourdough baking that involves mixing just the flour and water for your dough and letting it rest before adding the starter and salt. For a typical loaf using 500 grams of flour, you would mix the flour with the required amount of water (often around 350-375 grams, depending on desired hydration) until no dry bits remain. This mixture is then covered and left to rest for anywhere from 30 minutes to a few hours.
During this resting period, the water fully hydrates the flour, and enzymatic activity begins to break down starches into simpler sugars, which the yeast will feed on later. More importantly, the gluten network starts to develop on its own without any mechanical kneading. This results in a dough that is easier to handle, less sticky, and requires less intensive kneading later on. Implementing an autolyse step significantly improves dough structure and extensibility, contributing to a better final loaf.
Mixing the Dough: Incorporating Starter and Salt
After the autolyse period, it's time to incorporate your active sourdough starter and salt into the dough. Gently add the measured amount of starter (e.g., 100-150 grams of active starter for a 500g flour loaf) and salt (typically 9-11 grams, or about 1.8-2.2% of the flour weight) to the autolysed dough. The salt is withheld during the autolyse because it can tighten the gluten structure prematurely and interfere with the enzymatic breakdown of starches.
Mix the ingredients thoroughly until everything is fully combined and the starter and salt are evenly distributed throughout the dough. This can be done by hand using techniques like the "pincer method" or stretching and folding, or with a stand mixer fitted with a dough hook. The goal is to integrate the new ingredients without tearing the developing gluten network. Continue mixing until the dough starts to show some initial signs of structure and elasticity.
Bulk Fermentation: The First Rise
Bulk fermentation, also known as the first rise, is the crucial period where the dough develops flavor, structure, and gas. After mixing in the starter and salt, the dough is left to ferment at room temperature. This phase typically lasts several hours, often 4-6 hours depending on the ambient temperature and the strength of your starter. During this time, the yeast in your starter consumes the sugars in the flour, producing carbon dioxide gas, which causes the dough to rise, and organic acids, which contribute to the sourdough's characteristic tang.
The dough should be covered to prevent drying out. The ideal temperature for bulk fermentation is usually between 75-80°F (24-27°C). In cooler environments, bulk fermentation will take longer. Observing the dough's volume increase and its texture are key indicators of progress during this phase.
Performing Coil Folds for Strength and Structure
To build strength and structure in the dough during bulk fermentation, bakers often perform a series of "coil folds" or "stretch and folds." These techniques gently develop the gluten network without deflating the dough. For coil folds, wet your hands slightly, lift the center of the dough from the container, allowing the edges to fall underneath, creating tension. Repeat this action on all four sides. Stretch and folds involve wetting your hands, grabbing one side of the dough, stretching it up gently, and folding it back over the center. Rotate the bowl and repeat on all sides.
These folds are typically performed every 30 to 60 minutes during the first 2-3 hours of bulk fermentation. For a 4-6 hour bulk fermentation, you might perform 3-5 sets of folds. As you perform the folds, you'll notice the dough becoming progressively smoother, stronger, and more elastic, holding its shape better between sets. This process is vital for achieving good structure and an open crumb in the final loaf.
Judging Dough Readiness by Volume and Feel
Knowing when bulk fermentation is complete is critical. Over-proofing or under-proofing during this stage can significantly impact the final bread. A good indicator of readiness is the dough's volume increase. For a typical sourdough, you're often looking for a volume increase of about 30-50% from its initial size. The dough should look noticeably puffier and have a domed surface.
Beyond volume, the dough's feel is also important. It should feel airy and jiggly, filled with gas bubbles. When you gently poke it, it should slowly spring back, but not completely. If it springs back immediately, it might need more time. If the indentation remains completely, it might be slightly over-proofed. Trusting your observation of the dough's visual cues and tactile feel, alongside approximate timing from your easy sourdough starter schedule guide for the dough phase, is key to mastering this stage.
Shaping and Proofing Your Sourdough Loaf

Pre-Shaping for Tension
Once bulk fermentation is complete, the dough is gently transferred onto a lightly floured surface for pre-shaping. The purpose of pre-shaping is to create initial tension on the surface of the dough and to give it a rough form (usually a round or rectangle, depending on the final desired shape) before the final shaping. Avoid using too much flour, as this can prevent the dough from sticking to itself and developing surface tension.
Gently coax the dough into a loose ball or log using a bench scraper or your hands, being careful not to degas it too much. Allow the pre-shaped dough to rest on the counter, covered, for 20-30 minutes. This rest period, called the bench rest, allows the gluten to relax after handling, making the dough easier to perform the final shaping without tearing.
Final Shaping Techniques for a Boule or Batard
After the bench rest, the dough is ready for final shaping into its intended form, most commonly a boule (round) or batard (oval). The goal of final shaping is to build maximum surface tension, which helps the loaf hold its shape during proofing and baking and contributes to a good oven spring. For a boule, gently fold the edges of the dough towards the center, then flip it over and use the surface tension to round it against the counter with cupped hands.
For a batard, shape the dough into a rectangle, fold one side over two-thirds of the way, then fold the other side over the rest, and finally roll it up tightly from one end. The key is to create a taut skin on the outside of the loaf. Proper shaping techniques are vital; a poorly shaped loaf will spread out flat during proofing or baking.
Proofing in a Banneton Basket: The Second Rise
After final shaping, the dough is placed seam-side up into a proofing basket, typically a banneton lined with floured cloth or rice flour. Bannetons help the dough maintain its shape during the final rise and also impart a nice pattern on the crust. The dough is then covered and left to proof. This second rise is shorter than the bulk fermentation and prepares the loaf for baking.
The duration and location of proofing depend on your desired outcome. A common method is cold proofing in the refrigerator for 8-12 hours or even up to 24 hours. Cold proofing slows fermentation significantly, deepening flavor and making the dough easier to score. Alternatively, you can proof at room temperature for 2-4 hours, which is faster but requires careful monitoring to avoid over-proofing.
Understanding Temperature and Time's Impact on Proofing
Temperature is a critical factor during the final proofing stage. As mentioned, cold proofing in the refrigerator (around 38-40°F / 3-4°C) dramatically slows yeast activity. This extended, slow fermentation contributes complex flavors and organic acids, resulting in a more tangy loaf. Cold dough is also firmer and easier to handle and score just before baking, which helps achieve a better oven spring and crust.
Room temperature proofing (around 70-78°F / 21-26°C) is much faster. The dough will typically be ready to bake in just a few hours. However, it's easier to over-proof at warmer temperatures. An over-proofed loaf may spread out when turned onto the baking surface and have a weak oven spring. Learning to judge the dough's readiness by feel (it should feel slightly puffy but still hold its shape) is essential, regardless of temperature.
Baking Your Sourdough Bread to Perfection
Scoring the Dough: Creating Expansion and Design
Just before baking, the proofed dough is turned out onto a piece of parchment paper or directly onto a preheated baking surface. Scoring involves making cuts on the surface of the dough using a sharp blade, like a razor blade or a specialized tool called a lame. The primary purpose of scoring is to control where the bread expands during the intense heat of the oven ("oven spring"). Without scoring, the crust would harden quickly, and the loaf would burst unpredictably.
Scoring also allows bakers to add decorative patterns to their loaves. Simple cuts, like a single deep slash (ear) or a crosshatch pattern, are common. The depth and angle of the score can influence how the crust opens up. A confident, quick cut is key for a clean score that promotes good expansion.
Baking in a Dutch Oven: Achieving a Crispy Crust and Open Crumb
Baking sourdough in a preheated Dutch oven is a widely recommended technique for home bakers. Preheat your oven to a high temperature, typically between 450-500°F (230-260°C), with the Dutch oven inside for at least 30-60 minutes. The hot Dutch oven mimics the conditions of a professional deck oven by trapping steam released from the dough. This steam keeps the crust soft during the initial phase of baking, allowing the loaf to expand fully (oven spring) before the crust sets.
Place the scored dough carefully into the hot Dutch oven using the parchment paper (if used) as handles. Bake covered for the first 20-25 minutes. Then, remove the lid and continue baking for another 20-25 minutes, or until the crust is a deep golden brown and the internal temperature reaches around 205-210°F (96-99°C). Baking uncovered allows the crust to brown and crisp up beautifully.
Cooling Completely Before Slicing
Perhaps the most challenging part for an eager baker is waiting for the bread to cool after it comes out of the oven. However, cooling is a crucial step for developing the final texture and flavor of your sourdough loaf. As the bread cools on a wire rack, moisture from the interior migrates to the crust, contributing to its crispness. More importantly, the internal structure of the crumb sets completely.
Slicing into a hot loaf can result in a gummy, doughy texture because the starches haven't fully gelatinized and set. Allow your sourdough loaf to cool completely, ideally for at least 1-2 hours, before slicing into it. This patience will be rewarded with the perfect texture and structure you worked so hard to achieve by following your easy sourdough starter schedule guide and subsequent baking steps.
Troubleshooting Common Sourdough Issues
Reviving a Sluggish Starter
It's common for a new sourdough starter, or even an established one that's been neglected, to seem sluggish or inactive. Several factors can contribute to this, including cold temperatures, infrequent feeding, or using chlorinated water. To revive a sluggish starter, try moving it to a warmer location, ideally in the 75-80°F range. Increase the feeding frequency to every 12 hours if you were feeding every 24.
Using a higher proportion of whole grain flour, like rye or whole wheat, for a few feedings can also provide more nutrients to boost microbial activity. Ensure you are discarding enough starter before feeding; keeping too large a volume relative to the fresh food can dilute its activity. With consistent, warm, and regular feedings, a sluggish starter will often regain its vigor within a few days, getting you back on track with your easy sourdough starter schedule guide.
Addressing a Dense Crumb
A dense crumb, meaning the interior of the bread is tight and heavy rather than open and airy, is a common issue for beginner sourdough bakers. Several factors can cause this. An under-active or immature starter is a prime culprit; if your starter isn't strong enough to produce sufficient gas, the dough won't rise properly. Ensure your starter is consistently doubling or tripling after feeding before you bake with it.
Other causes include insufficient bulk fermentation or proofing (not allowing enough time for the dough to develop gas), insufficient gluten development (not enough kneading or folding), or improper shaping that doesn't build enough tension. Review your process: Is your starter active? Did the dough increase significantly in volume during bulk fermentation? Did you perform enough folds? Addressing these points will help improve your crumb structure.
Preventing a Flat Loaf Spread
When your beautifully shaped dough spreads out into a pancake rather than holding its height during proofing or baking, it's usually a sign of insufficient structure or over-proofing. Over-proofing is very common; if the dough ferments too long, the gluten structure can weaken, and the yeast can exhaust its food supply, causing the dough to collapse. Pay close attention to the dough's feel and volume increase during proofing, rather than relying solely on time, especially if proofing at room temperature.
Insufficient tension built during shaping is another major factor. The taut skin created during final shaping provides the structure that helps the loaf hold its form. Practice your shaping technique to ensure you are creating adequate surface tension. Cold proofing in the refrigerator can also help, as the cold dough is firmer and easier to handle and score, which supports better oven spring and prevents excessive spreading.
Maintaining Your Sourdough Starter Long-Term
Storing Your Starter in the Refrigerator
Once your sourdough starter is mature and you're not baking frequently, you can store it in the refrigerator to slow down its activity significantly. This allows you to feed it less often. Simply place your active starter in a clean jar, loosely covered, and place it in the fridge. In the refrigerator, you only need to feed your starter about once every 1-4 weeks, depending on how long you plan to store it and how robust your starter is.
When you're ready to bake, you'll need to revive it. Take the starter out of the fridge, let it come to room temperature for a few hours, discard a portion (leaving your usual amount, say 50-100g), and feed it with fresh flour and water. Repeat the feeding process (every 12 or 24 hours) at room temperature until it is consistently doubling or tripling again, which might take 1-3 feedings.
Reviving a Cold Starter for Baking
To bake with a starter stored in the refrigerator, you need to bring it back to peak activity. This typically involves a few 'refreshment' feedings at room temperature. Take your starter from the fridge and let it warm up for 2-4 hours. Discard down to your desired amount (e.g., 50 grams) and feed it with equal parts flour and water (e.g., 50g flour, 50g water). Mix well and leave it at room temperature.
Observe its activity. Once it peaks and falls, discard again and feed it once more. Usually, after 1-3 regular feedings at room temperature, your starter will be consistently active and ready to leaven a loaf. You'll know it's ready when it reliably doubles or triples in volume within a few hours of being fed, passing the visual readiness test and potentially the float test. Planning this revival is an essential part of using your easy sourdough starter schedule guide for ongoing baking.
Sharing your mature, active sourdough starter is a wonderful way to spread the joy of baking. Once your starter is well-established and consistently active (say, after a month or two of regular use and feeding), you can easily share a portion with friends or family. Simply take a few tablespoons or grams (e.g., 50-100g) of your active starter and place it in a clean jar for them.
Provide them with instructions on how to feed and maintain it, perhaps sharing your own easy sourdough starter schedule guide tips. Explain that they should feed it shortly after receiving it and continue regular feedings to help it establish in their environment. Sharing starter is a tradition that connects bakers and ensures these living cultures continue to thrive.
Conclusion: Mastering the 7-Day Sourdough Schedule
Embarking on the 7-day journey to create your first sourdough starter is a foundational step in mastering the art of naturally leavened bread. This easy sourdough starter schedule guide provides a clear path through the initial stages, demystifying the process of cultivating a living culture from simple ingredients. By consistently feeding and observing your starter, you build the essential tool needed to create flavorful, healthy, and deeply satisfying loaves. Remember that patience, observation, and consistency are your greatest allies.
Successfully navigating this initial week not only yields a vibrant starter but also instills a deeper understanding of fermentation and dough dynamics. As you move from starter creation to baking your first loaf, you'll apply the principles learned, from hydration ratios to temperature control. This guide is just the beginning; the world of sourdough is vast and full of learning opportunities, from experimenting with different flours to trying new techniques.
Enjoy the Process and Experimentation
Sourdough baking is as much about the journey as the destination (a warm, crusty loaf!). Don't be discouraged by early challenges or loaves that aren't perfect. Each bake is a learning experience. Embrace the rhythm of feeding your starter, the feel of the dough developing under your hands, and the anticipation as your loaf bakes. This easy sourdough starter schedule guide is a starting point, but feel free to experiment once you're comfortable.
Try different flour combinations in your starter or dough. Adjust hydration levels to see how it affects the dough's handling and the final crumb. Experiment with longer or shorter bulk fermentations or proofing times. Join online communities or find local baking groups to share experiences and tips. The beauty of sourdough lies in its adaptability and the endless possibilities for exploration. Enjoy the process, learn from each bake, and savor the incredible bread you create!
Frequently Asked Questions
What is the most important factor in maintaining a healthy sourdough starter?
The most important factor is consistent feeding schedule and maintaining a proper ratio of flour and water to starter. This ensures a thriving culture for successful baking.
How long does it typically take to create a usable sourdough starter from scratch?
Creating a usable starter typically takes 1-2 weeks. The process involves daily feedings and observation until the starter consistently doubles in size after feeding, indicating sufficient activity.
What are some signs that my sourdough starter is not healthy or ready to bake with?
Signs of an unhealthy starter include a foul odor, the presence of mold, or the lack of consistent rising and falling after feeding.
Can I adjust the sourdough starter schedule to fit my own schedule?
Yes, you can adjust the schedule, but consistency is key. You can refrigerate the starter to slow down fermentation and feed it less frequently, but remember to refresh it before baking.
What type of flour is best for creating and maintaining a sourdough starter?
While all-purpose flour works, whole wheat flour or rye flour are often recommended initially. These flours contain more nutrients that encourage yeast growth and activity.
Final Reflection: The Transformative Power of a Simple Sourdough Schedule
The seemingly simple act of nurturing a sourdough starter is, in reality, a profound metaphor for patience, consistency, and the rewarding beauty of slow living. In a world obsessed with instant gratification, the rhythmic process of feeding and caring for your starter offers a powerful counterpoint, a tangible reminder that the most fulfilling things in life often require time and dedication. This guide aimed to demystify the process, making it accessible to even the busiest of individuals.
The journey of baking sourdough, guided by a reliable schedule, is more than just creating delicious bread; it's a deeply personal experience. It connects us to ancient traditions, fostering a sense of connection to the earth and the natural rhythms of life. The subtle changes in your starter, the variations in the bread's texture and flavor—these are all testaments to the unique interplay between nature and human intention. The best things in life are not things.
This simple quote resonates deeply with the sourdough experience, reminding us that the true value lies not in the final product, but in the process itself.
Now, I invite you to embark on your own sourdough journey. Don't be intimidated by the seemingly complex process; embrace the simplicity of a well-structured schedule. Take your time, observe the subtle changes, and savor the satisfaction of creating something beautiful and delicious with your own two hands. Let the rhythmic act of feeding your starter become a mindful practice, a moment of calm amidst the chaos of daily life. The reward? Not just incredible bread, but a deeper connection to yourself and the world around you.
Unleash Your Inner Baker: Start Your Sourdough Journey Today!
Thanks for taking the time to explore the world of sourdough with us! We hope you now feel confident in tackling your own simple sourdough schedule. Ready to put your newfound knowledge into action?
- Bake your first sourdough loaf! Use the schedule we outlined to guide you through the process. Don't worry about perfection—just enjoy the journey.
- Share your baking experience! Tell us about your first loaf on social media using #BakeWithEaseSourdough – we’d love to see your creations!
- Consider experimenting with different flours or hydration levels to discover your perfect sourdough recipe. What unique twist will you add?
What exciting flavor combinations will you create with your freshly baked sourdough?