
Crafting Crispy Roman Style Pizza Dough: Advanced Techniques

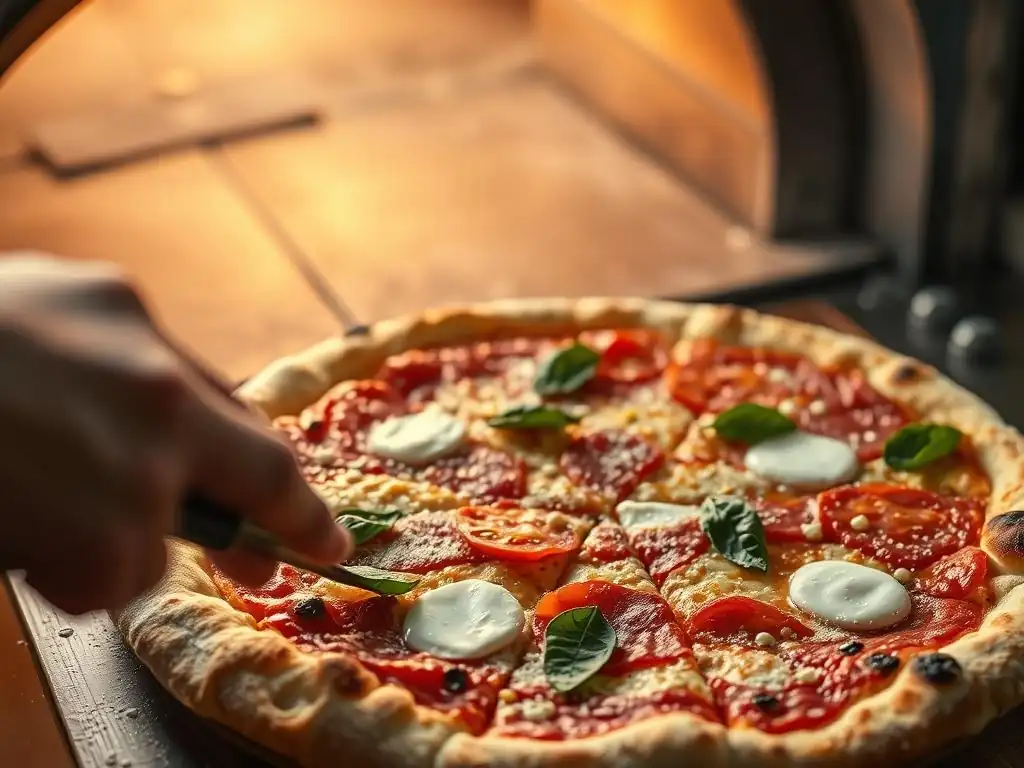
Welcome to BakeWithEase, your haven for unlocking baking brilliance! Ever dreamt of achieving that perfect, airy-yet-crisp pizza crust? This week, we're diving deep into the secrets of a truly exceptional bake: the Crispy Roman pizza dough recipe. Discover advanced techniques that will transform your pizza-making game, and prepare to be amazed by the incredible texture you can achieve. Are you ready to embark on a journey to pizza perfection? Let's get baking!
- Mastering Crispy Roman Pizza: An Advanced Guide
- Understanding the Fundamentals of Roman Style Pizza Dough
- Advanced Dough Preparation Techniques for Roman Pizza
- The Art of Stretching and Shaping Roman Pizza Dough
- Baking Crispy Roman Pizza: Achieving Perfection in the Oven
- Troubleshooting Common Issues in Roman Pizza Dough
- Crispy Roman Pizza Topping Ideas and Inspiration
- Storing and Reheating Roman Style Pizza Dough
-
Frequently Asked Questions
- How does Roman style pizza dough differ from other pizza doughs?
- What are the key ingredients for a truly crispy Roman pizza dough?
- Why is the fermentation process so crucial for this particular dough?
- What are some advanced techniques for achieving the perfect Roman pizza crust?
- What are some common mistakes to avoid when making Roman pizza dough?
- Final Reflection: The Pursuit of the Perfect Roman Crisp
- Unleash Your Inner Pizzaiolo: Master the Crisp!
Mastering Crispy Roman Pizza: An Advanced Guide
Welcome back to BakeWithEase! If you've already mastered the basics of pizza dough and are ready to take your skills to the next level, you're in the right place. Crafting truly exceptional crispy Roman style pizza dough involves understanding nuances beyond simple mixing and baking. This guide dives into advanced techniques that elevate your dough from good to outstanding, focusing on achieving that signature light, airy interior and remarkable crisp exterior characteristic of authentic Roman pizza, often referred to as pizza alla pala or pizza in teglia.
Achieving the perfect crispy Roman pizza dough recipe requires attention to detail at every stage, from ingredient selection to fermentation and baking. We'll explore how different flours behave, the magic of high hydration, the benefits of pre-ferments, and precise temperature control. These advanced steps are not just about following instructions but understanding the science behind the bake, empowering you to troubleshoot and refine your process for consistently delicious results.
Understanding the Fundamentals of Roman Style Pizza Dough
Key Ingredients for Authentic Roman Pizza
The foundation of any great crispy Roman pizza dough recipe lies in its ingredients. While seemingly simple – flour, water, yeast, and salt – the quality and type of each are paramount for advanced techniques. For optimal results, bakers often turn to Italian '0' or '00' flours with moderate to high protein content (around 12-14%) and a good W index (250-300), which indicates strength and elasticity necessary to handle high hydration levels. Using fresh yeast typically offers a more nuanced flavor profile compared to instant dry yeast, though the latter is reliable and easier to store.
Water quality also plays a subtle but important role; filtered water is often preferred to avoid chlorine, which can inhibit yeast activity. Fine sea salt or kosher salt is better than iodized table salt, as iodine can also negatively impact yeast and dough structure. The precise balance and quality of these few components are where the mastery begins in developing a superior crispy Roman pizza dough that performs well under advanced methods like long fermentation.
Hydration Levels and Their Impact on Crispy Crust
Hydration in baking refers to the ratio of water to flour by weight, expressed as a percentage. Traditional pizza dough might sit around 55-65% hydration, but crispy Roman pizza dough often pushes much higher, typically ranging from 70% to even 85% or more. This significantly higher water content is a key factor in achieving the desired texture. More water allows for greater steam production during baking, which helps the dough expand rapidly in the hot oven, creating a more open, airy crumb structure.
This high hydration also contributes to the dough's eventual crispiness. As the water evaporates during the bake, it leaves behind a network of gluten and starch that, when fully dried and browned, becomes incredibly crisp. Managing such wet dough requires different handling techniques and a robust flour, but the payoff is a lighter, more digestible crust with that sought-after shatteringly crispy Roman pizza finish.
The Role of Flour in Roman Pizza Dough Development
The type of flour is perhaps the single most influential ingredient when aiming for an exceptional crispy Roman pizza dough recipe, especially with high hydration. Flours with a higher protein content (specifically gluten-forming proteins like glutenin and gliadin) are essential. When mixed with water, these proteins form gluten, a stretchy network that gives dough its structure and elasticity. A strong gluten network is crucial for trapping the gases produced by yeast, allowing the dough to rise significantly, and for supporting the high water content without collapsing.
Italian '00' flour, while finely milled, can vary greatly in strength (W index). For high-hydration Roman styles, look for '00' or '0' flours specifically marketed for long fermentation or high hydration, often labeled with W values above 250. Using a weaker flour (like standard all-purpose flour with 10-11% protein) at high hydration will result in a slack, unmanageable dough that won't hold its shape or produce the desired open, crispy crumb structure.
Advanced Dough Preparation Techniques for Roman Pizza
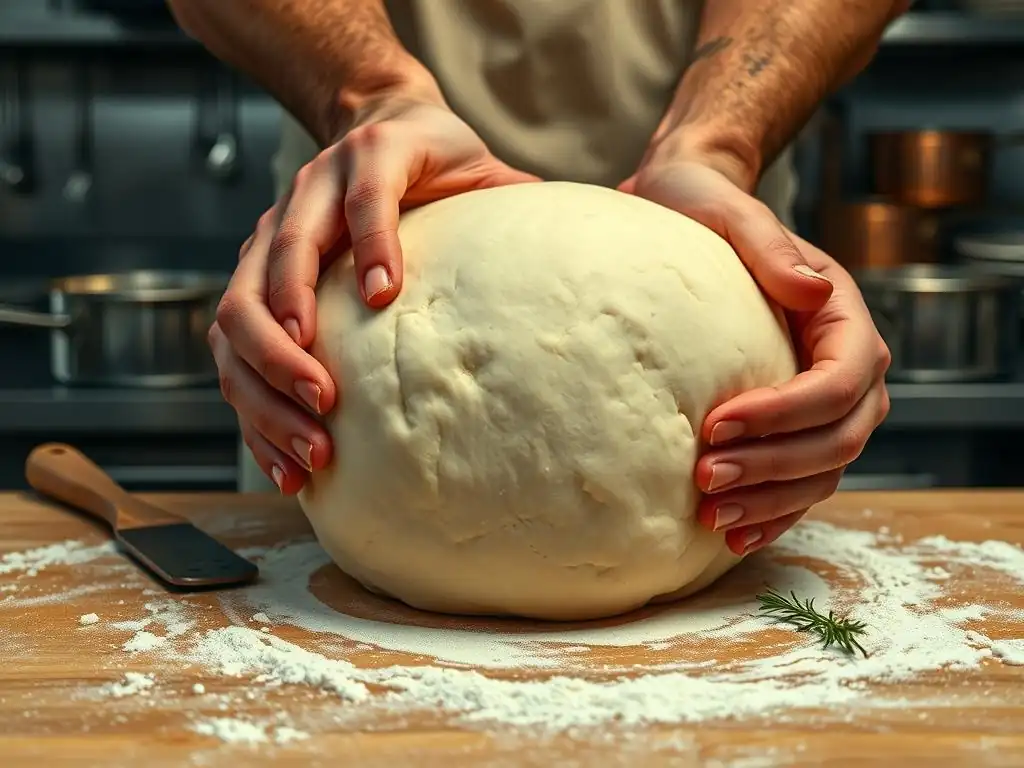
Autolyse: Enhancing Dough Strength and Flavor
Autolyse is a simple yet powerful technique where you mix just the flour and water for your crispy Roman pizza dough and let it rest for 20 to 60 minutes before adding the yeast and salt. During this rest period, enzymes in the flour begin to break down proteins, and the flour hydrates more fully. This process kickstarts gluten development without the mechanical work of kneading, making the subsequent mixing much easier.
The benefits of autolyse are significant: it leads to a more extensible dough that is easier to handle, especially with high hydration, and it requires less kneading to achieve optimal gluten development. Furthermore, this resting period allows for complex sugars to develop, contributing to a more nuanced flavor profile in the final crispy Roman pizza crust. It's a foundational step for many advanced bakers seeking superior dough quality.
Poolish or Biga: Pre-Ferments for Complex Flavors
Incorporating a pre-ferment like a poolish or biga is a cornerstone advanced technique for enhancing the flavor, aroma, and structure of your crispy Roman pizza dough. A poolish is a liquid starter made with equal parts flour and water (by weight) and a small amount of yeast, fermented for several hours (typically 8-16) at room temperature or longer in the fridge. A biga is a stiffer pre-ferment, usually with a hydration of 50-60%, also fermented over a period of time.
Both pre-ferments introduce beneficial acids and compounds developed during the long, slow fermentation of a portion of the flour. This results in a more complex, slightly tangy flavor profile that simply isn't achievable with a direct dough method. They also contribute to a more open crumb structure and can improve the dough's stability, making it easier to handle at high hydration, ultimately leading to a crispier Roman pizza dough.
Achieving the Perfect Dough Temperature
Controlling the dough temperature throughout the mixing and fermentation process is critical for consistent results, especially when crafting crispy Roman pizza dough with long fermentation times. Yeast activity is highly dependent on temperature; too cold and it's sluggish, too warm and it ferments too quickly, potentially leading to off-flavors and poor structure. The ideal finished dough temperature is often targeted around 24-26°C (75-79°F).
To control the dough temperature, bakers consider the 'friction factor' (heat generated during mixing) and the ambient room temperature. A common method is to calculate the required water temperature using a formula: Target Dough Temperature multiplied by the number of factors (e.g., 3 for room temp, flour temp, desired dough temp) minus the sum of the measured room and flour temperatures.
For example, if room and flour are both 22°C and target is 25°C, water temp would be (25*3) - (22+22) = 75 - 44 = 31°C. Using cooler water is often necessary, especially for long, cold fermentation periods that are key to developing flavor in a crispy Roman pizza dough recipe.
The Art of Stretching and Shaping Roman Pizza Dough
Gentle Stretching Techniques for a Light and Airy Crust
Once your high-hydration crispy Roman pizza dough has undergone its long fermentation, it's time to shape it. Aggressive kneading or pressing will deflate the precious air bubbles developed during fermentation, resulting in a dense crust. Instead, employ gentle stretching techniques. Turn the dough out onto a well-floured surface (using semolina or rice flour can help prevent sticking without incorporating too much extra flour into the dough itself).
Use your fingertips to gently dimple the dough, then slide your hands underneath and stretch it out from the center, allowing gravity to assist. Techniques like the 'slap and fold' or stretching the dough over the back of your hands while rotating are effective ways to extend the dough without tearing, preserving that airy structure vital for a light and crispy Roman pizza base. Patience and a light touch are key here.
Avoiding Tears: Tips for Handling High-Hydration Dough
Handling high-hydration dough for a crispy Roman pizza dough recipe can be challenging due to its stickiness and elasticity. Tearing the dough compromises the gluten network and releases trapped gases, hindering oven spring and crispiness. To avoid tears, ensure your dough has developed sufficient gluten strength during mixing and fermentation – it should feel extensible but also have tension.
Keep your hands lightly floured or wet, or lightly oil the surface you're working on. Avoid pulling or forcing the dough. If the dough resists stretching, let it rest for 5-10 minutes (a process called bench rest); the gluten will relax, making it easier to stretch further without tearing. Work with confidence but also gentleness, understanding that the dough's structure is delicate at this stage.
Creating the Signature Rectangular Shape
While round pizzas are classic, Roman pizza in teglia (pan pizza) and pizza alla pala (peel pizza) are traditionally rectangular or elongated. Shaping your crispy Roman pizza dough into this form requires a slightly different approach than a round Neapolitan pizza. After gently stretching the dough to a rough rectangle, you often transfer it to a well-oiled rectangular pan for the final proof and bake (teglia style) or shape it directly on a floured peel before sliding it onto a hot stone or steel (pala style).
For pan pizza, gently press and stretch the dough to fit the pan, working from the center outwards, ensuring even thickness. For pala style, continue the gentle stretching on the peel, maintaining the elongated shape. The goal is to create a relatively thin base that will crisp up beautifully, while leaving a slightly thicker edge or border that puffs up and provides structure. This shape is both traditional and practical for serving slices of crispy Roman pizza.
Baking Crispy Roman Pizza: Achieving Perfection in the Oven
Oven Temperature and Placement for Optimal Crispiness
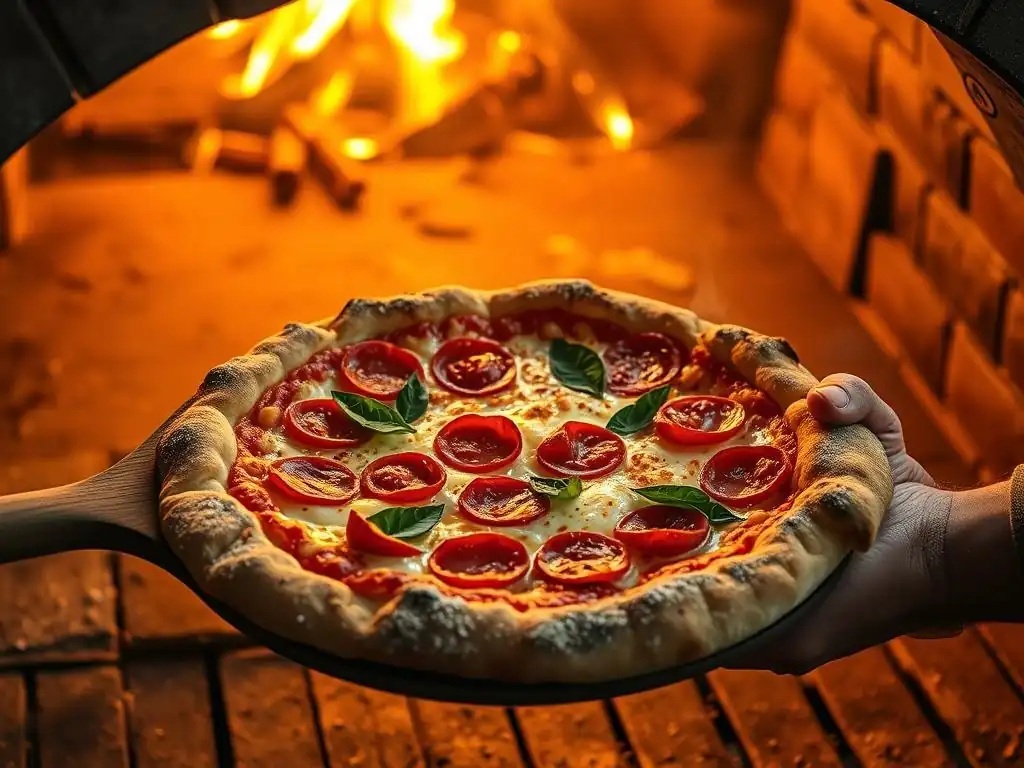
Baking is where the magic happens to transform your carefully prepared crispy Roman pizza dough into a golden, airy, and crunchy masterpiece. High temperatures are essential. Home ovens should be preheated to their maximum setting, typically 250-275°C (480-525°F), or even higher if possible. This intense heat provides the necessary oven spring and quickly sets the crust, promoting crispiness.
Placement in the oven is also critical. For pan-baked Roman pizza, placing the pan on the lowest rack helps ensure the bottom crust gets direct heat, guaranteeing a crisp base. For pizzas baked directly on a stone or steel, placing the stone/steel on a middle or slightly lower rack works well, allowing radiant heat from below to crisp the base while the top browns under the convection or broiler heat. Proper temperature and placement are non-negotiable steps for that authentic crispy Roman pizza texture.
Using a Pizza Stone or Steel for Enhanced Heat Transfer
A pizza stone or, even better, a pizza steel is an invaluable tool for achieving a super crispy Roman pizza crust in a home oven. These tools are dense and conduct heat far more effectively than a standard baking sheet. When preheated in a hot oven for at least 30-60 minutes (or even longer), they store a significant amount of thermal energy.
When the pizza dough is placed on the hot stone or steel, this stored heat is rapidly transferred to the base of the dough. This intense heat shock causes the dough to puff up quickly (oven spring) and immediately begins the process of crisping the bottom crust. The result is a much crispier base than you could achieve on a cooler surface, essential for the distinctive texture of crispy Roman pizza.
The Importance of Steam in the Initial Baking Phase
While not always explicitly discussed for pizza, creating steam in the oven during the initial phase of baking can benefit high-hydration doughs like those used for crispy Roman pizza. Steam keeps the surface of the dough moist for a few crucial minutes, delaying the formation of a hard crust. This allows the dough more time to expand fully before the crust sets, contributing to a lighter, airier crumb.
One common method is to place a tray on the bottom rack of the oven while preheating your stone/steel and then carefully pour a cup of hot water into the tray just as you launch the pizza. Be cautious when doing this to avoid steam burns. The steam environment helps maximize the dough's potential for oven spring, which in turn supports the development of a light interior necessary for a truly crispy Roman pizza dough result.
Troubleshooting Common Issues in Roman Pizza Dough
Dough Too Sticky: Adjusting Hydration Levels
Working with high-hydration dough for a crispy Roman pizza dough recipe can be a sticky affair, especially for those new to it. If your dough feels excessively sticky and difficult to handle even after proper mixing and resting, it might be a sign that the hydration level is too high for the flour you are using, or perhaps you need more practice handling wet dough.
- Add a small amount of flour (a tablespoon at a time) during the initial mixing phase if you realize it's unmanageable early on.
- Ensure you are using a strong flour capable of absorbing high amounts of water.
- Use techniques like wetting your hands or using a dough scraper to handle the dough instead of relying solely on flouring the surface, which can make the crust tough. Sometimes, simply letting the dough rest for 15-20 minutes allows the flour to absorb more water, making it less sticky.
Dough Not Rising: Identifying and Correcting Problems
If your crispy Roman pizza dough isn't rising as expected during fermentation, several factors could be at play. The most common culprits relate to the yeast or the fermentation environment.
- Yeast Viability: Check the expiration date of your yeast. If using active dry yeast, ensure your water temperature is correct (around 40-46°C / 105-115°F) to activate it before adding to the flour.
- Water Temperature: Water that is too hot will kill the yeast; too cold and it will be sluggish. Aim for the ideal dough temperature discussed earlier.
- Room Temperature: Yeast activity slows significantly in cold environments. Ensure your proofing area is warm enough (ideally 24-26°C / 75-79°F). For cold fermentation in the fridge, rising will be very slow but should still show some activity over 24-72 hours.
- Salt/Sugar Contact: Salt can inhibit yeast if in direct contact for too long before mixing. Ensure salt is added after the yeast has been partially incorporated. Too much sugar can also hinder yeast activity.
- Insufficient Fermentation Time: Perhaps the dough just needs more time to rise, especially in cooler conditions or with less yeast. Be patient!
Achieving an Evenly Cooked and Crispy Crust
An unevenly cooked or inconsistently crispy Roman pizza crust can be frustrating after all your effort. This often points to issues with oven setup, temperature consistency, or dough thickness.
- Ensure your oven is fully preheated, including your stone or steel. Use an oven thermometer to verify the temperature is accurate.
- Rotate the pizza halfway through the baking time to ensure even browning and crisping, especially if your oven has hot spots.
- Make sure the dough is stretched to an even thickness before baking. Thicker areas will cook slower and might not crisp up properly, while thinner areas could burn.
- If the bottom is crisping but the top is pale, use the broiler for the last minute or two, watching carefully to prevent burning. If the top is browning too fast before the base is crisp, consider moving the pizza to a lower rack or covering the top loosely with foil.
Crispy Roman Pizza Topping Ideas and Inspiration
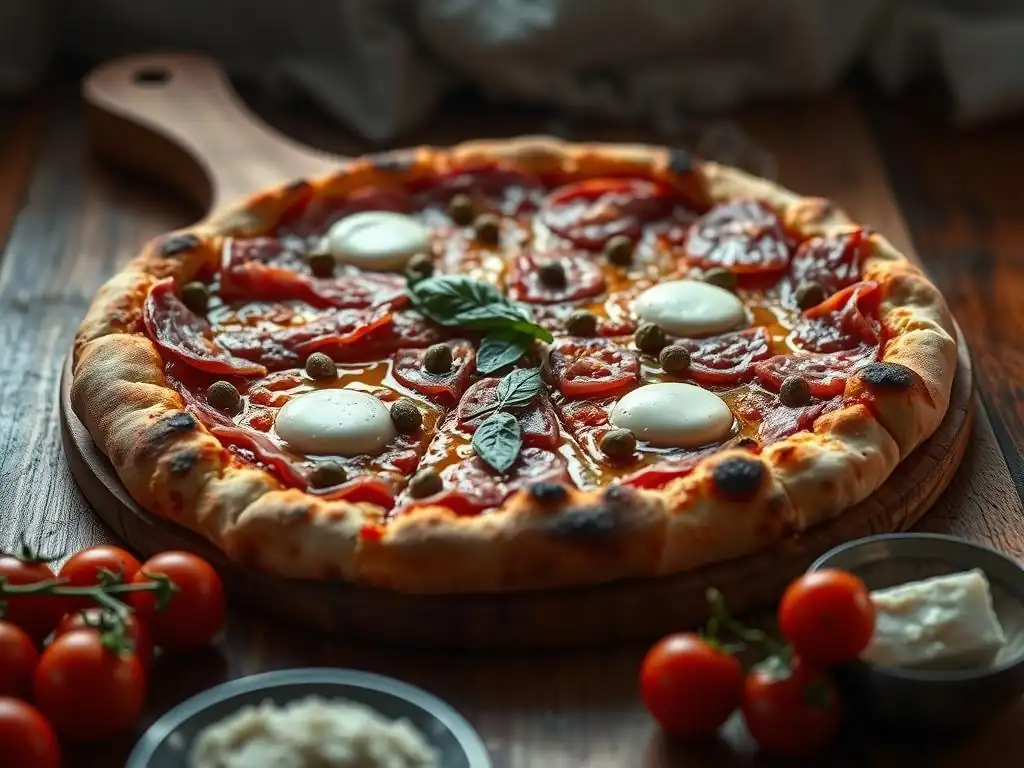
Classic Roman Pizza Topping Combinations
While the crispy Roman pizza dough itself is a star, the right toppings complement its unique texture. Roman style often favors lighter toppings that don't weigh down the airy crust. Classic pizza rossa (red pizza) is simply topped with crushed tomatoes, garlic, oregano, and olive oil – no cheese! Pizza bianca (white pizza) is topped only with olive oil, salt, and sometimes rosemary.
Other beloved Roman combinations include patate e rosmarino (thinly sliced potato and rosemary), funghi (mushrooms), or simple margherita (tomato, mozzarella, basil), though the Roman version might use less cheese than its Neapolitan cousin to maintain crispiness. The focus is often on highlighting one or two high-quality ingredients rather than piling on many.
Exploring Unique and Flavorful Topping Options
Once you've mastered the classics, feel free to experiment with unique topping combinations on your crispy Roman pizza dough. Think seasonal vegetables like zucchini flowers, asparagus, or artichokes (a Roman staple). Cured meats like prosciutto or speck are delicious added after baking to preserve their texture and flavor.
Consider using different cheeses – perhaps a sharp pecorino romano sprinkled on after baking, or dollops of ricotta. Don't be afraid to incorporate elements like pesto swirls, roasted garlic cloves, or a drizzle of balsamic glaze post-bake. The key is to use toppings that offer great flavor without releasing too much moisture or being excessively heavy, which could compromise the crispiness of the base.
Achieving Balance Between Dough and Toppings
The beauty of a great crispy Roman pizza dough recipe lies in its light, airy, and incredibly crispy crust. The toppings should enhance, not overpower, this texture. A common mistake is overloading the pizza with too much sauce, cheese, or heavy ingredients. This adds excess moisture and weight, preventing the crust from achieving its full crisp potential.
Aim for a balanced ratio. Use just enough sauce to cover thinly, distribute cheese evenly and sparingly, and spread other toppings out so they aren't piled high. Remember that the crispy base is the main event, and the toppings are there to provide flavor contrast and complement the delightful crunch. Less is often more when it comes to topping a Roman style pizza.
Storing and Reheating Roman Style Pizza Dough
Proper Storage Techniques for Unbaked Dough
Properly storing your crispy Roman pizza dough allows for flexibility and can even improve flavor through cold fermentation. For short-term storage (up to 3-4 days), place the dough ball(s) in individual containers or bags lightly oiled to prevent sticking. Ensure the container is large enough to accommodate expansion and seal it tightly before refrigerating. Cold fermentation develops more complex flavors and makes the high-hydration dough easier to handle.
For longer storage, crispy Roman pizza dough freezes exceptionally well. After its initial bulk fermentation, divide and shape the dough into balls. Place them on a baking sheet lined with parchment paper and freeze until solid (a few hours). Once frozen, transfer the dough balls to freezer-safe bags or containers, removing as much air as possible. Frozen dough can last for several months.
Reheating Tips to Maintain Crispiness
Reheating leftover crispy Roman pizza slices requires methods that revive the crust's crispiness without making it soggy. Avoid the microwave at all costs, as it steams the pizza, resulting in a rubbery crust.
The best methods involve dry heat:
- Oven: Place slices directly on the oven rack or on a baking sheet in a preheated oven at around 180-200°C (350-400°F) for 5-10 minutes until heated through and the crust is crisp again.
- Stovetop: Place slices in a dry, non-stick skillet over medium heat. Cover loosely with a lid (or even just foil tented) for a few minutes to heat the toppings, then remove the lid to let the bottom crisp up for another few minutes. This often yields the crispiest result.
Making Roman Pizza Dough in Advance: A Time-Saving Strategy
Preparing your crispy Roman pizza dough recipe in advance, particularly utilizing cold fermentation in the refrigerator, is a fantastic time-saving strategy that also significantly enhances the flavor and texture. You can mix your dough, perform a bulk fermentation at room temperature for a couple of hours, and then transfer it to the fridge for a slow fermentation lasting anywhere from 24 hours up to 72 hours or even longer, depending on the yeast quantity and flour strength.
This allows you to break up the pizza-making process, handling the messy part a day or two before you plan to bake. When you're ready, simply take the dough out of the fridge 1-2 hours before shaping to allow it to come to room temperature. This advanced planning makes serving fresh, crispy Roman pizza on a weeknight or for entertaining much more feasible, and the long, slow fermentation contributes immensely to that desired complex flavor and airy, crispy crust.
Frequently Asked Questions
How does Roman style pizza dough differ from other pizza doughs?
Roman style pizza dough is known for its high hydration and long fermentation, resulting in a very crispy and light crust compared to other styles like Neapolitan or New York style. It often uses a lower protein flour as well.
What are the key ingredients for a truly crispy Roman pizza dough?
Essential ingredients include strong bread flour (though sometimes a lower protein flour can be used), water, salt, olive oil, and a small amount of yeast or starter. The ratio of water to flour is particularly important.
Why is the fermentation process so crucial for this particular dough?
A long fermentation process, often lasting 24-72 hours, allows the dough to develop flavor, strengthens the gluten structure, and creates air pockets which contribute to the desired crispy texture.
What are some advanced techniques for achieving the perfect Roman pizza crust?
Advanced techniques include autolysing the flour, careful temperature control during fermentation, and using a pizza steel or stone for baking at high temperatures to ensure maximum crispiness.
What are some common mistakes to avoid when making Roman pizza dough?
Overmixing the dough is a common error, as it can result in a tough crust. Also, using too much yeast can lead to a dense and overly risen dough, preventing the desired crispy texture.
Final Reflection: The Pursuit of the Perfect Roman Crisp
The quest for the perfectly crisp Roman pizza dough transcends mere culinary ambition; it's a journey into the heart of texture, tradition, and the enduring power of simple ingredients. This article explored advanced techniques to achieve that coveted shatteringly crisp crust, a hallmark of Roman-style pizza. From hydration levels and fermentation times to the crucial role of the baking steel, we've delved deep into the science and art behind this iconic pizza. The methods discussed remain highly relevant today, as the demand for authentic, high-quality pizza continues to grow.
The influence of Roman pizza, and its emphasis on a thin, airy crust, is undeniable in the modern culinary landscape. Its simplicity belies a complex interplay of technique and precision, a testament to the enduring power of traditional foodways. The best things in life are simple,
a phrase often repeated, rings particularly true when considering the elegant simplicity of a perfectly crafted Roman pizza. The journey to mastering this dough is a personal one, demanding patience and attention to detail, but the reward – that first satisfying crunch – is truly unforgettable. This pursuit reflects a broader cultural shift towards appreciating artisanal food and the stories behind its creation.
Now, it's your turn. Consider the techniques discussed within these pages. Don't be afraid to experiment, to adjust hydration levels, to play with fermentation times. The pursuit of the perfect crisp is not a destination, but a process of continuous learning and refinement. Embrace the challenge, and you'll not only master the art of Roman pizza dough, but you'll also discover a deeper appreciation for the artistry and dedication that goes into creating something truly exceptional. The journey awaits – begin your own pursuit of that perfect crunch!
Unleash Your Inner Pizzaiolo: Master the Crisp!
Thanks for joining us on this crispy pizza journey! You've just unlocked the secrets to crafting authentic Roman-style dough. Ready to put your new skills to the test?
- Bake your masterpiece: Try out the recipe today – the satisfying crunch awaits! Remember to share your creation with us on social media using #BakeWithEaseRomanPizza!
- Experiment with toppings: Push your culinary boundaries! What unexpected flavour combinations will you create?
- Join our community: Share your tips and tricks (or your baking fails – we’ve all been there!) in the comments below.
Ready to discover your new favourite pizza dough recipe? Let's hear your plans!