
Piping Leaf Shapes: A Simple Greenery Detail

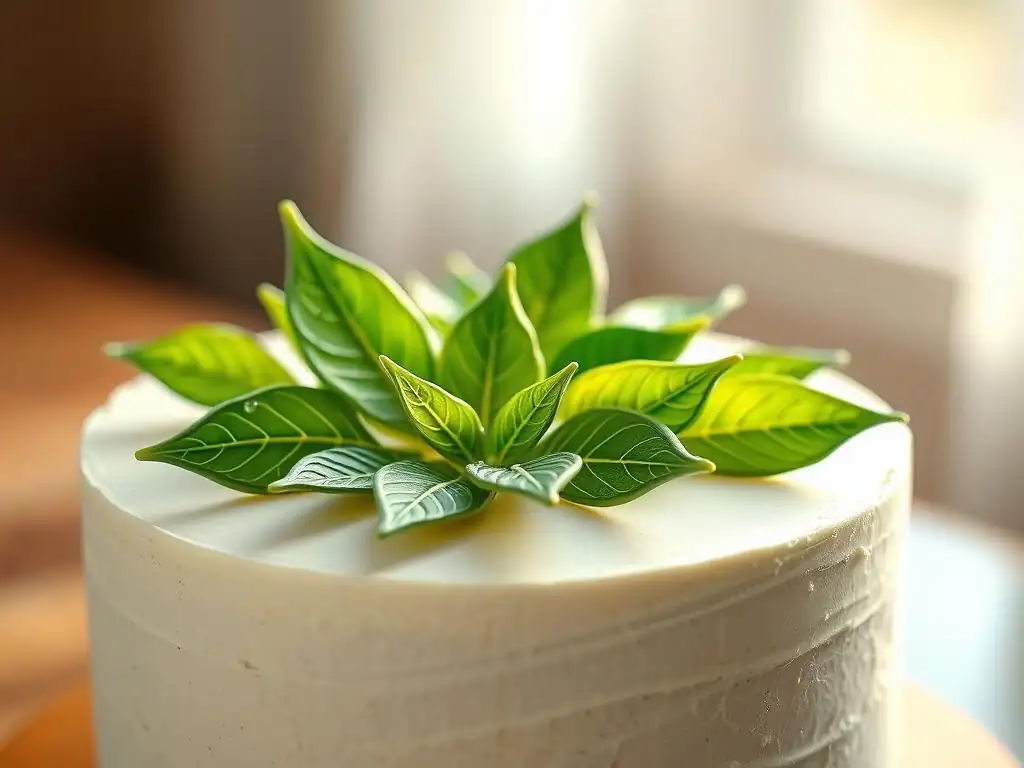
Welcome to BakeWithEase, where baking becomes a joy, not a chore! Ever wondered how to add that touch of professional elegance to your baked creations? Dive into our guide and unlock the secrets of easy buttercream leaf piping. It's simpler than you think, and the results are stunning. Discover how to transform your cakes and cupcakes with this beautiful, yet achievable, technique. Ready to add a flourish of greenery to your next masterpiece? Let's get started!
- BakeWithEase: Mastering Easy Buttercream Leaf Piping for Cake Decorating
- Essential Tools and Ingredients for Piping Buttercream Leaves
- Step-by-Step Guide: Easy Buttercream Leaf Piping Techniques
- Advanced Buttercream Leaf Piping Techniques
- Troubleshooting Common Buttercream Leaf Piping Problems
- Creative Ideas for Using Buttercream Leaves in Cake Decorating
- Maintaining and Storing Your Buttercream Decorations
- Conclusion: Mastering the Art of Easy Buttercream Leaf Piping
-
Frequently Asked Questions
- How do I achieve a realistic leaf color for my buttercream?
- What type of frosting is best for piping leaf shapes?
- What piping tip is recommended for creating buttercream leaves?
- How do I hold the piping bag for optimal control when piping leaves?
- What are some common mistakes to avoid when piping buttercream leaves?
- Final Reflection: The Enduring Elegance of Simple Buttercream Leaves
- Unleash Your Inner Pastry Artist: Master Piping Leaves Today!
BakeWithEase: Mastering Easy Buttercream Leaf Piping for Cake Decorating
Elevate Your Cakes with Realistic Buttercream Leaves
Adding greenery to your cakes with easy buttercream leaf piping is a fantastic way to bring natural beauty and sophistication to your baked creations. Whether you're decorating a floral cake, a nature-themed celebration cake, or simply want to add a touch of elegance, realistic buttercream leaves provide depth, color, and texture that can transform a plain cake into a stunning centerpiece.
This technique, focusing on easy buttercream leaf piping, allows even novice decorators to achieve impressive results, giving the appearance of intricate detail without requiring years of practice. The vibrant green hues and delicate shapes of well-piped leaves can make your buttercream flowers truly pop or stand beautifully on their own as a simple, elegant design.
Mastering the art of piping buttercream leaves opens up a world of creative possibilities. Imagine a simple white cake adorned with a cascade of varied green leaves, or a border of lush foliage around the base.
Unlike pre-made sugar leaves which can be brittle and lack the fresh look of buttercream, piped leaves blend seamlessly with your frosting, offering a consistent texture and flavor profile. This easy buttercream leaf piping skill is not just about aesthetics; it's about adding another dimension to your cake artistry, making your desserts look professionally finished and truly special for any occasion, from birthdays to garden parties or even elegant weddings.
Why Buttercream Leaf Piping is Perfect for Cake Decorating Beginners
Easy buttercream leaf piping is often recommended as one of the first piping techniques for beginners, and for good reason. The basic motion is relatively simple to learn: applying pressure while pulling away from the surface. This fundamental action is the core of many piping skills. Furthermore, leaf tips are designed to naturally create a leaf shape with minimal effort, often requiring just a slight pressure variation to form the point and veins. This forgiving nature makes practicing less intimidating and allows beginners to see satisfying results quickly, building confidence to tackle more complex designs later.
Compared to piping intricate flowers like roses or chrysanthemums, the easy buttercream leaf piping technique involves fewer complex movements and less concern about precise petal placement. You don't need to worry about swirling motions or intricate layering initially. A simple leaf tip and consistent buttercream are the main requirements.
Many beginners find they can create recognizable and attractive leaves within their first 15-20 minutes of practice, making it an accessible and rewarding skill to acquire right at the start of their cake decorating journey. This foundational skill is essential for adding filler and balance to floral arrangements, a common and beautiful cake design.
What You'll Learn: Mastering the Buttercream Leaf Piping Technique
In this guide focused on easy buttercream leaf piping, you will gain a comprehensive understanding of everything needed to create beautiful green leaves for your cakes. We'll start with the basics, covering the essential tools and ingredients, including how to choose the right leaf tip (like the popular Wilton #352 or Ateco #349), achieve the perfect buttercream consistency, and mix realistic shades of green food coloring. Understanding these foundational elements is crucial for successful piping.
Moving beyond the preparation, you'll learn the step-by-step process for piping basic leaves, focusing on the correct angle, pressure, and motion. We'll explore how slight variations can create different leaf shapes and sizes. For those ready to take their skills further, we'll touch upon advanced techniques like adding veins and layering leaves for more realism and depth. Finally, we'll cover practical tips for troubleshooting common issues, creative ideas for incorporating leaves into your designs, and advice on storing your beautiful buttercream creations, ensuring you can confidently add stunning greenery using easy buttercream leaf piping to all your future cakes.
Essential Tools and Ingredients for Piping Buttercream Leaves
Choosing the Right Piping Tip for Leaf Shapes
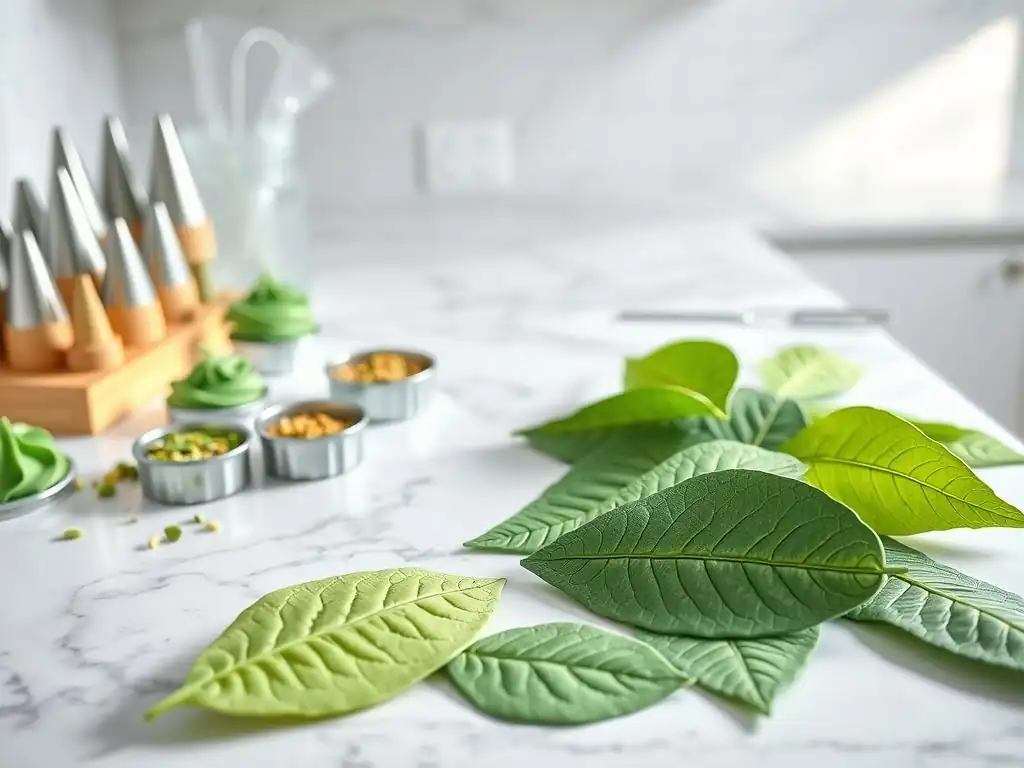
The key to creating realistic buttercream leaves lies significantly in selecting the correct piping tip. Leaf tips are specifically designed with a V-shaped opening, which, when pressure is applied correctly, allows the buttercream to fan out at the base and come to a point at the top, mimicking a natural leaf shape. The size of the tip opening determines the size of the leaf.
For easy buttercream leaf piping, two popular and versatile options are the Wilton #352 and the Ateco #349. The Wilton #352 is a widely used small leaf tip, excellent for creating delicate leaves perfect for filling in spaces around flowers or creating subtle borders. Its opening is relatively narrow, resulting in slender leaves.
Larger leaf tips, such as Wilton #67 or Ateco #353, produce bigger, bolder leaves, suitable for creating prominent foliage designs or covering larger areas on a cake. The angle and depth of the V-shaped opening can also vary slightly between tips and manufacturers, affecting the leaf's width and the prominence of the central fold (which can resemble a vein).
Experimenting with a few different leaf tips (perhaps a small one like #352 and a medium one like #67) is a good starting point for easy buttercream leaf piping, allowing you to see how each tip impacts the final shape and size of your leaves and find which ones you prefer for different applications.
Selecting the Best Buttercream Consistency for Leaf Piping
Achieving the correct buttercream consistency is absolutely vital for successful easy buttercream leaf piping. If your buttercream is too stiff, it will be difficult to pipe smoothly, potentially causing jagged edges and making it hard to create the pointed tip of the leaf. It might also tear the buttercream as you pull the bag away.
On the other hand, if the buttercream is too soft, the leaves will lose their shape immediately after piping, slumping and melting rather than holding their defined form. The ideal consistency for piping leaves is often described as being similar to soft-serve ice cream or smooth peanut butter – firm enough to hold its shape when piped, but soft enough to flow smoothly through the tip with moderate pressure.
To test the consistency, fill a piping bag fitted with a leaf tip and pipe a few practice leaves. If they look sharp and hold their shape without slumping, your consistency is likely correct. If they are difficult to push through or look rough, add a tiny amount of milk or water (about half a teaspoon at a time) and mix thoroughly.
If they slump or melt, add a tablespoon or two of sifted powdered sugar or a small amount of softened butter and mix again. Adjusting consistency is a delicate process; add liquid or dry ingredients very gradually and test after each addition to avoid over-correcting and ensure the perfect texture for easy buttercream leaf piping.
Achieving the Perfect Green Food Coloring for Realistic Leaves
The color of your buttercream leaves significantly impacts their realism and overall appeal. While a single shade of green can work, using multiple shades adds depth and a more natural appearance. Start with a good quality gel food coloring, as gels are highly concentrated and won't add excess liquid to your buttercream, which could affect the consistency needed for easy buttercream leaf piping.
A basic leaf green is a great starting point. For a natural look, consider mixing this with a touch of yellow for a brighter, fresh spring green, or a tiny amount of brown or black for a deeper, more mature or forest green.
To create variations, divide your green buttercream into smaller bowls and add different amounts or shades of color to each. For example, you might have a main batch of medium green, a smaller batch with extra yellow for highlight leaves, and another small batch with a hint of brown for darker accent leaves. Remember that buttercream colors often deepen slightly as they sit, so it's better to aim for a shade that is slightly lighter than your desired final color.
Always mix thoroughly to ensure no streaks of unmixed color remain. Achieving realistic shades adds another layer of sophistication to your easy buttercream leaf piping.
Other Essential Tools: Piping Bags, Couplers, and Parchment Paper
Beyond the leaf tip and buttercream, a few other essential tools are necessary for efficient and easy buttercream leaf piping. High-quality piping bags are crucial. Disposable piping bags are convenient for quick cleanup, while reusable bags are more environmentally friendly and often more durable. Ensure the bags are strong enough to withstand the pressure required for piping. For easy buttercream leaf piping, a medium-sized bag (around 12 inches) is usually comfortable to hold and allows you to work for a decent amount of time before refilling.
Couplers are optional but highly recommended, especially for beginners or if you plan to use multiple tips with the same color buttercream. A coupler is a two-part plastic piece that fits inside the piping bag, allowing you to easily change tips without changing the bag of frosting. This is particularly useful when practicing different leaf tips or if you want to switch between a leaf tip and another tip quickly.
Finally, having parchment paper or wax paper handy is excellent for practicing your easy buttercream leaf piping technique before applying it directly to the cake. You can pipe leaves onto the paper, then gently peel them off and reuse the buttercream (as long as it hasn't gotten too warm). Piping onto parchment also allows you to create leaves in advance and chill them until firm, making them easier to handle and place precisely on the cake.
Step-by-Step Guide: Easy Buttercream Leaf Piping Techniques
Preparing Your Piping Bag with Green Buttercream
The first step to successful easy buttercream leaf piping is properly preparing your piping bag. If you're using a coupler, drop the base part into the bag, push it down towards the tip, and snip the end of the bag just enough for the coupler threads to poke through. Screw on the leaf tip over the coupler threads. If you're not using a coupler, drop the leaf tip into the bag and snip the end of the bag so that the tip fits snugly but the narrowest part of the V-opening is not obstructed.
Next, fill the bag with your prepared green buttercream. It's best not to overfill the bag; fill it about half to two-thirds full. This makes the bag easier to handle and control, which is important for maintaining consistent pressure during easy buttercream leaf piping. Fold down the top edge of the bag before scooping in the buttercream to keep the outside clean.
Use a spatula to push the buttercream down towards the tip, gently squeezing out any large air bubbles. Twist the top of the bag tightly to seal the buttercream and apply pressure. This twisted section is where you will apply pressure with your dominant hand.
Mastering the Basic Buttercream Leaf Piping Motion
The basic motion for easy buttercream leaf piping is straightforward but requires a little practice to get smooth results. Hold the piping bag with the twisted end secured in your dominant hand, using your other hand to guide the bag near the tip. Position the leaf tip so that the V-shaped opening is perpendicular to the surface you are piping on. This means the V is upright, with the point at the top and the base at the bottom, or vice-versa, depending on your preferred angle, but the opening is facing away from you or towards you, not sideways.
Place the tip lightly against the surface. Apply firm, consistent pressure to the bag, allowing the buttercream to fan out and form the base of the leaf. As you maintain pressure, pull the bag away from the surface in a steady motion, gradually easing up on the pressure as you reach the desired length of the leaf. Stop applying pressure completely as you pull the tip away cleanly to create the pointed tip of the leaf. The key to easy buttercream leaf piping here is the combination of consistent pressure followed by a smooth release and pull-away motion.
Creating Different Leaf Shapes and Sizes with Varying Pressure
Once you've mastered the basic pull-away motion, you can create a variety of leaf shapes and sizes by simply varying the pressure you apply and the speed at which you pull away. For smaller, more delicate leaves, use less pressure and pull away quickly over a short distance. This results in a narrow base and a sharp point, perfect for filling in small gaps or creating fine details.
For larger, fuller leaves, apply more pressure at the start, allowing the buttercream to spread wider at the base. Maintain this pressure as you pull away more slowly over a longer distance before gradually releasing. This creates a wider, longer leaf. Experimenting with the initial pressure and the speed of your pull-away is key to mastering easy buttercream leaf piping variations. You can also slightly wiggle the tip back and forth as you pull away (just a tiny motion) to give the leaf edges a more natural, slightly irregular look, adding to the realism of your buttercream greenery.
Practice Makes Perfect: Tips for Consistent Buttercream Leaf Piping
Consistency in pressure and motion is the hallmark of beautiful, uniform buttercream leaves. The best way to achieve this consistency with easy buttercream leaf piping is through practice. As mentioned earlier, piping onto parchment paper is an excellent way to practice without wasting buttercream. Pipe rows and rows of leaves, focusing on keeping the size and shape consistent. Observe how changes in your hand pressure or pull-away speed affect the outcome.
- Practice Session Goal: Aim to pipe at least 50-100 leaves on parchment paper during a practice session.
- Focus on Pressure: Pay attention to how much pressure you're applying. Try to keep it steady throughout the main part of the leaf.
- Smooth Release: Practice releasing pressure cleanly at the end to avoid tails or blobs at the leaf tip.
- Angle Consistency: Ensure your tip is held at the same angle relative to the surface for each leaf to maintain uniformity in shape.
- Scrape and Repipe: If your buttercream gets warm from the heat of your hand, scrape it back into the bowl, give it a quick stir, or even pop it in the fridge for a few minutes if it's too soft, then refill your bag. Consistency in buttercream temperature helps consistency in piping.
Consistent practice, even just 10-15 minutes daily, will dramatically improve your easy buttercream leaf piping skills.
Piping Leaves Directly onto Cakes vs. Piping onto Parchment Paper
You have two main options when applying buttercream leaves to your cake: piping directly onto the cake surface or piping them onto parchment paper first and then transferring them. Piping directly onto the cake is faster and allows the leaves to adhere immediately. This is ideal for simple borders, filling space around flowers already on the cake, or when you're confident in your easy buttercream leaf piping skills and placement.
Piping onto parchment paper offers more control and flexibility. Once piped onto the paper, you can place the paper on a flat surface or baking sheet and chill the leaves in the refrigerator or freezer until they are firm (usually 10-20 minutes in the fridge, 5-10 in the freezer). Once firm, you can carefully peel the leaves off the parchment using an offset spatula and arrange them precisely on the cake.
This method is excellent for creating intricate arrangements, cascades, or wreaths, as it allows you to plan your design and adjust placement before the leaves soften. It's also useful for creating leaves in advance. For easy buttercream leaf piping, practicing on parchment before going directly onto the cake is highly recommended.
Advanced Buttercream Leaf Piping Techniques
Creating Veined Buttercream Leaves for Added Realism
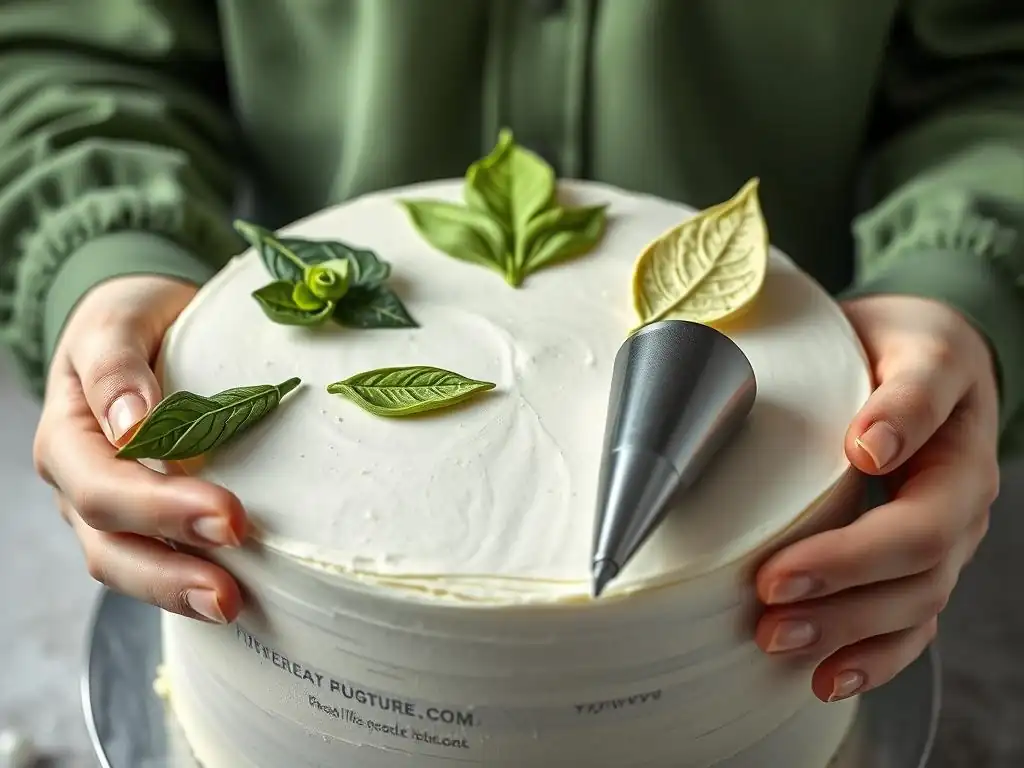
To take your easy buttercream leaf piping to the next level and add significant realism, you can incorporate veining. Many leaf tips are designed with a slight ridge in the V-opening that naturally creates a subtle central vein when piped correctly. However, for more pronounced veining, you can use a veining tool or the back of a small knife or toothpick immediately after piping the leaf onto the cake or parchment paper while the buttercream is still soft.
To create veins, gently press the tool into the center of the leaf, running it from the base towards the tip to deepen the central line formed by the tip. Then, lightly etch smaller lines branching off from the central vein towards the edges, mimicking natural leaf patterns. Work quickly before the buttercream crusts over.
This technique requires a steady hand and a light touch to avoid tearing the buttercream or distorting the leaf shape. Practicing this veining step on parchment paper after piping the leaf will help you get the feel for the right pressure and motion needed to add realistic detail to your easy buttercream leaf piping.
Layering Buttercream Leaves for Depth and Dimension
Layering buttercream leaves is a technique that adds significant depth, texture, and dimension to your cake decorations, moving beyond simple flat designs. Instead of piping all leaves side-by-side on a single plane, you pipe some leaves first, allow them to set slightly (either by letting them sit for a few minutes or chilling if piped on parchment), and then pipe additional leaves partially overlapping the first layer.
When layering, start with the leaves that will form the base or back layer of your arrangement. Pipe these leaves in place. Then, pipe the next layer, ensuring the new leaves partially cover the stems or bases of the first layer. Continue layering, building outwards or upwards, allowing each layer to set briefly if needed.
This creates a lush, full look, making your buttercream greenery appear more organic and realistic. For example, creating a dense cluster around the base of a buttercream flower involves piping leaves radiating outwards, then piping more leaves closer to the flower, overlapping the outer layer. This layering adds complexity and visual interest to your easy buttercream leaf piping designs.
Using Multiple Shades of Green for a Natural Look
As mentioned earlier, using multiple shades of green is a simple yet highly effective way to enhance the realism of your buttercream leaves. Nature rarely presents leaves in a single uniform color; you see variations from light chartreuse new growth to deep forest green mature leaves, often with subtle hints of yellow, brown, or even red. Applying this principle to your easy buttercream leaf piping makes your greenery look more dynamic and lifelike.
Prepare 2-4 different shades of green buttercream, ranging from light to dark. When piping your arrangement, alternate between these shades. Pipe some leaves in the darkest shade to create shadows and depth, use the medium shades for the bulk of the foliage, and add touches of the lightest shade for highlights and new growth.
You can also load a piping bag with two shades side-by-side to create variegated leaves directly from the tip, though this requires a slightly different bag-loading technique. Using multiple colors adds visual complexity and makes your easy buttercream leaf piping look far more sophisticated than a single-color approach.
Incorporating Other Buttercream Flowers and Elements
Buttercream leaves are rarely the star of the show on a cake; they typically serve as supporting elements for buttercream flowers or other decorations. Mastering easy buttercream leaf piping is essential for creating balanced and beautiful floral arrangements. Leaves provide a natural backdrop for colorful blossoms, fill in empty spaces, and add visual weight and structure to the design.
Once you've piped your buttercream flowers (like roses, hydrangeas, or peonies), strategically pipe leaves around and between them. Use different leaf sizes and shades to create a natural look. For instance, use larger, darker leaves towards the base of the arrangement and smaller, lighter leaves higher up.
You can also incorporate other simple piped elements like buds, vines (using a small round tip like #2 or #3), or even piped branches (using a star tip or modified petal tip) to complement your easy buttercream leaf piping and create a full, cohesive nature scene on your cake. The leaves are the unsung heroes that make your floral compositions look complete and vibrant.
Troubleshooting Common Buttercream Leaf Piping Problems
Buttercream Too Soft or Too Stiff: Adjusting Consistency
One of the most frequent issues encountered during easy buttercream leaf piping is an incorrect buttercream consistency. As discussed earlier, if your buttercream is too soft, your piped leaves will quickly lose their shape, slumping or melting, especially in a warm environment or from the heat of your hands. If this happens, the best fix is to add more sifted powdered sugar, a tablespoon at a time, mixing thoroughly until the desired firmness is achieved.
Alternatively, you can refrigerate the buttercream for 10-15 minutes to firm it up, then remix it before piping. Be cautious not to make it too cold, or it will become stiff.
Conversely, if your buttercream is too stiff, it will be difficult to pipe smoothly, resulting in jagged or rough-edged leaves. It might also cause the piping bag to split under pressure. To loosen stiff buttercream, add a very small amount of liquid – milk, cream, or water – half a teaspoon at a time, mixing completely before adding more.
You could also add a tiny bit of softened shortening or butter. Mix until the buttercream is smooth and pliable, testing the consistency frequently by piping a practice leaf. Finding that perfect consistency is key to easy buttercream leaf piping success.
Leaf Shape is Distorted: Pressure and Piping Angle Issues
Distorted leaf shapes are often a result of inconsistent pressure or an incorrect piping angle. If your leaves are lopsided or have an uneven width, you might be applying more pressure on one side of the V-opening than the other. Ensure you are squeezing the bag evenly with your dominant hand. If the tip of the leaf is blunt or blobs, you're likely not releasing pressure completely and pulling away cleanly at the end of the piping motion. Practice the smooth release and quick pull-away technique.
The angle at which you hold the tip against the surface also matters for easy buttercream leaf piping. Holding the tip too flat against the cake can result in wide, flat leaves, while holding it too perpendicular can make it hard to control the flow.
A slight angle, perhaps around 45 degrees relative to the surface, often provides the best control for the buttercream to fan out correctly at the base and come to a point. If your leaves look like amorphous blobs rather than distinct shapes, revisit the basic piping motion, focusing on consistent pressure while pulling away and a clean stop.
Air Bubbles in Buttercream: How to Prevent and Fix Them
Air bubbles trapped in your buttercream can cause frustrating gaps or bursts in your piped leaves, ruining their smooth appearance. Air bubbles are often introduced during the mixing process, especially if the buttercream is whipped too vigorously or for too long. To minimize air bubbles, mix your buttercream on a lower speed towards the end of mixing, allowing the mixer to push air out.
If you notice air bubbles while piping, the best way to deal with them is to gently squeeze and knead the filled piping bag before you start piping. This helps to consolidate the buttercream and push smaller bubbles towards the tip. If a bubble gets stuck in the tip while piping, you might hear a slight pop or see a gap in the flow.
Stop piping, point the tip away from your work, and squeeze firmly to push the bubble out. Then, resume piping. Kneading the bag and testing the flow before starting each piping session will significantly reduce issues with air bubbles during easy buttercream leaf piping.
Leaves Not Sticking to the Cake: Surface Preparation
Sometimes, piped buttercream leaves don't adhere well to the cake surface, especially if the cake is very cold, covered in a crusted buttercream, or made with a non-buttercream frosting like whipped cream. For easy buttercream leaf piping to stick properly, the surface needs to be slightly receptive. If the cake is chilled, allow it to sit at room temperature for 10-15 minutes before piping the leaves so the surface isn't too hard.
If your cake is covered in a buttercream that has crusted over, you might need to gently touch the area where you plan to pipe the leaf with a fingertip or a clean brush dipped in a tiny amount of water or milk to slightly soften the surface just before piping. This creates a small, slightly tacky spot for the fresh buttercream leaf to adhere to.
Ensure the cake surface is clean and free of any crumbs or grease, which can also prevent the buttercream from sticking. Piping onto a freshly frosted or slightly softened buttercream surface provides the best adhesion for your easy buttercream leaf piping.
Creative Ideas for Using Buttercream Leaves in Cake Decorating
Simple Leaf Borders for Elegant Cakes
One of the simplest yet most elegant ways to use easy buttercream leaf piping is to create a border around the base or top edge of your cake. A continuous line of piped leaves, either all facing the same direction or alternating directions, provides a clean, sophisticated finish. This technique is particularly effective on cakes with minimal other decoration, allowing the simple greenery to stand out.
You can vary the look of the border by using different sizes of leaf tips or alternating between two shades of green. For a more textured border, pipe two overlapping rows of leaves. A leaf border works beautifully on a smooth buttercream or ganache-covered cake and adds a touch of natural elegance suitable for various occasions, from anniversaries to afternoon tea parties. The ease of this technique makes it a perfect application for those just starting with easy buttercream leaf piping.
Creating Wreaths and Garlands with Buttercream Leaves
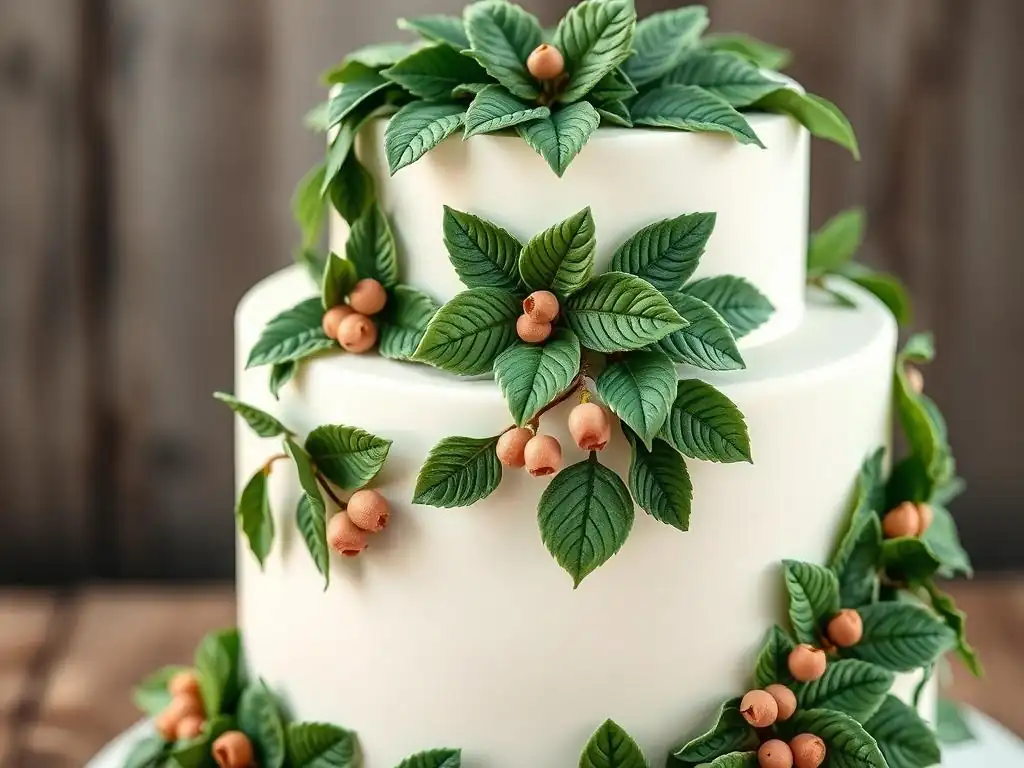
Buttercream leaves are ideal for creating stunning wreaths and garlands on cakes, mimicking natural foliage arrangements. A wreath is typically a circular design placed on the top or side of the cake, while a garland is a trailing design, often draped over edges or cascading down the side. These designs allow you to showcase your easy buttercream leaf piping skills in a more complex composition.
Start by lightly marking the outline of your desired wreath or garland on the cake surface using a toothpick (be gentle!). Then, begin piping your leaves along the marked line, layering them slightly to create a full effect. Use a mix of leaf sizes and shades of green for a more realistic and visually interesting result.
You can add small buttercream flowers, berries (piped with a round tip in red or pink), or other details within the wreath or garland to make it even more festive or specific to a theme. Creating these natural-looking arrangements is a rewarding way to use easy buttercream leaf piping.
Using Buttercream Leaves to Accentuate Buttercream Flowers
Buttercream leaves truly shine when used as supporting actors for buttercream flowers. Flowers piped directly onto the cake often look unfinished or isolated without accompanying greenery. Leaves provide the necessary context, color contrast, and volume to make floral arrangements look complete and vibrant. This is arguably the most common and effective use of easy buttercream leaf piping.
After piping your main flowers (like roses, peonies, or hydrangeas), strategically pipe leaves around their bases and between the blossoms. Use the leaves to fill in gaps, cover any less-than-perfect spots where flowers meet the cake, and direct the eye through the arrangement. Lighter shades of green can be used near the flower petals, while darker shades can provide a base layer.
The contrast between the vibrant flower colors and the natural green leaves makes both elements stand out, elevating the entire cake design. Mastering easy buttercream leaf piping is essential for anyone wanting to create beautiful buttercream floral cakes.
Combining Buttercream Leaves with Other Decorations: Sprinkles, Edible Glitter
Buttercream leaves can be beautifully combined with other cake decorating elements to add extra sparkle, texture, or themed details. For example, after piping your easy buttercream leaf piping arrangement, you can gently sprinkle edible glitter or fine sanding sugar over the wet buttercream leaves to give them a dewy, frosted, or shimmering effect, especially nice for winter or fantasy themes.
Small, nonpareil sprinkles in complementary colors (like tiny white "berries" or brown "twigs") can be placed amongst the leaves using tweezers. Edible pearls or dragees can also be added for a touch of elegance. For a more rustic look, you can pipe small dots or swirls of brown buttercream amongst the leaves to represent soil or bark. The key is to add these elements thoughtfully so they enhance, rather than overpower, your beautiful buttercream greenery created with easy buttercream leaf piping.
Maintaining and Storing Your Buttercream Decorations
How to Store Buttercream Leaves Made in Advance
If you're piping buttercream leaves onto parchment paper for later use, proper storage is crucial to keep them in perfect condition. Once piped onto parchment, place the paper on a flat baking sheet or cutting board that will fit in your refrigerator or freezer. Chill the leaves until they are firm, which usually takes about 10-20 minutes in the fridge or 5-10 minutes in the freezer.
Once firm, you can carefully peel the leaves off the parchment using a thin offset spatula. Place them in an airtight container, layering them gently between sheets of wax paper or parchment paper to prevent them from sticking together or getting crushed. Store the container in the refrigerator for up to a week or in the freezer for several weeks.
When ready to use, take them out of the freezer and let them thaw slightly in the refrigerator for about 15-20 minutes before handling, as they can be brittle when frozen solid. Handling firm, chilled leaves is much easier than working with soft ones, making pre-piping a great technique for easy buttercream leaf piping in bulk.
Preventing Buttercream Leaves from Melting or Cracking
Buttercream is sensitive to temperature, which can cause problems for piped decorations like leaves. Warm environments or warm hands holding the piping bag can cause the buttercream to soften and the piped leaves to lose their shape or even melt. To prevent this, work in a cool room if possible. If your hands warm the bag too much, switch to a fresh bag of chilled buttercream or take a break to cool down your hands. Using a chilled cake surface also helps the leaves set faster.
Cracking can occur if buttercream gets too cold too quickly, or if it's handled roughly when frozen. When storing or transporting leaves or decorated cakes, avoid drastic temperature changes. Allow chilled cakes or pre-made leaves to temper slightly at room temperature (about 10-15 minutes) before moving them or adding more decorations. If you notice your buttercream cracking while piping, it might be too stiff; refer back to the troubleshooting section for adjusting consistency. Proper temperature management is key to maintaining the integrity of your easy buttercream leaf piping.
Best Practices for Transporting Cakes Decorated with Buttercream Leaves
Transporting a cake decorated with delicate buttercream leaves requires careful planning to ensure your beautiful greenery arrives intact. The most important factor is keeping the cake cool and stable. If transporting a significant distance, use an insulated cake carrier or box. If it's a warm day, consider using ice packs placed strategically around the cake box (not directly touching the cake).
Ensure the cake is placed on a non-slip mat or secured within the transport box so it cannot slide. Drive carefully, avoiding sudden stops or turns. Ideally, transport the cake on a flat surface in your vehicle, such as the floor or trunk, rather than on a slanted seat.
If using pre-made, chilled leaves, it's often best to transport the cake undecorated and add the chilled leaves at the final destination, as they are more fragile than a smooth layer of frosting. Taking these precautions will help preserve your easy buttercream leaf piping and the rest of your cake's decoration during transit.
Conclusion: Mastering the Art of Easy Buttercream Leaf Piping
Elevate Your Cake Decorating Skills with Greenery
Mastering easy buttercream leaf piping is a fundamental skill that offers immense potential for elevating your cake decorating. It's a technique that is accessible to beginners yet versatile enough for advanced decorators to create intricate, lifelike foliage. By understanding the right tools, achieving the perfect buttercream consistency, and practicing the basic piping motion, you can confidently add beautiful greenery to any cake.
Whether you're creating a simple border, a lush wreath, or accenting vibrant buttercream flowers, the ability to pipe realistic leaves in various sizes and shades of green adds depth, dimension, and a touch of natural elegance that store-bought decorations simply cannot replicate. It's a rewarding skill that opens up a world of creative possibilities, transforming your cakes from simple desserts into impressive works of edible art. Continue practicing these easy buttercream leaf piping techniques, and you'll see a significant improvement in the overall appearance and professionalism of your baked creations.
Resources for Further Cake Decorating Learning at BakeWithEase.com
Congratulations on taking steps to master easy buttercream leaf piping! This is just one of many exciting techniques you can learn to enhance your cake decorating skills. BakeWithEase.com offers a wealth of resources to help you continue your journey in the world of baking and cake decoration.
Explore our extensive collection of recipes for various types of buttercream perfect for piping, including classic American buttercream, Swiss meringue buttercream, and Italian meringue buttercream, each offering slightly different consistencies and flavors suitable for easy buttercream leaf piping and other decorations. Dive deeper into our "Cake Decorating Basics" category for guides on frosting a cake smoothly, piping shells, stars, and rosettes, and using different food coloring techniques.
Visit our "Intermediate Baking" section for challenges like piping complex flowers or working with different mediums like ganache or fondant. Whatever your skill level or interest, BakeWithEase.com is here to provide the knowledge, tips, and inspiration you need to bake and decorate with ease and confidence.
Frequently Asked Questions
How do I achieve a realistic leaf color for my buttercream?
To achieve a realistic leaf color, use a combination of gel food coloring. Start with a base of green, and then add small amounts of yellow or brown for depth and natural variation.
What type of frosting is best for piping leaf shapes?
A stiff buttercream frosting is ideal for piping leaf shapes. It holds its shape well and allows for defined details without spreading. American buttercream or Swiss meringue buttercream (chilled) work well.
What piping tip is recommended for creating buttercream leaves?
A leaf piping tip, such as a #67, #68, or #352, is specifically designed for creating leaf shapes. Experiment with different sizes to achieve various leaf sizes and styles.
How do I hold the piping bag for optimal control when piping leaves?
Hold the piping bag at a 45-degree angle to the surface you're decorating. Apply consistent pressure and use small, controlled movements to create realistic leaf shapes.
What are some common mistakes to avoid when piping buttercream leaves?
Avoid using a frosting that is too soft, which will cause the leaves to lose their shape. Also, be careful not to overfill the piping bag, as this can make it difficult to control the frosting flow.
Final Reflection: The Enduring Elegance of Simple Buttercream Leaves
The art of piping buttercream leaves, while seemingly simple, offers a surprisingly profound connection to the beauty of nature and the power of handcrafted detail. It's more than just a cake decorating technique; it's a gateway to expressing creativity and adding a touch of personalized artistry to any confection. In a world increasingly dominated by mass production, this simple skill allows us to reclaim a sense of mindful creation and appreciate the small details that make a big difference.
The enduring appeal of handcrafted elements, especially in the context of food, speaks to a deeper human need for connection and authenticity. We are drawn to the imperfections and unique character of handmade items, a quality that mass-produced goods often lack. This resonates deeply with the current trend towards artisanal food and the appreciation of slow, deliberate processes. The details are not the details. They make the design.
– Charles Eames. This quote perfectly encapsulates the importance of mastering even the seemingly minor aspects of cake decorating, transforming a simple cake into a work of art.
Now, it's your turn. Consider how you can incorporate this simple yet elegant technique into your own baking journey. Don't be afraid to experiment with different leaf shapes, colors, and piping techniques. Let the process be a moment of mindful creation, a chance to connect with your creativity, and a way to add a touch of personal magic to your baked goods. The beauty of a perfectly piped buttercream leaf lies not just in its visual appeal, but in the intention and care put into its creation. Embrace the simplicity, and let your creativity bloom.
Here's a CTA tailored for the article "Piping Leaf Shapes: A Simple Greenery Detail" on BakeWithEase.com:
Unleash Your Inner Pastry Artist: Master Piping Leaves Today!
Thanks for exploring the art of piping perfect leaves! You've now got the skills to elevate your baked goods from delicious to dazzling. Ready to put your new knowledge into practice?
- Practice your leaf piping: Grab your bag and tips, and try piping different leaf varieties. Experiment with pressure and movement to find your perfect style. Don't be afraid to make mistakes – they're learning opportunities!
- Share your creations: Show us your leaf-adorned masterpieces on social media using #BakeWithEaseLeaves. We can't wait to see what you bake!
- Challenge a friend: Share this article with a fellow baking enthusiast and see who can create the most realistic leaf.
What kind of leaf will you master first? Let us know in the comments!