
Pavlova Perfection: Baking the Ideal Marshmallowy Meringue Base

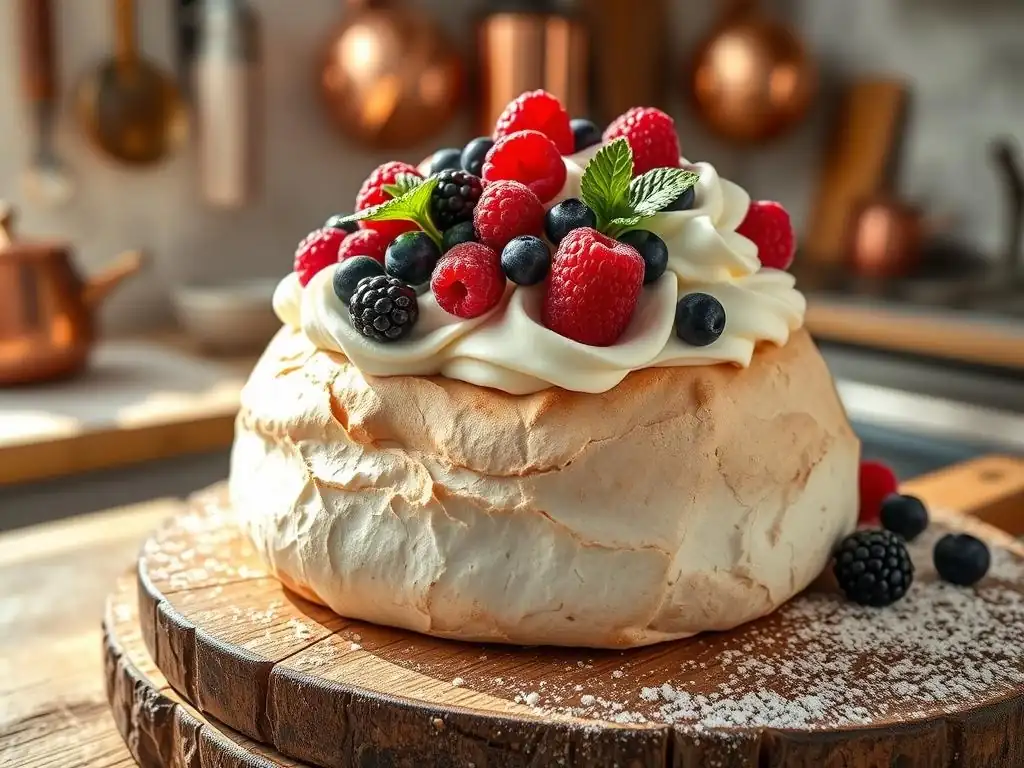
Welcome to BakeWithEase, where baking dreams become delicious reality! Ever wondered how to achieve that perfect, marshmallowy interior in a Pavlova? Pavlova Perfection: Baking the Ideal Marshmallowy Meringue Base unlocks the secrets to creating a stunning dessert. Dive in to discover our easy marshmallow meringue pavlova recipe and elevate your baking game. Curious to learn more about achieving that elusive meringue texture? Read on, and let's transform your kitchen into a haven of baking brilliance!
- Mastering the Marshmallow Meringue: Your Guide to Pavlova Perfection
- What is Pavlova and Why is the Meringue Base So Important?
- Classic Pavlova Recipe: Ingredients and Preparation
- Step-by-Step: Creating the Ideal Pavlova Meringue
- Baking Your Pavlova: Temperature and Timing are Key
- Troubleshooting Common Pavlova Problems
- Pavlova Variations: Exploring Different Flavors and Toppings
- Storing Your Pavlova: Maintaining Crispness and Freshness
- The Ultimate Marshmallow Meringue Pavlova Recipe: A Recap
- Frequently Asked Questions
- Final Reflection: The Enduring Allure of the Pavlova
- Unlock Your Inner Pastry Chef: Mastering the Pavlova
Mastering the Marshmallow Meringue: Your Guide to Pavlova Perfection
Welcome to the wonderful world of pavlova! This ethereal dessert, named after the famous Russian ballerina Anna Pavlova, is a true showstopper. At its heart is a meringue base that's crisp and delicate on the outside, yet soft and wonderfully marshmallowy within. Achieving this perfect texture is the key to a truly memorable pavlova, and while it might seem daunting, it's entirely achievable with the right techniques and an understanding of the science behind the bake. Think of it as learning a dance – each step is crucial for a graceful finish.
Creating a flawless pavlova meringue base is less about complex ingredients and more about precision in technique. It's about understanding how egg whites behave when whipped, how sugar stabilizes them, and how the oven's heat transforms them. Our goal is to guide you through crafting an easy marshmallow meringue pavlova recipe that delivers that sought-after contrast of textures. We'll cover everything from selecting the right ingredients to troubleshooting common issues, ensuring your pavlova is a triumph ready for any topping you choose.
What is Pavlova and Why is the Meringue Base So Important?
Pavlova is a dessert consisting of a baked meringue shell, traditionally topped with whipped cream and fresh fruit. Its origin is debated between Australia and New Zealand, but its universal appeal is undeniable. Unlike a hard, brittle meringue used for cookies or pie toppings, the pavlova meringue is designed to have a unique duality: a thin, crisp outer crust that gives way to a soft, slightly chewy, marshmallow-like interior. This textural contrast is what sets pavlova apart and makes it so delightful.
The meringue base isn't just a vessel for toppings; it is the foundation and star of the dish. Its texture and flavor dictate the success of the entire dessert. A poorly made base can be uniformly hard, completely flat, or weep sugary syrup. But a perfectly baked base provides that essential crackle when you cut into it, followed by the yielding, sweet softness inside. Mastering the meringue base is therefore paramount to creating a truly exceptional pavlova experience.
Understanding the Key Characteristics of a Perfect Pavlova Meringue
A perfect pavlova meringue should exhibit several distinct characteristics. Visually, it should have a beautiful, often slightly rustic, shape with a crisp, light brown or cream-colored exterior. It shouldn't be flat; there should be some height and structure to hold toppings. When tapped gently, it should sound hollow. Most importantly, when you break or cut into it, the outer shell should shatter delicately, revealing a distinct, soft, and airy interior that resembles a marshmallow.
The texture of the interior is critical. It should be soft and spongy, not wet or overly chewy. This soft center is created by the interaction of sugar, acid (like vinegar), and starch (like cornstarch) within the whipped egg whites as they bake and cool. The sugar dissolves, the acid helps stabilize the foam, and the starch prevents the egg proteins from contracting too much, contributing to that lovely, yielding texture. Achieving this requires careful whipping, precise sugar addition, and controlled baking.
Why a Marshmallowy Center is the Hallmark of a Great Pavlova
The marshmallowy center is the defining feature that elevates a pavlova from a simple meringue dessert to something truly special. It provides a delightful contrast to the crisp outer shell, creating a dynamic eating experience. This soft, sweet heart is achieved through specific ingredients and baking techniques that differentiate pavlova meringue from other types. Without that yielding, slightly chewy, airy interior, it's just a large, hard meringue disc.
This unique texture is largely thanks to the addition of a small amount of acid (like white vinegar or cream of tartar) and a starch (usually cornstarch). The acid helps stabilize the whipped egg whites, allowing them to reach their maximum volume and preventing them from collapsing. The cornstarch works by interfering with the protein structure of the egg whites during baking, preventing them from becoming uniformly hard and brittle, thereby encouraging that soft, marshmallow-like core. Getting the balance right is key to unlocking this magical texture in your easy marshmallow meringue pavlova recipe.
Classic Pavlova Recipe: Ingredients and Preparation
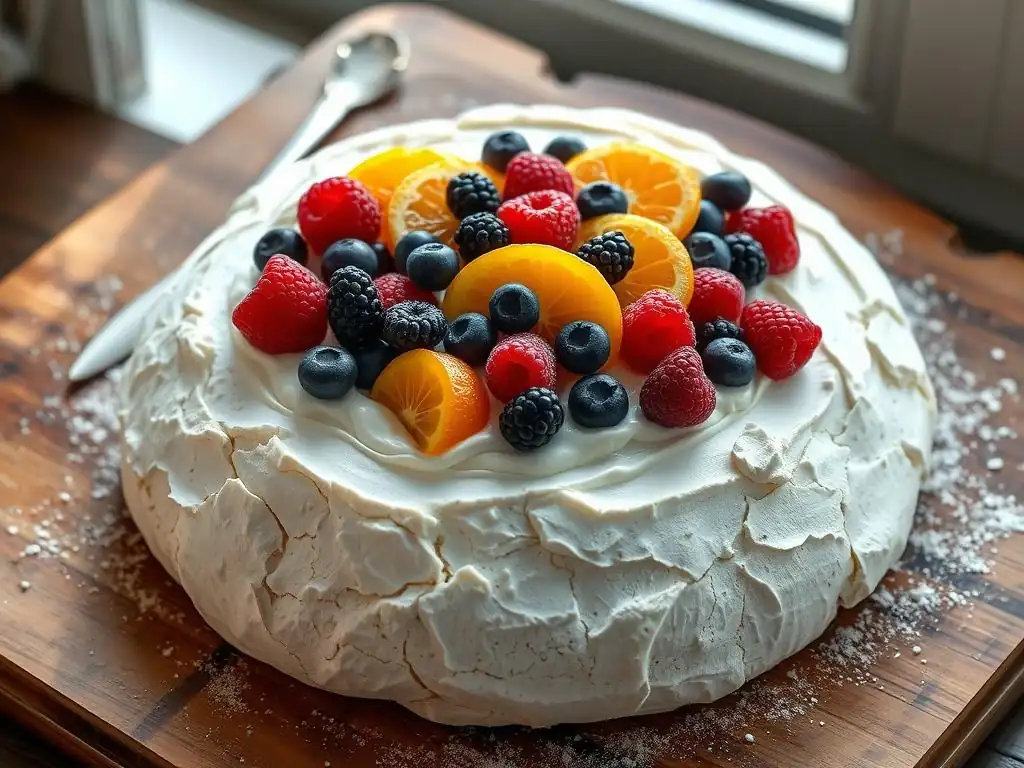
Creating a classic pavlova doesn't require an extensive list of exotic ingredients. The beauty of this dessert lies in transforming simple components into something extraordinary. The core ingredients are egg whites, sugar, and a couple of crucial additions that create the signature texture. Success starts with using ingredients at the right temperature and ensuring they are free from contaminants like grease or egg yolk.
For a standard pavlova serving around 6-8 people, you'll typically need egg whites from about 4-6 large eggs, roughly 250-300 grams of superfine (caster) sugar, 1-2 teaspoons of white vinegar or lemon juice, and 1-2 teaspoons of cornstarch. Some recipes might also include a touch of vanilla extract for flavor. Using superfine sugar is often recommended because it dissolves more easily into the egg whites, resulting in a smoother, more stable meringue.
Gathering Your Ingredients for the Perfect Pavlova
Let's break down the essential ingredients needed for a perfect pavlova meringue base.
- Egg Whites: Use fresh, room-temperature egg whites. Cold egg whites are harder to whip to full volume. Aim for about 4 large egg whites, which is roughly 120-140 grams. Ensure they are completely free of any yolk. Even a tiny drop of fat can prevent the egg whites from whipping properly. Some bakers even recommend separating eggs when cold (as they separate cleaner) and then letting the whites sit at room temperature for 30-60 minutes before whipping.
- Sugar: Superfine (caster) sugar is preferred for its ability to dissolve quickly, leading to a smooth, stable meringue. Granulated sugar can be used, but you need to be extra careful to ensure it's fully dissolved. You'll need about 200-250 grams of sugar for 4 egg whites – roughly 50-60 grams of sugar per egg white is a good ratio to aim for. This high sugar content is crucial for both structure and the marshmallowy interior.
- Acid: White vinegar or lemon juice (about 1 teaspoon per 4 egg whites) helps stabilize the whipped egg whites and contributes to the crisp exterior. Cream of tartar is also a popular choice, used at a ratio of about 1/4 teaspoon per egg white.
- Starch: Cornstarch (about 1 teaspoon per 4 egg whites) is the secret weapon for the marshmallowy center. It interferes with the protein structure during baking, keeping the interior soft and yielding.
Having all your ingredients measured and ready before you start whipping is key to a smooth process. Using digital scales for accuracy, especially for sugar, can make a difference in consistency.
Essential Equipment for Baking a Flawless Pavlova
Having the right tools makes the pavlova-making process much easier and increases your chances of success.
- Clean Mixing Bowl: Absolutely crucial. Use a spotlessly clean, dry bowl, preferably glass or metal. Plastic bowls can retain grease residue, which is detrimental to whipping egg whites. Wipe the bowl down with a little vinegar or lemon juice and dry thoroughly before starting.
- Electric Mixer: A stand mixer with a whisk attachment is ideal for achieving the necessary volume and stiffness, but a good hand mixer works too. The whipping process can take 10-15 minutes, so a mixer is highly recommended over hand-whipping.
- Measuring Tools: Accurate measuring cups and spoons, and ideally a digital scale for weighing sugar and egg whites. Consistency in ratios is important.
- Baking Sheets: Heavy-duty baking sheets that won't warp in the oven.
- Parchment Paper: Essential for lining the baking sheet. Meringue sticks to everything else. Drawing a circle on the underside of the parchment can help guide your shaping.
- Spatula or Spoon: For shaping the meringue mound on the baking sheet.
- Oven Thermometer: Highly recommended! Oven temperatures can vary significantly from the dial setting. Knowing the true temperature is vital for the slow, low-temperature bake required for pavlova. A difference of just 10-20°C can affect the outcome dramatically.
Ensuring all your equipment is clean and dry before you begin is just as important as having the right ingredients. A speck of grease on your whisk or bowl can prevent your egg whites from ever reaching stiff peaks.
Step-by-Step: Creating the Ideal Pavlova Meringue
Creating the perfect pavlova meringue is a process that requires patience and attention to detail, particularly during the whipping and sugar incorporation stages. Think of it as building a delicate structure – each step adds strength and stability. Following these steps carefully will help you achieve that coveted crisp shell and marshmallowy interior in your easy marshmallow meringue pavlova recipe.
The process begins with whipping the egg whites into a stable foam, gradually adding sugar to create a glossy, stiff meringue, and finally folding in the key ingredients for texture. The order and method in which you add ingredients are just as important as the ingredients themselves. Rushing any step can compromise the final result, leading to a weeping or collapsed meringue.
Step 1: Whipping the Egg Whites to Stiff Peaks (and the Secret to Stability)
Start with your room-temperature egg whites in a clean, dry bowl. Begin whipping on a low to medium speed until the egg whites become foamy and opaque, like soap bubbles. This aerates the egg whites and creates the initial structure. Once foamy, increase the speed to medium-high. The egg whites will transition from foamy to soft peaks (they droop when the whisk is lifted) and then to firm peaks (they hold their shape but the tips curl slightly).
The secret to stability at this stage, beyond a clean bowl and room-temperature eggs, is patience. Don't rush the whipping process. Aim for glossy, stiff peaks that stand straight up when the whisk is lifted. This indicates a strong protein structure capable of holding the sugar and maintaining its shape during baking. Over-whipping can cause the proteins to break down, leading to a less stable meringue, so stop just as stiff peaks are achieved.
Step 2: Gradually Adding Sugar for a Glossy Meringue
Once you've reached stiff peaks, begin adding the sugar very slowly, a tablespoon at a time, with the mixer still running on medium-high speed. This gradual addition allows the sugar granules to dissolve properly into the egg white foam. Adding sugar too quickly can deflate the meringue or result in undissolved sugar, which can cause weeping later.
Continue whipping for about 8-10 minutes after all the sugar has been added. The meringue should become incredibly thick, smooth, and glossy. To check if the sugar is fully dissolved, rub a small amount of meringue between your fingers. If you feel any grittiness, continue whipping until it's completely smooth. This stage is crucial for creating a stable, shiny meringue that will bake correctly and yield that perfect marshmallowy center.
Step 3: Incorporating Vinegar and Cornstarch: The Marshmallow Magic
With the meringue whipped to stiff, glossy peaks and the sugar fully dissolved, it's time to add the ingredients responsible for the unique pavlova texture: acid and starch. Gently sprinkle the cornstarch over the meringue surface. Then, drizzle the white vinegar (or lemon juice/cream of tartar) over the top as well.
Using a large metal spoon or a spatula, gently fold these ingredients into the meringue. Use a cutting and folding motion, working from the bottom of the bowl up and over, rotating the bowl as you go. Fold just until the cornstarch is incorporated and there are no visible streaks. Do not overmix, as this can deflate the meringue. This gentle incorporation ensures the stabilizers are evenly distributed without losing the volume you've worked so hard to build.
Step 4: Shaping Your Pavlova Meringue Base
Line a baking sheet with parchment paper. If you want a perfectly round pavlova, draw a circle (about 8-10 inches in diameter) on the parchment paper using a pencil, then flip the paper over so the pencil mark is underneath. Dollop the meringue onto the center of the circle guide (or directly onto the parchment if free-forming).
Use a spatula or the back of a spoon to gently shape the meringue into a disc within your marked circle. You can create swirls or peaks on the sides and top for a decorative effect – these will crisp up beautifully in the oven. Ensure the sides are slightly built up to create a well for toppings. Aim for a disc that is roughly 1.5 to 2 inches high. Don't overwork the meringue during shaping; keep it light and airy.
Baking Your Pavlova: Temperature and Timing are Key
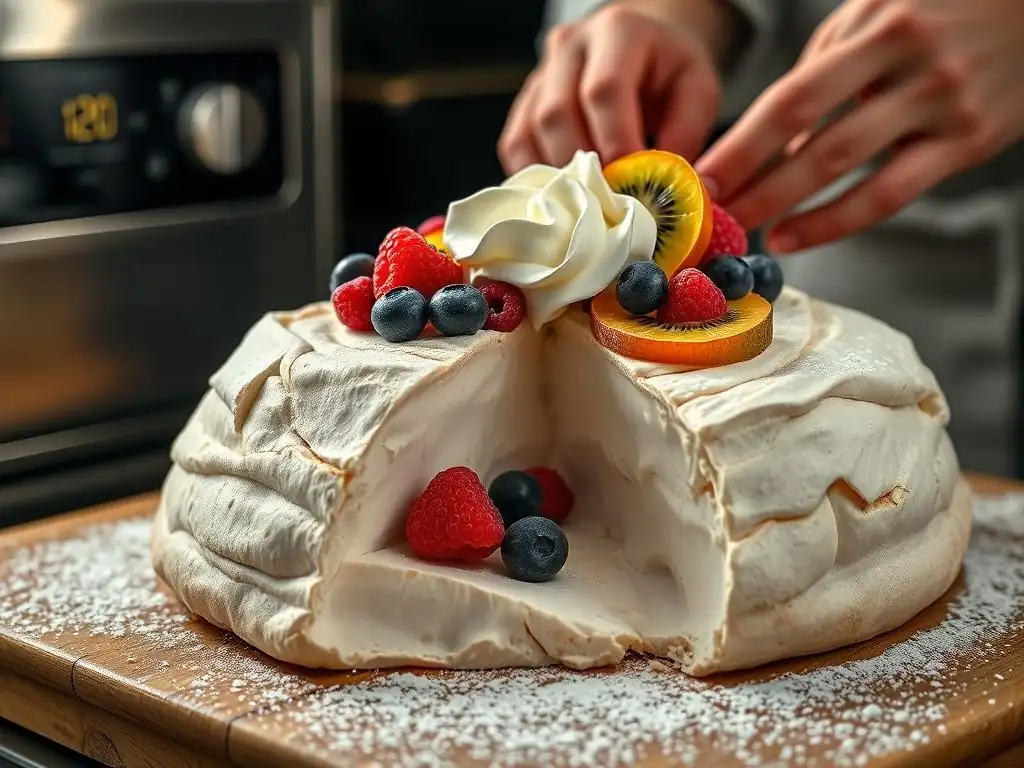
Baking a pavlova is less about cooking it through and more about drying it out slowly at a low temperature. This controlled heat allows the exterior to crisp up and stabilize while the interior retains its soft, marshmallowy texture. The oven temperature and baking time are critical factors determining whether you get a perfect result or a cracked, chewy, or weeping meringue.
The general principle is a low temperature for a long time, followed by cooling inside the oven. This ensures the meringue dries out evenly and doesn't collapse from a sudden temperature change. Getting this step right is vital for your easy marshmallow meringue pavlova recipe.
Finding the Sweet Spot: Optimal Oven Temperature for Pavlova
The optimal oven temperature for baking pavlova typically ranges between 100°C and 120°C (210°F to 250°F). A temperature around 110°C (230°F) is often considered the sweet spot for achieving a crisp exterior and a soft, marshmallowy interior without causing significant cracking or browning. Higher temperatures can cause the meringue to brown too quickly or expand too rapidly, leading to cracks.
It is highly recommended to use an oven thermometer to verify your oven's actual temperature. Many ovens fluctuate or are inaccurate. Preheat your oven with the thermometer inside and adjust your dial setting until the thermometer reads the desired temperature consistently. Baking at a true 110°C (230°F) provides the gentle heat needed for the meringue to dry out slowly and develop the correct texture.
Baking Time: Achieving the Perfect Crispy Shell and Marshmallowy Interior
The baking time for a pavlova depends on its size and thickness, as well as your oven's specific characteristics. For a standard 8-10 inch diameter pavlova, the baking time is typically between 1 hour and 1 hour 30 minutes. The goal is for the exterior to be firm and dry to the touch, easily peeling away from the parchment paper.
After the initial baking time, turn off the oven but leave the pavlova inside with the door slightly ajar (you can prop it open with a wooden spoon). This slow cooling process is absolutely essential. It prevents the meringue from experiencing a sudden temperature shock, which can cause it to crack or collapse. Leave it in the cooling oven for at least 2-3 hours, or ideally, overnight. The residual heat continues to dry the meringue gently.
Cooling Your Pavlova: A Crucial Step for Preventing Cracks
Cooling the pavlova slowly inside the turned-off oven is arguably as important as the baking itself when aiming for a crack-free and stable meringue. Removing a hot pavlova directly into cooler room air can cause it to contract too quickly, leading to significant cracks or even collapse. The gentle decrease in temperature within the oven allows the meringue structure to set and stabilize gradually.
Leave the oven door slightly open to allow moisture to escape while the temperature slowly drops. This process can take several hours, so it's often best to bake the pavlova in the evening and leave it in the oven overnight. Only remove the pavlova from the oven once it is completely cool to the touch. This patient cooling period ensures the meringue maintains its shape and texture, ready to be topped.
Troubleshooting Common Pavlova Problems
Even with a great easy marshmallow meringue pavlova recipe, things can occasionally go awry. Meringue can be finicky! Understanding common issues and how to address them will save you frustration and help you achieve perfection next time. Most problems relate to temperature, moisture, or ingredient ratios.
Don't be discouraged if your first pavlova isn't picture-perfect. Baking is a science, and sometimes small environmental factors (like humidity) can play a role. Identifying the problem is the first step to fixing it for future attempts.
Preventing a Cracked Pavlova: Tips and Tricks
Cracking is one of the most common pavlova woes. While a few hairline cracks are often considered part of the rustic charm, large cracks can be disappointing. The primary causes of cracking are usually sudden temperature changes or baking at too high a temperature.
- Bake Low and Slow: Ensure your oven temperature is accurate and stays within the recommended 100-120°C (210-250°F) range. Use an oven thermometer!
- Cool Slowly: Never remove the pavlova directly from a hot oven into the room. Always cool it completely inside the turned-off oven with the door ajar for several hours or overnight.
- Avoid Over-Whipping: Whipping the meringue past stiff peaks can make it brittle and more prone to cracking.
- Ensure Sugar is Dissolved: Undissolved sugar can create weak spots in the meringue structure.
- Don't Open Oven Door: Resist the urge to open the oven door frequently during baking, as this causes temperature fluctuations.
What to Do if Your Pavlova is Too Chewy or Too Hard
If your pavlova is uniformly hard and brittle, lacking that soft, marshmallowy center, it's likely been over-baked or baked at too high a temperature. The low, slow bake is essential for achieving the dual texture.
If it's too chewy throughout, it might not have been dried out enough, or perhaps too much cornstarch was used. Ensure you are baking for the full recommended time and allowing it to cool completely in the oven. Humidity can also play a role; meringue absorbs moisture from the air, which can make it chewy. Baking on a dry day is ideal if possible. Ensure your sugar is fully dissolved, as undissolved sugar can also lead to a chewy texture.
Addressing a Soggy Pavlova Bottom
A soggy bottom typically occurs when the pavlova is baked on parchment paper that isn't completely flat or if moisture collects underneath during baking or cooling. It can also happen if the meringue base is too thin in the center, making it vulnerable to moisture.
Ensure your parchment paper lies flat on the baking sheet. If using a circle guide, make sure the pencil mark is on the underside. Shaping the meringue with slightly higher sides helps create a more stable base that is less likely to become soggy. Also, proper cooling in the oven with the door ajar allows moisture to escape, preventing condensation from forming underneath.
Pavlova Variations: Exploring Different Flavors and Toppings
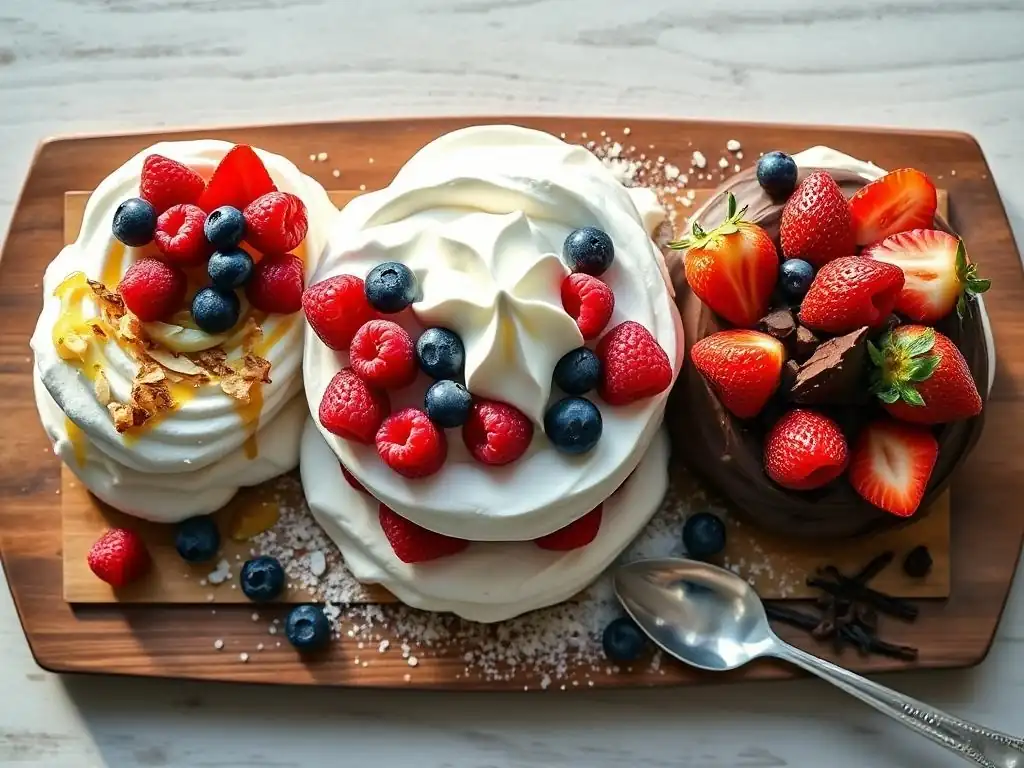
While the classic pavlova with berries and cream is undeniably delicious, the beauty of a perfect marshmallow meringue base is its versatility. Once you've mastered the easy marshmallow meringue pavlova recipe, you can let your creativity shine with various flavor combinations and toppings.
The light, sweet base pairs well with a wide range of flavors, from tart fruits to rich chocolate. Experimenting with different toppings allows you to adapt the pavlova for different seasons or occasions.
Classic Pavlova Toppings: Berries and Cream
The quintessential pavlova topping is a generous dollop of softly whipped cream and an abundance of fresh berries. The slightly tartness of berries like strawberries, raspberries, blueberries, and kiwifruit cuts through the sweetness of the meringue beautifully.
To prepare the classic topping:
- Whip cold heavy cream (about 300-400ml for a standard pavlova) with a little powdered sugar (to taste, maybe 1-2 tablespoons) and a splash of vanilla extract until soft peaks form. Avoid over-whipping to stiff peaks, as a softer consistency drapes nicely over the meringue.
- Pile the whipped cream onto the cooled pavlova base.
- Arrange a colorful mix of fresh berries artfully over the cream. A simple strawberry and raspberry mix is always a crowd-pleaser.
Creative Pavlova Ideas: Lemon Curd & Blueberries, Chocolate & Raspberries
Beyond the classic, the possibilities are vast. Consider these delicious variations:
- Lemon Curd and Blueberries: Top the meringue with tangy homemade or good-quality store-bought lemon curd, then scatter fresh blueberries over the top. The bright citrus is a fantastic contrast to the sweet meringue. A sprinkle of lemon zest adds extra zing.
- Chocolate and Raspberries: Drizzle melted dark chocolate over the meringue before adding whipped cream. Then top with fresh raspberries and perhaps some chocolate shavings. The slight bitterness of dark chocolate complements the sweet meringue and tart raspberries.
- Tropical Pavlova: Use toppings like passionfruit pulp, mango slices, and kiwi fruit with the whipped cream for a taste of the tropics.
These are just a few starting points. Think about seasonal fruits, different creams (like mascarpone cream), or even a drizzle of caramel or fruit coulis.
Making Mini Pavlovas: A Perfect Individual Dessert
Mini pavlovas are fantastic for individual servings and entertaining. The process for making the meringue is the same, but instead of shaping one large disc, you pipe or spoon smaller mounds onto the baking sheet.
Shape the mini pavlovas into individual nests or discs, about 3-4 inches in diameter. Build up the sides slightly to create a well for toppings. The baking time will be shorter than a large pavlova, typically 45-75 minutes, depending on size and thickness. Cool them in the oven as you would a large one. Mini pavlovas offer a perfect portion size and allow guests to choose their own toppings if serving a variety.
Storing Your Pavlova: Maintaining Crispness and Freshness
Proper storage is key to preserving the delicate texture of your pavlova. The meringue is highly susceptible to moisture from the air and from its toppings. Knowing how to store it correctly will keep your easy marshmallow meringue pavlova recipe success story lasting longer.
The main rule is to keep the unfilled meringue base away from humidity. Once topped, its shelf life is much shorter.
Best Practices for Storing Unfilled Pavlova Meringue
An unfilled pavlova meringue base, once completely cool and dry, can be stored in an airtight container at room temperature for 2-3 days. The key is airtight to protect it from moisture in the air.
- Ensure the pavlova is completely cool before storing.
- Use a container large enough that the pavlova fits without being crushed.
- Place parchment paper between layers if stacking (though a single layer is best).
- Do not store it in the refrigerator before adding toppings, as the fridge is a humid environment and can make the meringue chewy.
If stored correctly, the exterior should remain crisp, and the interior should retain its marshmallowy texture.
How to Store Pavlova with Toppings
Once you add whipped cream and fruit, the moisture from the toppings will start to soften the meringue. For this reason, it's best to assemble the pavlova just before serving.
If you have leftovers of an assembled pavlova, they can be stored in the refrigerator for a day or two, but the meringue will soften considerably. The crisp shell will likely be gone, and the interior might become denser. It will still be edible and delicious, but the signature textural contrast will be lost. For the best experience, serve assembled pavlova within an hour or two of adding the toppings.
The Ultimate Marshmallow Meringue Pavlova Recipe: A Recap
You now have the knowledge and steps to bake a truly magnificent pavlova with that desired crispy shell and soft, marshmallowy center. Remember that patience and precision are your best friends in this process. From whipping the egg whites to the slow bake and cool-down, each stage contributes significantly to the final result of your easy marshmallow meringue pavlova recipe.
Don't be afraid to practice. Like any baking skill, mastering pavlova takes a little experience. Your confidence will grow with each attempt, and soon you'll be whipping up perfect pavlovas with ease.
Achieving Pavlova Perfection: Key Takeaways for Success
Let's summarize the most critical points for achieving pavlova perfection:
- Cleanliness is Paramount: Ensure your bowl and whisk are spotless and grease-free.
- Room Temperature Eggs: Use egg whites at room temperature for maximum volume.
- Gradual Sugar Addition: Add sugar slowly and whip until completely dissolved and the meringue is glossy and stiff.
- Acid and Starch: Don't skip the vinegar/lemon juice and cornstarch – they are key to the marshmallowy texture. Fold them in gently.
- Low and Slow Bake: Bake at a low temperature (around 110°C/230°F) for a long duration (1-1.5 hours). Use an oven thermometer!
- Cool in the Oven: Always cool the pavlova completely inside the turned-off oven with the door ajar.
- Assemble Just Before Serving: Top the pavlova with cream and fruit just before you plan to serve it to maintain the meringue's crispness.
[ ] Get clean, dry equipment ready
[ ] Separate egg whites carefully (no yolk!)
[ ] Let egg whites come to room temperature
[ ] Measure sugar, acid, and starch accurately
[ ] Whip egg whites to stiff peaks
[ ] Add sugar slowly and whip until glossy and smooth
[ ] Gently fold in acid and starch
[ ] Shape meringue on parchment paper
[ ] Preheat oven to accurate low temperature (e.g., 110°C)
[ ] Bake for recommended time (e.g., 1 hour 15 minutes)
[ ] Turn off oven and cool completely inside with door ajar
[ ] Store unfilled pavlova properly
[ ] Assemble just before serving
Enjoying Your Effort: Serving and Presenting Your Pavlova
Once your beautiful pavlova meringue base is completely cool and ready, the fun part begins: assembling and serving! Carefully transfer the cooled meringue from the baking sheet to your serving plate. It should peel away from the parchment paper easily if baked and cooled correctly.
Top generously with softly whipped cream, allowing it to cascade slightly over the edges. Then, arrange your chosen fresh fruits or other toppings artfully over the cream. A final dusting of powdered sugar or a sprig of mint can add a lovely finishing touch. Present your pavlova proudly – its impressive appearance and delightful texture are sure to impress your guests. Sharing your homemade easy marshmallow meringue pavlova recipe creation is the sweet reward for your efforts!
Frequently Asked Questions
What makes this Pavlova recipe "easy"?
This recipe focuses on simplified steps and clear instructions, making it easy for beginners to achieve a stable meringue base. We use readily available ingredients.
What is "marshmallowy" about this Pavlova?
The term refers to the meringue's desired texture: a crisp outer shell with a soft, fluffy, marshmallow-like interior. This is achieved through specific baking temperatures and techniques.
Can I substitute any ingredients in this Pavlova recipe?
While some substitutions are possible, we recommend sticking to the recipe for optimal results. Changing ingredients may affect the structure and texture of the meringue base.
How do I prevent my Pavlova from cracking?
Cracking is common! Reduce the oven temperature and allow the Pavlova to cool completely in the oven. This slow cooling process minimizes drastic temperature changes.
What are some topping suggestions for this Easy Marshmallow Meringue Pavlova?
Fresh fruit like berries and kiwi are classic choices. Whipped cream or flavored pastry cream also complement the sweet meringue base beautifully.
Final Reflection: The Enduring Allure of the Pavlova
The seemingly simple act of whipping egg whites into a cloud of airy perfection holds a surprising depth, mirroring the enduring appeal of the pavlova itself. This recipe, designed for ease and accessibility, aims to demystify the process and bring the joy of this iconic dessert to every kitchen. The pursuit of the ideal marshmallowy meringue base, as explored throughout this article, is more than just a culinary quest; it's a testament to the power of simple ingredients transformed by skill and precision.
The pavlova's journey from humble beginnings to a global dessert phenomenon speaks volumes about our collective desire for both elegance and comfort. It's a dish that transcends cultural boundaries, uniting people through a shared appreciation for its delicate texture and sweet, tangy flavor. A pavlova is a celebration of simplicity and perfection, a testament to the artistry of baking.
This sentiment, though not a direct quote, encapsulates the spirit of the pavlova and the passion it inspires in bakers worldwide. Its ongoing popularity reflects our need for moments of sweetness and the satisfaction of creating something beautiful from scratch.
Now, I invite you to embrace the challenge. Don't be intimidated by the seemingly delicate nature of the meringue; with a little patience and the guidance provided in this article, you can achieve pavlova perfection. The reward? Not just a delicious dessert, but a sense of accomplishment and the joy of sharing something truly special with loved ones. So, gather your ingredients, preheat your oven, and embark on your own pavlova journey. The sweet taste of success awaits.
Unlock Your Inner Pastry Chef: Mastering the Pavlova
Thanks for joining us on this delicious journey into the world of Pavlovas! We hope you gained a newfound appreciation for this delicate meringue masterpiece. Now it's time to put your newfound knowledge into practice!
- Bake your dream Pavlova: Gather your ingredients and follow the recipe steps from the article – we're confident you'll create a show-stopping dessert! Don't be afraid to experiment with different flavour combinations.
- Share your Pavlova triumph: Snap a picture of your beautiful creation and share it on social media using #BakeWithEasePavlova – let’s inspire each other!
- Explore other BakeWithEase recipes: Dive into our extensive recipe library for more baking adventures. You might be surprised by what delicious creations you discover!
Ready to transform your kitchen into a Pavlova paradise? What unique flavor combination will you try first?