
Your Essential Basic Sourdough Equipment Guide (Recipe Included)

Welcome to BakeWithEase, your guide to confident baking!
Ready to unlock the magic of sourdough? The journey to a perfectly tangy loaf starts with the right tools. This week, we're diving deep into our Essential Basic Sourdough Equipment Guide – a beginner-friendly resource to help you gather everything you need to cultivate a thriving starter and bake incredible bread. Curious about the must-have items and clever substitutes? Let's get started!
- Your Essential Basic Sourdough Equipment Guide (Recipe Included) - BakeWithEase
- Introduction to Sourdough Baking: Essential Equipment for Beginners
- Sourdough Starter Equipment Beginner Guide: What You Absolutely Need
-
Essential Sourdough Bread Baking Equipment: Beyond the Starter
- Sourdough Mixing Bowls: Choosing the Right Size and Material
- Measuring Tools: Ensuring Accuracy in Your Sourdough Recipe
- Dough Scraper: A Baker's Best Friend
- Proofing Basket (Banneton): Shaping Your Sourdough Loaf
- Dutch Oven or Baking Stone: Achieving a Crispy Crust
- Bread Lame (Scoring Knife): Creating Beautiful Sourdough Designs
- Optional Sourdough Equipment: Enhancing Your Baking Experience
- Basic Sourdough Bread Recipe Using Your New Equipment
- Maintaining Your Sourdough Equipment: Cleaning and Storage
- Conclusion: Embark on Your Sourdough Journey with Confidence
-
Frequently Asked Questions
- What are the absolute essential pieces of equipment for starting a sourdough starter?
- Can I use metal bowls or utensils when working with sourdough starter?
- How important is a kitchen scale for making sourdough?
- What size jar is best for a sourdough starter?
- Do I really need a proofing basket (banneton) right away?
- Final Reflection: The Humble Beginnings of Sourdough Mastery
- Unleash Your Inner Baker: Start Your Sourdough Journey Today!
Your Essential Basic Sourdough Equipment Guide (Recipe Included) - BakeWithEase
Introduction to Sourdough Baking: Essential Equipment for Beginners
Why the Right Sourdough Equipment Matters for Baking Success
Embarking on the sourdough journey is exciting, but having the right tools can make a significant difference between frustration and consistently delightful loaves. Just as a carpenter needs specific tools for woodworking, a sourdough baker benefits immensely from having the appropriate gear. The correct equipment helps control variables like temperature, ensures proper dough handling, and facilitates the creation of that signature crispy crust and airy interior. Investing in a few key pieces is fundamental for any beginner looking to master the art of fermentation baking.
Using the right sourdough equipment for beginners simplifies the process and increases your chances of success from the very first loaf. For instance, a reliable scale ensures accurate ingredient measurements, which is crucial for sourdough hydration levels. A proper proofing basket helps the dough maintain its shape during the final rise, leading to a better-structured loaf. Think of your equipment as your co-pilot, guiding you through the nuances of working with a living culture like sourdough starter. With the right setup, you'll find the process less intimidating and far more rewarding.
BakeWithEase: Your Guide to Easy Sourdough Baking
At BakeWithEase, we believe that baking sourdough should be accessible and enjoyable for everyone, regardless of experience level. Our mission is to demystify the process, providing clear, step-by-step guides, simple recipes, and practical tips. We understand that starting out can feel overwhelming with all the information available, especially when it comes to gathering the necessary tools. That's why we've compiled this comprehensive sourdough starter equipment beginner guide to help you confidently set up your baking station.
We focus on essential, functional equipment that delivers results without unnecessary complexity or expense. Our approach is rooted in making baking easy and fun. We'll walk you through the absolute must-haves for maintaining a healthy starter and baking your first delicious loaf, ensuring you know exactly what you need and why. With BakeWithEase, you're not just getting recipes; you're gaining a partner in your baking adventures, equipped with the knowledge and guidance to bake with ease.
Sourdough Starter Equipment Beginner Guide: What You Absolutely Need
The Sourdough Starter Jar: Choosing the Right Container
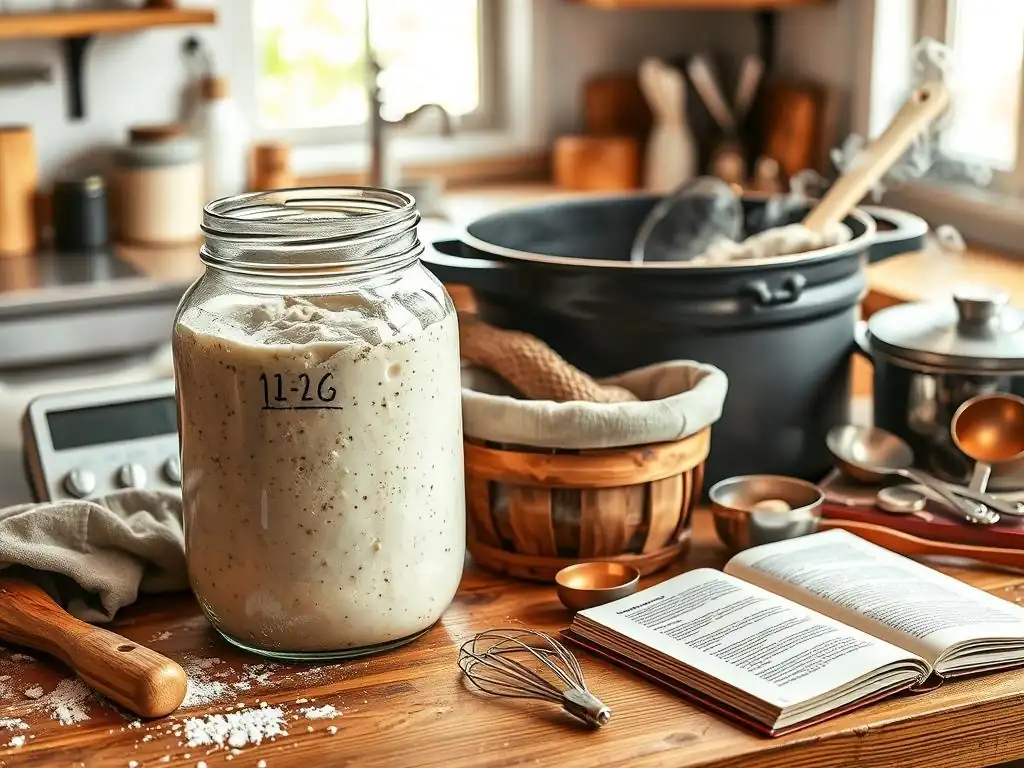
The vessel you choose for your sourdough starter is more than just a container; it's the home for your living culture. It needs to be clean, inert, and ideally transparent so you can easily observe the activity of your starter – the bubbles, the rise, and the fall. A good starter jar should also have enough capacity to allow the starter to double or even triple in size after feeding without overflowing, which is a common issue for beginners. The opening should be wide enough for easy stirring and feeding.
Selecting the right sourdough starter jar is a crucial first step in your sourdough starter equipment beginner guide. Many bakers start with a simple glass jar they already have, like a mason jar. While this works, a dedicated jar with straight sides can make it easier to track the starter's growth using an elastic band or marker. Ensuring the jar is clean and free from soap residue is vital, as even small amounts can inhibit the growth of the beneficial microbes in your starter.
Glass vs. Plastic: Which Sourdough Starter Jar is Best?
When deciding between glass and plastic for your sourdough starter jar, glass is overwhelmingly the preferred choice by experienced bakers, and for good reason. Glass is non-porous, meaning it doesn't absorb odors or flavors and is very easy to clean and sanitize thoroughly. This reduces the risk of unwanted bacteria contaminating your starter. Its transparency is also a major advantage, allowing you to easily see the fermentation process, track its rise and fall, and gauge its readiness for baking.
Plastic containers, while lightweight and less prone to breaking, can scratch over time, creating tiny crevices where bacteria can hide. Some plastics may also contain chemicals that could potentially leach into your starter, although food-grade plastics are generally considered safe. However, for the health and vitality of your starter, and ease of observation and cleaning, a glass sourdough starter jar is the recommended option for any beginner.
Sourdough Starter Jar Size: How Big Should It Be?
The ideal size for your sourdough starter jar depends on how much starter you plan to maintain and how often you bake. For a beginner maintaining a relatively small amount, say 50-100 grams of active starter for weekly baking, a jar with a capacity of at least 500ml (about 1 pint) is generally sufficient. This size allows ample room for the starter to expand significantly after feeding.
If you plan to maintain a larger quantity of starter or feed it larger amounts (e.g., 1:2:2 or 1:3:3 ratios of starter:flour:water), or if you live in a very warm environment where activity is rapid, a larger jar, perhaps 750ml or 1 liter (about 1 quart), might be more appropriate. A common mistake for beginners is using a jar that is too small, leading to messy overflows. Always err on the side of slightly larger if unsure.
Sourdough Starter Feeding Tools: Spoons and Scoops
Feeding your sourdough starter accurately is key to keeping it healthy and active. This involves measuring out the starter itself, as well as the flour and water you add. While a kitchen scale is essential for precision (more on that later), having the right tools for scooping and stirring the starter and its food is also important. Simple tools like spoons or small scoops are indispensable for this daily or weekly task.
Your sourdough starter equipment beginner guide isn't complete without mentioning the tools used for feeding. These tools should be easy to clean and handle, allowing you to efficiently mix the new ingredients into the starter without leaving dry pockets of flour. The material of the spoon or scoop can also play a role in maintaining the starter's health and flavor.
Measuring Spoons for Accurate Sourdough Starter Feeding
While weighing ingredients is the gold standard in baking, especially with sourdough, measuring spoons can be useful for adding very small amounts of water or for scooping out starter when transferring or discarding. For example, a teaspoon or tablespoon can help portion out a small amount of starter to start a new jar or share with a friend. However, relying solely on volume measurements (like cups and spoons) for the main feeding is not recommended for consistency, as flour density varies greatly.
Using measuring spoons is more about convenience for small tasks rather than the primary method for feeding. For the most accurate sourdough starter feeding, especially when following recipes that specify weights, a digital scale is paramount. Nevertheless, having a set of standard measuring spoons (tablespoon, teaspoon, etc.) is a useful addition to your sourdough equipment for beginner tasks.
Non-Reactive Spoons: Avoiding Metallic Tastes in Your Sourdough
When stirring your sourdough starter, it's best to use non-reactive materials. Stainless steel is generally considered safe and non-reactive for brief contact like stirring. However, prolonged contact with certain metals, particularly aluminum or reactive alloys, can potentially react with the acidic environment of the starter, leading to off-flavors or even weakening the starter over time.
For stirring and handling your starter, wooden, silicone, or plastic spoons are excellent non-reactive choices. Many bakers prefer a small silicone spatula as it's flexible enough to scrape down the sides of the jar effectively, ensuring all the new flour and water are fully incorporated. Including a non-reactive stirring tool is a simple but important detail in your sourdough starter equipment beginner guide.
Thermometer for Sourdough Starter: Monitoring Temperature
Temperature is one of the most significant factors influencing the activity of your sourdough starter. The microbes responsible for fermentation thrive within specific temperature ranges. Keeping your starter too cold will slow activity considerably, while extreme heat can kill the beneficial bacteria and yeasts. Monitoring the ambient temperature where your starter lives, and sometimes the starter's temperature itself, gives you valuable insight into its behavior.
Having a thermometer is a highly recommended piece of sourdough starter equipment for beginners. It helps you understand why your starter might be behaving a certain way – perhaps it's sluggish because your kitchen is cooler than ideal, or maybe it's peaking rapidly because it's warm. This knowledge empowers you to troubleshoot and adjust feeding schedules or find a warmer spot for your starter, leading to a more predictable and reliable culture.
Why Temperature is Crucial for Sourdough Starter Activity
The wild yeasts and lactic acid bacteria in your sourdough starter are living organisms, and their metabolic rate is heavily dependent on temperature. Typically, these microbes are most active and balanced between 75°F and 80°F (24°C and 27°C). Within this range, the starter will rise predictably, develop a pleasant tangy aroma, and be ready to use for baking within a reasonable timeframe (often 4-12 hours after feeding, depending on the ratio).
Temperatures below 70°F (21°C) will significantly slow down fermentation, meaning it will take much longer for your starter to become active. Temperatures above 80°F (27°C) can accelerate activity, but consistently high temperatures can favor certain bacteria that produce overly sour flavors or break down the gluten structure of the starter. Understanding and monitoring temperature, therefore, is fundamental to maintaining a healthy, vigorous starter ready to leaven your bread.
Best Thermometers for Sourdough Starter: Digital vs. Analog
For monitoring the ambient temperature of your kitchen or proofing area, a simple indoor thermometer, either digital or analog, works well. A digital thermometer often provides a quicker and more precise reading. You can place this near your starter jar to see the conditions it's experiencing. Some bakers even use an infrared thermometer to quickly check the surface temperature of the starter itself, though this is less common for beginners.
A basic digital kitchen thermometer (like an instant-read probe thermometer) can also be useful for checking the temperature of the water you use to feed your starter or the temperature of your dough during bulk fermentation. For your sourdough starter equipment beginner guide, a simple digital room thermometer is a great start to help you understand your starter's environment. They are inexpensive and readily available.
Essential Sourdough Bread Baking Equipment: Beyond the Starter
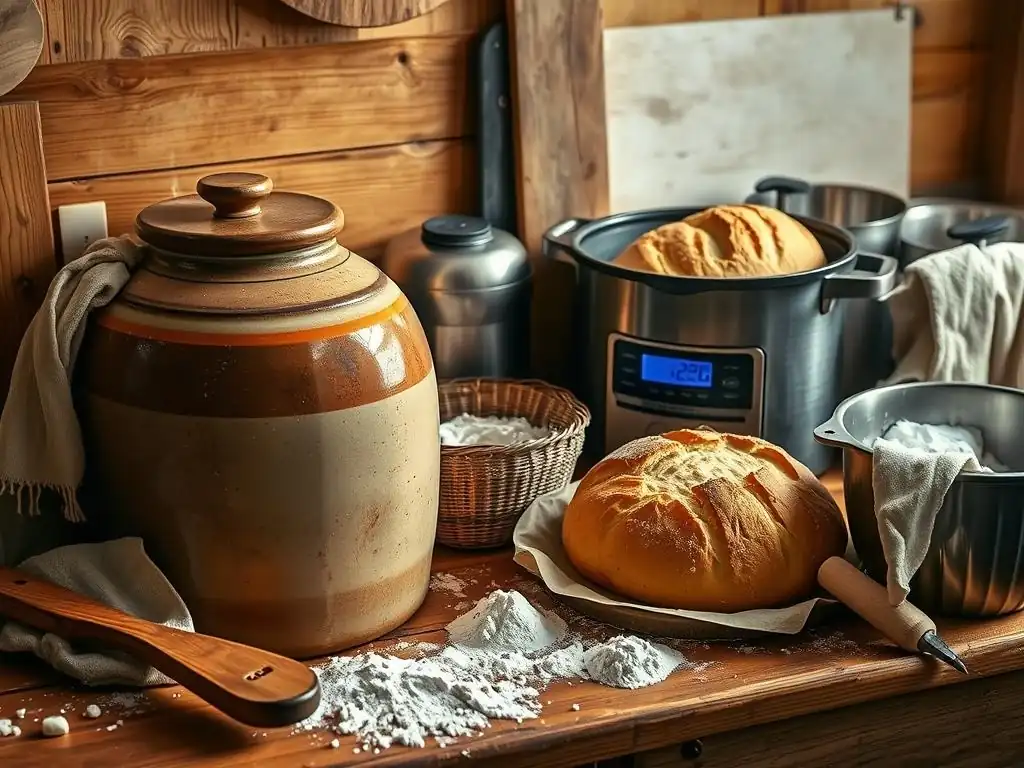
Once your sourdough starter is thriving, the next step is baking bread! This requires a few additional pieces of equipment to mix, shape, proof, and bake your loaf successfully. These tools are designed to handle the unique characteristics of high-hydration sourdough dough and create the desired crust and crumb structure. Gathering these essentials will equip you to transform your bubbly starter into a beautiful loaf.
Building your essential sourdough equipment beginner guide includes understanding the tools needed for the bread-making process itself. From the initial mixing to the final bake, each piece of equipment plays a role in managing the dough and achieving optimal results. Don't feel pressured to buy everything at once, but these items are considered standard for most sourdough recipes.
Sourdough Mixing Bowls: Choosing the Right Size and Material
A good mixing bowl is fundamental for combining your flour, water, salt, and starter. For sourdough, which is often a high-hydration dough, you'll need a bowl that is large enough to comfortably mix the ingredients without spilling, especially during the initial hydration step (autolyse) and the subsequent stretch and folds. A standard recipe for a single loaf often uses 400-500 grams of flour, which requires a bowl with a capacity of at least 4-6 quarts (about 4-6 liters) to allow room for mixing and fermentation.
The material of your mixing bowl can also influence convenience and handling. While the material doesn't directly affect the sourdough process as much as with the starter itself, factors like weight, durability, and ease of cleaning are considerations. Having at least one generously sized mixing bowl is a non-negotiable part of your sourdough equipment for beginners.
Stainless Steel vs. Glass vs. Plastic Mixing Bowls
Each material has its pros and cons for sourdough mixing bowls. Stainless steel bowls are lightweight, durable, and non-reactive. They are easy to clean and don't retain odors. However, they don't offer visibility into the dough's development on the sides or bottom. Glass bowls are also non-reactive and heavy, providing stability during mixing. Their transparency is a great advantage, allowing you to see the dough's texture and development. However, they are fragile and can break easily.
Plastic bowls are the lightest and most affordable option. They are durable but can scratch over time and potentially retain odors or stains. While food-grade plastic is safe, some bakers prefer to avoid it for long fermentation periods. For a beginner, a large stainless steel or glass bowl is an excellent investment. Many bakers use a combination, perhaps a large stainless steel for initial mixing and a clear glass container for bulk fermentation to observe the dough.
Investing in a Large Mixing Bowl for Sourdough
Investing in a large mixing bowl is particularly important for sourdough because the dough typically undergoes a process called "bulk fermentation" where it rises and develops strength over several hours, often at room temperature. During this time, the dough can significantly increase in volume, sometimes doubling or more, and you'll perform several sets of "stretch and folds" or "coil folds" within the bowl.
A bowl that is too small makes these tasks difficult, messy, and can restrict the dough's ability to rise properly. For a typical ~500g flour loaf, a bowl with a 6 to 8-quart capacity provides ample space for mixing, stretching, folding, and observing the dough's expansion during bulk fermentation. This generous size is a key piece of sourdough equipment beginner advice often shared by experienced bakers.
Measuring Tools: Ensuring Accuracy in Your Sourdough Recipe
Accuracy in ingredient measurements is paramount in baking, and it becomes even more critical when working with sourdough. The hydration level (the ratio of water to flour) significantly impacts the dough's consistency, handling, and the final outcome of the bread. Unlike many conventional recipes that rely solely on volume measurements (cups and spoons), sourdough recipes are almost always based on weight for precision.
Therefore, having reliable measuring tools is a fundamental part of your sourdough starter equipment beginner guide. While measuring cups and spoons have their place for smaller additions or general cooking, a digital scale is indispensable for consistent sourdough results. Getting the flour and water quantities right is the first step to a successful loaf.
Digital Kitchen Scale: The Key to Consistent Sourdough Results
A digital kitchen scale is arguably the single most important piece of measuring equipment for sourdough baking. Flour density varies depending on how it's stored or scooped, making volume measurements (like cups) highly inconsistent. For example, one cup of all-purpose flour can weigh anywhere from 120 to 145 grams. This variation can drastically change the hydration of your dough.
Using a digital scale to weigh your flour, water, starter, and salt ensures you are using the exact ratios specified in the recipe every single time. This consistency is vital for replicating successful bakes and troubleshooting issues. Look for a scale that measures in grams and has a capacity of at least 1 kg (2.2 lbs), though 5 kg is better for weighing larger batches or bowls. Zeroing out (tarring) the weight of your bowl is a standard function on most scales.
Measuring Cups and Spoons: When to Use Them
While a digital scale should be your primary tool for measuring the main ingredients in sourdough (flour, water, starter, salt), measuring cups and spoons still have occasional uses. They can be helpful for measuring small additions like seeds, herbs, or olives if the recipe provides volume measurements for these.
They can also be used for general kitchen tasks related to baking, like portioning oil for greasing bowls or measuring out ingredients for a discard recipe. However, for the core sourdough ingredients, always defer to your digital scale if the recipe provides weights. Think of measuring cups and spoons as supplementary tools, not substitutes for the precision a scale offers in sourdough.
Dough Scraper: A Baker's Best Friend
A dough scraper is a simple yet incredibly versatile tool that quickly becomes indispensable for any sourdough baker. Sourdough dough, especially high-hydration dough, can be very sticky and difficult to handle. A dough scraper helps you manage this sticky dough on your work surface and in your mixing bowl without adding excessive amounts of flour, which can dry out the dough.
Adding a dough scraper to your sourdough equipment beginner kit will significantly improve your ability to work with dough. It's used for dividing dough, scraping it off surfaces, shaping loaves, and cleaning up sticky messes. There are typically two main types: a bench scraper and a bowl scraper, each with slightly different uses.
Bench Scraper vs. Bowl Scraper: Understanding the Difference
A bench scraper (also called a bench knife or dough cutter) is usually a rectangular tool with a flat metal or plastic blade and a handle. It's primarily used on a flat surface, like a counter or cutting board. It's excellent for dividing dough into portions, lifting sticky dough from the work surface, shaping loaves with tension, and scraping flour or dried dough off your bench. A metal bench scraper with a sturdy handle is highly recommended.
A bowl scraper is typically made of flexible plastic or silicone and has a curved edge designed to match the shape of a mixing bowl. Its main purpose is to scrape down the sides of the bowl, gathering every bit of dough and ensuring thorough mixing. It's also useful for gently folding ingredients or performing stretch and folds within the bowl. Both types are useful, but a bench scraper is often considered slightly more essential for handling the dough on the counter.
Using a Dough Scraper for Shaping and Handling Sticky Dough
One of the key skills in sourdough baking is learning to handle sticky dough effectively. A bench scraper is invaluable here. When shaping your loaf on a lightly floured surface, you can use the bench scraper to gently nudge and tuck the dough, building tension on the surface without your hands getting completely covered in sticky dough. It acts as an extension of your hand, providing structure and control.
For instance, when performing the final shaping, you might use the bench scraper to scoop the dough and flip it, or to pull it towards you to create surface tension. When the dough is very wet, using the scraper to help lift and fold during stretch and folds can also be easier than using just your hands. Mastering the use of a dough scraper is a technique that greatly benefits any sourdough equipment beginner.
Proofing Basket (Banneton): Shaping Your Sourdough Loaf
A proofing basket, commonly called a banneton, is a container used for the final rise (proofing) of your shaped sourdough loaf before baking. Its purpose is twofold: it helps the dough hold its shape as it expands during the final proof, and if the basket is lined with cane or cloth, it imparts a lovely pattern on the surface of the dough. Using a banneton is a standard practice for achieving a well-shaped, round or oval loaf.
Including a proofing basket in your sourdough equipment beginner setup is highly recommended for consistent loaf shape and structure. The basket supports the dough, preventing it from spreading outwards and encouraging it to rise upwards. This support is particularly important for high-hydration sourdough dough, which can be quite slack.
Round vs. Oval Bannetons: Choosing the Right Shape
Proofing baskets come in various shapes and sizes, with the most common being round (for a boule) and oval (for a batard). The shape you choose depends purely on the shape of loaf you prefer to bake. A round banneton is perfect for creating a classic boule, a round loaf that often fits well in a Dutch oven. An oval banneton is used for making batards, elongated loaves that are popular for slicing.
Most beginners start with either a medium round or a medium oval banneton, suitable for loaves made with 400-600 grams of flour. If you plan to bake in a round Dutch oven, a round banneton is a natural fit. If you prefer slicing longer pieces for sandwiches, an oval might be better. The choice is largely aesthetic and practical based on your baking vessel and serving preference.
Material Matters: Cane vs. Plastic Proofing Baskets
Traditional bannetons are made from woven cane (rattan). These baskets are typically lined with flour before use, which helps the dough release easily and creates the characteristic spiral pattern on the crust. Cane baskets also allow the dough to breathe slightly, which can help prevent a sticky surface.
Plastic bannetons are also available and are often easier to clean. Some plastic bannetons mimic the cane pattern, while others are smooth and require a cloth liner (usually linen or cotton) to prevent sticking and absorb a little surface moisture. Both types work effectively for supporting the dough during proofing. For a sourdough equipment beginner, either material is fine, though traditional cane is very popular. Remember to flour cane baskets generously!
Dutch Oven or Baking Stone: Achieving a Crispy Crust
One of the hallmarks of artisan sourdough bread is its thick, crispy crust. Achieving this at home requires creating a steamy environment around the loaf during the initial phase of baking. Professional ovens inject steam, but home bakers can replicate this effect using either a Dutch oven or a baking stone/steel with added steam. These tools are essential for getting that coveted oven spring and crust development.
Choosing your baking vessel is a critical decision in your sourdough equipment beginner journey. Both Dutch ovens and baking stones/steels have their proponents, and both can produce excellent results when used correctly.
Dutch Oven for Sourdough: Trapping Steam for Optimal Rise
Baking sourdough in a Dutch oven is perhaps the most popular method for home bakers, especially beginners. A heavy pot with a lid (like cast iron or enameled cast iron) is preheated in a very hot oven. When the shaped dough is placed inside and the lid is put on, the moisture evaporating from the dough is trapped within the pot. This creates a steamy micro-environment around the loaf.
This steam keeps the surface of the dough moist, allowing it to expand fully during the initial oven spring before the crust sets. After about 20-25 minutes, the lid is removed, allowing the crust to dry out and brown beautifully. A 5-quart or 6-quart round or oval Dutch oven is suitable for most standard loaf sizes (using 400-600g of flour). This method is relatively simple and consistently delivers great results, making it a top recommendation in any sourdough equipment beginner guide.
Baking Stone or Baking Steel: Alternatives for a Crispy Bottom
An alternative to a Dutch oven is using a preheated baking stone or baking steel. These are placed in the oven and get incredibly hot, providing intense heat transfer to the bottom of the loaf, which helps create a strong oven spring and a crispy bottom crust. When using a stone or steel, you need to create steam in the oven externally.
External steam can be generated by placing a tray of hot water or ice cubes on a rack below the stone/steel just before baking, or by spraying the oven walls with water. This method requires a bit more finessing to create and maintain sufficient steam compared to the contained environment of a Dutch oven. However, a baking stone or steel can accommodate larger or multiple loaves compared to most Dutch ovens. For a sourdough equipment beginner, the Dutch oven method is often considered easier for consistent steam generation.
Bread Lame (Scoring Knife): Creating Beautiful Sourdough Designs
Before baking, sourdough bread is typically "scored" with a sharp blade. Scoring involves making cuts on the surface of the dough. This isn't just for decoration; it serves a crucial purpose. As the loaf bakes and expands rapidly in the hot oven (oven spring), the scores act as vents, directing where the dough will tear and expand. Without scoring, the crust would tear unpredictably, often along the sides or bottom.
A bread lame (pronounced "lahm") is a specific tool designed for scoring dough. It typically consists of a handle with a razor blade attached. Using a sharp blade allows you to make clean cuts that open up beautifully during baking. Adding a lame to your sourdough equipment beginner list is essential for controlling oven spring and achieving those signature artistic patterns on your crust.
Why Scoring Your Sourdough Bread is Important
Scoring is vital for several reasons. Firstly, it controls the expansion of the loaf during oven spring. The dough will expand most significantly where it is weakest, and scoring creates deliberate weak points. This results in a controlled, upward expansion rather than sideways tearing. Secondly, the pattern of the scores influences the final shape and appearance of the loaf.
Beyond function, scoring allows for creativity and personal expression. Bakers use different patterns – a single bold slash, a series of parallel lines, or intricate designs – to create unique loaves. Mastering scoring takes practice, but even simple cuts will dramatically improve the look and rise of your sourdough bread. It's a skill that goes hand-in-hand with having the right tool, the bread lame.
Different Types of Bread Lames and How to Use Them
Bread lames come in various forms. The most common type is a stick lame, which holds a standard double-edged razor blade, often slightly curved. The curve allows for easier shallow cuts on the rounded surface of the dough. Some lames have fixed blades, while others allow you to replace the blade when it dulls (which you should do frequently for sharp cuts). Another type is a curved lame (often called a "grignette"), where the blade is held in a fixed, curved position, ideal for creating ears or overlaps on your scores.
To use a lame, hold it at a shallow angle (around 30 degrees) to the surface of the dough and make confident, fluid cuts. For a single score, go about 1/2 inch deep. For multiple parallel scores, shallower cuts (about 1/4 inch) are usually sufficient. Always use a fresh, sharp blade for clean cuts. A dull blade will drag and tear the dough instead of slicing it cleanly.
Optional Sourdough Equipment: Enhancing Your Baking Experience
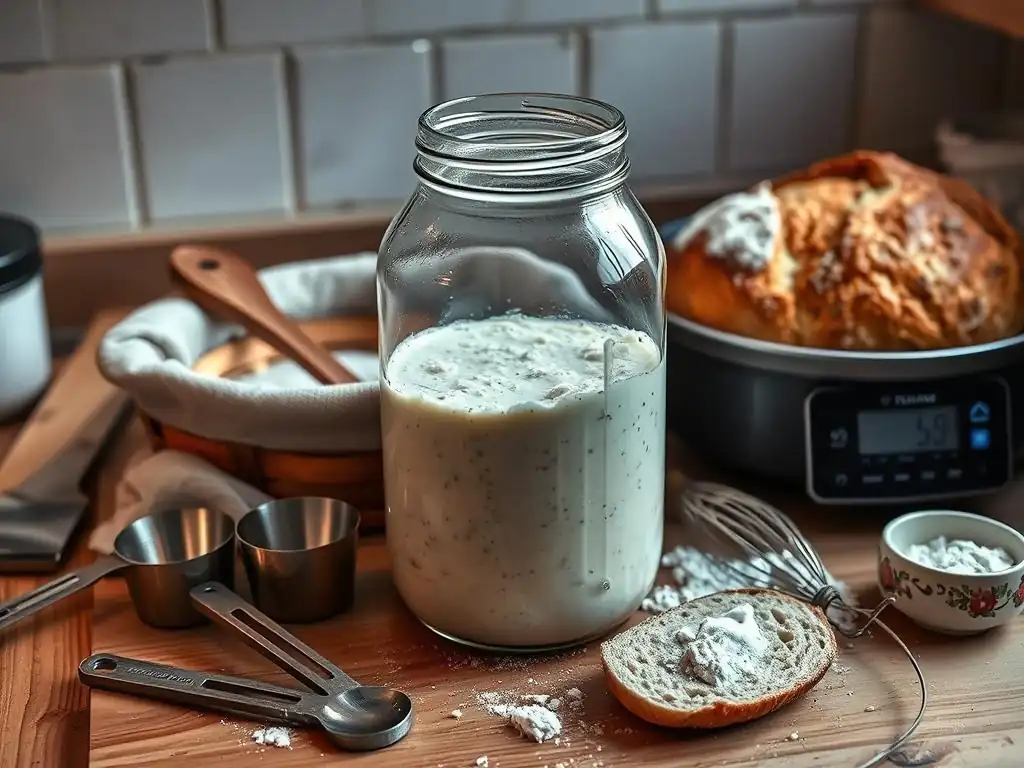
While the items listed above cover the essentials for getting started with sourdough, there are several other tools that can make the process easier, more efficient, or simply more enjoyable. These are not strictly necessary for your first loaf but are worth considering as you become more comfortable and look to refine your techniques. Think of these as helpful upgrades in your sourdough equipment beginner journey.
These optional tools range from those that assist with dough preparation to those that improve the final cooling process. They can save time, reduce manual effort, or help achieve slightly better results with specific aspects of the bake.
Stand Mixer: For Hands-Free Dough Mixing
Mixing sourdough by hand, especially high-hydration dough, can be a workout. While hand mixing (like the stretch and fold technique) is excellent for developing gluten and understanding your dough, a stand mixer can take the effort out of the initial mixing and kneading phase. Fitted with a dough hook, a stand mixer can develop gluten efficiently with minimal effort on your part.
For bakers who make large batches, have physical limitations, or simply prefer a less hands-on approach to mixing, a stand mixer can be a valuable addition to their sourdough equipment. However, many purists argue that hand mixing allows for a better feel for the dough and is perfectly sufficient for developing the necessary gluten strength for sourdough. A robust mixer with enough power to handle stiff dough is recommended if you choose this route.
Dough Whisk (Danish Dough Whisk): Gentle Mixing Technique
A Danish dough whisk is a unique tool specifically designed for mixing wet doughs and batters. It consists of a long handle with a series of wire loops at the end. Its open structure allows it to cut through thick dough and incorporate ingredients quickly and efficiently without overworking the mixture or causing it to clump up like a solid spoon might.
This whisk is particularly effective for the initial mixing of flour and water (the autolyse step) and for incorporating the starter and salt into the dough. It mixes everything together with minimal sticking and makes it easier to achieve a shaggy, hydrated mass before the dough development phase begins. It's a relatively inexpensive tool that many sourdough bakers find incredibly useful for gentle yet effective mixing.
Cooling Rack: Preventing Soggy Bread
After spending hours mixing, proofing, and baking your sourdough loaf, the last thing you want is a soggy bottom crust. Placing a hot loaf directly onto a flat surface will trap steam, causing the bottom to become damp and soft. A cooling rack allows air to circulate around the entire loaf, enabling steam to escape evenly as the bread cools.
Using a wire cooling rack is essential for achieving and maintaining that desirable crispy crust all around your loaf. It also allows the internal structure of the bread to set properly as it cools. While you might have a cooling rack already, ensuring you have one sturdy enough to support a heavy loaf of sourdough is worthwhile. It's a simple piece of sourdough equipment that makes a significant difference in the final texture of your bread.
Basic Sourdough Bread Recipe Using Your New Equipment
Now that you're familiar with the essential sourdough equipment beginner guide, let's put those tools to work with a simple and reliable sourdough bread recipe. This recipe uses the weight measurements you'll achieve with your digital scale and utilizes the other essential tools like your mixing bowl, proofing basket, and baking vessel.
This recipe is designed to be straightforward for beginners, focusing on the core techniques without overly complex steps. It yields one standard loaf, perfect for practicing your new skills and equipment use. Remember that sourdough results can vary based on your starter's activity and ambient temperature, so observe your dough rather than just following times rigidly.
Ingredients for Our Beginner-Friendly Sourdough Recipe
- 100 grams active sourdough starter (fed 4-12 hours prior, bubbly and doubled)
- 350 grams warm water (around 80-85°F or 27-30°C)
- 500 grams strong bread flour (or a mix of bread flour and 10-20% whole wheat)
- 10 grams fine sea salt
These ingredient weights are standard for a medium-sized loaf and are easily measured with your digital kitchen scale. Using warm water helps kickstart the fermentation process, especially if your kitchen is cool. Bread flour is recommended for its higher protein content, which helps develop a strong gluten network.
Step-by-Step Instructions: Baking Sourdough with Ease
- Mix (Autolyse): In your large mixing bowl, weigh out the warm water and active sourdough starter. Stir briefly with your non-reactive spoon or dough whisk. Add the flour and mix with your hands, dough whisk, or bowl scraper until no dry clumps remain. The dough will be shaggy. Cover the bowl and let rest for 30-60 minutes. This step (autolyse) allows the flour to hydrate.
- Add Salt: Weigh the salt and sprinkle it over the dough. Dimple it in with wet fingers, then mix and squeeze the dough gently for 2-3 minutes to incorporate the salt evenly. The dough might feel a bit looser.
- Bulk Fermentation with Folds: Over the next 2-4 hours (depending on room temperature), perform 3-4 sets of stretch and folds or coil folds every 30-45 minutes. Lightly wet your hands before each set. For stretch and folds, grab one side of the dough, stretch it up, and fold it over the center. Rotate the bowl and repeat 3 more times. For coil folds, gently lift the dough from the center and let the ends tuck underneath. The dough will become smoother and stronger with each set.
- Rest and Shape: After the folds, let the dough rest undisturbed until it has visibly increased in volume (roughly 30-60% increase, depending on temperature and starter activity) and looks bubbly. This could take 1-3 more hours. Lightly flour your work surface and gently scrape the dough out using your bench scraper. Perform a pre-shape into a loose ball or oval and let rest for 20 minutes. Then, perform the final shape, building tension on the surface.
- Proof (Retard): Lightly flour your proofing basket (especially if cane) or line a bowl with a floured cloth. Gently place the shaped dough seam-side up into the basket. Cover the basket with plastic wrap or a damp towel and refrigerate for 8-12 hours (or up to 24 hours). Cold proofing develops flavor and makes the dough easier to score.
- Preheat Oven & Baking Vessel: About 45-60 minutes before baking, place your Dutch oven (with lid) into your oven and preheat to 450°F (230°C). If using a baking stone/steel, place it in the oven and preheat, preparing your steam setup.
- Score & Bake: Carefully remove the hot Dutch oven from the oven (use oven mitts!). Gently invert the cold dough from the proofing basket onto a piece of parchment paper or directly into the hot pot. Use your bread lame to make your desired scores. Lower the dough into the Dutch oven using the parchment paper as handles. Place the lid on.
- Bake Covered: Bake with the lid on for 20 minutes. The steam trapped inside will help the loaf expand.
- Bake Uncovered: Carefully remove the lid. Reduce the oven temperature slightly if your crust is browning too fast (e.g., to 425°F / 220°C). Continue baking uncovered for another 20-25 minutes, or until the crust is deep golden brown and the internal temperature reaches 205-210°F (96-99°C) when checked with a thermometer.
- Cool: Carefully remove the bread from the Dutch oven and transfer it immediately to a wire cooling rack. Let it cool completely for at least 2-3 hours before slicing. Slicing too early can result in a gummy interior.
Tips for Success: Mastering Your First Sourdough Loaf
- Observe Your Starter: Learn to recognize when your starter is active and ready – typically when it has doubled or tripled and is full of bubbles, usually 4-12 hours after feeding.
- Room Temperature Matters: Pay attention to the temperature of your kitchen. Warmer temperatures speed up fermentation; cooler temperatures slow it down. Adjust your bulk fermentation time accordingly.
- Don't Add Too Much Flour: Sourdough is often a wet dough. Resist the urge to add excessive flour during mixing or shaping, as this can make the bread dense and dry. Use water on your hands or a bench scraper to handle sticky dough.
- Develop Gluten: Don't skip the stretch and folds or coil folds. These steps are crucial for building the dough's structure and creating that airy crumb.
- Trust the Proofing Basket: The banneton is your friend! It provides the necessary support during the final proof.
- Handle Hot Equipment Carefully: Always use oven mitts when handling a preheated Dutch oven or baking stone.
- Be Patient with Cooling: Allowing the bread to cool completely on a rack is essential for texture and flavor development.
Maintaining Your Sourdough Equipment: Cleaning and Storage
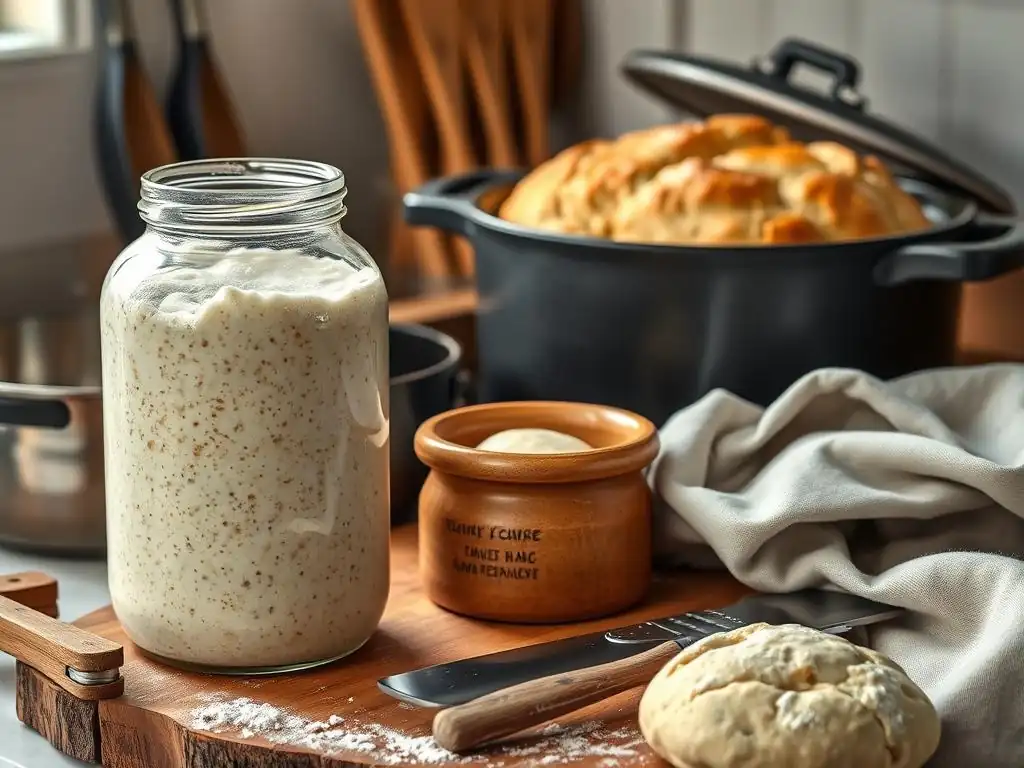
Proper care of your sourdough equipment ensures its longevity and helps maintain a hygienic baking environment. Cleaning tools that come into contact with your starter or dough is crucial to prevent unwanted mold or bacteria from interfering with your sourdough culture or future bakes. Simple cleaning routines will keep your gear in top condition.
Regular cleaning and appropriate storage are important steps in your sourdough starter equipment beginner journey. Taking a few moments after each use will save you time and hassle in the long run and protect your investment in your baking tools.
Proper Cleaning Techniques for Sourdough Equipment
- Sourdough Starter Jar: Wash with hot, soapy water after transferring your starter or when it needs cleaning. Rinse thoroughly to remove all soap residue, as soap can inhibit starter activity. You can also sanitize it periodically by pouring boiling water into it. Ensure it's completely dry before adding starter back in.
- Mixing Bowls, Spoons, Scoops, Dough Scrapers: Wash immediately after use with warm, soapy water. Dried dough is much harder to remove. Use a sponge or brush to scrub away any residue. Dry completely before storing.
- Proofing Basket (Banneton): For cane bannetons, do not wash with water unless absolutely necessary (e.g., mold). After use, let any residual flour dry completely, then brush it out vigorously with a stiff brush. This removes excess flour and dough bits. If washing is required due to mold, scrub with a stiff brush and hot, soapy water, rinse very well, and let it dry completely in a warm, airy spot, ideally in sunlight. For plastic bannetons or cloth liners, wash with soap and water and dry thoroughly.
- Dutch Oven / Baking Stone/Steel: Follow the manufacturer's instructions. Cast iron Dutch ovens require seasoning. Enameled cast iron and baking stones/steels usually just need to be wiped clean once cool. Avoid soap on seasoned cast iron or porous stones. Scrape off any baked-on bits.
Storing Your Equipment for Longevity
Store your sourdough equipment in a clean, dry place. Ensure items like bannetons are completely dry before storing to prevent mold growth. Keep metal items like bench scrapers or lames dry to prevent rust. Store razor blades for your lame safely.
Proper storage prevents damage, keeps your tools organized, and ensures they are ready for your next baking session. Storing equipment correctly is a small habit that contributes significantly to the ease and enjoyment of your sourdough baking practice.
Conclusion: Embark on Your Sourdough Journey with Confidence
Frequently Asked Questions
What are the absolute essential pieces of equipment for starting a sourdough starter?
You'll need a clean glass or plastic jar to house your starter, a digital kitchen scale for accurate measurements, and a non-reactive spoon or spatula for stirring.
Can I use metal bowls or utensils when working with sourdough starter?
It's best to avoid metal as it can react with the acidic environment of the starter, potentially affecting its flavor and activity. Stick to glass, plastic, or wood.
How important is a kitchen scale for making sourdough?
Extremely important! Sourdough baking relies on precise ratios of flour and water. A digital kitchen scale ensures consistent results and helps you maintain the starter's health.
What size jar is best for a sourdough starter?
A jar that holds about 1-2 quarts is ideal. It gives the starter room to expand as it ferments and makes it easier to manage.
Do I really need a proofing basket (banneton) right away?
Not necessarily when just starting the starter. A proofing basket is primarily for shaping the final loaf. You can use a bowl lined with a floured cloth initially.
Final Reflection: The Humble Beginnings of Sourdough Mastery
The journey to baking your own sourdough bread begins not in the oven, but with the right tools. Mastering the art of sourdough isn't about expensive gadgets; it's about understanding the fundamental equipment that allows the magic of fermentation to unfold. This guide has highlighted the essential pieces, proving that even on a budget, you can embark on this rewarding culinary adventure.
The enduring appeal of sourdough lies not just in the delicious, tangy loaf it produces, but in the process itself. It's a connection to a time-honored tradition, a testament to patience and precision. Bread making is a metaphor for life. You have to nurture it, feed it, and be patient. The rewards are immeasurable.
This quote, though not specifically about sourdough, perfectly encapsulates the experience of cultivating a starter and baking with it. The act of nurturing a living organism, watching it grow and thrive, mirrors the growth and development we experience in our own lives.
Now, it's your turn. Don't be intimidated by the seemingly complex world of sourdough. Gather your essential equipment, embrace the process, and allow yourself to be surprised by the incredible results. The journey might have its challenges, but the satisfaction of biting into a loaf you've crafted from scratch, from a starter you've nurtured, is an unparalleled reward. Start your sourdough journey today – your taste buds will thank you.
Unleash Your Inner Baker: Start Your Sourdough Journey Today!
Thanks for taking the time to explore the world of sourdough with us! We hope you now feel confident and equipped to embark on this rewarding baking adventure. Ready to get started?
- Begin your sourdough starter today! Follow the recipe in the article and watch your own unique culture come to life. This is the cornerstone of your sourdough success.
- Share your sourdough journey! Post a picture of your starter or your first loaf on social media using #BakeWithEaseSourdough and inspire others.
- Explore our other sourdough recipes and tips on BakeWithEase.com— discover the endless possibilities of this ancient baking technique!
What will be your first sourdough creation? Let us know in the comments below!