
Basic Sourdough: Troubleshooting Sticky Dough Simply

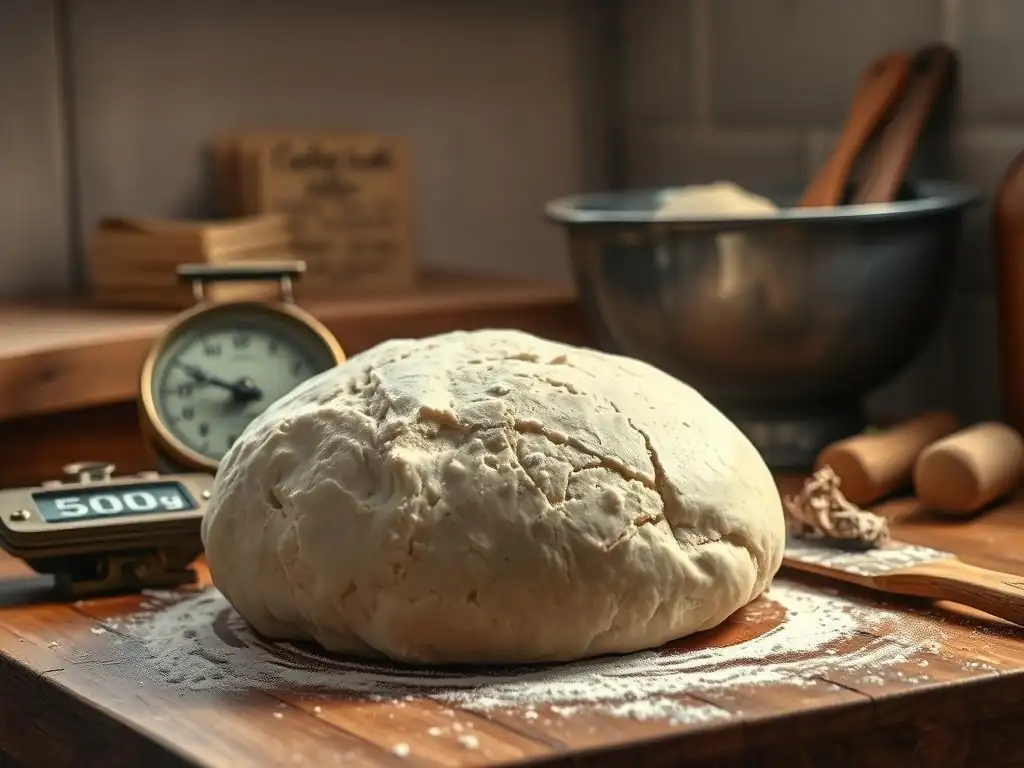
Welcome to BakeWithEase, your companion on the journey to baking brilliance! Ever wrestled with a stubbornly sticky sourdough? You're not alone! This article dives deep into sticky sourdough dough troubleshooting tips, offering simple solutions to common problems. Discover the secrets to a perfectly workable dough, and unlock the potential for artisan-quality loaves from your own kitchen. Let's get baking!
- Sourdough: Troubleshooting Sticky Dough - Bake Like a Pro
- Understanding Sticky Sourdough Dough
- Sourdough Dough Hydration: Key to Success
- Troubleshooting Sticky Sourdough Dough: Step-by-Step
- Preventing Sticky Sourdough Dough
- Tools for Handling Sticky Dough
- Common Mistakes with Sticky Dough
- Rescuing Sticky Sourdough Dough
- Sourdough Troubleshooting Chart: Sticky Dough Solutions
- Conclusion: Mastering Sourdough Baking
-
Frequently Asked Questions
- What are the common causes of sticky sourdough dough?
- How can I adjust the hydration level if my sourdough dough is consistently sticky?
- Is the type of flour I use important for sourdough success, especially regarding stickiness?
- What are some techniques to improve gluten development and reduce stickiness in sourdough?
- What is the role of temperature in managing sticky sourdough dough?
- Final Reflection: The Unexpected Joys of a Sticky Situation
- Unlock Your Sourdough Success!
Sourdough: Troubleshooting Sticky Dough - Bake Like a Pro
Understanding Sticky Sourdough Dough
Common Causes of Sticky Sourdough Dough
One of the most frequent culprits behind sticky sourdough dough is often higher hydration levels than the baker is accustomed to or that the flour can handle. While high hydration (meaning a higher percentage of water relative to flour by weight, often 75% or more) can lead to an open, airy crumb, it inherently makes the dough more challenging to work with.
For instance, a dough with 80% hydration will feel significantly wetter and stickier than one at 65%, requiring different handling techniques and patience. Furthermore, insufficient gluten development is a major factor; if the network of gluten proteins isn't strong enough to hold the water, the dough remains slack, wet, and adheres readily to surfaces.
Another significant cause relates directly to your ingredients and process. Using flour with lower protein content, such as an all-purpose flour around 10-11% protein instead of a bread flour with 12-14%, means there's less protein available to form that strong gluten structure needed to manage hydration. Additionally, improper fermentation timing can contribute to stickiness.
Under-fermented dough hasn't had enough time for the gluten to fully develop and strengthen through the yeast activity. Conversely, severely over-fermented dough can begin to break down, losing structure and becoming excessively sticky and difficult to handle. Temperature also plays a role; a warmer kitchen or warmer water can speed up fermentation, potentially leading to a stickier situation if not monitored closely.
The Challenges of Handling High-Hydration Dough
Handling high-hydration sourdough dough presents unique challenges primarily due to its fluidity and reduced structure compared to lower hydration doughs. Imagine trying to shape a dough that feels closer to a thick batter than a firm mass; it spreads easily, resists holding tension, and sticks tenaciously to hands, surfaces, and tools.
This makes traditional kneading methods difficult and requires bakers to adopt techniques like stretch and folds or coil folds performed directly in the bowl or on a lightly wet surface, rather than heavy flouring. These techniques build strength gradually without incorporating excessive flour, which would alter the hydration ratio.
Furthermore, high-hydration doughs require careful management during bulk fermentation and shaping. Because they are slacker, achieving good surface tension during shaping can be tricky. Without adequate tension, the loaf struggles to hold its shape and achieve a good oven spring. Proofing also becomes more critical; they often benefit from cold fermentation to firm up and become easier to handle. Understanding these challenges is the first step in mastering sticky sourdough dough troubleshooting tips and developing the necessary skills to work with wetter doughs effectively.
Sourdough Dough Hydration: Key to Success
Importance of Hydration in Sourdough Baking
Hydration, the ratio of water to flour, is paramount in sourdough baking as it directly influences the dough's texture, the crumb structure of the final loaf, and the ease of handling. Higher hydration levels generally lead to a more open, airy crumb with larger holes, which is often desired in artisanal sourdough. The increased water content allows the dough to expand more freely during fermentation and baking.
However, this comes at the cost of increased stickiness and a more challenging dough to work with. A dough at 70% hydration will produce a different result and require different handling than one at 60% or 85%.
Beyond the crumb structure, hydration also impacts the fermentation process itself. Water is essential for activating the enzymes in the flour and enabling the yeast and bacteria in the sourdough starter to thrive and produce gases. Sufficient hydration ensures the starter can effectively break down starches and proteins, contributing to flavor development and dough extensibility. Balancing desired crumb characteristics with manageable dough consistency is a key skill, and understanding how hydration affects stickiness is central to effective sticky sourdough dough troubleshooting tips.
Flour Type and its Impact on Dough Stickiness
The type of flour used is a critical determinant of how sticky your sourdough dough will be, even at the same hydration level. Different flours have varying protein contents and absorption capabilities. Bread flour, with its higher protein content (typically 12-14%), can absorb more water than all-purpose flour (around 10-11% protein) while still forming a manageable dough. Using all-purpose flour in a recipe designed for bread flour at the same hydration will almost certainly result in a much stickier, slacker dough because the lower protein struggles to build a strong enough gluten network to hold the water.
Whole wheat and other whole grain flours also significantly impact stickiness. While they often have high protein content, the bran and germ particles can interfere with gluten development and absorb water differently. Whole wheat flour, for example, often requires more water initially but can still feel stickier because the bran cuts through the gluten strands, weakening the structure.
Understanding the absorption properties of your specific flour brand and type is vital when adjusting hydration or applying sticky sourdough dough troubleshooting tips. If your usual recipe is too sticky, trying a stronger bread flour or slightly reducing hydration might be necessary.
Water Temperature's Influence on Dough Consistency
The temperature of the water used in your sourdough dough significantly impacts the initial consistency and the rate of fermentation, both of which can affect stickiness. Using warmer water (say, 80-85°F or 27-29°C) helps activate the starter and enzymes more quickly, jumpstarting gluten development and fermentation. This can initially make the dough feel less shaggy and come together faster. However, warmer water leads to faster fermentation overall.
Conversely, using colder water (around 65-70°F or 18-21°C) slows down the initial activity. The dough might feel slightly stiffer at first, but the slower fermentation gives you more time to work with the dough during bulk fermentation and perform stretch and folds to build strength gradually. If your dough is consistently too sticky early in the process, and your kitchen is warm, reducing the water temperature slightly can help give you more control and prevent the dough from becoming unmanageably sticky too quickly. This is a simple yet effective tactic among various sticky sourdough dough troubleshooting tips.
Troubleshooting Sticky Sourdough Dough: Step-by-Step
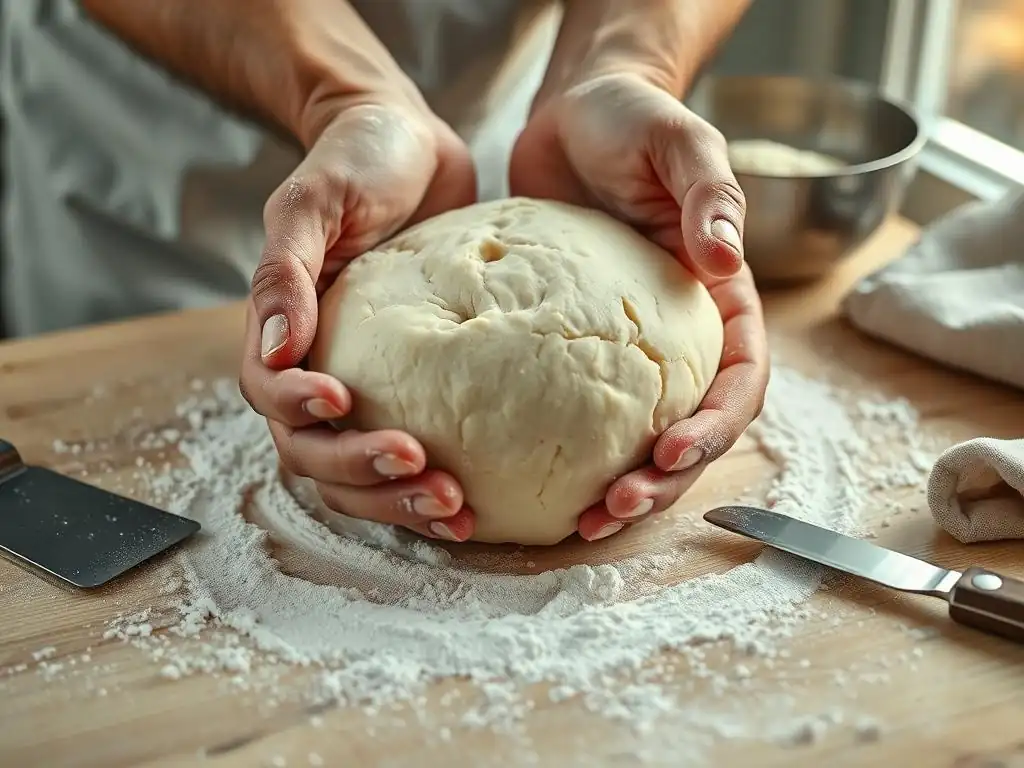
Tip 1: Adjusting Hydration Levels
When faced with sticky sourdough dough, the most direct adjustment you can make, especially if you're using a new recipe or flour, is to slightly reduce the hydration. This involves using less water relative to the amount of flour specified. If a recipe calls for 500g flour and 400g water (80% hydration) and your dough is consistently too sticky to handle, consider reducing the water to 385g or 375g in your next bake. This brings the hydration down to 77% or 75%, respectively, which can make a noticeable difference in manageability while still allowing for a relatively open crumb.
Implementing this tip requires precision, ideally using a digital scale to weigh all ingredients. Reduce the water content gradually, perhaps by just 2-3% of the flour weight initially, as suggested. For a recipe with 500g of flour, this means reducing the water by 10g to 15g. Make this change in your subsequent bake, rather than adding more flour mid-mix, which can throw off the balance.
Observe how the dough handles throughout the process. If it's still too sticky, you can make a further small reduction in the next batch. This systematic approach is a fundamental sticky sourdough dough troubleshooting tip.
Reduce Water Content Gradually
Example: Reduce hydration by 2-3% initially
When you find your standard recipe results in overly sticky sourdough dough, a practical starting point for troubleshooting is to reduce the water content by a small percentage of the flour weight. For example, if your recipe uses 500 grams of flour, reducing the hydration by 2% means using 10 grams less water (500g * 0.02 = 10g). If the original recipe called for 375 grams of water (75% hydration), you would reduce it to 365 grams.
Similarly, a 3% reduction on 500 grams of flour is 15 grams of water. Reducing the water from 375 grams to 360 grams changes the hydration to 72%. These small adjustments, made consistently over a few baking sessions, allow you to find the hydration level that works best with your specific flour, environment, and handling style, making the dough much more manageable without drastically changing the final loaf characteristics. This gradual approach is a core component of effective sticky sourdough dough troubleshooting tips.
Tip 2: Mastering the Autolyse Technique
The autolyse technique, involving mixing just the flour and water from your recipe and letting it rest before adding the starter and salt, is an incredibly effective method for managing sticky sourdough dough. This resting period, typically ranging from 20 minutes to an hour (sometimes longer), allows the flour to fully hydrate evenly. More importantly, enzymatic activity begins to break down proteins, and the gluten network starts to form without any mechanical work from kneading.
By allowing the dough to autolyse, you give the gluten a head start. When you later add the starter and salt and begin kneading or folding, the dough will already have some structure and will be less shaggy and often less sticky than if you mixed everything together from the start. This makes subsequent handling much easier and contributes to better gluten development overall, which is crucial for dough strength and manageability. Incorporating autolyse is a powerful sticky sourdough dough troubleshooting tip.
Benefits of Autolyse for Dough Strength
The primary benefit of the autolyse technique is the significant boost it gives to dough strength and extensibility. During the rest period, enzymes called proteases begin to break down proteins, while amylase breaks down starches into sugars that will feed the starter later. More critically, without the presence of salt (which tightens the gluten) or the starter (which introduces acidity), the gluten-forming proteins can link up more easily and relax.
This relaxation and initial gluten formation makes the dough more pliable, easier to stretch without tearing, and less resistant when you do begin kneading or folding. It effectively preconditions the dough, making the subsequent steps required to build a strong gluten network much more efficient and resulting in a dough that holds its shape better and is less prone to collapsing or becoming excessively sticky during fermentation.
Optimal Autolyse Duration
The optimal duration for the autolyse depends on the type of flour used and the baker's preference, but a common range is between 20 minutes and 1 hour at room temperature. For doughs containing a significant amount of whole wheat or other whole grains, a longer autolyse of 45 minutes to 1.5 hours can be beneficial, as these flours take longer to hydrate fully.
For doughs made primarily with white bread flour, 20 to 30 minutes is often sufficient to see significant benefits in dough handling. Some bakers even perform a 'fermentolyse,' where the starter is added with the flour and water during the initial mix, but salt is withheld for the resting period. Experimenting with durations within this range (e.g., trying 30 min vs. 60 min) can help you find what works best for your recipe and workflow as part of your sticky sourdough dough troubleshooting tips.
Tip 3: Proper Gluten Development Through Kneading
Proper gluten development is absolutely fundamental to managing sticky sourdough dough. Gluten is the protein network that gives dough its structure and elasticity, allowing it to trap the gases produced by the starter and rise. If this network is weak or underdeveloped, the dough will remain slack, sticky, and unable to hold its shape, regardless of hydration level. Adequate kneading or folding builds and strengthens this network, transforming a shaggy, sticky mass into a smooth, elastic dough.
Think of gluten development as building a microscopic framework. The more you work the dough (up to a point), the more the gluten strands align and connect, creating a strong, stretchy film. This film is what gives the dough tension and allows it to be handled without sticking excessively. Insufficient development is a prime reason for overly sticky dough, making effective sticky sourdough dough troubleshooting tips often focus heavily on this stage.
Kneading's Role in Sourdough Structure
Kneading, whether manual or mechanical, or through gentle folding techniques, aligns the gluten proteins (glutenin and gliadin) present in the flour and facilitates the formation of strong, interconnected strands. This process develops the dough's elasticity, allowing it to be stretched without tearing, and its extensibility, allowing it to expand. A well-developed gluten structure provides the necessary support for the dough to hold its shape during bulk fermentation, proofing, and baking.
Without sufficient kneading or folding, the gluten network remains weak and disorganized. The dough lacks tension, feels heavy and dense, and, crucially, remains very sticky because there isn't a strong enough structure to contain the water. Building this structure is non-negotiable for achieving a well-risen loaf and is a core part of sticky sourdough dough troubleshooting tips.
Effective Kneading Techniques: Stretch and Fold, Coil Folds
For high-hydration sourdough, traditional aggressive kneading on a floured surface can incorporate too much extra flour, altering the recipe balance. Instead, techniques like stretch and folds or coil folds, performed in the bowl or on a lightly wet surface, are highly effective. Stretch and folds involve wetting your hands, grabbing one side of the dough, stretching it upwards gently, and folding it back over the center. Rotate the bowl and repeat this process around the dough (typically 4 times per set).
Coil folds are similar but involve wetting hands, lifting the dough from the center with both hands, allowing the ends to tuck under, and then gently placing it back in the container. These techniques build strength gradually over several sets performed during the initial hours of bulk fermentation (e.g., 3-5 sets spaced 30-45 minutes apart). They develop gluten while minimizing stickiness and preserving the airy structure. Mastering these techniques is essential for sticky sourdough dough troubleshooting tips when dealing with wet doughs.
Identifying a Well-Kneaded Dough
You can identify a well-kneaded or sufficiently folded dough using the "windowpane test." Gently pull a small piece of dough from the main mass and slowly stretch it between your fingers. If the dough can be stretched thin enough to see light through it without tearing easily, it has developed a strong gluten network. It should feel smooth, elastic, and less sticky than it was initially.
Other indicators include the dough pulling away cleanly from the sides of the bowl (if using a mixer) or forming a taut, smooth ball that holds its shape (if hand kneading). With stretch and folds, the dough will become progressively smoother, less shaggy, and more resistant to stretching with each set of folds. It will also hold its shape better between folds. Achieving this level of development is a key milestone in sticky sourdough dough troubleshooting tips.
Tip 4: Strategic Flour Usage
Using flour strategically, rather than excessively, is key when dealing with sticky sourdough dough. It's tempting to dump copious amounts of flour onto your work surface and hands, but this changes the hydration ratio of the dough, potentially resulting in a drier loaf than intended. Instead, use just enough flour to prevent sticking where and when necessary.
This means lightly dusting your work surface and hands only when you need to transfer or shape the dough, not throughout the entire process. For techniques like stretch and folds or coil folds, using wet hands or a lightly wet surface is often preferable to using flour, as it prevents sticking without incorporating extra dry flour into the dough's interior. Mindful flour usage is an important aspect of effective sticky sourdough dough troubleshooting tips.
Flour Your Work Surface and Hands
When it's time to transfer your dough from the bulk fermentation container or shape your loaf, a light dusting of flour on your work surface and hands becomes essential to prevent the dough from adhering completely. The key word here is light. You want just enough flour to create a barrier. Sprinkle a small amount (perhaps a tablespoon or two) onto your clean surface and spread it thinly.
Similarly, rub a small amount of flour onto your hands. This creates a thin barrier that helps you manipulate the sticky sourdough dough without it welding itself to you. Remember, you're aiming to reduce sticking, not to incorporate a significant amount of additional flour into the dough itself. This technique allows you to maintain control during shaping, a critical step in sticky sourdough dough troubleshooting tips.
Choosing the Right Flour for Dusting
The type of flour you choose for dusting can also make a difference. While you can use the same flour you used for the dough, some bakers prefer using rice flour, especially for dusting banneton baskets. Rice flour is gluten-free, meaning it won't absorb moisture from the dough surface and become gummy, which helps prevent sticking during proofing.
For dusting surfaces and hands during shaping, bread flour or all-purpose flour works fine, provided you use it sparingly. Some recipes might suggest semolina flour, which has a coarser texture that acts like tiny ball bearings, helping the dough slide more easily. Experimenting with different dusting flours is a small but potentially helpful step in your sticky sourdough dough troubleshooting tips arsenal.
Tip 5: Cold Fermentation for Dough Strength
Cold fermentation, or retarding the dough in the refrigerator, is a powerful technique for managing sticky sourdough dough and improving its handling characteristics. After the bulk fermentation phase (or sometimes after shaping), placing the dough in a cold environment (typically 38-40°F or 3-4°C) significantly slows down yeast activity while allowing enzymatic activity (like protease action) to continue breaking down proteins slowly.
This slow breakdown over a longer period (often 8-24 hours or even longer) further develops flavor and, crucially, improves the dough's structure and manageability. The cold temperature firms up the dough, making it much less sticky and easier to handle, score, and transfer for baking. This is particularly beneficial for high-hydration doughs that are otherwise challenging to work with at room temperature. Incorporating cold fermentation is a highly recommended sticky sourdough dough troubleshooting tip.
Advantages of Retarding Sourdough Dough
Retarding sourdough dough in the refrigerator offers multiple advantages. Flavor development is enhanced as the long, slow fermentation produces more complex organic acids. The acidity also helps strengthen the gluten network over time. From a handling perspective, the primary advantage is the significant reduction in stickiness and increased firmness.
A cold dough is much easier to score cleanly before baking, allowing for better oven spring. It also holds its shape better when transferred to a hot baking surface. For bakers struggling with sticky, slack doughs, cold fermentation is often the key to achieving better control and more consistent results. It's a cornerstone among effective sticky sourdough dough troubleshooting tips.
Time and Temperature for Cold Fermentation
Typical cold fermentation times range from 8 hours to up to 48 hours, or even longer depending on the recipe and desired outcome. A standard duration is 12-24 hours at refrigerator temperatures of 38-40°F (3-4°C). Shorter times (8-12 hours) will still provide some dough firming benefits, while longer times (24-48+ hours) will yield more complex flavors and a more developed structure.
The exact time will depend on your specific starter's activity, the hydration of your dough, and your refrigerator's temperature. Experimentation is key to finding the cold fermentation duration that best suits your schedule and results in a dough consistency you find manageable and yields the flavor profile you enjoy. This flexibility makes it a versatile tool in sticky sourdough dough troubleshooting tips.
Preventing Sticky Sourdough Dough
Accurate Ingredient Measurements
Preventing sticky sourdough dough starts with precision, especially when it comes to measuring ingredients. Baking is a science, and slight deviations in the water-to-flour ratio can drastically impact dough consistency. Relying on volume measurements (cups and spoons) is highly inaccurate for baking, as flour can be packed differently, leading to significant variations in weight. For example, a cup of flour can weigh anywhere from 120g to 150g depending on how it's scooped and leveled.
Using a digital kitchen scale to weigh all ingredients, especially flour and water, is the most reliable way to ensure you are hitting the intended hydration level of your recipe. This consistency allows you to accurately assess if a recipe's hydration works for you or if you need to make adjustments in future bakes. Accurate measurement is the foundational step in preventing issues and applying sticky sourdough dough troubleshooting tips effectively.
Selecting High-Quality Flour
The quality and type of flour you use have a profound impact on dough hydration and stickiness. As mentioned earlier, flours vary in protein content and absorption capabilities. Using a high-quality bread flour with a protein content of 12-14% provides a stronger gluten network capable of handling higher hydration levels without becoming excessively sticky. These flours are designed for yeasted and sourdough bread making.
Cheaper or lower-protein flours may not absorb water as efficiently or build sufficient structure, leading to a perpetually sticky dough even at moderate hydration. While experimenting with different flours is part of the baking journey, understanding that flour quality is a key variable helps you prevent sticky dough issues from the outset. Choosing a reliable, strong flour is a proactive sticky sourdough dough troubleshooting tip.
Maintaining an Active Sourdough Starter
An active, vigorous sourdough starter is essential for successful sourdough baking and plays a role in dough consistency. A healthy starter, fed regularly and used at its peak activity (usually when it has doubled or tripled in size and is full of bubbles), provides the necessary leavening power to develop the dough's structure during fermentation.
A weak or inactive starter will ferment the dough slowly or not at all, leading to poor gluten development and a dense, potentially sticky dough that hasn't built the internal strength needed to manage its hydration. Ensuring your starter is robust and ready to work before mixing your dough is a preventative step that minimizes the chances of encountering sticky sourdough dough issues.
Tools for Handling Sticky Dough
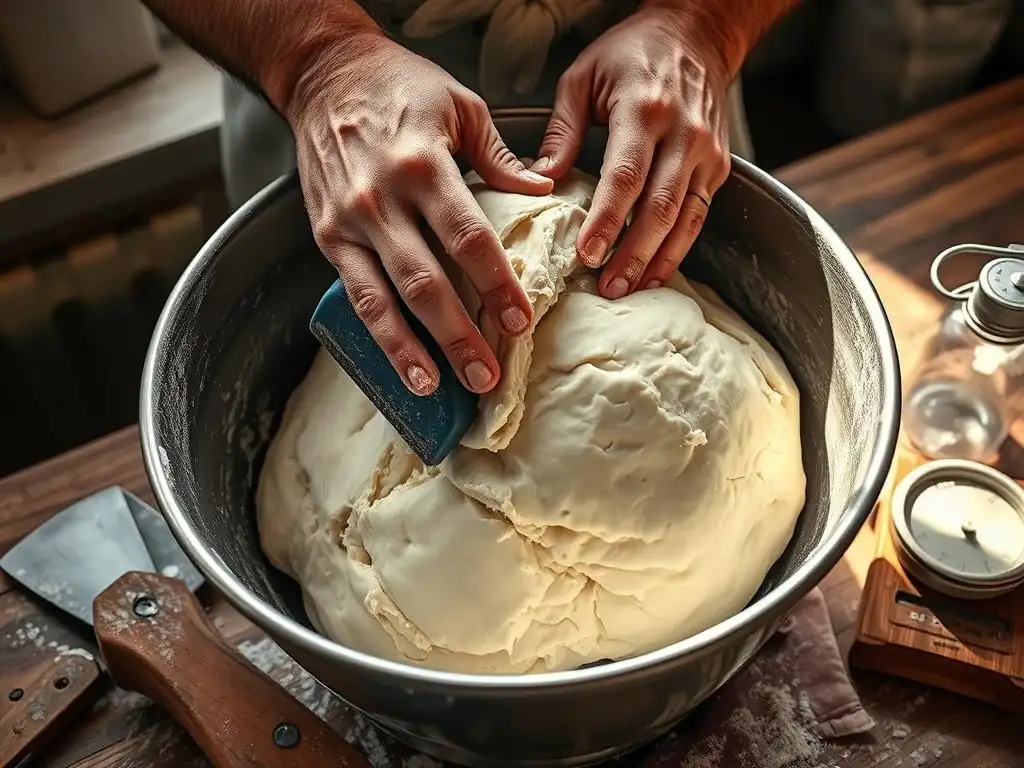
Dough Scrapers: Essential for Handling Dough
Dough scrapers are indispensable tools when working with sticky sourdough dough. A bench scraper (a flat, rectangular metal or plastic tool) is invaluable for dividing dough, cleaning your work surface, and, crucially, for manipulating sticky dough on the counter without it welding itself to the surface. You can use the edge of the scraper to gently lift and fold sections of dough or to scrape up any bits that stick.
A bowl scraper (a flexible plastic or silicone tool with a curved edge) is perfect for getting every last bit of sticky dough out of your mixing bowl and for performing stretch and folds directly in the bowl without getting dough all over your hands. These simple, inexpensive tools make handling sticky dough significantly easier and are highly recommended additions to your toolkit for sticky sourdough dough troubleshooting tips.
Banneton Baskets: Preventing Sticking During Proofing
Banneton baskets (proofing baskets), typically made from rattan or cane, are designed to hold the shaped dough during its final proofing phase. They help the dough maintain its shape and contribute to the loaf's surface texture. To prevent sticky sourdough dough from adhering to the basket during proofing, they must be properly floured.
Using a generous amount of flour, ideally rice flour as it resists moisture absorption, is key. Dust the inside of the basket thoroughly, ensuring flour gets into all the crevices. Gently place your shaped dough seam-side up into the floured basket. This creates a non-stick barrier, ensuring you can easily invert the dough onto your baking surface without it tearing or sticking, a common frustration addressed by effective sticky sourdough dough troubleshooting tips.
Wet Hands vs. Oiled Hands
When handling sticky sourdough dough directly, especially during stretch and folds or shaping, keeping your hands from sticking is paramount. Two common techniques are using wet hands or oiled hands. Wetting your hands with a little water creates a temporary non-stick surface. The dough is less likely to adhere to a wet surface than a dry one. This method is often preferred during stretch and folds as it doesn't add any fat to the dough.
Alternatively, lightly oiling your hands with a neutral-flavored oil can also prevent sticking. Some bakers prefer this method for shaping, as it can provide a smoother feel. The choice between wet and oiled hands is often a matter of personal preference and what feels most effective for the specific dough consistency you're working with. Experiment to see which method works best for you when applying sticky sourdough dough troubleshooting tips.
Common Mistakes with Sticky Dough
Over-Hydrating the Dough
One of the most common mistakes leading to excessively sticky sourdough dough is simply using too much water relative to the flour. This often happens when bakers attempt a high-hydration recipe (like 80% or more) before they are comfortable handling wetter doughs or before they understand how their specific flour performs at that hydration level. A dough that is too wet will be slack, spread excessively, and be incredibly difficult to build tension in or shape.
While high hydration can yield beautiful results, it requires skill and practice. If you are consistently battling unmanageably sticky dough, it's a strong indicator that your hydration level might be too high for your current skill set or flour type. Reducing hydration slightly in future bakes is often the most effective solution among sticky sourdough dough troubleshooting tips.
Insufficient Kneading or Folding
As discussed earlier, proper gluten development is crucial. A frequent mistake is not performing enough kneading or folding during the bulk fermentation phase. This results in a dough with a weak gluten network that cannot support its structure or hydration. The dough remains slack, lacks tension, and feels perpetually sticky and difficult to handle.
Even with moderately hydrated dough, insufficient development will lead to stickiness and poor oven spring. Ensure you are performing the recommended number of stretch and folds or coil folds for your recipe, spaced appropriately, until the dough shows signs of developing strength and becoming smoother and less sticky between sets. Patience and consistent folding are key sticky sourdough dough troubleshooting tips.
Rushing the Bulk Fermentation
Bulk fermentation is the phase where the dough develops flavor, rises, and builds strength. Rushing this process or misjudging its endpoint can lead to sticky dough issues. Under-fermented dough hasn't had enough time for the starter to work, build structure, and develop elasticity, resulting in a dense, sticky mass that's hard to shape.
Conversely, while less common as a direct cause of initial stickiness compared to over-hydration or under-development, severely over-fermented dough can begin to break down. The gluten network can degrade, causing the dough to become overly slack, sometimes wet, and difficult to handle without tearing. Learning to read your dough and understand the signs of proper bulk fermentation is vital for preventing and addressing sticky sourdough dough.
Rescuing Sticky Sourdough Dough
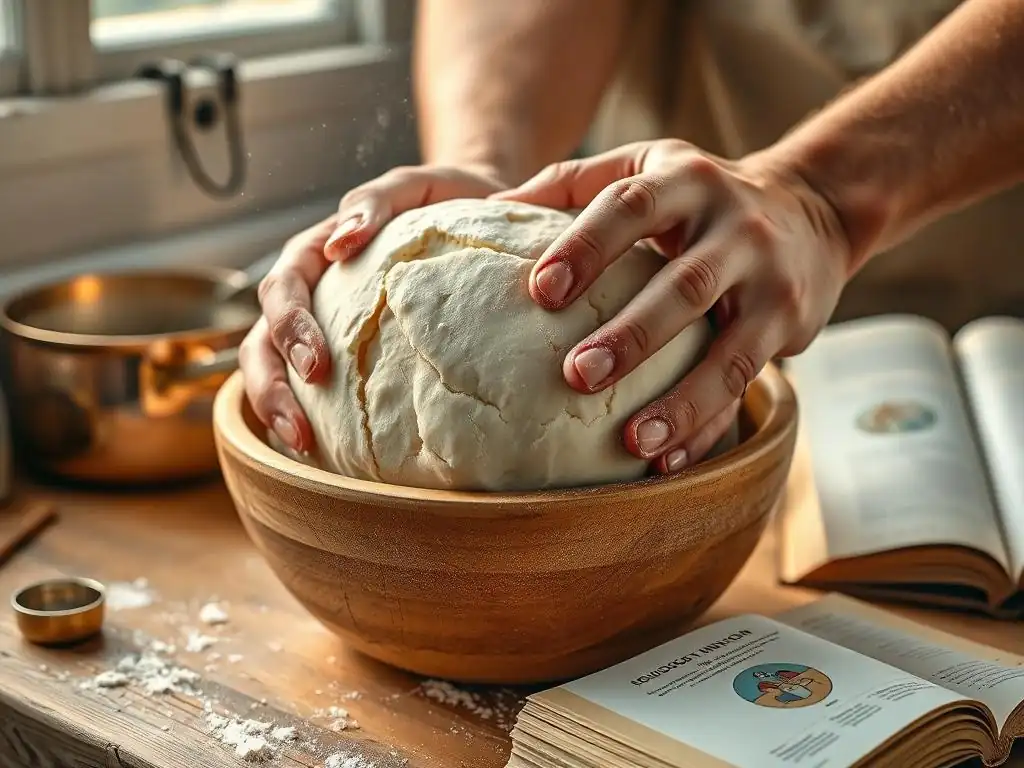
Adding Flour Post-Fermentation
If you realize your dough is excessively sticky after bulk fermentation has completed, adding a significant amount of flour directly into the dough at this stage is generally not recommended. It's very difficult to evenly incorporate dry flour into a developed dough without negatively impacting the structure and potentially creating pockets of dry flour.
A better approach is to use flour strategically on your work surface and hands during shaping, as discussed earlier. If the dough is truly unworkable due to extreme stickiness, it might be salvageable as a focaccia or another flatbread where structure is less critical. For future bakes, adjust the initial hydration or focus more on gluten development based on these sticky sourdough dough troubleshooting tips.
Using a Dough Whisk or Stand Mixer for Initial Mixing
For those consistently struggling with sticky dough during the initial mixing phase, using a Danish dough whisk or a stand mixer can be incredibly helpful. A dough whisk is designed to combine wet and dry ingredients efficiently without developing gluten initially, making it easier to get a shaggy mass together before autolyse or kneading.
A stand mixer with a dough hook can handle very sticky, high-hydration doughs that are difficult or impossible to knead by hand. The mechanical action develops gluten effectively. If you find yourself always battling extreme stickiness right from the start, leveraging these tools can make the process much more manageable and less frustrating, allowing you to focus on the subsequent steps of your sticky sourdough dough troubleshooting tips.
Gentle Manipulation with Wet Hands
As an alternative to flouring or oiling, gently manipulating sticky sourdough dough with wet hands is a technique favored by many bakers, particularly for performing stretch and folds or coil folds in the bowl. Before touching the dough, simply dip your hands in a bowl of water and shake off the excess. The thin film of water on your hands prevents the dough from sticking.
This method is clean, doesn't add extra ingredients to the dough, and allows you to feel the dough's development directly. It requires a gentle touch; avoid squeezing or tearing the dough. Re-wet your hands as needed throughout the process. Mastering this gentle manipulation is a core skill when applying sticky sourdough dough troubleshooting tips to wet doughs.
Sourdough Troubleshooting Chart: Sticky Dough Solutions
Understanding the potential issues leading to sticky sourdough dough and their corresponding solutions is key to improvement. Often, the problem isn't just one thing but a combination. For instance, extremely sticky dough might be caused by high hydration coupled with insufficient gluten development. Identifying the root cause is crucial.
Below is a breakdown of common sticky dough problems, their likely causes, and practical sticky sourdough dough troubleshooting tips to address them in your current or next bake. This serves as a quick reference guide.
- Problem: Dough is extremely sticky and slack immediately after mixing.
- Possible Cause: Hydration is too high for the flour or your handling comfort level; Insufficient initial mixing.
- Solution: Reduce hydration in the next bake (e.g., by 2-3% of flour weight); Ensure ingredients are well combined initially, perhaps using a dough whisk or mixer; Consider a longer autolyse.
- Problem: Dough is sticky and lacks structure after initial folds.
- Possible Cause: Insufficient gluten development; Weak starter; Under-fermentation.
- Solution: Perform more sets of stretch and folds or coil folds, ensuring the dough gains tension; Verify your starter is active and peak; Allow adequate bulk fermentation time.
- Problem: Dough is sticky and hard to shape after bulk fermentation.
- Possible Cause: Insufficient gluten development during bulk; Hydration still too high; Temperature too warm; Over-fermentation.
- Solution: Ensure dough passed the windowpane test or showed good tension after bulk; Reduce hydration next time; Consider cold fermentation to firm up the dough before shaping; Be mindful of bulk fermentation duration in warm conditions.
- Problem: Dough sticks to banneton during proofing.
- Possible Cause: Insufficient flouring of the banneton; Using regular flour instead of rice flour; Dough surface too wet.
- Solution: Generously flour the banneton, especially with rice flour; Ensure the dough surface is relatively dry before placing it in the basket (e.g., flip it seam side up).
Conclusion: Mastering Sourdough Baking
Embrace the Learning Curve
Mastering sourdough baking, especially handling sticky sourdough dough, is a journey that involves a learning curve. It's perfectly normal to encounter challenges like overly sticky dough, especially when starting out or trying new techniques or recipes. Each bake, even those that don't turn out perfectly, provides valuable lessons about how your starter behaves, how your flour handles hydration, and how environmental factors like temperature affect the dough.
Instead of getting discouraged by sticky dough, view it as an opportunity to learn. Pay attention to the dough's feel at each stage – after mixing, after folds, after bulk fermentation. Note what techniques you used, the hydration level, and the temperature. This observational approach, combined with applying sticky sourdough dough troubleshooting tips systematically, will build your intuition and skill over time.
Practice and Experimentation
The key to overcoming challenges with sticky sourdough dough and improving your baking skills is consistent practice and willingness to experiment. Don't be afraid to try reducing hydration slightly, increasing the number of folds, or incorporating a cold fermentation step. Make small changes in each bake and observe the results.
Keep a baking journal to track your recipes, hydration levels, techniques used, and outcomes. This record will be invaluable in identifying patterns and understanding what works best in your kitchen with your ingredients. With patience and persistent application of sticky sourdough dough troubleshooting tips, you will gain confidence and skill in handling even the stickiest of doughs, leading to consistently delicious sourdough loaves.
Frequently Asked Questions
What are the common causes of sticky sourdough dough?
Sticky sourdough dough is often caused by high hydration, under-mixing, or incorrect flour selection. These factors can make the dough difficult to handle.
How can I adjust the hydration level if my sourdough dough is consistently sticky?
Reduce the amount of water in your recipe by a small percentage, perhaps 10-20 grams, to decrease the hydration. This adjustment can significantly improve dough handling.
Is the type of flour I use important for sourdough success, especially regarding stickiness?
Yes, the protein content of the flour is crucial. Using bread flour with a higher protein content helps develop gluten, reducing stickiness.
What are some techniques to improve gluten development and reduce stickiness in sourdough?
Employ autolysing (allowing flour and water to rest before mixing) and stretch and folds during bulk fermentation to strengthen the gluten structure. This improves elasticity.
What is the role of temperature in managing sticky sourdough dough?
Warm temperatures can accelerate fermentation and make the dough stickier. Try to keep your dough in a cooler environment during bulk fermentation to slow down activity.
Final Reflection: The Unexpected Joys of a Sticky Situation
Mastering sourdough is not about avoiding sticky dough; it's about understanding its nuances and embracing the journey. A perfectly manageable dough is a myth, especially in the unpredictable world of sourdough baking. The stickiness, often a source of frustration, is actually a testament to the vibrant life within your starter and the complex interplay of hydration and fermentation.
The struggle with sticky dough mirrors the larger challenges of sourdough baking—the patience required, the attention to detail, and the acceptance of imperfection. It's a process that demands a mindful approach, a willingness to learn from each batch, and a deep appreciation for the natural rhythms of fermentation. The best bread is made with love, patience, and a little bit of flour on the floor.
– Anonymous (a baker's proverb). This quote, while seemingly lighthearted, encapsulates the very essence of the sourdough experience, including the inevitable sticky moments. It's in those moments, wrestling with a stubbornly clingy dough, that we truly connect with the craft.
So, the next time you find yourself facing a particularly sticky situation with your sourdough, remember this: it's not a failure, but an opportunity. Embrace the stickiness, learn from it, and allow it to guide you towards a deeper understanding of this ancient and rewarding art. Don't be afraid to experiment, adjust your techniques, and most importantly, enjoy the process. The perfectly risen loaf is a reward, but the journey itself is where the true magic lies.
Unlock Your Sourdough Success!
Thanks for diving into the world of sourdough with us! We hope you gained valuable insights into tackling that tricky sticky dough. Now it's time to put your new knowledge into practice.
- Bake your best loaf yet: Try the techniques discussed today and see the difference! Even a small adjustment can make a big impact.
- Share your sourdough journey: Post a picture of your creation on social media and tag us – we'd love to see your results! Use #BakeWithEaseSourdough.
- Experiment with different flours: What will you discover with a rye-based sourdough?
Ready to transform your baking? What's the first step you'll take to perfect your sourdough technique?