
Microwave Melting Magic: Get Perfect Chocolate Without the Fuss

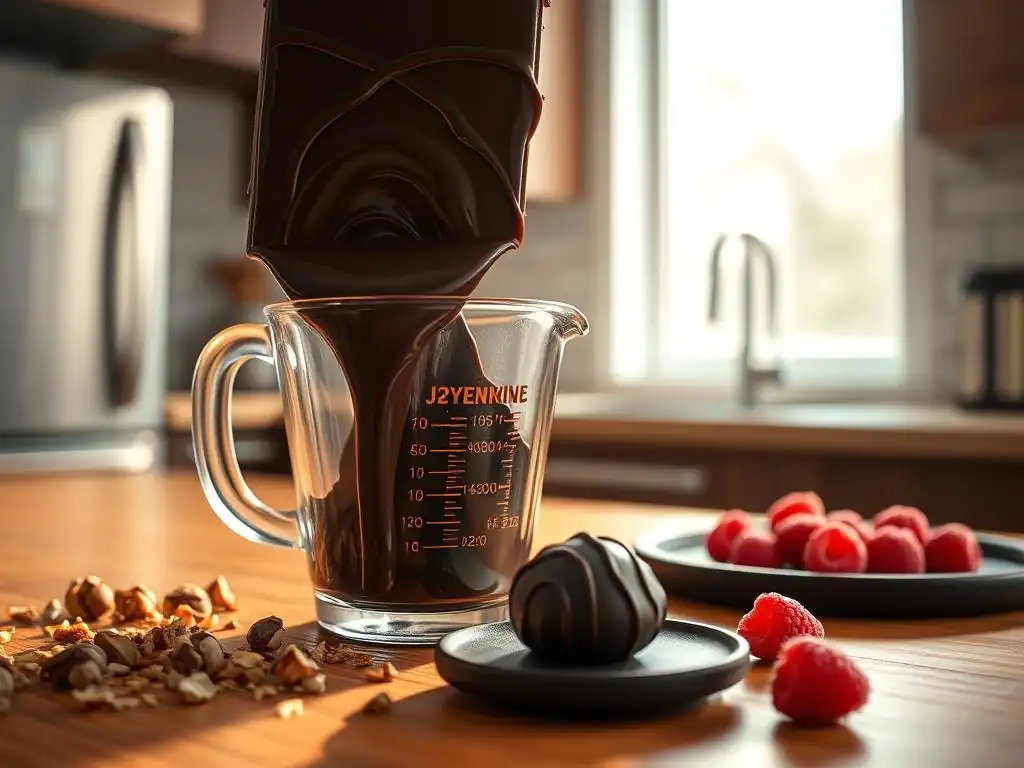
Welcome to BakeWithEase, your kitchen companion for all things baking! Ever struggled with melting chocolate? Microwave Melting Magic is here to revolutionize your dessert game. Discover our foolproof microwave melting chocolate recipe and unlock a world of smooth, decadent possibilities. Are you ready to ditch the double boiler and achieve perfect chocolate every time? Let's get started!
- Introduction to Microwave Chocolate Melting for Baking with Ease
-
The Ultimate Microwave Melting Chocolate Recipe: Step-by-Step
- Ingredients for Microwave Chocolate Melting Success
- Equipment You'll Need for Effortless Melting
- Step 1: Preparing Your Chocolate for Microwave Melting
- Step 2: Setting the Microwave for Perfect Chocolate
- Step 3: The Microwave Melting Process: Time and Power
- Step 4: Stirring for Smooth, Glossy Melted Chocolate
- Step 5: Achieving the Perfect Consistency for Your Recipe
- Troubleshooting Common Microwave Chocolate Melting Problems
- Tips and Tricks for Microwave Melting Chocolate Like a Pro
- Creative Uses for Microwave Melted Chocolate in Baking
- Microwave Melting Chocolate vs. Double Boiler: A Comparison
- Storing Leftover Melted Chocolate
- Conclusion: Mastering the Art of Microwave Melting Chocolate with BakeWithEase
-
Frequently Asked Questions
- How long should I microwave chocolate for the first interval?
- What type of chocolate is best for microwave melting?
- Why is it important to stir the chocolate between microwave intervals?
- What should I do if my chocolate seizes or becomes grainy?
- Can I use the microwave melting method for different types of chocolate, like white or dark chocolate?
- Final Reflection: The Enduring Allure of Perfectly Melted Chocolate
- Unleash Your Inner Chocolatier: Melt Away to Smooth Perfection!
Introduction to Microwave Chocolate Melting for Baking with Ease
Why Microwave Melting Chocolate is a Game-Changer for Bakers
Melting chocolate is a fundamental skill in baking, used for everything from simple drizzles to complex ganaches. While traditional methods like the double boiler are reliable, they can be time-consuming and involve extra cleanup. This is where the microwave steps in as a true game-changer for home bakers seeking efficiency and simplicity. Mastering the microwave melting chocolate recipe offers unparalleled speed and convenience, allowing you to achieve perfectly smooth, usable chocolate in just minutes, significantly cutting down prep time for your favorite treats.
Using the microwave method is particularly beneficial when you only need a small amount of melted chocolate for decorating or a quick recipe. Instead of setting up a pot of simmering water and dealing with steam, you can simply pop your chocolate into a microwave-safe bowl.
This method is not only faster – often taking only 2-4 minutes total compared to 10-15 minutes or more for a double boiler setup – but also reduces the number of dishes you need to wash afterwards. For busy bakers or those just starting out, understanding how to melt chocolate in the microwave effectively makes many baking projects feel less daunting and more accessible.
BakeWithEase's Guide to Fuss-Free Chocolate Melting
At BakeWithEase, our goal is to make baking enjoyable and accessible for everyone, regardless of their skill level. Our guide to fuss-free chocolate melting focuses on simplifying this crucial step using the power of your microwave. We'll walk you through the process, from selecting the right chocolate to the specific timing and techniques needed to avoid common pitfalls like burning or seizing. This approach is designed to demystify what can sometimes feel like a tricky task, ensuring you achieve silky-smooth melted chocolate every time.
Following our straightforward microwave melting chocolate recipe means you can confidently prepare chocolate for dipping, coating, or incorporating into batters without the stress. We emphasize low power settings and frequent stirring, two key secrets to success that prevent overheating and promote even melting. Our step-by-step instructions are crafted to be easy to follow, making it simple for even complete beginners to get perfect results. By the end of this guide, you'll have the knowledge and confidence to melt chocolate in the microwave like a seasoned pro, opening up a world of delicious baking possibilities.
The Ultimate Microwave Melting Chocolate Recipe: Step-by-Step
Ingredients for Microwave Chocolate Melting Success
The quality and type of chocolate you use significantly impact the outcome of your microwave melting chocolate recipe. For best results, always choose good quality chocolate intended for baking, whether it's bars, wafers, or chips. Chocolate with a higher cocoa butter content generally melts more smoothly and is less prone to seizing. Avoid using chocolate candy bars that contain fillers and other ingredients that can interfere with the melting process, leading to a less desirable texture.
You can successfully melt various types of chocolate in the microwave, including dark chocolate, milk chocolate, and white chocolate, although each requires slightly different handling due to their varying compositions. For example, dark chocolate, with its higher cocoa solids and lower sugar content, is more forgiving than white chocolate, which contains milk solids and sugar that can scorch easily. Starting with approximately 1 cup (around 170-200 grams) of finely chopped or chip-form chocolate is a good amount for testing your microwave's power and learning the technique, as larger quantities may melt unevenly.
Equipment You'll Need for Effortless Melting
To execute this microwave melting chocolate recipe smoothly, you'll need minimal equipment. The most essential item is a microwave-safe bowl. Glass or ceramic bowls are excellent choices as they distribute heat relatively evenly and don't retain odors or flavors. Plastic bowls can work, but ensure they are specifically marked as microwave-safe and avoid using scratched or old plastic, which might leach chemicals. A simple heatproof rubber or silicone spatula is also indispensable for stirring the chocolate during and after melting.
Having a sturdy spatula allows you to gently incorporate the melted chocolate with the still-solid pieces, promoting even melting without introducing air. For precise measurements, especially when working with specific recipes like ganache, a kitchen scale is helpful, as weighing chocolate is more accurate than using volume measurements like cups, particularly for chopped bar chocolate. While not strictly necessary for the basic melting process, having these tools on hand makes the entire experience more efficient and helps ensure consistent results every time you melt chocolate in the microwave.
Step 1: Preparing Your Chocolate for Microwave Melting
Proper preparation is key to a successful microwave melting chocolate recipe. If you're using chocolate bars or blocks, it's crucial to chop them into small, uniform pieces. Aim for pieces roughly the size of chocolate chips or even smaller. Smaller pieces melt faster and more evenly, reducing the risk of scorching the parts that melt first while others are still solid. Using a sharp knife on a cutting board works well for this.
If you are using chocolate chips or wafers, they are already in a convenient size and require no chopping. Simply measure out the desired amount of chocolate and place it directly into your microwave-safe bowl.
Ensure the bowl is completely dry, as even a tiny drop of water can cause the chocolate to seize, turning it into a stiff, unworkable mass. This preparation step might seem minor, but taking the time to chop chocolate into uniform pieces or ensure your bowl is dry significantly increases your chances of achieving a smooth, glossy result when you melt chocolate in the microwave.
Step 2: Setting the Microwave for Perfect Chocolate
The power setting on your microwave is perhaps the most critical factor in a successful microwave melting chocolate recipe. High power can easily scorch chocolate before it even has a chance to melt evenly. The secret is to use a low power setting, typically 50% power. Some microwaves have specific "melt chocolate" or "soften" settings; if yours does, these are often calibrated to a low power level and can be suitable.
Setting your microwave to 50% power allows the chocolate to heat gently and gradually. This slow, controlled heating prevents the cocoa solids and sugars from burning, which happens rapidly at high temperatures. If your microwave doesn't have a percentage setting, you can use a medium or medium-low setting, but be extra vigilant with stirring and shorter heating intervals. Always start with a low power setting; you can always increase it slightly on subsequent attempts once you understand how your specific microwave handles melting chocolate.
Step 3: The Microwave Melting Process: Time and Power
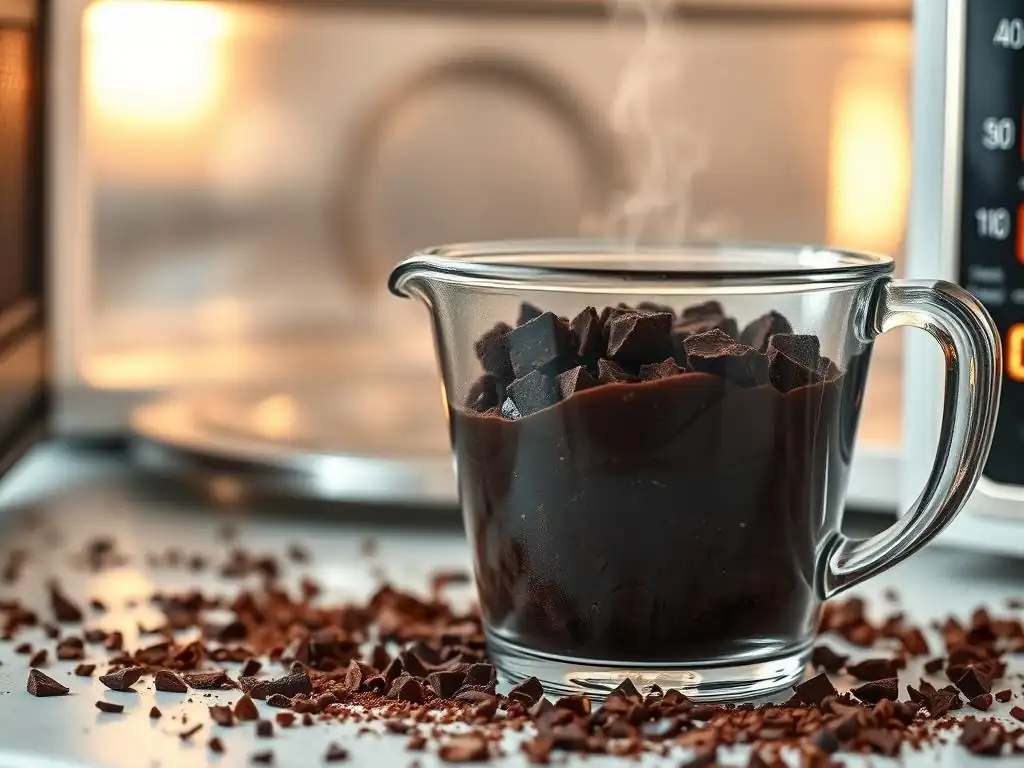
The actual melting process in a microwave melting chocolate recipe involves short bursts of heating followed by stirring. For most microwaves set to 50% power, start with a 30-second interval. After 30 seconds, remove the bowl from the microwave and stir the chocolate thoroughly with your spatula, even if it doesn't look like much has melted. The residual heat within the chocolate pieces will continue the melting process as you stir.
Return the bowl to the microwave and heat again for another 30 seconds (or even shorter bursts of 15-20 seconds for smaller quantities or white chocolate). Remove and stir again. Repeat this process of short heating intervals and vigorous stirring. The total time required will vary depending on the amount of chocolate, its type, and the wattage of your microwave, but typically ranges from 2 to 5 minutes for 1 cup of chocolate. The key is patience and frequent stirring; do not try to melt it all in one long burst.
Step 4: Stirring for Smooth, Glossy Melted Chocolate
Stirring is arguably the most important step in a successful microwave melting chocolate recipe. After each short heating interval, remove the bowl from the microwave and stir the chocolate vigorously for 20-30 seconds. Even if the chocolate appears mostly solid, stirring helps distribute the heat evenly throughout the bowl. This allows the chocolate to melt from the residual heat, which is much gentler than direct microwave energy.
As you continue the short heating bursts and stirring, you'll notice more and more chocolate melting. Keep stirring until the chocolate is about 75-80% melted, with just a few small solid pieces remaining. At this point, do not put the chocolate back in the microwave. Simply continue stirring the mixture. The heat from the already melted chocolate will be sufficient to melt the remaining small pieces, resulting in a beautifully smooth, glossy, and perfectly tempered (or nearly so) finished product. This technique prevents overheating the delicate melted chocolate and ensures a uniform consistency.
Step 5: Achieving the Perfect Consistency for Your Recipe
Once your chocolate is fully melted and smooth after the final stirring, check its consistency. For most applications like dipping or drizzling, you want a fluid, pourable texture. If the chocolate seems a little too thick, you can gently warm it again in the microwave for a very short burst, like 5-10 seconds, on 50% power, then stir again. Be cautious, as even a few extra seconds can lead to overheating.
If your microwave melting chocolate recipe calls for mixing the melted chocolate into a batter or ganache, ensure the temperature is suitable. For ganache, the melted chocolate is combined with hot cream; the residual heat is crucial. For batters, the chocolate shouldn't be so hot that it cooks the eggs or other ingredients. The goal is a smooth, lump-free consistency that integrates seamlessly into your final product. Practicing this microwave melting chocolate recipe a few times will help you recognize the perfect consistency for different uses.
Troubleshooting Common Microwave Chocolate Melting Problems
Burnt Chocolate: How to Avoid and Fix It
One of the most common frustrations when melting chocolate in the microwave is burning. Burnt chocolate is characterized by a hard, dry, crumbly texture and a distinct, unpleasant smell. This usually happens when the chocolate is heated at too high a power setting or for too long without adequate stirring. The sugars and cocoa solids literally scorch, and unfortunately, burnt chocolate cannot be rescued.
To avoid burning when using a microwave melting chocolate recipe, always use a low power setting (50%) and heat in very short intervals (30 seconds initially, then 15-20 seconds as it melts). Stir thoroughly after every heating interval. If you notice any signs of burning – a change in smell or texture – immediately stop heating. Prevention is key, as burnt chocolate must be discarded and you'll need to start over with fresh chocolate.
Seized Chocolate: Rescuing Your Melted Chocolate
Seized chocolate is another common issue, where the smooth melted chocolate suddenly turns into a stiff, grainy, and clumpy mass. This is almost always caused by the introduction of a small amount of liquid, typically water or steam. Chocolate is hydrophobic, meaning it repels water. A tiny bit of liquid causes the cocoa particles to clump together, creating the seized texture.
If your chocolate seizes while following a microwave melting chocolate recipe, don't despair immediately – it can sometimes be rescued! The fix involves adding more liquid, specifically a fat or a larger quantity of hot liquid. Try stirring in a teaspoon of vegetable oil, melted shortening, or clarified butter into the seized chocolate. Stir vigorously until it becomes smooth again. Alternatively, you can try stirring in a tablespoon or two of hot cream or milk (the same temperature as the chocolate) – this often works by hydrating all the cocoa particles instead of just a few.
Uneven Melting: Ensuring a Smooth Texture
Uneven melting results in a bowl of chocolate with some parts perfectly smooth and liquid while others are still solid chunks. This often occurs if the chocolate pieces are not uniform in size, if the power setting is too high, or if the chocolate isn't stirred frequently enough. When you don't stir, the chocolate around the edges of the bowl heats faster than the center, leading to hot spots and uneven melting.
To ensure even melting with your microwave melting chocolate recipe, start by chopping your chocolate into uniformly small pieces (unless using chips). Crucially, adhere to the short heating intervals (30 seconds, then 15-20 seconds) and stir thoroughly after each interval. Stirring redistributes the heat and brings the solid pieces into contact with the melted chocolate, promoting consistent melting. Patience and diligent stirring are your best tools against uneven melting.
Melting White Chocolate: A Delicate Process
Melting white chocolate in the microwave requires extra care because it contains milk solids and sugar, which are much more susceptible to scorching than the cocoa solids in dark or milk chocolate. White chocolate also has a different melting point, typically lower than dark chocolate. Treat white chocolate with extreme gentleness during your microwave melting chocolate recipe.
Always use the lowest power setting your microwave offers (e.g., 50% or even lower if possible) and start with even shorter heating intervals, perhaps just 15-20 seconds from the beginning. Stir thoroughly after every interval, even if it looks completely solid. White chocolate will hold its shape even when it's nearly melted, so rely on stirring to gauge its progress. Stop heating when there are just a few tiny pieces left and stir until completely smooth. Overheating white chocolate by just a few seconds can easily ruin it.
Tips and Tricks for Microwave Melting Chocolate Like a Pro
Choosing the Right Chocolate for Microwave Melting
The success of your microwave melting chocolate recipe begins with selecting the appropriate chocolate. For baking, choose chocolate specifically labeled for baking (like baking bars, wafers, or chips) rather than everyday candy bars. Baking chocolate typically has stabilizers and a higher proportion of cocoa butter, which helps it melt smoothly and set properly. Brands like Ghirardelli, Callebaut, or Guittard are popular choices known for quality and reliable melting properties.
The type of chocolate matters too. Dark chocolate (50% cocoa or higher) is the most forgiving for microwave melting. Milk chocolate and white chocolate are more delicate due to their milk and sugar content and require more careful handling with lower power and shorter bursts. Compound chocolate or confectionery coating (often found as "candy melts") is designed to melt easily and doesn't require tempering, making it very simple to use in the microwave, but it contains vegetable oil instead of cocoa butter, resulting in a different flavor and texture than real chocolate.
Using Chocolate Chips vs. Chocolate Bars
Both chocolate chips and chopped chocolate bars can be used in a microwave melting chocolate recipe, but they behave slightly differently. Chocolate chips contain less cocoa butter and often include stabilizers to help them keep their shape when baked into cookies. This means they can be a bit more difficult to melt into a completely smooth, fluid consistency compared to chopped bar chocolate or wafers designed specifically for melting.
Chopped chocolate bars or melting wafers (like couverture chocolate) are generally preferred by professionals because they melt more smoothly and evenly due to their higher cocoa butter content. However, chocolate chips are convenient and widely available, and they work perfectly fine for many applications like mixing into batters or making ganache, as long as you follow the low power and frequent stirring method. For applications requiring a very smooth, glossy finish like dipping or coating, chopped baking bars or wafers will often yield superior results.
Adding Liquids to Melted Chocolate: What to Know
Adding liquids to melted chocolate must be done carefully to avoid seizing, as discussed earlier. Small amounts of cold or lukewarm liquid are the primary culprit for seized chocolate in a microwave melting chocolate recipe. If you need to combine melted chocolate with liquid ingredients, like in ganache (chocolate + cream) or sauces, the key is to add the liquid hot and in a sufficient quantity.
For ganache, you typically pour hot (simmering) cream over the melted chocolate and let it sit for a minute before stirring. The heat from the cream helps prevent seizing. If you need to add a small amount of flavoring extract (like vanilla), it's best to stir it into the chocolate after it's fully melted and slightly cooled, or mix it into a larger quantity of fat (like butter or oil) before combining with the chocolate. Remember, a tiny bit of liquid is bad, but a larger, hot amount can be okay depending on the recipe.
Coloring Melted Chocolate: Best Practices
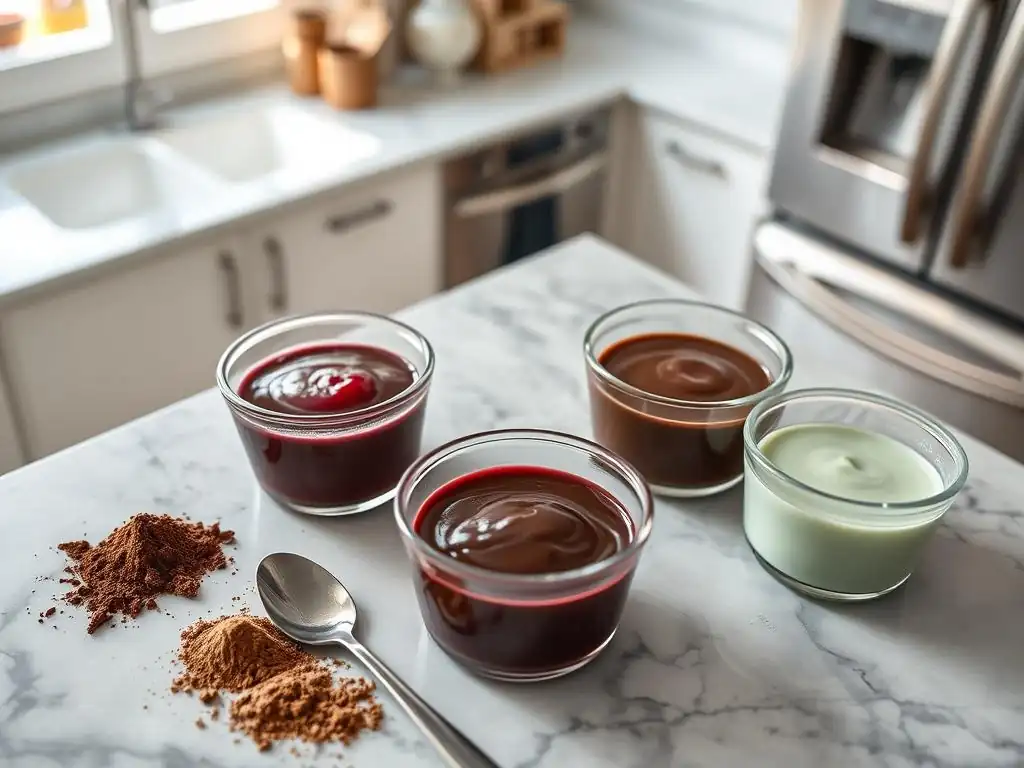
Coloring chocolate melted using a microwave melting chocolate recipe requires specific types of food coloring. Standard water-based liquid or gel food colorings will cause the chocolate to seize immediately. You must use oil-based or powder-based food colorings specifically designed for chocolate or candy making. These colorings are formulated to mix with the fat in the chocolate without causing issues.
Add the coloring sparingly to the fully melted chocolate and stir thoroughly to incorporate. You can always add more color to deepen the shade, but you cannot remove it if you add too much. Start with a tiny amount on a toothpick and mix it in. The color will develop as you stir. This process works for white chocolate, milk chocolate, and even dark chocolate (though coloring dark chocolate typically only allows for subtle shade adjustments or enhancing its brown color).
Flavoring Melted Chocolate: Enhancing Your Baking
Melted chocolate from your microwave melting chocolate recipe can be easily flavored to add depth and complexity to your baked goods. Extracts are a popular way to do this, but as mentioned, water-based extracts like standard vanilla extract should be added carefully. Using oil-based extracts is safer. Alternatively, you can stir standard extracts into a small amount of fat (like a teaspoon of melted butter or vegetable oil) before combining with the melted chocolate.
Other ways to flavor melted chocolate include adding a pinch of salt to enhance the chocolate flavor, stirring in spices like cinnamon or chili powder, or incorporating citrus zest (ensure no liquid or pith is included). Liqueurs or coffee can also be added, but remember the rule about liquids – they must be hot and added in a sufficient quantity, often as part of a ganache or sauce recipe rather than directly into plain melted chocolate. Experiment with different flavor combinations to elevate your baking creations.
Creative Uses for Microwave Melted Chocolate in Baking
Chocolate Drizzles and Decorations
One of the simplest and most popular uses for chocolate melted using a microwave melting chocolate recipe is for drizzling and decorating. Once your chocolate is perfectly smooth and fluid, you can easily transfer it to a piping bag (with a fine tip or just a snipped corner), a ziploc bag, or even just use a spoon or fork to create decorative lines, swirls, or patterns on cookies, cakes, cupcakes, or pastries.
For a quick drizzle, a fork dipped in melted chocolate and waved back and forth over the baked good works wonders. For more controlled designs, fill a small piping bag. The speed and ease of melting chocolate in the microwave make it perfect for last-minute decorating touches. You can drizzle different types of chocolate (dark, milk, white) for contrast or even colored melted chocolate for festive designs.
Chocolate Ganache in Minutes
A classic chocolate ganache, traditionally made by heating cream and stirring in chopped chocolate, can be quickly assembled using chocolate melted via our microwave melting chocolate recipe. While some prefer the traditional method for temperature control, for a simple drizzle or quick frosting, melting the chocolate first can streamline the process.
To make a quick ganache, melt your chocolate using the microwave method until smooth. Separately, heat heavy cream just until it starts to simmer. Pour the hot cream over the melted chocolate (or pour the melted chocolate into the hot cream, depending on the ratio and desired consistency) and let it sit undisturbed for a minute. Then, gently stir from the center outwards until a smooth, glossy emulsion forms. The ratio of chocolate to cream dictates the consistency, from a pourable glaze (1:1 ratio chocolate to cream) to a firm truffle filling (2:1 or 3:1 ratio chocolate to cream).
Chocolate Coating and Dipping
Melting chocolate in the microwave is excellent for coating and dipping small items like strawberries, pretzels, cookies, or cake pops. Ensure your melted chocolate is smooth and at the right temperature (around 90-92°F for dark, 86-88°F for milk/white chocolate, ideally, though microwave melting might not achieve perfect temper without additional steps).
Use a deep, narrow bowl for melting the chocolate when dipping to make it easier to fully submerge items. Dip the item, letting excess chocolate drip back into the bowl, and place it on parchment paper to set.
For a shiny, snappy coating with real chocolate, you ideally need to temper the chocolate after melting, a process that involves cooling and reheating to stabilize the cocoa butter crystals. While a full tempering is beyond a simple microwave melting chocolate recipe, melting carefully at low power and stirring can sometimes result in a "cheater's temper" that gives a decent set and shine, especially with high-quality chocolate or wafers designed for melting.
Incorporating Melted Chocolate into Batters and Doughs
Many baking recipes call for incorporating melted chocolate directly into cake batters, brownie mixes, cookie doughs, or mousse bases. Using the microwave to melt the chocolate makes this step fast and easy. Melt the chocolate according to the steps in our microwave melting chocolate recipe until it's smooth and lump-free.
Allow the melted chocolate to cool slightly before adding it to your batter or dough. If it's too hot, it could curdle eggs, melt butter, or otherwise negatively affect the texture of your mixture. Stir the slightly cooled melted chocolate into your recipe ingredients until just combined. The rich flavor and moistness that melted chocolate adds are unparalleled, contributing significantly to the final taste and texture of baked goods like lava cakes, fudgy brownies, or rich chocolate cookies.
Microwave Chocolate Mug Cake Recipe
A fantastic quick treat leveraging the speed of the microwave and melted chocolate is a microwave mug cake. This simple recipe often starts by melting chocolate and butter together in a mug. Use about 1-2 tablespoons of chocolate chips or chopped chocolate and 1 tablespoon of butter. Melt them together in the microwave on 50% power for 30-60 seconds, stirring halfway, until smooth.
Once the chocolate and butter are melted using your quick microwave melting chocolate recipe technique, whisk in a small amount of sugar, an egg yolk (or a whole egg for a slightly different texture), a splash of milk or cream, a tiny bit of vanilla extract, and then fold in a tablespoon or two of flour and a pinch of baking powder and salt. Mix until just combined, being careful not to overmix.
Microwave on high for 60-90 seconds (timing varies by microwave) until puffed and set around the edges but still slightly gooey in the center. It's an instant individual dessert made possible by fast microwave melting.
Microwave Melting Chocolate vs. Double Boiler: A Comparison
Speed and Convenience
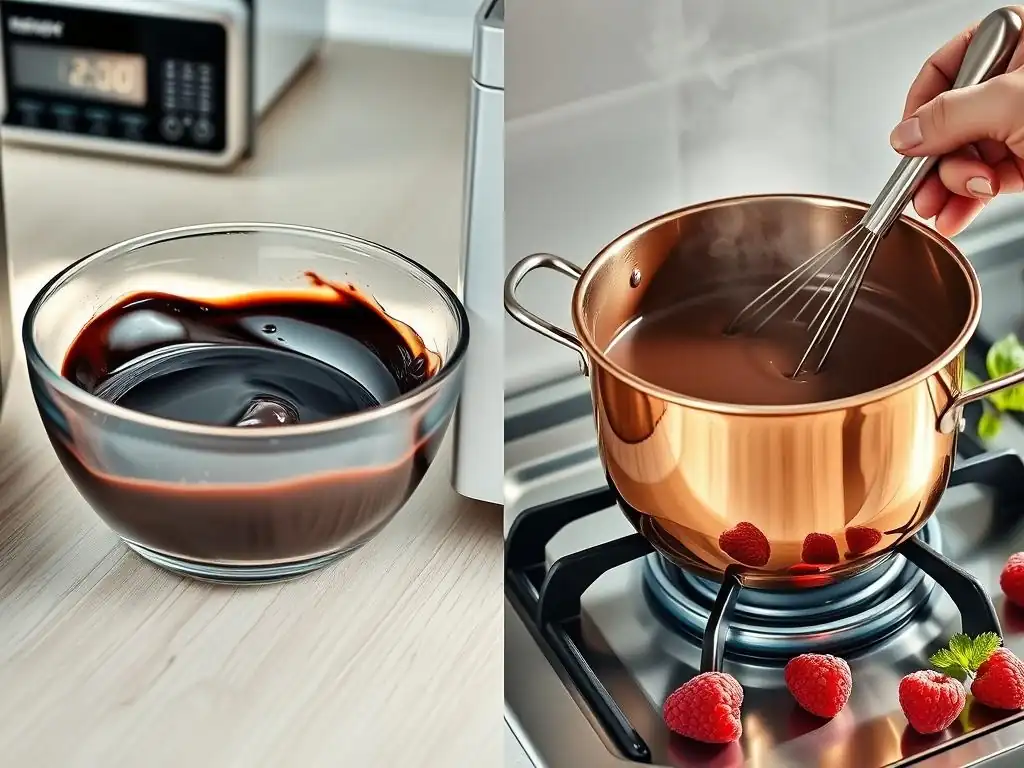
When comparing melting chocolate using a microwave melting chocolate recipe versus a double boiler, speed and convenience are the most significant differences. The microwave method is undeniably faster. You can go from solid chocolate to melted and ready-to-use in typically 2-5 minutes, depending on the quantity and microwave wattage. This involves minimal setup – just a bowl and a spatula.
The double boiler method, while reliable, takes longer. You need to fill a pot with water, bring it to a simmer, place a heatproof bowl over it, and wait for the steam's indirect heat to melt the chocolate. This process can take 10-20 minutes, plus the time to set up and clean two pots/bowls instead of one. For small amounts or quick tasks, the microwave method in a microwave melting chocolate recipe offers unbeatable speed and ease.
Temperature Control
Temperature control is where the double boiler method traditionally holds an advantage. The gentle, indirect heat from the steam in a double boiler provides more gradual and controllable heating. It's easier to maintain the chocolate at a specific temperature or prevent it from overheating, which is crucial when tempering chocolate for a shiny, stable finish.
The microwave, conversely, heats from within and can create hot spots, making precise temperature control more challenging. While using low power and stirring frequently helps mitigate this, it's harder to hold chocolate at a specific temperature range necessary for true tempering using only the microwave. For simple melting for ganache, mixing into batters, or quick drizzles, the control offered by a microwave melting chocolate recipe is sufficient, but for delicate tempering, a double boiler or dedicated melting pot is often preferred.
Ease of Cleaning
Cleaning up after melting chocolate is a factor many bakers consider. The microwave melting chocolate recipe method typically involves just one bowl and one spatula, both of which are relatively easy to wash, especially if you clean them before the chocolate has fully hardened.
The double boiler method requires cleaning both the pot used for water and the bowl used for melting the chocolate. While not significantly more difficult, it does involve more items to wash. For bakers looking to minimize cleanup, the single-bowl approach of melting chocolate in the microwave is a clear winner.
Best Use Cases for Each Method
The best method depends on the application and quantity. A microwave melting chocolate recipe is ideal for:
- Small quantities of chocolate (up to 1-2 cups).
- Quick tasks like drizzling, dipping a few items, or incorporating into a quick batter.
- When speed and convenience are priorities.
- For beginners or those wanting a fuss-free approach.
The double boiler method is often better suited for:
- Larger quantities of chocolate (2 cups or more).
- When precise temperature control is needed, such as for tempering chocolate for candies or molded figures.
- Melting very delicate chocolates like white chocolate, where the gentle heat is more forgiving.
- Situations where you need to keep the chocolate melted and warm for an extended period (the hot water bath helps maintain temperature).
Both methods are valuable tools in a baker's arsenal, but understanding the strengths of the microwave melting chocolate recipe makes it a go-to for many everyday baking needs.
Storing Leftover Melted Chocolate
Properly Cooling Melted Chocolate
If you have leftover melted chocolate from your microwave melting chocolate recipe, proper cooling and storage are important. Allow the melted chocolate to cool slightly in the bowl at room temperature. Do not place it directly into the refrigerator while still very warm, as drastic temperature changes can sometimes cause issues with texture or bloom (a whitish coating).
Once the chocolate has cooled to near room temperature, transfer it to an airtight container. Ensure the container is completely dry before adding the chocolate. Store the container in a cool, dry place, away from direct sunlight and strong odors. Properly stored, leftover melted chocolate can be kept for several months, similar to how you would store solid chocolate.
Reheating Melted Chocolate in the Microwave
Leftover melted chocolate stored properly can be easily reheated for later use. The microwave is again a convenient tool for this. Place the hardened chocolate back into a microwave-safe bowl. Reheat it using the same principles as your initial microwave melting chocolate recipe: low power (50%) and very short intervals (15-30 seconds), stirring thoroughly after each interval.
Continue heating and stirring until the chocolate is melted and smooth again. Be even more cautious with reheating than with initial melting, as the chocolate has already been heated once. Stop heating when there are just a few small solid pieces remaining and rely on stirring to melt the rest. This gentle reheating process prevents scorching and helps restore the chocolate to a usable consistency.
Preventing Chocolate Bloom
Chocolate bloom is the appearance of a dull, grayish or whitish film on the surface of chocolate. There are two types: sugar bloom (grainy texture, caused by moisture) and fat bloom (waxy texture, caused by temperature fluctuations). While bloom affects the appearance, it doesn't typically make the chocolate unsafe to eat, but it can impact texture and melting properties.
To prevent bloom on leftover chocolate from your microwave melting chocolate recipe, store it in a consistent, cool temperature (ideally between 60-70°F or 15-21°C) and keep it away from humidity. Ensure the storage container is airtight and dry. Rapid temperature changes, like moving chocolate from a cold refrigerator directly into a warm room, are a common cause of fat bloom. Melting and properly cooling chocolate again can sometimes help re-incorporate the fat crystals and reduce the appearance of bloom, making it suitable for re-melting for less critical applications.
Conclusion: Mastering the Art of Microwave Melting Chocolate with BakeWithEase
Mastering the simple microwave melting chocolate recipe is a valuable skill for any home baker. It offers unparalleled speed, convenience, and minimal cleanup, making it the perfect method for countless baking tasks, from quick drizzles to incorporating chocolate into batters and making easy ganache. By following the essential techniques – using low power settings, heating in short intervals, and stirring frequently and thoroughly – you can reliably achieve smooth, glossy melted chocolate every time.
While the microwave might not be the best choice for professional tempering, for the vast majority of home baking applications, it is a highly effective and user-friendly method. We hope this BakeWithEase guide empowers you to confidently melt chocolate in the microwave, troubleshoot common issues, and explore creative ways to use melted chocolate in your baking. With a little practice, you'll find that fuss-free microwave melting truly adds a touch of magic to your kitchen creations, making baking with chocolate easier and more enjoyable than ever before.
Frequently Asked Questions
How long should I microwave chocolate for the first interval?
The initial interval should be short, typically 30 seconds, to prevent burning. Check and stir the chocolate thoroughly before microwaving again.
What type of chocolate is best for microwave melting?
Good quality chocolate chips or chopped chocolate bars work best. Avoid using chocolate with added ingredients like nuts or caramel, as they can burn easily.
Why is it important to stir the chocolate between microwave intervals?
Stirring distributes the heat evenly, preventing hot spots and scorching, which can ruin the chocolate's texture and flavor.
What should I do if my chocolate seizes or becomes grainy?
Seized chocolate is often caused by moisture contamination. Try stirring in a very small amount of vegetable oil or shortening to smooth it out.
Can I use the microwave melting method for different types of chocolate, like white or dark chocolate?
Yes, you can, but adjust the timing accordingly. White chocolate burns easier, so use shorter intervals and stir frequently.
Final Reflection: The Enduring Allure of Perfectly Melted Chocolate
The ease and precision of microwave chocolate melting transcends mere convenience; it's a gateway to unlocking the boundless creativity of chocolate artistry. From simple drizzles to elaborate ganaches, mastering this technique opens doors to a world of delicious possibilities, readily available in every kitchen. This method isn't just about speed; it's about control and consistent results, eliminating the anxieties of a double boiler and ensuring perfectly smooth, luscious chocolate every time.
The simple act of melting chocolate, a seemingly mundane task, holds a surprising power to evoke memories and emotions. The rich aroma, the glossy sheen of the melted confection, it all contributes to a sensory experience that transcends the culinary. Chocolate is a gift from the gods, a comfort to the soul.
This sentiment, though perhaps hyperbolic, speaks to the deep-seated connection many have with this beloved ingredient, and mastering its melting is a key to unlocking its full potential. The ease of the microwave method makes this accessible to everyone, regardless of skill level.
Consider the possibilities now laid before you. Will you create decadent chocolate bark adorned with your favorite nuts and dried fruits? Perhaps you'll craft rich, velvety chocolate sauce to elevate your desserts. Or maybe you'll embark on a more ambitious project, using your perfectly melted chocolate as the foundation for a stunning creation. The journey begins with a simple microwave and a bar of your favorite chocolate; the destination is limited only by your imagination. Embrace the magic, and let the melting begin!
Unleash Your Inner Chocolatier: Melt Away to Smooth Perfection!
Thanks for joining us on this chocolatey adventure! We hope you now feel confident in tackling even the trickiest chocolate melting tasks. Ready to put your newfound skills to the test?
- Master the Microwave Melt: Try our technique with your favorite chocolate bar – you'll be amazed by the smooth, silky results! Experiment with different types of chocolate to see which melts best.
- Share your Success: Post a picture of your perfectly melted chocolate creation on social media and tag us @BakeWithEase! Let's celebrate your chocolate triumphs together.
- Explore More Melting Magic: Dive into our other articles on baking techniques and recipes for even more delicious creations.
What’s your favorite thing to make with perfectly melted chocolate? Let us know in the comments below!