
Perfecting Vanilla Bean Custard for Exquisite Tarts

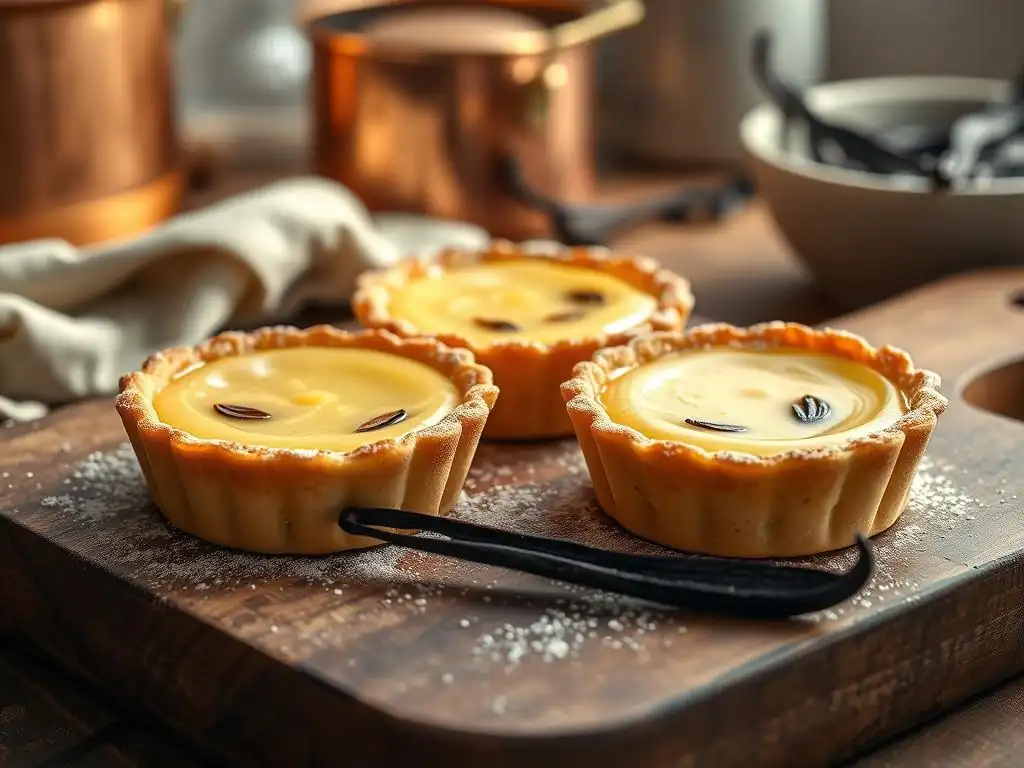
Welcome to BakeWithEase, where baking becomes a joy, not a chore! Are you ready to elevate your pastry game? This week, we're diving deep into a classic dessert that's surprisingly simple to master: Vanilla Bean Custard Tarts. Discover the secrets to achieving that perfect creamy texture and intense vanilla flavor. But what if the custard curdles, or the pastry is too tough? Don't worry, we've got you covered! Read on to unlock the techniques and tips that will transform you into a custard tart artisan.
- Bake Like a Pro: Mastering Vanilla Bean Custard Tarts at Home
- Understanding Vanilla Bean Custard: A Baker's Foundation
-
Step-by-Step Guide to Making Vanilla Bean Custard for Tarts
- Preparing Your Ingredients: Vanilla Beans, Heavy Cream, and More
- Infusing the Cream: Extracting Maximum Vanilla Flavor
- Cooking the Custard Base: Achieving the Perfect Consistency
- Tempering the Eggs: Preventing Curdling in Your Custard
- Straining for Silky Smoothness: Removing Lumps and Imperfections
- Chilling the Custard: Essential for Setting and Flavor Development
- Assembling Your Vanilla Bean Custard Tarts
- Tips and Tricks for Vanilla Bean Custard Tart Perfection
- Vanilla Bean Custard Tart Variations and Creative Ideas
- Elevate Your Baking: Mastering the Art of Vanilla Bean Custard Tarts
- Frequently Asked Questions
- Final Reflection: The Enduring Allure of a Perfect Custard
- Unleash Your Inner Pastry Chef: Master the Art of Vanilla Bean Custard
Bake Like a Pro: Mastering Vanilla Bean Custard Tarts at Home
Creating a truly memorable vanilla bean custard tart is a rewarding baking experience. It's a classic dessert that, while seemingly simple, requires attention to detail to achieve that signature silky texture and rich flavor. This guide will walk you through mastering the art of making the perfect vanilla bean custard filling, ensuring your tarts are the star of any occasion.
From selecting the finest vanilla beans to understanding the crucial steps of tempering and chilling, we'll cover everything you need to know. Whether you're a seasoned baker or just starting your journey with custard tarts, these techniques and tips will elevate your skills and help you craft desserts that are both beautiful and incredibly delicious.
Understanding Vanilla Bean Custard: A Baker's Foundation
What is Vanilla Bean Custard? A Rich Pastry Cream Explained
Vanilla bean custard, often referred to in the baking world as crème pâtissière (pastry cream) when thickened with starch, is a fundamental component in many desserts, particularly tarts. It's a rich, creamy filling typically made from milk or cream, egg yolks, sugar, a thickening agent (like cornstarch or flour), and crucially, vanilla. Unlike a simple stirred custard (like crème anglaise), pastry cream is cooked to a thicker consistency, allowing it to hold its shape when cooled, making it ideal for filling tart shells, eclairs, or layered cakes.
The magic of a great vanilla bean custard lies in its balance – not too sweet, wonderfully smooth, and bursting with the complex aroma of vanilla. When used in vanilla bean custard tarts, this creamy filling contrasts beautifully with a crisp pastry crust. Achieving the right thickness is key; it should be firm enough to slice without running, yet soft and yielding on the palate. A well-made custard for tarts is a testament to a baker's patience and precision.
The Secret to Exceptional Flavor: Why Quality Vanilla Beans Matter
The defining characteristic of a perfect vanilla bean custard is, unsurprisingly, the vanilla itself. Using real vanilla beans, specifically high-quality ones like Madagascar Bourbon, Tahitian, or Mexican varieties, makes an enormous difference compared to extract alone. Vanilla beans contain hundreds of aromatic compounds that contribute a depth and complexity of flavor that extract, which is primarily vanillin, simply cannot replicate. The tiny black specks visible in the finished custard are the hallmark of using a real bean, a visual cue that promises authentic flavor.
For a standard 9-inch tart requiring about 2-3 cups of custard, using at least one full vanilla bean, sometimes two for intense flavor, is recommended. The process of splitting the bean and scraping out the seeds (the "caviar") and then infusing the pod along with the seeds into the warm milk or cream is crucial. This allows the full spectrum of vanilla's flavor compounds to be extracted, resulting in a more fragrant and delicious vanilla bean custard filling. Investing in good quality beans is perhaps the single most important step in elevating your vanilla bean custard tarts.
Key Ingredients for the Best Vanilla Bean Custard Filling
Crafting the perfect vanilla bean custard for tarts relies on a few core ingredients, each playing a vital role. Beyond the star ingredient, quality vanilla beans, you'll need fresh egg yolks, which provide richness, color, and act as a primary thickener when gently heated. A typical recipe for a 9-inch tart might call for 4 to 6 egg yolks. Granulated sugar sweetens the custard and also helps tenderize the egg proteins, contributing to smoothness.
The liquid base is usually whole milk or a combination of milk and heavy cream. Using some cream adds extra richness and a luxurious mouthfeel. A starch, commonly cornstarch or sometimes flour, is essential for thickening the custard to a stable, sliceable consistency suitable for tarts. About 1/4 to 1/3 cup of cornstarch is often used for a standard batch. A pinch of salt can help balance the sweetness, and sometimes a touch of butter is whisked in at the end for extra silkiness and shine.
Step-by-Step Guide to Making Vanilla Bean Custard for Tarts
Preparing Your Ingredients: Vanilla Beans, Heavy Cream, and More
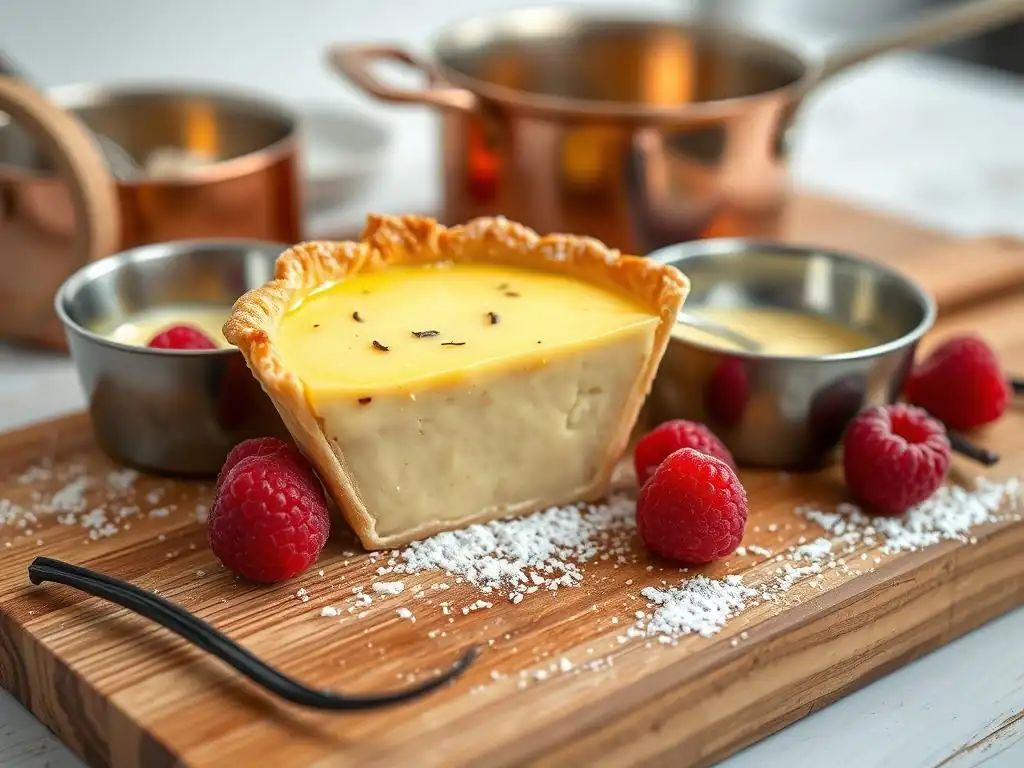
Before you begin cooking, having all your ingredients measured and ready is key to a smooth process, especially when making custard, which requires precise timing. Start by measuring your milk and/or cream into a saucepan. Slice your vanilla bean lengthwise with a sharp paring knife, then use the back of the knife to scrape out the tiny black seeds. Add both the seeds and the scraped pod to the cold milk/cream in the saucepan.
In a separate medium bowl, whisk together the egg yolks and sugar until they are pale yellow and slightly thickened – this process is called "ribboning." Whisk in the cornstarch (or flour) and salt until no lumps remain. Having everything prepped minimizes frantic scrambling once the cooking starts, ensuring you can focus on achieving the perfect vanilla bean custard texture without interruptions.
Infusing the Cream: Extracting Maximum Vanilla Flavor
The first step in building that incredible vanilla flavor for your vanilla bean custard is infusing the liquid base. Place the saucepan with the milk/cream, vanilla bean seeds, and pod over medium heat. Gently heat the mixture, stirring occasionally, until it just reaches a simmer – you'll see small bubbles forming around the edges. Do not boil vigorously, as this can scorch the milk.
Once simmering, remove the pan from the heat, cover it, and let it steep for about 15-20 minutes. This allows the heat to continue extracting the maximum flavor from the vanilla bean. The longer it steeps, the more pronounced the vanilla notes will be in your finished custard for tarts. Some recipes skip the steeping and just bring it to a boil, but a short steep truly enhances the vanilla depth.
Cooking the Custard Base: Achieving the Perfect Consistency
After steeping, remove the vanilla bean pod from the milk mixture (you can rinse and dry it to use for vanilla sugar later!). Gently reheat the milk mixture over medium heat until it is hot again, but not boiling rapidly. While the milk is reheating, give your egg yolk mixture a quick whisk to ensure it's smooth.
Now comes a critical step: tempering the eggs. Slowly drizzle about half of the hot milk mixture into the egg yolk mixture while whisking constantly. This gradually warms the egg yolks, preventing them from scrambling when they hit the hotter liquid. Once tempered, pour the warmed egg yolk mixture back into the saucepan with the remaining hot milk.
Tempering the Eggs: Preventing Curdling in Your Custard
Tempering is non-negotiable when making vanilla bean custard. Eggs begin to cook and solidify (scramble) at relatively low temperatures, around 140°F (60°C). If you were to add cold egg yolks directly into hot milk, the sudden change in temperature would cause the proteins to seize up instantly, resulting in lumpy, scrambled eggs instead of a smooth custard base.
By slowly whisking a portion of the hot liquid into the egg mixture first, you gently raise the temperature of the yolks. When this warmed mixture is then added back to the main pot of hot liquid, the temperature difference is much smaller, allowing the egg proteins to thicken the liquid smoothly rather than coagulate into curds. This technique is essential for achieving the silky-smooth texture desired for perfect vanilla bean custard tarts. Aim for the egg mixture to reach a temperature around 120°F (50°C) during the tempering process before adding it back to the main pot.
Straining for Silky Smoothness: Removing Lumps and Imperfections
Once the custard has thickened on the stove, it's wise to strain it immediately. Place a fine-mesh sieve over a clean bowl or container. Pour the hot custard through the sieve, using a spatula to gently push it through if needed.
Straining removes any small lumps of cooked egg or starch that may have formed despite careful cooking and tempering. It also catches any stray bits of vanilla bean pod you might have missed. This step is quick but makes a significant difference in achieving that professionally smooth and glossy finish that is characteristic of the best vanilla bean custard filling for tarts.
Chilling the Custard: Essential for Setting and Flavor Development
Once strained, the vanilla bean custard is still relatively soft. It needs to be chilled thoroughly to set properly and develop its full flavor potential. Cover the surface of the warm custard directly with plastic wrap, pressing it down so it touches the entire surface. This prevents a skin from forming as it cools.
Refrigerate the custard for at least 4-6 hours, or preferably overnight. During this time, the starch molecules fully hydrate and cross-link, turning the liquid into a firm, yet creamy, mass perfect for filling tart shells. Chilling also allows the vanilla flavor to meld and deepen. Before using, give the chilled custard a vigorous whisk or beat it briefly with an electric mixer to restore its smooth, spreadable consistency.
Assembling Your Vanilla Bean Custard Tarts
Choosing the Right Tart Crust: Sweet Shortcrust Pastry
The foundation of any great tart is its crust, and for vanilla bean custard tarts, a sweet shortcrust pastry is the classic choice. This type of dough, often called pâte sucrée, is rich in butter and sugar, resulting in a tender, crumbly texture and a slightly sweet flavor that complements the creamy custard beautifully. It's less prone to shrinking than pâte brisée (standard pie dough) and holds its shape well.
Making a sweet shortcrust pastry involves combining flour, sugar, cold butter (cut into small pieces), and often an egg yolk or whole egg for richness and binding. The key is to work the butter into the dry ingredients until it resembles coarse crumbs (using a food processor or your fingertips), then adding just enough liquid (egg and/or a little cold water) to bring the dough together. Overworking the dough develops gluten, leading to a tough crust, so handle it minimally. After forming, the dough must be chilled for at least 30 minutes before rolling.
Blind Baking Your Tart Shell: Preventing a Soggy Bottom
Blind baking is a crucial step when filling a tart shell with a wet filling like vanilla bean custard. It involves partially or fully baking the tart crust before adding the filling. This pre-cooking step ensures that the bottom crust is fully cooked and crisp, preventing it from becoming soggy when the moist custard is added and chilled.
To blind bake, line the chilled, rolled-out pastry dough in your tart pan. Trim the edges and prick the bottom all over with a fork. Line the shell with parchment paper or foil, pressing it snugly against the sides and bottom. Fill the lined shell with pie weights, dried beans, or rice – enough to fill it right up to the top edge.
Bake in a preheated oven (often around 375°F or 190°C) for about 15-20 minutes, or until the edges are lightly golden. Remove the weights and lining, then continue baking for another 5-10 minutes until the bottom is dry and lightly golden. Let the crust cool completely before filling.
Filling the Tart Shell: Achieving an Even Layer of Custard
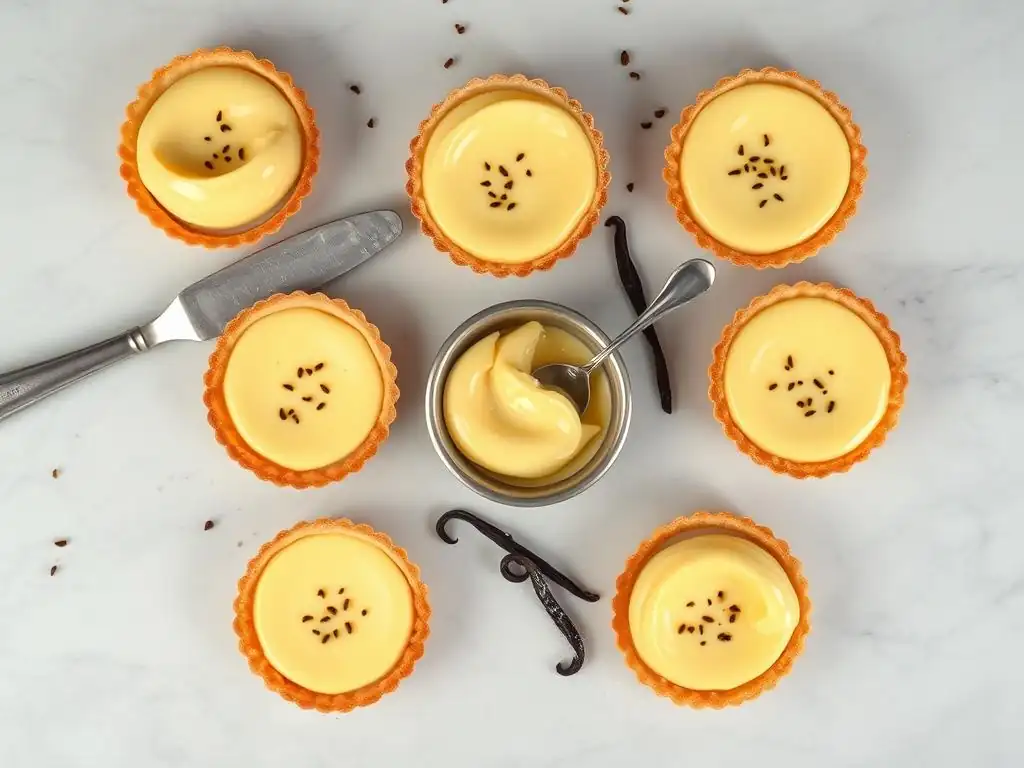
Once your blind-baked tart shell is completely cool and your vanilla bean custard is thoroughly chilled and smoothed out by whisking, it's time to assemble your vanilla bean custard tarts. Carefully spoon or pour the prepared custard into the cooled tart shell.
Use an offset spatula or the back of a spoon to spread the custard evenly across the bottom and right up to the edges of the crust. Aim for a smooth, level surface. For a standard 9-inch tart shell, you'll typically use the entire batch of custard made from the quantities mentioned earlier. Ensuring an even layer not only looks appealing but also guarantees a consistent texture throughout the tart.
Setting the Custard: Refrigeration for Perfect Texture
After filling the tart shell, the assembled vanilla bean custard tart needs to chill again to allow the custard to fully set within the crust. Place the tart carefully in the refrigerator.
Allow the tart to chill for at least 2-3 hours before slicing and serving. This chilling time is essential for the custard to become firm enough to hold its shape when cut. It also allows the flavors to meld between the crust and the filling. Patience during this final chilling step is rewarded with a beautifully set vanilla bean custard tart that slices cleanly and offers the ideal creamy-to-crisp texture contrast.
Tips and Tricks for Vanilla Bean Custard Tart Perfection
Achieving the Perfect Custard Texture: Avoiding Overcooking
The texture of your vanilla bean custard is paramount. Overcooking is a common pitfall that can result in a grainy or rubbery custard. Cook the custard gently over medium heat, whisking constantly, until it thickens significantly and comes to a gentle boil. Once it reaches this point, cook for just 1-2 minutes more while continuing to whisk vigorously. This ensures the starch is fully cooked and activated, leading to maximum thickening, but stops before the egg proteins over-coagulate.
A good indicator is when the custard coats the back of a spoon thickly and you can run your finger through it to leave a clean line. If you have a thermometer, aim for a temperature around 195-205°F (90-96°C). Immediately remove from heat and strain. Remember, it will continue to thicken as it cools and chills.
Troubleshooting Common Custard Problems: Lumps, Thin Consistency
Encountering issues with your vanilla bean custard? Lumps are often caused by insufficient whisking during cooking or not straining the custard. If you get lumps, straining is your best defense. If the custard is too thin after chilling, it could be due to undercooking (the starch didn't activate fully) or not using enough starch/egg yolks for the amount of liquid.
Unfortunately, it's difficult to thicken custard significantly once it's chilled. You can try gently reheating it with a slurry of cornstarch and milk, whisking constantly until it thickens, then re-straining and chilling, but this risks altering the texture. Prevention through proper cooking and straining is always easier than fixing it later. If it's just slightly thin, it might still be usable in a tart, just perhaps not sliceable into perfect wedges.
Enhancing the Vanilla Flavor: Vanilla Extract, Vanilla Bean Paste
While vanilla beans provide the most authentic and complex flavor for vanilla bean custard, you can enhance or supplement it. Adding a teaspoon or two of high-quality pure vanilla extract after the custard is cooked and removed from the heat can boost the aroma, as some volatile compounds in extract are lost during heating.
Vanilla bean paste is another excellent option. It contains both extract and vanilla bean seeds suspended in a syrup. It offers a good compromise between the convenience of extract and the visual appeal and flavor of seeds. You can use vanilla bean paste in place of or in addition to a scraped vanilla bean, typically using 1-2 teaspoons per vanilla bean called for in a recipe. This ensures your vanilla bean custard filling is packed with flavor.
Serving and Storage: Keeping Your Tarts Fresh and Delicious
Vanilla bean custard tarts are best served chilled. Remove the tart from the refrigerator about 15-20 minutes before slicing to allow the custard to soften slightly for optimal texture. Use a sharp knife dipped in hot water and wiped dry between slices for clean cuts.
Store leftover vanilla bean custard tarts in the refrigerator, covered loosely with plastic wrap or in an airtight container. They will keep well for 2-3 days. The crust may soften slightly over time due to moisture from the custard, but the flavor will remain excellent. Freezing vanilla bean custard tarts is generally not recommended, as it can affect the texture of both the custard (making it watery or grainy upon thawing) and the crust.
Vanilla Bean Custard Tart Variations and Creative Ideas
Adding Fruit to Your Custard Tarts: Fresh Berries
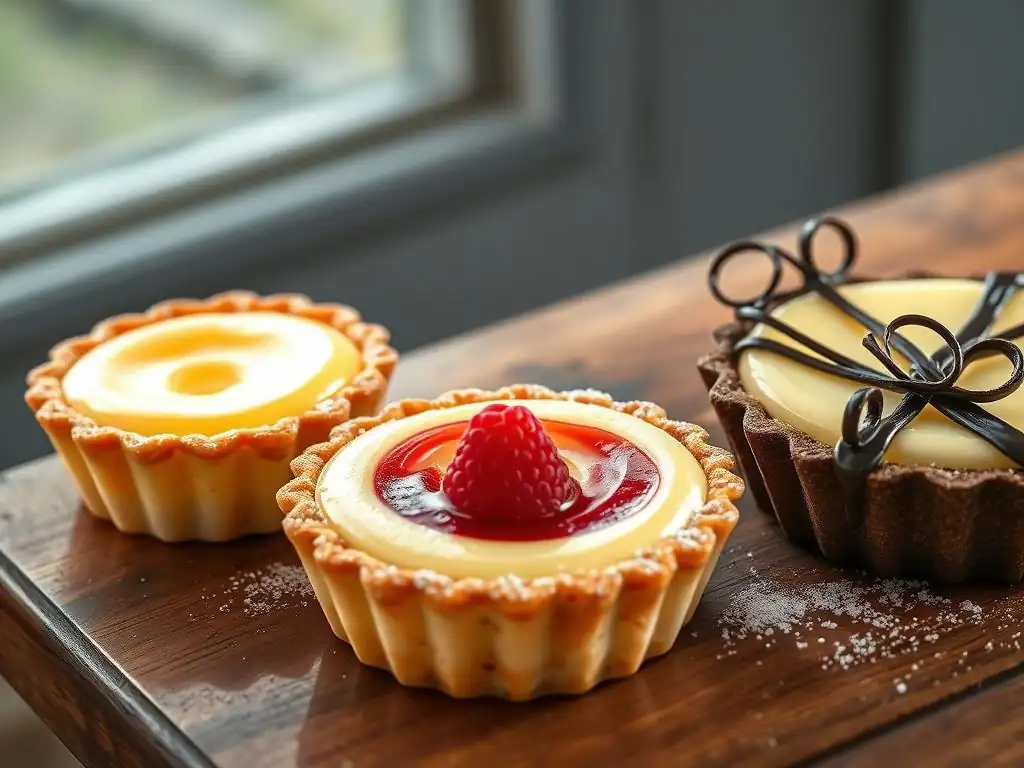
While a classic vanilla bean custard tart is delicious on its own, adding fruit can introduce wonderful color, freshness, and contrasting texture. Fresh berries like strawberries, raspberries, blueberries, or mixed berries are popular choices. They can be arranged artfully on top of the chilled custard just before serving.
Alternatively, you can add a layer of fruit compote or sliced fresh fruit before adding the custard, though this might increase the risk of a soggy bottom if the fruit is very juicy. A common technique is to brush the blind-baked crust with a thin layer of melted white chocolate or a simple egg white wash and bake briefly to create a moisture barrier before adding juicy fillings or fruit. The vibrant colors and slight acidity of berries beautifully complement the rich, creamy vanilla bean custard.
Chocolate Vanilla Bean Custard Tarts: A Decadent Twist
For chocolate lovers, transforming your vanilla bean custard tarts into a chocolate version is a simple yet decadent modification. This can be done by incorporating chocolate into the custard base itself. One method is to whisk finely chopped dark or semi-sweet chocolate into the hot, strained vanilla bean custard immediately after cooking. The residual heat will melt the chocolate; whisk until smooth and fully incorporated, then chill as usual.
Another approach is to create a layer of chocolate ganache over the set vanilla bean custard. Once the custard tart is chilled and set, warm some heavy cream and pour it over chopped chocolate, stirring until smooth. Let the ganache cool slightly until it thickens, then pour or spread it over the set custard layer. Chill again until the ganache is firm. This creates a rich, two-layer chocolate vanilla bean custard tart.
Caramelized Sugar Topping: Creating a Crème Brûlée Effect
For an elegant finish and a delightful textural contrast, you can turn your vanilla bean custard tart into something akin to a large crème brûlée tart. Once the vanilla bean custard tart is fully chilled and set, sprinkle a thin, even layer of granulated sugar (superfine sugar works best for even melting) over the surface of the custard.
Using a kitchen torch, carefully heat the sugar until it melts and caramelizes into a hard, glassy layer. Move the torch constantly to prevent scorching. If you don't have a torch, you can place the tart under a hot broiler for a minute or two, watching it very closely as the sugar melts rapidly. This creates a stunning, crackly topping that offers a delightful crunch against the smooth vanilla bean custard filling. Serve immediately after caramelizing for the best texture.
Elevate Your Baking: Mastering the Art of Vanilla Bean Custard Tarts
Mastering vanilla bean custard tarts is a skill that will serve you well in the world of pastry. The techniques learned – from infusing flavors and tempering eggs to blind baking crusts and achieving perfect custard consistency – are applicable to numerous other desserts.
By paying attention to the details, using quality ingredients, and practicing patience, you can consistently produce exquisite vanilla bean custard tarts that impress. So go ahead, gather your ingredients, embrace the process, and enjoy the delicious results of your baking efforts.
Frequently Asked Questions
How do I prevent my vanilla bean custard from curdling?
Curdling often happens due to overheating. Use a low heat and gently stir the custard constantly to ensure even cooking. Consider using a bain-marie for more delicate heating.
What type of vanilla bean is best for vanilla bean custard tarts?
While personal preference plays a role, Madagascar vanilla beans are often favored for their rich, creamy flavor. Tahitian vanilla beans offer a more floral aroma.
Can I use vanilla extract instead of a vanilla bean?
Yes, but the flavor will be different. Substitute one tablespoon of high-quality vanilla extract for one vanilla bean. Note that the visual appeal of vanilla bean specks will be missing.
How do I get a perfectly smooth custard filling for my tarts?
After cooking, immediately strain the custard through a fine-mesh sieve. This removes any lumps or cooked egg particles, resulting in a silky texture.
How long can I store vanilla bean custard tarts?
Vanilla bean custard tarts are best enjoyed fresh. However, they can be stored in the refrigerator for up to 3 days. Be sure to cover them tightly to prevent the pastry from becoming soggy.
Final Reflection: The Enduring Allure of a Perfect Custard
The pursuit of the perfect vanilla bean custard is not merely a culinary quest; it's a journey into the heart of flavor itself. This article explored the nuances of crafting a custard that transcends mere sweetness, achieving a balance of richness, creaminess, and the unmistakable, intoxicating aroma of vanilla. From sourcing high-quality beans to mastering the delicate art of tempering, each step contributes to an experience that elevates the humble tart to an unforgettable culinary masterpiece.
The enduring appeal of vanilla bean custard lies in its versatility and its ability to evoke powerful memories and emotions. It's a flavor that connects us to simpler times, to comforting traditions passed down through generations. As culinary trends come and go, the classic elegance of a perfectly executed custard remains timeless. The simplest things are often the most beautiful.
This sentiment perfectly encapsulates the magic of a well-made vanilla bean custard, a testament to the power of quality ingredients and meticulous technique.
Now, I invite you to consider your own culinary journey. Perhaps this article has inspired you to try your hand at making your own vanilla bean custard tarts, or maybe it has simply deepened your appreciation for the artistry involved in creating such a seemingly simple dessert. Regardless, I hope this exploration has sparked a renewed sense of wonder and curiosity, encouraging you to embrace the pursuit of perfection – one creamy, vanilla-infused bite at a time.
Unleash Your Inner Pastry Chef: Master the Art of Vanilla Bean Custard
Thanks for joining us on this creamy journey into the heart of perfect vanilla bean custard! You've now unlocked a secret weapon for elevating your desserts to the next level. Ready to put your newfound knowledge to the test?
- Craft your dream custard: Experiment with different vanilla bean qualities and find your perfect flavor profile. Don't be afraid to tweak the recipe!
- Share your custard creations: Show off your stunning tarts (or other custard-based delights!) on social media using #BakeWithEaseCustard. Let's inspire each other!
- Dive deeper into our recipe archive: Explore more of our easy-to-follow baking recipes perfect for all skill levels on BakeWithEase.com.
What innovative flavor combinations will you create with your masterful vanilla bean custard?