
The Role of Butter in Cake Problems (and How to Use It Right)

Welcome to BakeWithEase, your trusted companion in the delightful world of baking! Ever wondered why your butter cake isn't quite reaching its full, melt-in-your-mouth potential? This article dives deep into butter cake troubleshooting tips, unraveling the mysteries of this crucial ingredient and revealing how to harness its power for baking perfection. Prepare to unlock the secrets to achieving flawlessly delicious cakes, every single time. Let's get started!
- The Role of Fat in Cake Problems (and How to Use It Right) - BakeWithEase
- Understanding Fat's Impact on Cake Texture & Structure
- Common Cake Problems Linked to Fat and Solutions
- Fat Types and Their Impact on Cake Baking
- Mastering Fat Creaming Techniques for Perfect Cakes
- Fat Cake Troubleshooting Tips: A Summary
- Beyond Fat: Other Factors Affecting Cake Success
-
Frequently Asked Questions
- What is the most common problem caused by using butter that is too cold in butter cakes?
- Why is creaming butter and sugar so important for a light and fluffy butter cake?
- How can using melted butter affect the final texture of a butter cake?
- What are some signs that I've overmixed my butter cake batter, and how can butter contribute to this issue?
- What type of butter is best for baking butter cakes, and why does the fat content matter?
- Final Reflection: The Unsung Hero (and Villain) of the Perfect Cake
- Unlock Your Baking Potential: Master the Art of Butter!
The Role of Fat in Cake Problems (and How to Use It Right) - BakeWithEase
Understanding Fat's Impact on Cake Texture & Structure
The Importance of Fat in Cake Baking
Fat is a cornerstone ingredient in countless cake recipes, playing a vital role far beyond just adding richness. It significantly influences the final texture, moisture, and structure of your baked goods. Think of fat, whether it's butter, shortening, or oil, as a tenderizer. It coats flour particles, preventing them from forming excessive gluten networks.
This limited gluten development is key to achieving a tender, soft crumb rather than a tough, bread-like texture. A classic pound cake, for example, often uses a high ratio of fat to flour (sometimes equal parts by weight), resulting in its characteristic fine, dense crumb and moist texture. Without adequate fat, cakes tend to be dry, tough, and less enjoyable.
Beyond tenderness, fat contributes crucial moisture and flavor. Butter, in particular, brings a rich, dairy flavor that is highly desirable in many cakes. Fat also helps extend the shelf life of cakes by keeping them moist longer. Furthermore, when fat (especially solid fat like butter or shortening) is creamed with sugar, it incorporates air bubbles.
These tiny air pockets are essential for leavening, helping the cake rise and creating a lighter structure. The quality and amount of fat, therefore, directly impact everything from how high your cake rises to how it feels in your mouth and how long it stays fresh. Mastering the use of fat is fundamental for effective butter cake troubleshooting tips and general cake success.
How Fat Temperature Affects Cake Outcome
The temperature of your fat, especially butter, is not a detail to overlook; it dramatically impacts how it interacts with other ingredients and affects the final cake structure. Cold, hard butter, when cut into dry ingredients (like in some biscuit or scone methods, or specific cake techniques), melts slowly in the oven, creating steam pockets that contribute to flakiness or lift. However, in most standard cake recipes relying on the creaming method, using cold butter will result in poor aeration. It won't blend smoothly with sugar to create that necessary airy matrix.
Conversely, butter that is too soft or melted can also cause issues. Butter that is too warm (borderline melted) cannot hold air when creamed with sugar. The sugar crystals will just dissolve into the fat instead of cutting into it and creating air pockets. This leads to a dense cake with less volume. Room temperature butter, typically between 65-70°F (18-21°C), is ideal for creaming. At this temperature, it's pliable enough to blend smoothly but firm enough to trap air when beaten with sugar. Using butter at the correct temperature is one of the most critical butter cake troubleshooting tips.
Common Cake Problems Linked to Fat and Solutions
Dense Cakes: Is Your Fat the Culprit?
One of the most frustrating cake problems is a dense, heavy texture instead of a light, airy crumb. Often, the fat is indeed the culprit, specifically how it was handled or measured. If you used cold butter for a recipe requiring creaming, you likely didn't incorporate enough air. The creaming process with room-temperature butter and sugar is responsible for building a significant portion of the cake's structure and lift before chemical leaveners even activate. Insufficient creaming means insufficient air pockets, leading directly to a denser cake.
Another fat-related cause for density can be overmixing after the flour is added, especially if using melted fat or oil. While fat tenderizes by coating flour and inhibiting gluten, excessive mixing can still develop gluten networks, particularly in recipes with lower fat ratios or when the fat is liquid. This overdeveloped gluten creates toughness and density, counteracting the tenderizing effect of the fat. Recognizing these issues is key to effective butter cake troubleshooting tips.
Troubleshooting Dense Cake: Creaming Fat Properly
Proper creaming of butter and sugar is paramount for a light cake texture when using the creaming method. Start with butter that is truly at room temperature—it should be soft enough to indent easily with your finger but not greasy or melted. Beat the butter alone for a minute or two to soften it further, then gradually add the sugar.
Beat on medium speed until the mixture is visibly lighter in color (pale yellow or almost white) and significantly increased in volume, taking on a fluffy, aerated texture. This process can take anywhere from 5 to 10 minutes with an electric mixer, depending on the amount and speed.
Scraping down the sides and bottom of the bowl frequently (every minute or two) is crucial to ensure all the butter and sugar are evenly incorporated and aerated. If the mixture looks curdled, the butter might have been too cold, or the eggs were added too quickly or were also too cold. Warm the bowl slightly or beat longer, scraping often, to bring it back together before proceeding. This diligent creaming is a fundamental step in preventing density and is a top item on any list of butter cake troubleshooting tips.
Correcting Fat Temperature for Lighter Cakes
Ensuring your fat is at the correct temperature before you begin mixing is a simple yet impactful step to avoid dense cakes. For recipes calling for creaming butter and sugar, plan ahead to let your butter sit out at room temperature for 30-60 minutes, depending on the ambient temperature.
You can test if it's ready by pressing it; your finger should leave an indentation without the butter collapsing or feeling greasy. If you're in a hurry, you can carefully and briefly microwave it on a very low setting (like 10% power) in short bursts, flipping it frequently, or cut it into small pieces and let it sit for 10-15 minutes.
If a recipe calls for melted butter or oil, ensure it's specified and follow those instructions precisely. Using melted butter in a creaming method recipe will result in a dense cake because the structure relies on the air incorporated during creaming. Understanding when and why different fat temperatures are required is vital for successful baking and effective butter cake troubleshooting tips.
A dry cake is often a disappointing outcome. While overbaking is a primary culprit, issues with fat can also contribute to dryness. Fat provides moisture and richness, so if a recipe has too little fat, the cake can turn out dry and crumbly. This can happen if you accidentally mismeasure the fat or if you try to significantly reduce the fat content of a standard recipe without making other compensating adjustments (like adding more liquid or using ingredients like applesauce or yogurt that add moisture).
Furthermore, even if the correct amount of fat is used, overbaking can still lead to a dry cake. As a cake bakes longer than necessary, moisture evaporates, and the fats can render out excessively, leaving behind a drier structure. The fat that was intended to keep the cake moist is lost. Preventing overbaking is just as important as using the right amount and type of fat when aiming for a moist cake.
Too Little Fat: Recognizing the Signs
How do you know if too little fat is the issue behind your dry cake? A cake lacking sufficient fat will often have a coarse, crumbly texture that falls apart easily rather than holding together in moist crumbs. It might taste less rich and feel dry in your mouth. The crust might be thicker and harder than expected. If you've followed a standard recipe and your cake is consistently dry, double-check your fat measurement technique (using scales is highly recommended for accuracy, e.g., 227g for a U.S. cup of butter).
If you are intentionally using a reduced-fat recipe or adapting a standard one, be aware that you will likely need to compensate for the lost moisture and tenderness. Replacing some fat with moist ingredients like mashed banana, applesauce, pumpkin puree, or yogurt can help. Adding a little extra liquid (milk, buttermilk, etc.) or using ingredients like brown sugar (which contains molasses and adds moisture) can also mitigate dryness. These are useful butter cake troubleshooting tips when dealing with low-fat variations.
Overbaking and Fat Loss: Prevention is Key
Even with the perfect amount of fat, overbaking will dry out your cake. Fat renders and liquid evaporates when exposed to excessive heat for too long. To prevent this, rely on visual cues and the toothpick test rather than just the timer. Check for doneness a few minutes before the recipe's minimum bake time. The cake should look set around the edges, and the center should spring back slightly when gently pressed.
The toothpick test is reliable: insert a wooden skewer or toothpick into the center of the cake. It should come out with a few moist crumbs attached, but no wet batter. If it comes out completely clean, the cake is likely already slightly overbaked. If it comes out with wet batter, it needs more time. Knowing your oven (using an oven thermometer is a great butter cake troubleshooting tip!) and checking frequently towards the end of the baking time are the best defenses against overbaking and preserving the fat-induced moisture.
Greasy or Oily Cakes: Fat Excess and How to Avoid It
At the opposite end of the spectrum from dryness is a cake that feels greasy or oily. This is almost always a result of too much fat or improper incorporation. Using significantly more fat than the recipe calls for throws off the delicate balance of ingredients. The excess fat doesn't get properly emulsified or absorbed by the dry ingredients and simply pools or coats the cake, leading to a heavy, greasy texture.
Another cause can be adding melted fat that is too hot to the batter, which can sometimes break the emulsion. Overmixing after adding melted fat or oil can also sometimes contribute to a greasy texture, though less commonly than simply using too much. Accurate measurement is the primary defense against a greasy cake.
Measuring Fat Accurately for Cake Recipes
Precision in baking, especially with fat, is crucial. The most accurate way to measure solid fats like butter or shortening is by weight using a kitchen scale. A standard U.S. cup of butter weighs approximately 227 grams. Volume measurements for solid fats, especially if packed incorrectly, can easily lead to errors. For example, packing shortening too tightly into a measuring cup can result in using 10-15% more than intended.
For liquid fats like oil, volume measurements are generally more reliable, but using the correct measuring cup (liquid vs. dry) is still important. Use a liquid measuring cup placed on a flat surface and read at eye level. Always double-check the recipe's specified measurement method. If it calls for "1 cup butter, softened," weigh it if possible (227g) or use the markings on the butter wrapper if available (often marked in tablespoons and cup increments). Accurate measurement is a fundamental butter cake troubleshooting tip.
Reducing Fat Content Strategically (Without Sacrificing Flavor)
While using the specified amount of fat is best for the intended outcome of a recipe, sometimes bakers wish to reduce fat for dietary reasons. Simply cutting the amount of fat in half will likely result in a dry, tough cake. Strategic reduction involves making substitutions. As mentioned, ingredients like applesauce, mashed banana, pumpkin puree, prunes, or yogurt can replace some fat while adding moisture.
For example, you might replace half the butter in a muffin recipe with applesauce. However, in delicate cakes where creaming is essential for lift (like many butter cakes), replacing a large portion of the butter is difficult without significantly altering the texture and structure. The fat's role in aeration and tenderizing is hard to replicate fully.
Start with small reductions or substitutions (e.g., replacing 25% of the fat) and test the results. For butter cake troubleshooting tips related to fat reduction, focus on recipes specifically developed to be lower in fat or those where fat's primary role is moisture rather than creaming for lift.
Sinking Cakes: Fat's Role in Structural Integrity
A cake that rises beautifully in the oven only to sink in the center is heartbreaking. While many factors can cause sinking (like opening the oven door too early or incorrect leavening), issues with fat can also play a role, particularly in recipes with a high fat-to-flour ratio. In these cakes, the structure is heavily reliant on the protein matrix formed by eggs and the limited gluten developed from flour, which must be strong enough to support the weight of the moist, fat-rich crumb.
If there's an imbalance—perhaps too much fat relative to the structural components (flour and eggs), or if the fat wasn't properly emulsified into the batter—the structure can be weakened. As the cake bakes, the fat melts, and if the protein network isn't robust enough to hold up, the center can collapse. Overcreaming butter and sugar can also sometimes contribute to sinking if the air bubbles created are too large or unstable, leading to a structure that can't support itself once the initial oven spring subsides.
Fat and Gluten Balance for Stable Cakes
Fat's job is partly to limit gluten development, ensuring tenderness. However, you still need some gluten structure from the flour, along with the protein from eggs, to provide stability. In recipes with very high fat content (like butter cakes or pound cakes), the balance is delicate. Using too little flour relative to the fat can result in a weak structure prone to sinking. Conversely, too much flour can lead to a dry, tough cake.
Ensuring you use the correct type and amount of flour specified in the recipe is important. Cake flour, with its lower protein content, is often used in tender cakes to limit gluten further while still providing some structure. All-purpose flour provides more structure but can lead to toughness if overmixed in the presence of liquid. Understanding how your fat interacts with the flour and eggs helps in butter cake troubleshooting tips related to structural issues.
Correcting Fat-Related Imbalances to Prevent Sinking
Preventing fat-related sinking involves ensuring the correct ratios of ingredients and proper mixing techniques.
- Accurate Measurement: Use a scale to measure flour and fat, especially in sensitive recipes. Even slight variations can impact the structure.
- Proper Emulsification: Ensure the fat is well incorporated into the batter. In the creaming method, add eggs one at a time, beating well after each addition, to create a stable emulsion. If the batter looks curdled, beat longer or warm it slightly before adding dry ingredients.
- Don't Over-rely on Fat for Structure: While fat contributes richness and tenderness, the primary structure comes from protein coagulation (eggs) and gluten development (flour). Ensure these components are present in the right proportions and handled correctly (e.g., don't overmix after adding flour).
- Check Oven Temperature: An oven that is too cool can also contribute to sinking, as the structure sets too slowly. Use an oven thermometer.
Addressing these points is crucial for effective butter cake troubleshooting tips focused on preventing that dreaded sunken center.
Fat Types and Their Impact on Cake Baking
The type of fat you choose significantly impacts the flavor, texture, and appearance of your cake. Different fats behave differently due to their melting points and composition.
Shortening vs. Butter: Choosing the Right One
Butter and shortening are both solid fats commonly used in baking, but they yield different results.
- Butter: Composed of about 80-82% fat, 16-18% water, and 1-2% milk solids. Butter provides excellent flavor and contributes to browning (Maillard reaction) and spread. When creamed, the water content turns to steam in the oven, contributing to lift and flakiness. The milk solids contribute to browning. However, butter has a lower melting point than shortening.
- Shortening: Typically 100% fat (often hydrogenated vegetable oil). Shortening has a higher melting point than butter. This means it stays solid longer during baking, creating more tender crumbs as it melts later, coating flour particles effectively. It also results in cakes with a higher volume and a lighter, whiter crumb because it incorporates air very well during creaming and doesn't promote browning like butter's milk solids do. Shortening is flavorless.
Using a blend of butter and shortening is common in some recipes (like many commercial cakes) to get the best of both worlds: the flavor of butter and the tenderness and structure-building properties of shortening. For classic butter cake troubleshooting tips, understanding butter's unique properties (flavor, browning, lower melting point) is key.
Oil: Understanding the Different Types and Their Effects
Liquid fats like oil (vegetable oil, canola oil, olive oil, etc.) behave very differently from solid fats. Since oil is liquid at room temperature, it cannot be creamed with sugar to incorporate air. Cakes made with oil rely solely on chemical leaveners (baking soda, baking powder) for lift. However, oil excels at providing moisture. It coats flour particles more effectively than solid fat, inhibiting gluten development and resulting in a very tender, moist crumb that stays soft longer.
Oil-based cakes often have a more uniform, slightly tighter crumb structure compared to butter-based cakes which can have a more open, irregular crumb from creaming. Neutral-flavored oils like vegetable or canola oil are best for most cakes unless you want the specific flavor of an oil like olive oil (which works well in some fruit or chocolate cakes). Oil is a great choice for cakes where moisture is paramount, like carrot cake, zucchini bread, or some chocolate cakes.
Vegan Fat Alternatives: Considerations for Cake Baking
Baking vegan cakes requires substituting traditional fats like butter. Common vegan fat alternatives include:
- Vegan Butter Sticks: These are designed to mimic butter's consistency and often work well in creaming methods. Their composition varies by brand, so results can differ. Look for those specifically formulated for baking.
- Melted Coconut Oil: Can be used in place of oil or melted butter, but it imparts a coconut flavor unless refined. Its behavior can vary as it's solid at cooler room temperatures but liquid when warm.
- Vegetable Shortening: Many shortenings are vegan and can be used for tenderness and structure, though they lack flavor.
- Fruit Purees/Vegetables: Applesauce, banana, pumpkin, avocado can replace some fat for moisture but won't contribute to creaming lift or richness in the same way.
When using vegan fat alternatives, especially in recipes originally designed for butter, experimentation might be needed. Vegan butter sticks are often the best bet for recipes relying on the creaming method, but their performance can vary compared to dairy butter. Vegan butter cake troubleshooting tips often involve finding the right brand and ensuring it's at the correct temperature for creaming.
Mastering Fat Creaming Techniques for Perfect Cakes
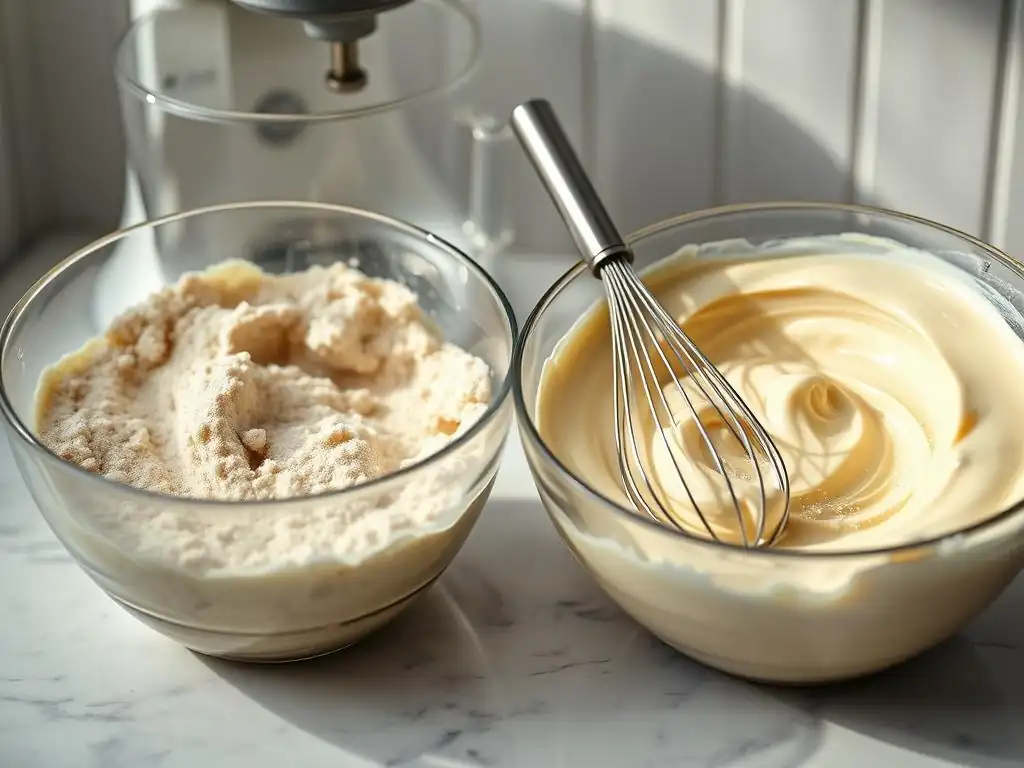
The creaming method is fundamental to many butter-based cakes, providing essential aeration and structure. Mastering it is vital for successful baking and effective butter cake troubleshooting tips.
The Traditional Creaming Method: A Step-by-Step Guide
The traditional creaming method starts by beating softened solid fat (usually butter) and sugar together until light and fluffy. Here's a breakdown:
- Soften Butter: Ensure butter is at room temperature (65-70°F).
- Beat Butter: Beat the softened butter alone on medium speed for 1-2 minutes to make it smooth.
- Add Sugar: Gradually add the sugar to the butter while beating.
- Cream: Increase speed to medium-high and beat the mixture. The goal is to incorporate air. Creaming should take 5-10 minutes with a stand mixer or longer with a hand mixer. The mixture will become pale yellow, significantly increased in volume, and look fluffy. Scrape down the bowl frequently (every 1-2 minutes) to ensure even creaming.
- Add Eggs: Add eggs one at a time, beating well after each addition (about 30-60 seconds) until fully incorporated and the mixture is smooth. If it looks curdled, keep beating; adding a tablespoon of the dry ingredients can sometimes help stabilize it.
- Alternate Dry & Wet: Add dry and wet ingredients alternately, starting and ending with dry, mixing only until just combined after each addition.
This thorough creaming process builds a stable, aerated base for your cake.
Reverse Creaming Method: When to Use It
The reverse creaming method is an alternative technique that often results in a cake with a very fine, velvety, and tender crumb. It's particularly good for cakes where you want a delicate texture.
- Combine Dry Ingredients: Whisk together all the dry ingredients (flour, sugar, leavener, salt).
- Cut in Fat: Add softened solid fat (butter or shortening) to the dry ingredients and mix on low speed until the mixture resembles coarse crumbs or wet sand. This coats the flour particles with fat before liquid is added, further inhibiting gluten development.
- Add Wet Ingredients: Combine all liquid ingredients (eggs, milk, extracts). Add about half of the liquid mixture to the dry ingredients and mix until just combined.
- Add Remaining Liquid: Add the rest of the liquid in one or two additions, mixing until the batter is smooth and lump-free, but be careful not to overmix.
This method minimizes gluten development, leading to a very tender cake, though it may not achieve the same volume as the traditional creaming method. It's a useful technique to know for butter cake troubleshooting tips related to crumb texture.
Tips for Achieving Light and Fluffy Frosting
While the article focuses on cake, fat is also key in frosting. For a light and fluffy buttercream, the consistency and temperature of the fat (usually butter) are vital.
- Room Temperature Butter: Just like for cakes, your butter should be softened but not melted. If it's too cold, it won't cream properly. If it's too warm, the frosting will be greasy and potentially soupy.
- Proper Creaming: Beat the butter alone for several minutes until it's very smooth and light. This incorporates air.
- Gradual Sugar Addition: Gradually add powdered sugar, mixing on low speed initially to avoid a cloud, then increasing speed to beat until smooth and fluffy.
- Liquid Control: Add liquid (milk, cream, water) a tablespoon at a time until the desired consistency is reached. Too much liquid makes it thin; too little makes it stiff.
Achieving the right fat consistency and technique is key to a spreadable, airy frosting that complements your perfectly baked cake.
Fat Cake Troubleshooting Tips: A Summary
Troubleshooting cake problems often comes back to understanding how fat functions in your recipe. Here’s a quick recap of common issues and their fat-related causes:
- Dense/Low Volume:
- Butter too cold for creaming?
- Insufficient creaming time/technique?
- Overmixing after adding flour (developing too much gluten)?
- Dry/Crumbly:
- Too little fat used?
- Overbaking (leading to moisture/fat loss)?
- Recipe inherently low in fat without compensation?
- Greasy/Oily:
- Too much fat used (measurement error)?
- Fat not properly emulsified?
- Melted fat added too hot?
- Sinking Center:
- Imbalance of fat relative to flour/eggs?
- Poor emulsification of fat and eggs?
- Overcreaming leading to unstable air pockets?
Checking these points is a great starting point for butter cake troubleshooting tips.
Chocolate Cake Example and Fat Troubleshooting
Let's consider a common chocolate layer cake. If your chocolate cake is dense and not very tall, potential fat issues could include:
- Cold Butter: If it's a creamed butter recipe, using cold butter means insufficient air was incorporated during creaming, resulting in poor lift and density.
- Overmixing: Chocolate cakes often use cocoa powder (a dry ingredient). If you overmix after adding the dry ingredients (including cocoa and flour) to the creamed butter mixture, you can develop tough gluten, leading to a dense, sometimes dry, crumb despite adequate fat.
- Incorrect Fat Type: Using oil in a recipe designed for creamed butter will result in a dense cake because it bypasses the crucial aeration step of creaming.
To troubleshoot: Ensure butter is room temperature for creaming (65-70°F). Cream butter and sugar for the full 5-8 minutes until light and fluffy. Add eggs one at a time, beating well. When adding dry ingredients, mix only until just combined—stop as soon as you see no dry streaks. Using these butter cake troubleshooting tips can help you achieve a light, moist chocolate cake.
Beyond Fat: Other Factors Affecting Cake Success
While fat plays a huge role, remember that cake baking is a science of interactions between many ingredients. Other factors are equally critical.
Flour Type and Measurement
Using the wrong type of flour (e.g., bread flour instead of cake flour) or mismeasuring flour (packing it into the cup instead of spooning and leveling) can drastically change the structure and texture, leading to toughness or dryness regardless of fat.
Egg Temperature and Incorporation
Eggs contribute structure and moisture. Using cold eggs can curdle butter mixtures, affecting emulsification. Adding eggs one at a time and beating properly ensures they are fully incorporated into the fat/sugar mixture, contributing to a stable batter.
Oven Temperature and Baking Time
An inaccurate oven temperature can cause cakes to bake too quickly (dry, possibly domed and cracked) or too slowly (sinking, dense). Overbaking is a leading cause of dry cakes, even with sufficient fat. Always check your oven temperature with an external thermometer and test for doneness towards the end of the baking time.
Frequently Asked Questions
What is the most common problem caused by using butter that is too cold in butter cakes?
Using butter that is too cold often results in a dense and uneven cake texture. The butter won't cream properly, hindering proper aeration and gluten development.
Why is creaming butter and sugar so important for a light and fluffy butter cake?
Creaming incorporates air, creating tiny air pockets that expand during baking. This aeration process is essential for a light and fluffy texture and helps leaven the cake.
How can using melted butter affect the final texture of a butter cake?
Melted butter can lead to a greasy, dense, and often flat cake. It prevents the necessary air incorporation that creaming provides, altering the cake's structure.
What are some signs that I've overmixed my butter cake batter, and how can butter contribute to this issue?
Overmixing develops too much gluten, resulting in a tough and chewy cake. Overmixing can happen when butter is too soft or melted, leading to uneven mixing and gluten formation.
What type of butter is best for baking butter cakes, and why does the fat content matter?
Unsalted butter with a high fat content (around 80-82%) is generally recommended. This higher fat content contributes to a richer flavor and a more tender crumb in the final cake.
Final Reflection: The Unsung Hero (and Villain) of the Perfect Cake
The seemingly simple act of creaming butter and sugar is, in reality, the cornerstone of countless baking triumphs and disasters. A seemingly minor detail in the recipe, the quality and handling of butter significantly impacts the final texture, moisture, and overall success of your cake. This article has explored the multifaceted role of butter in cake baking, revealing its potential to elevate a recipe to perfection or lead to a crumbly, dry disappointment.
The journey through butter's impact on cake baking has been a fascinating exploration of culinary science and personal experience. I've learned firsthand the importance of paying close attention to seemingly small details, and the profound effect even subtle variations can have on the final product. The difference between something good and something great is attention to detail.
This quote resonates deeply, as the meticulous attention to butter's temperature, quality, and incorporation truly distinguishes a good cake from an exceptional one.
Now, armed with this knowledge, I encourage you to approach your next cake baking adventure with renewed focus. Don't just measure out the butter; understand it. Consider its temperature, its quality, and its role in the overall structure of your cake. Experiment, learn from your mistakes, and savor the delicious rewards of mastering this essential ingredient. The perfect cake awaits – and it all starts with the butter.
Unlock Your Baking Potential: Master the Art of Butter!
Thanks for diving into the world of butter and its crucial role in baking! You've now unlocked valuable insights into creating perfectly moist and flavorful cakes. Ready to put your new knowledge into action?
- Bake your dream cake: Try out one of the recipes mentioned in the article, focusing on the butter techniques you just learned. Pay close attention to temperature and creaming!
- Share your baking triumph (or even your baking mishaps!): Post a picture of your creation on social media and tag us – we’d love to see it!
- Explore our other articles on cake decorating to elevate your skills even further. We've got tons of tips on frostings, fillings, and more!
What surprising ways have you discovered to use butter in your baking? Let's share ideas in the comments below!