
Why Your Bread Shape Isn't Holding During Baking

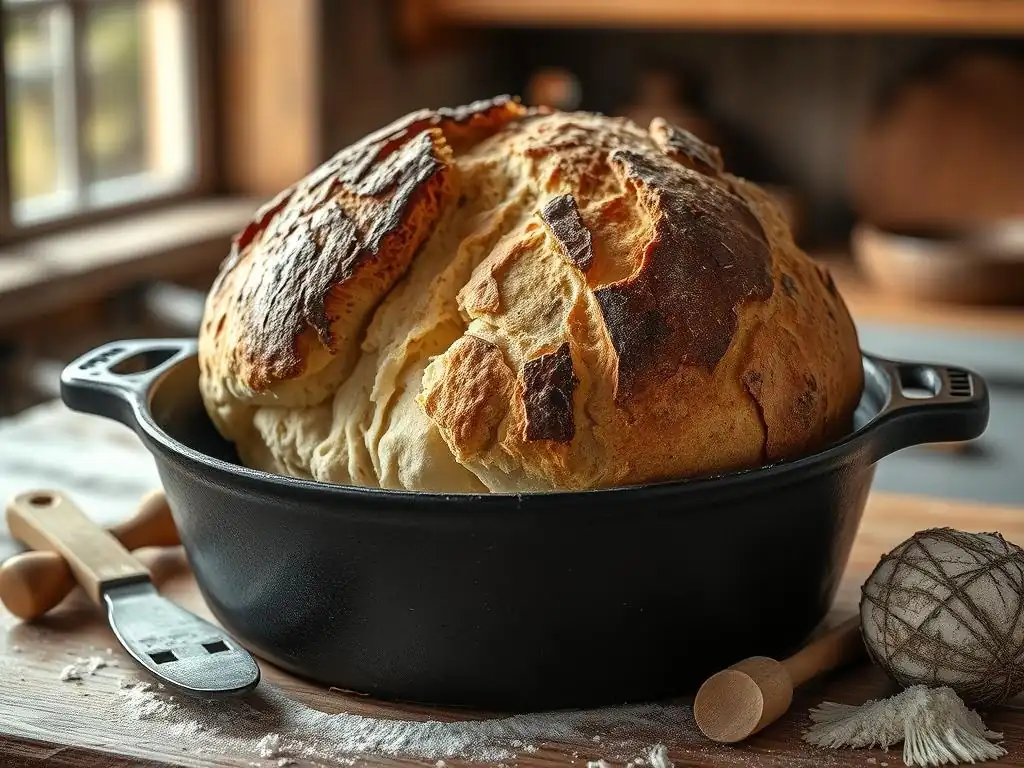
Welcome to BakeWithEase, your haven for baking brilliance! Ever wondered why your beautifully shaped loaf deflates during baking? This can be a frustrating experience, but don't worry, you're not alone. In this article, we'll delve into the common culprits behind why your bread shaping holds poorly. Get ready to unlock the secrets to perfectly formed loaves, every single time. Let's bake!
- Why Your Bread Shaping Holds Poorly During Baking: A BakeWithEase Guide
- Understanding Bread Shaping and Its Importance
- Common Reasons for Bread Shaping Issues
- Troubleshooting Bread Shaping Problems: Step-by-Step
- Advanced Techniques for Improved Bread Shaping
- Preventing Future Bread Shaping Issues
- Achieving Perfect Bread Shape: Final Tips from BakeWithEase
- Frequently Asked Questions
- Final Reflection: The Humble Loaf and the Art of Patience
- Unlock Your Bread's Full Potential!
Why Your Bread Shaping Holds Poorly During Baking: A BakeWithEase Guide
Welcome to BakeWithEase! It's frustrating when you've put time and effort into your dough, only for your carefully shaped loaf to spread out or collapse in the oven. If you're experiencing issues where your bread shaping holds poorly, you're not alone. This is a common hurdle for many bakers, but understanding the underlying causes can help you achieve that beautiful, well-structured loaf you're aiming for. Let's dive into the science and technique behind maintaining your bread's shape.
Understanding Bread Shaping and Its Importance
Achieving a well-shaped loaf isn't just about aesthetics; it's fundamental to the final texture and structure of your bread. The way you handle and shape your dough directly impacts how it rises, how the crust develops, and even the crumb structure inside. When your bread shaping holds poorly, it often indicates an issue earlier in the process that needs addressing.
Proper shaping creates tension on the surface of the dough, forming a kind of "skin" that helps the loaf hold its form as it expands during proofing and baking. This surface tension is crucial for directing the oven spring upwards rather than outwards. Without this tension, or if the internal structure isn't strong enough to support it, the dough will simply flatten, resulting in a dense, wide loaf instead of a tall, airy one. Mastering shaping is a key step in elevating your baking results.
The Role of Gluten Development in Bread Structure
Gluten is the backbone of most bread doughs. It's a protein network formed when two proteins, glutenin and gliadin, found in wheat flour, combine with water and are worked (kneaded or folded). As you develop gluten, these proteins link together, creating elastic strands that can trap the carbon dioxide gas produced by yeast during fermentation.
A well-developed gluten network is essential because it provides the dough with strength and elasticity. Think of it like tiny balloons within a stretchy net. The net (gluten) holds the balloons (gas bubbles) in place. If the gluten isn't strong enough, the network is weak, and it can't support the structure needed for the dough to hold its shape, especially when dealing with higher hydration doughs or larger loaves. Insufficient gluten development is a primary reason why bread shaping holds poorly.
Why Proper Shaping Matters for Bread's Final Form
Shaping is the process of organizing the dough's internal structure and creating surface tension. This step aligns the gluten strands, preparing the dough to expand predictably. For example, shaping a boule (round loaf) involves gathering the dough into a tight ball, creating a smooth, taught surface on top and a seam underneath. This surface tension acts like a skin, resisting the outward spread and encouraging upward expansion.
When shaping is done correctly, it sets the stage for optimal proofing and oven spring. A properly shaped loaf will maintain its form throughout the final rise and burst upwards in the hot oven. Conversely, poor shaping — like trapping too much air inside, not creating enough surface tension, or handling the dough too roughly — can lead to an uneven rise, a weak structure, and ultimately, a loaf where the bread shaping holds poorly, resulting in a flat or misshapen final product.
Common Reasons for Bread Shaping Issues
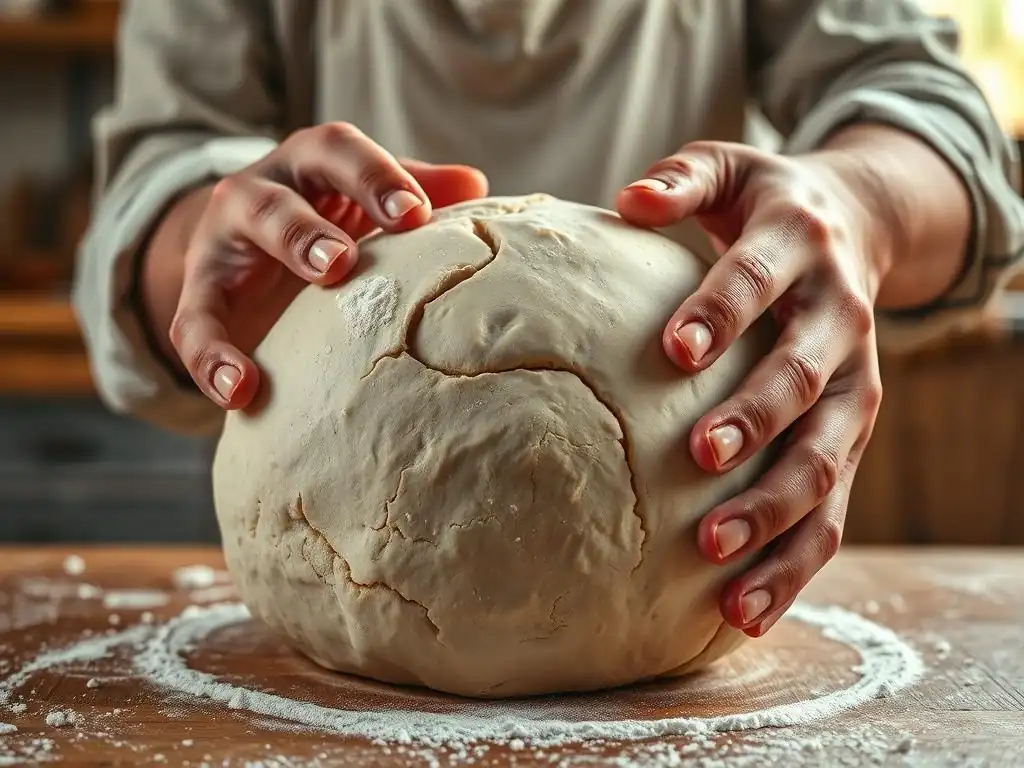
Understanding the root causes is the first step to fixing them. Several factors can contribute to your bread shaping holding poorly. It's often not just one issue, but a combination of factors working against your dough's ability to maintain its form.
Insufficient Gluten Development: A Key Factor
As discussed, gluten provides the necessary structure. If your dough hasn't been mixed, kneaded, or folded enough, the gluten network won't be strong enough to support the weight and expansion of the dough. This is particularly evident with wetter doughs, which require more development to build strength. A dough with poor gluten development will feel slack, tear easily when stretched, and won't hold its shape after initial forming.
Consider a typical loaf of sourdough. If the bulk fermentation doesn't include sufficient folding (say, only one fold over 4 hours when it needed three or four), the gluten structure might remain weak. When you try to shape this dough, it will likely spread out immediately on the counter, indicating that the bread shaping holds poorly because the internal scaffolding isn't built.
Overcoming Under-Developed Gluten in Bread Dough
The best way to combat under-developed gluten is through proper mixing and sufficient development techniques like kneading or stretch-and-folds. For machine mixing, ensure you knead for the recommended time, often 8-12 minutes depending on the mixer and dough. For hand kneading, aim for 10-15 minutes until the dough passes the "windowpane test" – you can stretch a small piece thin enough to see light through it without tearing.
If you're using a no-knead or minimal-knead method, incorporate several sets of stretch-and-folds during the bulk fermentation. Performing 3-4 sets of folds at 30-45 minute intervals over the first couple of hours of bulk fermentation significantly strengthens the dough. This patient approach allows the gluten network to build strength and elasticity, making your dough far more capable of holding its shape during subsequent steps.
Dough Hydration Levels: Too Wet or Too Dry?
Dough hydration, the ratio of water to flour by weight, dramatically affects dough handling and structure. High hydration doughs (like 75% or more water to flour) are stickier and more challenging to handle, requiring more careful gluten development and shaping technique to prevent the bread shaping from holding poorly. Low hydration doughs (below 60%) are easier to shape but can result in denser bread if not handled correctly.
If your dough is too wet for the amount of gluten developed, it will simply lack the internal strength to stand up. Imagine trying to build a sandcastle with soaking wet sand versus slightly damp sand – the structure won't hold. Conversely, overly dry dough can be stiff and resistant to shaping, potentially leading to cracks or an inability to create sufficient surface tension.
Adjusting Dough Hydration for Better Shape Retention
When working with new recipes, especially those with high hydration, consider slightly reducing the water initially (e.g., by 5-10%) until you are comfortable handling wetter doughs. You can always add a little more water later if needed. For overly wet dough, adding a tablespoon or two of flour during the final stages of mixing or during initial folds can help, but be careful not to add too much, which can make the dough tough.
If your dough feels too dry and isn't coming together, gradually add water, a teaspoon at a time, during kneading until it reaches a pliable but not sticky consistency. Remember that different flours absorb water differently, so the hydration level is often a guideline. Pay attention to how the dough feels rather than sticking rigidly to a percentage, especially if you find your bread shaping holds poorly consistently.
Incorrect Shaping Techniques: Mastering the Basics
Even with perfectly developed dough, poor shaping technique can ruin everything. Common mistakes include not creating enough surface tension, trapping large air pockets inside the loaf, or degassing the dough too much. If the surface isn't taut, it won't resist the outward spread during proofing and baking. Trapped air pockets can cause blowouts or uneven structure, while excessive degassing removes the very bubbles that give bread its lift.
For instance, when shaping a baguette, you need to gently degas the dough, fold it over itself, and then roll it to create a long, tight cylinder with significant surface tension. If this is done too loosely, or if you tear the dough while shaping, the structure is compromised. The resulting loaf will likely flatten out in the oven, demonstrating how easily incorrect technique leads to bread shaping holding poorly.
Avoiding Common Shaping Mistakes
- Not enough tension: Ensure you are creating a smooth, taut surface on your loaf. For rounds, tuck the dough under itself repeatedly until a tight ball forms. For longer loaves, roll tightly from one end, sealing the seam well.
- Trapping air: Gently handle the dough. Avoid folding large amounts of air into the center during shaping. You want to preserve the smaller bubbles developed during fermentation.
- Being too rough: Don't punch down or manhandle the dough excessively. This deflates the dough too much and can damage the gluten network you worked hard to build. Aim for firm but gentle handling.
- Not sealing seams: Ensure all seams are properly sealed at the bottom of the loaf. Unsealed seams can burst open during baking, leading to a loss of structure and shape.
Dough Temperature: Impact on Shape Stability
Dough temperature plays a critical role throughout the bread-making process, influencing fermentation rate and dough handling. Dough that is too warm can ferment too quickly, potentially leading to over-proofing before shaping or during the final proof. Overly warm dough can also be sticky and harder to handle and shape effectively, making it more likely that the bread shaping holds poorly.
Conversely, dough that is too cold will ferment slowly, which isn't necessarily bad, but inconsistent temperatures can lead to unpredictable results. For instance, if your bulk fermentation was too warm (say, consistently above 80°F), the dough might develop rapidly but potentially exhaust the yeast's energy prematurely, leaving you with a weaker structure by the time you get to shaping.
Controlling Dough Temperature for Optimal Baking Results
Aim for consistent dough temperatures throughout the process. Many recipes suggest a target dough temperature after mixing, often between 75-80°F (24-27°C) for bulk fermentation. Use a thermometer to check your water and flour temperatures, and adjust using warmer or colder water to hit your target. During bulk fermentation, try to keep the dough in a consistent environment, perhaps using a proofer or your oven with the light on (often around 80°F).
If your dough becomes too warm during shaping (e.g., due to warm hands or a warm counter), it can become slack. A brief rest in the refrigerator (15-20 minutes) can help firm it up and make it easier to handle and shape effectively. Controlling temperature ensures the dough ferments at a predictable pace and maintains optimal handling characteristics.
Proofing Problems: Over-Proofing vs. Under-Proofing
Proofing is the final rise before baking, where the shaped dough expands further. Over-proofing is a major culprit behind bread shaping holding poorly in the oven. An over-proofed dough has expanded too much; the gluten network is stretched to its limit, and the yeast has consumed most of its available sugars. When you bake it, the structure is too weak to support itself, and it will likely collapse or spread out rapidly instead of achieving good oven spring.
Under-proofing, while less likely to cause the dough to collapse outwards, can also lead to poor shape. An under-proofed loaf still has a lot of potential expansion left. This can result in explosive, uncontrolled oven spring that might tear the crust unevenly or push against weak points in the shaping, sometimes leading to a misshapen loaf or dense areas.
Identifying and Correcting Proofing Issues
- The Poke Test: This is the most common way to check proofing. Gently press your finger into the dough.
- Under-proofed: The indentation springs back immediately.
- Perfectly Proofed: The indentation springs back slowly, leaving a small indent.
- Over-proofed: The indentation remains and does not spring back.
- Visual Cues: Over-proofed dough often looks puffy, has lost some surface tension, and may even show small bubbles about to burst. Under-proofed dough looks dense and hasn't increased significantly in size.
If your dough is slightly under-proofed, you can give it a little more time. If it's significantly over-proofed, you have a few options depending on the severity. For slightly over-proofed dough, handle it very gently and bake immediately.
For severely over-proofed dough, you might need to reshape it (which will degas it) and give it a much shorter final proof, or even punch it down, reshape, and proof again as if starting a new loaf (though the final result might be slightly denser). Learning to recognize the signs of perfectly proofed dough is key to preventing your bread shaping from holding poorly.
Troubleshooting Bread Shaping Problems: Step-by-Step
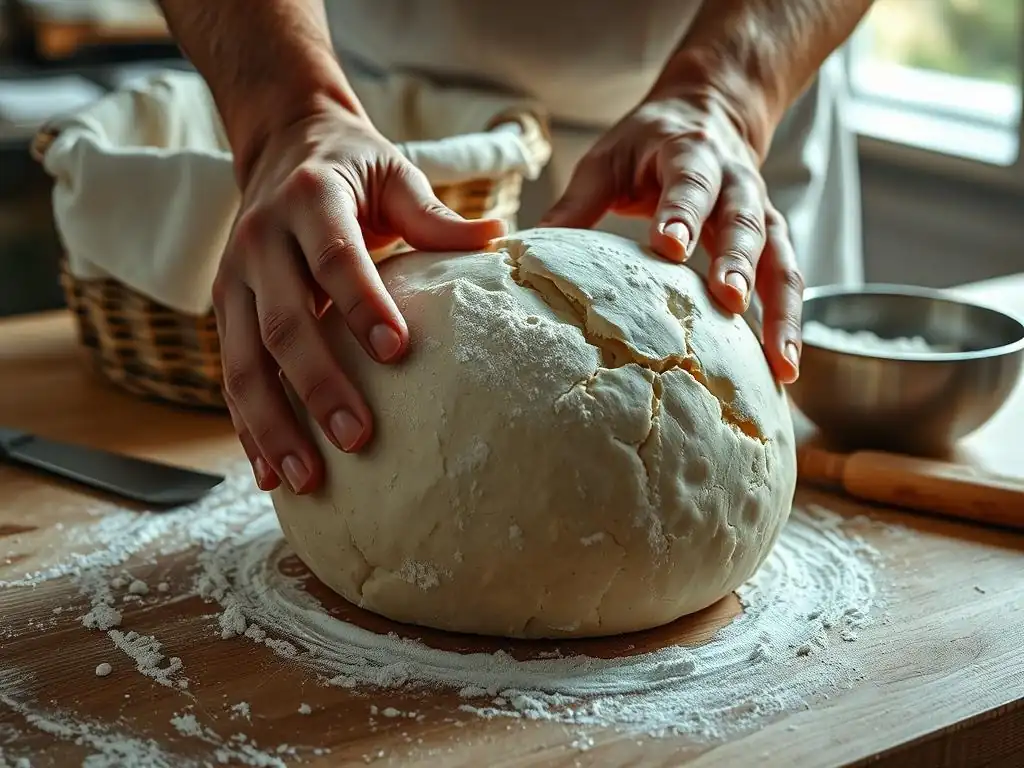
If your bread shaping holds poorly, don't despair! You can systematically identify and correct the issues. Here's a step-by-step guide to help you diagnose and improve your process.
Assessing Your Dough's Gluten Strength
Start by examining your dough before shaping. Does it feel elastic and extensible? Or does it feel slack and tear easily when you try to stretch it? Perform the windowpane test after mixing and again after bulk fermentation.
- Task List: Gluten Assessment
- [ ] Did the dough pass the windowpane test after initial mixing/kneading?
- [ ] Did I perform sufficient stretch-and-folds during bulk fermentation (e.g., 3-4 sets)?
- [ ] Does the dough feel strong and elastic, or weak and prone to tearing?
- [ ] Does the dough hold a relatively tight ball shape for a minute or two after being rounded?
If your assessment points to weak gluten, you know you need to focus on development in your next bake. This might mean longer kneading, more vigorous stretch-and-folds, or ensuring you are working with a flour that has adequate protein content (typically 11-13% for bread flour).
Evaluating Dough Hydration and Adjusting Accordingly
Feel the dough's stickiness and observe its behavior. Does it spread out rapidly on the counter after being turned out? Is it incredibly difficult to handle without it sticking everywhere?
- Task List: Hydration Check
- [ ] Does the dough feel excessively sticky, even with wet hands or a bench scraper?
- [ ] Does the dough puddle or spread significantly within moments of being placed on a surface?
- [ ] Was the measured water-to-flour ratio particularly high (e.g., above 80%)?
- [ ] Did I use a flour that might absorb less water than anticipated (e.g., some all-purpose flours)?
If hydration seems too high for your current skill level or flour type, note this for your next bake and consider slightly reducing the water. For the current problematic dough, you could try incorporating a small amount of flour during pre-shaping or shaping, though this is a temporary fix and affects the final texture.
Refining Your Bread Shaping Technique: A Practical Guide
Watch videos or read detailed guides specific to the shape you are trying to achieve. Focus on creating a taut surface without tearing the dough or trapping large air bubbles. Practice makes perfect here.
- Task List: Shaping Technique Review
- [ ] Am I creating sufficient surface tension?
- [ ] Am I sealing the seams properly?
- [ ] Am I handling the dough gently to preserve internal gases?
- [ ] Am I degassing the dough appropriately (not too much, not too little)?
Reflect on your shaping process. Did you rush? Did the dough feel resistant or too loose? Adjust your approach in your next attempt, perhaps focusing on slower, more deliberate movements.
Shaping Round Loaves: Battards and Boules
For round loaves like boules (perfectly round) or battards (oval), the key is creating a tight, smooth surface. Start with a pre-shape where you gently round the dough and let it rest for 15-20 minutes. This relaxes the gluten. For the final shape, gently flatten the dough into a circle or oval.
Fold the sides into the center, overlap them slightly, and then roll the dough towards you, tucking the far edge underneath. As you roll, use your hands to create tension, pulling the top surface tight as you tuck the bottom underneath. You can also use the counter surface to help build tension by rotating the dough while gently pulling it towards you. The goal is a smooth, tight skin on top and a well-sealed seam underneath.
Shaping Long Loaves: Baguettes and Torpedos
Shaping long loaves requires a different approach but the same principle of tension. After pre-shaping into a rough log and resting, gently flatten the dough. Fold the top third down to the center and press to seal lightly. Fold the bottom third up over the top fold and press firmly to seal the seam.
Then, fold the dough in half lengthwise and seal the final seam with the heel of your hand, pressing firmly along the edge. Finally, gently roll the dough back and forth, starting from the center and working outwards, applying gentle pressure to lengthen the loaf while maintaining an even thickness and building surface tension. Avoid stretching or tearing.
Controlling Dough Temperature Throughout the Process
Use a thermometer to check your dough temperature at various stages: after mixing, during bulk fermentation, and before shaping.
- Task List: Temperature Monitoring
- [ ] What was the target dough temperature after mixing? Was it achieved?
- [ ] Was the bulk fermentation environment consistent? What was the average temperature?
- [ ] Did the dough feel excessively warm or cold during shaping?
- [ ] Was the final proofing environment temperature controlled?
If temperature fluctuations are significant, invest in a reliable thermometer and find a consistent spot for fermentation and proofing. A proofing box or oven with the light on can help maintain a steady temperature, leading to more predictable fermentation rates and dough consistency, which in turn helps your bread shaping hold better.
Optimizing Proofing for Enhanced Shape Retention
Pay close attention to the dough during the final proof. Use the poke test and visual cues to judge readiness, rather than relying solely on time, as proofing time is highly dependent on temperature and yeast activity.
- Task List: Proofing Assessment
- [ ] How did the dough respond to the poke test before baking?
- [ ] Did the dough look significantly larger or puffier than expected?
- [ ] Were there signs of collapse or loss of tension on the surface?
- [ ] Was the proofing environment particularly warm or cold?
If you frequently over-proof, try reducing the proofing time or proofing in a cooler spot. If under-proofing is the issue, give the dough more time in a warm, consistent environment. Remember that dough proofed in a banneton needs to be slightly less proofed than dough proofed on a flat surface, as the banneton provides support.
Advanced Techniques for Improved Bread Shaping
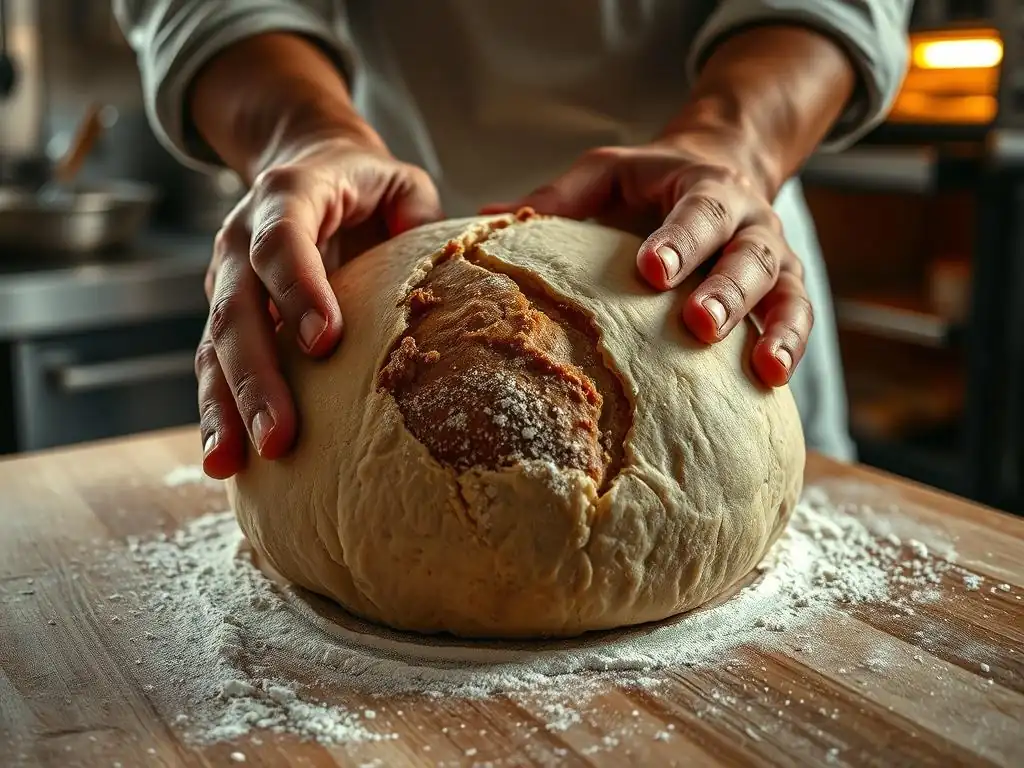
Once you've got the basics down, these techniques can further assist in achieving and maintaining a beautiful bread shape, especially when your bread shaping holds poorly with wetter doughs.
Using a Banneton Basket for Support
A banneton (or proofing basket) is invaluable for supporting the dough during its final rise. Typically made of rattan, cane, or plastic, these baskets hold the dough's shape, especially for boules and battards, preventing it from spreading outwards during the critical final proof. They also help wick away a small amount of moisture from the surface, contributing to a better crust.
To use a banneton, heavily flour it (rice flour works best as it's less likely to stick) and gently place your shaped dough inside, seam-side up if you plan to bake it seam-side down, or seam-side down if you're baking it seam-side up (like in a Dutch oven). The basket provides the necessary lateral support, ensuring that even a slacker dough maintains its form as it expands, significantly reducing the chances of your bread shaping holding poorly before it hits the oven.
Scoring the Dough: Function and Technique
Scoring (making cuts on the surface of the shaped dough) is more than just decorative; it's functional. It provides controlled points for the dough to expand during oven spring. Without scoring, the expanding gases will find the weakest point in the crust (which is forming rapidly in the hot oven) and burst out unpredictably, leading to uneven tears and a potentially misshapen loaf.
Proper scoring directs the expansion, allowing the loaf to achieve maximum volume and a beautiful "ear" (a flap of crust that lifts up along a score line). The depth and angle of your scores matter. For a boule, a simple cross or square pattern allows even expansion. For a baguette, angled cuts along the length encourage the classic segmented look. A sharp blade (like a razor blade or lame) is essential for clean cuts that open up correctly.
Baking with Steam: Creating a Crust that Holds
Steam in the oven during the initial phase of baking is crucial for optimal oven spring and crust development. High heat causes the dough to expand rapidly (oven spring). In a dry oven, the crust forms almost instantly, becoming rigid and restricting expansion. Steam keeps the surface of the dough moist and pliable for the first 10-15 minutes, allowing the dough to expand fully before the crust sets.
This extended pliability is essential for the dough to achieve its maximum volume and for the scored cuts to open properly. A loaf baked without sufficient steam will have a thinner, harder crust that sets too quickly, potentially restricting oven spring and contributing to the bread shaping holding poorly as the internal structure pushes against a rigid exterior. Methods for creating steam include using a Dutch oven, placing a tray of hot water in the oven, or using lava rocks in a tray with boiling water.
Preventing Future Bread Shaping Issues
Consistency is key in baking. By focusing on a few core principles, you can significantly reduce the likelihood of your bread shaping holding poorly in the future.
Best Practices for Gluten Development
- Use appropriate flour with adequate protein content for bread baking (typically 11-13%).
- Ensure thorough mixing or kneading until the dough is smooth and elastic and passes the windowpane test.
- Implement a sufficient number of stretch-and-folds during bulk fermentation, especially for wetter doughs (e.g., 3-4 sets every 30-45 minutes for the first 2-3 hours).
- Allow adequate bulk fermentation time for the gluten network to relax and strengthen.
Maintaining Optimal Dough Hydration
- Start with a hydration level appropriate for your skill level and the type of bread you are making.
- Measure ingredients accurately by weight using a kitchen scale.
- Pay attention to the feel of the dough; adjust hydration slightly based on how the dough is behaving rather than sticking rigidly to percentages.
- Remember that different flours absorb water differently. Be prepared to make minor adjustments.
Consistent Shaping Techniques for Reliable Results
- Practice your shaping techniques regularly. Watch videos and follow detailed instructions for specific shapes.
- Focus on creating sufficient, even surface tension without tearing the dough.
- Ensure all seams are properly sealed.
- Handle the dough gently to preserve internal gases while still creating structure.
Monitoring and Adjusting Proofing Times
- Learn the signs of properly proofed dough using the poke test and visual cues.
- Don't rely solely on time, as proofing is highly dependent on temperature.
- Control the proofing environment temperature for consistency.
- Use a banneton for support during final proof, especially for wetter doughs or if your bread shaping holds poorly.
Achieving Perfect Bread Shape: Final Tips from BakeWithEase
Mastering bread shaping takes practice, patience, and attention to detail. When your bread shaping holds poorly, it's usually a sign that one or more factors in the process – gluten development, hydration, shaping technique, temperature, or proofing – need adjustment.
Remember that every dough is different, influenced by flour type, ambient temperature, and even humidity. Be observant and willing to adapt. By focusing on building a strong gluten structure, managing hydration, refining your shaping method, controlling temperature, and correctly judging proofing, you'll be well on your way to consistently baking beautiful, well-shaped loaves that you can be proud of. Happy baking!
Frequently Asked Questions
Why is my bread shape collapsing during baking?
The most common reason is insufficient gluten development during the kneading process. This means the dough lacks the necessary strength and elasticity to hold its shape.
What role does hydration play in bread shape retention?
High hydration doughs, while producing open crumb, are inherently more challenging to shape and retain their form. Excess water can weaken the gluten structure.
How does oven temperature affect bread shape?
If the oven temperature is too low, the bread may spread out before it sets. A properly heated oven is essential for a good oven spring.
Could proofing time be the problem with my bread shape holding poorly?
Over-proofing can lead to a weakened gluten structure. The dough will have expanded too much and lack the strength to hold its shape during baking.
What are some techniques I can use to improve bread shaping?
Focus on gentle yet firm handling of the dough. Proper surface tension is crucial for a well-shaped loaf that holds its form in the oven.
Final Reflection: The Humble Loaf and the Art of Patience
The seemingly simple act of shaping bread holds a surprising amount of power over the final product. A poorly shaped loaf, prone to collapse, isn't just an aesthetic issue; it represents a missed opportunity for a perfectly risen, beautifully browned masterpiece. This article explored the crucial techniques and common pitfalls that lead to bread that refuses to hold its form, highlighting the importance of understanding dough hydration, gluten development, and proper proofing techniques.
The journey of bread making, from mixing the flour to the satisfying crusty crackle of the finished loaf, is a powerful metaphor for life itself. The process demands patience, attention to detail, and a willingness to learn from mistakes. As we've explored the nuances of bread shaping, we've also touched upon the importance of understanding the fundamental principles of baking. The best bread is made with love and patience,
a wise baker once told me, and I believe that sentiment extends far beyond the kitchen.
Now, consider your own "loaves" – your projects, your relationships, your personal growth. Do you approach them with the same care and attention to detail you would a sourdough boule? Take a moment to reflect on the areas of your life where you might be rushing the process, neglecting the fundamentals, or failing to appreciate the importance of proper preparation. Embrace the art of patience, master the fundamentals, and watch your "loaves" rise to their full potential.
Unlock Your Bread's Full Potential!
Thanks for taking the time to delve into the mysteries of bread shaping! We hope you now have a clearer understanding of why your loaves might not be holding their form. Ready to put your newfound knowledge into practice?
- Master the Art of Shaping: Try experimenting with different shaping techniques – from the classic boule to a rustic batard – and observe the results. Notice how the dough behaves and what adjustments you need to make. This is where the real learning begins!
- Share Your Baking Triumphs (or Challenges!): Post a picture of your freshly baked bread on social media – tag us! We'd love to see your creations and learn from your experiences.
- Dive Deeper into Bread Science: Explore our other articles on dough hydration and fermentation for even more baking expertise.
What unique bread shape will you master next?