
Mixing Matters: How Technique Causes Cake Issues

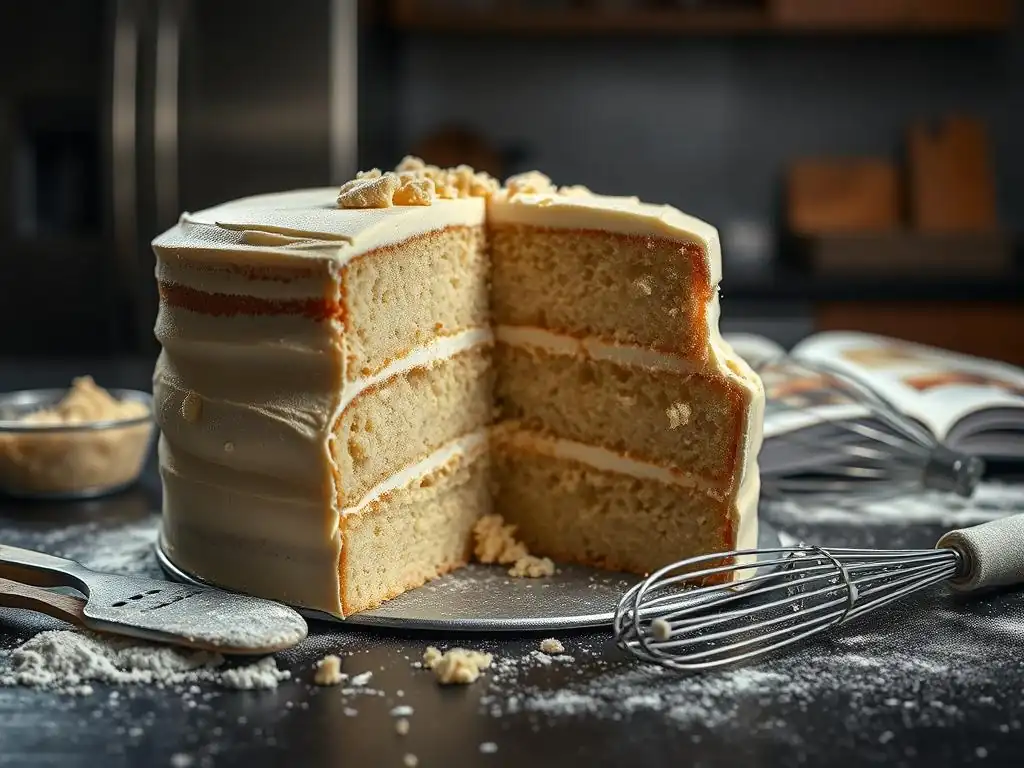
Welcome to BakeWithEase, where baking becomes a joy, not a chore! Ever wondered why your cakes sometimes fall flat, develop a tough crust, or just don't have that perfect, melt-in-your-mouth texture? Dive into our latest article, " Mixing Matters: How Technique Causes Cake Issues," and unlock the secrets to achieving flawless results. We'll explore common pitfalls that impact cake texture problems and provide simple techniques to transform your baking game. Ready to bake a better cake? Let's get started!
- Cake Texture Troubleshooting: Mixing Techniques
- Understanding Cake Texture Problems and Mixing Techniques
- Overmixing: Developing Too Much Gluten
- Undermixing: Incomplete Emulsification
- Common Mixing Errors
- Troubleshooting Cake Texture Issues
- Achieving Perfect Cake Texture
-
Frequently Asked Questions
- What are some common cake texture problems that bakers often face?
- How does the mixing technique affect the final texture of a cake?
- What is the creaming method, and how does it influence cake texture?
- What role does gluten development play in common cake texture problems?
- Where can I find techniques to troubleshoot and prevent common cake texture problems?
- Final Reflection: The Art and Science of Perfect Cake Texture
- Unlock Your Baking Potential: Master Cake Mixing!
Cake Texture Troubleshooting: Mixing Techniques
Understanding Cake Texture Problems and Mixing Techniques
Cake texture is a delicate balance, the result of a complex interplay between ingredients and how they are combined. Achieving that perfect crumb – moist, tender, and evenly structured – is the goal of every baker. However, issues like density, dryness, toughness, or unevenness can plague even experienced bakers.
Often, the root cause isn't a faulty recipe or bad ingredients, but rather the technique used during the mixing process. Understanding the science behind how ingredients interact when mixed is the first step to diagnosing and fixing common cake texture problems. This section explores how different mixing approaches directly influence the final outcome of your baked goods.
Mixing isn't just about combining ingredients; it's about developing structure, incorporating air, and creating a stable emulsion. Each stage of mixing, from creaming butter and sugar to incorporating dry ingredients, serves a specific purpose that impacts the cake's rise, tenderness, and overall mouthfeel. For instance, the way you combine fat and sugar affects air incorporation, while the handling of flour dictates gluten development.
Mastering these techniques is crucial because errors at any stage can lead to significant cake texture problems, from a tough, chewy crumb resulting from overmixing to a heavy, uneven cake caused by undermixing. By focusing on the how of mixing, you gain control over the what of your cake's texture.
The Impact of Mixing on Cake Texture
The texture of a cake is primarily determined by three factors: the balance of ingredients, the amount of air incorporated, and the development of gluten. Mixing technique directly influences the latter two. Proper mixing ensures that fats and liquids are evenly distributed, creating a stable emulsion that prevents separation and contributes to moisture.
Simultaneously, techniques like creaming or whipping incorporate air bubbles, which act as leavening agents, helping the cake rise light and fluffy. The way flour is handled during mixing is critical because it contains proteins that form gluten when hydrated and agitated. Controlling gluten development is paramount; too much leads to toughness, while too little can result in a crumbly texture.
Consider a classic butter cake made using the creaming method. The initial step of beating butter and sugar together is designed to cut tiny air pockets into the fat. These air pockets expand during baking, contributing significantly to the cake's volume and tender crumb. If this step is rushed or done improperly, insufficient air is incorporated, leading to a dense cake.
Similarly, when flour is added, mixing should be minimal, just enough to combine. Over-mixing at this stage develops excessive gluten, resulting in a tough, bread-like texture rather than a tender cake crumb. Thus, each mixing step is a deliberate action aimed at achieving a specific structural outcome, directly impacting the final cake texture problems you might encounter.
Why Proper Mixing Technique Matters
Mastering proper mixing technique is fundamental to consistent and successful cake baking. It's the difference between a cake that is light, moist, and evenly textured, and one that is dense, dry, or riddled with tunnels. Precise mixing ensures that leavening agents are evenly distributed, allowing for a uniform rise. It guarantees that fats and liquids are properly emulsified, preventing a greasy texture and ensuring moisture is locked in. Moreover, it controls the development of gluten from the flour, which is the primary culprit behind many cake texture problems, particularly toughness.
Beyond the technical outcomes, proper mixing technique builds confidence in the kitchen. When you understand why you perform each step – why you cream butter and sugar for a specific duration, why you add eggs one at a time, or why you mix dry ingredients just until combined – you gain a deeper appreciation for the baking process. This understanding empowers you to troubleshoot when things go wrong and even adapt recipes.
For example, recognizing the signs of over-developed gluten allows you to adjust your mixing time in future attempts. Ultimately, focusing on proper mixing technique is an investment in consistently producing delicious cakes with the desired texture, minimizing frustrating cake texture problems technique can solve.
Overmixing: Developing Too Much Gluten
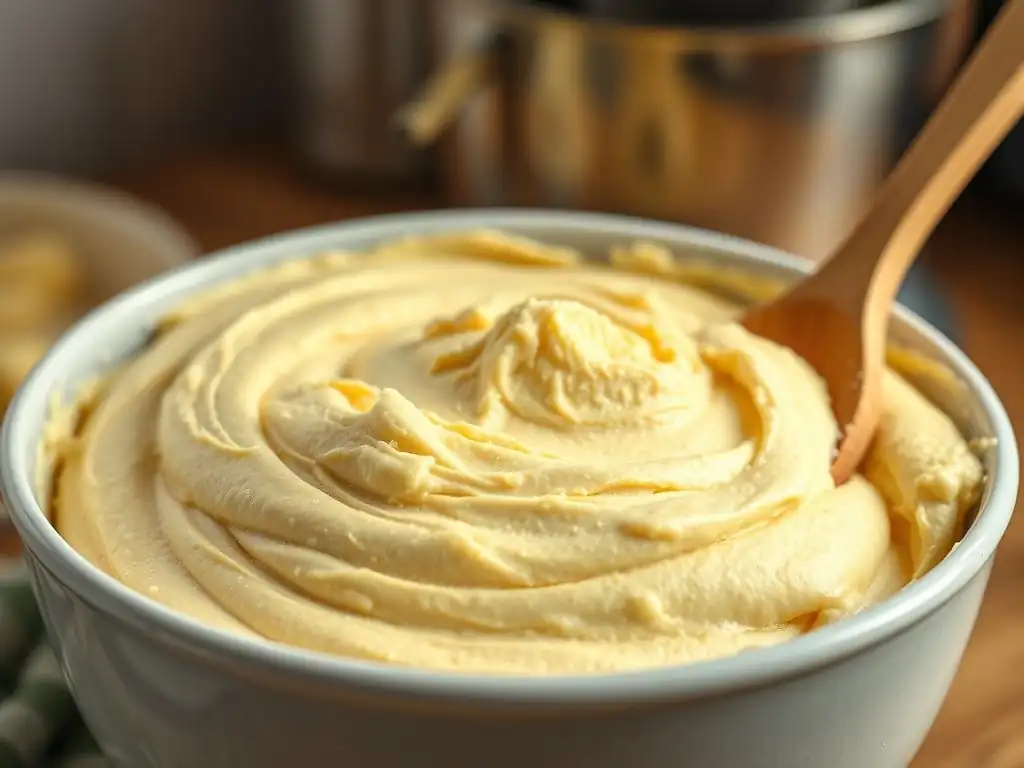
Overmixing is one of the most common culprits behind undesirable cake texture problems, particularly in recipes that rely on wheat flour. While mixing is essential to combine ingredients and build structure, excessive agitation, especially after flour has been added, activates and develops gluten proteins in the flour. Gluten provides structure and elasticity, which is desirable in bread, but detrimental in a tender cake. When you overmix, the gluten network becomes too strong and tight, resulting in a tough, chewy texture that is far from the desired delicate crumb.
This issue is more pronounced with flours higher in protein, like bread flour, though it can still occur with all-purpose or cake flour if handled improperly. The mechanical action of the mixer, combined with the hydration of the flour, causes the glutenin and gliadin proteins to link together, forming the gluten network. The longer and more vigorously you mix after adding flour, the more developed this network becomes.
Think of kneading dough for bread – that extensive mixing is designed to build a strong gluten structure. In cake baking, however, we want minimal gluten development to ensure tenderness. Overmixing is a prime example of how cake texture problems technique related manifest.
Gluten Development and Overmixing
Gluten development begins the moment flour is mixed with liquid. The proteins gliadin and glutenin, present in wheat flour, absorb water and, through mechanical mixing (agitation), start to bond and form a matrix known as gluten. This network is elastic and strong, providing structure to baked goods. In yeast breads, significant mixing or kneading is required to develop a robust gluten structure that can trap carbon dioxide produced by yeast, leading to a chewy texture and good rise.
However, cakes typically rely on chemical leaveners (like baking powder or baking soda) and air incorporated during creaming or whipping for their rise. A tender cake requires a delicate, rather than a strong, structure. Overmixing after the flour is added causes excessive development of the gluten network.
Instead of a tender crumb that breaks apart easily, you get a tough, elastic structure that resists chewing. This is a classic example of how improper cake texture problems technique exacerbates issues; applying a bread-making mixing philosophy to cake results in failure. The key is to mix only until the dry ingredients are just incorporated, stopping before the gluten has a chance to form those strong bonds.
Identifying an Overmixed Cake Batter
Identifying an overmixed cake batter before baking can save you from disappointment. While it's harder to spot than undermixing, there are signs. An overmixed batter might appear smoother and more elastic than intended, possibly even stretching slightly when lifted with a spatula. It might also lose some of the airiness achieved during the creaming or egg-whipping stages because the vigorous mixing can deflate the batter. However, the most definitive signs of overmixing are usually visible in the baked cake.
Dense and Chewy Texture: Overdeveloped Gluten
The hallmark of an overmixed cake is its texture after baking. Instead of a light, tender crumb that yields easily, the cake will feel dense and heavy. When you bite into it, it will have a distinctly chewy or tough quality, similar to bread, rather than the expected melt-in-your-mouth tenderness of a cake. This toughness is a direct result of the over-developed gluten network, which creates a strong, elastic structure within the cake. This is the most common and frustrating of the cake texture problems technique errors introduce when overmixing.
Tunneling: Air Pockets from Overmixing
Another common symptom of overmixing is the appearance of "tunnels" or large, elongated air pockets within the cake's crumb. These tunnels are often irregular and can run vertically through the cake. While it might seem counterintuitive that overmixing (which can deflate batter) causes large air pockets, it's related to the strong gluten network.
The vigorous mixing creates large air bubbles, and the strong, elastic gluten network is able to trap and maintain these large bubbles during baking, rather than allowing them to disperse into a finer crumb structure. This tunneling is a clear visual indicator of excessive gluten development caused by over-zealous mixing.
Preventing Overmixing
Preventing overmixing is relatively simple once you understand the cause. The key is to minimize agitation once the flour is introduced to the wet ingredients. This is the critical stage where gluten develops.
Accurate Ingredient Measurement for Consistency
Accurate measurement is the foundation of successful baking and plays a subtle role in preventing overmixing. If you mismeasure ingredients, particularly flour or liquid, the batter's consistency will be off. For example, too much flour can lead to a dry batter that requires more mixing to combine, increasing the risk of gluten development.
Too little liquid can have a similar effect. Using a scale for dry ingredients is highly recommended for accuracy (e.g., 1 cup of all-purpose flour weighs approximately 120-130 grams, depending on sifting). Precise measurements ensure the batter reaches the correct consistency with minimal mixing, thus reducing the likelihood of over-activating gluten and causing cake texture problems technique mistakes lead to.
Gentle Mixing Techniques to Control Gluten
The most direct way to prevent overmixing is to use gentle mixing techniques, especially after adding dry ingredients.
- Mix on Low Speed: If using an electric mixer, switch to the lowest speed as soon as you add the flour mixture.
- Mix Just Until Combined: Stop mixing the moment you no longer see streaks of dry flour. It's okay if there are a few small lumps; they will often disappear during baking. Overmixing even for just 30-60 seconds too long after adding flour can be enough to develop toughness.
- Consider Hand Mixing: For the final incorporation of dry ingredients, sometimes switching from an electric mixer to a wooden spoon or spatula allows for better control, making it easier to stop mixing at the precise moment the flour is incorporated. This manual control helps prevent accidental overmixing.
Undermixing: Incomplete Emulsification
While overmixing is a common cause of tough cakes, undermixing presents its own set of cake texture problems. Undermixing occurs when ingredients, particularly fats and liquids, are not sufficiently combined or emulsified. Emulsification is the process of dispersing one liquid within another, like oil and water, using an emulsifier (often egg yolks or proteins in flour) to create a stable mixture that doesn't separate. Proper emulsification is crucial for creating a smooth, homogeneous batter that bakes into a moist, evenly textured cake.
Undermixing can happen at various stages, from not properly creaming butter and sugar to not fully incorporating eggs or, most commonly, not adequately combining the wet and dry ingredients. When the batter is undermixed, the fat isn't evenly distributed, the sugar crystals may not be fully dissolved, and the leavening agents might be concentrated in certain areas. This lack of uniformity leads to significant issues in the final cake texture, resulting in a variety of undesirable outcomes that are the opposite of those caused by overmixing.
Incomplete Emulsification and Undermixing
Incomplete emulsification is a primary consequence of undermixing, particularly in recipes using the creaming method (like butter cakes) or those involving adding fat to liquids. When butter and sugar are not creamed long enough, insufficient air is incorporated, and the sugar crystals don't properly cut into the fat. When eggs are added too quickly or not mixed in thoroughly, the emulsion can break, leaving a curdled appearance. Similarly, if the wet and dry ingredients aren't combined sufficiently, pockets of unincorporated flour or liquid remain.
This failure to create a stable, homogeneous mixture means that fat, sugar, and liquid are not evenly dispersed throughout the batter. During baking, this uneven distribution leads to inconsistent heat transfer and leavening action. Areas with more fat might become greasy, while areas with unincorporated flour will be dry and dense. The structure won't be uniform, resulting in a cake with an irregular crumb and potential sinking or uneven rising. Addressing incomplete emulsification is key to resolving specific cake texture problems technique related to insufficient mixing.
Identifying an Undermixed Cake Batter
Identifying an undermixed batter is usually easier than spotting overmixing. The batter will look visibly uneven and lumpy, rather than smooth and homogeneous.
Lumpy Batter and Visible Ingredients
The most obvious sign of an undermixed cake batter is its appearance. You will likely see streaks of unincorporated flour, pockets of unmixed wet ingredients, or lumps of butter or sugar. The batter won't have a consistent color or texture throughout.
For instance, if you are making a chocolate cake, you might see distinct streaks of cocoa powder that haven't been blended in. A properly mixed batter, especially after adding wet and dry ingredients, should look relatively smooth and uniform, even if it's thick. Visible dry spots or wet puddles are clear indicators of undermixing and potential cake texture problems technique failure.
Uneven Rise and Inconsistent Density
An undermixed cake, once baked, will often exhibit an uneven rise. One side might be higher than the other, or the center might sink due to structural weakness from poor ingredient distribution. The crumb density will also be inconsistent; some areas might be dense and heavy (where flour wasn't fully hydrated or leavening wasn't dispersed), while others might be slightly lighter but still lack uniform structure.
You might also find pockets of dry, floury bits or, conversely, areas that seem excessively moist or greasy. These inconsistencies are direct results of the ingredients not being properly combined and emulsified during the mixing stage.
Achieving Proper Emulsification
Achieving proper emulsification is critical for a smooth batter and a tender, even-textured cake. This requires attention to detail at specific mixing stages.
Creaming Butter and Sugar Effectively
In recipes using the creaming method, the initial step of creaming butter and sugar is vital for both air incorporation and starting the emulsification process.
- Use Softened Butter: Butter should be softened but still cool to the touch (around 65-68°F or 18-20°C). If it's too cold, it won't cream properly; if too warm, it will be greasy and won't hold air.
- Cream for Sufficient Time: Cream butter and sugar together on medium speed for approximately 3 to 5 minutes, or until the mixture is lightened in color (pale yellow) and fluffy in texture. The volume should noticeably increase as air is incorporated. The sugar crystals cut into the fat, creating tiny air pockets and helping to disperse the fat evenly. Stopping too soon means insufficient air and poor fat distribution, leading to a denser, potentially greasy cake.
Gradual Egg Addition for Smooth Emulsification
Eggs act as emulsifiers, helping to bind the fat and liquid components of the batter. Adding them correctly is key to maintaining a stable emulsion.
- Add Eggs One at a Time: Beat in one egg at a time, mixing on medium speed until each egg is fully incorporated before adding the next. Scrape down the sides and bottom of the bowl occasionally to ensure everything is combined.
- Mix Until Emulsified: The mixture should look smooth and homogeneous after each egg is added, not curdled or separated. If it looks slightly broken, adding a tablespoon of the dry ingredient mixture can sometimes help bring it back together. Adding eggs too quickly overwhelms the mixture's ability to emulsify, leading to a broken batter that won't bake up with a fine, even crumb.
Common Mixing Errors
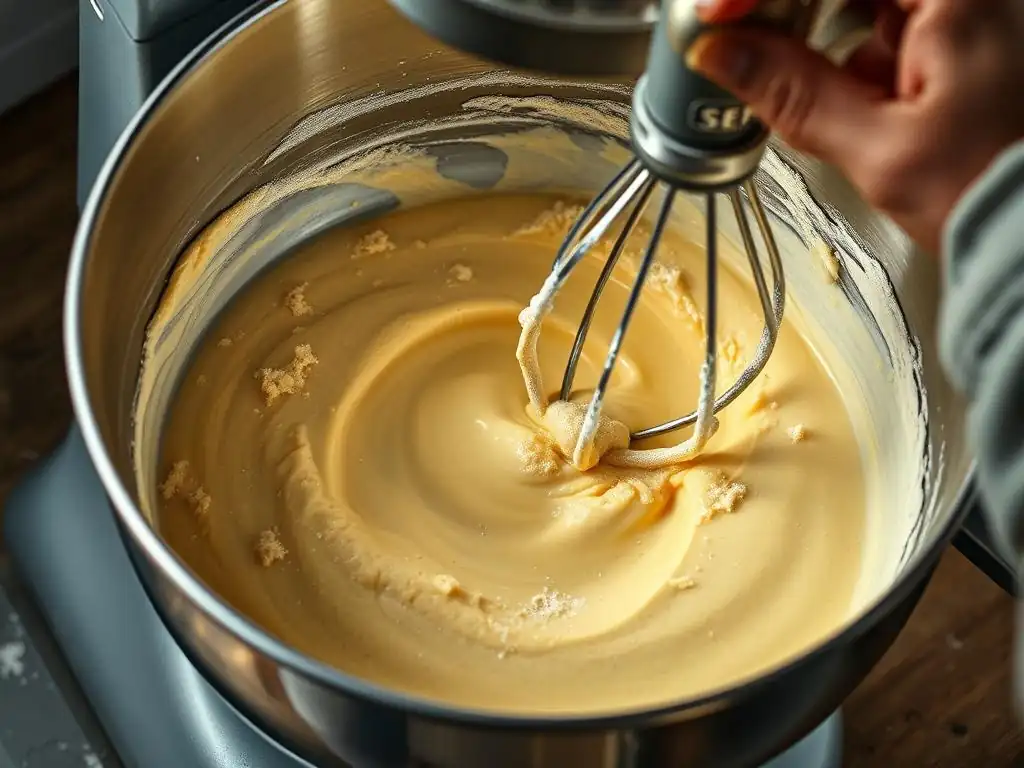
Beyond the broad categories of overmixing and undermixing, several specific errors in technique can lead to cake texture problems. These often relate to the speed of mixing, the order in which ingredients are added, and the tools used. Being aware of these common pitfalls can help you refine your process and avoid frustrating results.
Incorrect Mixing Speed
The speed at which you mix your batter is not arbitrary; it serves different purposes at different stages. Using the wrong speed can either overdevelop gluten, fail to incorporate enough air, or result in poor emulsification.
Appropriate Speed for Each Mixing Stage
- Creaming Butter and Sugar: Typically requires medium speed (e.g., setting 4-6 on a stand mixer) to incorporate sufficient air and create a light, fluffy mixture. Mixing too slow won't incorporate enough air; mixing too fast can overheat the butter.
- Adding Eggs: Medium speed is usually best to ensure eggs are fully incorporated and emulsified into the butter mixture.
- Adding Dry and Wet Ingredients (Alternating): Use low speed (e.g., setting 1-2 on a stand mixer) to gently combine the ingredients. This minimizes gluten development once the flour is added. High speed at this stage is a major cause of overmixing and toughness.
- Final Mixing: Often involves a very short burst on low speed or finishing by hand to ensure everything is just combined.
Using speeds that are too high throughout the process is a common cake texture problems technique error that leads directly to overmixing and toughness. Conversely, using speeds that are too low for tasks like creaming will result in insufficient air and a dense cake.
Incorrect Ingredient Order
The order in which ingredients are added in a cake recipe, particularly in methods like creaming or reverse creaming, is designed to achieve specific structural outcomes. Deviating from this order can disrupt emulsification, air incorporation, and gluten development.
Following Recipe Instructions Precisely
Recipes are developed with a specific sequence for a reason. In the creaming method, creaming butter and sugar first establishes the base structure and air. Adding eggs next emulsifies the mixture. Then, alternating dry and wet ingredients, starting and ending with dry, helps control gluten development and maintain a stable emulsion. Adding all wet or all dry ingredients at once can overwhelm the batter, making it harder to combine evenly without overmixing, or causing the emulsion to break.
Alternating Wet and Dry Ingredients
Many cake recipes instruct you to add dry and wet ingredients alternately, usually in three additions of dry and two of wet, beginning and ending with the dry ingredients.
- Start with Dry: Adding a portion of the dry ingredients first helps stabilize the creamed mixture and makes it easier to incorporate the first addition of liquid without the batter separating.
- Alternate: Add about one-third of the dry ingredients, mix on low speed until just incorporated, then add about half of the wet ingredients, mix until just combined, and repeat, ending with the final third of the dry ingredients.
- End with Dry: Finishing with dry ingredients helps absorb any excess moisture and reduces the risk of overmixing liquid into the batter.
This alternating method allows for gradual incorporation, making it easier to achieve a smooth, homogeneous batter with minimal mixing, thus preventing both undermixing (lumps) and overmixing (toughness). Ignoring this sequence is a frequent cake texture problems technique mistake.
Over-reliance on Electric Mixers
Electric mixers, whether stand mixers or hand mixers, are invaluable tools for bakers, making tasks like creaming butter and whipping egg whites much easier and more efficient. However, over-reliance on them, or using them improperly, can contribute to cake texture problems. Their power means that overmixing can happen very quickly, often in a matter of seconds once the flour is added.
Advantages and Disadvantages of Stand Mixers
- Advantages: Stand mixers provide consistent speed and power, ideal for tasks like creaming large amounts of butter and sugar, kneading dough (though not for cakes! ), or whipping large batches of egg whites to stiff peaks. They free up your hands, allowing you to prepare other ingredients.
- Disadvantages: Stand mixers are powerful and can easily overmix cake batter, especially on higher speeds. It can be harder to see and feel the batter's consistency compared to mixing by hand, making it easier to miss the "just combined" point. They may also leave unincorporated ingredients at the very bottom or sides of the bowl, requiring diligent scraping.
When Hand Mixing is Preferable
For the final stage of incorporating dry ingredients into cake batter, hand mixing with a spatula or wooden spoon is often preferable, especially for smaller batches or when precision is paramount.
- Greater Control: Hand mixing gives you a better feel for the batter's consistency and makes it easier to stop mixing the moment the last streaks of flour disappear.
- Reduced Gluten Development: The gentler action of hand mixing is less likely to develop gluten compared to the vigorous action of an electric mixer.
- Ideal for Delicate Batters: For delicate cakes like sponge cakes or chiffon cakes, which rely heavily on whipped eggs for structure, folding in the dry ingredients by hand is essential to avoid deflating the airy batter.
Knowing when to put the electric mixer aside and finish mixing by hand is a key technique to prevent overmixing and ensure a tender cake crumb, avoiding common cake texture problems technique related.
Troubleshooting Cake Texture Issues
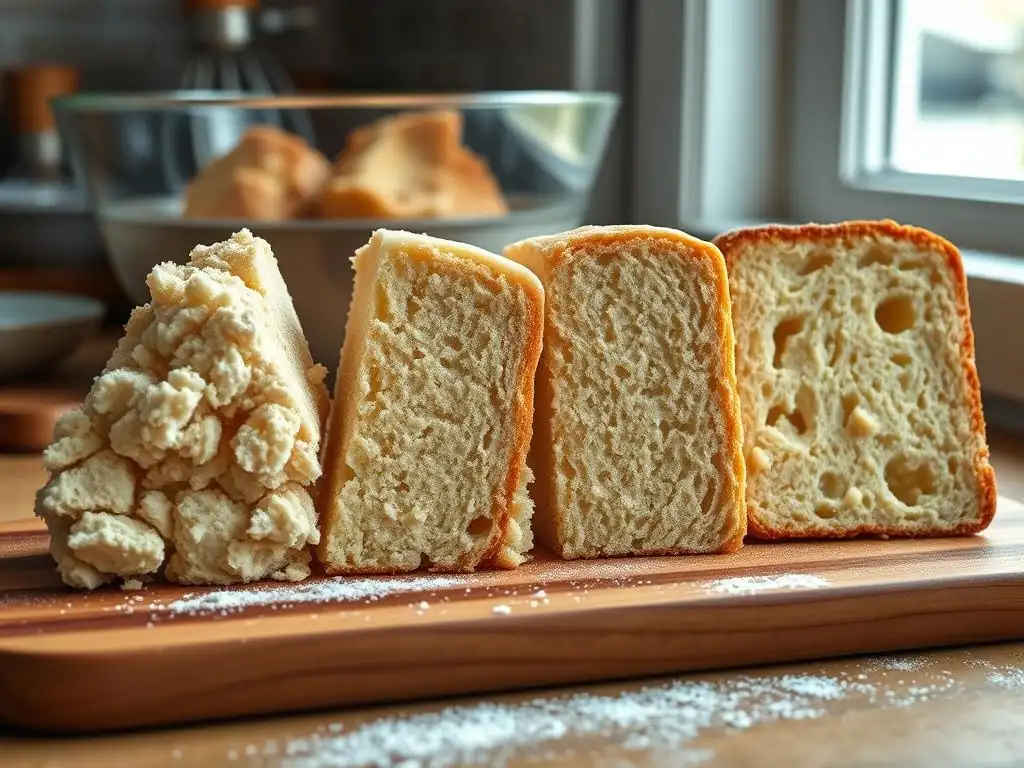
Even with careful technique, sometimes cake texture problems still arise. Understanding the likely causes related to mixing can help you diagnose the issue and improve your next bake. Many common problems like dryness, density, or gumminess can be traced back to either overmixing or undermixing, impacting the cake's structure and moisture distribution.
Dry Cake: Mixing and Moisture Balance
While often linked to incorrect oven temperature or baking time, a dry cake can also be a consequence of mixing errors. Overmixing can develop a strong gluten network that makes the cake tough and less capable of retaining moisture, resulting in a dry mouthfeel. Undermixing, leading to poor emulsification, can also cause dry spots where ingredients weren't properly hydrated or fat wasn't evenly distributed to provide richness and moisture protection. Ensuring proper mixing helps create a structure that holds moisture effectively.
Dense Cake: Identifying the Cause
A dense cake lacks the desired lightness and volume. This is frequently linked to insufficient leavening, but mixing technique plays a significant role. Undermixing, particularly during the creaming of butter and sugar or the whipping of eggs, results in insufficient air incorporation, leading to a heavy, dense crumb. Overmixing, by developing too much gluten, can also result in a dense, heavy cake because the strong gluten network restricts the cake's ability to rise fully and develop a tender structure. Identifying whether the density is accompanied by toughness (overmixing) or lumpiness/unevenness (undermixing) can help pinpoint the specific mixing error.
Gummy Cake: Gluten and Starch Factors
A gummy texture, where the cake feels slightly sticky or pasty in the mouth, is often a sign of overmixing, especially when combined with too much liquid or sugar. Overdeveloped gluten contributes to this chewiness, and the presence of excess moisture or undissolved sugar can exacerbate the gummy feeling. Additionally, overmixing can damage starch granules in the flour, causing them to release too much starch, which contributes to a gummy texture. This specific cake texture problems technique link is particularly frustrating, as it's a combination of toughness and unpleasant stickiness.
Angel Food Cake: Achieving Volume Through Proper Mixing
Angel food cake is a prime example of a cake where mixing technique is paramount. This cake relies entirely on whipped egg whites for its leavening and structure; it contains no chemical leaveners or fat (like butter or oil).
- Whipping Egg Whites: Egg whites must be whipped to the correct stage (medium-stiff peaks) to create a stable foam capable of supporting the cake's structure. Undermixing leaves the foam too weak; overmixing can make the foam dry and difficult to fold, leading to a dry cake.
- Folding in Dry Ingredients: The flour (usually cake flour for tenderness) and sugar must be folded gently into the whipped egg whites, not mixed vigorously. Overmixing at this stage will deflate the egg whites, resulting in a dense, rubbery cake. Undermixing will leave pockets of unincorporated flour.
Angel food cake clearly demonstrates how precise mixing – whipping to the right consistency and gentle folding – is the sole determinant of achieving the desired light, airy texture, highlighting the critical impact of cake texture problems technique application.
Achieving Perfect Cake Texture
Achieving that elusive "perfect" cake texture is a journey that involves understanding ingredients, following recipes, and, crucially, mastering mixing techniques. It's not just about avoiding errors, but about executing each step with intention and care.
Tips for the Ideal Cake Crumb
- Use Ingredients at the Right Temperature: Ensure butter and eggs are at the correct temperature (usually room temperature) for optimal emulsification and air incorporation.
- Measure Accurately: Use a scale for dry ingredients whenever possible for consistent results.
- Don't Overmix: Mix dry ingredients in just until no streaks of flour remain. Use low speed or hand mixing at this stage.
- Don't Undermix: Ensure butter and sugar are creamed properly, eggs are fully incorporated, and the batter is homogeneous before adding it to the pan.
- Scrape Down the Bowl: Regularly scrape the sides and bottom of your mixing bowl to ensure all ingredients are evenly incorporated.
- Understand Your Mixer: Get a feel for how powerful your mixer is and adjust mixing times and speeds accordingly compared to recipe instructions, which are often guidelines.
Practice and Observation
Like any skill, mastering cake mixing technique requires practice. Don't be discouraged by cakes that don't turn out perfectly. Each bake is a learning opportunity. Pay attention to how the batter looks and feels at different stages. Note the texture of the finished cake and try to diagnose what might have gone wrong based on the principles of overmixing and undermixing. Keeping a baking journal can help you track variables and identify patterns related to cake texture problems technique variations.
Resources for Improving Cake Baking
Improving your cake baking skills and understanding cake texture problems technique involves continuous learning. Many excellent resources offer detailed guides, recipes, and troubleshooting tips.
- King Arthur Baking Website
- Sally's Baking Addiction: Cake Recipes
Exploring these resources can provide further insights into specific cake types, methods, and how mixing techniques apply differently to various recipes, ultimately helping you achieve consistently delicious results.
Frequently Asked Questions
What are some common cake texture problems that bakers often face?
Common issues include dense cakes, dry cakes, and cakes that sink in the middle. These problems often stem from improper mixing techniques.
How does the mixing technique affect the final texture of a cake?
The mixing technique significantly impacts gluten development and air incorporation. Overmixing leads to tough cakes, while undermixing results in uneven texture.
What is the creaming method, and how does it influence cake texture?
The creaming method involves beating butter and sugar to incorporate air, creating a light and fluffy texture. Proper creaming is crucial for achieving a tender crumb.
What role does gluten development play in common cake texture problems?
Excessive gluten development, often caused by overmixing, creates a tough and chewy cake. Controlling gluten is key to a soft and delicate texture.
Where can I find techniques to troubleshoot and prevent common cake texture problems?
BakeWithEase.com offers step-by-step guides and easy-to-follow recipes that address mixing techniques and ingredient ratios, helping you achieve perfect cake textures.
Final Reflection: The Art and Science of Perfect Cake Texture
The quest for the perfect cake is a journey fraught with pitfalls, but understanding the intricate relationship between technique and texture is the key to unlocking consistently delicious results. Many home bakers struggle with seemingly inexplicable cake failures, but the reality is that most issues stem from a lack of precision in fundamental techniques. This article has highlighted the crucial role of ingredient measurement, mixing methods, and baking temperatures in achieving the desired texture.
The impact of mastering these techniques extends far beyond simply creating a visually appealing cake; it's about understanding the fundamental principles of baking and applying them with confidence. The subtle nuances of creaming butter and sugar, the importance of gentle folding, and the precise control of oven temperature are all interconnected elements that contribute to the final product. As the renowned pastry chef, Julia Child, once said: Always remember that baking is a science, but it's also an art. The more you understand the science, the better you can express your art.
This sentiment perfectly encapsulates the journey of mastering cake baking.
Now, it's your turn. Take what you've learned here – the importance of precise measurements, the right mixing methods, and the careful monitoring of baking temperatures – and apply it to your next baking adventure. Don't be afraid to experiment, to learn from your mistakes, and to refine your technique. The path to baking perfection is a continuous process of learning and refinement, but the reward – a perfectly textured, flawlessly delicious cake – is well worth the effort. So, grab your whisk, embrace the challenge, and let the baking begin!
Unlock Your Baking Potential: Master Cake Mixing!
Thanks for taking the time to explore the secrets of perfect cake mixing! You've now got the knowledge to avoid common baking pitfalls. Ready to put your new skills into practice?
- Bake your best cake yet! Try the techniques discussed, focusing on one new method at a time. Note the differences in texture and rise. This is your chance to become a true baking master.
- Share your baking triumphs (and even your flops!) in the comments below. Let's learn from each other's experiences!
- Experiment with a new recipe that utilizes these techniques. Challenge yourself to improve your baking game!
What delicious creation will you bake first to put your newfound mixing knowledge to the test?