
Why Did My Bread Crack Unevenly? (And How to Prevent It)

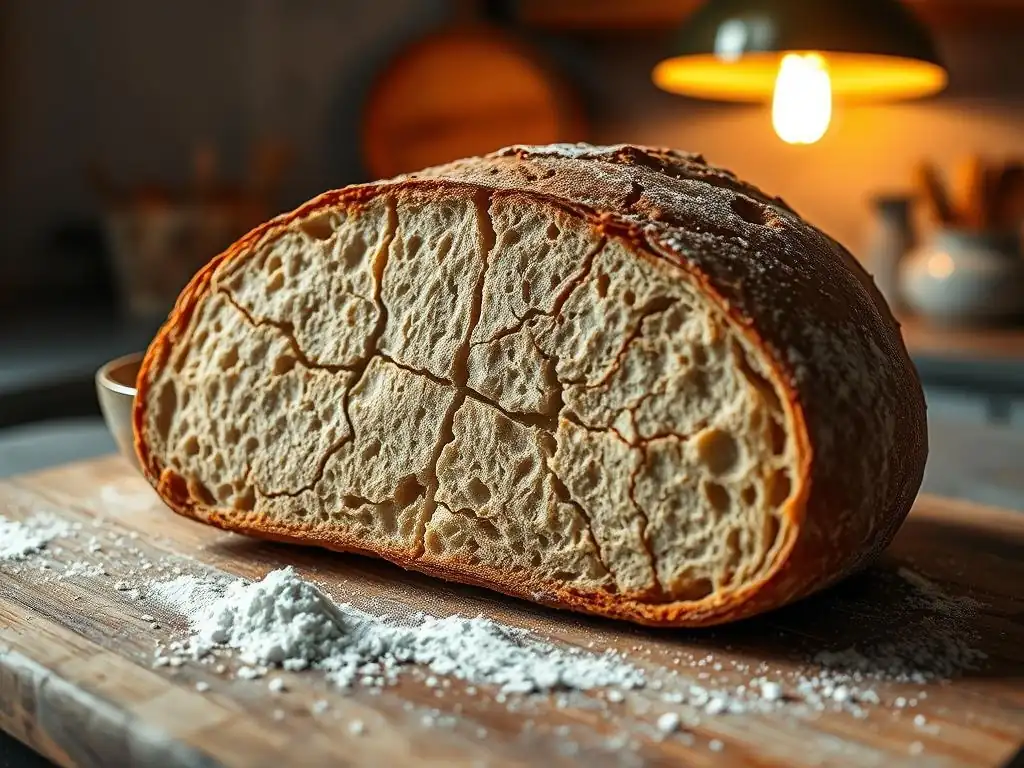
Welcome to BakeWithEase, your trusted guide to baking brilliance! Ever wondered why your beautiful loaf sometimes erupts with uneven cracks, shattering your baking dreams? Dive in as we explore the secrets behind those frustrating fissures and reveal the uneven bread cracking solutions that will have you producing perfectly sculpted loaves every time. Get ready to unlock the keys to consistent, professional-looking bread!
- Why Did My Sourdough Bread Crack Unevenly? (And How to Prevent It) - BakeWithEase
- Understanding Uneven Cracking in Sourdough Bread: A Common Baking Problem
- The Science Behind Sourdough Bread Cracking: Factors at Play
-
Common Causes of Uneven Sourdough Bread Cracking: Identifying the Culprits
- Over-Proofing: A Leading Cause of Weakened Structure
- Under-Proofing: Resulting in Insufficient Expansion
- Insufficient Steam: Leading to a Dry and Brittle Crust
- Scoring Issues: How Improper Cuts Cause Uneven Breaks
- Oven Temperature Imbalances: Hot Spots and Uneven Baking
- Dough Hydration: Too Much or Too Little Water
- Weak Sourdough Starter: Insufficient Rise and Structure
-
Uneven Sourdough Bread Cracking Solutions: A Comprehensive Guide
- Solution 1: Mastering the Proofing Process for Even Rise
- Solution 2: Creating Adequate Steam for a Controlled Crust
- Solution 3: Perfecting Your Scoring Technique for Predictable Cracks
- Solution 4: Addressing Oven Temperature Issues for Uniform Baking
- Solution 5: Balancing Dough Hydration for Optimal Texture
- Solution 6: Strengthening Your Sourdough Starter
- Preventing Future Sourdough Bread Cracking: Proactive Baking Strategies
- Troubleshooting Specific Bread Types: Addressing Unique Challenges
- Conclusion: Achieving Baking Success with Evenly Cracked Sourdough Bread
- Frequently Asked Questions
- Final Reflection: The Humble Crust and the Pursuit of Perfection
- Unlock Your Baking Potential: Evenly Baked Bread Awaits!
Why Did My Sourdough Bread Crack Unevenly? (And How to Prevent It) - BakeWithEase
Understanding Uneven Cracking in Sourdough Bread: A Common Baking Problem
Introduction: The Frustration of Cracked Sourdough
Few things are as satisfying as pulling a beautifully golden, perfectly cracked loaf of sourdough bread from the oven. That signature crack, or ear, is a hallmark of a successful bake, indicating good oven spring and a well-developed structure. However, sometimes, the crack isn't where you expect it, or worse, it splits haphazardly across the loaf, resulting in an uneven, less appealing appearance. This isn't just an aesthetic issue; uneven cracking can sometimes point to underlying problems in your baking process that affect the bread's texture and rise.
This common challenge can be disheartening, especially after hours of patient proofing and careful handling. Whether you're a sourdough novice or have baked many loaves, encountering uneven cracking is part of the journey. Understanding why this happens is the first step towards achieving that perfect, controlled expansion and mastering the art of sourdough baking. Let's dive into the science and common culprits behind this issue and explore effective uneven bread cracking solutions.
What is Uneven Sourdough Bread Cracking and Why Does It Happen?
Uneven sourdough bread cracking refers to the phenomenon where the crust splits during baking in an uncontrolled or asymmetrical manner, rather than expanding along the planned score lines. Instead of a clean, defined ear or an even break across the top, you might see multiple small cracks, a large split on the side, or just a general ruggedness that wasn't intended. This indicates that the bread's internal pressure found the path of least resistance somewhere other than your carefully placed scores.
The root cause of uneven cracking lies in the interplay between the expanding dough and the setting crust during the initial phase of baking (oven spring). As the dough heats up, gases expand rapidly. Simultaneously, the outer surface begins to dry and set, forming a crust. If the crust sets too quickly or is too rigid, the expanding interior must find a way out.
Ideally, this exit is the score you made. If the score isn't deep enough, or the crust is weak elsewhere, the bread will burst unpredictably. Identifying the specific cause is key to finding the right uneven bread cracking solutions for your particular situation.
The Science Behind Sourdough Bread Cracking: Factors at Play
Crust Formation and Expansion: The Key to Understanding Cracks
During the crucial first 10-15 minutes in the oven, often called oven spring, the dough undergoes rapid expansion due to the production of steam and carbon dioxide gas. At the same time, the heat from the oven begins to dry the outer layer of the dough, initiating crust formation.
For a loaf to achieve maximum volume and a beautiful crack, the crust must remain pliable enough during this expansion phase to allow the dough to push outwards, guided by the baker's score. If the crust forms too quickly or is too dry and rigid, it restricts expansion everywhere except where it is weakest, or where it can break through haphazardly.
The temperature and humidity within the oven play significant roles in crust formation. A hot, dry environment will cause the crust to set very rapidly, potentially before the dough has finished expanding. Conversely, a humid environment, created by steam, keeps the surface of the dough moist and elastic for longer, allowing for greater expansion and a more controlled break along the score lines. Understanding this balance between internal pressure, dough expansion, and the setting of the crust is fundamental to preventing uneven bread cracking.
Internal Pressure and Steam: The Forces Shaping Your Bread
The engine driving oven spring is the rapid expansion of gases trapped within the dough. As the temperature rises, residual carbon dioxide produced during fermentation expands significantly. More importantly, the water within the dough turns into steam. This steam builds immense internal pressure, pushing outwards in all directions. This pressure is what forces the dough to expand and rise dramatically in the oven.
For a loaf to crack predictably along a score, this internal steam pressure must be sufficient to overcome the resistance of the developing crust and weakest point – your score. If there isn't enough internal pressure (perhaps due to under-proofing or a weak starter), the expansion will be minimal, and cracking might be absent or uneven.
Conversely, if the crust is too strong or the score is insufficient, the pressure will find another, uncontrolled escape route, leading to uneven bread cracking. Adequate steam in the oven helps keep the crust supple, allowing the internal pressure to do its work effectively.
Gluten Development from Sourdough Starter: How it Impacts Bread Structure
Gluten, a network formed by proteins in flour when hydrated and worked, provides the structure and elasticity necessary for bread dough to trap gases and hold its shape during fermentation and baking. In sourdough baking, the starter plays a crucial role not only in leavening but also in developing the gluten network through its enzymatic activity and the mechanical action of mixing and folding. A well-developed gluten structure is vital for controlling expansion and directing the crack.
If the gluten is underdeveloped, the dough lacks the strength and elasticity to support expansion uniformly. It may collapse or expand weakly and unevenly. Conversely, if the gluten is overworked or broken down (potentially by excessive fermentation or aggressive handling), the structure can be compromised, leading to unpredictable tears and uneven cracking. The strength and extensibility of the gluten network determine how well the dough can stretch and hold the expanding gases until the steam pressure forces a clean break along the score line. Achieving the right balance in gluten development is key to preventing uneven bread cracking.
Common Causes of Uneven Sourdough Bread Cracking: Identifying the Culprits
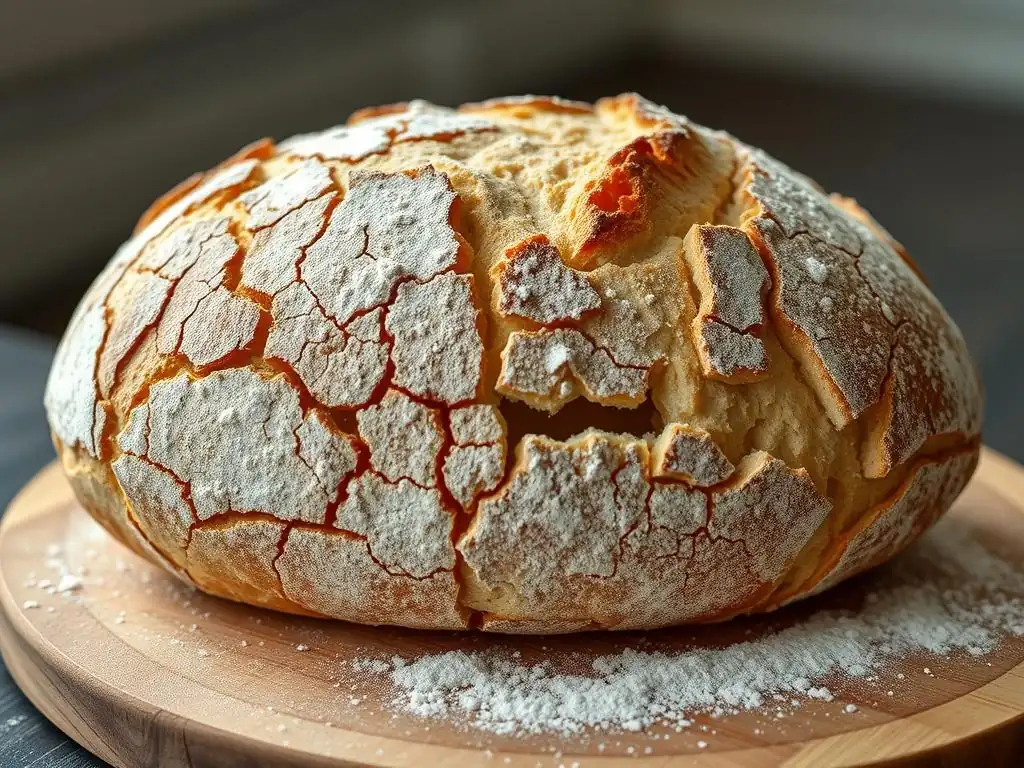
Over-Proofing: A Leading Cause of Weakened Structure
Over-proofing occurs when the dough has fermented for too long or at too warm a temperature, exhausting the available sugars and weakening the gluten structure. An over-proofed dough often appears very bubbly, feels fragile, and may even start to deflate slightly. When placed in the hot oven, it lacks the structural integrity and residual sugars needed for vigorous oven spring.
Instead of a strong, directed expansion, an over-proofed loaf might spread sideways or collapse slightly. The weakened structure cannot withstand the internal steam pressure effectively, leading to uncontrolled tears and uneven bread cracking in multiple places, often along the sides or bottom rather than the top score. A common sign is a loaf that looks good before baking but falls flat or cracks poorly in the oven.
Under-Proofing: Resulting in Insufficient Expansion
Under-proofing is the opposite problem, where the dough hasn't fermented long enough to develop sufficient gas or strength. An under-proofed dough feels dense and heavy and doesn't show significant signs of fermentation (like bubbles or increased volume). When it hits the oven, it still has a lot of potential for expansion, but the crust can set too quickly if the dough hasn't relaxed enough.
The strong internal pressure combined with a tight, underdeveloped structure and potentially a rapidly setting crust can lead to explosive, unpredictable cracking. This often results in a large, singular, and deep crack that wasn't intended, or multiple small, sharp fissures. The loaf might also dome excessively high and crack along the sides or bottom as the dense interior pushes outwards against a resistant crust.
Insufficient Steam: Leading to a Dry and Brittle Crust
Steam is absolutely critical during the initial phase of baking sourdough. It keeps the surface of the dough moist and elastic, preventing the crust from setting too quickly. This pliability allows the dough to expand fully during oven spring, guiding the expansion towards the score. Without adequate steam, the surface dries out rapidly in the hot oven, forming a thin, rigid crust within minutes.
When the internal pressure builds, this brittle crust cannot stretch or yield easily. The dough then bursts through the weakest points, which may not be your score lines, resulting in uneven bread cracking. This is a frequent cause of multiple small cracks or a large, uncontrolled split. Ensuring a humid environment in the oven for the first 15-20 minutes is one of the most effective uneven bread cracking solutions.
Scoring Issues: How Improper Cuts Cause Uneven Breaks
Scoring is the baker's way of creating a planned weak point in the crust, directing the oven spring and controlling where the loaf expands and cracks. An improper score is a very common reason for uneven bread cracking. This can manifest in several ways: scores that are too shallow, not deep enough to provide a clear path for expansion; scores that are too deep, causing the loaf to collapse or tear excessively; or scores that are made with a dull blade, which drag the dough instead of making a clean cut, hindering expansion.
If the score is insufficient or poorly executed, the internal steam pressure will ignore it and find the actual weakest point on the surface, which might be a thin spot, a bubble just under the surface, or simply a random point of less resistance. The result is an unpredictable and uneven crack. Mastering scoring technique is a fundamental step in achieving controlled oven spring and preventing uneven bread cracking.
Oven Temperature Imbalances: Hot Spots and Uneven Baking
Ovens are not always perfectly uniform in temperature. Many home ovens have hot spots or cooler areas, often due to the location of the heating element or poor air circulation. If your bread is placed in an area of the oven that is significantly hotter or cooler than the rest, different parts of the crust will set at different rates.
A hot spot can cause one side of the loaf to develop a crust much faster than the other. When the dough expands, it will preferentially burst through the side with the weaker, less-set crust, leading to significant uneven bread cracking. Using an oven thermometer to verify your oven's actual temperature and rotating your bread partway through baking can help mitigate these temperature imbalances.
Dough Hydration: Too Much or Too Little Water
The hydration level of your dough (the ratio of water to flour) significantly impacts its handling properties, fermentation rate, and how the crust develops. Very high-hydration doughs (above 80%) are slack and extensible but can be challenging to handle and score cleanly. The surface can also dry out quickly if not managed with sufficient steam.
Low-hydration doughs (below 70%) are stiffer and easier to handle and score, but they may not expand as vigorously in the oven. If a low-hydration dough is also under-proofed, the tight structure combined with less potential for expansion can lead to a very strong, resistant crust that cracks unpredictably. Finding the right hydration for your flour and skill level is important for consistent results and preventing uneven bread cracking.
Weak Sourdough Starter: Insufficient Rise and Structure
A healthy, active sourdough starter is the engine of your bread. It provides the leavening power and contributes to the dough's structure and flavor. A weak or inactive starter will not produce enough gas to create sufficient internal pressure for good oven spring. It also may not contribute effectively to developing the gluten network.
If your starter is weak, the dough will likely be under-proofed even after a seemingly long fermentation time, and the resulting loaf will have poor volume and weak structure. When baked, the lack of internal pressure means expansion is minimal, and any cracking that occurs will likely be small, irregular, and uneven, as the dough lacks the force to create a strong, directed break. Ensuring your starter is vigorous and active is a foundational step in successful sourdough baking and preventing uneven bread cracking.
Uneven Sourdough Bread Cracking Solutions: A Comprehensive Guide
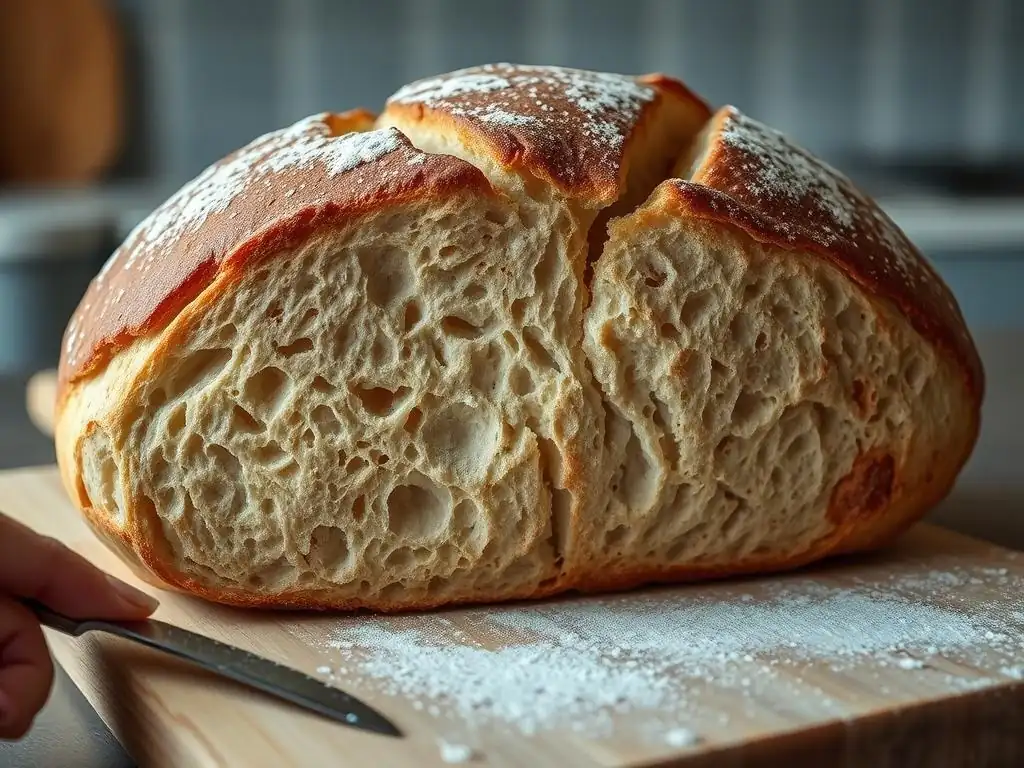
Solution 1: Mastering the Proofing Process for Even Rise
Achieving the correct proofing level is arguably the most critical factor in preventing uneven bread cracking. It's a delicate balance between under and over-proofing. Proper proofing ensures the dough has developed enough gas for good oven spring and the gluten structure is relaxed but still strong enough to support expansion.
Visual Cues for Perfect Proofing: What to Look For
Learning to read your dough is key. For a bulk ferment, look for a significant increase in volume, typically between 50% and 100%, depending on the flour and temperature. The surface should appear bubbly and slightly domed. For the final proof (after shaping), the dough should look visibly larger and feel light and airy. A common test is the "poke test": gently press a floured finger into the side of the dough.
If the indentation springs back slowly but not completely, it's likely ready. If it springs back immediately, it's under-proofed. If it stays completely indented, it's likely over-proofed. Mastering these cues is a vital uneven bread cracking solution.
Proofing Time and Temperature: Finding the Right Balance
Proofing time is highly dependent on temperature. Warmer temperatures speed up fermentation, while colder temperatures slow it down. A standard room temperature proof might take 4-6 hours for the bulk ferment and 2-4 hours for the final proof. Cold proofing in the refrigerator (often overnight or up to 24 hours) slows fermentation dramatically, developing flavor and structure. Experimenting with different proofing times and temperatures for your specific recipe and environment is necessary to find the sweet spot. Keeping a baking journal to track times, temperatures, and results can help you dial in the perfect proofing schedule.
Solution 2: Creating Adequate Steam for a Controlled Crust
Providing sufficient steam in your oven during the initial baking phase is essential for a pliable crust that allows controlled expansion. This is one of the most effective uneven bread cracking solutions.
Steaming Methods: Using Water, Ice Cubes, or Dutch Ovens
There are several ways to create steam in a home oven. One common method is to place a tray on the bottom rack of your oven while it preheats and pour hot water into it just as you load the bread. Another popular technique is using a Dutch oven or cloche.
Preheating the Dutch oven with the lid on traps the moisture released by the bread itself, creating a perfect steaming environment inside. Some bakers also throw a handful of ice cubes into the preheated tray or directly onto the oven floor (if safe for your oven) just before closing the door.
Optimizing Oven Humidity: Achieving the Perfect Crust
The goal is to maintain a high-humidity environment for the first 15-20 minutes of baking. If using a tray, ensure you use enough hot water to generate steam for that duration. If using a Dutch oven, keep the lid on for the initial phase (usually 20-25 minutes) before removing it to allow the crust to brown. Avoid opening the oven door unnecessarily during the steaming phase, as this lets the steam escape. Experimenting with different steaming methods can help you find the best way to achieve a moist crust and prevent uneven bread cracking.
Solution 3: Perfecting Your Scoring Technique for Predictable Cracks
Precise and confident scoring is crucial for directing oven spring and preventing uncontrolled splits. It's a skill that improves with practice.
Scoring Tools: Choosing the Right Blade or Knife
The best tool for scoring is a lame (pronounced "lahm"), which is a razor blade attached to a handle. A sharp razor blade makes a clean, swift cut without dragging the dough. A very sharp knife can also work, but a lame generally provides better control and a finer cut, especially on wet doughs. Using a dull blade is a common cause of poor scoring and subsequent uneven bread cracking. Always use the sharpest blade you can.
Scoring Patterns: Techniques for Different Bread Shapes
The scoring pattern you choose depends on the shape of your loaf and the desired aesthetic. For a round loaf (boule), a single deep slash across the top (a crescent moon shape) or a simple cross is common. For an oval loaf (batard), one or more diagonal slashes along the length are typical.
Decorative scores can be added, but the primary functional score should be the deepest and most deliberate. The pattern helps control how the dough expands and where the ear forms. Practice different patterns to see how they affect your loaf's structure and help avoid uneven bread cracking.
Depth and Angle: How to Achieve Even Expansion
The depth and angle of your score are critical. For a functional score intended to create an ear, the cut should typically be about 1/2 inch deep. The angle should be shallow, almost parallel to the surface of the dough (around 30-45 degrees). This allows the top flap of dough to lift and create the characteristic ear as the bread expands underneath.
For scores meant to simply allow expansion without a large ear (like a cross on a boule), a straight, perpendicular cut is appropriate. Scores that are too shallow won't provide a clear path, while scores that are too deep can cause the loaf to spread too much or collapse. Consistent depth and angle across the entire score are essential for preventing uneven bread cracking.
Solution 4: Addressing Oven Temperature Issues for Uniform Baking
Inconsistent oven temperatures can lead to parts of your loaf crusting over faster than others, causing uneven expansion and cracking. Addressing this is a practical uneven bread cracking solution.
Using an Oven Thermometer: Ensuring Accurate Temperature
Do not rely solely on your oven's built-in thermostat, as they can often be inaccurate by 25-50°F (15-30°C). An inexpensive oven thermometer placed inside will show you the true temperature. Preheat your oven for at least 30-60 minutes to ensure it reaches and stabilizes at the desired temperature throughout the cavity. Adjust your oven's setting based on the thermometer reading if necessary.
Rotating Your Bread: Promoting Even Baking
If you suspect your oven has hot spots, rotating your bread partway through the bake can help. After the initial steaming period (usually 20-25 minutes), when you remove the Dutch oven lid or steam tray, rotate the loaf 180 degrees. This ensures that all sides of the loaf are exposed to similar temperatures during the remainder of the baking time, promoting uniform crust development and helping to prevent uneven bread cracking.
Adjusting Rack Position: Optimizing Heat Distribution
The position of your oven rack also affects how heat reaches your bread. For most sourdough loaves baked in a Dutch oven, placing the rack in the middle of the oven works best, allowing for even heat circulation around the pot. If baking directly on a baking stone or steel, slightly lower positions might be preferred to prevent the bottom from burning before the top is done, but ensure there is still enough head clearance for oven spring. Experiment with rack position to find what works best in your specific oven setup.
Solution 5: Balancing Dough Hydration for Optimal Texture
The amount of water in your dough impacts everything from handling to crust development. Finding the right hydration level is key to consistent results and is a relevant uneven bread cracking solution.
Measuring Ingredients Accurately: The Importance of Precision
Baking is a science, and precision in measuring ingredients is crucial, especially water. Using a digital scale to weigh both your flour and water is far more accurate than using volume measurements (cups). Flour density can vary significantly depending on how it's stored and scooped, which directly impacts the actual hydration percentage. Weighing ensures your hydration is exactly what the recipe intends, providing a consistent starting point for troubleshooting.
Adjusting Hydration Levels: Adapting to Different Flours
Not all flours absorb water the same way. Whole wheat and rye flours absorb more water than white bread flour. The humidity in your environment can also affect flour's moisture content. If you consistently experience issues like overly wet or dry dough, you may need to slightly adjust the hydration level in your recipe. If uneven bread cracking seems related to your dough being too stiff (under-hydrated) or too slack and hard to score (over-hydrated), try slightly increasing or decreasing the water in your next batch, perhaps by just 1-2% of the flour weight.
Solution 6: Strengthening Your Sourdough Starter
A vigorous sourdough starter is fundamental for successful sourdough baking. A weak starter can lead to underdeveloped dough and uneven bread cracking.
Feeding Schedule and Ratios: Maintaining a Healthy Starter
A healthy starter needs regular feeding with fresh flour and water. The ideal feeding ratio (starter:flour:water) and frequency depend on the temperature and how often you bake. For a starter kept at room temperature and used regularly, a 1:1:1 or 1:2:2 ratio fed daily or every 12 hours might be necessary.
For a starter stored in the refrigerator, feeding once a week might suffice, but it will need a few refreshing feeds at room temperature before baking. Look for signs of activity: doubling or tripling in size within a few hours of feeding, lots of bubbles, and a pleasant, tangy aroma.
Recognizing Signs of a Weak Starter: Adjusting Your Approach
Signs of a weak starter include sluggish activity (not doubling within a predictable timeframe), minimal bubbling, a thin or watery consistency after feeding, or an off-putting aroma (like acetone). If your starter seems weak, try feeding it more frequently for a few days, perhaps at a higher ratio of fresh flour and water (e.g., 1:5:5). Ensure the temperature is warm enough (ideally 75-80°F or 24-27°C) to encourage bacterial and yeast activity. Using warm water for feeding can also help. A strong starter provides the necessary lift and structure to prevent uneven bread cracking.
Preventing Future Sourdough Bread Cracking: Proactive Baking Strategies
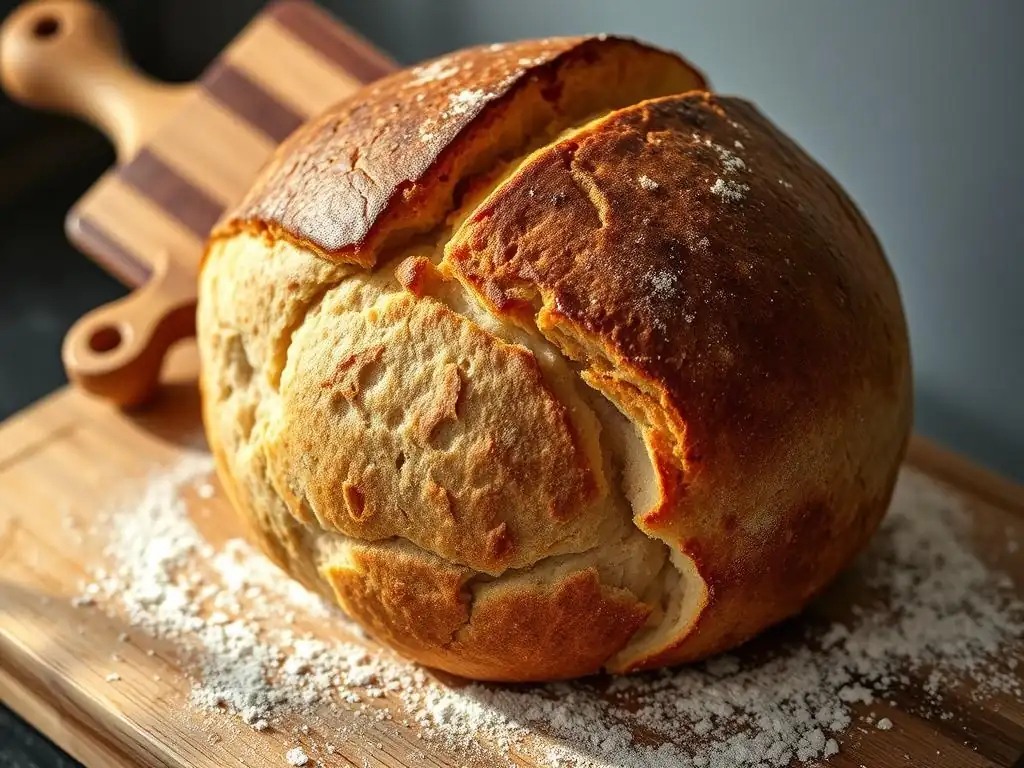
Keeping a Baking Journal: Tracking Your Results
One of the most effective ways to improve your baking and prevent recurring issues like uneven bread cracking is to keep a detailed baking journal. Note down everything: ingredients used (including brand and type of flour), hydration percentage, starter feeding details, autolyse time, mixing time, bulk fermentation time and temperature, folds performed, final proof time and temperature, scoring pattern, oven temperature settings, steaming method, and final baking time and temperature.
After the bake, record the results: oven spring, crust color, crumb structure, flavor, and importantly, how the loaf cracked. Did it crack along the score? Was it uneven? Where did it split? By tracking these variables, you can start to identify patterns and pinpoint which factors might be contributing to uneven bread cracking in your specific process.
Experimenting with Small Changes: Finding What Works Best
Once you have a journal and some hypotheses based on the common causes of uneven bread cracking, start experimenting. The key is to change only one variable at a time per bake. For instance, if you suspect over-proofing, try reducing your bulk ferment time by 30 minutes in the next bake, keeping everything else constant. If you think it's a scoring issue, try making your score slightly deeper or using a sharper blade.
Making small, incremental changes allows you to isolate the impact of each variable. This systematic approach is much more effective than changing multiple things at once, which makes it impossible to know what actually solved the problem. Patience and observation are key here.
Investing in Quality Baking Equipment: Enhancing Your Baking
While you can make great bread with minimal equipment, investing in a few key tools can significantly improve your consistency and help prevent issues like uneven bread cracking. A reliable digital scale is non-negotiable for accurate measurements. An oven thermometer confirms your oven's true temperature. A good quality lame with sharp, replaceable blades makes scoring much easier and more effective.
For steaming, a Dutch oven or a dedicated baking stone/steel combined with a reliable steaming method (like a heavy tray or lava rocks) can make a big difference compared to simply spraying water. While equipment isn't a magic fix, having the right tools eliminates potential variables and allows you to focus on technique and dough handling, ultimately leading to more consistent and successful loaves with predictable cracks.
Troubleshooting Specific Bread Types: Addressing Unique Challenges
Sourdough Bread Cracking: Special Considerations
Sourdough bread, by its nature, presents unique challenges when it comes to cracking. The wild yeast and bacteria in the starter create a more complex fermentation process compared to commercial yeast. This can lead to more variability in dough strength and activity. The long fermentation times often involved in sourdough baking also increase the risk of over or under-proofing.
Furthermore, the characteristic tang of sourdough comes from lactic and acetic acids produced during fermentation. These acids can affect the gluten structure, sometimes making it more extensible but potentially less strong if fermentation is mismanaged. Paying close attention to your starter's health, mastering proofing based on dough activity rather than just time, and ensuring proper scoring are particularly crucial for consistent results with sourdough and effectively implementing uneven bread cracking solutions.
High-Hydration Sourdough Cracking: Techniques for a Perfect Crust
High-hydration sourdough doughs (typically 80% hydration or more) are known for producing an open, airy crumb but can be challenging to handle and score. Their wetness makes them prone to spreading, and the surface can dry out very quickly in the oven if not managed properly. Uneven bread cracking is a common issue with high-hydration doughs if the crust sets prematurely.
Successfully baking high-hydration sourdough requires ample steam in the oven to keep the surface pliable. Using a preheated Dutch oven is highly recommended for this. Scoring requires a very sharp blade and a swift, confident hand, as the dough is less firm. Some bakers even lightly mist the surface of the dough with water just before scoring to help the blade glide smoothly. Gentle handling during shaping and transfer to the baking vessel is also key to preserving the delicate structure.
Rye Sourdough Cracking: Addressing unique challenges
Rye flour behaves very differently from wheat flour due to its lower gluten content and higher levels of pentosans, which are water-absorbing carbohydrates. This means rye doughs are often stickier and denser than wheat doughs, and they don't develop gluten in the same way. Rye sourdoughs rely more on the acid produced by the starter to create structure and prevent the dough from collapsing.
Cracking in rye sourdough can be different from wheat sourdough. Instead of a defined ear, you might see smaller, more numerous cracks across the surface. Under-proofing is a common cause of excessive, uncontrolled cracking in rye loaves, as the dense dough expands late and forcefully. Ensuring adequate fermentation and using plenty of steam are important uneven bread cracking solutions for rye breads. Scoring techniques might also differ; sometimes simpler, shallower scores are preferred to prevent the denser loaf from collapsing.
Conclusion: Achieving Baking Success with Evenly Cracked Sourdough Bread
Uneven sourdough bread cracking is a common hurdle in the baking journey, but it's one that can be overcome with understanding and practice. It's rarely caused by a single factor, but rather a combination of issues related to proofing, steam, scoring, oven conditions, dough hydration, or starter health. By systematically troubleshooting each potential cause and implementing the uneven bread cracking solutions discussed, you can significantly improve your results.
Remember to observe your dough, pay attention to the signs it gives you, and don't be afraid to experiment with small adjustments. Keeping a baking journal is an invaluable tool for tracking your progress and identifying patterns. With patience and persistent application of these techniques, you'll be well on your way to achieving consistently beautiful loaves with that satisfying, predictable crack, transforming frustrating bakes into successful ones. Happy baking!
Frequently Asked Questions
What causes uneven cracking in bread?
Uneven cracking often results from inconsistent dough hydration or improper shaping. These factors can lead to uneven expansion during baking, causing cracks.
How can I prevent my bread from cracking unevenly?
To avoid uneven cracks, ensure consistent hydration and proper kneading of your dough. Pay attention to shaping techniques and allow for adequate proofing time before baking.
Are there specific types of bread that are more prone to uneven cracking?
Yes, breads with high hydration or those that require extensive fermentation are generally more susceptible to uneven cracking. Examples include artisan loaves and sourdough.
What are some quick fixes for bread that has already cracked?
If your bread has cracked, consider covering it with foil during baking to reduce further cracking or adjust your oven temperature for more even cooking.
Can the type of flour affect cracking in bread?
Absolutely! The protein content in flour can influence dough strength and elasticity. Bread flour typically leads to better structure and can help reduce uneven cracking compared to all-purpose flour.
Final Reflection: The Humble Crust and the Pursuit of Perfection
The seemingly simple act of baking bread reveals a complex interplay of science and artistry, and uneven cracking, a common frustration, highlights this perfectly. Understanding the nuances of dough hydration, fermentation, and oven spring is crucial not just for aesthetically pleasing loaves, but for achieving consistent texture and flavor. The quest for a flawlessly smooth crust is, in essence, a quest for mastery over the baking process itself.
The journey from a cracked crust to a beautifully browned loaf is a microcosm of the larger human experience – a constant striving for improvement, a learning process marked by both successes and failures. The most beautiful things are the most unpredictable.
This quote, while not directly about baking, perfectly encapsulates the unpredictable nature of the process and the beauty found in embracing imperfection. The uneven cracks in our bread become lessons learned, each one a step closer to understanding the delicate balance required to create a truly exceptional loaf.
So, the next time your bread emerges from the oven with a less-than-perfect crust, don't despair! Embrace the learning opportunity. Reflect on your technique, adjust your approach, and remember that the journey towards baking perfection is a continuous one. Each loaf, whether cracked or flawless, represents a step forward in your culinary journey. Now, go forth and bake!
Unlock Your Baking Potential: Evenly Baked Bread Awaits!
Thanks for taking the time to explore the mysteries of uneven bread baking with us! We hope you now feel equipped to conquer those frustrating cracks and achieve picture-perfect loaves every time. Ready to put your newfound knowledge to the test?
- Master the Art of Even Baking: Try adjusting your baking technique based on the tips provided—paying particular attention to pre-heating your oven thoroughly or using a Dutch oven. This will be your first step towards perfectly baked bread.
- Share Your Baking Triumphs: Show off your beautifully baked loaves on social media using #BakeWithEase and #EvenlyBakedBread. Let's inspire each other!
- Explore More Baking Secrets: Dive deeper into our extensive library of baking guides on BakeWithEase.com—you might discover the perfect recipe for your next baking adventure!
What's your biggest bread-baking challenge, and how will you tackle it next time?