
Never Stick Again: How to Prepare Cake Pans Like a Pro

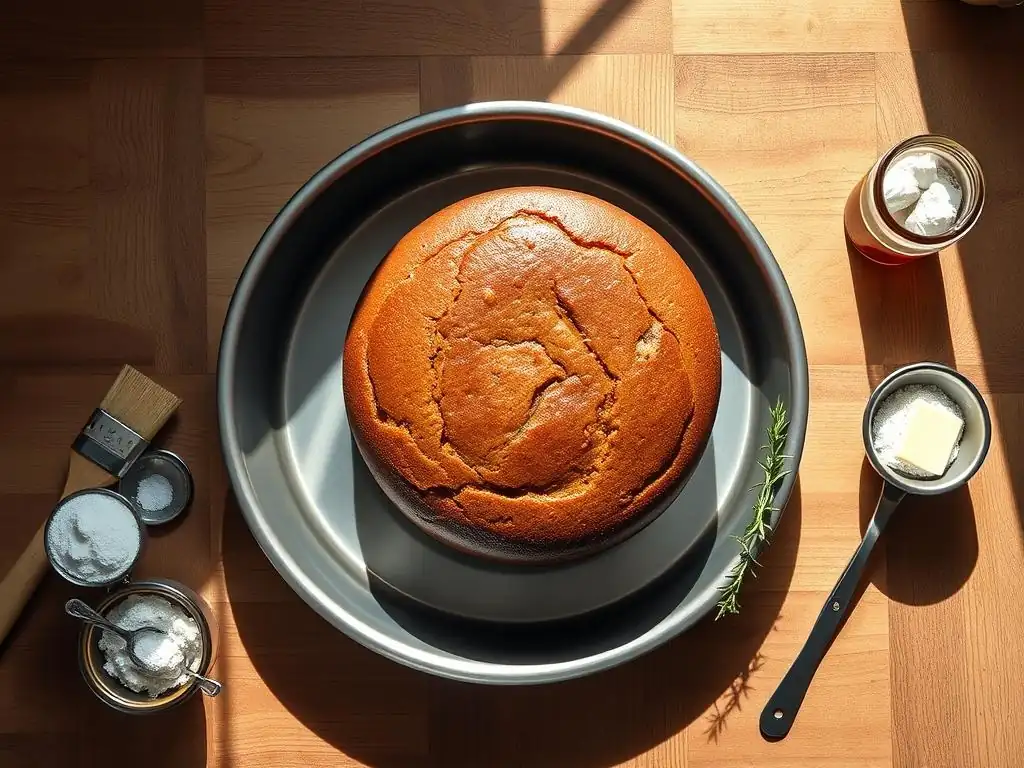
Welcome to BakeWithEase, your trusted companion on your baking journey! Ever dreamt of a perfectly released cake, leaving no crumb behind? This article dives deep into essential cake pan release tips that will transform your baking experience. Unlock the secrets to effortless cake removal and say goodbye to frustrating sticking forever. Intrigued? Let's get started!
- BakeWithEase' Guide to Perfect Cake Pan Preparation
- Understanding Cake Pan Sticking: Why Cakes Get Stuck
- The Ultimate Cake Pan Release Methods: A Step-by-Step Guide
- Choosing the Right Method for Different Cake Types
- Troubleshooting Common Cake Pan Problems
- Advanced Cake Pan Release Techniques for Pro Bakers
- Essential Tools for Perfect Cake Pan Preparation
- Cake Pan Release Tips: Expert Advice and Best Practices
- Conclusion: Bake With Ease - Achieve Cake Perfection with Proper Pan Prep
-
Frequently Asked Questions
- What is cake pan release, and why is it important?
- What are some common cake pan release tips discussed on BakeWithEase?
- Can I use butter instead of shortening for cake pan release?
- What if I don't have parchment paper? Are there alternative cake pan release tips?
- Is using a commercial cake pan release spray always the best option?
- Final Reflection: The Sweet Science of Effortless Cake Release
- Unleash Your Inner Baking Pro!
BakeWithEase' Guide to Perfect Cake Pan Preparation
Baking a beautiful cake only to have it crumble or stick to the pan during release can be incredibly frustrating. It's a common problem that can ruin hours of effort. Fortunately, preventing sticking is often simpler than you think, requiring just a few reliable cake pan release tips and techniques. Mastering pan preparation is a fundamental skill for any baker, ensuring your creations come out cleanly, intact, and ready for decorating.
This guide will walk you through the essential steps and various methods for preparing your cake pans, from classic greasing and flouring to modern sprays and clever hacks. We'll explore why cakes stick, the best approaches for different types of batter, and common troubleshooting tips. By following these expert cake pan release tips, you'll significantly increase your success rate and bake with greater confidence and ease.
Understanding Cake Pan Sticking: Why Cakes Get Stuck
Factors Contributing to Cake Sticking
Several elements can conspire to make your cake stubbornly adhere to the pan. One primary culprit is insufficient or uneven application of your chosen release agent. If even a small patch of the pan surface lacks grease or flour, the cake batter will bond directly to the metal, creating anchor points that resist release. For instance, a small gap in greasing near the bottom edge of a round pan can cause the entire bottom to tear upon inversion.
Another significant factor is the cake batter's composition. Batters high in sugar, like those for caramel or some spice cakes, are inherently stickier. As the sugar melts and caramelizes during baking, it can create a strong adhesive bond with the pan surface. Similarly, batters with a high fat content can sometimes stick if the pan isn't prepared correctly, although fat generally helps prevent sticking. The age and condition of your pan also play a role; older pans with scratches or worn non-stick coatings are more prone to sticking than new, well-maintained ones.
The Importance of Proper Cake Pan Prep
Proper cake pan preparation is not just an optional step; it's a critical foundation for a successful bake. Skipping or rushing this process is a leading cause of baking mishaps, often resulting in broken cakes, uneven layers, and wasted ingredients. Think of it as insurance for your baking efforts – a small investment of time upfront saves significant frustration and potential failure later.
Beyond simply preventing sticking, diligent pan prep contributes to a better final product. When a cake releases cleanly, its structure remains intact, leading to more uniform layers that are easier to stack and decorate. It also ensures the cake's crust forms correctly without tearing, presenting a professional appearance. Implementing effective cake pan release tips ensures that your beautiful, perfectly baked cake makes it out of the pan in one piece, ready to be enjoyed.
The Ultimate Cake Pan Release Methods: A Step-by-Step Guide
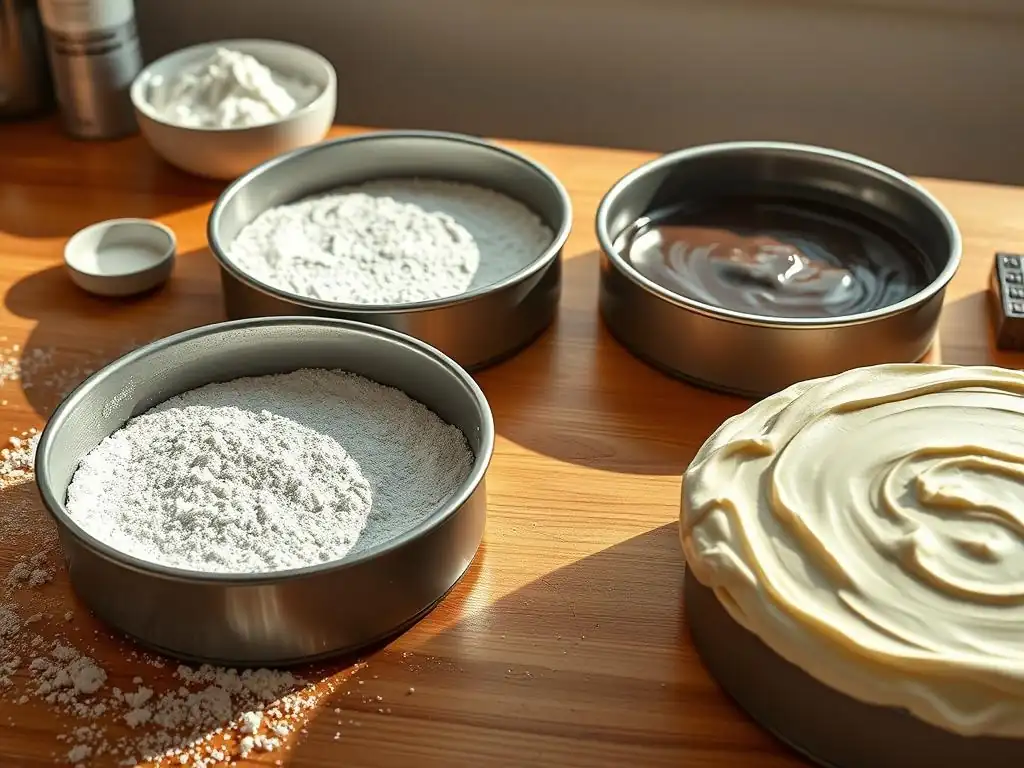
Method 1: Classic Greasing and Flour Coating for Cake Pans
The traditional method of greasing and flouring is a time-tested technique that provides a reliable barrier between the cake batter and the pan surface. This two-step process ensures that the cake has minimal contact with the pan itself, promoting a clean release. It's particularly effective for standard butter-based cakes and offers a slightly textured exterior that can be desirable for some recipes.
This method works by creating a slippery layer of fat, followed by a fine coating of flour. As the cake bakes, the flour particles become embedded in the outer crust of the cake, while the grease prevents the batter from sticking to the pan. The combination creates a robust non-stick surface. For best results, use a solid fat like softened butter or shortening, as liquid oils can pool and leave gaps.
Step 1: Thoroughly Greasing the Cake Pan
Using a pastry brush, paper towel, or even your fingers, apply a generous, even layer of softened butter, shortening, or a neutral-flavored solid fat (like coconut oil) to the entire interior surface of the cake pan. This includes the bottom, sides, and any intricate details if using a Bundt pan. Ensure there are no bare spots; aim for coverage of approximately 98-99% of the surface area. Pay special attention to corners and crevices. For a 9-inch round pan, about 1-2 tablespoons of softened butter is usually sufficient.
Step 2: Flour Dusting for Easy Cake Release
Once the pan is fully greased, add about 1-2 tablespoons of all-purpose flour to the pan. Hold the pan over your sink or a piece of parchment paper and tilt and rotate it, tapping the sides gently. This action distributes the flour evenly over the greased surfaces. The flour should adhere to all the greased areas, creating a thin white coating. Continue rotating and tapping until the entire greased surface is covered with a fine layer of flour.
Step 3: Removing Excess Flour from the Pan
After the pan is thoroughly dusted with flour, invert it and tap out any excess flour. You don't want thick clumps of flour sitting in the bottom or corners, as this can create dry, unappealing patches on the finished cake crust. A light, even coating is sufficient. A quick tap upside down should remove most of the excess. Your pan is now prepped and ready for batter.
Method 2: Baking Spray: A Convenient Cake Pan Release Solution
Baking spray, often labeled as "non-stick baking spray with flour," is a popular and convenient alternative to the classic grease and flour method. It combines aerosolized oil with flour or a flour substitute in one easy-to-apply product. This method significantly cuts down on preparation time and can be particularly useful for pans with intricate designs, like Bundt pans, where getting into every nook and cranny with butter and flour can be challenging.
While baking spray offers convenience, not all sprays are created equal. Some standard non-stick cooking sprays (like those containing only oil) are not formulated for baking and can sometimes leave a gummy residue on pans over time. Baking-specific sprays contain emulsifiers and often flour, making them much more effective for cake release. Proper application is key to avoiding sticky spots, even with a good spray.
Choosing the Right Baking Spray
Look specifically for baking sprays that contain flour or a flour-like substance. These are explicitly designed for cakes and baked goods. Brands like Baker's Joy or sprays labeled "Baking Spray with Flour" are good options. Avoid regular cooking sprays meant for frying or sautéing, as they often lack the necessary components to prevent cake sticking effectively. Read the label carefully to ensure it's intended for baking.
Applying Baking Spray Evenly
Hold the can of baking spray about 6-8 inches away from the pan. Apply an even coating, ensuring that you cover the bottom, sides, and any central tubes or intricate details. Don't just spray the bottom; neglecting the sides is a common mistake that leads to sticking. Use a consistent sweeping motion and aim for complete coverage. You want a visible, but not overly thick or dripping, layer of spray. For a 9-inch round pan, a 2-3 second spray should be sufficient to cover the entire interior surface.
Method 3: Parchment Paper Circles for Cake Pan Perfection
Using parchment paper is an excellent cake pan release tip, especially for flat-bottomed cake layers baked in round or square pans. While it doesn't eliminate the need to grease the sides of the pan, it provides an absolutely reliable non-stick surface for the bottom of the cake, where sticking is most common and most damaging to the cake's structure. This method is particularly useful for delicate cakes or when you want an absolutely clean bottom crust.
Parchment paper works by creating a physical barrier that the cake batter cannot adhere to. Even if the pan is scratched or has a worn non-stick coating, the parchment ensures the cake bottom lifts away cleanly. It's a simple yet highly effective technique used by many professional bakers for consistent results. While cutting the paper takes a moment, the assurance it provides is well worth the effort, minimizing the risk of your cake sticking.
Cutting Parchment Paper to Fit Your Cake Pan
For a round pan, place the pan bottom on a piece of parchment paper and trace around it with a pencil. Cut slightly inside the traced line to ensure the paper fits snugly without going up the sides. Alternatively, fold a square of parchment in half, then in half again, and repeat until you have a narrow wedge.
Place the point of the wedge at the center of the pan bottom and cut the paper at the pan's edge. Unfold, and you'll have a perfect circle. For square or rectangular pans, simply measure and cut the paper to fit the bottom dimensions precisely.
Securing Parchment Paper in the Pan
Before placing the parchment circle or square in the pan, lightly grease the bottom of the pan. This small amount of grease acts like glue, holding the parchment paper in place so it doesn't shift when you pour in the batter. Once the bottom is lightly greased, press the cut parchment paper firmly into the bottom of the pan, smoothing out any wrinkles. Then, grease the sides of the pan using butter, shortening, or baking spray, as the parchment only covers the bottom.
Method 4: The "Cake Goop" Method: Homemade Pan Release
"Cake Goop," also sometimes called "Baker's Joy copycat" or "pan release paste," is a simple, homemade mixture that provides exceptional non-stick performance. It's a blend of equal parts flour, vegetable shortening, and vegetable oil, whipped together into a smooth paste. This mixture can be made in advance and stored, offering a convenient and highly effective alternative to commercial sprays or the traditional grease and flour method.
The advantage of Cake Goop is its consistency and staying power. Unlike butter, which can melt and pool, or sprays, which can be applied unevenly, Goop provides a thick, uniform coating that adheres well to the pan surface, including intricate designs. It's particularly recommended for Bundt pans and other detailed molds where complete coverage is paramount. Making a batch takes only a few minutes and can last for several baking sessions, making it a cost-effective solution.
Recipe for Homemade Cake Goop
To make Cake Goop, you'll need three ingredients:
- 1 cup all-purpose flour
- 1 cup vegetable shortening (like Crisco)
- 1 cup vegetable oil (a neutral one like canola or sunflower oil)
Combine all three ingredients in a medium bowl. Use a whisk, fork, or electric mixer to whip the mixture until it is smooth and lump-free, with a consistency similar to a thick paste or frosting. This should take just a minute or two. Once combined, transfer the mixture to an airtight container and store it at room temperature in your pantry. It should keep well for several months.
Applying Cake Goop for Effortless Release
To use Cake Goop, simply use a pastry brush or a paper towel to apply a generous, even layer to the entire interior surface of your cake pan. Ensure every part of the pan – bottom, sides, center tube, and any decorative elements – is thoroughly coated. You want a visible layer, but not so thick that it pools. Its paste-like consistency makes it easy to spread and ensures excellent coverage, significantly reducing the risk of your cake sticking.
Choosing the Right Method for Different Cake Types
Selecting the appropriate pan preparation method is crucial, as different cake batters have varying tendencies to stick. What works perfectly for a sturdy pound cake might not be sufficient for a delicate sponge. Understanding the characteristics of your cake batter will help you choose the most effective cake pan release tips.
For example, cakes with a high sugar content or those that are particularly moist tend to be sticker than drier, less sweet cakes. Similarly, cakes baked in intricate pans naturally require a more robust release strategy due to the increased surface area and tight corners. Matching the pan prep method to the cake type is a key aspect of achieving consistent baking success and preventing common sticking issues.
Best Cake Pan Prep for Delicate Cakes (Sponge Cakes, Angel Food Cakes)
Delicate cakes like sponge cake and angel food cake often have a very fine, tender crumb and are prone to tearing if they stick. Angel food cakes, in particular, are traditionally baked in ungreased pans (specifically tube pans) because the batter needs to cling to the sides to rise properly and achieve its airy structure. Greasing an angel food cake pan will cause it to collapse.
For sponge cakes (like genoise), which rely less on clinging to the pan for structure than angel food but are still very tender, a light greasing and flouring is often recommended, or even better, using parchment paper on the bottom and lightly greasing the sides. Some recipes might even suggest just greasing the bottom and sides and omitting the flour if a very smooth crust is desired. Always check your specific recipe's recommendations, as delicate cakes are the exception to many general pan prep rules.
Preparing Pans for Rich and Dense Cakes (Chocolate Cakes, Bundt Cakes)
Rich, dense cakes like chocolate fudge cakes or heavy pound cakes, and cakes baked in detailed Bundt pans, benefit from robust pan preparation. These batters often have a high fat or sugar content, which can increase sticking risk, especially in pans with many crevices. The classic grease and flour method is effective, but you must ensure complete coverage, particularly in intricate Bundt designs.
For Bundt pans and other detailed molds, using baking spray with flour or the homemade Cake Goop method (Method 4) is highly recommended. These options provide excellent coverage of all the nooks and crannies. When using grease and flour on a Bundt pan, use a pastry brush to work the fat into all the details, then add flour and tap vigorously to coat everything before tapping out the excess. For dense cakes in standard round pans, grease and flour or baking spray are usually sufficient, but ensure full coverage of both the bottom and sides.
Cake Pan Release Tips for Sticky Cakes (Carrot Cake, Spice Cake)
Cakes high in sugar, moisture, or containing sticky additions like grated carrots, fruits, or molasses (common in carrot cake, spice cake, fruitcakes) are particularly prone to sticking. For these types of cakes, you need extra assurance. Combining methods can provide the best protection.
A highly effective strategy for sticky cakes is to grease the pan thoroughly, then line the bottom with parchment paper, and finally grease the sides again. This ensures the bottom is completely non-stick, and the sides are well-protected. Using baking spray with flour or Cake Goop is also an excellent choice for these batters, as they create a strong barrier. Whichever method you choose, ensure the entire pan surface that will come into contact with the batter is coated, as even a small ungreased spot can lead to a significant sticking issue.
Troubleshooting Common Cake Pan Problems
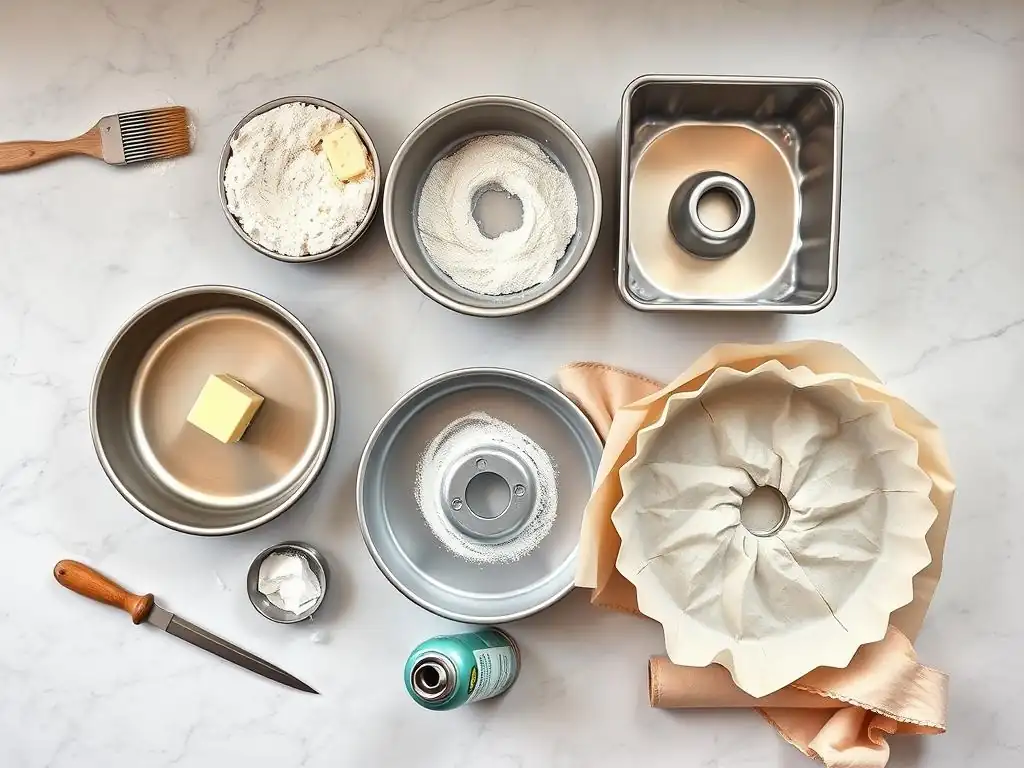
Even with careful preparation, sometimes things don't go perfectly. Understanding why common problems occur and how to address them is part of mastering cake baking. These troubleshooting cake pan release tips can help you diagnose issues and prevent them in the future.
A common issue is partial sticking, where only a section of the cake adheres to the pan. This often points to an uneven application of the release agent. Another problem is the cake sinking or tearing upon release, which can be related to sticking but also other factors like underbaking or cooling too quickly. Learning to identify the signs and causes will improve your results over time.
Cake Still Sticks Even After Greasing and Flouring?
If your cake still sticks despite greasing and flouring, several factors could be at play. First, re-evaluate your greasing and flouring technique. Was the entire surface covered? Were there any gaps, especially in corners or around a center tube? Ensure you used enough fat and flour to create a solid barrier. Using softened butter or shortening rather than melted butter can help achieve better coverage as it stays in place.
Second, consider the type of cake and pan. Was it a very sticky batter baked in a detailed pan? You might need a more robust method like baking spray with flour or Cake Goop, or adding a parchment paper liner to the bottom. Also, ensure you are letting the cake cool in the pan for the recommended time (usually 10-15 minutes) before attempting to invert it; removing it too soon can cause it to stick or break.
Uneven Cake Release: Causes and Solutions
Uneven cake release, where part of the cake comes out cleanly but another section sticks, is almost always due to inconsistent pan preparation. This means the grease and/or flour (or spray/goop) was not applied evenly across the entire surface. Perhaps you missed a spot on the side, or didn't tap out the flour well enough, leaving a thick patch in one area and a thin one elsewhere.
To prevent uneven release, be meticulous in your pan preparation. Use a pastry brush to spread butter or shortening into all areas, paying attention to edges and corners. When flouring, rotate and tap the pan thoroughly to ensure the flour coats every greased surface evenly. When using spray, use a sweeping motion to cover the entire interior. If you frequently experience uneven release with a specific pan, consider using parchment paper on the bottom and being extra careful with the sides, or switch to the Cake Goop method for better adhesion to the pan surface.
Preventing a Mess: Clean Cake Pan Prep Techniques
While achieving a non-stick surface is the primary goal, keeping your workspace clean during pan preparation is also important. Flour can easily get everywhere! When greasing with butter or shortening, using a paper towel or pastry brush helps contain the fat. Avoid using your fingers unless absolutely necessary, as it can be messy.
When flouring, perform the dusting over your sink or a large piece of parchment paper or newspaper. This catches the excess flour that you tap out, making cleanup much easier. Simply fold up the paper and discard the excess flour. If using baking spray, spray inside the sink or a large box to contain the aerosolized particles and prevent a greasy film from settling on your counters and floor. Implementing these clean cake pan release tips makes the process less frustrating.
Advanced Cake Pan Release Techniques for Pro Bakers
While the basic methods are sufficient for most home baking, some advanced techniques can further improve cake release, especially for challenging recipes or professional results. These methods often address specific baking challenges, like ensuring even baking alongside non-stick properties or handling very delicate structures.
These techniques might involve using specialized tools or incorporating additional steps into the baking and cooling process. They represent refinements on the fundamental cake pan release tips, offering solutions for situations where standard methods might fall short. Exploring these can help you achieve even more consistent and flawless results in your baking.
Using Baking Strips for Even Baking and Easy Release
Baking strips (sometimes called cake strips or leveling strips) are fabric bands soaked in water and wrapped around the outside of cake pans. Their primary purpose is to insulate the pan edges, causing the cake to bake more evenly and preventing doming. However, they also contribute indirectly to easier cake release.
By promoting even heating, baking strips help the cake set uniformly. This uniform structure reduces the likelihood of uneven expansion or contraction that could cause parts of the cake to stick or crack upon cooling. While they don't directly coat the inside of the pan, using them in conjunction with a proper internal pan release method (like grease and flour or baking spray) can lead to a more structurally sound cake that is less likely to tear when inverted.
Freezing Cake Layers for Clean Removal
This technique is often used after baking and cooling, but it significantly impacts the final release and handling of the cake layers. Once your cake has cooled in the pan for the recommended time and has been inverted onto a cooling rack, allow it to cool completely. For very delicate or moist cakes, or when you need exceptionally clean, sharp edges (especially for stacking), wrapping the cooled cake layers tightly in plastic wrap and freezing them for 1-2 hours (or longer) can be beneficial.
Freezing firms up the cake's structure, making it much less fragile. When you unwrap the frozen or partially frozen layer, it's easier to handle, move, and even level with less risk of breakage or crumbling compared to a room-temperature cake. While this isn't a direct pan preparation tip, it's a powerful post-bake technique that ensures your perfectly released cake layers remain intact and easy to work with.
Pan Types and Their Impact on Cake Release
The material and finish of your cake pan significantly affect how easily cakes release. Pans made from aluminum or stainless steel generally require thorough greasing and flouring. Dark-coated non-stick pans often require less preparation, sometimes just a light spray or greasing, but their non-stick coating can degrade over time. Glass pans heat differently and can sometimes cause sticking if not properly prepped.
Silicone pans are marketed as completely non-stick, and often require only minimal or no greasing, although a light spray can provide extra insurance, especially for sticky batters. However, silicone pans can sometimes result in less browning on the crust compared to metal pans. Understanding the properties of your pans helps you choose the most appropriate cake pan release tips for each situation. For instance, a brand new high-quality non-stick pan might only need a light greasing, while a well-used aluminum pan will definitely need the full grease and flour treatment.
Essential Tools for Perfect Cake Pan Preparation
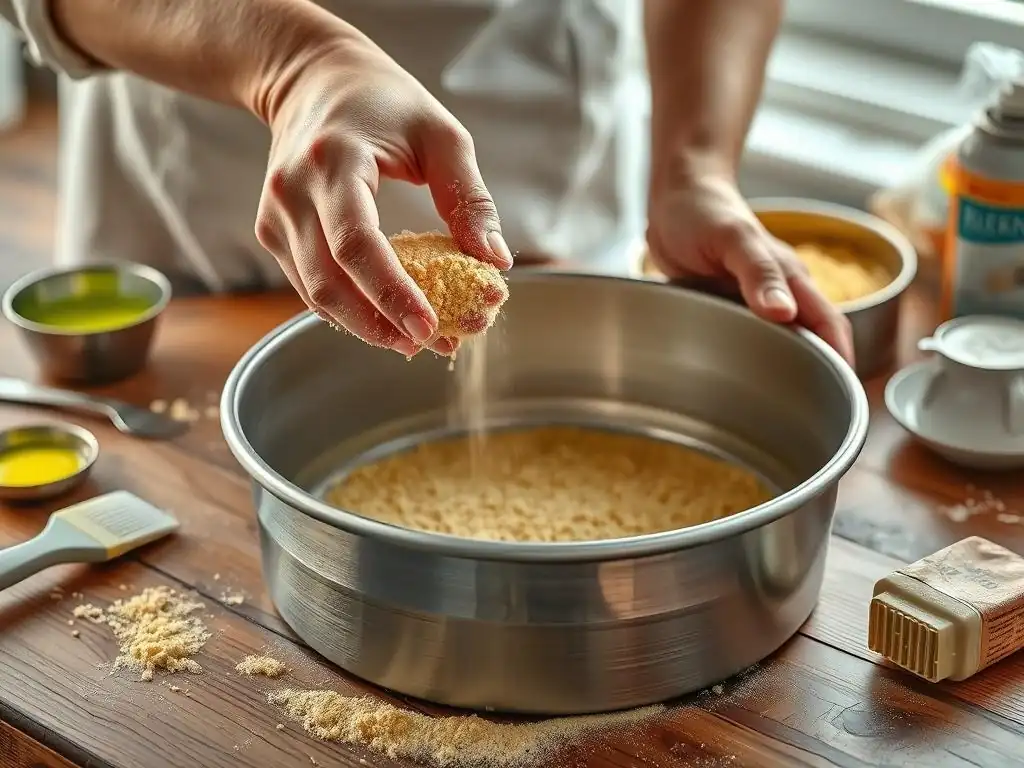
Having the right tools makes cake pan preparation much easier and more effective. While you can often get by with basic kitchen items, a few specialized tools can help you achieve more consistent and thorough coverage, which is key to preventing sticking. Investing in these simple items can significantly improve your baking success rate.
From specialized brushes to the pans themselves, the tools you use play a role in how well your cake releases. Using tools designed for the task ensures that your chosen release agent gets into every corner and surface, leaving no room for the cake batter to bond directly with the metal or silicone.
Best Types of Cake Pans for Easy Release
While any pan can work with proper preparation, some types are inherently easier to work with. High-quality aluminum pans with a smooth, even finish are excellent when properly greased and floured. Pans with a durable non-stick coating, while they may eventually wear, offer great initial non-stick properties. Look for pans with a heavy gauge metal, as they conduct heat more evenly, which can also aid in release.
Bundt pans made from heavy cast aluminum (like those from Nordic Ware) are known for their intricate designs and excellent release properties if prepped correctly, often benefiting from baking spray with flour or Cake Goop. Springform pans, designed for cheesecakes and tarts but also used for delicate cakes, have a removable side and bottom, which inherently aids in release, though the bottom still needs preparation (often parchment paper).
Recommended Greasing and Flouring Tools
For greasing, a dedicated pastry brush is ideal. Natural bristle brushes work well for applying butter or shortening, while silicone brushes are easy to clean and can also be used for applying liquid oil or Cake Goop. A paper towel can also work in a pinch, but it's harder to get into corners with it.
For flouring, simply adding the flour to the pan and tapping is sufficient. However, a fine-mesh sieve can be used to lightly dust the pan after greasing for an extra-fine, even coating, though this is usually not necessary with the standard tapping method. For applying Cake Goop or baking spray, the spray nozzle or a pastry brush (for Goop) are the only tools needed.
Cake Pan Release Tips: Expert Advice and Best Practices
Achieving a perfectly released cake every time comes down to consistency and attention to detail. Even the best methods can fail if executed poorly. Following a few expert tips and best practices can elevate your pan preparation from hit-or-miss to consistently successful.
These insights come from years of baking experience and address common pitfalls that even seasoned bakers can occasionally fall into. Incorporating these cake pan release tips into your routine will significantly reduce the frustration of stuck cakes and help you bake with greater confidence.
Ensuring a Smooth Cake Release Every Time
Consistency is key. Use enough release agent to cover the entire surface. Don't skimp on the grease or spray. For grease and flour, ensure the flour coats every bit of grease. For sprays, use a sweeping motion to avoid bare spots. Always grease the sides of the pan unless the recipe specifically says not to (like for angel food cake).
Allow the cake to cool in the pan for the recommended time (typically 10-15 minutes for standard cakes, longer for Bundt cakes) before attempting to invert it. This allows the cake's structure to set slightly and pull away from the pan edges as it cools. Trying to remove a hot cake is a recipe for disaster. Also, give the pan a gentle tap on the counter before inverting; this can sometimes help loosen edges.
Avoiding Common Mistakes in Cake Pan Preparation
One of the most common mistakes is not greasing the sides of the pan. The cake rises and expands, and the sides are just as likely to stick as the bottom. Another mistake is using too much flour, which can create a thick, gummy layer on the cake crust. A light, even dusting is sufficient.
Using the wrong type of release agent is another pitfall; regular cooking spray is not the same as baking spray with flour. Also, not preparing the pan right before adding the batter can be an issue, especially with sprays or melted butter, which can drip or pool if left sitting too long. Prepare the pan just before you are ready to pour in the batter.
Maintaining Your Cake Pans for Long-Term Non-Stick Performance
Proper care extends the life of your cake pans and helps maintain their non-stick properties. Avoid using metal utensils that can scratch non-stick coatings. Wash pans gently with warm, soapy water and a soft sponge (avoid abrasive scrub pads).
For pans without non-stick coatings, ensure they are thoroughly dried after washing to prevent rust. Avoid putting non-stick pans in the dishwasher, as the harsh detergents and high heat can degrade the coating over time. Seasoning aluminum or steel pans periodically (lightly greasing and heating) can also help build up a non-stick surface over time. Caring for your pans is an essential part of successful cake pan release tips.
Conclusion: Bake With Ease - Achieve Cake Perfection with Proper Pan Prep
Preventing cakes from sticking to the pan is a fundamental skill that transforms baking from a hopeful gamble into a consistent success. By understanding the reasons behind sticking and employing the right cake pan release tips and techniques, you can ensure your beautiful creations emerge from the pan clean, intact, and ready for their final touches.
Whether you prefer the classic grease and flour method, the convenience of baking spray, the reliability of parchment paper, or the homemade effectiveness of Cake Goop, mastering pan preparation is a game-changer. Remember to choose the method best suited for your cake type and pan, be meticulous in your application, and always allow your cake to cool properly before attempting release. With these essential cake pan release tips in your arsenal, you're well on your way to baking with ease and achieving cake perfection every time.
Frequently Asked Questions
What is cake pan release, and why is it important?
Cake pan release refers to methods used to prevent cakes from sticking to the pan after baking. It's crucial for achieving clean cake removal, which is essential for presentation and frosting.
What are some common cake pan release tips discussed on BakeWithEase?
BakeWithEase provides tips such as using shortening and flour, parchment paper, and commercial cake pan release sprays. These techniques create a barrier between the cake batter and the pan.
Can I use butter instead of shortening for cake pan release?
While butter can be used, it may not be as effective as shortening. Shortening has a higher fat content and less water, leading to a more reliable release.
What if I don't have parchment paper? Are there alternative cake pan release tips?
Yes! You can use the shortening and flour method exclusively. Grease the pan thoroughly with shortening, then dust it with flour, tapping out any excess. This creates a non-stick coating.
Is using a commercial cake pan release spray always the best option?
Commercial sprays are convenient and generally effective, but some may alter the flavor of the cake slightly. Consider homemade options if you prefer complete control over ingredients.
Final Reflection: The Sweet Science of Effortless Cake Release
The seemingly simple act of releasing a cake from its pan is, in reality, a crucial step that can make or break the baking experience. A perfectly released cake, sliding effortlessly from its pan, is a testament to preparation and technique, a small victory that speaks volumes about attention to detail. This isn't just about avoiding a sticky mess; it's about preserving the integrity of your beautiful creation.
The impact of properly preparing cake pans extends far beyond the individual baker. It's about the joy of sharing perfectly formed cakes, the satisfaction of a job well done, and the preservation of precious baking time. The frustration of a stuck cake is a universal experience, and mastering this seemingly small skill can significantly elevate the entire baking process. The secret to success is to know something nobody else knows.
While not directly about baking, this quote highlights the power of mastering a seemingly small detail, transforming it into a unique advantage.
Now, armed with these tips and tricks, I invite you to approach your next baking project with renewed confidence. Remember the power of preparation – the careful greasing, the strategic flouring, the thoughtful use of parchment paper. Don't just bake a cake; craft a cake. Embrace the process, and savor the sweet reward of a perfectly released masterpiece, a testament to your dedication and skill. Let the effortless release of your next cake be a symbol of your growing mastery in the kitchen.
Unleash Your Inner Baking Pro!
Thanks for joining us on this journey to perfectly prepared cake pans! We hope you now feel confident tackling even the most intricate cake designs. Ready to put your new skills to the test?
- Bake your dream cake today! Use your newfound pan-prepping expertise to create that masterpiece you've always envisioned.
- Share your baking triumphs with us on social media – we'd love to see your perfectly formed creations! Use #BakeWithEasePro.
- Challenge a friend to a baking showdown – who can create the most stunning cake using these techniques?
Now, tell us: what delicious cake will you bake first?