
Blown Sugar Basics: Create Delicate Spheres and Shapes

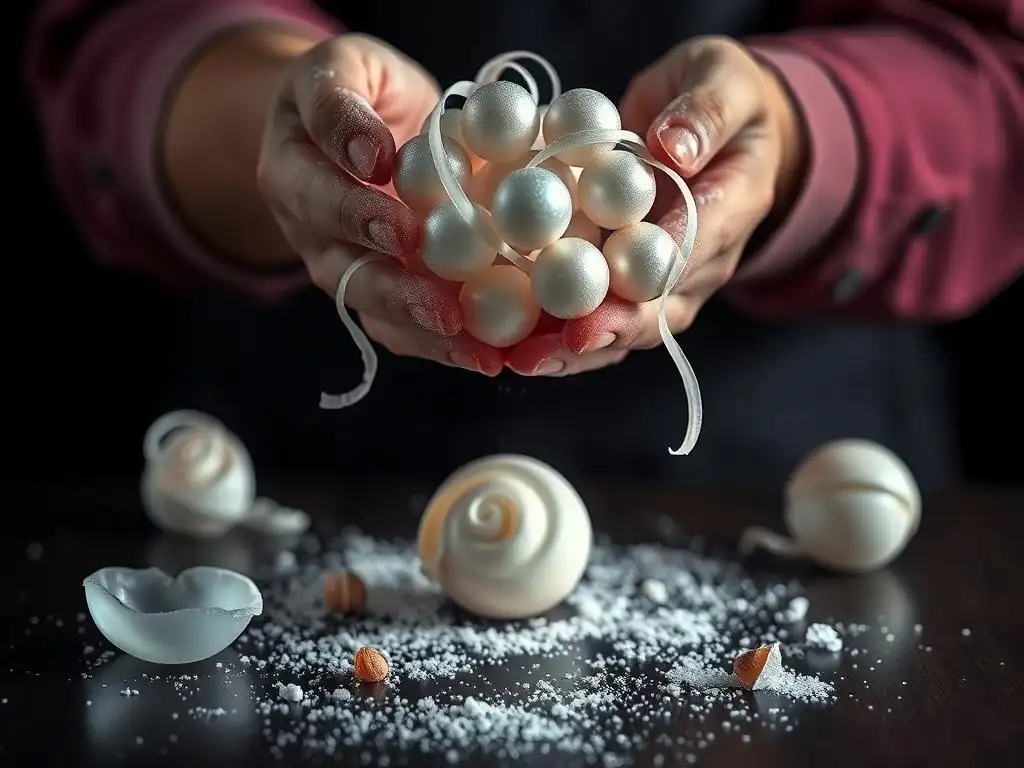
Welcome to BakeWithEase, your haven for baking brilliance! Ever dreamt of crafting those impossibly delicate, shimmering orbs that grace the creations of master pastry chefs? This week, we're diving deep into the captivating world of blown sugar. Get ready to unlock the secrets behind how to make sugar spheres, transforming simple sugar into breathtaking edible art. Prepare to be amazed as we demystify this advanced baking technique, one perfectly formed sphere at a time!
- Introduction to Blown Sugar Techniques: Create Delicate Spheres and Shapes
- Essential Ingredients and Tools for Creating Blown Sugar Spheres and Shapes
- Step-by-Step Guide on How to Make Sugar Spheres from Blown Sugar
- Advanced Techniques for Crafting Intricate Blown Sugar Decorations
- Troubleshooting and Maintaining Quality in Blown Sugar Work
- Inspiration and Applications: Using Blown Sugar Spheres in Baking Presentations
- Conclusion: Mastering How to Make Sugar Spheres and Enhance Your Baking Skills
- Frequently Asked Questions
- Final Reflection: The Enduring Sweetness of Sugar Art
- Unleash Your Inner Sugar Artist!
Introduction to Blown Sugar Techniques: Create Delicate Spheres and Shapes
Blown sugar is a captivating art form in the world of advanced baking, transforming simple sugar into ethereal, glassy creations. It's a technique that requires precision, patience, and practice, but the results are stunning decorative elements that can elevate any dessert from ordinary to extraordinary. Mastering the basics, like learning how to make sugar spheres, opens up a world of possibilities for pastry chefs and enthusiastic home bakers alike.
This guide delves into the fundamental principles and practical steps required to work with blown sugar. We'll cover everything from selecting the right ingredients and essential tools to the delicate process of heating, handling, and shaping the molten sugar. Understanding the science behind sugar crystallization and temperature control is crucial for success, ensuring your sugar remains pliable enough to work with while avoiding brittleness or premature hardening. By following these techniques, you'll gain the confidence to create not only basic spheres but also explore more intricate shapes and designs.
Understanding the Art of Blown Sugar in Advanced Baking
Blown sugar is a highly specialized technique involving heating sugar to a specific temperature, allowing it to cool slightly until it becomes pliable, and then injecting air into it using a pump or by mouth (with proper safety measures). The goal is to create hollow, glass-like structures that are incredibly delicate and often used for high-end dessert presentations. This artistry requires a keen understanding of sugar's properties at different temperatures and the ability to work quickly and skillfully.
The process is similar in principle to glassblowing, but instead of molten glass, you're manipulating molten sugar. As the sugar cools, it hardens into a rigid, crystalline structure that holds its shape. The challenge lies in maintaining the sugar at a temperature where it is malleable enough to blow and shape without becoming too hot to handle or cooling too quickly and becoming brittle. Achieving the perfect consistency and working temperature is key to producing smooth, thin-walled sugar spheres and other delicate decorations.
The Role of Sugar Work & Decorations in Elevating Baked Goods
Sugar work, including techniques like blown sugar, pulled sugar, and cast sugar, plays a vital role in modern patisserie and cake decorating. These edible decorations add height, dimension, texture, and visual drama to desserts, transforming them into edible works of art. A simple cake can become a showstopper with the addition of a perfectly formed, shimmering sugar sphere or an intricate sugar flower.
Beyond aesthetics, sugar decorations demonstrate a high level of skill and craftsmanship, often associated with professional pastry kitchens. Incorporating elements like blown sugar spheres into a dessert presentation signals attention to detail and a commitment to artistic expression. Whether used as a focal point atop a multi-tiered cake or as delicate accents on individual plated desserts, sugar work provides a unique way to enhance the overall appeal and perceived value of baked goods.
Essential Ingredients and Tools for Creating Blown Sugar Spheres and Shapes

Success in blown sugar starts with having the right materials and equipment. Unlike simple sugar syrups, blown sugar requires specific types of sugar and additives to achieve the desired elasticity and stability. Having dedicated tools designed for sugar work is also essential for safety and precision.
Gathering all necessary items before you begin is crucial, as the process requires quick work once the sugar reaches the correct temperature. Trying to find a tool mid-process can lead to the sugar cooling too much and becoming unusable. Preparation is key to a smooth and successful sugar blowing session.
Selecting the Right Sugar Types for Blown Sugar Art
The foundation of blown sugar is granulated sugar, typically sucrose. However, sucrose alone is prone to crystallization, which can make it difficult to work with and result in brittle, cloudy decorations. To counteract this, other sugars and additives are incorporated. Glucose syrup is a common addition, often used in a ratio of about 3 parts sugar to 1 part glucose syrup. Glucose helps prevent crystallization and adds elasticity to the sugar, making it more pliable for blowing and pulling.
Isomalt is another popular choice, especially in professional settings. Isomalt is a sugar alcohol derived from beet sugar. It is less sweet than sucrose, doesn't brown as easily when heated, and is highly resistant to crystallization and humidity. While it can be slightly more expensive, isomalt provides a clear, stable medium that is excellent for intricate blown sugar work, resulting in decorations that hold their shape and clarity longer than those made solely with sucrose and glucose.
Must-Have Equipment for Shaping and Blowing Sugar
Working with hot sugar requires specialized tools for both safety and successful manipulation. A high-quality candy thermometer is non-negotiable; precise temperature control is paramount. You'll need a sturdy, heavy-bottomed saucepan for heating the sugar mixture evenly. Silicone mats or a marble slab are essential cool surfaces for slightly cooling the sugar before working with it.
For the blowing itself, you'll need a sugar blowing pump, which is essentially a bicycle-style pump with a thin metal nozzle. This allows you to inject air into the sugar while maintaining a safe distance from the heat. Other useful tools include heat-resistant gloves (cotton or silicone), a heat lamp to keep small pieces of sugar warm and pliable, metal scissors or a knife for cutting sugar, and various shaping tools like metal tubes or molds.
Safety Precautions When Working with Hot Sugar
Working with molten sugar is inherently dangerous due to the extremely high temperatures involved, typically reaching 300°F (149°C) or more. Severe burns can occur instantly if hot sugar comes into contact with skin. Therefore, safety must be the absolute priority. Always wear heat-resistant gloves when handling warm or hot sugar. Avoid wearing loose clothing or jewelry that could dip into the hot sugar.
Ensure your workspace is clean, dry, and free of distractions. Have a bowl of ice water nearby as an immediate first-aid measure in case of a burn, though for serious burns, immediate medical attention is necessary. Never leave heating sugar unattended. When blowing sugar, be mindful of the hot nozzle and the potential for bursting sugar pieces. Keeping children and pets out of the kitchen while you are working with hot sugar is also strongly recommended.
Step-by-Step Guide on How to Make Sugar Spheres from Blown Sugar
Learning how to make sugar spheres is often the first step in mastering blown sugar. While it takes practice, breaking down the process into manageable steps makes it achievable. The key is careful temperature control and confident, swift movements once the sugar is ready.
This section will walk you through the process, from preparing your sugar mixture to the actual blowing and shaping. We'll also touch upon common pitfalls and how to avoid them, helping you improve your technique with each attempt.
Preparing the Sugar Mixture for Optimal Workability
The first step in how to make sugar spheres is preparing the sugar mixture. A standard recipe might call for 3 cups of granulated sugar, 1 cup of glucose syrup, and about 1 cup of water. Combine these ingredients in your heavy-bottomed saucepan. Stir gently over low heat until the sugar is completely dissolved. Avoid splashing sugar crystals onto the sides of the pan, as these can cause crystallization later. If crystals do form, you can brush down the sides of the pan with a wet pastry brush.
Once the sugar is dissolved, increase the heat and bring the mixture to a boil. Do not stir the mixture once it boils, as this can also induce crystallization. Allow the mixture to cook undisturbed until it reaches the hard crack stage, typically between 300°F and 310°F (149°C - 154°C) on your candy thermometer. This temperature range ensures that the sugar will harden properly when cooled but remain pliable enough to work with briefly.
Heating and Cooling: Achieving the Perfect Sugar Consistency
Heating the sugar to the precise hard crack stage is critical. Too low a temperature and the sugar will be too soft and sticky to blow; too high, and it may scorch or become too brittle. Once the sugar reaches the target temperature, immediately remove the pan from the heat and carefully pour the hot sugar onto a silicone mat or greased marble slab. Allow it to cool slightly.
As the sugar cools, its consistency will change. Initially, it will be a liquid, then it will become a thick syrup, and finally, it will start to solidify around the edges. Using heat-resistant gloves, begin folding the edges of the sugar into the center as it cools. This process helps cool the sugar evenly and incorporates air, which makes the sugar more opaque and workable. Continue folding and gathering the sugar until it is cool enough to handle comfortably with gloves but still pliable, like thick taffy. It should no longer be transparent but have a satiny sheen.
Techniques for Blowing and Shaping Delicate Sugar Spheres
Once the sugar is pulled to a workable consistency, take a small piece (about the size of a large walnut) and shape it into a smooth ball. Insert the tip of your sugar blowing pump nozzle into the ball, ensuring the sugar seals tightly around the nozzle. Hold the sugar ball gently in your gloved hands, keeping it warm under a heat lamp if necessary.
Begin pumping air slowly and steadily into the sugar. As you pump, gently rotate and manipulate the sugar sphere, encouraging it to expand evenly. The sugar will thin out and expand like a balloon. Be careful not to pump too quickly or make the walls too thin, as the sphere could burst.
Aim for a thin, even shell. Once the sphere is the desired size and shape, quickly seal the hole where the nozzle was inserted by pinching the sugar together, then carefully detach the sphere from the nozzle. Place the finished sphere on a cooling rack or silicone mat to harden completely.
Tips for Avoiding Common Mistakes in Sugar Sphere Creation
Several common issues can arise when learning how to make sugar spheres. One frequent problem is premature crystallization, resulting in grainy or cloudy sugar. This can often be avoided by not stirring the sugar once it boils and ensuring the initial sugar dissolution is complete. Another issue is the sugar cooling too quickly, making it hard and brittle before you can blow it. Working quickly, using a heat lamp, and having your tools ready can help.
Bursting spheres are also common, usually due to pumping air too fast, making the sugar walls too thin in certain spots, or having air leaks around the nozzle. Practice gentle, even pumping and ensure a tight seal around the nozzle. If the sugar is too sticky and won't hold its shape, it might not have been cooked to a high enough temperature or cooled sufficiently before working.
Conversely, if it's too hard and breaks easily, it might have been cooked too long or cooled too much. Patience and adjusting your timing and temperature control are key to overcoming these challenges.
Advanced Techniques for Crafting Intricate Blown Sugar Decorations
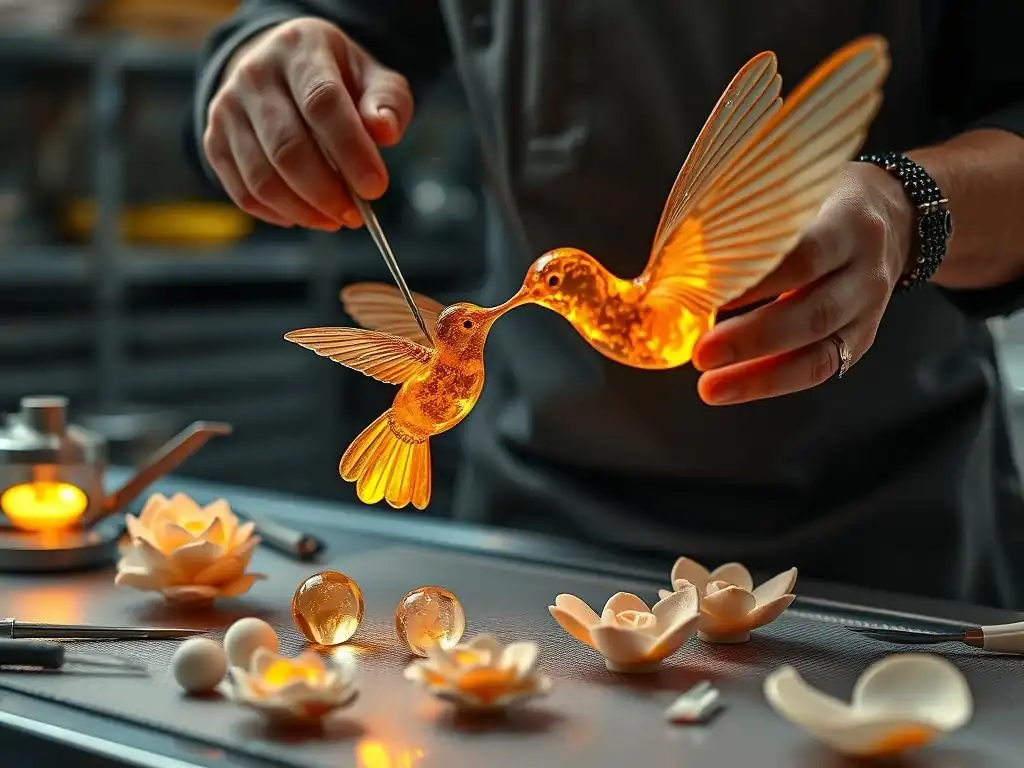
Once you've mastered how to make sugar spheres, you can explore more complex blown sugar creations. The same principles of heating, pulling, and blowing sugar apply, but with added manipulation and shaping techniques. These advanced methods allow you to create stunning, detailed sugar art.
Pushing beyond simple spheres involves understanding how to control the sugar's movement and using tools to sculpt and form it before it hardens. This requires even greater speed and precision.
Creating Various Shapes Beyond Spheres: Flowers, Ribbons, and More
The pliability of warm blown sugar allows for the creation of a wide array of shapes. To make flower petals, for instance, you can blow a small, elongated bubble, then gently flatten and shape it into a petal form using your fingers or a tool before it hardens. Multiple petals can be attached together (using a little warm sugar as "glue") to form a flower.
Ribbons can be made by blowing a long, narrow tube of sugar, then carefully flattening it and shaping it into flowing ribbon-like forms. Animal figures or abstract sculptures can also be created by blowing specific shapes and then assembling them. This often involves blowing multiple components and then adhering them together while the sugar is still slightly warm or using a torch sparingly to melt edges for joining. Creativity and careful handling are paramount when crafting these detailed shapes.
Using Color and Edible Paints to Enhance Sugar Decorations
Adding color is a fantastic way to bring your blown sugar creations to life. Food-grade gel or powder colors can be added to the sugar mixture while it's heating. Use colors specifically designed for candy or sugar work, as water-based colors can cause crystallization. Start with a small amount and add more to achieve the desired intensity, remembering that the color will appear lighter when the sugar is blown thin.
Once the sugar is blown and hardened, you can also use edible paints or dusts to add details or shading. Edible airbrush colors, luster dusts mixed with alcohol (like vodka or clear extract), or edible food pens can be used to paint on surfaces or highlight textures. For example, gold or silver luster dust can give sugar spheres a metallic sheen, or different colors can be painted onto sugar petals to create realistic floral effects.
Combining Blown Sugar with Other Sugar Art Techniques for Unique Effects
Blown sugar pairs beautifully with other sugar art techniques like pulled sugar and cast sugar, allowing for multi-textured and visually dynamic decorations. Pulled sugar is used to create opaque, satiny shapes like leaves, stems, or ribbons. These can be made separately and then attached to blown sugar elements.
Cast sugar involves pouring hot sugar into molds to create solid, clear, or colored shapes. These solid elements can serve as bases or structural components for delicate blown sugar pieces. For example, a cast sugar stand could support a delicate blown sugar sculpture, or pulled sugar leaves could frame a cluster of blown sugar berries. Combining these techniques adds complexity and depth to your sugar art, enabling you to create truly unique and impressive edible displays.
Troubleshooting and Maintaining Quality in Blown Sugar Work
Even experienced sugar artists encounter challenges. Knowing how to troubleshoot common problems and properly handle and store your finished creations is essential for preserving their beauty and structure. Prevention is often the best approach, but understanding how to mitigate issues can save a piece.
Maintaining the delicate nature of blown sugar requires careful attention to detail, especially regarding environmental factors like humidity.
How to Fix Cracks and Imperfections in Sugar Spheres
Cracks are a common issue when working with blown sugar, often caused by handling the sugar too roughly, uneven cooling, or the sugar being slightly too brittle. Small cracks can sometimes be repaired using a very small amount of warm sugar mixture as glue, carefully applied with a toothpick. Alternatively, a heat lamp can be used very briefly to gently soften the edges of a crack, allowing them to meld together, but this requires extreme caution to avoid melting the entire piece.
If a sphere has a significant imperfection or crack that cannot be repaired invisibly, it's often best to discard it and try again. The sugar can usually be broken up and remelted, though repeated remelting can affect the clarity and workability. Prevention is key: ensure the sugar is at the right temperature and consistency, handle pieces gently, and avoid sudden temperature changes.
Proper Storage and Handling of Finished Sugar Decorations
Blown sugar is highly susceptible to moisture. Humidity in the air can cause sugar to become sticky, cloudy, and eventually collapse. Therefore, proper storage is crucial. Finished sugar decorations should be stored immediately in an airtight container. Adding desiccants, such as silica gel packets (ensure they are food-safe and placed so they don't touch the sugar), to the container helps absorb moisture.
Handle finished pieces as little as possible, and always with clean, dry hands or gloves. Avoid touching the delicate surfaces. When transporting sugar decorations, pack them carefully in padded boxes to prevent breakage. Ideally, sugar decorations should be made as close to the time of display as possible, especially in humid environments.
Extending Shelf Life and Preserving the Delicacy of Sugar Art
While sugar is technically edible for a long time, the delicate nature and clarity of blown sugar decorations are temporary, especially when exposed to air. For best results, aim to display and consume desserts with blown sugar within a day or two of creation. Using isomalt can extend the shelf life and resistance to humidity compared to sugar/glucose mixtures.
Storing creations in a cool, dry, climate-controlled environment is the best way to preserve their appearance. Avoid refrigeration, as the temperature fluctuations and condensation can quickly ruin sugar work. By minimizing exposure to moisture and handling, you can maintain the beautiful, glass-like quality of your blown sugar art for display.
Inspiration and Applications: Using Blown Sugar Spheres in Baking Presentations
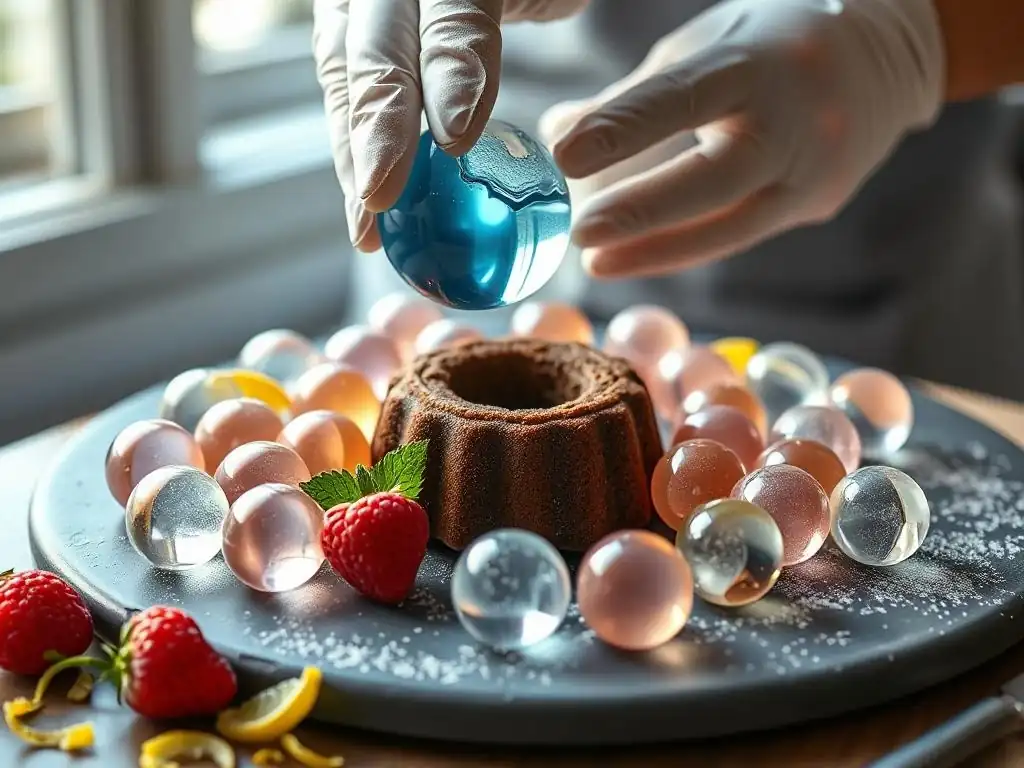
Blown sugar spheres and shapes are versatile decorative elements that can dramatically enhance the visual appeal of various baked goods. Their delicate, often transparent or semi-transparent quality adds a touch of elegance and sophistication. Learning how to make sugar spheres provides a fundamental skill for creating these stunning accents.
From elaborate wedding cakes to simple plated desserts, there are countless ways to incorporate blown sugar into your presentations, adding height, texture, and a unique artistic touch.
Incorporating Sugar Spheres into Cake Designs and Pastry Displays
Sugar spheres are frequently used as focal points or accents on cakes. A cluster of spheres in varying sizes can top a tiered cake, creating a bubbly, celebratory effect. Smaller spheres can be scattered around the base or sides of a cake, adding shimmer and texture. When learning how to make sugar spheres, practicing different sizes will give you more options for cake design.
In pastry displays, blown sugar elements can be used to add height and visual interest. Delicate spheres can be placed alongside tarts, mousses, or individual pastries. For example, a single, perfectly clear sugar sphere might top a rich chocolate mousse, providing a striking contrast in texture and appearance. They can be attached to cakes or pastries using a small dab of royal icing, melted chocolate, or tempered sugar.
Creative Ideas for Showcasing Blown Sugar Decorations in Desserts
Beyond traditional cake topping, blown sugar offers creative possibilities. Consider using blown sugar spheres to represent bubbles in a champagne-themed dessert or as 'snowflakes' on a winter cake. Elongated blown sugar shapes can mimic icicles or abstract sculptures rising from a dessert plate.
You can also fill clear sugar spheres with edible gold leaf, sprinkles, or even a flavored syrup just before sealing for an added surprise element. Another idea is to use blown sugar cages or structures to encase a dessert component, adding a layer of visual intrigue. The key is to think about how the lightness and fragility of the sugar can complement the textures and forms of the dessert itself.
Seasonal and Themed Sugar Sphere Designs for Special Occasions
Blown sugar can be easily adapted for different seasons and themes. For a festive holiday cake, red and green colored sugar spheres can mimic ornaments or berries. For Halloween, black or orange spheres could add a spooky touch. Pastel-colored spheres are perfect for spring or Easter desserts.
Themed events offer great inspiration. For a nautical theme, clear or blue spheres could represent water bubbles. For a celestial theme, shimmering spheres could be stars or planets. Learning how to make sugar spheres in various colors and sizes allows you to customize your sugar art for any occasion, making your baked goods truly unique and memorable.
Conclusion: Mastering How to Make Sugar Spheres and Enhance Your Baking Skills
Embarking on the journey of blown sugar art is a rewarding experience that significantly expands your baking and decorating repertoire. While it demands precision and practice, the ability to transform simple sugar into breathtaking, delicate forms is a truly impressive skill. Learning how to make sugar spheres is the foundational step, providing you with the essential techniques needed for more complex creations.
We've covered the critical aspects, from selecting the right ingredients and ensuring safety to the detailed steps of heating, shaping, and blowing sugar. We also explored troubleshooting, storage, and creative applications. Remember that success in blown sugar, like many advanced baking techniques, comes with experimentation and persistence.
Recap of Key Techniques in Blown Sugar Basics
Mastering how to make sugar spheres relies on a few core principles:
- Accurate Temperature Control: Heating sugar to the hard crack stage (around 300-310°F or 149-154°C) is non-negotiable.
- Proper Cooling and Pulling: Allowing the sugar to cool just enough to handle while still being pliable, and pulling it to incorporate air.
- Gentle, Even Blowing: Injecting air slowly and rotating the sugar consistently to create a uniform, thin wall.
- Quick and Confident Handling: Working efficiently before the sugar cools too much.
- Humidity Management: Storing finished pieces correctly to protect them from moisture.
These techniques, applied diligently, will lead you to successful blown sugar creations.
Encouragement to Experiment and Innovate with Sugar Art in Baking
Don't be discouraged by initial failures; they are a natural part of the learning process. Each attempt teaches you more about the behavior of sugar. Once you are comfortable with how to make sugar spheres, challenge yourself to create different shapes, incorporate color, or combine blown sugar with pulled or cast sugar elements.
Blown sugar is a medium for creativity and innovation. Use it to express your unique artistic vision in your baking. Whether you aim for elegant simplicity or elaborate sculptures, the skills gained in mastering how to make sugar spheres will serve as a valuable foundation for your continued exploration of the beautiful world of sugar art. Keep practicing, keep experimenting, and most importantly, have fun with it!
Frequently Asked Questions
How difficult is it to make blown sugar spheres for a beginner?
Blown sugar work, including spheres, can be challenging for beginners. It requires practice and precision in controlling temperature and sugar consistency. Start with simpler shapes before attempting spheres.
What special equipment is needed for making sugar spheres?
You'll need a heat-resistant surface, a sugar thermometer, a heat lamp or warming oven, and an air pump (like a small bellows) for blowing. Food-safe gloves are essential to protect your hands from the hot sugar.
What kind of sugar is best for creating blown sugar spheres?
Granulated sugar is the most common choice. It needs to be cooked into a clear, pliable sugar syrup. Using high-quality sugar can help minimize impurities and improve the clarity of the final product.
How do I prevent my sugar spheres from cracking or collapsing?
Maintaining a consistent temperature is crucial. Avoid sudden temperature changes, and ensure the sugar is properly tempered. Work quickly but carefully to prevent the sugar from cooling too rapidly.
Can I add color or flavor to my blown sugar spheres?
Yes, you can add food coloring gels or powders to the sugar syrup after it's cooked. Flavorings like extracts or oils can also be added, but use them sparingly as they can affect the sugar's consistency.
Final Reflection: The Enduring Sweetness of Sugar Art
The delicate art of crafting blown sugar spheres isn't just a culinary skill; it's a testament to the enduring power of creativity and precision. In a world increasingly dominated by digital interactions, the tactile experience of working with molten sugar, shaping it with breath and skill, offers a unique and deeply satisfying counterpoint. This tangible connection to the creation process is something truly special, and the resulting beautiful, ephemeral spheres are a testament to that dedication.
The influence of this seemingly simple technique extends far beyond the kitchen. It speaks to a broader appreciation for artistry and craftsmanship, reminding us of the beauty that can be found in the meticulous attention to detail. The process itself is a meditation, requiring patience and focus, qualities increasingly rare in our fast-paced world. The details are not the details. They make the design.
- Charles Eames. This quote perfectly encapsulates the importance of precision in blown sugar work, and its wider application to life's endeavors.
Now, I invite you to consider the possibilities. Perhaps you'll try your hand at creating your own sugar spheres, embracing the challenge and the reward of mastering this intricate technique. Or maybe this exploration has sparked a broader appreciation for the artistry inherent in seemingly simple things. Regardless, I hope this journey into the world of blown sugar has left you with a renewed sense of wonder and a desire to explore the sweet possibilities that lie ahead. Let the delicate beauty of blown sugar inspire you to find the artistry in your own life.
Unleash Your Inner Sugar Artist!
Thanks for diving into the sweet world of blown sugar! We hope you now feel confident in creating your own delicate spheres and whimsical shapes. Ready to take your skills to the next level?
- Master a new blown sugar technique: Try experimenting with different colors and flavors to create truly unique pieces. Think beyond spheres – try twisting, pulling, and shaping your sugar into entirely new forms!
- Share your creations: Show off your stunning blown sugar artistry on social media using #BakeWithEaseBlownSugar. We’d love to see what you come up with!
- Join our BakeWithEase community: Connect with fellow sugar artists in our online forum to share tips, tricks, and inspiration. Let's build a supportive network of sugar enthusiasts together!
What unexpected shape or design will you create with your newfound blown sugar skills?