
Mastering High Hydration Pizza Dough: The Sticky Truth Revealed

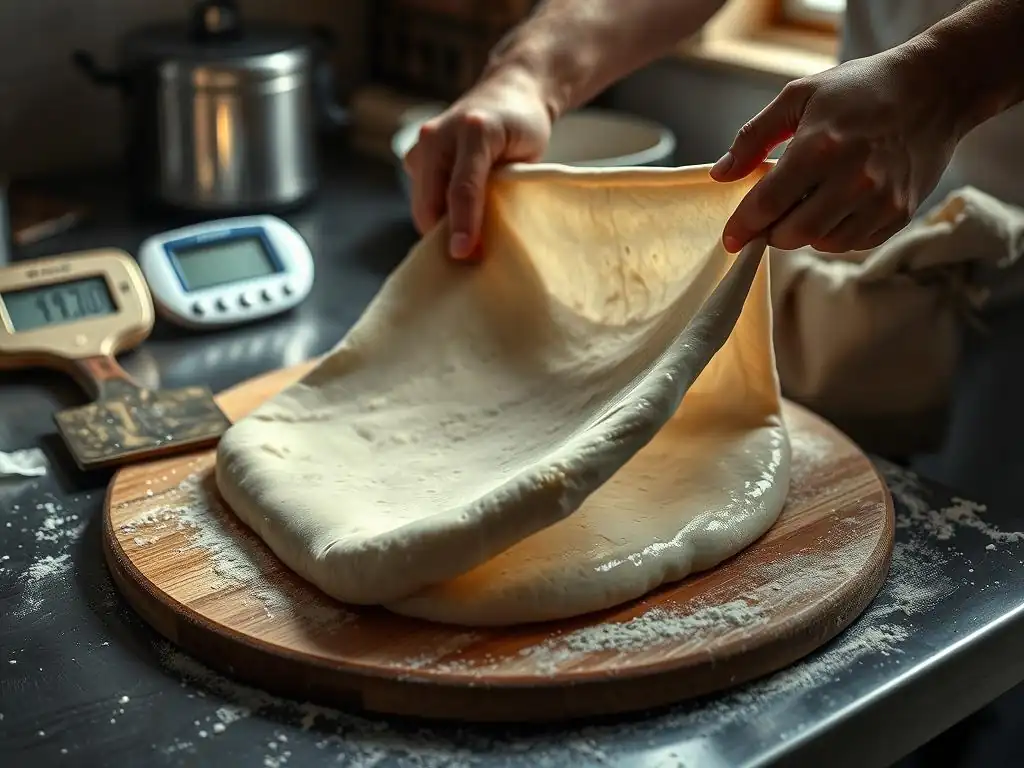
Welcome to BakeWithEase, your baking sanctuary! Ever wondered what secrets lie within a seemingly simple pizza dough? Prepare to uncover the sticky truth behind creating the perfect, airy crust with our High Hydration Pizza Dough Recipe. We’ll guide you through the process, demystifying high hydration and leaving you with a pizza so good, you’ll never order takeout again. Ready to elevate your pizza game? Let's get baking!
- Introduction to High Hydration Pizza Dough
- The Science Behind High Hydration Pizza Dough
- Essential Ingredients for High Hydration Pizza Dough
-
High Hydration Pizza Dough Recipe: A Step-by-Step Guide
- Recipe: High Hydration Pizza Dough for BakeWithEase
- Step 1: Mixing the Dough (Autolyse and Initial Hydration)
- Step 2: Kneading Techniques for High Hydration Dough (Stretch and Folds)
- Step 3: Bulk Fermentation: Time and Temperature Considerations
- Step 4: Dividing and Balling the Dough
- Step 5: Cold Fermentation (Proofing) for Enhanced Flavor
- Troubleshooting Common Issues with High Hydration Dough
- Baking High Hydration Pizza: Achieving the Perfect Crust
- High Hydration Pizza Dough Variations and Experimentation
- Serving and Storing High Hydration Pizza
- Conclusion: Embracing the Art of High Hydration Pizza Dough
-
Frequently Asked Questions
- What exactly is high hydration pizza dough, and why should I try it?
- Is high hydration pizza dough difficult to work with, especially for beginners?
- What are some key techniques to manage the stickiness of high hydration dough?
- What type of flour is best for a high hydration pizza dough?
- Can I use a stand mixer to make high hydration pizza dough, or is it better to knead by hand?
- Final Reflection: The Transformative Power of a Hydrated Crust
- Unleash Your Inner Pizzaiolo: Craft the Perfect Pie!
Introduction to High Hydration Pizza Dough
What is High Hydration Pizza Dough and Why is it Desirable?
High hydration pizza dough refers to dough made with a relatively large amount of water compared to the flour weight. While standard pizza dough might use around 55-60% hydration (water weight as a percentage of flour weight), high hydration dough typically falls in the range of 70% to 85% hydration, sometimes even higher. This increased water content significantly changes the dough's texture, making it wetter, stickier, and initially more challenging to handle than lower hydration doughs. However, mastering this technique unlocks a superior pizza crust.
The desirability of high hydration dough lies in the qualities it imparts to the final baked product. The extra water allows for greater steam production during baking, which helps the crust rise and create a more open, airy crumb structure. It also contributes to a thinner, crispier crust that still maintains a delightful chewiness. For many pizza aficionados, achieving that light, bubbly, and slightly irregular crust characteristic of Neapolitan-style pizza or artisanal home bakes is the ultimate goal, and high hydration is key to getting there.
Benefits of High Hydration Dough: A Crispier Crust and Airy Interior
One of the most sought-after benefits of using a high hydration pizza dough recipe is the resulting crust texture. During the intense heat of a pizza oven, the high water content rapidly turns to steam, causing the dough to puff up dramatically. This rapid expansion creates large, irregular air pockets throughout the crust, leading to that desirable open crumb structure often seen in professional pizzerias. The exterior bakes up incredibly crispy, sometimes developing attractive charring (often called leoparding), while the interior remains soft and airy.
Beyond texture, high hydration contributes to enhanced flavor. The increased water allows for more enzyme activity during fermentation, breaking down complex starches into simpler sugars. These sugars contribute to better browning during baking and develop more complex, nuanced flavors in the crust over time, especially during a longer cold fermentation period. A high hydration pizza dough recipe, when executed correctly, produces a pizza crust that is not just a vehicle for toppings, but a flavorful and texturally exciting element in itself.
Understanding Hydration Percentage in Pizza Dough
Hydration percentage is a fundamental concept in baking, representing the weight of water as a percentage of the weight of flour. The formula is straightforward: (Weight of Water / Weight of Flour) * 100%. For example, if a recipe uses 1000 grams of flour and 700 grams of water, the hydration is (700 / 1000) * 100% = 70%. This calculation is crucial because it dictates the consistency of the dough and how it will behave during mixing, kneading, fermentation, and baking.
Different hydration levels yield vastly different doughs. A dough at 55% hydration will feel quite stiff and easy to handle, typical of some New York-style pizzas. Moving to 65% hydration results in a softer, more pliable dough. When you reach 70% hydration and beyond, the dough becomes progressively stickier and slacker, requiring different handling techniques like stretch and folds rather than traditional kneading. Understanding this percentage allows bakers to adjust recipes, troubleshoot issues, and intentionally create doughs with specific characteristics for their desired crust.
The Science Behind High Hydration Pizza Dough
Gluten Development in High Hydration Dough
Gluten development is the process by which proteins in flour, primarily glutenin and gliadin, combine with water and mechanical energy (like mixing or kneading) to form an elastic network called gluten. In high hydration dough, the abundance of water allows the gluten proteins to hydrate more fully and easily. This increased hydration facilitates the formation of a more extensive and flexible gluten network compared to lower hydration doughs.
While the gluten network in high hydration dough can be very strong, the dough's slackness means it requires different methods to build structure. Traditional vigorous kneading might be too difficult or messy. Instead, techniques like autolyse (resting the mixed flour and water) and gentle stretch and folds over time are employed. These methods allow the gluten network to develop gradually and align itself, trapping the gas produced by the yeast and giving the dough its strength and ability to rise. The developed gluten network is what holds the structure of the airy crumb during baking.
Water Absorption and its Impact on Dough Texture
Flour's ability to absorb water is a critical factor in high hydration baking. Different types of flour, and even different batches of the same flour type, can vary in their protein content and starch characteristics, affecting how much water they can absorb and hold. High-protein flours, like bread flour (typically 12-14% protein), can absorb more water and form a stronger gluten network than lower-protein flours like pastry flour (around 8-10% protein). This is why high-protein flour is generally recommended for high hydration doughs; it has the capacity to handle the extra water without becoming a completely unmanageable puddle.
The water content directly dictates the dough's texture. At 75% hydration, the dough will be significantly stickier and more extensible (stretchy) than at 65%. This high water content makes the dough initially challenging to work with by hand, sticking readily to surfaces and hands. However, with proper handling techniques and sufficient gluten development, this slack, wet dough transforms into a lively, bubbly mass during fermentation, promising that desired light and airy crust. Managing this stickiness is a key skill in mastering a high hydration pizza dough recipe.
The Role of Autolyse in High Hydration Pizza Dough
Autolyse is a simple yet powerful technique particularly beneficial for high hydration doughs. It involves mixing just the flour and water from the recipe and letting the mixture rest for a period, typically from 20 minutes up to several hours, before adding the salt and yeast. During this rest period, two things happen: the flour fully hydrates without the interference of salt (which can tighten gluten) or yeast (which starts fermentation), and enzymatic activity begins to break down some starches and proteins.
The main benefit of autolyse for high hydration dough is that it allows the gluten network to start forming on its own through simple hydration. This makes the dough much easier to handle and knead later on. Even a short 30-minute autolyse can significantly reduce the required kneading time and improve the dough's extensibility. This technique is highly recommended when following a high hydration pizza dough recipe, as it makes the sticky dough much more manageable and contributes to a smoother, more elastic final dough structure.
Essential Ingredients for High Hydration Pizza Dough
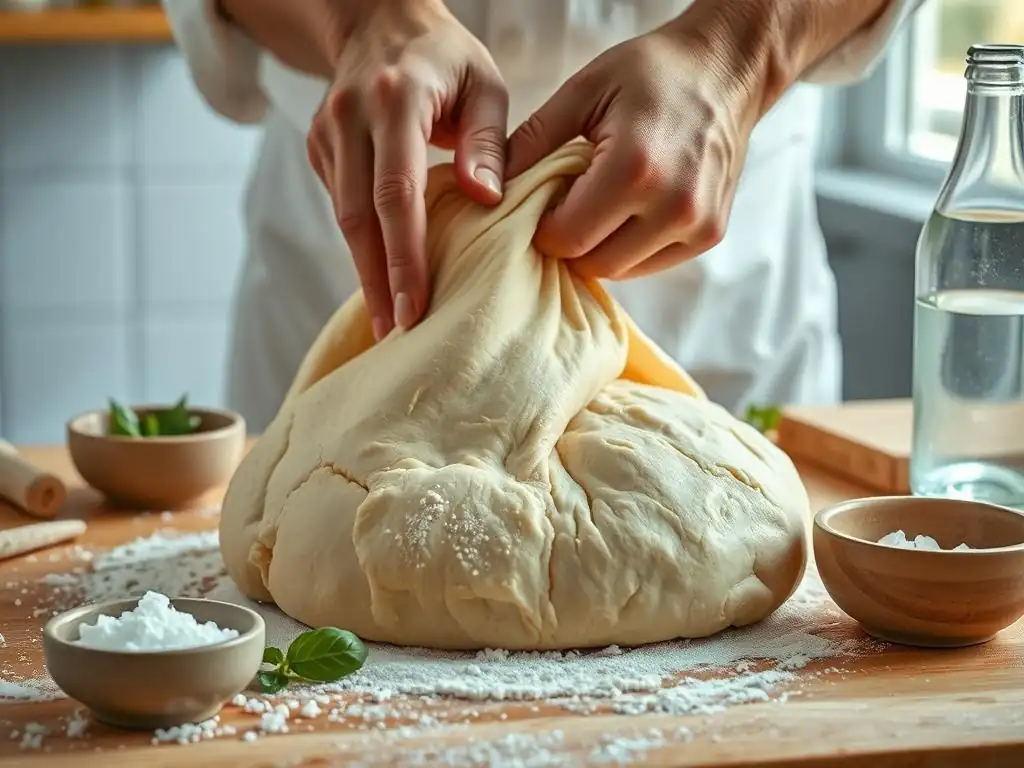
Choosing the Right Flour for High Hydration: Protein Content Matters
Selecting the correct flour is paramount for a successful high hydration pizza dough recipe. High hydration doughs require a strong gluten network to support the large volume of water and trap fermentation gases. Therefore, a high-protein flour is essential.
Bread flour, with its typical protein content of 12-14%, is an excellent choice as it contains ample glutenin and gliadin to form that robust structure. Many professional pizza makers also favor Italian Tipo 00 flour, specifically varieties milled for pizza (often labeled "Tipo 00 for Pizza" or "W" number specified), which can have high protein levels (though the protein structure and starch content differ from North American bread flours, contributing to a unique texture).
Using a lower-protein flour, like all-purpose flour (around 10-11.5% protein), for a high hydration dough (say, 75%) will likely result in a very weak, soupy dough that collapses easily. It simply doesn't have enough protein to absorb the water and build a strong enough network. While you can make dough with all-purpose flour at lower hydration levels (e.g., 60-65%), attempting a truly high hydration pizza dough recipe requires the structural support provided by a flour designed for strong gluten development.
Water Quality and its Influence on Dough Performance
The quality of your water can subtly but significantly impact your high hydration pizza dough. Water contains dissolved minerals and can vary in pH. Highly chlorinated water can sometimes inhibit yeast activity, although this is less of an issue with modern yeast strains and typical tap water levels. More importantly, the mineral content affects how gluten develops. Hard water, which contains more dissolved minerals like calcium and magnesium, tends to strengthen the gluten network, making the dough firmer and less sticky. Soft water, with fewer minerals, can result in a slacker, stickier dough.
For most home bakers, standard tap water is perfectly fine, especially if it's potable. If your tap water has a very strong chlorine smell, letting it sit out for 30 minutes to an hour before use can help dissipate the chlorine. Using filtered or bottled water is also an option if you suspect your tap water quality is affecting your results, but it's often unnecessary. Understanding that water hardness can influence dough consistency allows you to make minor adjustments to hydration levels or mixing times when following a high hydration pizza dough recipe.
The Importance of Salt and Yeast in High Hydration Dough
Salt is a crucial ingredient in any bread or pizza dough, and its role in a high hydration dough recipe is multifaceted. It enhances the flavor of the crust, making it taste less bland. More importantly from a structural perspective, salt helps to strengthen the gluten network by tightening it.
This effect is particularly valuable in slack, high hydration doughs, helping to provide structure and control the dough's extensibility. Salt also regulates yeast activity, slowing down fermentation for a more controlled rise and better flavor development. It's typically added after the initial mixing/autolyse phase to allow initial gluten hydration without hindrance.
Yeast is the leavening agent responsible for making the dough rise. In a high hydration dough, the yeast has abundant water available, allowing it to become active quickly and efficiently. Different types of yeast (active dry, instant, fresh) can be used, requiring slight adjustments in quantity and activation method.
The amount of yeast used, along with temperature and time, dictates the fermentation rate. For a high hydration pizza dough recipe intended for a long, slow cold fermentation (which develops the best flavor), a very small amount of yeast is typically used – perhaps as little as 0.1% of the flour weight for a 48-hour fermentation. The goal is a slow, steady production of carbon dioxide and organic acids, not a rapid puff-up.
High Hydration Pizza Dough Recipe: A Step-by-Step Guide
Recipe: High Hydration Pizza Dough for BakeWithEase
This example high hydration pizza dough recipe is designed for home bakers using bread flour and targeting around 75% hydration. It yields approximately four 250g dough balls, suitable for medium pizzas. Remember that flour absorption varies, so you might need slight water adjustments.
Yields: 4 medium pizzas Hydration: Approx. 75% Fermentation: 24-48 hours (cold fermentation recommended)
- Ingredients:
- High-protein Bread Flour: 1000g
- Water (cool, around 60-65°F / 15-18°C): 750g
- Fine Sea Salt: 25g (2.5% of flour weight)
- Instant Dry Yeast: 1g (0.1% of flour weight)
This recipe provides a starting point. Feel free to experiment with slight variations in hydration (e.g., 70% or 80%) as you gain confidence. The low yeast amount is key for the long cold fermentation which enhances flavor significantly.
Step 1: Mixing the Dough (Autolyse and Initial Hydration)
Begin by measuring your flour and water accurately using a kitchen scale. In a large mixing bowl, combine the 1000g of bread flour with 700g of the water. Reserve the remaining 50g of water to add later if needed, as flour absorption varies. Mix the flour and water by hand or with a spatula until no dry flour remains. The mixture will be shaggy and somewhat sticky – this is expected for a high hydration dough recipe.
Cover the bowl and let the mixture rest for the autolyse period. A rest of 30-60 minutes is sufficient for most flours and makes subsequent mixing much easier. During this time, the flour hydrates, and gluten starts to develop passively. After the autolyse, sprinkle the 25g of salt and the 1g of instant dry yeast over the dough. Begin incorporating them, which will feel messy at first. If the dough feels too stiff (unlikely at 75% hydration but possible), slowly add a little of the reserved water. Mix until the salt and yeast are mostly incorporated, about 2-3 minutes.
Step 2: Kneading Techniques for High Hydration Dough (Stretch and Folds)
Because high hydration dough is very sticky, traditional kneading on a counter is difficult. Instead, we use stretch and folds performed in the bowl. Wet your hands slightly to prevent sticking. Grab a portion of the dough from one side, stretch it gently upwards, and fold it over the center of the dough mass. Rotate the bowl a quarter turn and repeat this stretching and folding action. Perform 4-6 folds in a session, rotating the bowl each time. This completes one "set" of stretch and folds.
Let the dough rest for 20-30 minutes, covered. Repeat the stretch and fold process. For this high hydration pizza dough recipe, perform 3-4 sets of stretch and folds over the first 1.5 to 2 hours of bulk fermentation. You will notice the dough becoming progressively smoother, more elastic, and less sticky after each set as the gluten develops and strengthens. By the last set, the dough should hold its shape better and feel more cohesive.
Step 3: Bulk Fermentation: Time and Temperature Considerations
Bulk fermentation is the initial rise of the dough before it is divided and shaped. For this high hydration pizza dough recipe using a small amount of yeast, the bulk fermentation will be relatively slow. After completing the stretch and folds, cover the bowl tightly and let the dough rest at room temperature (around 70-75°F / 21-24°C) for 1-2 hours. You should see some initial signs of activity, like small bubbles.
After the initial room temperature rise, the dough is typically moved to the refrigerator for a long, cold fermentation. Cold temperatures significantly slow down yeast activity but allow enzymes to work longer, developing complex flavors. A cold fermentation of 24 to 48 hours is ideal for this recipe. Place the covered bowl in the refrigerator. The dough will continue to rise slowly and develop flavor over this period. You can technically cold ferment for up to 72 hours, but 24-48 hours often hits a sweet spot for flavor and dough manageability.
Step 4: Dividing and Balling the Dough
After the cold fermentation period, remove the dough from the refrigerator. It should have increased significantly in volume and likely be covered in bubbles. Gently turn the dough out onto a lightly floured surface (use minimal flour to avoid incorporating too much dry flour into the high hydration dough). Be careful not to degas it too much.
Using a dough scraper or knife, divide the dough into four equal portions, aiming for around 250g each. To shape each portion into a ball, gently pull the edges of the dough underneath itself to create tension on the surface. Rotate the dough while tucking the edges, forming a smooth ball.
You can also use the surface tension method: place the dough portion on a clean, unfloured counter and use your hands to gently pull it towards you while rotating, creating a tight skin on top. Place the dough balls into individual containers or on a tray, leaving space between them, and cover tightly.
Step 5: Cold Fermentation (Proofing) for Enhanced Flavor
The dough balls now undergo a final cold fermentation period, often called proofing or second fermentation. Place the covered dough balls back into the refrigerator for at least another 6-8 hours, and ideally up to 24 hours. This secondary cold proofing allows the individual dough balls to relax while continuing to develop flavor and structure.
Approximately 2-3 hours before you plan to bake, remove the dough balls from the refrigerator and let them come to room temperature. This is a crucial step. Cold dough is difficult to stretch. As they warm up, the gluten relaxes, and the dough becomes pliable and easy to shape. They will also puff up slightly more as the yeast becomes more active at room temperature. By the time you are ready to stretch, the high hydration pizza dough should be soft, airy, and easy to handle.
Troubleshooting Common Issues with High Hydration Dough
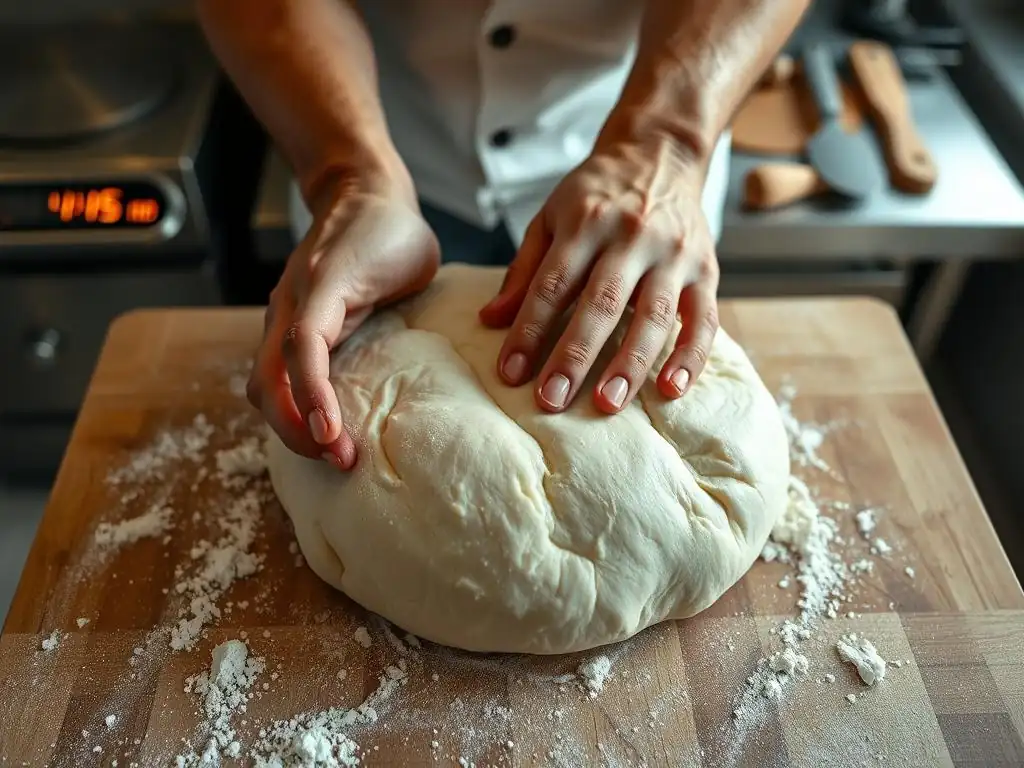
Dough Too Sticky: Handling Challenges
The most common challenge when working with a high hydration pizza dough recipe is its inherent stickiness. A dough at 75% hydration or higher will naturally cling to hands and surfaces. The key is to manage, not eliminate, the stickiness. Avoid the temptation to add excessive amounts of flour during mixing or handling, as this will lower the effective hydration and change the final crust texture.
Techniques to manage sticky dough include: slightly wetting your hands or tools (like a dough scraper) with water before handling; using a minimal amount of flour on your work surface only when shaping the final pizza; performing stretch and folds in a lightly oiled bowl instead of on a counter; and using a dough scraper to help lift and manipulate the dough. Patience is also key; as gluten develops over time, the dough will become less sticky and more manageable, particularly after cold fermentation.
Dough Too Weak: Strengthening the Gluten Network
If your high hydration dough feels very slack, tears easily when stretching, or doesn't hold its shape, it likely has a weak gluten network. This can happen if you used a lower-protein flour, didn't mix or perform enough stretch and folds, or didn't allow sufficient rest time for gluten development (like autolyse). A weak dough won't trap fermentation gases effectively, resulting in a dense, flat crust instead of an airy one.
To strengthen a weak high hydration pizza dough: ensure you are using high-protein bread flour or suitable pizza flour. Increase the number of stretch and fold sessions during the initial bulk fermentation. Instead of 3 sets, try 4 or 5 sets spaced 30 minutes apart. You can also try incorporating a longer autolyse period, perhaps 60-90 minutes. If the dough is still weak after bulk fermentation, you can try an extra set of gentle folds when dividing and balling, though be careful not to degas the dough completely.
Dough Not Rising: Yeast Activity and Temperature
If your high hydration pizza dough isn't rising as expected, the issue is usually related to yeast activity or temperature. Ensure your yeast is active and not expired. If using active dry yeast, make sure you activated it properly in warm water (around 105-115°F / 40-46°C) before adding it to the flour/water mixture. Instant dry yeast can usually be mixed directly with the flour, but ensure it's fresh.
Temperature is also critical. If your room temperature is too cold (below 70°F / 21°C), bulk fermentation will be very slow. For a high hydration pizza dough recipe with a small amount of yeast intended for cold fermentation, the initial room temperature rise is just to get it started; the main rise and flavor development happen in the cold.
If the dough isn't rising at all after several hours at room temperature or days in the fridge, the yeast may be dead, the water was too hot when added, or there was an issue with ingredient measurements (e.g., too much salt directly contacting the yeast initially). Ensure your refrigerator temperature is consistently cold (below 40°F / 4°C) for proper slow fermentation.
Baking High Hydration Pizza: Achieving the Perfect Crust
Oven Temperature and Baking Time for Optimal Results
Baking high hydration pizza dough requires high heat to achieve that signature crispy exterior and airy interior. Home ovens typically reach temperatures between 500°F and 550°F (260°C to 290°C). Preheat your oven with your baking surface (stone or steel) inside for at least 45-60 minutes to ensure it is fully heated. The high temperature provides the necessary thermal shock to make the dough puff up rapidly and cook quickly, preserving moisture inside while crisping the outside.
Baking time will vary depending on your oven temperature, baking surface, and desired crust color. At 550°F, a pizza might bake in as little as 4-6 minutes. At 500°F, it might take 6-8 minutes. Watch the pizza closely; the crust should be golden brown, with some darker, charred spots (leoparding) appearing on the edges and bottom. The cheese should be bubbly and slightly browned. Baking too long at lower temperatures can result in a dry, tough crust, while not hot enough means you won't get that explosive rise and crispness characteristic of high hydration dough.
Stone vs. Steel: Choosing the Right Baking Surface
Using a baking stone or steel is essential for transferring sufficient heat to the base of your high hydration pizza dough, ensuring a crispy bottom crust. A pizza stone, typically made of ceramic or cordierite, absorbs and radiates heat, simulating the floor of a brick oven. It provides excellent heat distribution and helps absorb moisture from the dough, contributing to crispness.
A baking steel, made of steel, conducts heat much more efficiently and retains more heat than a stone. This means it can transfer heat to the dough base faster and at a higher rate, often resulting in a more pronounced oven spring (the dough's rapid expansion in the oven) and crispier bottom crust, especially in home ovens that may struggle to maintain very high temperatures.
Both can produce excellent results with a high hydration pizza dough recipe, but steel often gives a slight edge in maximizing oven spring and bottom crispness in a home setting. Place your chosen surface on the top rack of your oven for best results, as radiant heat from the top element also helps cook the toppings and brown the top of the crust.
Achieving a Charred Crust: Broiling Techniques
The attractive dark spots and charring, known as leoparding, on a high hydration pizza crust are highly desirable for many. This is achieved through intense, direct heat. While a very hot oven with a stone or steel helps, sometimes engaging the broiler function at the end of the bake can enhance this effect, particularly if your oven temperature isn't quite high enough.
Once the pizza is mostly baked and the bottom crust is golden, you can switch the oven to the broiler setting (usually on high). Move the pizza closer to the broiler element, keeping a very close eye on it. The intense top heat will quickly brown and char the edges and bubbles on the crust.
This happens very fast, often in under a minute, so do not walk away. Use tongs to rotate the pizza if necessary for even charring. This technique, combined with the high hydration and strong gluten development of the dough, helps replicate the charring seen on pizzas baked in extremely hot wood-fired ovens.
High Hydration Pizza Dough Variations and Experimentation
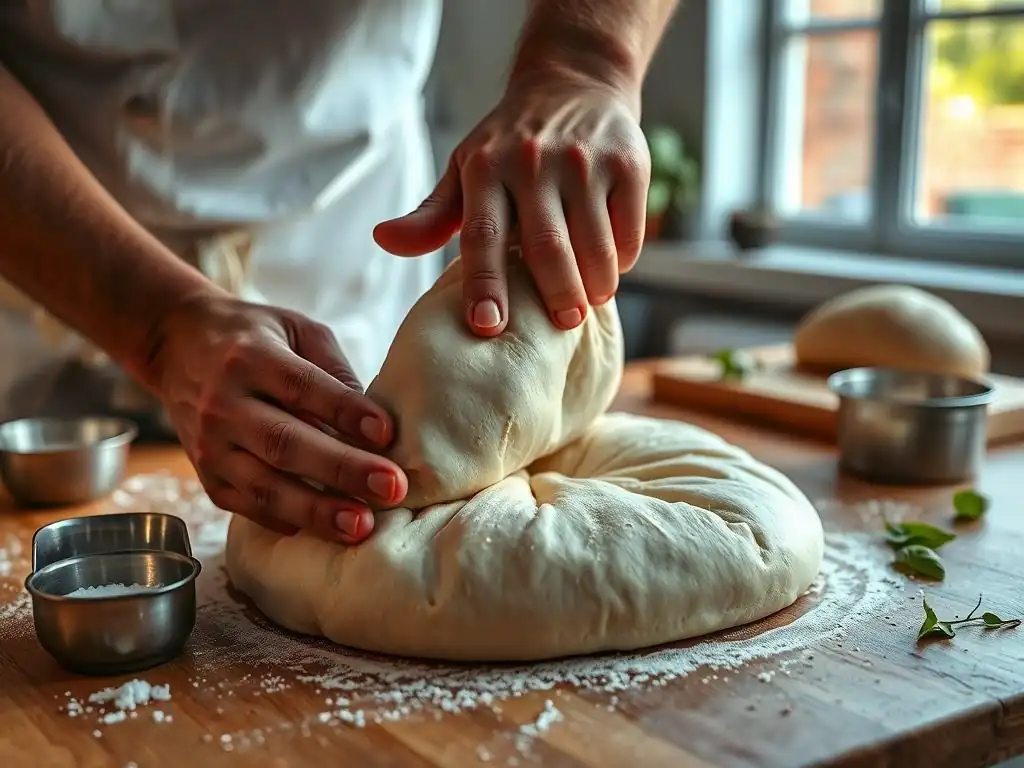
Different Flours for Unique Flavor Profiles (e.g., Semola, Whole Wheat)
While high-protein bread flour is standard for a high hydration pizza dough recipe, experimenting with other flours can introduce fascinating flavors and textures. Substituting a portion (e.g., 10-20%) of the bread flour with finely milled durum wheat flour, known as Semola Rimacinata, is popular in some Italian styles. Semola adds a slightly sweeter, nuttier flavor and contributes to a golden crust color and a pleasant chewiness.
Incorporating a small percentage of whole wheat flour (e.g., 5-10%) into your high hydration dough can add depth of flavor and nutritional value. Whole wheat flour absorbs more water than white flour due to the bran and germ content, so you might need to slightly adjust the overall hydration level or accept a slightly different dough texture. Using specialty flours like spelt or rye in small percentages can also impart unique characteristics, though they contain less gluten and should be used cautiously in high hydration doughs to maintain structure.
Adding Flavor Enhancers: Herbs, Spices, and Oils
Beyond the basic flour, water, salt, and yeast, you can infuse your high hydration pizza dough with extra flavor. A common addition is a small amount of olive oil (e.g., 1-2% of the flour weight). Olive oil can make the dough slightly more extensible and contribute to a tenderer crust, though some purists omit it for a chewier, more classic Neapolitan style.
You can also knead dried herbs like oregano, basil, or rosemary into the dough during the mixing phase for an aromatic crust. Garlic powder or a pinch of red pepper flakes can add subtle heat or pungency. Another technique is to use a portion of a preferment, like a poolish or biga (both essentially mixtures of flour, water, and yeast that ferment for a period before being added to the final dough). Using a preferment adds significant flavor complexity and can improve the dough's structure and keeping qualities, making your high hydration pizza dough recipe even better.
Exploring Different Hydration Levels: Finding Your Sweet Spot
Mastering high hydration pizza dough isn't just about hitting one specific percentage like 75%. It's about understanding how hydration affects the dough and finding the level that works best for your flour, your environment, and your desired result. Start with a manageable level, perhaps 70%, which is softer than standard but not excessively sticky. Once you're comfortable handling 70% hydration dough, try increasing it to 75% or even 80%.
Each increase in hydration brings new challenges in handling but also potential rewards in crust lightness and airiness. Conversely, if you find a very high hydration level (like 80%+) too difficult to work with consistently, dropping down to 72% or 75% might be your sweet spot, balancing ease of handling with excellent crust characteristics. Don't be afraid to experiment with your high hydration pizza dough recipe; small adjustments in water can teach you a lot about dough dynamics.
Serving and Storing High Hydration Pizza
Best Practices for Serving Freshly Baked Pizza
Serving pizza made with high hydration dough immediately after it comes out of the oven is key to enjoying its optimal texture. The crust is at its crispiest and most airy during the first few minutes. Let the pizza rest on a cooling rack or a wooden cutting board for just 1-2 minutes before slicing. This brief rest allows the cheese to set slightly, preventing it from sliding off, and lets steam escape from the bottom crust, helping it maintain crispness.
Use a sharp pizza cutter or a mezzaluna to slice the pizza cleanly without crushing the airy crust. Serve it piping hot! Encourage diners to eat it right away to experience the contrast between the crispy exterior and the soft, bubbly interior that is the hallmark of a well-made high hydration pizza dough recipe. The quality of the crust diminishes over time as moisture migrates from the toppings into the dough.
Storing Leftover Pizza: Maintaining Crust Quality
Storing leftover pizza, especially one with a delicate high hydration crust, requires a little care to preserve its quality as much as possible. Allow the pizza to cool completely at room temperature before storing it. Storing hot pizza creates condensation, which will make the crust soggy.
Once cool, store individual slices or whole pizzas in an airtight container or wrap them tightly in plastic wrap or aluminum foil. This prevents the crust from drying out or absorbing odors from the refrigerator. Stored this way, leftover pizza is typically good for 3-4 days in the refrigerator.
Reheating methods are crucial for reviving the crust. Avoid the microwave, which will make it chewy and soft. The best way to reheat is in a skillet over medium heat until the bottom is crispy, or in a preheated oven (around 350-400°F / 175-200°C) on a baking sheet or stone until heated through and the crust crisps up again.
Conclusion: Embracing the Art of High Hydration Pizza Dough
The Rewards of Mastering High Hydration Dough
Mastering a high hydration pizza dough recipe is a rewarding journey for any home baker. While the initial stickiness and handling challenges might seem daunting, the effort pays off exponentially in the final product. Achieving a pizza crust that is light, airy, full of large bubbles, and wonderfully crispy on the outside with a tender chew is a true accomplishment. This kind of crust elevates simple toppings and transforms homemade pizza into something truly special, rivaling pies from artisanal pizzerias.
Beyond the delicious results, working with high hydration dough teaches valuable lessons in dough handling, patience, and understanding the subtle interplay of flour, water, yeast, and time. It builds intuition about dough texture and fermentation stages. Successfully making a high hydration pizza dough recipe is a significant step in developing your baking skills and confidence, opening the door to other challenging and rewarding bread projects.
Further Exploration and Resources for Pizza Dough Perfection
Embarking on the path of high hydration pizza dough is just one part of the broader world of pizza making. To continue perfecting your craft, explore different types of flours and their impact on hydration and texture. Experiment with longer cold fermentation times to see how flavor develops over 72 hours or even more. Investigate using preferments like poolish or biga to add complexity.
Consider optimizing your baking setup – perhaps trying a baking steel if you've used a stone, or exploring different oven rack positions. Research techniques for stretching the delicate, airy dough without tearing it, like stretching on your knuckles or using gravity. There are many online communities, books, and videos dedicated to pizza making that offer a wealth of knowledge and inspiration. Keep practicing your high hydration pizza dough recipe, observe how the dough behaves, and don't be afraid to try new things to achieve your perfect pizza.
Frequently Asked Questions
What exactly is high hydration pizza dough, and why should I try it?
High hydration dough simply means dough with a higher water content relative to flour. This results in a lighter, airier crust with a more open crumb and increased flavor.
Is high hydration pizza dough difficult to work with, especially for beginners?
It can be trickier than regular dough due to its stickiness, requiring careful handling and techniques like stretch and folds. However, with practice and the right recipe, it's achievable for all skill levels.
What are some key techniques to manage the stickiness of high hydration dough?
Use plenty of flour on your work surface and hands. Employ stretch and fold techniques during bulk fermentation to build strength and avoid over-handling.
What type of flour is best for a high hydration pizza dough?
Generally, a strong bread flour with a high protein content (around 12-14%) is recommended. This provides the gluten structure needed to hold the extra water and create a chewy crust.
Can I use a stand mixer to make high hydration pizza dough, or is it better to knead by hand?
A stand mixer can be helpful, but be careful not to over-knead. Monitor the dough closely. Hand kneading is also effective and allows for greater control over the dough's texture.
Final Reflection: The Transformative Power of a Hydrated Crust
Mastering high hydration pizza dough isn't just about a recipe; it's about unlocking a deeper understanding of flour, water, and the alchemy of baking. The seemingly simple act of adjusting hydration percentages dramatically alters the texture, flavor, and overall experience of pizza making, proving that sometimes, less is truly more (in terms of added ingredients, that is). This journey into the sticky world of high hydration dough reveals a path to pizza perfection that transcends mere instruction.
The impact of this technique extends beyond the individual pizzaiolo. It represents a shift in culinary appreciation, a move away from overly processed, mass-produced foods towards a more mindful, hands-on approach to cooking. The best things in life are worth waiting for,
and the slow fermentation and careful handling required for high hydration dough certainly bear this out. The resulting crust, with its airy lightness and nuanced flavor, is a testament to the patience and precision involved. This mindful process connects us to the food we consume in a way that's increasingly rare in our fast-paced world.
Now, it's your turn. Don't just read about the transformative power of high hydration pizza dough; experience it. Embrace the stickiness, the challenge, the rewarding process of kneading and shaping this unique dough. The journey might be messy, but the destination – a pizza that sings with flavor and texture – is well worth the effort. Dare to experiment, adjust the hydration to your liking, and discover the joy of crafting a truly exceptional pizza from scratch. The sticky truth is, the reward is far greater than the mess.
Unleash Your Inner Pizzaiolo: Craft the Perfect Pie!
Thanks for diving into the world of high-hydration pizza dough! You've now unlocked the secrets to a truly exceptional crust. Ready to put your newfound knowledge into practice?
- Bake your dream pizza: Try the recipe from the article, tweaking it to your taste. Experiment with different flours and toppings! This is where the real fun begins.
- Share your creation: Post a picture of your masterpiece on social media and tag BakeWithEase – let's see those incredible results!
- Explore our other dough recipes: Discover a whole new world of baking possibilities on BakeWithEase.com (Although the link is not supposed to be clickable).
What unexpected ingredient will you add to your next high-hydration pizza?