
Tempering Dark Chocolate: Essential Temperatures and Techniques.

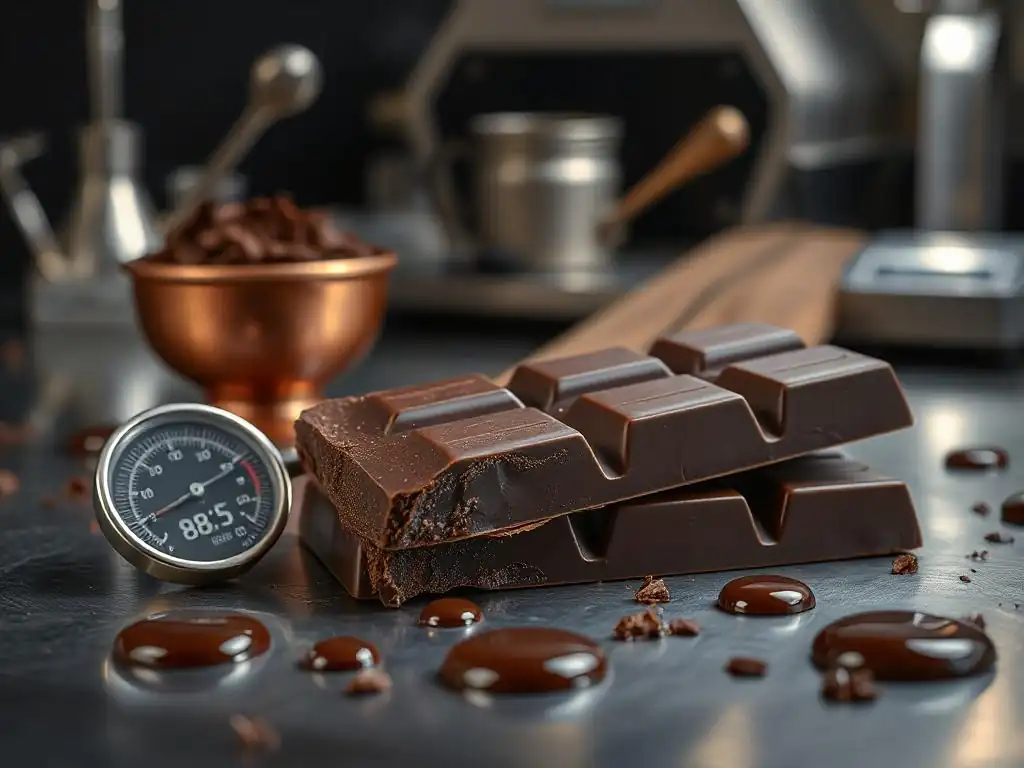
Welcome to BakeWithEase, where baking becomes a joy, not a chore! Ever wondered about the secret to that perfect, glossy shine on your homemade chocolates? This guide dives deep into the art of tempering, specifically focusing on achieving the ideal dark chocolate tempering temperatures. Unlock the secrets to professional-looking desserts and confections. Intrigued? Let's melt away the mystery and get started!
- Tempering Dark Chocolate: Essential Temperatures and Techniques for Perfect Results
- Introduction to Dark Chocolate Tempering: Achieving the Perfect Snap
- Essential Temperatures for Tempering Dark Chocolate: A Detailed Guide
- Dark Chocolate Tempering Techniques: Step-by-Step Instructions
- Troubleshooting Common Dark Chocolate Tempering Problems
- Testing for Proper Temper: Ensuring Quality
- Using Tempered Dark Chocolate in Baking: Applications and Ideas
- Storing Tempered Dark Chocolate: Maintaining Quality and Shelf Life
- Advanced Dark Chocolate Tempering Techniques: Beyond the Basics
- Conclusion: Mastering Dark Chocolate Tempering for Baking Excellence
-
Frequently Asked Questions
- What is tempering dark chocolate and why is it important?
- What are the key temperature ranges for tempering dark chocolate?
- What happens if I don't temper dark chocolate properly?
- What equipment do I need to temper dark chocolate?
- Where can I find easy-to-follow recipes and guides for tempering dark chocolate?
- Final Reflection: The Art and Science of Perfectly Tempered Dark Chocolate
- Unlock the Secrets of Perfectly Tempered Chocolate!
Tempering Dark Chocolate: Essential Temperatures and Techniques for Perfect Results
Introduction to Dark Chocolate Tempering: Achieving the Perfect Snap
Tempering dark chocolate is a fundamental skill for achieving professional-looking and delicious results in baking. It's the process of carefully heating and cooling chocolate to stabilize the cocoa butter crystals within it. When done correctly, tempered chocolate sets with a beautiful sheen, a satisfying snap when broken, and is resistant to melting at room temperature. Without tempering, chocolate can set unevenly, appear dull or streaky, and lack that desirable crisp texture.
Mastering the dark chocolate tempering temperatures guide is key to unlocking its full potential. Whether you're coating truffles, making delicate chocolate decorations, or crafting your own chocolate bars, understanding the precise temperatures and techniques involved will elevate your creations from homemade to exceptional. Don't be intimidated; with a little practice and attention to detail, you'll be achieving perfectly tempered dark chocolate every time.
Why Tempering Dark Chocolate Matters for Baking Success
Tempering is crucial for several reasons, all contributing to the quality and stability of your finished chocolate confections. Properly tempered dark chocolate has a firm texture, a glossy surface, and the characteristic "snap" when broken, which is a hallmark of high-quality chocolate work. This snap is due to the stable structure of the cocoa butter crystals.
Beyond aesthetics and texture, tempering prevents fat bloom, the unsightly grayish streaks or patches that can appear on untempered or improperly cooled chocolate. Fat bloom occurs when unstable cocoa butter crystals melt and recrystallize on the surface. Tempered chocolate also contracts slightly as it cools, making it easier to release from molds, a significant advantage when creating intricate shapes or coated items.
Understanding the Science Behind Chocolate Tempering
Chocolate is a complex mixture of cocoa solids, sugar, and cocoa butter. Cocoa butter is polymorphic, meaning it can crystallize into different forms (typically six, labeled Forms I through VI), each with a different melting point and stability. Only one form, Form V, is stable and melts at a temperature just below body temperature (around 31-34°C for dark chocolate), which gives tempered chocolate its desirable properties: firmness, gloss, and snap.
The tempering process is essentially about encouraging the formation of these stable Form V crystals while avoiding the less stable forms. This is achieved by melting all existing crystals by heating the chocolate to a specific temperature, then cooling it to a lower temperature where Form V crystals begin to form, and finally raising it slightly to a working temperature that melts out any unstable crystals, leaving predominantly the stable Form V crystals ready to set.
Essential Temperatures for Tempering Dark Chocolate: A Detailed Guide
Working with the correct temperatures is the absolute core of successful dark chocolate tempering. There are three key temperature ranges you need to manage: the initial melting temperature, the cooling or crystallization temperature, and the final working temperature. Precision is important, ideally using a reliable digital thermometer.
Getting these temperatures right is what differentiates a dull, soft chocolate from one that's shiny and snappy. Think of it as a specific recipe where the temperature ranges are your key ingredients. Deviating too much can lead to failure, but staying within the recommended ranges significantly increases your chances of success when following a dark chocolate tempering temperatures guide.
Dark Chocolate Tempering Temperature Chart: A Quick Reference
Having a quick reference handy can be incredibly helpful when you're in the middle of tempering. While exact temperatures can vary slightly depending on the specific chocolate's cocoa butter content and composition (especially between different brands or percentages), the following ranges serve as a reliable guide for most dark chocolates with 50% cocoa solids or higher.
Here is a standard dark chocolate tempering temperatures guide:
- Melting Temperature: 45-50°C (113-122°F) - Ensure all crystals are melted.
- Cooling/Crystallization Temperature: 27-29°C (81-84°F) - Encourage stable crystal formation.
- Working Temperature: 31-32°C (88-90°F) - Maintain stable crystals for molding/coating.
Note: These temperatures are for typical dark chocolate. Milk and white chocolate have different temperature ranges due to their different compositions.
Melting Dark Chocolate: The Initial Heating Phase
The first step in tempering dark chocolate is to melt it completely. The goal here is to destroy all existing crystal structures, both stable and unstable, so you can start fresh. Dark chocolate is typically heated to a temperature range higher than its final working temperature to ensure all cocoa butter crystals are fully melted.
For dark chocolate, the recommended melting temperature is usually between 45°C and 50°C (113°F and 122°F). Melting can be done using a double boiler (a bowl set over a pot of simmering water, ensuring the bottom of the bowl doesn't touch the water) or carefully in a microwave on low power, stirring frequently. Overheating the chocolate must be avoided, as this can scorch it or make it difficult to temper properly later.
Recommended Melting Temperatures for Different Dark Chocolate Percentages
While the 45-50°C range is standard for most dark chocolates, slight adjustments might be beneficial depending on the cocoa percentage. Chocolates with a very high cocoa percentage (e.g., 70% or more) might require slightly higher melting temperatures, perhaps closer to 50°C, to ensure all components are fully liquid.
Conversely, dark chocolates with lower cocoa percentages (e.g., 50-60%) might melt sufficiently at the lower end of the range, around 45°C. Always melt the chocolate gently and gradually. Constant stirring helps distribute the heat evenly and prevents hot spots, which can lead to scorching, especially around the edges of the melting vessel.
Cooling Dark Chocolate: Achieving Proper Crystal Formation
After melting, the chocolate needs to be cooled down to a specific temperature range to encourage the formation of desirable Form V crystals. This is the most critical phase for establishing the correct crystalline structure that will give the chocolate its temper. Cooling too quickly or too slowly, or to the wrong temperature, can lead to poor results.
For dark chocolate, the target cooling temperature is typically between 27°C and 29°C (81°F and 84°F). As the chocolate cools within this range, Form V crystals begin to form and grow. This process can be facilitated using techniques like seeding or tabling, which introduce stable crystals or promote rapid cooling and agitation.
Cooling Techniques: Seeding vs. Tabling
There are two primary methods for cooling and crystallizing dark chocolate: the seeding method and the tabling method.
- Seeding Method: This is often preferred for home bakers due to its simplicity. It involves adding small pieces (seeds) of already tempered dark chocolate to the melted chocolate as it cools. The stable Form V crystals in the "seed" chocolate act as templates, encouraging the melted chocolate to crystallize in the same stable form. You typically cool the melted chocolate slightly (e.g., to around 35°C) before adding the seeds.
- Tabling Method: This is a more traditional, professional technique that requires a clean, cool surface, typically marble or granite. About two-thirds of the melted chocolate is poured onto the surface and spread and worked with spatulas until it cools and thickens slightly, indicating crystal formation. This cooled, thickened chocolate is then scraped back into the remaining one-third of warm melted chocolate, mixing until the desired working temperature and consistency are reached.
Working Temperature: Maintaining the Temper
Once the chocolate has been cooled and agitated to encourage Form V crystal formation, it needs to be gently reheated to a specific working temperature. This final temperature is slightly higher than the cooling temperature but lower than the initial melting temperature. The purpose is to melt any unstable crystals (Forms I-IV) that may have formed during cooling, leaving behind only the stable Form V crystals suspended in the liquid chocolate.
For dark chocolate, the ideal working temperature range is usually between 31°C and 32°C (88°F and 90°F). At this temperature, the chocolate is fluid enough to work with – for dipping, molding, or coating – while maintaining the correct crystalline structure necessary for it to set with a proper temper.
Maintaining the Ideal Tempering Temperature for Consistent Results
Keeping the chocolate within its working temperature range is crucial while you are using it. If the chocolate cools too much, it will start to set prematurely and become too thick to work with, and potentially fall out of temper. If it gets too hot, the stable Form V crystals will melt, causing the chocolate to lose its temper entirely, requiring you to start the tempering process over.
You can maintain the working temperature by keeping the bowl of chocolate over a very gently warm water bath (off the heat, just using residual warmth), using a warming plate on a very low setting, or using a heat gun sparingly and carefully while stirring constantly. Monitoring the temperature with your thermometer frequently is essential during this phase to ensure consistent results throughout your batch.
Dark Chocolate Tempering Techniques: Step-by-Step Instructions
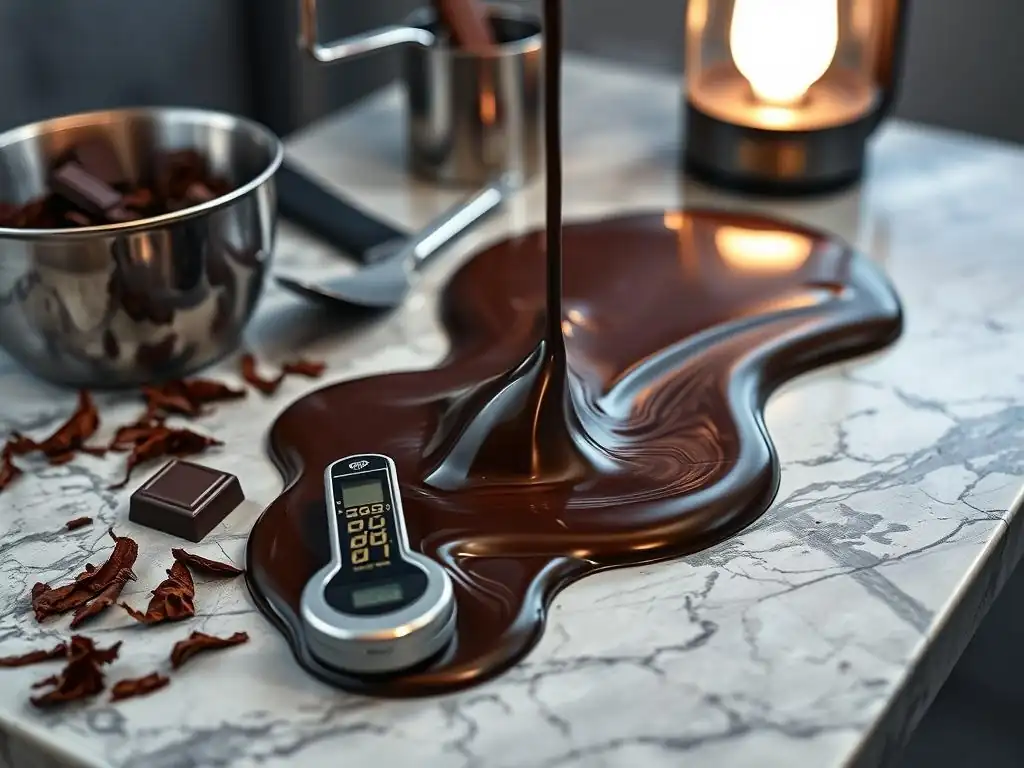
Now that we've covered the essential dark chocolate tempering temperatures guide, let's look at the practical application through common techniques. While the science remains the same, the method you choose depends on your equipment, the amount of chocolate you're tempering, and your personal preference. We'll detail the two most popular methods: seeding and tabling, plus a brief mention of using a machine.
Each technique aims to achieve the same crystalline structure but approaches the heating and cooling phases differently. Understanding the steps for each method will help you choose the best approach for your baking project and successfully temper your dark chocolate.
The Seeding Method: A Simple and Effective Technique
The seeding method is widely recommended for home bakers because it requires minimal specialized equipment – just a bowl, a thermometer, and a double boiler or microwave. It relies on introducing already tempered chocolate to a batch of melted chocolate to guide the crystallization process.
This method is less messy than tabling and works well for smaller to medium quantities of chocolate. It's a great starting point for anyone new to tempering dark chocolate and wanting a reliable way to achieve a good temper without needing a large marble slab.
Step 1: Melting the Chocolate
Start by finely chopping your dark chocolate. Place about two-thirds of the chopped chocolate in a heatproof bowl set over a pot of simmering water (a double boiler), ensuring the bottom of the bowl does not touch the water. Alternatively, place the chocolate in a microwave-safe bowl and heat on 50% power, stirring every 30 seconds.
Heat the chocolate, stirring occasionally, until it is completely melted and smooth. Use your thermometer to check the temperature. Heat until it reaches the melting range for dark chocolate, typically 45-50°C (113-122°F). Remove the bowl from the heat (or microwave) once melted.
Step 2: Seeding with Untempered Chocolate
Wipe the bottom of the bowl dry if using a double boiler. Add the remaining one-third of the finely chopped, untempered dark chocolate to the melted chocolate. Stir constantly with a spatula. The goal is for the added chocolate "seeds" to melt into the warm chocolate while simultaneously cooling the mixture down.
Continue stirring until all the added chocolate has melted and the temperature of the mixture drops to the cooling/crystallization range for dark chocolate, which is 27-29°C (81-84°F). This stirring and cooling encourages the formation of stable Form V crystals.
Step 3: Testing for Proper Temper
Once the chocolate has cooled to the target temperature and appears slightly thickened, gently reheat it slightly to the working temperature range of 31-32°C (88-90°F). This is often done by placing the bowl back over the warm (but no longer simmering) water bath for just a few seconds, or using a heat gun very briefly while stirring. Do not overheat it.
Keep the chocolate at this working temperature while you use it. Before using the bulk of the chocolate, perform a temper test (described later) to ensure it sets correctly. If it sets quickly (within 3-5 minutes) with a smooth, shiny finish, your dark chocolate is properly tempered.
The Tabling Method: A Traditional Tempering Approach
The tabling method, also known as marbleing, is a classic technique often used by professional chocolatiers. It requires a clean, cool surface (like marble, granite, or stainless steel) and provides rapid, even cooling through constant movement and spreading.
This method is highly effective at promoting crystal formation but can be messy and requires confidence and practice. It's ideal for larger quantities of chocolate and allows for precise control over the cooling process, making it a reliable technique once mastered.
Step 1: Pouring the Chocolate onto a Marble Slab
Melt about two-thirds of your finely chopped dark chocolate in a heatproof bowl over a double boiler or in the microwave, following the same procedure as in the seeding method, until it reaches 45-50°C (113-122°F). Ensure it is completely smooth and lump-free.
Pour approximately two-thirds of this melted chocolate onto a clean, cool marble or granite slab. Reserve the remaining one-third of the melted chocolate in the bowl; keep it warm over the residual heat of the double boiler or in a warm spot.
Step 2: Spreading and Cooling the Chocolate
Using metal scrapers or spatulas, immediately begin spreading and working the chocolate back and forth across the cold surface. The goal is to cool the chocolate rapidly and evenly while agitating it to encourage crystal formation.
Continue spreading, gathering, and spreading the chocolate until it starts to thicken and cool to the target temperature of 27-29°C (81-84°F). You'll notice a change in texture and appearance as crystals form – it might look slightly pasty or dull in spots. This working process typically takes several minutes.
Step 3: Returning the Chocolate to the Bowl
Once the chocolate on the slab has cooled and thickened appropriately, use your scrapers to gather it all up and scrape it back into the bowl with the reserved one-third of warm, melted chocolate.
Stir the mixture vigorously until it is uniform in temperature and consistency. The cooler, crystallized chocolate from the slab will melt slightly in the warmer chocolate, bringing the overall temperature to the desired working range of 31-32°C (88-90°F). Stir until smooth and fluid, then perform a temper test.
Using a Chocolate Tempering Machine: Streamlining the Process
For those who frequently work with tempered chocolate or handle larger volumes, a dedicated chocolate tempering machine can be a worthwhile investment. These machines automate the heating, cooling, and holding phases, taking much of the guesswork (and manual labor) out of the process.
Tempering machines typically have settings for dark, milk, and white chocolate, automatically following the correct temperature curves (like those in our dark chocolate tempering temperatures guide). You simply melt the chocolate in the machine's basin, select the chocolate type, and the machine handles the rest, maintaining the chocolate at the correct working temperature for extended periods, allowing for continuous use.
Troubleshooting Common Dark Chocolate Tempering Problems
Even with a detailed dark chocolate tempering temperatures guide and careful execution, you might encounter issues. Don't be discouraged; troubleshooting is part of mastering the craft. Understanding common problems like seizing, bloom, or thickness can help you identify what went wrong and how to fix it, or at least avoid it next time.
Most problems relate back to moisture, overheating, or incorrect cooling, all of which disrupt the delicate balance of cocoa butter crystals. Let's look at some frequent culprits and their solutions.
Chocolate Seizing: Causes and Solutions
Chocolate seizing is perhaps the most frustrating tempering problem. It happens when chocolate suddenly turns from a smooth, liquid state into a thick, grainy, unworkable paste. The most common cause is the introduction of even a tiny amount of water or steam. Cocoa solids are hydrophilic (water-attracting), and when they come into contact with moisture, they clump together, causing the mixture to seize.
- Causes:
- Water or steam getting into the chocolate (especially with a double boiler where water boils too vigorously).
- Adding liquid flavorings (like extracts) directly to melted chocolate without first mixing them with a fat (like oil or melted cocoa butter).
- Condensation from a lid dripping back into the chocolate.
- Solutions:
- Unfortunately, seized chocolate cannot typically be returned to a perfectly tempered state for molding or coating.
- However, you can sometimes rescue it for other uses by stirring in a tablespoon or two of hot, neutral oil (like vegetable or canola) or melted cocoa butter per cup of seized chocolate. This will create a ganache-like consistency suitable for fillings, sauces, or brownies, but it will not set with a temper.
- Prevention is key: ensure all equipment is bone dry, use a double boiler with gently simmering water (not boiling), and avoid covering melting chocolate unless using a method specifically designed to prevent condensation drip.
Bloom: Identifying and Preventing Fat Bloom
Fat bloom appears as grayish or whitish streaks, spots, or a dull film on the surface of solid chocolate. While harmless and the chocolate is still edible, it's visually unappealing and indicates the chocolate is out of temper. It occurs when unstable cocoa butter crystals melt and migrate to the surface, recrystallizing in an unattractive form.
- Causes:
- Improper tempering (not achieving or maintaining the correct crystal structure).
- Storing chocolate at fluctuating temperatures.
- Storing chocolate that hasn't been properly cooled and set after melting.
- Solutions:
- The good news is that bloomed chocolate can often be re-tempered! Simply chop it up and go through the tempering process again, paying close attention to the temperature ranges in our dark chocolate tempering temperatures guide.
- Prevention involves ensuring your chocolate is properly tempered and sets correctly. Also, store chocolate in a cool, dry place with stable temperatures (ideally around 15-18°C or 59-64°F).
Thick Chocolate: Adjusting Consistency
Sometimes, even if the chocolate is in temper, it might seem too thick to work with easily for dipping or coating thin items. This can happen if the chocolate has cooled slightly below its ideal working temperature or if the specific type of chocolate has a naturally high viscosity.
- Causes:
- Chocolate temperature dropping below the working range (31-32°C for dark).
- Using a type of dark chocolate with a lower cocoa butter content or higher viscosity.
- Solutions:
- Gently warm the chocolate back up to the correct working temperature. You can do this by briefly placing the bowl over a very gently warm water bath, using a heat gun on a low setting while stirring constantly, or placing it in a microwave for very short bursts (5 seconds) and stirring well.
- If the chocolate is still too thick at the correct working temperature, you can stir in a very small amount (e.g., 0.5-1%) of melted cocoa butter or a neutral, liquid fat like clarified butter or a flavorless oil. Be cautious, as adding too much fat can affect the set and flavor.
Testing for Proper Temper: Ensuring Quality
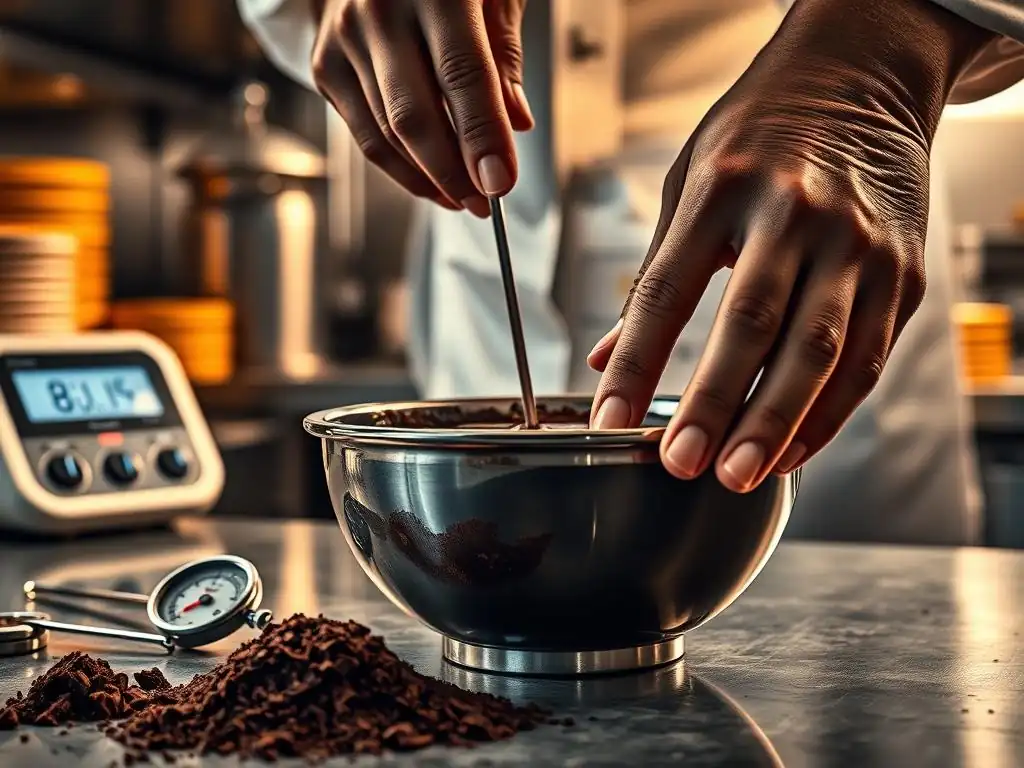
Before you commit your entire batch of tempered dark chocolate to your project, it's crucial to perform a temper test. This quick check confirms whether the chocolate has the correct crystalline structure and will set properly. Skipping this step can lead to disappointing results after you've dipped or molded everything.
There are a couple of simple, reliable tests you can use. They rely on the fact that properly tempered dark chocolate will set relatively quickly and with a specific appearance and texture compared to untempered chocolate.
The Dip Test: A Visual Indicator of Temper
The dip test is the most common and easiest way to check your chocolate's temper. It provides a visual confirmation of how the chocolate will set.
- How to perform: Dip the tip of a clean knife, metal spatula, or a piece of parchment paper into the tempered dark chocolate. Lift it out and scrape off any excess chocolate from the back, leaving a thin layer.
- What to look for: Set the dipped item aside at room temperature (ideally around 20-22°C or 68-72°F). A properly tempered dark chocolate should start to set and become dull or matte within 3-5 minutes. After about 5-10 minutes, it should be completely set, smooth, and shiny. If it remains wet, streaky, or takes a long time to set, the chocolate is likely out of temper.
The Snap Test: An Auditory Confirmation
Once the chocolate from the dip test has fully set (wait about 10-15 minutes or until fully hardened), you can perform the snap test. This test verifies the structural integrity provided by the stable Form V crystals.
- How to perform: Take the set piece of chocolate from your dip test (e.g., the parchment paper strip or chocolate on the knife).
- What to look for: Break the piece of chocolate. If it breaks cleanly with a distinct, sharp "snap," your dark chocolate is properly tempered. If it bends, is soft, or breaks with a dull, muffled sound, it is likely out of temper.
Using Tempered Dark Chocolate in Baking: Applications and Ideas
Once you've successfully tempered your dark chocolate following our dark chocolate tempering temperatures guide, a world of possibilities opens up! Tempered chocolate is essential for any application where you need the chocolate to set firm, shiny, and stable at room temperature.
From delicate garnishes to sturdy coatings, tempered dark chocolate adds a professional touch and delightful texture to countless baked goods and confections. Let's explore some popular uses.
Creating Chocolate Decorations and Garnishes
Tempered dark chocolate is perfect for making beautiful and precise decorations. Its ability to set quickly and cleanly allows for intricate work.
- Examples:
- Piping designs onto parchment paper (scrolls, lattices, abstract shapes).
- Making chocolate curls or shavings by scraping a block of tempered chocolate.
- Creating chocolate transfer sheets or textured pieces using special molds or textured mats.
- Dipping fruits (like strawberries or orange slices) or nuts.
- Crafting simple shapes like buttons or discs by piping small dots onto parchment.
These decorations set firm and can be handled easily, adding elegance to cakes, pastries, and desserts. A batch of 200g of tempered chocolate can create dozens of small piped decorations or enough curls for several cakes.
Coating Truffles and Candies with Tempered Chocolate
One of the most classic uses for tempered dark chocolate is coating truffles, caramels, nougats, and other candies. The tempered coating provides a satisfying shell that protects the soft interior and gives the candy a professional finish.
- Process:
- Prepare your truffle centers or candies.
- Dip them one by one into the bowl of tempered dark chocolate, ensuring they are fully submerged. Use a dipping fork or slotted spoon to lift them out, allowing excess chocolate to drip back into the bowl.
- Place the coated candies onto parchment paper to set.
- The tempered chocolate should set within minutes at room temperature, resulting in a smooth, non-sticky finish. Coating 50 standard-sized truffles might require anywhere from 300g to 500g of tempered chocolate, depending on the size and desired coating thickness.
Making Chocolate Bark and Snaps
Chocolate bark is one of the simplest and most versatile ways to use tempered dark chocolate. It requires minimal skill beyond getting the temper right.
- Process:
- Pour tempered dark chocolate onto a sheet pan lined with parchment paper or a silicone mat, spreading it into a thin, even layer (about 3-5mm thick).
- Immediately sprinkle with your desired inclusions – nuts, dried fruit, seeds, pretzels, candies, sea salt, etc.
- Allow the bark to set completely at room temperature until firm and snappy.
- Once set, break the bark into irregular pieces.
A standard half sheet pan (approximately 30x40 cm) can use about 500g to 750g of tempered dark chocolate to create a nice thin layer of bark loaded with toppings. The tempered chocolate ensures the bark has a clean snap when broken and doesn't melt easily in your hands.
Storing Tempered Dark Chocolate: Maintaining Quality and Shelf Life
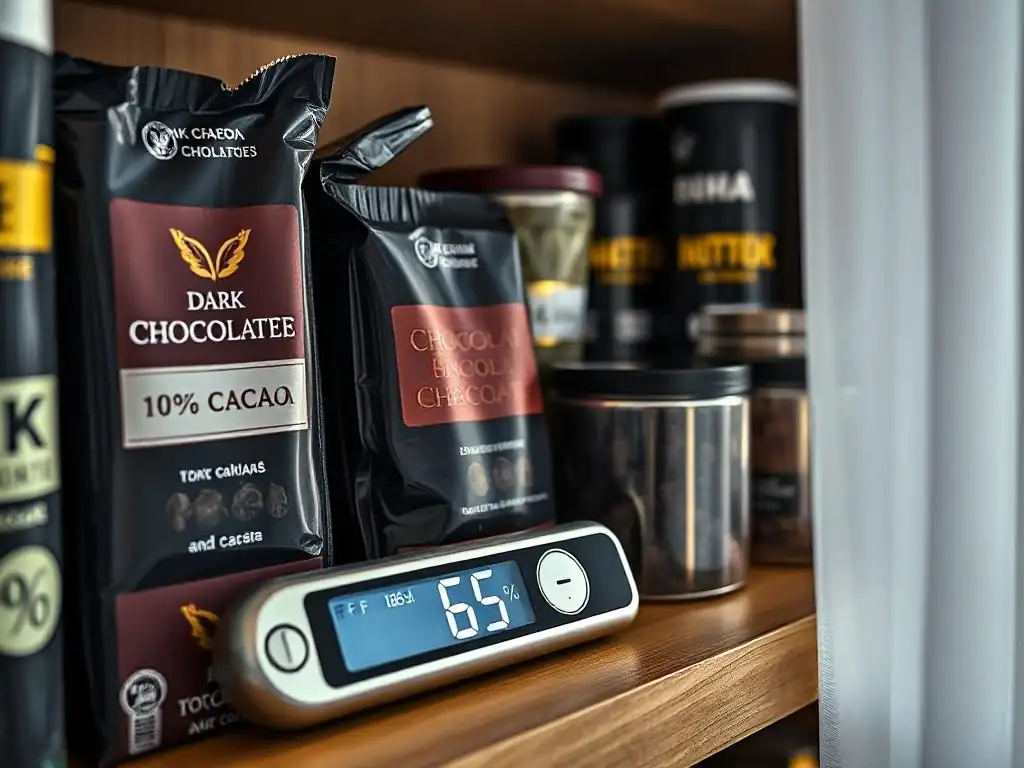
Proper storage is key to maintaining the quality, appearance, and shelf life of any chocolate, especially tempered chocolate. While tempering makes chocolate more stable than untempered chocolate, it's still susceptible to environmental factors like temperature fluctuations, moisture, and odors.
Storing your finished tempered chocolate items correctly will prevent issues like bloom and ensure they retain their shine and snap for as long as possible.
Proper Storage Conditions for Tempered Chocolate
The ideal storage conditions for tempered dark chocolate are cool, dry, and away from strong odors.
- Temperature: Store at a consistent temperature, ideally between 15°C and 18°C (59°F and 64°F). Avoid storing chocolate in the refrigerator, as the humidity can cause sugar bloom (a different type of bloom where sugar crystals surface) and the cold can dull the shine. If refrigeration is necessary in a very warm climate, place the chocolate in an airtight container before refrigerating, then allow it to come to room temperature slowly in the container before opening to prevent condensation.
- Humidity: Keep humidity low, ideally below 50%. Excess moisture is a major cause of sugar bloom and can affect texture.
- Light and Odors: Store chocolate away from direct sunlight and strong odors, as chocolate readily absorbs smells. Use airtight containers if storing near other foods.
Under these conditions, properly tempered dark chocolate can last for several months, maintaining its quality.
Re-Tempering Tempered Chocolate: When and How
What happens if you have leftover tempered dark chocolate, or if a batch goes out of temper during use? Can you re-temper it? Yes, absolutely! One of the benefits of chocolate is that it can often be melted and re-tempered multiple times, provided it hasn't been burned or contaminated.
If your tempered chocolate cools and solidifies before you've used it all, or if your temper test fails, simply chop the solid chocolate back into small pieces and go through the tempering process again from the beginning (melting, cooling/seeding, rewarming to working temperature), following the dark chocolate tempering temperatures guide. This allows you to reactivate and realign the cocoa butter crystals, restoring the chocolate's desirable properties.
Advanced Dark Chocolate Tempering Techniques: Beyond the Basics
Once you're comfortable with the fundamental dark chocolate tempering temperatures guide and basic methods like seeding or tabling, you might want to explore more advanced aspects. This could involve working with different types of dark chocolate or incorporating flavors and inclusions directly into your tempered chocolate creations.
These techniques build upon the core principles but allow for greater creativity and control over the final product, pushing your chocolate skills further.
Working with Different Types of Dark Chocolate
Not all dark chocolates are created equal. They vary significantly in cocoa percentage, origin, processing methods, and the amount and type of cocoa butter used. These factors can slightly influence the optimal tempering temperatures and behavior.
- Higher Cocoa Percentage: Chocolates with 70% cocoa or more often have less sugar and milk solids and can sometimes have a slightly higher optimal working temperature (e.g., 32-33°C). They also tend to be more viscous when melted.
- Lower Cocoa Percentage: Dark chocolates in the 50-60% range might have a slightly lower working temperature (e.g., 30-31°C). They are generally more fluid when melted.
- Origin/Brand Variations: Different manufacturers use different blends and processes. Some couverture chocolates are designed specifically for ease of tempering. Always check manufacturer recommendations if available, but the general dark chocolate tempering temperatures guide provided here is a good starting point for most types.
Experimenting with different brands and percentages will help you understand their unique characteristics and find your favorites for various applications.
Adding Flavors and Inclusions to Tempered Chocolate
Adding flavors or inclusions to tempered dark chocolate requires care to avoid disrupting the temper. Fat-based flavorings or dry inclusions are generally easiest to incorporate.
- Fat-Based Flavorings: Oil-based extracts or flavorings (like pure citrus oils or specialized candy flavorings) can be stirred directly into tempered chocolate. Use sparingly, as they are concentrated. Add them after the chocolate is tempered and at its working temperature.
- Dry Inclusions: Nuts, dried fruit, puffed rice, cookie pieces, etc., can be stirred into tempered chocolate just before pouring or molding. Ensure inclusions are completely dry, as moisture will cause seizing.
- Liquid Flavorings: Water-based extracts (like vanilla extract) or liqueurs should not be added directly to tempered chocolate, as they will cause it to seize. If you must add a liquid flavor, try incorporating it into a ganache or filling instead, or mix it with a small amount of melted cocoa butter or neutral oil first, then stir that mixture into the tempered chocolate very carefully.
Adding inclusions or flavors slightly cools the chocolate, so you might need to gently warm it back up to the working temperature if you're adding a significant amount.
Conclusion: Mastering Dark Chocolate Tempering for Baking Excellence
Mastering the art of tempering dark chocolate is a rewarding skill that significantly enhances the quality of your homemade confections. By understanding the science behind cocoa butter crystallization and diligently following a reliable dark chocolate tempering temperatures guide, you can consistently achieve chocolate that is beautifully shiny, perfectly firm, and snaps with satisfying crispness.
Whether you choose the simple seeding method, the classic tabling technique, or utilize a convenient tempering machine, the core principles of melting, cooling to crystallize, and gently reheating to a working temperature remain constant. Practice makes perfect, and with each attempt, you'll gain confidence in reading your chocolate and knowing when it's just right. So grab your thermometer, choose your favorite dark chocolate, and get ready to create stunning, professional-quality treats right in your own kitchen!
Frequently Asked Questions
What is tempering dark chocolate and why is it important?
Tempering dark chocolate is the process of stabilizing the cocoa butter within the chocolate. This ensures a smooth, glossy finish and a satisfying snap when broken.
What are the key temperature ranges for tempering dark chocolate?
The ideal tempering temperatures vary slightly, but generally you need to heat to around 115-120°F (46-49°C), cool to 88-89°F (31-32°C), and then gently warm back up to 89-90°F (32-32°C).
What happens if I don't temper dark chocolate properly?
Untempered or poorly tempered dark chocolate will likely have a dull, streaky appearance and may feel soft or crumbly. It may also develop fat bloom, a white or grayish coating.
What equipment do I need to temper dark chocolate?
A reliable thermometer is essential, as well as a double boiler or microwave-safe bowl, and a spatula for stirring. A marble slab can also be helpful for some tempering techniques.
Where can I find easy-to-follow recipes and guides for tempering dark chocolate?
BakeWithEase.com is your go-to resource! We offer step-by-step guides and tips for mastering the art of baking, including dark chocolate tempering techniques for all skill levels.
Final Reflection: The Art and Science of Perfectly Tempered Dark Chocolate
The pursuit of the perfect chocolate snap, that satisfying crackle and sheen, is more than just a culinary pursuit; it's a testament to the precise science of tempering. Understanding the specific temperature ranges and techniques involved in tempering dark chocolate is crucial for achieving professional-quality results, whether you're a seasoned chocolatier or a passionate home baker. This knowledge elevates a simple ingredient into a work of art.
The impact of mastering dark chocolate tempering extends far beyond the individual experience. It connects us to a rich history of confectionery artistry, a tradition passed down through generations. The meticulous process, requiring patience and precision, reflects a deeper appreciation for the ingredients and the craft itself. The beauty of chocolate lies not only in its taste, but in the process of its creation.
– This unspoken sentiment underscores the importance of understanding the nuances of tempering, transforming a simple bar of chocolate into something truly special.
Now, it's your turn. Consider the lessons learned within this guide – the importance of precise temperature control, the significance of seeding, and the rewarding feeling of achieving that perfect snap. Don't be afraid to experiment, to embrace the process, and to find your own rhythm in the art of tempering. The journey to mastering this technique is as rewarding as the final product itself. The next time you melt dark chocolate, remember the power of precision and the delicious possibilities that await.
Unlock the Secrets of Perfectly Tempered Chocolate!
Thanks for diving into the world of chocolate tempering with us! You've now got the knowledge to create flawlessly shiny, snappable treats. Ready to put your new skills to the test?
- Temper your first batch: Grab your chocolate and try the method that resonated most with you. We're confident you'll see amazing results.
- Share your creations: Show off your perfectly tempered masterpieces on social media – use #BakeWithEaseTempering for a chance to be featured!
- Explore more chocolate techniques: Dive deeper into our chocolate section for recipes and tutorials on everything from ganache to truffles!
Now, tell us: What's the first decadent treat you'll be tempering?