
Baking Basic Sourdough Without a Dutch Oven: An Easy Recipe

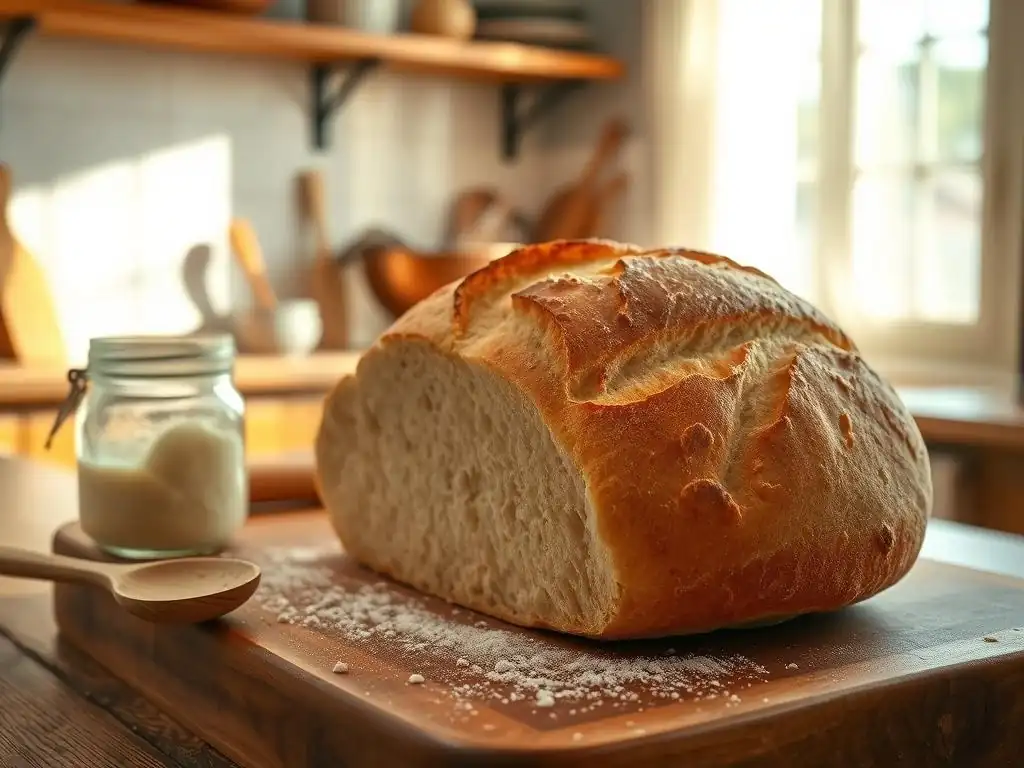
Welcome to BakeWithEase, your haven for unlocking the secrets of exceptional baking! Ever dreamt of crafting that perfect, tangy loaf? Then you're in the right place. Discover our easy sourdough starter recipe for beginners and so much more. Intrigued by the idea of sourdough without the fuss of a Dutch oven? Keep reading to learn how you can achieve incredible results with our simplified method – let's get baking!
- Introduction to Baking Sourdough Bread at Home (Without a Dutch Oven!)
- Understanding the Essential Ingredients for Easy Sourdough
- Creating Your Easy Sourdough Starter Recipe for Beginners
- Simple Sourdough Recipe: Dough Preparation (No Dutch Oven Needed)
- Shaping Your Sourdough Loaf for Oven Baking
- Baking Sourdough Bread Without a Dutch Oven: Step-by-Step
- Cooling and Slicing Your Homemade Sourdough Bread
- Troubleshooting Common Sourdough Baking Issues (Without a Dutch Oven)
- Tips and Tricks for Sourdough Success at Home
- Conclusion: Mastering Easy Sourdough Bread Baking at Home
-
Frequently Asked Questions
- What makes this sourdough recipe "easy," especially for beginners?
- Can I really bake sourdough without a Dutch oven, and how does it affect the result?
- How do I know if my sourdough starter is ready to use in this recipe?
- What if I don't have the exact type of flour called for in the recipe?
- How long does the entire process take, from starting the dough to having a baked loaf?
- Final Reflection: The Humble Sourdough Starter: A Gateway to Baking Joy
- Unleash Your Inner Baker: Start Baking Sourdough Today!
Introduction to Baking Sourdough Bread at Home (Without a Dutch Oven!)
BakeWithEase Welcomes You to Sourdough Simplicity
Welcome to BakeWithEase! We believe that baking delicious bread should be accessible to everyone, regardless of their equipment. Many people associate baking rustic, crusty sourdough with needing a specialized piece of equipment like a Dutch oven.
While Dutch ovens are fantastic for trapping steam and achieving that perfect crust, they are by no means essential. Our mission is to show you how to bake incredible, flavorful sourdough bread right in your standard home oven using just a baking sheet or stone. This guide is designed as an easy sourdough starter recipe for beginners and will walk you through every step, proving that simple methods can yield extraordinary results.
Getting started with sourdough can feel intimidating, but breaking it down into manageable steps makes it much more approachable. This easy sourdough recipe for beginners focuses on technique and understanding the process, not expensive gear. We'll cover everything from establishing your own vibrant sourdough starter – a crucial first step for any easy sourdough bread project – to shaping and baking your loaf to perfection without needing a heavy pot. By the end of this article, you'll have the confidence to bake beautiful, tangy loaves that rival those made in a Dutch oven, using tools you likely already own.
Why Bake Sourdough Without a Dutch Oven?
Baking sourdough without a Dutch oven offers several advantages, making it an attractive option, especially for those new to baking or working with limited resources. Firstly, it's significantly more accessible. Not everyone has a Dutch oven, which can be a considerable investment, sometimes costing upwards of $50 to over $300 depending on the brand and material.
Using a standard baking sheet or pizza stone means you can start baking delicious sourdough today, without needing to purchase specialized equipment. This lowers the barrier to entry for anyone eager to try making an easy sourdough starter recipe for beginners and bake their first loaf.
Secondly, baking directly on a baking surface allows for greater flexibility in loaf shape and size. While Dutch ovens typically accommodate one round or oval loaf, baking sheets can handle multiple smaller loaves or different shapes simultaneously. This can be beneficial if you're baking for a larger group or want to experiment with different bread forms.
Furthermore, mastering the technique of creating steam in your oven (which we'll cover) gives you a deeper understanding of the baking environment and how steam affects the crust, knowledge that translates to other types of bread baking as well. It proves that an easy sourdough recipe can indeed produce bakery-quality results with simple tools.
Understanding the Essential Ingredients for Easy Sourdough
The Flour Power: Choosing the Right Flour for Sourdough Bread
The type of flour you use is fundamental to the success of your sourdough, especially when aiming for an easy sourdough starter recipe for beginners. A good quality flour provides the structure and food source for your starter and your dough.
For building and maintaining an easy sourdough starter, a mix of all-purpose flour and whole wheat or rye flour is often recommended. The whole grain flours add nutrients that yeasts and bacteria in the starter thrive on, helping to create a robust and active culture more quickly, sometimes within 7-10 days of consistent feeding.
For the bread dough itself, a bread flour with a higher protein content (typically 12-14%) is ideal as it develops stronger gluten, which is crucial for trapping the gases produced during fermentation, resulting in a good rise and open crumb structure. All-purpose flour (around 10-12% protein) can also work, but might result in a slightly less structured loaf.
When selecting flour for your easy sourdough recipe, consider unbleached varieties. Bleached flours can sometimes contain additives that may affect the activity of your sourdough starter. Organic flours are also a popular choice as they are free from pesticides and herbicides, providing a cleaner food source for your starter culture.
Experimentation is key; some bakers find success with specific brands based on their local climate and water. For instance, a strong bread flour like King Arthur Baking's Unbleached Bread Flour (often around 12.7% protein) is a reliable choice for building structure in your dough. Using consistent, good-quality flour is a cornerstone of baking a successful, easy sourdough loaf.
Water Quality: Impact on Your Sourdough Starter and Dough
Water is the second most critical ingredient in your easy sourdough starter recipe for beginners and the dough itself. It hydrates the flour, allowing gluten to develop, and provides the necessary environment for the microbial activity in your starter. The quality of your water can significantly impact your sourdough.
Tap water containing high levels of chlorine or chloramines can inhibit or even kill the beneficial microorganisms in your starter, slowing down or preventing fermentation. If your tap water is heavily treated, it's best to use filtered or bottled water for both feeding your starter and mixing your dough. Leaving tap water out in an open container for 24 hours can help dissipate chlorine, but it won't remove chloramines.
The temperature of the water also plays a role. Warm water (around 75-80°F or 24-27°C) is generally preferred for feeding your starter and mixing dough as it promotes microbial activity and helps the dough come together smoothly. Using water that is too cold can slow down fermentation considerably, while water that is too hot can damage the starter.
The ratio of water to flour (hydration percentage) in your dough dictates its consistency – a higher hydration (e.g., 75-80%) results in a wetter, stickier dough that can be more challenging to handle but often yields a more open crumb, while a lower hydration (e.g., 65-70%) is easier for beginners. For an easy sourdough recipe, starting with a moderate hydration around 70-75% is often recommended.
Salt's Crucial Role in Sourdough Flavor and Structure
Salt, while seemingly simple, plays a vital multi-faceted role in your easy sourdough recipe. It's not just for flavor; it significantly impacts the dough's structure and fermentation rate. Salt tightens the gluten network, making the dough stronger and easier to handle. Without salt, sourdough dough can be slack and difficult to shape, leading to a flatter loaf. It also helps control the fermentation process by slowing down yeast activity, preventing the dough from over-proofing too quickly. This allows the complex flavors developed by the lactic acid bacteria in your sourdough starter to shine through.
When choosing salt, non-iodized options like sea salt or kosher salt are generally preferred. Iodine in iodized salt can potentially interfere with fermentation, though the effect is often minimal. The amount of salt typically used in a sourdough recipe ranges from 1.8% to 2.5% of the total flour weight.
For a recipe using 500 grams of flour, this would mean adding 9 to 12.5 grams of salt. Using the correct amount ensures both optimal flavor development and proper dough structure, contributing to a successful and easy sourdough baking experience. Too little salt results in bland bread with poor structure, while too much can kill the starter and result in a very dense loaf.
Creating Your Easy Sourdough Starter Recipe for Beginners
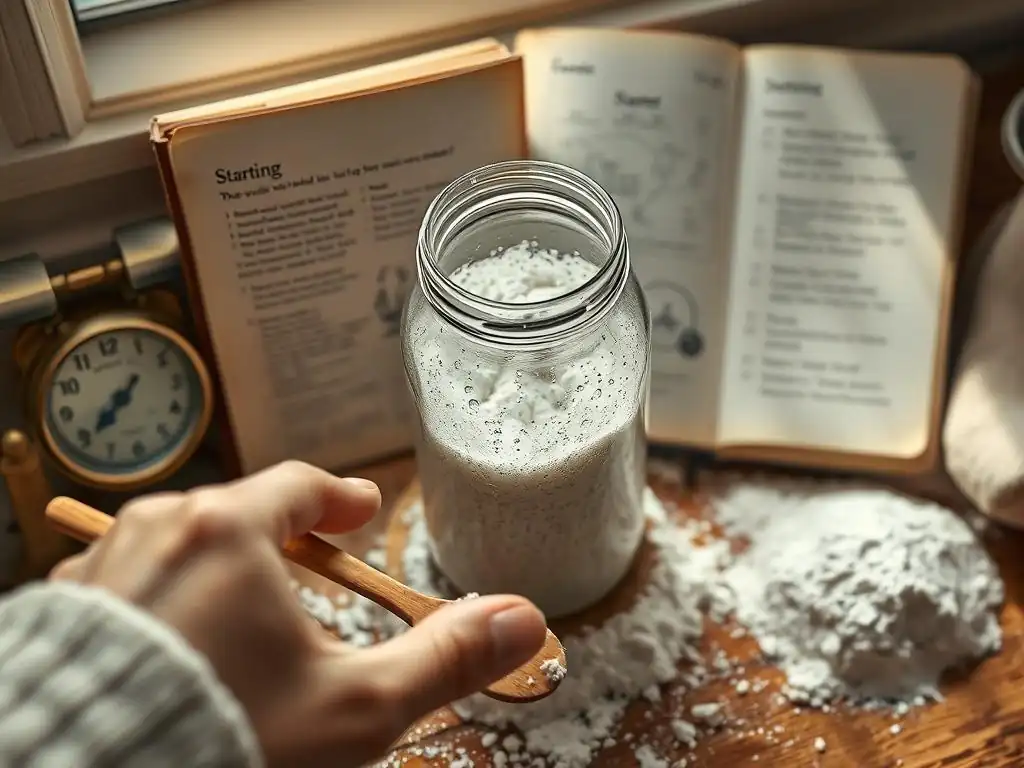
Feeding Your Starter: A Step-by-Step Guide
Creating and maintaining an active sourdough starter is perhaps the most crucial step in any easy sourdough starter recipe for beginners. It's a living culture of wild yeast and bacteria. To start one from scratch, combine equal parts by weight of flour (e.g., 50g all-purpose and 50g whole wheat) and lukewarm water (100g total, around 75-80°F) in a clean jar.
Mix thoroughly until no dry spots remain. Cover loosely (a lid resting on top or a cloth secured with a band) and leave it at room temperature (ideally 70-78°F). For the first 24-48 hours, you might not see much activity.
After 24-48 hours, you'll begin a daily feeding routine. This is where you discard a portion of the starter and feed it fresh flour and water. A common and effective feeding ratio for beginners is 1:1:1 by weight: 1 part starter, 1 part water, 1 part flour. For example, discard all but 50g of your existing starter. Add 50g fresh water and 50g fresh flour (e.g., a mix of all-purpose and whole wheat).
Mix well. Over 7-14 days, feeding daily, you should see consistent bubbling, rising, and a pleasant, tangy aroma. The starter should roughly double or triple in volume within 4-12 hours after feeding when it's strong enough to bake with. This consistent feeding schedule is key to developing a robust, easy sourdough starter.
Recognizing a Ready-to-Bake Sourdough Starter
Knowing when your easy sourdough starter is ready to use is essential for a successful bake. A mature and active starter will show predictable signs of life. After feeding, it should consistently double or even triple in volume within a few hours (the exact time depends on the temperature and feeding ratio, but typically within 4-8 hours at room temperature, around 75°F).
You'll see numerous bubbles throughout the starter, not just on the surface. The texture will be light and airy, and the aroma will be pleasantly tangy, like yogurt or fermented fruit, not overwhelmingly vinegary or like nail polish remover.
A simple test to confirm readiness is the "float test." Take a small spoonful of your peak-activity starter (when it's at its maximum volume after feeding) and gently drop it into a glass of room-temperature water. If the starter floats, it's full of carbon dioxide bubbles and is active enough to leaven your bread.
If it sinks, it needs more time to ferment or may need a few more consistent feedings to build strength. Using a starter that passes the float test and has consistently doubled after feeding is crucial for achieving a good rise in your easy sourdough recipe for beginners.
Simple Sourdough Recipe: Dough Preparation (No Dutch Oven Needed)
Autolyse: The Secret to Enhanced Sourdough Flavor
Autolyse is a simple yet powerful technique that significantly benefits your easy sourdough recipe. It involves mixing just the flour and water from your recipe together and letting them rest for 20 minutes to an hour before adding the starter and salt. This initial hydration allows the flour to fully absorb the water, beginning the gluten development process without any mechanical kneading.
It also activates enzymes that break down starches into sugars, providing more food for your starter later and contributing to better flavor and browning. This step makes the dough more extensible and easier to handle later in the process.
For a typical easy sourdough recipe using 500g flour and 375g water (75% hydration), you would simply combine the 500g flour and 375g water in a bowl and mix until no dry flour remains. The mixture will look shaggy and not smooth – this is perfectly normal. Cover the bowl and let it rest at room temperature. A rest period of 30 minutes is usually sufficient for beginners and makes a noticeable difference in dough texture. This initial hydration step is particularly helpful when working with higher hydration doughs, making subsequent mixing much easier.
Mixing the Dough: Combining Starter, Flour, and Water
After the autolyse period, it's time to add your active sourdough starter and salt to the dough. Gently incorporate the required amount of ripe, bubbly starter (typically 20-30% of the flour weight, so for 500g flour, you'd use 100-150g starter) and the salt (around 1.8-2.5% of flour weight, 9-12.5g for 500g flour) into the autolysed dough. You can do this by hand using a pinch-and-fold method or by briefly mixing with a stand mixer on a low speed. The goal is to distribute the starter and salt evenly throughout the dough.
Continue mixing or kneading for a few minutes until the salt is dissolved and the dough starts to show some initial signs of gluten development – it will become slightly smoother and less shaggy. Avoid over-mixing at this stage; further strength will be developed during the bulk fermentation through folding. This relatively short mixing time keeps this an easy sourdough recipe, relying more on time and gentle handling than intense kneading to build structure.
Bulk Fermentation: The First Rise
Bulk fermentation, or the first rise, is a critical stage in your easy sourdough recipe where flavor and structure develop. After mixing in the starter and salt, the dough is left to ferment at room temperature in a covered container. The ideal temperature for bulk fermentation is typically between 72°F and 78°F (22-26°C).
At these temperatures, bulk fermentation usually takes between 4 to 6 hours, although this time is highly variable depending on the temperature of your kitchen and the activity of your starter. You are looking for the dough to increase in volume by roughly 30-50% and show signs of fermentation, such as bubbles on the surface and along the sides of the container.
During this period, the wild yeasts produce carbon dioxide, causing the dough to rise, while the lactic acid bacteria produce organic acids that contribute to the characteristic tangy flavor of sourdough. Monitoring the dough's activity rather than strictly following a time is important. If your kitchen is cooler (e.g., 68°F), bulk fermentation might take 6-8 hours or even longer. Conversely, in a warmer environment (e.g., 80°F+), it could be finished in 3-4 hours. Look for visual cues: a visibly increased volume, a slightly domed surface, and a jiggly texture when you gently shake the container.
Folding the Dough: Strengthening the Gluten
To build strength in the dough during bulk fermentation, especially in an easy sourdough recipe that minimizes kneading, a series of folds are performed. These folds help align the gluten strands, improve the dough's structure, and equalize the temperature throughout the mass. Typically, you would perform 3-5 sets of folds during the first 2-3 hours of bulk fermentation.
For each set, wet your hands slightly to prevent sticking. Gently lift one side of the dough, stretch it upwards, and fold it over the opposite side. Rotate the bowl and repeat this motion 3 more times until all four sides have been folded into the center.
Allow the dough to rest for 30-60 minutes between each set of folds. As you perform subsequent folds, you will notice the dough becoming smoother, more elastic, and holding its shape better. After the last set of folds, let the dough rest undisturbed for the remainder of the bulk fermentation period until it has reached the desired volume increase. This folding technique is much gentler than traditional kneading and is perfect for developing structure in a wet sourdough dough, making it an essential part of an easy sourdough recipe.
Shaping Your Sourdough Loaf for Oven Baking
Pre-Shaping: Creating Tension in the Dough
After bulk fermentation is complete, gently turn the dough out onto a lightly floured surface. Avoid degassing the dough too much; you want to preserve the air bubbles. The purpose of pre-shaping is to gently coax the dough into a rough shape (usually a round or a loose rectangle) and begin creating surface tension.
This initial tension helps the dough hold its final shape during proofing and baking. For a round loaf (a boule), gently fold the edges of the dough towards the center to form a rough ball. For an oval loaf (a bâtard), fold the top down, then the sides in, and roll from the top down.
Once roughly shaped, let the dough rest on the counter, covered, for 20-30 minutes. This resting period, called the bench rest, allows the gluten to relax after handling, making the final shaping much easier. Skipping this step can result in a dough that springs back excessively during final shaping. Pre-shaping is a quick, gentle step that prepares the dough for the more deliberate final shaping, contributing to a well-formed loaf in your easy sourdough recipe.
Final Shaping: Preparing for Baking on a Baking Sheet
Final shaping is where you give the dough its final form and build significant surface tension, which is crucial for achieving a good oven spring when baking without a Dutch oven. For a boule, gently flip the pre-shaped dough over so the seam is on top. Fold the top edge down about one-third, then fold the sides in, overlapping slightly.
Finally, roll the dough from the top down, using your hands to create tension by pulling the dough towards you across the surface as you roll. The goal is to create a smooth, taut surface on top and a seam underneath. For a bâtard, fold the top down, fold the sides in tightly, and then roll from the top, sealing the seam as you go.
Once shaped, the dough needs to be placed into a proofing basket (banneton) or a bowl lined with a floured cloth (like a tea towel heavily dusted with rice flour to prevent sticking). Place the dough seam-side up in the basket if you plan to bake it seam-side down, or seam-side down if you plan to bake it seam-side up (which is less common for open baking). This careful shaping and placement are vital for maintaining the loaf's structure during proofing and ensuring it holds its form when transferred to a baking sheet for your easy sourdough bake.
Proofing: The Final Rise Before Baking
Proofing is the final resting period before your easy sourdough loaf goes into the oven. During this time, the shaped dough continues to ferment slowly, accumulating more gas and developing flavor. Proofing can be done at room temperature or in the refrigerator (cold proofing). Room temperature proofing typically takes 1-4 hours, depending on the temperature and the dough's activity.
The dough should look visibly puffy and increase in volume, but should not double. A good test is the "poke test": gently poke the dough with a floured finger; if the indentation springs back slowly but not completely, it's ready. If it springs back immediately, it needs more time. If it doesn't spring back at all, it's likely over-proofed.
Cold proofing in the refrigerator (at 38-40°F or 3-4°C) is a technique favored by many bakers, especially for an easy sourdough recipe. It significantly slows down fermentation, allowing for a longer proofing time (8-12 hours or even up to 24 hours). This longer, slower fermentation develops more complex flavors in the bread.
Cold proofing also makes the dough easier to handle and score just before baking. Whichever method you choose, ensure the dough is covered to prevent drying out. Properly proofed dough is essential for achieving a good oven spring and crumb structure when baking without the contained environment of a Dutch oven.
Baking Sourdough Bread Without a Dutch Oven: Step-by-Step

Preparing Your Oven and Baking Sheet
Baking sourdough without a Dutch oven requires creating a steamy environment in your conventional oven to achieve a beautiful, crusty exterior. Preheat your oven to a high temperature, typically between 450°F and 500°F (230°C to 260°C). It's crucial to preheat for at least 30-60 minutes to ensure the oven walls and your baking surface are thoroughly heated.
If you have a baking stone or steel, place it on the middle rack before preheating. This provides a hot surface for the bread, mimicking the heat transfer of a Dutch oven base. If you don't have a stone or steel, a sturdy metal baking sheet works well; simply place it in the oven while it preheats.
You will also need a way to create steam. A common method is to place a cast iron pan or a sturdy metal tray on the lowest rack of your oven during the preheat. Just before loading the bread, you will carefully pour hot water into this pan to generate steam. This preparation ensures your oven is hot and humid, conditions that are vital for the initial stage of baking when the bread's crust is setting. Achieving a good crust is a key outcome for any easy sourdough recipe, and proper oven setup is step one.
Scoring the Dough: Preventing Explosions
Scoring, or slashing, the dough just before baking serves several important purposes in your easy sourdough recipe. Firstly, it provides weak points on the surface of the loaf, allowing the rapidly expanding gases inside to escape in a controlled manner. Without scoring, the loaf might burst unpredictably along its weakest point, resulting in a less attractive shape. Secondly, scoring guides the oven spring, allowing the loaf to expand upwards and outwards where you've made the cuts, helping to achieve a better volume and shape.
Use a sharp blade, like a razor blade (a lame is ideal) or a very sharp knife. Work quickly and confidently. The depth and pattern of your scores can influence the final look of the loaf. For a simple score, a single slash down the center, about 1/2 inch deep, is effective.
You can also do multiple parallel slashes or decorative patterns. For baking without a Dutch oven, ensuring your scores are clean and deep enough is important to manage the expansion when the dough hits the hot oven and steam. This is a crucial step for any easy sourdough recipe aiming for a controlled rise and appealing crust.
Baking Time and Temperature: Achieving a Golden Crust
Baking time and temperature are key to achieving a perfect crust and well-cooked interior in your easy sourdough bread, especially when baking without a Dutch oven. After scoring, carefully transfer your dough onto the preheated baking sheet, stone, or steel. Immediately place it in the oven.
If using the steam method with a water pan, pour about 1 cup of hot water into the preheated pan on the lower rack and quickly close the oven door. The initial high temperature (450-500°F) combined with the steam helps the crust remain pliable, allowing the loaf to expand fully (oven spring) during the first 15-20 minutes of baking.
After 15-20 minutes, carefully open the oven door (mindful of the hot steam) and remove the steam pan. Lower the oven temperature to around 400-425°F (200-220°C) and continue baking for another 20-30 minutes. This lower temperature and dry heat allow the crust to crisp up and deepen in color, while the interior finishes cooking. The total baking time for a standard 500g loaf is typically 40-50 minutes. The bread is done when the crust is a deep golden brown and the internal temperature reaches 200-210°F (93-99°C). If you tap the bottom of the loaf, it should sound hollow.
The Water Bath Trick: Creating Steam for a Perfect Crust
The water bath trick is the most effective way to replicate the steamy environment of a Dutch oven when baking sourdough on a baking sheet. Steam is essential during the first phase of baking (the first 15-20 minutes) because it keeps the surface of the dough moist and flexible. This allows the loaf to expand significantly before the crust hardens. Without sufficient steam, the crust sets too early, restricting oven spring and resulting in a denser loaf with a less appealing crust.
To execute the water bath trick, place a sturdy, oven-safe pan (like a cast iron skillet or a metal baking tray) on the bottom rack of your oven while it preheats to its highest temperature (450-500°F). Have about a cup of very hot or boiling water ready. Once the oven is fully preheated and you've placed your scored loaf on the hot baking surface in the oven, quickly and carefully pour the hot water into the preheated pan on the bottom rack.
Close the oven door immediately to trap the steam. Be extremely cautious of the hot steam that will rush out when you open the door after the initial baking phase. This simple step is a game-changer for achieving a beautiful, blistered crust on your easy sourdough bread baked without a Dutch oven.
Cooling and Slicing Your Homemade Sourdough Bread
Allowing the Bread to Cool Completely
Patience is key after baking your beautiful easy sourdough loaf. Once it's removed from the oven with its gorgeous golden crust, it needs to cool completely on a wire rack. This is not just about preventing burnt fingers; the bread continues to cook internally as it cools. Starches inside the loaf are gelatinizing and setting, and moisture is distributing evenly throughout the crumb. Slicing into a hot loaf can result in a gummy, dense texture because this process hasn't finished.
Allow your sourdough loaf to cool for at least 2-3 hours at room temperature, or even longer for larger loaves. The crust will initially feel very hard and crisp right out of the oven, but it will soften slightly as it cools and the internal moisture equalizes. Cooling on a wire rack ensures air circulates around the entire loaf, preventing the bottom crust from becoming soggy. Resist the temptation to slice too early – waiting is crucial for the final texture and structure of your easy sourdough creation.
Slicing and Enjoying Your Sourdough Creation
Once your homemade easy sourdough bread has cooled completely, it's time to slice and enjoy the fruits of your labor! Use a good quality serrated bread knife for clean cuts without crushing the loaf. Hold the bread steady and use a sawing motion rather than pressing down hard. Slice the bread to your desired thickness.
Admire the crumb structure you've achieved – hopefully, it's open and airy! Notice the color of the crust and the tangy aroma. Your easy sourdough starter recipe for beginners journey has culminated in a delicious loaf made with simple equipment. Enjoy your bread simply with butter, use it for sandwiches, toast it, or pair it with soup. Sharing your homemade sourdough is also a wonderful experience. Take pride in the fact that you've baked a fantastic loaf without needing a Dutch oven!
Troubleshooting Common Sourdough Baking Issues (Without a Dutch Oven)

Dough Too Sticky or Too Dry?
Encountering dough that is either too sticky or too dry is a common issue, especially when starting with an easy sourdough starter recipe for beginners. If your dough is excessively sticky and difficult to handle even after resting and folding, it might be too high in hydration for your flour type or your current skill level. Different flours absorb water differently; whole wheat and rye flours absorb more water than white flour.
If your dough feels more like batter than dough, try slightly reducing the water in your next batch, perhaps by 2-3% of the flour weight (e.g., for 500g flour, use 360-365g water instead of 375g). Alternatively, try using a stronger bread flour with higher protein content. Adding a little extra flour during initial mixing or during folds can help, but avoid adding too much, which can make the bread dense.
Conversely, if your dough feels too dry, stiff, and doesn't develop elasticity easily, it might be too low in hydration or your flour is particularly thirsty. Ensure you are measuring ingredients accurately, preferably by weight using a kitchen scale. You can try increasing the water slightly in your next dough mix, again by 2-3% of the flour weight.
Also, ensure your water temperature is appropriate (around 75-80°F) as colder water is less readily absorbed. Remember that the texture will change throughout bulk fermentation and folding; a sticky dough can become more manageable as gluten develops. Patience and slight adjustments to hydration are key.
Flat Sourdough Loaf?
A flat sourdough loaf is a common disappointment but can often be attributed to a few factors when baking without a Dutch oven. One primary cause is an inactive or weak sourdough starter. If your starter doesn't reliably double after feeding or pass the float test, it won't have enough leavening power to lift the dough. Ensure your easy sourdough starter recipe for beginners is robust by feeding it consistently and waiting until it's at peak activity.
Another reason is insufficient gluten development during bulk fermentation. Not enough folding or a too-short bulk fermentation time can result in a weak dough structure unable to hold its shape and expand upwards. Ensure you are performing enough sets of folds and allowing adequate bulk fermentation time based on your kitchen temperature.
Over-proofing or under-proofing can also lead to a flat loaf. Over-proofed dough runs out of gas before it hits the oven, while under-proofed dough doesn't have enough internal tension. Pay close attention to the visual cues and the poke test during the final proofing stage.
Finally, insufficient surface tension from poor shaping can cause the loaf to spread outwards rather than rise upwards during the intense heat of the oven. Practice your shaping technique to create a taut surface. When baking on a flat surface without the support of a Dutch oven wall, strong structure and proper proofing are even more critical for achieving height.
Dense Crumb?
A dense or gummy crumb means the interior of your easy sourdough bread is heavy and compact, lacking the desired open, airy structure. This is often linked to issues with fermentation or baking. An underactive starter or insufficient bulk fermentation time are frequent culprits; if the dough hasn't produced enough carbon dioxide during the first rise, the crumb will be tight. Ensure your starter is vigorous and that your bulk fermentation goes for the appropriate duration based on temperature, showing a significant volume increase (30-50%) and signs of activity.
Under-baking is another major cause of dense or gummy crumb. If the internal temperature of the loaf doesn't reach the target 200-210°F (93-99°C), the starches won't fully gelatinize and set properly as the bread cools. Using a thermometer is the most reliable way to check for doneness.
Insufficient steam during the initial baking phase can also contribute to a denser crumb by restricting oven spring; the water bath trick is essential for allowing the loaf to expand fully. Finally, slicing the bread before it has completely cooled traps moisture inside, leading to a gummy texture. Always allow the loaf to cool fully on a wire rack for 2-3 hours.
Burnt Crust?
A burnt crust, while the interior might be perfectly cooked, can happen when baking at high temperatures, especially on a baking sheet or stone without the protection of a Dutch oven. If the top crust is burning before the loaf is done, your oven might be running too hot, or the bread is too close to the top heating element. Try lowering your oven temperature slightly after the initial steamed phase (from 450°F down to 400°F instead of 425°F, for example) or moving your oven rack down a notch.
If the bottom crust is burning, your baking surface (stone, steel, or sheet) might be too hot, or the bread is sitting directly on the heat source for too long. Ensure your baking surface is on the middle rack, not the bottom. You can also try placing a layer of parchment paper under the loaf before transferring it to the hot surface, which can offer a small amount of insulation.
If the bottom is still burning, you can try sliding a second baking sheet underneath the first one about halfway through the bake to create an air gap for insulation. Monitoring your oven temperature with an external thermometer can also help identify if your oven calibration is off. Adjusting temperature and rack position are key to preventing a burnt crust on your easy sourdough loaf baked without a Dutch oven.
Tips and Tricks for Sourdough Success at Home
Maintaining Your Sourdough Starter for Long-Term Baking
A healthy, active sourdough starter is your key to consistent baking success, especially when following an easy sourdough starter recipe for beginners. If you plan to bake frequently (daily or every couple of days), you can keep your starter at room temperature, feeding it once or twice a day using a ratio like 1:1:1 or 1:2:2 (starter:water:flour) by weight. This ensures it's always active and ready to use. However, if you bake less often (once a week or less), storing your starter in the refrigerator is a more convenient option.
To store in the fridge, feed your starter as usual, let it sit at room temperature for 1-2 hours to start activating, then place it in the refrigerator. The cold temperature slows down microbial activity significantly. To use it for baking, take it out of the fridge, discard most of it, and feed it 1-3 times at room temperature until it shows consistent doubling within a few hours and passes the float test.
This typically takes 1-2 days of room-temperature feeding after being in the fridge for a week or two. Remember to always save a small amount (e.g., 20-30g) to perpetuate your starter culture. This maintenance ensures you always have a vibrant easy sourdough starter ready for your next bake.
Experimenting with Flavors and Add-Ins
Once you've mastered the basic easy sourdough recipe, the world of flavor variations opens up! Sourdough provides a fantastic base for incorporating various seeds, herbs, cheeses, and even fruits. Common add-ins include toasted sesame seeds, poppy seeds, sunflower seeds, or a mix of seeds incorporated into the dough during the final stages of mixing or folded in during bulk fermentation. For a seed-crusted loaf, roll the shaped dough in seeds just before the final proof. A typical addition rate for seeds is 10-15% of the flour weight.
Herbs like rosemary or thyme, dried fruits such as cranberries or raisins, and nuts like walnuts or pecans can also be folded into the dough during bulk fermentation. Cheese, like cheddar or Gruyère, adds a savory dimension; incorporate cubed or grated cheese during the final folds. For a slight sweetness and unique texture, roasted garlic or olives are popular additions. Remember that adding ingredients can affect the dough's hydration and handling, so you might need slight adjustments. Experimenting with these variations keeps your easy sourdough baking exciting and allows you to customize your loaves.
Storing Your Sourdough Bread Properly
Proper storage is essential for keeping your homemade easy sourdough bread fresh and preserving its crusty exterior and tender interior. Once the loaf has cooled completely, the best way to store it for the first day or two is simply cut-side down on a cutting board or in a paper bag. This allows the crust to breathe and prevents it from becoming soft too quickly. Avoid plastic bags for initial storage as they trap moisture, making the crust soggy.
For longer storage, or after the first day, you can transition to a linen bread bag or a dedicated bread box, which helps regulate humidity. If you won't finish the loaf within 2-3 days, sourdough freezes exceptionally well. Slice the cooled loaf and place the slices in a freezer-safe bag or container, removing as much air as possible. Frozen slices can be toasted directly from the freezer.
A whole loaf can also be frozen; wrap it tightly in plastic wrap followed by foil. To thaw a whole loaf, unwrap it and let it thaw at room temperature, or reheat it in a moderate oven (350°F or 175°C) for 15-20 minutes to revive the crust. With proper storage, your easy sourdough bread can be enjoyed for days or weeks!
Conclusion: Mastering Easy Sourdough Bread Baking at Home
Congratulations! You've Baked Sourdough Without a Dutch Oven!
Give yourself a pat on the back! You've successfully navigated the process of baking a delicious, rustic sourdough loaf using just your standard home oven and a baking sheet or stone. You've created and nurtured an easy sourdough starter, understood the key ingredients, mixed and fermented the dough, shaped your loaf, and successfully created a steamy environment to achieve that coveted crust without relying on a specialized Dutch oven. This accomplishment demonstrates that baking high-quality sourdough is accessible and achievable with simple equipment and careful technique.
Mastering this easy sourdough recipe for beginners is a significant step in your baking journey. Each loaf you bake will teach you more about the process, your starter, and how your kitchen environment affects the dough. Don't be discouraged by loaves that aren't "perfect" – they are all part of the learning process, and even imperfect sourdough is usually delicious! You've built a fundamental understanding of sourdough baking principles that you can now apply to more complex recipes or variations.
Explore More Basic Sourdough Bread Recipes with BakeWithEase
Now that you've successfully baked your first easy sourdough loaf without a Dutch oven, you're ready to explore more possibilities! BakeWithEase offers a variety of basic sourdough bread recipes designed to build upon the skills you've just learned. Whether you want to try different hydration levels, experiment with adding whole grains to your dough, or attempt slightly different shaping techniques, our resources are here to guide you.
Consider trying a recipe for sourdough rolls, sourdough pizza dough, or even a sweeter sourdough variation. Continue nurturing your easy sourdough starter – it's a versatile tool for countless baking projects. Remember that consistent practice is the key to becoming a confident sourdough baker. Keep experimenting, keep learning, and keep baking delicious bread right in your own kitchen. Your journey with easy sourdough has just begun!
Frequently Asked Questions
What makes this sourdough recipe "easy," especially for beginners?
This recipe focuses on a simplified process and readily available ingredients, minimizing the complexity often associated with sourdough. It also avoids the need for a Dutch oven, making it more accessible.
Can I really bake sourdough without a Dutch oven, and how does it affect the result?
Yes, you can! While a Dutch oven creates a steamy environment for optimal crust, this recipe uses alternative methods to achieve a satisfactory rise and crust development.
How do I know if my sourdough starter is ready to use in this recipe?
A ripe starter should be doubled in size after feeding, bubbly, and have a slightly tangy aroma. This indicates it's active and will leaven your dough effectively.
What if I don't have the exact type of flour called for in the recipe?
While using the specified flour types is recommended for the best results, you can experiment with substituting similar flours, understanding that it might slightly alter the texture and flavor.
How long does the entire process take, from starting the dough to having a baked loaf?
The entire process, including starter preparation, dough fermentation, and baking, typically spans 24-48 hours. This includes the time for the sourdough starter to activate.
Final Reflection: The Humble Sourdough Starter: A Gateway to Baking Joy
The accessibility of sourdough baking is rapidly changing, and mastering this ancient craft no longer requires specialized equipment or years of experience. This simple recipe proves that anyone, even a complete beginner, can cultivate a thriving sourdough starter and bake delicious bread without the need for a Dutch oven. The joy of creating something from scratch, from a simple flour and water mixture, is a powerful experience.
The enduring appeal of sourdough lies not just in the taste of the resulting bread, but in the process itself. It's a journey of patience, observation, and connection to a tradition that spans centuries. Bread is the staff of life,
a common saying reminds us, but for me, the process of making sourdough has become a meditative practice, a quiet ritual in the midst of a busy life. It's a tangible link to the past, a reminder of simpler times and the enduring power of simple ingredients.
Now, I invite you to embark on your own sourdough journey. Don't be intimidated by the seemingly complex nature of sourdough baking. Start small, be patient, and enjoy the process. The rewards – the satisfying aroma of freshly baked bread, the delightful tangy flavor, and the immense pride in creating something truly special – are well worth the effort. Your first loaf might not be perfect, but the journey of learning and the delicious results will be incredibly rewarding. So, gather your ingredients, and let the baking begin!
Unleash Your Inner Baker: Start Baking Sourdough Today!
Thanks for taking the time to explore the world of sourdough baking with us! We hope you gained confidence in tackling this classic bread without needing fancy equipment. Ready to get your hands kneaded (pun intended! )?
- Bake your first sourdough loaf: Use the recipe from the article as a springboard and give it a go! Even small adjustments will help you personalize your sourdough journey.
- Share your sourdough success (or adventures!): Post a picture of your loaf on social media – tag us! We love seeing your creations.
- Explore our other simple baking recipes: Discover new baking possibilities on BakeWithEase.com – we have plenty more accessible guides waiting for you.
Now, tell us – what’s the first flavour or variation you’re excited to experiment with in your sourdough baking?