
Simple Basic Sourdough with Higher Hydration Tips for Beginners

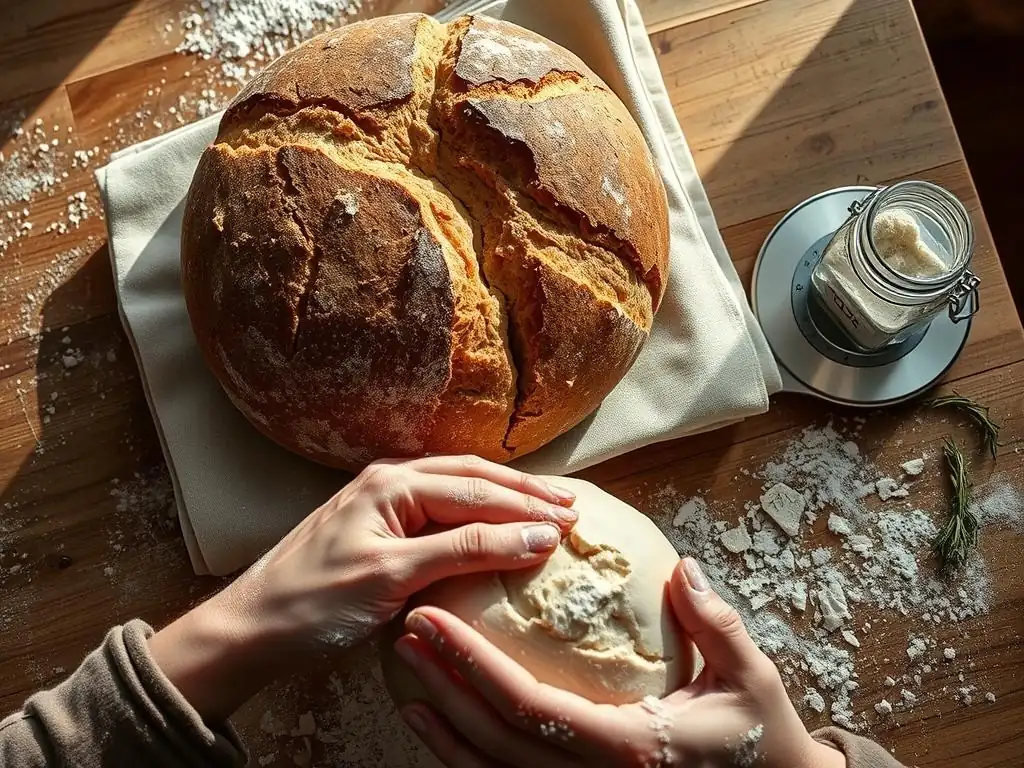
Welcome to BakeWithEase, where we believe everyone can create delicious, homemade treats!
Ever wondered how to achieve that perfectly airy crumb in your sourdough? This article dives deep into the secrets of sourdough starter hydration, particularly for beginners venturing beyond the basics. Unlock the potential of higher hydration and discover how it can transform your loaves. Ready to elevate your baking game? Let's get started!
- Introduction to High Hydration Sourdough for New Bakers
- Essential Equipment for Baking Beginner Sourdough
-
Sourdough Starter Hydration Beginners: A Step-by-Step Guide
- Step 1: Preparing Your Sourdough Starter (Optimal Hydration for Beginners)
- Step 2: Mixing the Dough (High Hydration Techniques)
- Step 3: Bulk Fermentation (Managing High Hydration Dough)
- Step 4: Shaping the Dough (Gentle Handling is Key)
- Step 5: Proofing the Dough (Cold Proofing vs. Room Temperature)
- Step 6: Baking the Sourdough (Achieving a Crisp Crust)
- Troubleshooting Common High Hydration Sourdough Problems
- Tips for Maintaining Your Sourdough Starter
- Recipes: Basic Sourdough with Higher Hydration for Beginners
- Enjoying Your Homemade High Hydration Sourdough
-
Frequently Asked Questions
- How does sourdough starter hydration affect the final bread?
- What is considered high hydration for a sourdough starter for beginners?
- Why is it important for beginners to understand sourdough starter hydration?
- What are some common mistakes beginners make when working with high hydration sourdough starters?
- Where can beginners find simple recipes using high hydration sourdough starters?
- Final Reflection: The Transformative Power of Hydration in Sourdough Baking
- Unleash Your Inner Baker: Master the Art of Sourdough!
Introduction to High Hydration Sourdough for New Bakers
Baking sourdough bread can feel like a magical process, turning simple flour and water into a beautiful, tangy loaf. As you venture beyond the very basic methods, you'll encounter recipes with higher hydration levels. This means the dough has a greater proportion of water compared to flour, often resulting in a more open crumb and a softer texture. While it might seem intimidating at first, understanding high hydration techniques is a rewarding step in your baking journey and is achievable even for beginners.
This guide is specifically designed to help you navigate the world of high hydration sourdough, focusing on practical tips and a step-by-step approach. We'll cover everything from understanding what hydration means for your dough to managing a stickier mix and achieving a fantastic bake. Paying close attention to your sourdough starter hydration beginners is the first crucial step, as a healthy, active starter is the foundation for any great loaf, especially one with higher water content.
Why Bake High Hydration Sourdough Bread? (Beginner-Friendly Explanation)
Baking sourdough with higher hydration offers several benefits that contribute to a superior loaf. Firstly, the increased water content allows the gluten network to develop more easily during mixing and fermentation, leading to a more open and airy crumb structure. Imagine those lovely large holes you see in artisan bread – higher hydration helps achieve that.
Secondly, higher hydration doughs tend to retain moisture better during baking, resulting in a crust that is wonderfully crisp and caramelized on the outside, while the interior remains moist and tender. This contrast in textures is a hallmark of excellent sourdough. While managing sticky dough can be a learning curve, the resulting bread's quality often makes the effort well worth it for new bakers looking to elevate their skills.
Understanding Hydration Levels in Sourdough Baking
Hydration in baking is expressed as a percentage, calculated by dividing the weight of water by the weight of flour used in the recipe and multiplying by 100. For example, if a recipe uses 500g of flour and 350g of water, the hydration is (350 / 500) * 100 = 70%. Basic sourdough recipes often start around 65-70% hydration. High hydration typically refers to recipes with 75% hydration or higher.
Understanding this percentage is key because it dictates the dough's consistency and how you'll handle it. A 65% hydration dough is relatively firm and easy to shape, while an 80% hydration dough will be quite wet, slack, and sticky. Managing sourdough starter hydration beginners also plays a role, as the starter itself contributes flour and water to the overall dough hydration calculation. Most standard starters are fed at a 1:1:1 ratio (starter:water:flour by weight), resulting in a 100% hydration starter.
Essential Equipment for Baking Beginner Sourdough
Having the right tools can significantly simplify the process of baking sourdough, especially when working with higher hydration doughs which can be trickier to handle. While you don't need every gadget on the market, a few key items are highly recommended to ensure success and make the experience more enjoyable. Investing in a few basic pieces will set you up for consistent results.
Even for sourdough starter hydration beginners, having reliable scales is paramount. Precision in measuring ingredients, particularly flour and water, is critical for controlling the hydration level of your dough. Small variations can make a big difference in how a high hydration dough behaves, so accurate measurements are non-negotiable.
Must-Have Tools for High Hydration Sourdough
- Digital Scale: Essential for accurate measurement of ingredients by weight. This is non-negotiable for controlling hydration.
- Large Mixing Bowl: Needed for mixing and the initial bulk fermentation. Glass or plastic bowls are common.
- Dough Scraper (Bench Scraper & Bowl Scraper): A metal bench scraper is invaluable for handling sticky dough on your counter, and a flexible bowl scraper helps get all the dough out cleanly.
- Proofing Basket (Banneton): Provides support for the shaped dough during proofing and gives the loaf a nice shape and pattern. Rattan bannetons are popular.
- Dutch Oven or Baking Stone with Cover: Creates a steamy environment essential for achieving a good oven spring and a crisp crust in the initial phase of baking. A 5-quart or 6-quart Dutch oven is a common size.
These tools form the core setup for baking quality sourdough. Working with higher hydration doughs means they are stickier and more challenging to manage without good scrapers. A banneton provides the necessary structure as the dough proofs, preventing it from spreading out too much. The Dutch oven simulates a professional steam oven, crucial for the initial burst of expansion and crust development.
Optional Tools That Can Help
While not strictly necessary, some additional tools can make the process smoother or offer greater control. An instant-read thermometer is useful for checking the internal temperature of your baked loaf (aim for around 205-210°F or 96-99°C). A lame (a sharp blade on a handle) allows for precise scoring of the dough before baking, which helps control expansion.
Other helpful items include a kitchen timer or scale with a timer function to track fermentation steps, and perhaps a spray bottle to add extra moisture to the oven if not using a covered vessel. For sourdough starter hydration beginners, having a dedicated jar for your starter with clear markings can also be beneficial for monitoring its growth and activity after feeding.
Sourdough Starter Hydration Beginners: A Step-by-Step Guide
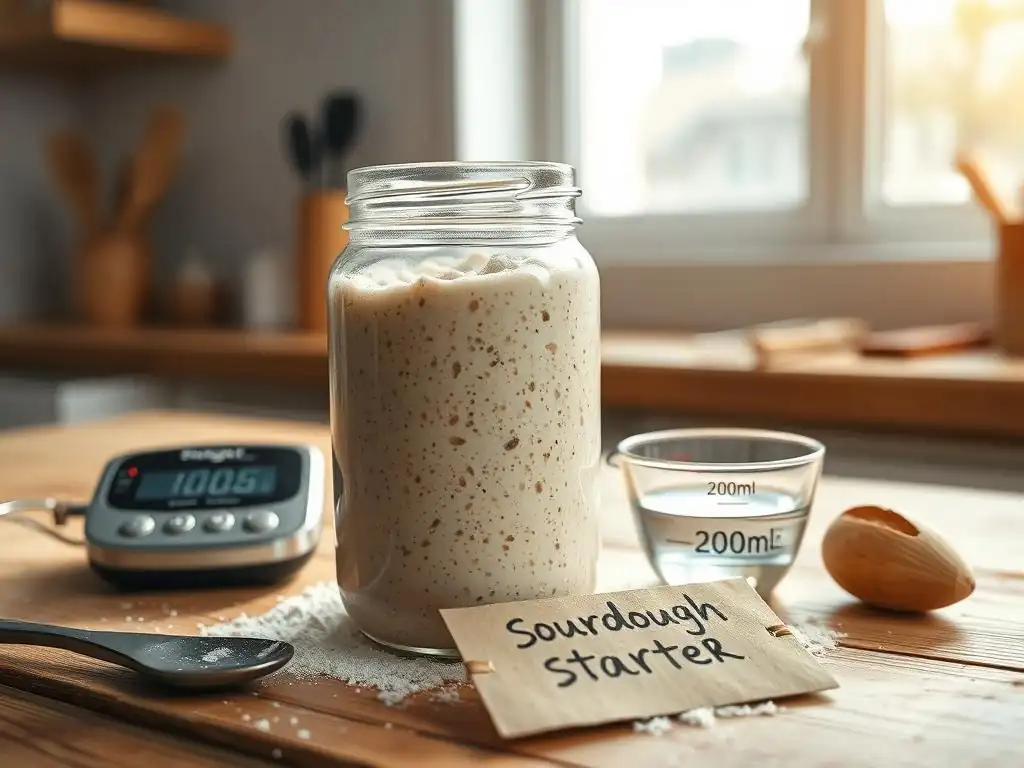
Successfully baking high hydration sourdough starts with a healthy and active starter. For sourdough starter hydration beginners, understanding how to feed and maintain your starter is foundational. A starter's hydration level is typically 100%, meaning it's fed equal parts flour and water by weight. This standard hydration works well for most sourdough recipes.
The activity of your starter directly impacts your dough's fermentation. A vigorous starter, bubbling and doubling (or tripling) in volume within a few hours after feeding (at room temperature, typically 70-78°F or 21-26°C), provides the necessary leavening power for a successful high hydration loaf. Learning to recognize these signs of activity is a key skill for any beginner baker.
Step 1: Preparing Your Sourdough Starter (Optimal Hydration for Beginners)
For beginners, maintaining a 100% hydration starter is the most straightforward approach. This means when you feed your starter, you add equal weights of flour and water to the existing starter. For instance, if you want to feed 50g of existing starter, you would add 50g of fresh flour and 50g of water. This consistent ratio makes calculations simple and ensures your starter is predictable.
The type of flour you use to feed your starter can influence its activity and the flavor it imparts. While all-purpose flour works, a mix of all-purpose and whole wheat or rye flour often gives the starter a boost due to the higher nutrient content in whole grains. Aim to feed your starter regularly, especially if kept at room temperature (daily or twice daily), or less frequently if stored in the refrigerator (weekly).
Feeding Your Sourdough Starter: The Right Ratios
The standard feeding ratio for a 100% hydration starter is 1:1:1 by weight (starter:water:flour). However, you can adjust this ratio depending on how quickly you want the starter to become active and how often you plan to bake. A 1:2:2 or 1:3:3 ratio (e.g., 10g starter, 20g water, 20g flour) will dilute the existing starter more, providing more "food" relative to the microbial population, potentially leading to a larger rise and peak over a longer period.
For sourdough starter hydration beginners preparing for a bake, feeding at a 1:1:1 or 1:2:2 ratio about 4-8 hours before mixing your dough is common practice when keeping the starter at room temperature (around 75°F or 24°C). This timing allows the starter to reach its peak activity when it's most potent for leavening your dough. Using filtered water is also recommended, as chlorine in tap water can sometimes inhibit microbial activity.
Recognizing When Your Starter Is Ready
A healthy, active starter ready for baking will show clear signs of fermentation. After feeding, it should approximately double or triple in volume within a few hours (timing depends on temperature and feeding ratio). The surface will be domed, and you'll see numerous bubbles throughout the jar, particularly on the sides and top.
A classic test for readiness is the "float test." Gently take a small spoonful of starter and drop it into a glass of water. If it floats, it's typically ready to use, indicating sufficient gas production. If it sinks, it may need more time to ferment or perhaps a different feeding strategy. For sourdough starter hydration beginners, observing the volume increase and bubble activity is the most reliable indicator.
Step 2: Mixing the Dough (High Hydration Techniques)
Mixing high hydration dough requires a slightly different approach than lower hydration doughs due to its stickiness. The goal is to hydrate the flour fully and begin developing the gluten network without overworking the dough initially. Patience and gentle handling are key at this stage.
Using a bowl scraper or wet hands can help manage the stickiness. Avoid adding extra flour during the initial mixing unless absolutely necessary, as this will change your target hydration level. Embrace the wetness – it's what will give you that desirable open crumb.
Autolyse: A Crucial Step for Hydration
The autolyse technique is particularly beneficial for high hydration doughs and is simple for beginners. It involves mixing just the flour and water from your recipe and letting it rest for 20 minutes to an hour (or even longer). This rest period allows the flour to fully absorb the water and enzymes in the flour begin to break down proteins, which helps with gluten development later.
For example, in a recipe calling for 500g flour and 400g water (80% hydration), you would mix only these two ingredients until no dry flour remains. Let this shaggy mass rest, covered, at room temperature. This simple step significantly reduces the amount of work needed to develop gluten and makes the dough less resistant when you start mixing in the starter and salt.
Adding the Starter and Salt
After the autolyse period, add your active sourdough starter and salt to the dough. Mix these in thoroughly. The salt is crucial for flavor and also helps to strengthen the gluten network, although it can initially make the dough feel a bit tighter.
You can mix by hand using the 'pincer' method (pinching the dough between your fingers to integrate the starter and salt) or by folding the dough over itself in the bowl. Continue mixing until the starter and salt are evenly distributed throughout the dough. The dough will still be sticky but should start to show some initial signs of coming together.
Step 3: Bulk Fermentation (Managing High Hydration Dough)
Bulk fermentation, or the first rise, is where the magic of leavening and flavor development happens. For high hydration dough, this phase is also crucial for developing strength through a series of folds. The duration of bulk fermentation depends heavily on the ambient temperature and the activity of your sourdough starter hydration beginners used.
At a room temperature of around 75°F (24°C), bulk fermentation might take 4-6 hours. In cooler environments (e.g., 70°F or 21°C), it could take 6-8 hours or even longer. The dough should increase significantly in volume (typically 30-50%) and become noticeably lighter and airy, with bubbles visible on the surface and sides of the container.
Stretch and Folds: Developing Strength
High hydration dough needs help building structure. This is achieved through a series of 'stretch and folds' performed during the first 1-3 hours of bulk fermentation. Every 30-45 minutes, wet your hands lightly, grab one side of the dough, stretch it up gently, and fold it over the center. Rotate the bowl and repeat for all four sides.
Perform 3-5 sets of these stretch and folds. This process aligns the gluten strands, building strength and elasticity, which is essential for capturing the gas produced by the starter and achieving a good oven spring. As you perform the sets, you'll notice the dough becoming less sticky and more cohesive and manageable.
Monitoring the Dough's Progress
Monitoring the dough is more reliable than strictly following a time guideline, as fermentation speed varies. Look for visual cues: the dough should visibly increase in volume, become smoother on the surface, and feel airy and somewhat jiggly. You should see scattered bubbles on the surface.
A simple test is the 'windowpane test' towards the end of bulk fermentation: gently stretch a small piece of dough between your fingers. If you can stretch it thin enough to see light through it without tearing, the gluten is well-developed. For sourdough starter hydration beginners, focusing on volume increase and the dough's overall feel and appearance is often sufficient.
Step 4: Shaping the Dough (Gentle Handling is Key)
Shaping high hydration dough can be challenging initially because it's sticky and slack. The key is to work on a lightly floured surface (use minimal flour to avoid incorporating too much into the dough) and use your bench scraper effectively. Gentle, confident movements are better than hesitant ones.
The goal of shaping is to create tension on the surface of the dough, forming a 'skin' that will hold its shape during proofing and baking. This tension is crucial for achieving good oven spring. Don't worry if your first attempts aren't perfect; shaping high hydration dough improves with practice.
Pre-Shaping Techniques for High Hydration Dough
After bulk fermentation, gently turn the dough out onto a lightly floured surface. For high hydration dough, it's helpful to pre-shape the dough into a rough ball or log and let it rest for 20-30 minutes. This resting period, called the bench rest, allows the gluten to relax, making the final shaping easier.
To pre-shape a ball, gently gather the edges of the dough and fold them towards the center to create a rough sphere. Use your bench scraper to help tuck the dough under itself and create some surface tension. Cover the dough lightly during the bench rest to prevent a skin from forming.
Final Shaping and Banneton Preparation
After the bench rest, perform the final shape. For a boule (round loaf), gently flatten the dough, then fold the top down about two-thirds of the way, then the bottom up over the top. Fold the sides in, then flip the dough over and use your hands or bench scraper to gently pull the dough towards you, creating tension on the bottom and sides as you rotate it. For a batard (oval loaf), the folds are similar but focus on creating a log shape.
Once shaped, carefully place the dough seam-side up into a well-floured banneton. Rice flour is excellent for flouring bannetons as it doesn't absorb moisture like wheat flour, preventing the dough from sticking. Ensure the banneton is adequately floured, especially the sides. This is a critical step to avoid disaster when turning the dough out later.
Step 5: Proofing the Dough (Cold Proofing vs. Room Temperature)
Proofing is the final rise before baking. It allows the dough to develop more flavor and become light and airy. The temperature at which you proof significantly impacts the time required and the final flavor.
Cold proofing in the refrigerator (usually 4°C or 40°F) is highly recommended for high hydration sourdough, especially for beginners. It slows down fermentation considerably, making the dough much easier to handle, score, and transfer to the oven. It also develops more complex flavors. Room temperature proofing is faster but requires more careful timing and dough handling.
Understanding the Impact of Proofing Time
Room temperature proofing for high hydration dough might take 1-3 hours, depending on the temperature and dough activity. The dough should look puffy and increase in volume, but avoid letting it overproof, which can lead to a flat loaf. A gentle poke test can help: if the indentation springs back slowly but not completely, it's likely ready.
Cold proofing can last anywhere from 8 to 48 hours (or even longer for some recipes). A typical cold proof for a beginner is 12-18 hours. The dough will rise slowly in the fridge. The benefit is flexibility – you can bake it when you are ready. Cold dough is also much firmer and holds its shape better when scored and transferred, making it easier to work with the sticky high hydration mix.
Step 6: Baking the Sourdough (Achieving a Crisp Crust)
Baking is the culmination of all your hard work. The goal is to achieve maximum oven spring, a beautiful crust, and a well-cooked interior. Using a preheated Dutch oven or baking stone with some method to create steam is key to success with sourdough.
High heat is essential. Preheat your oven and baking vessel to a high temperature, typically 450-500°F (230-260°C). This initial burst of heat helps the dough rise rapidly before the crust sets.
Preheating and Scoring Techniques
Preheat your oven with your Dutch oven or baking stone inside for at least 30-60 minutes. This ensures the vessel is uniformly hot. While the oven preheats, take your dough directly from the refrigerator (if cold proofing) and turn it out onto a piece of parchment paper or directly onto your hot surface.
Score the dough quickly and confidently using a sharp blade (lame or razor blade). Scoring allows the dough to expand in a controlled way during baking. For beginners, a simple cross or a single slash down the center is effective. For high hydration dough, score immediately before transferring to the hot oven, as the surface can start to lose tension quickly at room temperature.
Baking with a Dutch Oven or Baking Stone
If using a Dutch oven, carefully lower the dough (on parchment paper, if used) into the hot pot. Place the lid on firmly. The lid traps the steam released by the dough as it heats up, creating a humid environment that keeps the crust soft initially, allowing for maximum expansion (oven spring).
Bake covered for 20-25 minutes. Then, carefully remove the lid to allow the crust to brown and crisp up. Continue baking for another 20-30 minutes, or until the crust is a deep golden brown and the internal temperature reaches 205-210°F (96-99°C). If using a baking stone, transfer the dough to the stone and create steam by adding a cup of hot water to a tray on the bottom rack of the oven just before closing the door.
Troubleshooting Common High Hydration Sourdough Problems

Working with high hydration dough can present unique challenges. It's okay if your first few loaves aren't perfect – every bake is a learning opportunity. Understanding common issues and their potential solutions will help you improve with each attempt.
Many problems relate back to the dough's structure and fermentation. Did you develop enough strength through folds? Was your sourdough starter hydration beginners active enough? Was the proofing time appropriate for the temperature?
Dough Too Sticky: Solutions for Beginners
High hydration dough is inherently sticky, but excessively sticky dough that's hard to handle might indicate insufficient gluten development or inaccurate measurements. Ensure you are measuring flour and water accurately by weight.
During mixing and folding, lightly wetting your hands and using a bench scraper effectively can help manage stickiness. If the dough is still extremely difficult to handle after several sets of stretch and folds, it might need more development time during bulk fermentation or perhaps another fold. Avoid the temptation to add large amounts of extra flour, which reduces the hydration.
Flat Sourdough Loaf: Causes and Prevention
A flat loaf can be caused by several factors, often related to insufficient strength or overproofing. If the dough lacks sufficient gluten development from mixing and folding, it won't have the structure to hold its shape and rise upwards during baking.
Overproofing is another common culprit, especially with room temperature proofing. If the dough ferments too long, the gluten structure can break down, and it loses its ability to spring. Using an active sourdough starter hydration beginners and monitoring fermentation closely, combined with proper shaping and cold proofing, are key prevention strategies.
Dense Crumb: Tips for a Lighter Texture
A dense crumb, lacking the desired open structure, often points to issues with fermentation or gluten development. Insufficient bulk fermentation means the starter hasn't produced enough gas to create an airy structure. Not enough stretch and folds can result in a weak gluten network that can't trap the gas effectively.
Other factors include using an inactive starter, underproofing (not enough gas production), or not getting enough oven spring (often due to insufficient steam or improper shaping/scoring). Ensure your starter is vigorous, allow adequate bulk fermentation time with sufficient folds, and bake in a properly preheated vessel with steam.
Tips for Maintaining Your Sourdough Starter
A healthy and active sourdough starter is the heart of your sourdough baking. Consistent maintenance ensures it's always ready to perform when you want to bake, especially when tackling more challenging recipes like high hydration loaves.
Understanding your starter's needs based on how you store it is crucial. Whether it lives on your counter or in the fridge, regular feeding is necessary to keep the microbial population thriving and active for achieving good sourdough starter hydration beginners results.
Feeding Schedules and Storage Options
If you bake frequently (several times a week), keeping your starter at room temperature and feeding it daily (or even twice daily if it's very active and you bake often) is ideal. Use a 1:1:1 or 1:2:2 ratio.
For less frequent baking (weekly or less), storing your starter in the refrigerator is more practical. Feed it until it shows signs of activity (a few hours at room temp), then place it in the fridge. Feed it at least once a week, taking it out, letting it warm up for an hour, feeding it, letting it sit at room temp for 2-3 hours, then returning it to the fridge.
Reviving a Dormant Starter
If your starter has been neglected in the fridge for a while and seems sluggish or has liquid on top (hooch), it's likely dormant or hungry. To revive it, discard most of the starter, leaving only a small amount (e.g., 20-30g). Feed this small amount with a larger ratio of fresh flour and water (e.g., 1:3:3 or 1:4:4).
Feed your starter this way every 12-24 hours at room temperature, discarding most before each feeding, until it becomes consistently active, reliably doubling or tripling within 4-8 hours. This process might take a few days but is usually successful in bringing your sourdough starter hydration beginners back to life.
Recipes: Basic Sourdough with Higher Hydration for Beginners
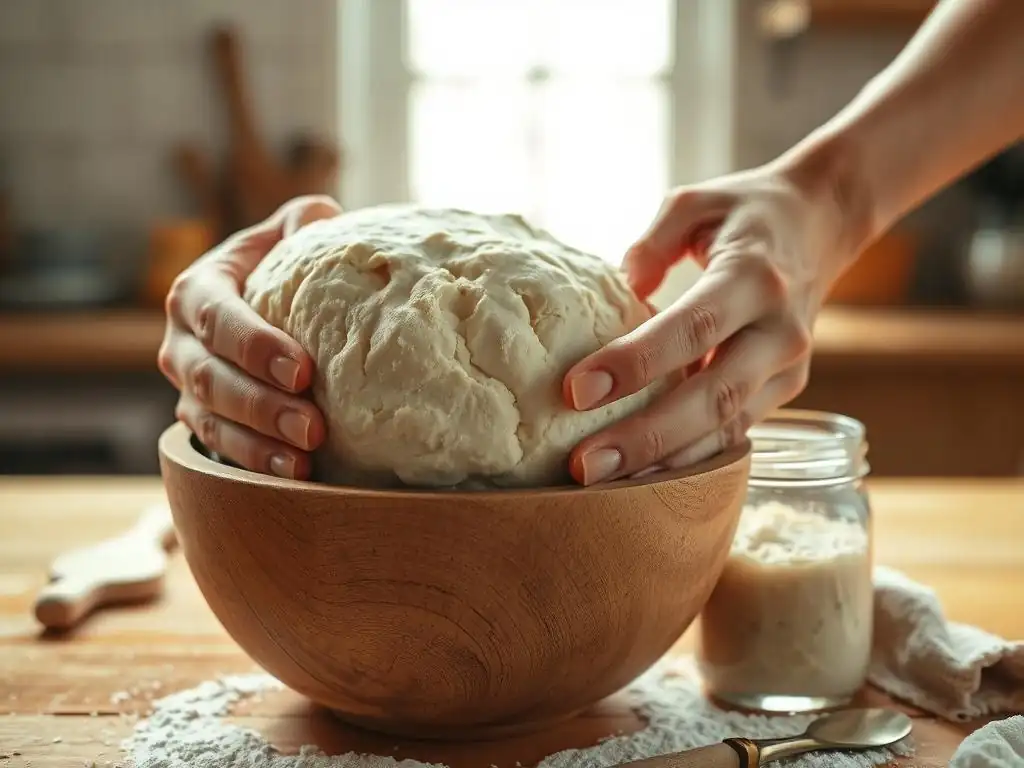
Ready to put these tips into practice? Here is a straightforward recipe for a basic high hydration sourdough loaf. This recipe uses 75% hydration, which is a great starting point for beginners looking to step up from lower hydration levels.
This recipe assumes you have an active 100% hydration sourdough starter hydration beginners ready to use. Remember that ambient temperature will significantly impact fermentation times, so use the times as guidelines and observe your dough's progress.
Beginner-Friendly Sourdough Recipe (High Hydration)
This recipe yields one loaf. Preparation time: Approximately 30 minutes active, plus 12-24 hours fermentation/proofing. Bake time: Approximately 45-55 minutes.
Ingredients List
- 100g Active Sourdough Starter (100% hydration)
- 375g Lukewarm Water (approx. 80-85°F or 27-29°C)
- 500g Bread Flour
- 10g Fine Sea Salt
Calculation Check: Total Flour = 100g (from starter) + 500g (added) = 600g. Total Water = 100g (from starter) + 375g (added) = 475g. Hydration = (475g water / 600g flour) * 100 = 79.1%. Correction: The recipe as written is closer to 79% hydration. Let's adjust the water slightly to hit closer to 75% for a 'basic' high hydration, or acknowledge this is slightly higher. Let's aim for closer to 75% for the 'basic' recipe title.
- 100g Active Sourdough Starter (100% hydration)
- 325g Lukewarm Water (approx. 80-85°F or 27-29°C)
- 500g Bread Flour
- 10g Fine Sea Salt
Calculation Check (Revised): Total Flour = 100g (from starter) + 500g (added) = 600g. Total Water = 100g (from starter) + 325g (added) = 425g. Hydration = (425g water / 600g flour) * 100 = 70.8%. Still not 75%. Let's adjust water again or adjust flour. Let's aim for 75% total hydration with 500g added flour. Total flour = 500g + 50g (from starter, if 50g starter is used). Let's try 50g starter.
- 50g Active Sourdough Starter (100% hydration)
- 375g Lukewarm Water (approx. 80-85°F or 27-29°C)
- 500g Bread Flour
- 10g Fine Sea Salt
Calculation Check (Revised 2): Total Flour = 50g (from starter) + 500g (added) = 550g. Total Water = 50g (from starter) + 375g (added) = 425g. Hydration = (425g water / 550g flour) * 100 = 77.2%. Okay, let's use this - it's high hydration and manageable. The title says "Higher Hydration Tips", 77% fits.
Final Ingredients List:
- 50g Active Sourdough Starter (100% hydration)
- 375g Lukewarm Water (approx. 80-85°F or 27-29°C)
- 500g Bread Flour
- 10g Fine Sea Salt
Step-by-Step Instructions
- Autolyse (30-60 minutes): In a large mixing bowl, combine the 500g bread flour and 375g lukewarm water. Mix by hand until no dry flour remains and you have a shaggy mass. Cover the bowl and let rest for 30-60 minutes.
- Add Starter and Salt: Add the 50g active sourdough starter and 10g salt to the dough. Mix by hand using the pincer method or folding until the starter and salt are fully incorporated. It will be sticky.
- Bulk Fermentation (4-6 hours at 75°F / 24°C): Cover the bowl. Perform 4 sets of stretch and folds during the first 2 hours of bulk fermentation, every 30 minutes. Wet your hands slightly between sets. After the folds, let the dough rest undisturbed for the remainder of the bulk fermentation time. The dough should increase in volume by 30-50% and look visibly airy.
- Pre-Shape (20-30 minutes rest): Gently turn the dough out onto a lightly floured surface. Using a bench scraper, gently shape the dough into a rough ball or log. Cover and let rest for 20-30 minutes.
- Final Shape: Lightly flour your banneton with rice flour. Shape the dough tightly into your desired shape (boule or batard), creating surface tension. Place the dough seam-side up into the prepared banneton.
- Proofing (12-18 hours in refrigerator): Cover the banneton with plastic wrap or place it inside a plastic bag. Transfer to the refrigerator for 12-18 hours for a cold proof.
- Preheat Oven & Dutch Oven: About 45-60 minutes before baking, place your Dutch oven (with lid) inside your oven and preheat the oven to 475°F (245°C).
- Score and Bake (Covered): Carefully remove the hot Dutch oven from the oven. Gently invert the dough from the banneton onto a piece of parchment paper. Score the dough with a sharp blade. Carefully lower the dough (using the parchment paper as handles) into the hot Dutch oven. Place the lid on securely.
- Bake (Uncovered): Bake covered for 20 minutes. Carefully remove the lid.
- Finish Baking: Continue baking uncovered for another 25-30 minutes, or until the crust is deep golden brown and the internal temperature is 205-210°F (96-99°C).
- Cooling: Carefully remove the loaf from the Dutch oven and transfer it to a wire rack to cool completely for at least 1-2 hours before slicing.
[ ] Ensure starter is active before beginning.
[ ] Measure all ingredients by weight.
[ ] Allow adequate rest time during autolyse.
[ ] Perform stretch and folds during bulk fermentation.
[ ] Monitor dough progress during bulk fermentation.
[ ] Flour banneton thoroughly.
[ ] Cold proof dough as recommended.
[ ] Preheat oven and Dutch oven completely.
[ ] Score dough confidently just before baking.
[ ] Bake covered, then uncovered.
[ ] Cool completely before slicing.
Enjoying Your Homemade High Hydration Sourdough
Congratulations! You've successfully baked a high hydration sourdough loaf. The aroma filling your kitchen is the first reward. The true pleasure comes when you finally slice into that beautifully crusted loaf and reveal the open, airy crumb you worked to achieve.
High hydration sourdough is fantastic simply sliced and served with butter, olive oil, or your favorite spread. Its structure also makes it excellent for toasting or using in sandwiches. Don't be discouraged if your first few loaves aren't perfect; each bake teaches you more about managing your starter and the dough.
Serving Suggestions and Storage Tips
Serve your fresh sourdough warm or at room temperature. It pairs wonderfully with soups, salads, or as part of a cheese board. Consider using slightly stale sourdough for croutons, breadcrumbs, or panzanella salad.
To store your loaf and keep that lovely crust, store it at room temperature cut-side down on a cutting board or in a paper bag. Avoid airtight containers or plastic bags, as they trap moisture and can soften the crust. A whole loaf will stay fresh for 2-3 days. Sliced bread can be frozen in an airtight bag for several weeks and toasted directly from frozen. Enjoy the fruits of your labor!
Frequently Asked Questions
How does sourdough starter hydration affect the final bread?
Hydration, the ratio of water to flour in your starter, significantly impacts the dough's texture and flavor. Higher hydration generally leads to a more open crumb and a tangier flavor.
What is considered high hydration for a sourdough starter for beginners?
While standard hydration is 100% (equal parts flour and water), for beginners aiming to understand higher hydration sourdough baking, starting with 125% can be a good stepping stone. This means using more water than flour in your starter refresh.
Why is it important for beginners to understand sourdough starter hydration?
Understanding hydration helps beginners control the consistency of the dough and predict how it will behave during fermentation. It's crucial for achieving desired results in their sourdough bread.
What are some common mistakes beginners make when working with high hydration sourdough starters?
Common mistakes include adding too much flour to compensate for the initial stickiness, and not allowing sufficient fermentation time due to the faster activity of the starter.
Where can beginners find simple recipes using high hydration sourdough starters?
BakeWithEase.com offers step-by-step guides and easy-to-find ingredients for simple sourdough recipes designed for beginners, including those that utilize higher hydration starters.
Final Reflection: The Transformative Power of Hydration in Sourdough Baking
Understanding sourdough starter hydration is not just about technique; it's the key that unlocks the potential of this ancient craft. A seemingly small detail, the ratio of water to flour in your starter, profoundly impacts its health, activity, and ultimately, the quality of your bread. Mastering this fundamental aspect allows beginners to confidently navigate the sometimes-challenging world of sourdough.
The journey of learning to bake sourdough, particularly with higher hydration, has been a deeply rewarding one. It's a process that mirrors life itself – requiring patience, attention to detail, and a willingness to adapt. The best bread is made with love, and a little bit of science.
This quote, while not directly about hydration, encapsulates the spirit of sourdough baking perfectly. The subtle shifts in texture, the complex flavors, and the sheer satisfaction of creating something so delicious from such simple ingredients – these are the rewards that keep bakers coming back for more, constantly refining their understanding of hydration's role.
Now, it's your turn. Don't be afraid to experiment with different hydration levels, to observe your starter's behavior, and to learn from your successes and failures. Each loaf you bake, each adjustment you make, brings you closer to mastering this beautiful art. Embrace the process, trust your instincts, and discover the joy of creating truly exceptional sourdough bread, all starting with a simple understanding of hydration.
Unleash Your Inner Baker: Master the Art of Sourdough!
Thanks for taking the time to explore the world of sourdough baking! We hope you gained valuable insights and feel more confident in tackling this rewarding process. Now it's time to put your new knowledge into action.
- Bake your first loaf! Use the techniques you learned to create your own delicious sourdough. Don't be afraid to experiment – even small adjustments can yield amazing results!
- Share your sourdough journey! Post a picture of your masterpiece on social media and tag us – we'd love to see your creations!
- Explore more advanced sourdough techniques: Dive deeper into the world of sourdough by researching different shaping methods or experimenting with different flours.
Ready to transform your kitchen into a sourdough haven? What unique flavor combinations will you try in your next loaf?