
The Intriguing World of Basic Sourdough: Your First Recipe

Welcome to BakeWithEase!
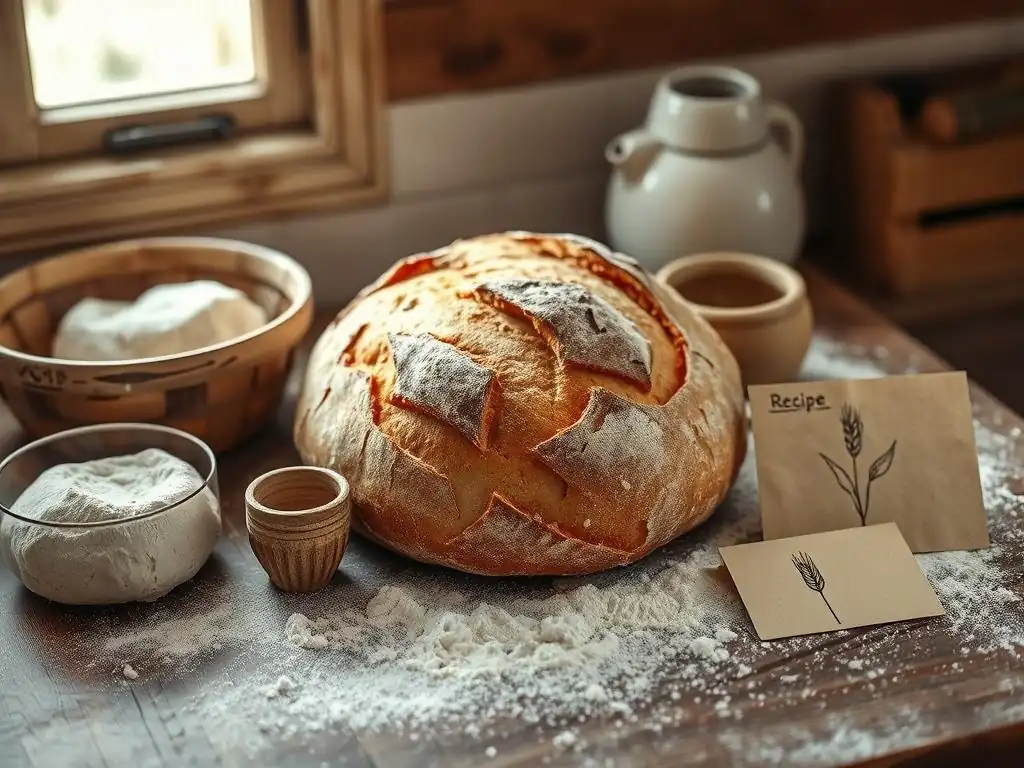
Dive into the intriguing world of sourdough and discover how surprisingly simple it can be to bake your own delicious, crusty loaf. While this article explores an easy beginner sourdough recipe, don't let the "beginner" label fool you – the techniques you'll learn here are foundational for mastering more complex bakes. Ready to unlock the secrets to that tangy, artisan flavor? Let's get started, and explore the magic of sourdough together, unraveling the mysteries of fermentation and transforming simple ingredients into something truly extraordinary.
- BakeWithEase Presents: Your Easy Beginner Sourdough Recipe
- Understanding Sourdough: An Introduction for Beginners
- Gathering Your Sourdough Essentials: Ingredients and Equipment
-
Easy Beginner Sourdough Recipe: A Step-by-Step Guide
- Step 1: Preparing Your Sourdough Starter
- Step 2: Mixing the Dough: The Autolyse Stage
- Step 3: Incorporating the Starter and Salt
- Step 4: Bulk Fermentation: The First Rise
- Step 5: Shaping the Dough: Creating a Taut Surface
- Step 6: Proofing: The Second Rise
- Step 7: Baking Your Sourdough Loaf: Achieving Golden Perfection
- Step 8: Cooling and Enjoying Your Homemade Sourdough
- Troubleshooting Your First Sourdough: Common Issues and Solutions
- Sourdough Baking Tips for Beginners: Ensuring Success
- Next Steps: Expanding Your Sourdough Baking Skills
- Frequently Asked Questions
- Final Reflection: The Humble Loaf, A Journey of Discovery
- Unleash Your Inner Baker: Start Your Sourdough Journey!
BakeWithEase Presents: Your Easy Beginner Sourdough Recipe
Embarking on the sourdough journey can feel a little daunting at first, but with the right guidance and a simple approach, it's incredibly rewarding. This guide is designed specifically for beginners, breaking down each step into manageable parts, making your first easy beginner sourdough recipe experience a success. Forget the complex jargon; we're here to demystify the process and help you bake a delicious loaf with confidence.
Sourdough bread, with its characteristic tangy flavor and chewy texture, is a testament to the power of natural fermentation. It's a living bread, relying on a culture of wild yeast and bacteria rather than commercial yeast. While it requires a little more time and patience than conventional bread, the result is a loaf with unparalleled depth of flavor and texture that is truly worth the effort. This easy beginner sourdough recipe will introduce you to the fundamental techniques.
Understanding Sourdough: An Introduction for Beginners
Sourdough baking taps into ancient bread-making traditions, using a naturally occurring leavening agent. Instead of a packet of instant yeast, you cultivate a "starter," a living mixture of flour and water that harbors wild yeasts and lactic acid bacteria. These microorganisms work together to produce the gas that makes the bread rise, contributing unique flavors and textures along the way. Understanding this basic concept is key to mastering your first easy beginner sourdough recipe.
The beauty of sourdough lies in its simplicity – just flour, water, salt, and your starter. Yet, the interactions between these few ingredients, guided by time and temperature, create a complex and flavorful bread. It's a process that teaches patience and observation, as you learn to read the signs the dough gives you throughout fermentation. Our easy beginner sourdough recipe focuses on these core principles.
What is Sourdough Bread? A Simple Explanation
Sourdough bread is bread that has been leavened using a sourdough starter. Unlike bread made with commercial yeast, which relies on a single strain of Saccharomyces cerevisiae to produce carbon dioxide quickly, sourdough bread uses a diverse microbial community. This community, primarily composed of wild yeasts and lactic acid bacteria (LAB), ferments the sugars in the flour, producing CO2 for rise and various organic acids (like lactic and acetic acid) that contribute to the characteristic sour flavor and improve the bread's keeping qualities.
Think of a sourdough starter as a small, thriving ecosystem. When added to dough, this ecosystem begins to break down the flour's starches and proteins. The wild yeasts consume sugars and produce CO2, while the LAB produce acids. These acids not only give sourdough its tang but also help break down gluten, potentially making the bread easier to digest for some people. This natural leavening process is the heart of any easy beginner sourdough recipe.
The Magic of Sourdough Starter: Wild Yeast and Fermentation
A sourdough starter is essentially a fermented mixture of flour and water. It's created by simply combining flour and water and letting it sit at room temperature, allowing naturally present wild yeasts and bacteria from the environment and the flour itself to colonize the mixture. Over several days of regular feeding (removing some starter and adding fresh flour and water), this microbial community strengthens and becomes stable enough to reliably leaven bread.
The wild yeasts in the starter, though often slower than commercial yeast, are resilient and contribute unique flavors. The lactic acid bacteria, which often outnumber the yeasts, produce lactic and acetic acids. Lactic acid provides a milder, yogurt-like tang, while acetic acid contributes a sharper, vinegar-like note. The balance between these acids can be influenced by feeding ratios, temperature, and hydration levels, allowing for a wide range of flavor profiles in sourdough bread. A healthy, active starter is the foundation of a successful easy beginner sourdough recipe.
Why Choose Sourdough? Benefits and Flavor Profile
Beyond its distinctive tangy flavor and chewy texture, sourdough bread offers several potential benefits. The long fermentation process can break down complex carbohydrates and gluten, which some studies suggest may improve digestibility for individuals sensitive to gluten (though it is not suitable for those with Celiac disease). The fermentation also increases the bioavailability of certain nutrients by breaking down phytic acid, an antinutrient found in grains that can inhibit mineral absorption.
From a flavor perspective, sourdough is simply unmatched by commercially yeasted bread. The prolonged fermentation develops a complex array of flavors that range from mildly tangy to intensely sour, depending on the starter and the fermentation process. The crust is typically robust and crackly, while the interior (crumb) is airy and open with an appealing chew. Baking an easy beginner sourdough recipe allows you to experience these unique characteristics firsthand.
Gathering Your Sourdough Essentials: Ingredients and Equipment
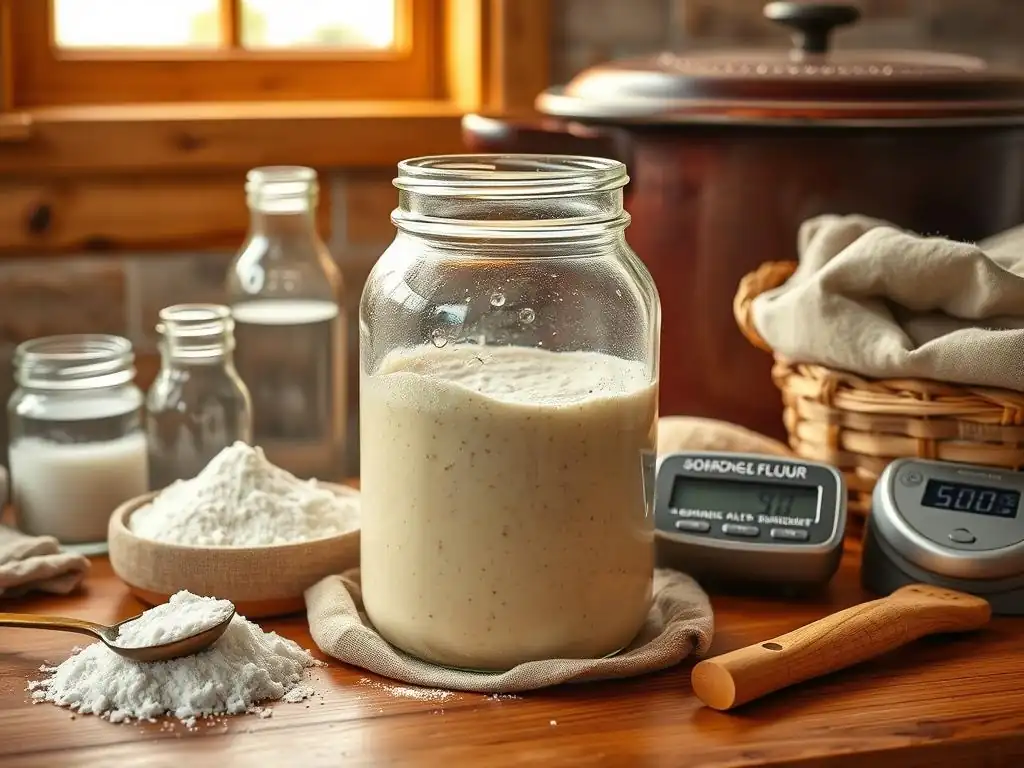
Having the right ingredients and basic equipment is crucial for a smooth baking process, especially when tackling your first easy beginner sourdough recipe. You don't need a professional bakery setup, but a few key items will make the journey much easier and more enjoyable.
Think of this section as your prep list before the real fun begins. Gathering everything beforehand eliminates last-minute scrambling and helps ensure accuracy, which is particularly important in sourdough baking where small variations can impact the final result.
Essential Ingredients for Your First Sourdough Loaf
Making sourdough requires surprisingly few ingredients, but their quality matters. For an easy beginner sourdough recipe, stick to the basics and focus on getting the best quality you can.
Flour Power: Choosing the Right Flour for Sourdough
For your first easy beginner sourdough recipe, a good quality bread flour is highly recommended. Bread flour typically has a higher protein content (around 12-14%) compared to all-purpose flour (around 10-12%). This higher protein means more gluten development, which is essential for creating the strong structure needed to trap the gases produced by the starter and achieve a good rise and open crumb.
While you can experiment with different flours like whole wheat, rye, or spelt later, starting with a reliable bread flour provides a more predictable outcome. Many bakers recommend using the same type of flour for both your starter and your dough to maintain consistency. For example, if your starter is fed with bread flour, use bread flour in your dough for this easy beginner sourdough recipe.
Water Quality: Importance for Sourdough Baking
The water you use can affect your sourdough starter and dough. Ideally, use filtered or non-chlorinated water. Chlorine in tap water can potentially harm the beneficial microorganisms in your starter, slowing down or inhibiting their activity. If your tap water is heavily chlorinated, letting it sit uncovered for 24 hours allows the chlorine to dissipate.
The temperature of the water also plays a role. Using warm water (around 80-85°F or 27-30°C) can help kickstart fermentation, especially in cooler environments. However, avoid hot water, as it can kill the yeast and bacteria. For this easy beginner sourdough recipe, aim for lukewarm water unless the recipe specifically calls for a different temperature.
Salt: Enhancing Flavor and Controlling Fermentation
Salt is more than just a flavor enhancer in sourdough; it also plays a crucial role in controlling fermentation and strengthening the gluten structure. Salt slows down yeast activity, preventing the dough from rising too quickly and allowing flavors to develop more fully during the long fermentation process. It also tightens the gluten network, which helps the dough hold its shape and trap gases for a better rise.
Use a good quality non-iodized salt, such as fine sea salt or kosher salt. Iodine can interfere with yeast activity. Measure salt accurately, as too little can lead to uncontrolled fermentation and a bland loaf, while too much can kill the starter and result in a dense, overly salty bread. Typically, salt makes up about 1.8-2.2% of the total flour weight in an easy beginner sourdough recipe.
Must-Have Equipment for Easy Sourdough Baking
You don't need a professional kitchen to bake sourdough, but a few key tools will make the process much smoother and help you achieve excellent results with your easy beginner sourdough recipe.
Mixing Bowls: Selecting the Right Size and Material
You'll need at least one large mixing bowl, preferably transparent so you can observe the dough's development. Glass or plastic bowls work well, but avoid metal bowls for long fermentation periods, as they can sometimes react with the acidic dough. A bowl with a capacity of at least 4-6 quarts is suitable for a standard 500g flour recipe, allowing plenty of room for the dough to rise during bulk fermentation.
Having a second smaller bowl is also useful for mixing your starter with water before adding it to the main dough. Ensure your bowls are clean and free of any soap residue, which can inhibit fermentation. Using a consistent bowl helps you gauge the dough's volume increase during fermentation more accurately for your easy beginner sourdough recipe.
Dough Scraper: Your Best Friend for Handling Sticky Dough
A dough scraper, either plastic or metal, is an indispensable tool for handling sticky sourdough dough. It helps you scrape the dough from the bowl, divide it, and clean up surfaces. A plastic bench scraper is flexible and excellent for getting dough out of curved bowls, while a metal one is sturdier and good for portioning dough on a flat surface.
Sourdough dough is often wetter than conventional dough, making it sticky. A scraper allows you to manipulate the dough with minimal sticking to your hands, which is particularly helpful during stretch and folds and shaping. This simple tool makes working with the dough much more manageable in an easy beginner sourdough recipe.
Proofing Basket (Banneton): Shaping Your Sourdough
A proofing basket, also known as a banneton, is used for the final rise (proofing) of your shaped dough. It helps the dough hold its shape as it expands and provides support, especially for wet doughs. Bannetons are typically made of rattan, cane, or plastic. They are often floured generously (usually with rice flour, which is less likely to be absorbed by the dough) to prevent sticking.
While a banneton is highly recommended for achieving a well-shaped loaf, you can improvise for your first easy beginner sourdough recipe. A bowl lined with a well-floured tea towel or lint-free cloth can serve the same purpose. The basket or lined bowl also imparts a lovely pattern on the crust if the dough is proofed seam-side up and then inverted onto your baking surface.
Dutch Oven or Baking Stone: Achieving Oven Spring
To get that beautiful rise and crispy crust characteristic of artisan sourdough, you need a way to create steam in your oven during the initial baking phase. A Dutch oven is one of the easiest and most effective ways for beginners to do this. The lid traps the moisture released by the dough as it heats up, creating a steamy environment that allows the crust to remain pliable and the dough to expand rapidly (oven spring) before the crust sets.
Alternatively, you can use a baking stone or steel and create steam manually by placing a tray of hot water or ice cubes in the bottom of the oven. However, for an easy beginner sourdough recipe, a Dutch oven offers a more controlled and reliable steamy environment, leading to predictable results and that coveted golden crust.
Easy Beginner Sourdough Recipe: A Step-by-Step Guide
This recipe is designed to be straightforward, focusing on the fundamental steps needed to bake your first loaf of sourdough. It uses common ratios and techniques that are widely accessible for beginners. Follow these steps carefully, and you'll be well on your way to enjoying homemade sourdough bread.
Remember that sourdough baking is also about intuition and adapting to your environment (kitchen temperature, starter activity, etc.). This easy beginner sourdough recipe provides a solid framework, but don't be afraid to observe your dough and make minor adjustments as you gain experience.
Step 1: Preparing Your Sourdough Starter
Before you can bake, you need an active, bubbly sourdough starter. This recipe assumes you already have a mature starter ready to go. If you don't, you'll need to create one, which typically takes about 7-14 days of consistent feeding.
Feeding Your Starter: Ensuring Optimal Activity
About 4-12 hours before you plan to mix your dough, feed your starter. The timing depends on how active your starter is and your kitchen temperature. A common feeding ratio for maintenance is 1:1:1 (starter:water:flour by weight). For baking, a slightly larger feed, like 1:2:2 or 1:3:3, can ensure you have plenty of active starter at its peak. For example, you might discard all but 25g of your starter, then feed it with 50g of warm water (80-85°F) and 50g of bread flour. Mix well, place it in a clean jar, and cover loosely.
Your starter is ready when it has significantly increased in volume (ideally doubled or tripled), is full of bubbles, and the surface is domed. This typically happens within 4-8 hours at room temperature (around 70-75°F or 21-24°C) after a 1:1:1 feeding. If your kitchen is cooler, it will take longer; warmer, it will be faster. Using an active starter is critical for the success of this easy beginner sourdough recipe.
The Float Test: Determining Starter Readiness
A common way to check if your starter is active enough to leaven bread is the "float test." Gently take a small spoonful of your fed starter and drop it into a glass of room temperature water. If the starter floats, it is ready to use – it's light and airy due to the trapped CO2 produced by the yeast.
If the starter sinks, it may not be active enough yet. This could mean it needs more time to ferment after feeding, or perhaps your starter needs to be strengthened with more consistent feeding over time. Wait a bit longer and test again, or give it another feed. An active starter that passes the float test is essential for achieving good oven spring in your easy beginner sourdough recipe.
Step 2: Mixing the Dough: The Autolyse Stage
The autolyse is a simple but powerful technique that improves dough handling and gluten development with minimal effort. It involves mixing just the flour and water from your recipe and letting it rest.
Combining Flour and Water: Hydration is Key
In a large mixing bowl, weigh your flour (e.g., 500g bread flour) and then weigh your water (e.g., 350g water for 70% hydration). For an easy beginner sourdough recipe, starting with a hydration of 65-75% is recommended. Higher hydration (more water relative to flour) makes the dough stickier but can lead to a more open crumb. Lower hydration is easier to handle. Combine the flour and water and mix with your hands or a spatula just until no dry flour remains. The mixture will look shaggy and rough.
Do not add the salt or the starter at this stage. The autolyse allows the flour to fully absorb the water and the gluten proteins to start bonding without the interference of salt or starter. This initial hydration is crucial for gluten development and makes subsequent mixing steps easier.
Autolyse Time: Allowing Flour to Absorb Water
Cover the bowl and let the mixture rest for 30 minutes to 1 hour at room temperature. During this rest period, enzymes in the flour (protease) begin to break down proteins, and the gluten network starts to form naturally. You'll notice the dough becomes smoother and more pliable after the autolyse, even though you haven't kneaded it.
This resting period allows for passive gluten development, making the dough less resistant and easier to work with when you incorporate the starter and salt. A successful autolyse sets the stage for a well-developed dough in your easy beginner sourdough recipe.
Step 3: Incorporating the Starter and Salt
After the autolyse, it's time to add the leavening agent and the flavor enhancer.
Gently Folding in the Starter
Add the required amount of active starter (e.g., 100g) to the autolysed dough. You can dollop it on top or spread it gently over the surface. Using wet hands helps prevent sticking. Dimple the starter into the dough with your fingers, then begin gently folding and squeezing the dough to incorporate the starter evenly. The dough might feel wet and messy at first.
Continue folding and squeezing until the starter is fully integrated into the dough. There should be no visible pockets of starter. This process might take 2-5 minutes. The dough will become slightly smoother as you work the starter in.
Adding Salt: Even Distribution is Important
Once the starter is mixed in, add the salt (e.g., 10g salt). Sprinkle it evenly over the dough surface. Again, using wet hands, gently fold and squeeze the dough to distribute the salt throughout. The dough might feel a little stiffer initially after adding the salt.
Work the salt in for 2-5 minutes until it's fully incorporated. You can use a technique called "pincer method" (pinching sections of dough) or continue folding and squeezing. Ensure there are no concentrated pockets of salt. Proper salt distribution is key for flavor and structure in your easy beginner sourdough recipe.
Step 4: Bulk Fermentation: The First Rise
Bulk fermentation (or the first rise) is the longest and most crucial stage of sourdough baking. This is where the starter gets to work, fermenting the dough, producing gases, and developing flavor.
Understanding Bulk Fermentation: Time and Temperature
Bulk fermentation begins after the starter and salt are mixed in and ends when the dough is shaped. The duration is highly dependent on the temperature of your kitchen and the activity of your starter. At a typical room temperature of 70-75°F (21-24°C), bulk fermentation for an easy beginner sourdough recipe might take anywhere from 4 to 8 hours. If your kitchen is cooler, it will take longer; warmer, it will be shorter.
The dough should increase significantly in volume, ideally by 30-50%, and become visibly more airy and bubbly. You'll see bubbles on the surface and along the sides of the bowl. The dough should feel lighter and more alive. Do not wait for it to double in volume during bulk fermentation, as this can lead to over-proofing later. Learning to read the dough's cues is a key skill in sourdough.
Stretch and Folds: Developing Dough Strength
During the first 2-3 hours of bulk fermentation, you will perform a series of "stretch and folds." This technique helps develop the gluten structure without intensive kneading and redistributes the yeast and bacteria, providing them with fresh food. Perform 3-4 sets of stretch and folds, spaced 30-45 minutes apart.
To perform a stretch and fold, wet your hands to prevent sticking. Grab one side of the dough, stretch it gently upwards without tearing, and fold it over the center. Rotate the bowl a quarter turn and repeat this process with the next side. Do this 3-4 times per set. The dough will become progressively smoother and stronger with each set. After the last set, let the dough rest undisturbed for the remainder of the bulk fermentation time.
Step 5: Shaping the Dough: Creating a Taut Surface
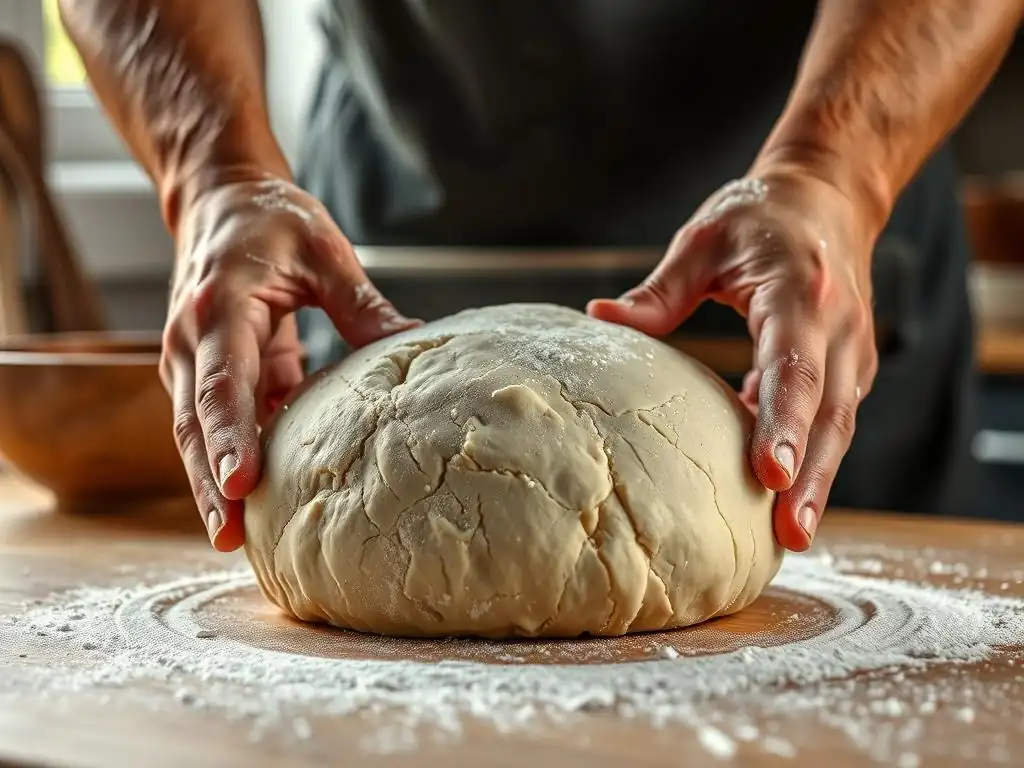
Shaping gives your dough its final form and creates tension on the surface, which helps the loaf hold its shape during proofing and contributes to good oven spring.
Pre-Shaping: Rounding the Dough Gently
Lightly flour your work surface. Gently scrape the dough out of the bowl using a dough scraper. It should look bubbly and feel airy. Gently pull the edges of the dough towards the center to form a rough ball or rectangle, depending on your desired final shape. The goal is to create a little surface tension.
Let the dough rest for 15-20 minutes, uncovered. This allows the gluten to relax, making the final shaping much easier. This short rest period is called the "bench rest." Don't skip this step in your easy beginner sourdough recipe.
Final Shaping: Creating the Desired Loaf Shape
After the bench rest, the dough should have spread out slightly but still hold some shape. Lightly flour the top of the dough. Using your dough scraper or hands, flip the dough over so the seam is now facing up.
Shape the dough into your desired final form (a boule/round or a batard/oval). Techniques vary, but the goal is to create a taut surface while minimizing degassing. For a boule, you might fold the sides in and then bring the top down, then use your hands or scraper to create tension by pulling the dough towards you while rotating it.
Once shaped, the dough needs to be placed into a floured proofing basket (banneton) or a lined bowl for the final rise. Place the dough seam-side up if using a banneton that you will invert before baking. Ensure the basket or liner is well-floured (rice flour works best) to prevent sticking. This careful shaping is vital for a beautiful loaf from your easy beginner sourdough recipe.
Step 6: Proofing: The Second Rise
Proofing is the final rise before baking. This is where the dough expands further and develops more complex flavors.
Cold Proofing in the Refrigerator: Slow Fermentation for Flavor
Cold proofing in the refrigerator is highly recommended for beginners and is a standard practice in many artisan sourdough recipes. Place the shaped dough in its proofing basket into the refrigerator (typically 35-40°F or 2-4°C) for 8 to 12 hours, or even up to 24 hours. The cold dramatically slows down fermentation, allowing enzymes to break down starches into sugars, resulting in a more flavorful crust and a better rise in the oven.
Cold proofing also makes the dough much easier to handle and score before baking, as it firms up. This extended, slow fermentation is a hallmark of great sourdough and significantly enhances the complexity of your easy beginner sourdough recipe.
Room Temperature Proofing: A Faster Option
If you're in a hurry, you can proof the dough at room temperature. Place the shaped dough in its proofing basket in a warm spot (75-80°F or 24-27°C) for 1-3 hours. The dough is ready when it has increased by about 30-40% and feels light and airy. A gentle poke test can help: if the dough springs back slowly, leaving a slight indentation, it's ready. If it springs back immediately, it needs more time. If the indentation remains completely, it's likely over-proofed.
Room temperature proofing is faster but offers less flavor development and can be trickier to time correctly, increasing the risk of over-proofing. For your first easy beginner sourdough recipe, cold proofing offers a more forgiving and flavorful approach.
Step 7: Baking Your Sourdough Loaf: Achieving Golden Perfection
Baking sourdough requires high heat and steam to achieve maximum oven spring and a beautiful crust. Using a preheated Dutch oven is the easiest way to provide these conditions at home.
Preheating Your Dutch Oven or Baking Stone
About 45-60 minutes before you're ready to bake, place your Dutch oven (with the lid on) or baking stone in your oven and preheat it to a high temperature, typically 450-500°F (230-260°C). High heat is essential for getting a good initial burst of expansion (oven spring). Ensure the Dutch oven or stone is fully heated through before placing the dough inside.
This long preheating time ensures that the vessel or stone is hot enough to immediately transfer heat to the dough, promoting a rapid rise and helping set the crust quickly. For an easy beginner sourdough recipe, don't rush this step.
Scoring the Dough: Controlling Oven Spring
Just before baking, take your proofed dough from the refrigerator (or at room temperature). Carefully invert the dough onto a piece of parchment paper or directly into the hot Dutch oven. Using a sharp razor blade (lame) or a very sharp knife, quickly score the surface of the dough with one or more cuts. Scoring allows the dough to expand in a controlled manner during oven spring, preventing it from bursting unpredictably.
Common scores include a single slash across the top for a batard or a simple cross or geometric pattern for a boule. The depth and angle of your score can influence how the loaf opens up. For an easy beginner sourdough recipe, a simple deep slash is often sufficient.
Baking Time and Temperature: Achieving a Crisp Crust
Carefully lower the dough into the preheated Dutch oven using the parchment paper as handles (if used). Place the lid on the Dutch oven and bake for 20-25 minutes. The lid traps the steam released by the dough, keeping the crust soft and allowing for maximum expansion.
After the initial covered bake, remove the lid and continue baking for another 20-30 minutes, or until the crust is deep golden brown and the internal temperature of the loaf reaches 205-210°F (96-99°C). Removing the lid allows the crust to dry out and crisp up beautifully. If using a baking stone, you would add steam manually during the first 20 minutes. This two-stage baking process is key for a great loaf from your easy beginner sourdough recipe.
Step 8: Cooling and Enjoying Your Homemade Sourdough
The final, and perhaps hardest, step is waiting for your bread to cool.
Allowing the Bread to Cool Completely
Once baked, carefully remove the loaf from the Dutch oven and place it on a wire rack to cool completely. This is a critical step! As the bread cools, steam escapes, and the internal structure sets. Cutting into hot bread can result in a gummy, dense crumb.
Allowing the loaf to cool for at least 2-3 hours (and ideally longer for larger loaves) ensures the best possible texture and flavor. Patience truly pays off in this easy beginner sourdough recipe.
Slicing and Serving: Enjoying the Fruits of Your Labor
Once fully cooled, slice your beautiful homemade sourdough with a serrated bread knife. Admire the open crumb and the gorgeous crust you created!
Enjoy your sourdough simply with butter, use it for sandwiches, or make toast. Share it with friends and family and bask in the glory of baking your very first easy beginner sourdough recipe!
Troubleshooting Your First Sourdough: Common Issues and Solutions
It's rare for a first sourdough loaf to be absolutely perfect, and that's okay! Learning to troubleshoot is part of the process. Here are some common issues you might encounter with your easy beginner sourdough recipe and how to address them.
Don't get discouraged by imperfect results. Each bake is a learning opportunity. Pay attention to what the dough tells you and adjust your technique or timing for the next loaf.
Dense Sourdough: Understanding Under-Proofing
If your sourdough loaf is dense with a tight, uniform crumb and lacks significant oven spring, it's likely under-proofed. This means the dough didn't ferment long enough during either the bulk fermentation or the final proofing stage. The starter didn't produce enough gas to create an open structure.
- Solution: Allow more time for fermentation in future bakes. Ensure your starter is very active before mixing the dough (passes the float test). Increase the bulk fermentation time, paying attention to the dough's volume increase (aim for 30-50% increase). If cold proofing, ensure it's in the fridge for at least 8-12 hours. If room temperature proofing, check for the slow spring-back poke test. Warmer kitchen temperatures will speed things up, cooler temperatures will slow them down.
Flat Sourdough: Addressing Over-Proofing
If your loaf spreads out excessively on the baking surface, lacks oven spring, and the crumb is often gummy or uneven, it's likely over-proofed. This means the dough fermented for too long, and the gluten structure weakened and couldn't hold the gas produced by the yeast. The dough might have felt overly fragile or collapsed slightly when handled.
- Solution: Reduce fermentation time in future bakes. This might mean a shorter bulk fermentation (stop when the dough has increased by 30-50%, not doubled) or a shorter final proof, especially if proofing at room temperature. If cold proofing, perhaps reduce the time slightly if your fridge is warmer than standard. Pay attention to the dough's feel – over-proofed dough often feels slack and heavy.
Sour Taste: Managing Fermentation Time
The level of sourness in sourdough is primarily controlled by the lactic acid bacteria (LAB) activity, which is influenced by time and temperature. A very sour loaf can result from a long, warm fermentation, especially if your starter favors acetic acid production.
- Solution: If you prefer a milder flavor, try shortening the bulk fermentation time slightly or proofing for a shorter period. Using a younger starter (baking sooner after feeding, when it's active but before peak sourness) can also result in a less tangy loaf. Cold proofing generally develops a pleasant tang, but extremely long cold proofs (>24 hours) can increase sourness. Adjusting your easy beginner sourdough recipe's timing to suit your taste is part of the fun.
Tough Crust: Adjusting Baking Time and Temperature
A crust that is too hard or tough might be a result of baking for too long or at too high a temperature without sufficient steam.
- Solution: Ensure you are using sufficient steam during the initial baking phase (using a lid on the Dutch oven is key for the first 20-25 minutes). You might also try reducing the overall baking time slightly or lowering the oven temperature for the second, uncovered phase. Ensure your oven temperature is accurate – an oven thermometer can help. The crust should be deep golden brown, not burnt.
Sourdough Baking Tips for Beginners: Ensuring Success

Mastering sourdough takes practice, but these tips can help you achieve better results with your easy beginner sourdough recipe from the start.
Remember that every kitchen is different, and every starter has its own personality. Be patient, observe, and learn from each loaf you bake.
Measuring Ingredients Accurately: Precision is Key
Sourdough baking is a bit like chemistry, especially in the initial stages. Using a digital kitchen scale to weigh your ingredients (flour, water, starter, and salt) is far more accurate than using volume measurements (cups). Small variations in ingredient ratios can significantly impact the dough's consistency and fermentation.
For example, 1 cup of flour can weigh anywhere from 120g to 150g depending on how it's scooped and packed. Using a scale ensures you are consistently hitting the hydration levels and salt percentages intended in your easy beginner sourdough recipe, leading to more predictable outcomes. Aim for precision, especially in your first few bakes.
Patience is a Virtue: Sourdough Takes Time
Sourdough is not quick bread. It relies on slow, natural fermentation, which takes hours, not minutes. Rushing the process at any stage – bulk fermentation, proofing, or cooling – will negatively impact the final loaf's texture and flavor.
Plan your baking schedule to accommodate the long fermentation times. Understand that the dough dictates the timeline, not the clock on the wall. Pay attention to the dough's look and feel rather than strictly adhering to suggested times, as these are just estimates and vary with temperature. Embrace the slow pace; it's part of the magic of an easy beginner sourdough recipe.
Don't Be Afraid to Experiment: Finding Your Perfect Recipe
While following an easy beginner sourdough recipe precisely is important for your first few loaves, don't be afraid to experiment as you gain confidence. Try slightly higher or lower hydration levels, adjust bulk fermentation time based on your kitchen temperature, or experiment with different proofing times.
Keep a baking journal to note your process, timing, and results. This will help you understand what works in your environment and how different variables affect your loaf. Finding your perfect easy beginner sourdough recipe might involve tweaking ratios or techniques based on your personal preferences and conditions.
Next Steps: Expanding Your Sourdough Baking Skills
Once you've successfully baked your first easy beginner sourdough recipe, a whole world of possibilities opens up! Sourdough is incredibly versatile.
Ready to explore beyond the basic loaf? Here are some ways to continue your sourdough journey and build upon the skills learned from your first easy beginner sourdough recipe.
Exploring Different Flour Combinations
The basic recipe uses bread flour, but you can incorporate other types of flour to change the flavor, texture, and nutritional profile of your bread. Try substituting a portion of the bread flour (e.g., 10-20%) with whole wheat flour, rye flour, or spelt flour.
Each flour type behaves differently due to varying protein content and absorption rates. Whole wheat and rye will absorb more water and can result in a denser loaf, while spelt offers a slightly sweeter flavor. Adjusting hydration might be necessary when using different flours. Experimenting with flour blends is a fantastic way to customize your easy beginner sourdough recipe experience.
Adding Flavors and Inclusions to Your Sourdough
Once comfortable with the basic dough, you can start adding inclusions to create flavored sourdough loaves. Common additions include seeds (sesame, poppy, sunflower), nuts (walnuts, pecans), dried fruits (cranberries, raisins), cheese, herbs (rosemary, thyme), or even roasted garlic.
Inclusions are typically added during the mixing stage after the autolyse or during the first set of stretch and folds. Be mindful that adding heavy inclusions can sometimes impact the dough's rise. Start with a small percentage (e.g., 10-20% of the flour weight) and see how the dough handles it. These additions can transform your easy beginner sourdough recipe into something truly unique.
Mastering Advanced Sourdough Techniques
As you gain experience, you can explore more advanced techniques to refine your sourdough baking. This might include using a stiff sourdough starter instead of a liquid one, experimenting with longer or shorter bulk fermentation or proofing times, or exploring different shaping methods for specific loaf characteristics.
Techniques like lamination (stretching the dough into a thin sheet) or adding levain (a specifically built-up starter) are also part of the advanced sourdough repertoire. Don't feel pressured to rush into these; master the fundamentals from your easy beginner sourdough recipe first, and then gradually introduce new techniques as you feel ready. The sourdough journey is a continuous learning process!
Frequently Asked Questions
What exactly is sourdough and why is it so popular?
Sourdough is a type of bread made using a fermented starter instead of commercial yeast. Its popularity stems from its unique tangy flavor and potential health benefits due to the fermentation process.
Is sourdough baking difficult for beginners?
While sourdough can seem intimidating, our Easy Beginner Sourdough Recipe is designed to simplify the process. The key is understanding the starter's activity and following the steps carefully.
What ingredients do I need to make this beginner sourdough?
You'll only need a few simple ingredients: sourdough starter, flour, water, and salt. The quality of your starter significantly impacts the final product.
How long does it take to make a sourdough loaf from start to finish?
Sourdough baking requires patience. From activating the starter to baking, the entire process can take around 24-48 hours, including fermentation and proofing time.
What are some common mistakes beginners make with sourdough?
Common mistakes include using an inactive starter, over-proofing or under-proofing the dough, and not scoring the loaf properly before baking. Our recipe provides tips to avoid these pitfalls.
Final Reflection: The Humble Loaf, A Journey of Discovery
The enduring appeal of sourdough bread lies not just in its tangy flavor, but in the transformative process it represents. Learning to bake sourdough, even a simple loaf, is a journey of patience, observation, and connection with the natural world – a skill increasingly valued in our fast-paced, technology-driven society. This simple act of nurturing a starter and coaxing it into a delicious loaf offers a powerful antidote to the immediacy of modern life.
The influence of sourdough extends far beyond the kitchen table. It's a testament to the enduring power of traditional techniques, a reminder of the interconnectedness between food, culture, and community. Sourdough baking fosters a deeper appreciation for the ingredients we use and the processes involved in creating something truly nourishing. Bread is the staff of life,
a common saying, but in the case of sourdough, it's also a staff of connection, a staff of patience, and a staff of mindful creation. This simple act connects us to generations past who relied on similar methods for sustenance and community.
Now, consider your own journey. Perhaps you've just completed your first sourdough loaf, or maybe you're still contemplating the process. Regardless, I encourage you to embrace the challenge. Don't be afraid to experiment, to learn from your mistakes, and to savor the unique character of each loaf you bake. The rewards extend far beyond a delicious piece of bread; they lie in the personal growth, the connection to tradition, and the simple satisfaction of creating something beautiful and nourishing with your own two hands.
Unleash Your Inner Baker: Start Your Sourdough Journey!
Thanks for taking the time to explore the fascinating world of sourdough! We hope you now feel empowered to tackle your first loaf. Ready to take the next step?
- Bake your first sourdough boule: Use the recipe and tips from this article as your guide – you’ve got this! Remember, patience is key.
- Share your baking experience: Post a picture of your masterpiece on social media and tag us – we’d love to see your results! Use #BakeWithEaseSourdough
- Discover more sourdough secrets: Explore our other articles on different sourdough techniques and recipes.
What unique twist will you add to your first sourdough loaf? Let's hear about it in the comments below!