
Why Your Chocolate Cake is Dry (Specific Tips)

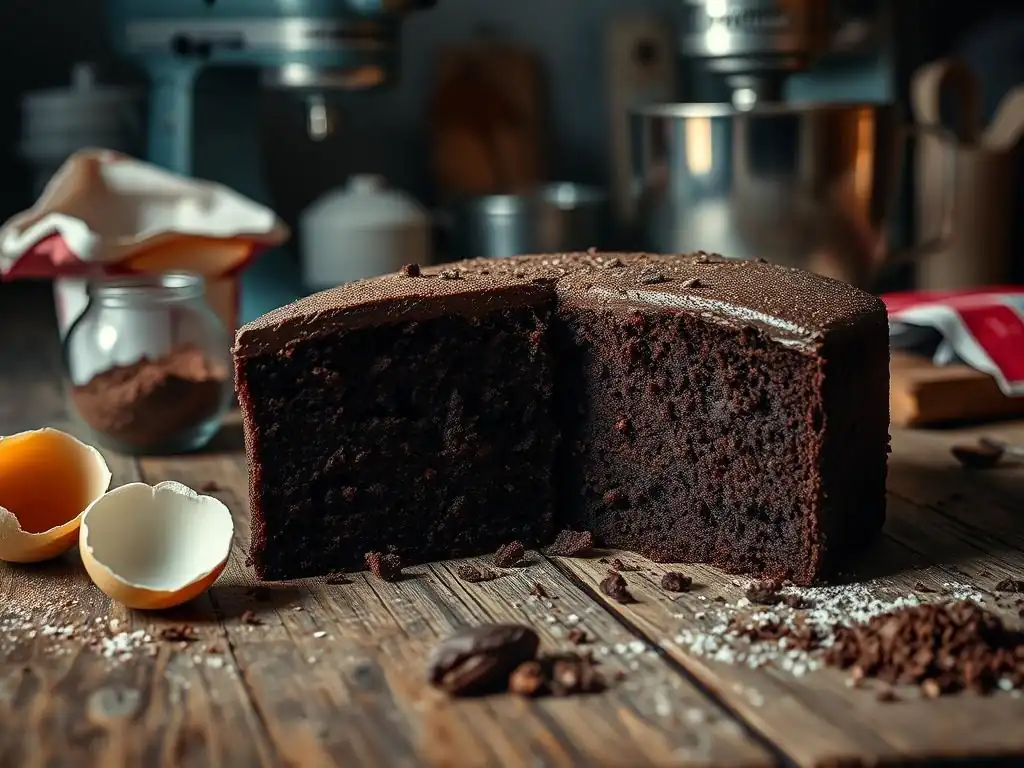
Welcome to BakeWithEase, where even the most challenging bakes become achievable! Ever wondered why your luscious chocolate cake turns out...less than perfect? We're diving deep into the secrets of moisture retention with our comprehensive guide on Dry Chocolate Cake Tips. Discover the surprisingly simple tweaks that can transform your next bake from crumbly to crave-worthy. Prepare to unlock the secrets to a perfectly moist chocolate cake, and banish dryness forever!
- Understanding Dry Chocolate Cake: A Common Baking Problem
-
Top Reasons for a Dry Chocolate Cake and How to Fix Them
- 1. Incorrect Flour Measurement: The Key to Moist Cake
- 2. Overbaking: The Most Frequent Culprit
- 3. Insufficient Liquid: Maintaining Cake Moisture
- 4. Too Much Cocoa Powder: Balancing Flavor and Moisture
- 5. Overmixing the Batter: Developing Gluten and Drying Out Cake
- 6. Using the Wrong Pan Size: Affecting Baking Time and Moisture
- Specific Tips for a Moist Chocolate Cake Every Time
- Preventing a Dry Chocolate Cake: Recipe Adjustments and Best Practices
- Troubleshooting Additional Chocolate Cake Problems
- BakeWithEase: Your Guide to Perfect Chocolate Cakes
-
Frequently Asked Questions
- Why is my chocolate cake often dry, even when I follow the recipe closely?
- What are some specific ingredients that can contribute to a dry chocolate cake?
- How can I prevent overbaking my chocolate cake?
- What kind of fats should I use to achieve a moist chocolate cake?
- Are there any secrets to adding moisture back into a slightly dry chocolate cake after it's baked?
- Final Reflection: The Sweet Science of a Moist Chocolate Cake
- Unlock the Secrets to Moist Chocolate Cake!
Understanding Dry Chocolate Cake: A Common Baking Problem
A dry chocolate cake is one of the most disappointing outcomes in baking. You envision a moist, decadent treat, but instead, you're left with a crumbly, often flavorless result that feels like sawdust in your mouth. This issue isn't just about taste; it affects the cake's texture, appearance, and overall enjoyment. Recognizing the signs early can help you understand what went wrong and how to prevent it next time.
Identifying a dry chocolate cake goes beyond just the taste. Often, the crust will appear thicker and harder than desired, and when you cut into it, the crumb feels coarse and brittle rather than soft and tender. The cake might crumble excessively when sliced, instead of holding its shape. Furthermore, it may lack the rich, deep chocolate flavor you expect, as moisture is crucial for carrying flavor compounds effectively.
Identifying the Signs of a Dry Chocolate Cake
Recognizing the symptoms of a dry chocolate cake is the first step toward fixing the problem. A primary indicator is the texture of the crumb itself. Instead of a plush, velvety interior that yields easily when pressed, a dry cake will feel dense and stiff. When you break a piece off, it will likely crumble into many small pieces rather than holding together in soft, moist clumps.
Another tell-tale sign is the crust. A properly baked, moist chocolate cake should have a relatively thin, tender crust. A dry cake, however, often develops a thick, hard crust that can be difficult to cut through. The overall appearance might also seem dull or lackluster compared to a moist cake which often has a slightly shiny surface. Finally, the taste test confirms it – if the cake feels dry and powdery in your mouth, lacking that melt-in-your-mouth quality, you've likely encountered a dry chocolate cake.
Why Moisture Matters in Chocolate Cake Baking
Moisture is absolutely fundamental to achieving a successful chocolate cake. It plays a critical role in several aspects of baking, from the initial mixing of ingredients to the final texture and shelf life of the finished product. Without adequate moisture, the structure of the cake becomes rigid and brittle, leading to that undesirable dry texture.
In the oven, moisture in the batter turns to steam, which helps the cake rise and creates a tender crumb structure. Liquids like milk, eggs, and oil or butter hydrate the dry ingredients, particularly flour and cocoa powder.
This hydration is key to developing the right amount of gluten for structure without making it tough, and it also helps dissolve sugars, contributing to tenderness. A cake with sufficient moisture will not only taste better and have a superior texture but will also stay fresh and delicious for a longer period, unlike a dry cake which can become stale very quickly.
Top Reasons for a Dry Chocolate Cake and How to Fix Them
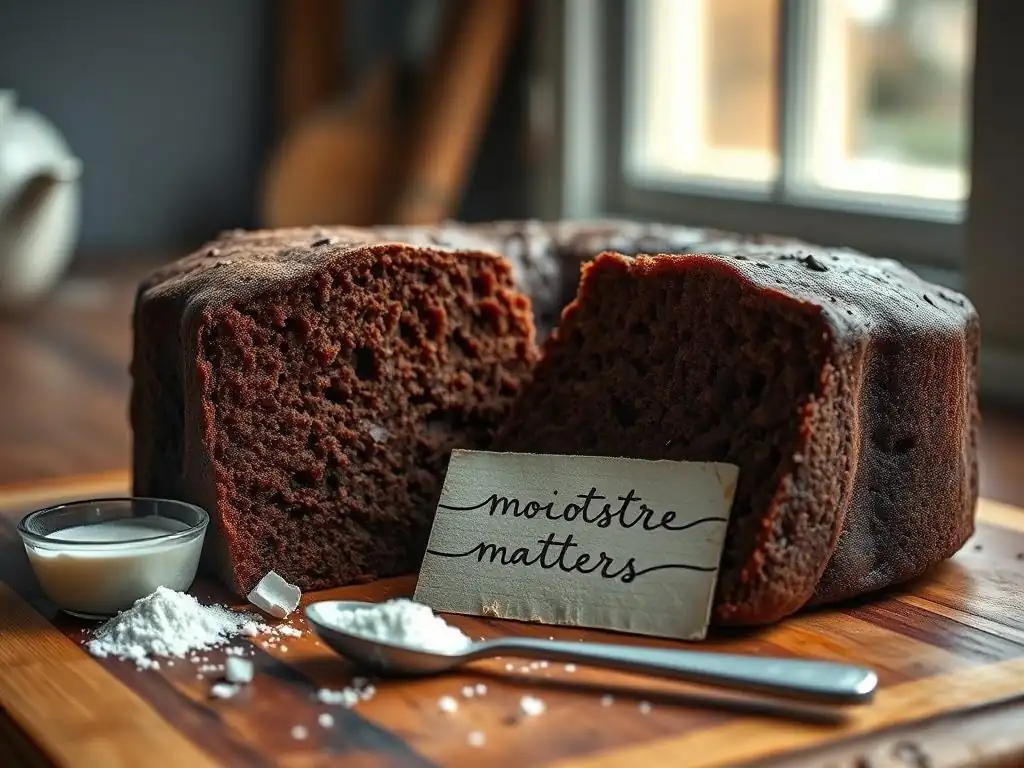
Understanding the root causes of a dry chocolate cake is crucial for preventing this common baking mishap. While many factors can contribute, some are far more frequent culprits than others. From how you measure your ingredients to how long you bake the cake, subtle errors can lead to significant dryness. Let's delve into the most common reasons behind dry chocolate cake and explore practical tips to ensure your next bake is wonderfully moist and tender.
Pinpointing the exact issue might require a bit of detective work, but focusing on these key areas will cover most scenarios. We'll look at ingredient ratios, baking technique, and even the specific types of ingredients you use. By addressing these common pitfalls, you'll be well on your way to consistently baking moist and delicious chocolate cakes.
1. Incorrect Flour Measurement: The Key to Moist Cake
Flour is a primary structural component of cake, but too much of it, or the wrong type, can quickly lead to a dry texture. Flour absorbs liquid, and using more than intended throws off the delicate balance of wet and dry ingredients in a recipe. This is one of the most common reasons for a dry chocolate cake, as even a small error in measurement can make a big difference in the final crumb.
Getting your flour measurement right is paramount for moisture control. It's not just about the volume; how you measure the volume matters significantly. Understanding the difference between flour types is also key, as they absorb liquid differently and develop gluten to varying degrees, both of which impact the cake's tenderness and moisture.
Measuring Flour Accurately: Avoiding Dryness
Accurate flour measurement is perhaps the single most important dry chocolate cake tip. The most common mistake bakers make is scooping flour directly from the bag with their measuring cup. This compacts the flour, resulting in significantly more flour by weight than the recipe intended. For example, a cup of all-purpose flour spooned gently into a measuring cup and leveled off weighs approximately 120-130 grams, while a cup scooped directly from the bag can easily weigh 150 grams or more – that's a difference of over 15%!
The correct method for volume measurement is the "spoon and level" technique: lightly spoon flour from its container into your dry measuring cup until it overflows, then use a straight edge (like the back of a knife) to level off the excess flour without tapping or shaking the cup. For ultimate accuracy, especially in finicky recipes, using a kitchen scale to measure flour by weight is the gold standard. Recipes that provide weights (e.g., 150g flour) are often more reliable for consistent results and avoiding a dry chocolate cake.
The Right Flour Type for Chocolate Cake: Cake Flour vs. All-Purpose
While many chocolate cake recipes call for all-purpose flour, the type of flour can influence the final texture and moisture. Cake flour has a lower protein content (around 8-10%) compared to all-purpose flour (around 10-12%). Lower protein means less gluten development when the batter is mixed.
Gluten provides structure, but too much gluten can make a cake tough and absorb more moisture, contributing to dryness. Using cake flour can result in a more tender, delicate crumb that feels moister because there's less gluten competing for the available liquid. If your recipe calls for all-purpose flour and you consistently get a dry chocolate cake, consider trying a recipe specifically developed for cake flour or researching how to substitute cake flour (often you need slightly more cake flour by volume) while potentially adjusting liquids.
2. Overbaking: The Most Frequent Culprit
Overbaking is arguably the most common reason why chocolate cakes turn out dry. When a cake bakes for too long, or at too high a temperature, the moisture within the cake evaporates excessively. The heat continues to cook the proteins and starches, causing them to set into a rigid, dry structure.
Even a few minutes too long in the oven can be the difference between a perfectly moist cake and a dry one. Monitoring your cake closely towards the end of the baking time is essential, and relying on visual cues and simple tests rather than just the clock is key to preventing this frequent issue contributing to a dry chocolate cake.
Using a Cake Tester: Ensuring Perfect Doneness
The most reliable way to check for doneness and avoid overbaking is by using a cake tester, such as a toothpick, wooden skewer, or metal cake tester. Insert the tester into the center of the cake. For most cakes, you're looking for the tester to come out with a few moist crumbs clinging to it, but no wet batter.
If the tester comes out completely clean, the cake is likely already slightly overdone, and moisture has evaporated. If it comes out with wet batter, it needs more time. Start checking a few minutes before the recipe's minimum suggested baking time, as ovens and pans vary. This simple step is a crucial dry chocolate cake tip to ensure you pull the cake out at just the right moment.
Oven Temperature Calibration: Preventing Overbaking
An inaccurate oven temperature is a silent saboteur of many baked goods, often leading to overbaking and thus a dry chocolate cake. Ovens can frequently be off by as much as 25-50°F (15-30°C) from the temperature you set on the dial. If your oven runs hot, a cake baked for the recommended time might actually be exposed to much higher heat than intended, causing it to bake faster and dry out before the center is properly cooked.
Using an inexpensive oven thermometer placed inside your oven is the best way to know its true temperature. If your oven consistently runs hot or cold, you can adjust the dial accordingly (e.g., if it runs 25°F hot, set it 25°F lower than the recipe specifies). Consistent, accurate oven temperature ensures the cake bakes evenly and within the expected timeframe, drastically reducing the risk of overbaking.
3. Insufficient Liquid: Maintaining Cake Moisture
The balance between wet and dry ingredients is fundamental to a cake's texture. If a recipe simply doesn't call for enough liquid relative to the dry ingredients, the resulting cake will inevitably be dry, regardless of how perfectly you measure or bake it. This can sometimes be an issue with poorly developed recipes.
Beyond the total amount, the type of liquid used also plays a significant role in the cake's moisture and tenderness. Different liquids interact with the dry ingredients in unique ways, affecting gluten development, leavening, and flavor, all of which contribute to the final moistness of your chocolate cake.
Adjusting Liquid Ratios in Chocolate Cake Recipes
If you suspect your recipe is inherently lacking in liquid, you might need to make minor adjustments. A recipe with too little liquid will often result in a very thick, stiff batter. While some cakes, like pound cake, use a stiff batter, most moist chocolate cakes have a pourable or easily spoonable consistency.
If your batter seems excessively thick, you could try adding a tablespoon or two more of the specified liquid (like milk, buttermilk, or coffee) at the end of mixing, until the batter reaches a more typical cake batter consistency. However, significant alterations should be approached cautiously, as they can affect the cake's structure and rise. For a tested solution to prevent a dry chocolate cake, look for recipes known for their moisture content.
Using the Right Type of Liquid: Buttermilk, Coffee, and Their Effects
The type of liquid used in a chocolate cake recipe significantly impacts its moistness and flavor. Buttermilk, for example, is a popular choice for moist cakes because its acidity helps tenderize the gluten in the flour, resulting in a softer crumb. The acid also reacts with baking soda, providing lift and further contributing to a light, moist texture.
Hot liquid, particularly hot coffee or boiling water, is another secret weapon for moist chocolate cakes. Hot liquid "blooms" the cocoa powder, intensifying its flavor. More importantly, it fully hydrates the cocoa particles and helps dissolve sugar, creating a smooth batter that bakes into an exceptionally moist cake. Using hot coffee adds a depth of flavor that complements chocolate beautifully, making it a favorite dry chocolate cake tip for many bakers.
4. Too Much Cocoa Powder: Balancing Flavor and Moisture
While essential for that rich chocolate flavor, cocoa powder is a dry ingredient that absorbs moisture. Using too much cocoa powder without adjusting the liquid or fat content can quickly lead to a dry, crumbly cake. Cocoa powder contains starches and fibers that soak up available moisture, much like flour does.
The type of cocoa powder also has slight differences in how it interacts with other ingredients, though the amount used is usually the primary factor in contributing to dryness. Achieving a moist chocolate cake requires balancing the desired chocolate intensity with the need for adequate moisture.
Cocoa Powder's Impact on Cake Texture
Cocoa powder, essentially finely ground cocoa solids after most of the cocoa butter has been removed, is inherently drying. It contains starch which absorbs liquid and contributes to structure, similar to flour. The more cocoa powder you add to a recipe, the more liquid is needed to hydrate these particles and prevent them from creating a dry, dense, or crumbly texture.
Recipes that are high in cocoa powder need to be carefully balanced with sufficient fat (butter or oil) and liquid (milk, water, coffee, buttermilk). If you try to significantly increase the cocoa in a recipe without increasing the wet ingredients, you are very likely to end up with a dry chocolate cake.
Choosing the Right Cocoa Powder: Dutch-Processed vs. Natural
There are two main types of unsweetened cocoa powder: natural and Dutch-processed (or alkalized). Natural cocoa is acidic, while Dutch-processed cocoa has been treated to neutralize its acidity. This difference primarily affects how the cocoa interacts with chemical leaveners (baking soda and baking powder). Natural cocoa is typically paired with baking soda (which needs acid to activate), while Dutch-processed cocoa is often used with baking powder (which contains its own acid).
While the type affects leavening and color, both are dry ingredients and absorb moisture. Using one over the other isn't a direct cause of dryness if the recipe is balanced for that specific type. However, substituting one for the other without adjusting leavening can impact the cake's rise and structure, indirectly affecting perceived moistness. For preventing a dry chocolate cake, ensuring the total amount of cocoa is balanced with liquids and fats is more important than the type itself.
Adjusting Recipe for Cocoa Powder Content: Ensuring Moistness
If you're adapting a recipe or find a favorite that's slightly dry but you love the chocolate flavor, you might need to subtly adjust the liquid or fat. For every extra tablespoon of cocoa powder you might add for stronger flavor, consider adding an extra tablespoon of the recipe's primary liquid (like milk or coffee) or a teaspoon of oil.
This small adjustment helps compensate for the extra moisture absorbed by the additional cocoa. It's a simple dry chocolate cake tip that can help maintain the desired moistness while boosting the chocolate intensity. Always make small adjustments at first, as too much liquid can also negatively impact texture.
5. Overmixing the Batter: Developing Gluten and Drying Out Cake
Once flour is added to the wet ingredients, mixing develops gluten. Gluten provides structure, which is necessary for a cake to hold its shape. However, overmixing develops too much gluten, resulting in a tough, dense texture that feels dry in the mouth, even if the cake contains sufficient moisture.
This is especially true after the dry ingredients (containing flour) have been added. Mixing vigorously or for too long at this stage builds a strong gluten network, similar to kneading bread dough, which is undesirable for a tender cake crumb. Learning the proper mixing techniques and knowing when to stop are key dry chocolate cake tips.
Mixing Techniques for a Tender Chocolate Cake
Proper mixing techniques are crucial for controlling gluten development and achieving a tender, moist chocolate cake. Most cake recipes follow a standard method: creaming butter and sugar until light and fluffy (incorporating air for leavening and tenderness), adding eggs one at a time (for richness and structure), and then alternating adding the dry ingredients and wet ingredients, beginning and ending with the dry.
The key is when to stop mixing. Once the dry ingredients are added, mix only until they are just combined. Use a low speed on your mixer, or even finish mixing by hand with a spatula. This minimizes the development of tough gluten strands, ensuring a soft, moist crumb.
Avoiding Overmixing: Visual Cues and Best Practices
To avoid overmixing, pay close attention to the batter's appearance. After adding the final portion of dry ingredients, mix only until no streaks of dry flour are visible. The batter should look mostly smooth, but it's okay if there are a few small lumps. Overmixing will result in a batter that looks very smooth, elastic, and perhaps even slightly gluey.
As a best practice, once you add the flour mixture, mix on the lowest speed or fold by hand. Stop mixing as soon as the flour is incorporated. This careful approach is a simple yet effective dry chocolate cake tip to prevent toughness and ensure a tender, moist result.
6. Using the Wrong Pan Size: Affecting Baking Time and Moisture
The size and type of baking pan specified in a recipe are chosen for a reason – they influence how the batter spreads, how thick the cake is, and critically, how long it needs to bake. Using a pan that is too large or too small can significantly alter the baking time and heat distribution, often leading to a dry chocolate cake.
A pan that's too small for the amount of batter will result in a thicker cake. This requires a longer baking time for the center to cook through. By the time the center is done, the edges and bottom can easily become overbaked and dry. Conversely, a pan that's too large will result in a thinner cake that bakes much faster. If you bake it for the time specified for a smaller pan, you'll likely end up with a very dry cake.
Pan Size and Its Influence on Cake Doneness
When you use a different pan size than the recipe calls for, you alter the surface area-to-volume ratio of the batter. A larger pan means the batter is spread thinner, increasing the surface area exposed to heat relative to the volume. This causes the cake to heat up and set much faster. A smaller pan means the batter is thicker, decreasing the surface area relative to volume, requiring more time for the heat to penetrate to the center.
For example, baking a recipe designed for two 8-inch round pans in two 9-inch round pans will result in thinner layers that bake faster. If you bake them for the same amount of time, they will almost certainly be overbaked and dry. This highlights why using the correct pan size or adjusting baking time is a key dry chocolate cake tip.
Adjusting Baking Time for Different Pan Sizes
If you must use a different pan size, be prepared to adjust the baking time. For a thicker cake in a smaller pan, you'll likely need to increase the baking time, potentially by 10-20 minutes or more, and you might consider slightly lowering the oven temperature (e.g., by 25°F) to allow the center to cook without overbaking the edges.
For a thinner cake in a larger pan, the baking time will be significantly shorter. Start checking for doneness much earlier than the recipe suggests – perhaps 10-15 minutes sooner. Always rely on the cake tester method (checking for moist crumbs) rather than the clock when adjusting for pan size. This vigilance is essential for preventing a dry chocolate cake when deviating from the recipe's specifications.
Specific Tips for a Moist Chocolate Cake Every Time
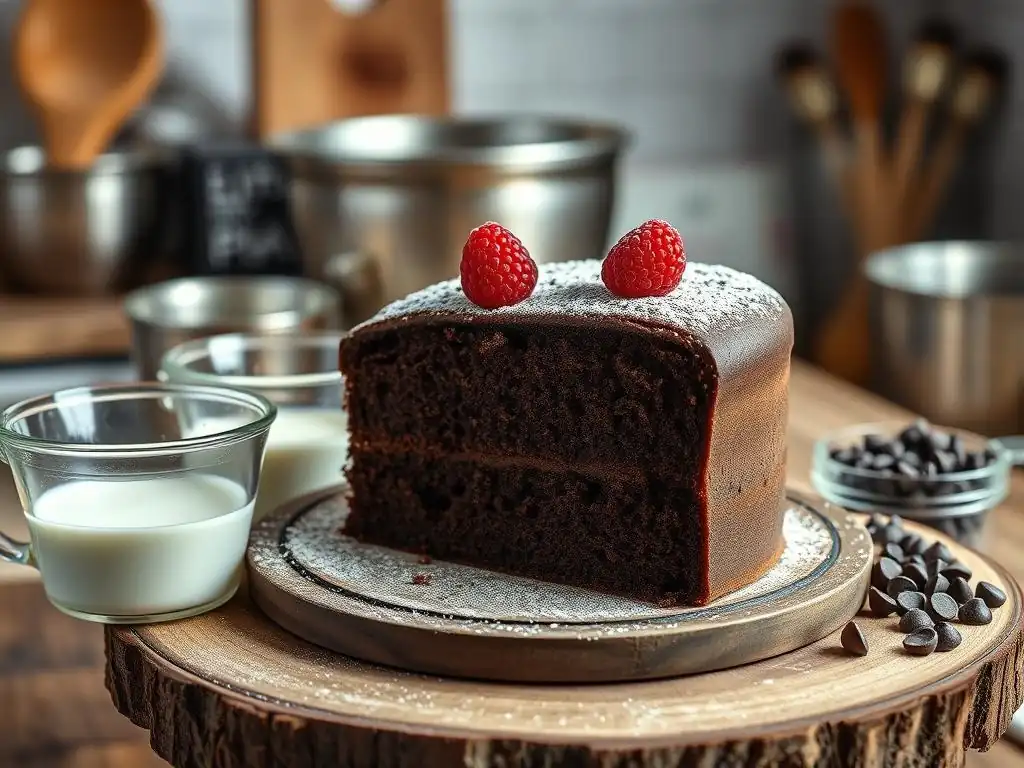
While avoiding the pitfalls mentioned above is crucial, there are also proactive steps you can take to add moisture and tenderness to your chocolate cake recipes. Incorporating certain ingredients or employing specific techniques can significantly boost the moisture content, resulting in a consistently delicious and never-dry chocolate cake.
These specific dry chocolate cake tips are like secret weapons in your baking arsenal. They are particularly useful if you have a beloved recipe that tends to turn out slightly dry, or if you simply want to ensure the most decadent, moist result possible. Let's explore some tried-and-true methods for injecting extra moisture into your chocolate bakes.
Tip 1: Add Moisture-Boosting Ingredients
Certain ingredients are champions at adding and retaining moisture in cakes. Incorporating these into your batter can make a significant difference in the final texture, resulting in a more tender, moist crumb that stays fresh longer. They work by adding fat, which inhibits gluten development, or by providing additional liquid and natural humectants (substances that attract and retain moisture).
Experimenting with these additions is a fantastic dry chocolate cake tip for customizing recipes and ensuring a consistently moist result. Even small additions can have a noticeable positive impact on the cake's texture and richness.
Using Sour Cream or Yogurt: Adding Richness and Moisture
Adding full-fat sour cream or plain full-fat yogurt to your chocolate cake batter is an excellent way to boost moisture and tenderness. The fat content contributes to a rich, soft crumb by coating flour particles and inhibiting gluten formation. The acidity in these dairy products also helps tenderize the cake and can react with baking soda to aid in leavening, leading to a lighter texture that feels moister.
You can often substitute a portion of the liquid or fat in a standard recipe with an equal amount of sour cream or yogurt. For instance, if a recipe calls for 1 cup of milk, you might try using ½ cup milk and ½ cup sour cream. This simple swap is a powerful dry chocolate cake tip for achieving a wonderfully moist and slightly denser, more luxurious crumb.
Incorporating Oil: For a Tender and Moist Crumb
Many exceptionally moist chocolate cake recipes rely heavily on oil, or use a combination of butter and oil. While butter provides flavor, oil is superior at creating a tender, moist crumb. This is because oil is 100% fat (whereas butter is about 80% fat and 20% water/milk solids) and it remains liquid at room temperature.
Oil coats the flour particles more effectively than butter, further inhibiting gluten development and resulting in a softer cake. Because it's liquid at room temperature, cakes made with oil often feel moister in your mouth. If your butter-based chocolate cake is often dry, consider finding a recipe that uses oil, or experimenting with replacing a portion of the butter (e.g., substituting half the butter with an equal volume of oil). This is a classic dry chocolate cake tip favored by professional bakers for guaranteed moisture.
Adding Applesauce or Mashed Banana: Natural Sweetness and Moisture
For a slightly healthier twist or simply to add natural moisture, applesauce or mashed ripe banana can be incorporated into chocolate cake batters. These ingredients add moisture and natural sweetness, and their pectin content can contribute to a soft, tender texture. They can sometimes be used to replace a portion of the fat (like butter or oil) in a recipe, although this will change the flavor and texture slightly.
Using applesauce or banana adds moisture without adding significant amounts of fat, making the cake feel lighter while still being incredibly moist. As a general guideline, you can often substitute half the amount of butter or oil called for with an equal amount of unsweetened applesauce or mashed banana. This is a great dry chocolate cake tip if you enjoy the subtle fruity undertones they can add.
Tip 2: Employ the Hot Liquid Method
The "hot liquid" method, often involving boiling water or hot coffee, is a staple in many famously moist chocolate cake recipes. While it might seem counterintuitive to add hot liquid to cake batter, this technique works wonders for intensifying chocolate flavor and ensuring exceptional moisture. It's a simple step that can elevate a good chocolate cake to a truly outstanding one.
This method is particularly effective with recipes that use cocoa powder. The hot liquid helps fully dissolve the cocoa and sugar, creating a smooth, almost pudding-like base that contributes significantly to the cake's final texture and moistness.
What is the Hot Liquid Method and Why It Works
The hot liquid method involves adding boiling water or hot brewed coffee to the cocoa powder, either initially to create a paste (blooming the cocoa) or towards the end of mixing the batter. When hot liquid is added to cocoa powder, it helps to fully dissolve the cocoa solids and release flavor compounds, resulting in a richer, more intense chocolate taste.
More importantly for our goal of preventing a dry chocolate cake, the hot liquid thoroughly hydrates the dry cocoa particles and helps dissolve sugar crystals. This creates a smoother, more liquid batter than one made with just cold or room-temperature liquids. A well-hydrated batter bakes into a more tender, moist cake because the liquids are already fully absorbed by the dry ingredients before baking even begins.
How to Incorporate Hot Liquid into Your Chocolate Cake Batter
The specific timing for adding hot liquid varies by recipe. Some recipes instruct you to whisk boiling water or hot coffee directly into the cocoa powder first, creating a thick, fragrant paste before adding it to the rest of the wet ingredients. Other recipes have you combine all other ingredients first, and then slowly whisk or gently fold the hot liquid into the finished batter at the very end.
Regardless of the exact step, the principle is the same: use hot liquid to fully hydrate the cocoa and dissolve sugar. Be careful when adding hot liquid to avoid splashing, and mix it in gently until just combined. This simple dry chocolate cake tip is a hallmark of many reliable recipes for moist chocolate cakes.
Tip 3: Simple Syrup Soak: An Instant Moisture Fix
Sometimes, even with the best intentions, a cake might turn out slightly drier than you hoped after baking. Don't despair! A simple syrup soak is a fantastic dry chocolate cake tip that can instantly add moisture and improve the texture of a baked cake. This technique is widely used by professional bakers, especially for layer cakes, to ensure a moist and tender result every time.
Simple syrup is incredibly easy to make and can be flavored to complement the chocolate cake. Applying it to the warm or cooled cake allows the liquid to be absorbed, transforming a potentially dry crumb into a delightfully moist one.
Preparing and Applying Simple Syrup to a Baked Cake
To make simple syrup, combine equal parts sugar and water in a saucepan (e.g., ½ cup sugar and ½ cup water). Heat the mixture over medium heat, stirring occasionally, until the sugar is completely dissolved. Bring it just to a simmer, then remove from the heat and let it cool slightly.
Once your chocolate cake has cooled for about 10-15 minutes out of the oven, or even after it has completely cooled, you can apply the syrup. Use a skewer or toothpick to poke holes all over the top of the cake layers, going about halfway down. Then, gently brush or spoon the slightly cooled simple syrup over the top, allowing it to soak into the holes. For a very dry cake, you might use slightly more syrup. Let the cake sit and absorb the syrup before frosting.
Flavoring Your Simple Syrup for Enhanced Taste
Plain simple syrup adds moisture, but you can easily enhance its flavor to perfectly complement your chocolate cake. For a classic pairing, stir in a teaspoon or two of vanilla extract after the syrup has cooled slightly. For a mocha twist, replace the water with brewed coffee or add a tablespoon of instant coffee granules to the hot water.
Other delicious options include adding a splash of liqueur (like Kahlúa, rum, or orange liqueur) or infusing the syrup with citrus zest (like orange zest) or a cinnamon stick while it heats. Strain out any solids before applying the syrup. Flavoring the simple syrup is a wonderful way to add an extra layer of taste while ensuring your dry chocolate cake problem is instantly solved.
Preventing a Dry Chocolate Cake: Recipe Adjustments and Best Practices
Consistently baking moist chocolate cakes involves more than just troubleshooting; it's about adopting best practices and, if necessary, making thoughtful adjustments to your go-to recipes. By understanding the principles behind moisture in baking, you can approach any chocolate cake recipe with the knowledge needed to ensure a tender and delicious outcome.
Beyond the baking process itself, how you handle and store your finished cake also plays a significant role in maintaining its moisture. Even a perfectly baked cake can become dry if not cared for properly after it comes out of the oven.
Modifying Your Favorite Chocolate Cake Recipe for Guaranteed Moisture
If you have a favorite chocolate cake recipe that occasionally results in a dry texture, consider making small, targeted adjustments based on the dry chocolate cake tips discussed. Start with accurate ingredient measurement, especially flour, ideally using a scale. Ensure your oven temperature is accurate with a thermometer.
Then, consider incorporating moisture-boosting ingredients. Could you swap some milk for buttermilk? Add a few tablespoons of sour cream? Use oil instead of just butter? Or try the hot liquid method if the recipe doesn't already use it? Make one adjustment at a time so you can see its effect. Remember to avoid overmixing, particularly after adding the dry ingredients, and always check for doneness using a cake tester just before the suggested baking time is up.
Storing Your Chocolate Cake Properly to Maintain Moisture
Even the most perfectly baked moist chocolate cake can dry out quickly if not stored correctly. Exposure to air is the enemy of cake moisture. Once your cake has cooled completely, wrap it tightly. For unfrosted layers, wrap each layer individually in plastic wrap, then again in aluminum foil. This double layer of protection prevents air from reaching the cake.
Store wrapped cake layers at room temperature for up to 2-3 days. If the cake is frosted, especially with a perishable frosting like cream cheese frosting, store it in an airtight cake carrier or container at room temperature for a day, or refrigerate it for longer storage. However, refrigeration can sometimes dry out cake, so bring it back to room temperature before serving for the best texture. For longer storage, well-wrapped cake layers or frosted cake can be frozen. Proper storage is a simple yet crucial dry chocolate cake tip for enjoying your bake days later.
Troubleshooting Additional Chocolate Cake Problems
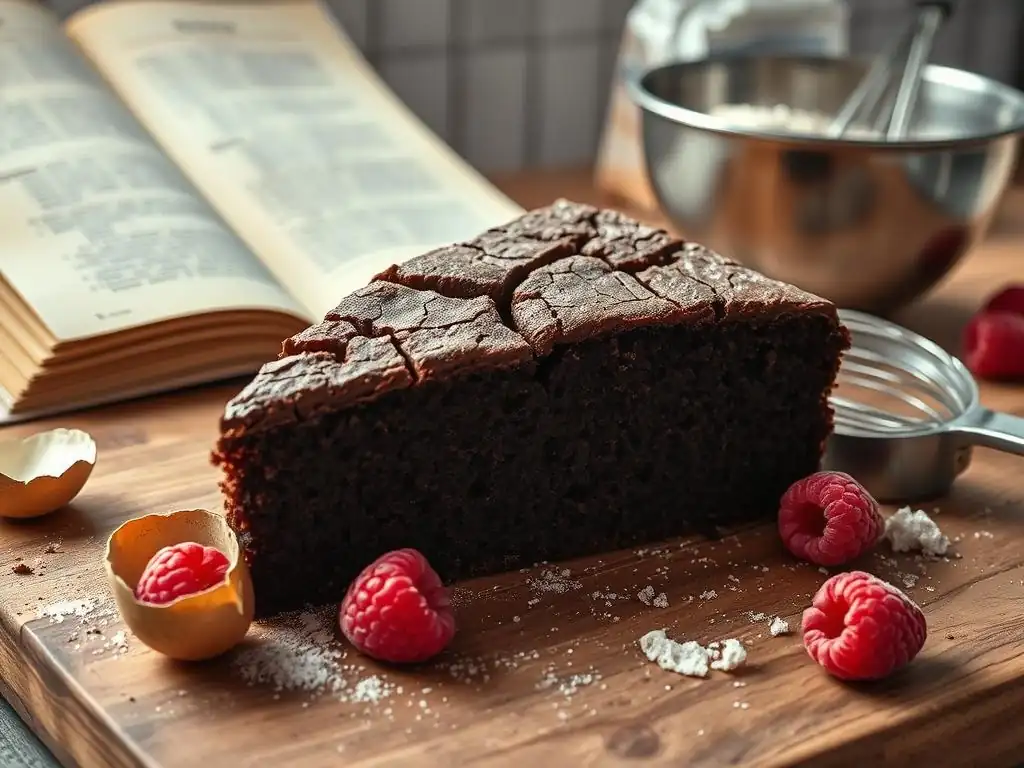
Sometimes, the issues with a chocolate cake extend beyond just dryness. Bakers might encounter problems like a cracked top, sinking center, or uneven texture. While dryness is often related to the baking process and ingredients, other problems can point to different factors, such as oven hot spots, leavening issues, or improper cooling.
Understanding the potential causes of these other common problems can help you become a more skilled and confident baker. Addressing one issue, like a dry texture, might involve fixing a technique that also impacts other aspects of the cake's structure and appearance.
Cracked Top? See our article on even baking techniques.
A cracked top on a chocolate cake can sometimes be a symptom of the cake baking too quickly on the outside before the inside has fully risen and set. This rapid setting of the exterior crust can cause it to crack as the interior continues to expand. While not a direct cause of overall dryness, it can indicate that the cake was exposed to excessive heat, potentially leading to dryness around the edges or top crust.
Issues like an oven running too hot or placing the cake on a rack too close to a heating element can contribute to both a cracked top and uneven baking that results in dry patches. If you're consistently getting cracked tops along with dryness, it's worth investigating your oven's temperature accuracy and rack placement. For detailed guidance on achieving a perfectly level, uncracked cake top, please see our dedicated article on even baking techniques.
BakeWithEase: Your Guide to Perfect Chocolate Cakes
At BakeWithEase, our mission is to help you master the art of baking, turning common frustrations like a dry chocolate cake into baking successes. We believe that with the right knowledge and techniques, anyone can bake delicious, moist cakes consistently. Our guides are designed to break down complex baking science into easy-to-understand dry chocolate cake tips and actionable steps.
Whether you're a beginner learning the basics of accurate measurement or an experienced baker troubleshooting a finicky recipe, BakeWithEase provides the resources you need. Explore our collection of recipes, techniques, and troubleshooting articles to build your skills and bake perfect chocolate cakes that are moist, tender, and full of flavor every single time.
Frequently Asked Questions
Why is my chocolate cake often dry, even when I follow the recipe closely?
Dry chocolate cake is often caused by overbaking, leading to moisture evaporation. Another common culprit is using too much flour in the batter.
What are some specific ingredients that can contribute to a dry chocolate cake?
Using too much cocoa powder without compensating with extra liquid can result in dryness. Also, low-fat ingredients (like skim milk) can reduce the moisture content.
How can I prevent overbaking my chocolate cake?
Use a reliable oven thermometer to ensure accurate temperature. Start checking for doneness a few minutes before the recipe's suggested baking time.
What kind of fats should I use to achieve a moist chocolate cake?
Using fats like oil or butter in the correct proportions is crucial. Butter adds flavor, while oil contributes to a more tender and moist crumb.
Are there any secrets to adding moisture back into a slightly dry chocolate cake after it's baked?
You can try brushing the cake with a simple syrup or a chocolate ganache to add moisture and flavor. Consider serving it with a moist topping like whipped cream.
Final Reflection: The Sweet Science of a Moist Chocolate Cake
The quest for the perfect, moist chocolate cake is a universal one, and the subtle science behind it remains surprisingly relevant in today's baking world. A dry cake isn't just a culinary disappointment; it's a missed opportunity for joy, a testament to the importance of understanding even the smallest details in the baking process. Mastering the art of a moist chocolate cake transcends mere recipe following; it's about understanding the fundamental interactions of ingredients and achieving a harmonious balance.
The enduring appeal of chocolate cake, a classic dessert across cultures and generations, highlights the emotional connection we have with food. It's more than just sustenance; it's comfort, celebration, and a shared experience. The frustration of a dry cake, therefore, is amplified by this inherent emotional weight. As Julia Child wisely said, Find something you're passionate about and keep tremendously interested in it.
This passion, applied to baking, can transform a simple cake into a masterpiece, and understanding the reasons behind dryness is the first step towards that mastery.
So, the next time you're faced with a bowl of dry ingredients, remember the lessons learned. Don't be discouraged by a less-than-perfect result; instead, view it as an opportunity for growth. Experiment with different techniques, explore the nuances of ingredient ratios, and most importantly, embrace the process. You, too, can unlock the secret to a consistently moist and delicious chocolate cake, bringing joy to yourself and those you share it with. The journey towards baking perfection is a rewarding one, filled with sweet successes and valuable lessons learned along the way.
Unlock the Secrets to Moist Chocolate Cake!
Thanks for taking the time to learn how to avoid dry chocolate cake – you're one step closer to baking perfection! We hope you found the tips and tricks helpful. Now, let's put that knowledge into action:
- Bake your dream chocolate cake: Use the techniques outlined above to create a deliciously moist and flavorful cake that will impress your friends and family. Don't forget to adjust ingredient quantities as needed!
- Share your baking success: Post a picture of your perfectly moist cake on social media and tag us @BakeWithEase – we’d love to see it!
- Explore our other recipes: Discover more secrets to amazing baking on BakeWithEase.com – we have a whole library of recipes waiting for you!
What’s your favorite trick for keeping cakes moist? Share your insights below!