
Altitude Baking Hacks: Adjusting Oven Temps and Times for HighElevation Success

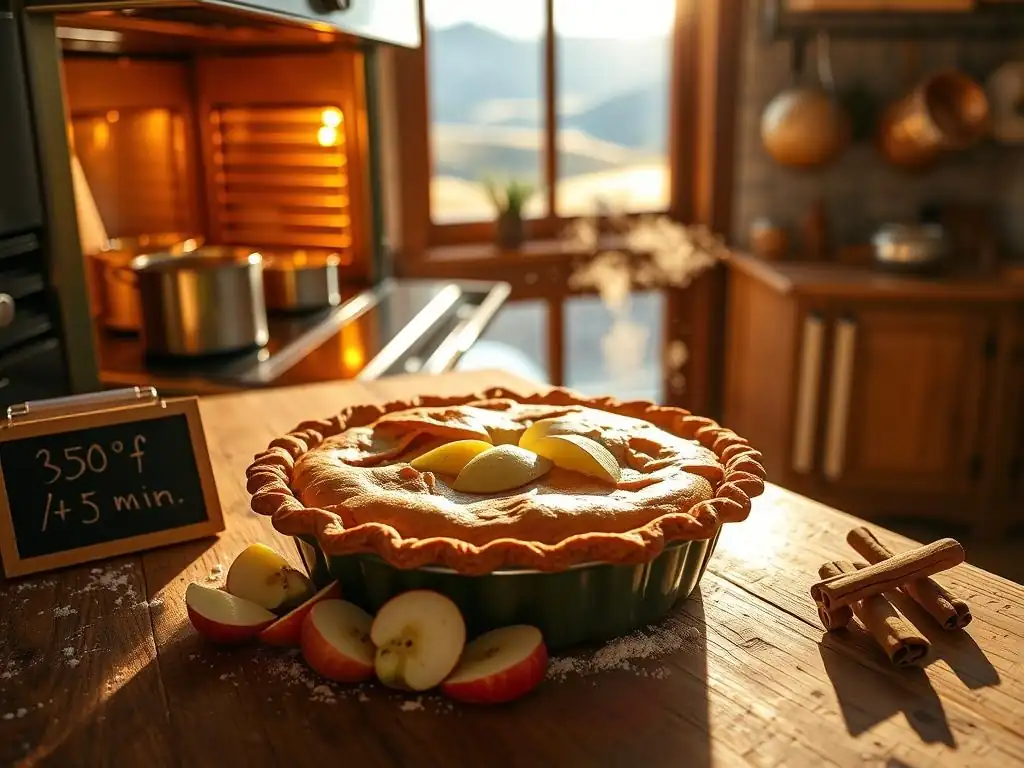
Welcome to BakeWithEase, your ultimate baking companion! Ever wondered why your cakes sink or your cookies spread at high altitudes? Unlock the secrets to flawless baking, no matter the elevation. Dive into our High Altitude Baking Tips and discover simple adjustments that will transform your high-elevation baking into a resounding success. Curious to learn how to adjust oven temps and times for perfect results? Let's get started!
- Understanding the Science Behind High Altitude Baking
- Essential High Altitude Baking Tips for Perfect Results
- Key Ingredient Adjustments for High Altitude Baking
- High Altitude Baking: Troubleshooting Common Problems
- High Altitude Baking Recipe Adaptations: Practical Examples
- Tools and Techniques for Successful High Altitude Baking
- High Altitude Baking: Expert Advice and Best Practices
- Summary: Achieving Baking Success at High Altitude
-
Frequently Asked Questions
- How does high altitude affect baking?
- What are some general adjustments I can make to recipes for high altitude baking?
- Why is it important to reduce the amount of leavening agents at high altitude?
- How does increasing the oven temperature help with high altitude baking?
- Where can I find more detailed high-altitude baking recipes and techniques?
- Final Reflection: Reaching New Heights in Baking
- Unlock Your High-Altitude Baking Potential!
Understanding the Science Behind High Altitude Baking
Why Baking at High Altitude is Different
Baking at higher elevations presents unique challenges compared to baking at sea level. The primary factors at play are lower atmospheric pressure and typically lower humidity. As you ascend, the air pressure decreases, which has a significant impact on gases, liquids, and how ingredients behave during the baking process. This reduced pressure means that leavening agents, like baking powder and yeast, work more vigorously, causing batters and doughs to rise faster and higher than they would at sea level.
Furthermore, water boils at a lower temperature at higher altitudes. At sea level, water boils at 212°F (100°C), but at 5,000 feet (about 1,500 meters), it boils around 203°F (95°C), and at 10,000 feet (about 3,000 meters), it boils around 194°F (90°C). This lower boiling point means that moisture evaporates more quickly from your baked goods.
The structure-building elements (like proteins in flour and eggs) don't have as much time to set before the internal temperature reaches the boiling point of water, potentially leading to collapsed cakes or dry textures. Mastering these differences is key to successful high altitude baking tips.
The Impact of Lower Air Pressure on Baked Goods
Lower air pressure directly affects the rate at which batters and doughs rise. With less pressure pushing down, the gases produced by leavening agents expand more easily and rapidly. This can cause baked goods to over-expand before their structure is set, leading to weakened cell walls. Imagine a balloon expanding too quickly – it's more likely to pop. Similarly, a cake rising too fast might dome excessively and then collapse in the center as the fragile structure gives way.
This rapid expansion also contributes to the faster evaporation of moisture. Because the boiling point of water is lower, liquids turn to steam more readily within the oven. The combination of rapid rise and increased moisture loss means that many standard recipes need adjustments to achieve the desired texture, volume, and appearance when you're applying high altitude baking tips. Without adjustments, you might find your cookies spreading too much, your bread loaves collapsing, or your muffins having gummy centers.
How Altitude Affects Leavening Agents
Leavening agents, such as baking soda, baking powder, and yeast, rely on producing gases (carbon dioxide or steam) to create lift and structure in baked goods. At higher altitudes, the lower atmospheric pressure allows these gases to expand with less resistance. This means that the same amount of leavening that works perfectly at sea level can cause excessive rising at elevation.
For example, a recipe designed for sea level might call for 2 teaspoons of baking powder for a standard cake. At 5,000 feet, this amount might cause the cake to rise too quickly, dome dramatically, and then fall. The internal structure simply doesn't have enough time or strength to support the rapid expansion. Yeast doughs will also ferment and rise faster, potentially leading to over-proofing if not monitored closely. Adjusting the amount of leavening is one of the fundamental high altitude baking tips to control the rise and ensure a stable structure.
Essential High Altitude Baking Tips for Perfect Results
Mastering Oven Temperature Adjustments for High Altitude Baking
One of the most effective high altitude baking tips involves adjusting your oven temperature. The general guideline is to increase the oven temperature slightly. While this might seem counterintuitive given the faster rise and evaporation, a slightly higher temperature helps set the structure of your baked goods more quickly, preventing collapse and promoting better overall texture.
For instance, if a recipe calls for baking at 350°F (175°C) at sea level, a common adjustment at altitudes above 3,000 feet is to increase the temperature by 15-25°F (about 8-14°C), perhaps baking at 365°F or 375°F (185°C or 190°C). This hotter, faster initial heat helps to firm up the proteins and starches before the gases expand excessively. However, this needs to be balanced with preventing over-browning, which can happen more quickly at higher altitudes due to drier air and faster evaporation concentrating sugars on the surface.
Reducing Oven Temperature for Even Baking
Wait, didn't you just say increase the temperature? Yes, that's a common adjustment, but it's important to understand why and when you might slightly reduce it, or perhaps use a combination approach. While increasing the temperature helps set structure quickly, baking too hot can lead to crusts forming before the interior is fully cooked, resulting in gummy centers or uneven textures. Many experienced high altitude bakers find that a slight reduction (perhaps 5-10°F or 3-6°C) combined with a longer baking time works better for certain items like delicate cakes or custards, allowing the interior to cook through gently.
The key is experimentation and understanding your specific oven and altitude. For example, a dense loaf of bread might benefit from an initial higher temperature followed by a reduction to ensure the interior bakes fully without the crust burning. Some sources suggest reducing oven temperature by 25°F (14°C) for most baked goods above 3,500 feet, which directly contradicts the 'increase' advice. This highlights that high altitude baking tips are guidelines, not strict rules.
The goal is to slow the rise slightly and allow the structure to set. Reducing the temperature slows down everything, including the leavening rate, giving the structure more time to catch up. This strategy is often preferred for recipes prone to collapse or excessive doming.
Adjusting Baking Times at High Altitudes: A Comprehensive Guide
Because moisture evaporates faster and baked goods tend to brown more quickly at higher altitudes, baking times often need adjustment. Typically, you will find that many items require less baking time than specified in sea-level recipes, especially if you've increased the oven temperature. A cake that takes 30-35 minutes at sea level might be done in 25-30 minutes at 5,000 feet when baked at a slightly higher temperature.
However, if you've opted to reduce the oven temperature slightly to prevent over-browning or give the structure more time to set gently, you might actually need to increase the baking time. For instance, a slow-baked item like a large loaf of quick bread might need an extra 5-10 minutes at a slightly lower temperature to ensure the center is fully cooked.
Monitoring your baked goods closely is crucial. Use visual cues (golden brown color, edges pulling away), touch (springs back when lightly pressed), and internal temperature (cakes often 205-210°F or 96-99°C; bread 200-210°F or 93-99°C) rather than relying solely on the clock when employing high altitude baking tips.
Key Ingredient Adjustments for High Altitude Baking
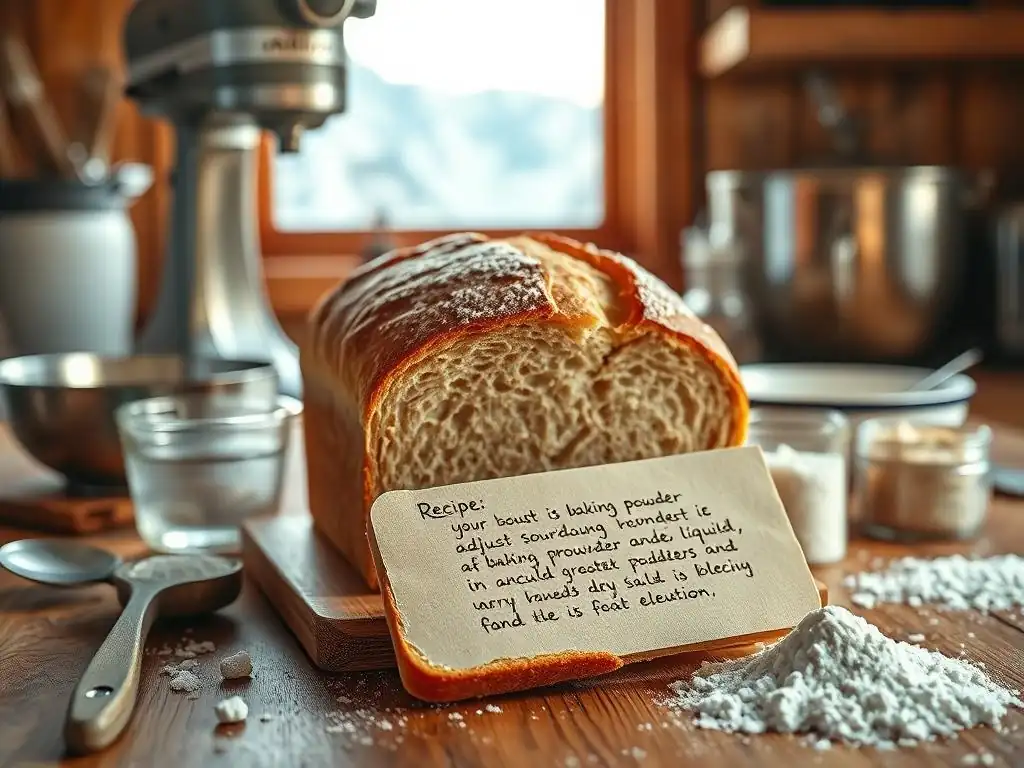
Reducing Sugar Content in High Altitude Recipes
Sugar plays several roles in baking: it adds sweetness, contributes to browning, tenderizes the crumb, and helps retain moisture. At high altitudes, where moisture evaporates faster and browning occurs more quickly, the amount of sugar often needs to be reduced. Too much sugar can weaken the structure, contribute to excessive spread in cookies, and cause the exterior of cakes and muffins to brown or even burn before the interior is cooked.
A common guideline is to reduce the sugar by 1 to 3 tablespoons per cup called for in the original recipe, or roughly 10-15%. For example, if a cake recipe requires 1.5 cups of sugar, you might start by using 1 cup plus 2 tablespoons. This adjustment helps create a more stable structure and prevents the rapid, dark browning that can occur. It's one of the critical high altitude baking tips for achieving balanced texture and appearance.
Increasing Liquid Content for Optimal Moisture
Due to the lower boiling point of water and drier air at higher elevations, moisture evaporates from baked goods at a faster rate. This can result in dry, dense, or crumbly textures if the liquid content isn't adjusted. To counteract this, you'll typically need to add more liquid to your batters and doughs.
The amount of extra liquid needed varies depending on the recipe and altitude, but a general rule of thumb is to add 1 to 2 tablespoons of liquid (milk, water, buttermilk, etc.) per cup of liquid called for in the original recipe, or perhaps per cup of flour. For example, if a muffin recipe uses 1 cup of milk, you might add an extra 2-3 tablespoons.
For yeast breads, you might need a few extra tablespoons of water to achieve the correct dough consistency. Adding moisture is one of the most effective high altitude baking tips for preventing dryness and ensuring a tender crumb.
The Role of Flour in High Altitude Baking
Flour provides the structural framework for most baked goods, primarily through its protein content (gluten). At high altitudes, where batters and doughs rise more rapidly, a slightly stronger structure is often needed to support the quicker expansion and prevent collapse. Increasing the amount of flour slightly can help provide this extra support.
Adding 1 to 2 tablespoons of flour per cup in the original recipe is a common high altitude baking tip. This extra flour contributes more protein and starch, which helps to build a sturdier network that can withstand the increased pressure from leavening gases.
However, adding too much flour can result in a dry or tough product, so this adjustment should be made cautiously and in conjunction with increased liquid. Sometimes, simply using a flour with a slightly higher protein content (like bread flour instead of all-purpose in yeast recipes, or a good quality all-purpose with around 10.5-11.5% protein) can also make a difference.
High Altitude Baking: Troubleshooting Common Problems
Preventing Collapsed Cakes at High Altitude
Collapsed cakes, where the center sinks after baking, are a common frustration in high altitude baking. This usually happens because the cake rises too quickly due to the lower pressure, but the structure (set by heat) doesn't develop fast enough to support the expanded batter. When the fragile structure can no longer hold, it collapses.
To prevent this, several high altitude baking tips can be applied simultaneously. First, reduce the leavening agents (baking powder/soda) by 10-25%. Second, slightly increase the structural ingredients like flour (1-2 tbsp per cup) or eggs (add an extra egg yolk or a whole small egg).
Third, slightly increase the baking temperature (15-25°F) to set the structure faster, or slightly decrease it (5-10°F) and bake longer to allow the structure to set more gently. Reducing sugar (1-3 tbsp per cup) also helps by creating a stronger crumb. Combining these adjustments provides a more stable environment for the cake to bake evenly and maintain its shape.
Avoiding Dry and Crumbly Baked Goods
Dryness is another frequent issue when baking at high altitudes, primarily due to faster moisture evaporation. Cookies that spread too much and become brittle, or cakes and muffins that feel dry and crumbly, are tell-tale signs that more moisture is needed or retained.
Increasing the liquid content in the recipe is the most direct solution. Adding 1 to 2 tablespoons of liquid per cup is a standard adjustment. Another effective high altitude baking tip is to slightly reduce the baking time or temperature to minimize moisture loss during baking.
Ensure your oven temperature is accurate using an oven thermometer, as an oven running hot will exacerbate drying. Reducing sugar slightly (as discussed earlier) can also indirectly help, as too much sugar can sometimes interfere with gluten development, leading to a crumbly texture, although its primary role regarding dryness is moisture retention, which is less effective at altitude anyway. Using ingredients like buttermilk, yogurt, or sour cream can also add richness and moisture.
Addressing Over-Browning Issues in High Altitude Ovens
Baked goods tend to brown faster and more intensely at high altitudes. This is partly due to the drier air and faster evaporation concentrating sugars on the surface, and also potentially due to slight variations in oven performance at different pressures. An item might look perfectly golden brown on the outside but still be undercooked in the center.
Adjusting oven temperature is key here. If you are experiencing excessive browning, try reducing the oven temperature by 10-25°F (6-14°C) and increasing the baking time slightly. This allows the interior to cook through at a gentler pace.
Reducing the sugar content in the recipe (1-3 tbsp per cup) also helps mitigate over-browning, as sugar is a major contributor to caramelization. If the tops are browning too quickly but the interior isn't done, you can loosely tent the baked goods with aluminum foil for the latter part of the baking time. This is a simple yet effective high altitude baking tip to manage surface browning.
High Altitude Baking Recipe Adaptations: Practical Examples

Chocolate Cake - High Altitude Adaptation
Let's consider adapting a standard chocolate cake recipe for high altitude. A typical sea-level recipe might call for 2 cups flour, 1.5 cups sugar, 1/2 cup cocoa, 2 tsp baking soda, 1 tsp baking powder, 2 eggs, 1 cup milk, 1/2 cup oil, 1 tsp vanilla, and 1 cup hot water.
For a high altitude version (e.g., 5,000-7,000 feet):
- Reduce baking soda/powder: Try reducing baking soda to 1.5 tsp and baking powder to 3/4 tsp. (approx. 20-25% reduction).
- Increase flour: Add 2-3 tablespoons extra all-purpose flour.
- Increase liquid: Add 2-3 tablespoons extra milk or add 1-2 tablespoons extra hot water.
- Reduce sugar: Reduce sugar to 1 cup plus 2 tablespoons (approx. 15% reduction).
- Increase temperature: Bake at 365°F (185°C) instead of 350°F (175°C).
- Adjust time: Start checking 5-10 minutes earlier than the original recipe suggests.
These are example adjustments illustrating the principles of high altitude baking tips. You might need further fine-tuning based on your specific altitude and oven.
Peanut butter cookies can be prone to excessive spread and dryness at high altitude. A standard recipe might use 1 cup peanut butter, 1 cup sugar, 1 cup brown sugar, 2 eggs, 1 tsp baking soda, 1/2 tsp baking powder, and 2 cups flour.
For high altitude adaptation:
- Reduce leavening: Reduce baking soda to 3/4 tsp and baking powder to 1/4 tsp.
- Reduce sugar: Reduce white sugar to 3/4 cup and brown sugar to 3/4 cup (approx. 25% total sugar reduction). This significantly helps control spread and prevents overly crisp edges.
- Increase moisture/structure: Consider adding an extra egg yolk, or 1-2 tablespoons of milk or cream. Some recipes might benefit from an extra tablespoon or two of flour, but be cautious not to make them tough.
- Increase temperature: Bake at 375°F (190°C) instead of 350°F (175°C) to set the structure faster.
- Adjust time: Baking time might be similar or slightly shorter, check for doneness when edges are set and centers look slightly soft.
Applying these high altitude baking tips helps create cookies that are thicker, chewier, and less prone to crumbling.
Sourdough Bread - High Altitude Adaptation
Sourdough bread requires careful handling of fermentation and proofing, which are accelerated at high altitude. The main challenges are over-proofing and faster crust formation leading to dense interiors. A standard sourdough recipe involves a levain, flour, water, and salt, with long fermentation and proofing times.
High altitude baking tips for sourdough:
- Reduce Levain/Starter percentage: Use a slightly lower percentage of active starter in your dough (e.g., if you normally use 20%, try 15-18%). This slows fermentation slightly.
- Use Cooler Water: Mix your dough with cooler water than usual. This also helps slow down the yeast activity.
- Reduce Fermentation/Proofing Times: Watch the dough, not the clock! Bulk fermentation and proofing will happen faster. Your dough might be ready to shape after 3-4 hours of bulk fermentation instead of 4-6 hours, and final proofing might take only 1-2 hours at room temperature instead of 2-3 hours.
- Increase Hydration Slightly (Optional): If your bread is coming out dry, you might slightly increase the water, but only by 1-2% initially, as too much can make the dough hard to handle.
- Baking Temperature/Time: Often, baking temperature can remain high (e.g., 450-500°F or 230-260°C), but you might need to reduce the overall baking time, especially the covered portion if using a Dutch oven, to prevent the crust from getting too thick or dark before the interior is baked. Checking internal temperature (200-210°F or 93-99°C) is vital.
Adapting sourdough is more about managing the process (temperature, time, hydration) than drastic ingredient changes, making these high altitude baking tips centered on observation and timing.
Tools and Techniques for Successful High Altitude Baking
Using a Baking Stone for Even Heat Distribution
Uneven oven temperature can be exacerbated at higher altitudes, and a baking stone or steel can be a valuable tool to counteract this. Placing a preheated baking stone on a rack in your oven helps to stabilize the oven temperature and provides a consistent, radiant heat source from below.
For items like bread, pizza, or even cookies, baking directly on or above a preheated stone promotes better oven spring and more even cooking. The stone absorbs and radiates heat, minimizing temperature fluctuations when the oven door is opened and ensuring that the bottom of your baked goods cooks thoroughly at the same rate as the top. This consistent heat is one of the helpful high altitude baking tips for achieving reliable results.
Investing in an Accurate Oven Thermometer
Oven temperatures can vary significantly from the dial setting, sometimes by as much as 25-50°F (14-28°C). At high altitudes, where precise temperature control is even more critical for successful baking, relying on an inaccurate oven thermostat can lead to frustration.
An inexpensive, in-oven thermometer placed near your baked goods will show you the actual temperature inside your oven. Knowing the true temperature allows you to make accurate adjustments. For example, if your oven dial is set to 350°F but the thermometer reads 325°F, you know you need to set the dial higher to reach your desired baking temperature. This simple tool is one of the most fundamental high altitude baking tips for consistent outcomes.
Experimenting with Different Baking Pans
The type and color of your baking pans can influence how quickly baked goods brown and cook, especially at higher altitudes. Dark-colored pans absorb more heat and can cause faster browning, particularly on the bottom and edges. Shiny metal pans reflect heat, leading to lighter browning and potentially longer baking times. Glass or ceramic pans conduct heat differently than metal.
If you're struggling with over-browning on the bottoms or edges, switching from dark non-stick pans to shiny aluminum pans might help. For items that need a strong, set crust quickly, a darker pan might be beneficial. Experimenting with the pans you use for different recipes and observing the results is part of refining your high altitude baking tips and techniques. For instance, using a light-colored metal muffin tin might prevent the bottoms of your muffins from burning before the centers are done.
High Altitude Baking: Expert Advice and Best Practices
Use Room Temperature Ingredients for Better Emulsification
Using ingredients like eggs, butter, and milk at room temperature is a standard baking practice that becomes even more important at high altitudes. Room temperature ingredients emulsify more easily, meaning they combine smoothly and evenly with other ingredients.
This creates a more stable batter or dough structure from the outset. A well-emulsified mixture is less likely to separate and provides a more uniform base for the leavening gases to expand within. This leads to a finer, more consistent crumb structure and helps prevent issues like tunneling or dense spots, contributing to overall success in high altitude baking.
Rotate Pans During Baking for Even Cooking
Even the best ovens have hot spots. At high altitudes, where baking times can be shorter and browning happens faster, rotating your baking pans halfway through the baking time is a simple but effective technique.
Rotating ensures that all sides of your cake, cookies, muffins, or bread are exposed to the same amount of heat, promoting even rising, browning, and cooking. This helps prevent one side of a cake from being undercooked while the other is overcooked, or half a sheet of cookies from being perfectly baked while the other half is still pale. It's a straightforward high altitude baking tip that improves consistency.
Let Baked Goods Cool Completely Before Frosting
Allowing cakes, cupcakes, and other items to cool completely on a wire rack before frosting or storing is crucial, especially at high altitudes. The baking process continues slightly even after the item is removed from the oven as residual heat finishes cooking the interior and allows the structure to set fully.
At altitude, where structures can be more fragile, cutting into or frosting a warm cake can cause it to collapse or tear. Cooling racks allow air circulation, preventing condensation that can make the bottom soggy. Ensuring your baked goods are fully cooled guarantees they are structurally sound and at the right temperature to receive frosting or glaze without melting it, contributing to the final presentation and texture when applying high altitude baking tips.
Summary: Achieving Baking Success at High Altitude
Key Takeaways for High Elevation Bakers
Baking at high altitudes requires understanding the unique environmental factors – lower air pressure, faster gas expansion, quicker moisture evaporation, and lower water boiling points. These factors necessitate adjustments to standard sea-level recipes to achieve the desired results.
The core high altitude baking tips involve adjusting ingredients and techniques. Key ingredient modifications include slightly reducing leavening agents (baking powder/soda/yeast) to control the rapid rise, slightly increasing liquid content to counteract faster evaporation and prevent dryness, and potentially slightly increasing flour or adding an extra egg for stronger structure. Adjusting sugar downwards helps manage sweetness, tenderness, and prevents over-browning.
Technique-wise, adjusting oven temperature (often slightly increasing it to set structure faster, but sometimes slightly decreasing for gentler baking) and monitoring baking time closely are paramount. Using an oven thermometer, rotating pans, and ensuring ingredients are at room temperature are also helpful practices. By understanding these principles and being willing to experiment, bakers at any elevation can achieve delicious results.
Frequently Asked Questions
How does high altitude affect baking?
At higher altitudes, there is less air pressure, leading to faster evaporation of liquids and quicker rising times. This can result in dry, collapsed cakes and tougher cookies if adjustments aren't made.
What are some general adjustments I can make to recipes for high altitude baking?
Common adjustments include reducing leavening agents (like baking powder and baking soda), increasing liquid, and increasing oven temperature. These changes help to balance the effects of the lower air pressure.
Why is it important to reduce the amount of leavening agents at high altitude?
Excessive leavening at high altitude can cause baked goods to rise too quickly and then collapse. Reducing the amount helps to create a more stable structure and prevent deflation.
How does increasing the oven temperature help with high altitude baking?
Increasing the oven temperature slightly helps to set the structure of the baked good faster, preventing it from collapsing before it's fully cooked. It also counteracts the faster evaporation of liquids.
Where can I find more detailed high-altitude baking recipes and techniques?
BakeWithEase.com offers a wealth of resources, including step-by-step guides, recipes, and tips specifically tailored for high-altitude baking. Explore their website for more in-depth information!
Final Reflection: Reaching New Heights in Baking
Mastering high-altitude baking isn't just about adjusting recipes; it's about unlocking a whole new world of culinary possibilities. The challenges presented by lower air pressure and boiling points are significant, but as this article has shown, they are far from insurmountable. With the right knowledge and techniques, even the most delicate cakes and the flakiest pastries can thrive at higher elevations.
The impact of altitude on baking extends beyond simply achieving a successful outcome; it speaks to the adaptability and resilience required in any creative endeavor. The process of learning to adjust recipes, to understand the subtle nuances of ingredient interactions at different altitudes, is a journey of discovery. It's a testament to the power of experimentation and the satisfaction of overcoming a challenge. The greatest glory in living lies not in never falling, but in rising every time we fall.
- Nelson Mandela. This quote perfectly encapsulates the spirit of high-altitude baking – a continuous process of learning, adapting, and ultimately, triumphing.
Now, it's your turn. Don't let the altitude limit your baking aspirations. Take the knowledge you've gained here, experiment with your favorite recipes, and embrace the unique challenges and rewards of high-altitude baking. The perfectly risen cake, the flawlessly crisp cookie – these are not just culinary achievements, but testaments to your perseverance and creativity. So, preheat your oven, gather your ingredients, and reach for new heights in your baking journey!
Unlock Your High-Altitude Baking Potential!
Thanks for joining us on this journey to mastering high-altitude baking! We hope you now feel confident tackling those tricky altitude adjustments. Ready to take your baking to new heights?
- Bake your dream cake (or cookies, or bread!): Put your newfound knowledge to the test! Try that recipe you've been eyeing, making the necessary adjustments based on what you've learned.
- Share your high-altitude baking triumphs (or challenges!): Let's build a supportive community! Share your experiences and photos on our BakeWithEase social media pages.
- Explore our other high-altitude baking resources: Dive deeper into specific recipes and techniques by browsing the rest of our site.
What's your next high-altitude baking adventure? Let us know in the comments!