
Sheet Pan Essentials: Selecting, Seasoning, and Maintaining Like a Pro

Welcome to BakeWithEase, where baking becomes a joy, not a chore! Ever wondered how to unlock the full potential of that trusty workhorse in your kitchen? This week, we're diving deep into sheet pan baking tips and techniques that will revolutionize your baking game. Discover the secrets to selecting, seasoning, and maintaining your sheet pans like a pro, and prepare to create perfectly baked goods every time. Ready to elevate your baking skills? Let's get started!
- Choosing the Right Sheet Pan for Baking Success
- Seasoning Your Sheet Pan: Unlock Non-Stick Performance
- Sheet Pan Baking Tips: Techniques for Perfect Results
- Maintaining Your Sheet Pan: Cleaning and Storage
- Advanced Sheet Pan Baking Techniques
- Troubleshooting Common Sheet Pan Baking Problems
- Sheet Pan Baking: A Beginner's Guide
- Favorite Sheet Pan Recipes
- Conclusion: Elevate Your Baking with Proper Sheet Pan Care
- Frequently Asked Questions
- Final Reflection: The Enduring Power of the Humble Sheet Pan
- Unleash Your Inner Baking Pro: Master the Sheet Pan!
Choosing the Right Sheet Pan for Baking Success
Understanding Sheet Pan Sizes and Materials
Selecting the correct sheet pan size is fundamental for successful baking and roasting. The most common sizes encountered in home kitchens are the half-sheet pan, typically measuring around 18x13 inches, and the quarter-sheet pan, roughly 9x13 inches. Professional kitchens often use full-sheet pans (18x26 inches), but these are usually too large for standard home ovens.
The half-sheet is incredibly versatile for everything from cookies to roasting a chicken, while the quarter-sheet is perfect for smaller batches, toasting nuts, or fitting into toaster ovens. Using the appropriate size prevents overcrowding (a common issue addressed by good sheet pan baking tips) and ensures even heat distribution.
The material of your sheet pan significantly impacts cooking performance. Aluminum is the industry standard due to its excellent heat conductivity, which promotes even browning and consistent results. Look for heavy-gauge aluminum (16 or 18 gauge is good) as it's less prone to warping. Stainless steel pans are durable and non-reactive but tend to heat less evenly than aluminum, potentially leading to hot spots. Some pans are made of aluminized steel, which combines the strength of steel with the heat properties of aluminum, offering a good balance.
Aluminum, Stainless Steel, and Non-Stick Sheet Pans: A Comparison
Aluminum sheet pans are beloved by bakers for their superior heat conductivity, which translates to beautifully golden-brown baked goods and perfectly roasted vegetables. However, bare aluminum can react with acidic ingredients like tomatoes or lemon juice, potentially causing discoloration on the pan and imparting a metallic taste to the food. This is why many professional sheet pan baking tips recommend using parchment paper or silicone mats when cooking acidic items on aluminum.
Non-stick sheet pans offer convenience with easy food release and quicker cleanup. They typically feature a non-stick coating over a metal base, often aluminum or aluminized steel. While great for delicate items or sticky doughs, the non-stick surface can sometimes hinder deep browning compared to bare metal. The coating can also degrade over time, especially if exposed to high heat, metal utensils, or harsh scrubbing. Proper care is essential to maintain the lifespan of non-stick pans, a key element in effective sheet pan baking tips.
Rimmed vs. Rimless: Choosing the Right Sheet Pan
Rimmed sheet pans, featuring raised edges on all four sides, are arguably the most versatile type for general baking and roasting. The rims prevent liquids, fats, or small ingredients (like nuts or vegetables) from sliding off the pan into your oven. They are essential for sheet pan dinners, roasting meats and vegetables, baking bars, and most cookie recipes where some spread is expected. A standard half-sheet pan is almost always rimmed.
Rimless sheet pans, also known as cookie sheets, have either no rims or only one or two very shallow rims. Their design allows for easy sliding of baked goods, particularly cookies or pastries, directly onto a cooling rack without needing to lift or handle them individually. While convenient for specific tasks like cookie baking, they are unsuitable for anything liquidy or prone to rolling off, limiting their overall utility compared to rimmed pans. Most home bakers find a few good quality rimmed pans more indispensable.
Investing in High-Quality Sheet Pans
The quality of your sheet pan directly impacts your baking results. Thin, flimsy pans (often 20 gauge or higher) are highly susceptible to warping when exposed to high oven temperatures. This sudden buckling, known as thermal shock, can cause ingredients to shift and cook unevenly. A warped pan also sits unevenly on oven racks, further contributing to inconsistent heating. Investing in heavier-gauge pans (16 or 18 gauge) provides better durability and resistance to warping, ensuring your pan remains flat and distributes heat evenly for years of consistent baking.
While high-quality pans might have a higher upfront cost, they are a worthwhile investment for any dedicated baker. A sturdy, well-made sheet pan will conduct heat more uniformly, preventing burnt edges and undercooked centers. Professional-grade pans are designed to withstand frequent use and high temperatures without degrading, making them more economical in the long run. Choosing quality is one of the most fundamental sheet pan baking tips for achieving reliable performance.
Seasoning Your Sheet Pan: Unlock Non-Stick Performance
Why Seasoning Improves Performance
Seasoning is the process of baking thin layers of oil onto a bare metal pan (like aluminum or carbon steel) to create a natural, non-stick surface. When oil is heated past its smoke point, it undergoes polymerization, forming a hard, plastic-like coating that bonds to the metal. This layer fills the microscopic pores and creates a smoother surface, making it much easier to release food without it sticking.
Unlike manufactured non-stick coatings, seasoning is a living surface that improves with use and proper care. Each time you cook fatty foods on a seasoned pan and clean it correctly, you add to the polymerized layer, enhancing its non-stick properties over time. This natural buildup is incredibly durable and can withstand higher temperatures than many synthetic coatings, making it a valuable technique for maintaining bare metal pans and improving their performance for various sheet pan baking tasks.
Step-by-Step Guide to Seasoning a Baking Sheet
Preparing the Sheet Pan
Before seasoning, it's crucial to start with a perfectly clean pan. Wash the new sheet pan thoroughly with hot, soapy water to remove any manufacturing oils or residues. Use a soft sponge or cloth; avoid steel wool or harsh abrasives that could scratch the surface.
Rinse the pan completely and dry it immediately and thoroughly. Any residual water or soap can interfere with the seasoning process. Ensure the pan is bone dry before moving to the next step.
Applying Oil for Seasoning
Select a high smoke point oil for seasoning, such as flaxseed oil, grapeseed oil, or vegetable oil. Avoid olive oil or butter, which have lower smoke points and can become sticky or rancid.
Apply a very thin layer of your chosen oil over the entire surface of the pan, including the edges and underside. Use a paper towel or clean cloth to rub the oil in, then use a clean, dry cloth to wipe off as much excess oil as possible. The goal is a microscopic film; too much oil will result in a sticky, uneven surface.
Baking the Sheet Pan
Preheat your oven to a temperature just above the smoke point of the oil you used, typically between 350°F and 400°F (175°C to 200°C). Place the sheet pan upside down on the oven rack.
Bake for 1 to 2 hours. During this time, the oil will polymerize and bond to the pan. Turn off the oven and allow the pan to cool completely inside the oven. For the best initial seasoning, repeat the oiling and baking process 2-3 times once the pan has cooled.
Troubleshooting Seasoning Issues
If your seasoned pan feels sticky or has uneven patches after baking, it's usually due to applying too much oil or not wiping off the excess properly before baking. The thick layer of oil didn't fully polymerize.
To fix this, you can try heating the pan in the oven again, perhaps at a slightly higher temperature (carefully! ), to see if the excess oil will finish polymerizing. If it remains sticky, you may need to scrub the pan down (perhaps using salt as a gentle abrasive) and repeat the seasoning process, being meticulous about wiping off the excess oil before baking. Remember, a good seasoning builds up gradually with use, particularly when roasting foods with fats.
Sheet Pan Baking Tips: Techniques for Perfect Results
Preparing Ingredients for Even Baking
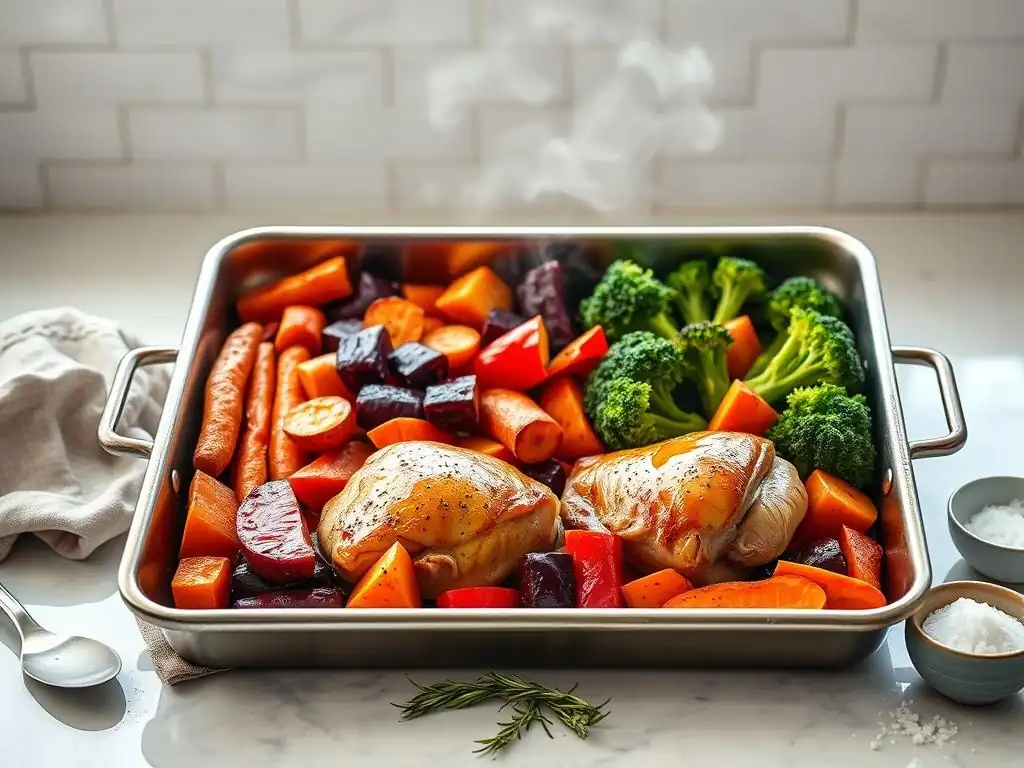
One of the most critical sheet pan baking tips for roasting is ensuring your ingredients are cut into uniform sizes and thicknesses. Whether you're roasting vegetables, chicken pieces, or fish fillets, inconsistent sizes mean some pieces will cook faster than others. For example, if roasting potatoes, cut them all into roughly 1-inch cubes or wedges so they finish cooking simultaneously.
Equally important is drying your ingredients before they hit the pan. Moisture on the surface of vegetables or proteins will cause them to steam rather than roast and brown. Patting items thoroughly dry with paper towels allows them to achieve that desirable caramelized exterior and crisp texture. This step is simple but dramatically improves the outcome of sheet pan meals.
Achieving Even Baking: Food Arrangement
Overcrowding is the enemy of even cooking on a sheet pan. When too many ingredients are packed tightly together, they release moisture, and the pan becomes a steaming environment instead of a roasting one. This prevents proper browning and crisping.
Always arrange ingredients in a single layer on the sheet pan, leaving some space around each piece to allow hot air to circulate freely. If you have a large amount of food, use two sheet pans instead of cramming everything onto one. Proper spacing ensures each piece gets direct heat contact with the pan and is surrounded by hot air, leading to consistent cooking and beautiful browning.
Temperature and Timing: Mastering Baking Temperatures
Sheet pan baking often utilizes higher temperatures, typically ranging from 375°F to 450°F (190°C to 230°C), especially for roasting vegetables and proteins. These higher temperatures are key to achieving quick cooking, good caramelization, and crispy textures. However, the specific temperature and cooking time will depend entirely on the ingredients being used. For instance, roasting root vegetables might take 30-45 minutes at 425°F, while chicken breasts could take 20-25 minutes at the same temperature.
Using an oven thermometer is a valuable sheet pan baking tip, as oven temperatures can vary significantly from the dial setting (sometimes by 25-50°F or more). Rotating the sheet pan halfway through the cooking time can also help compensate for any hot spots in your oven and ensure more even browning across the pan. Always check for doneness using visual cues or an internal thermometer for proteins.
Preventing Sticking: Parchment, Silicone, and Greasing
Preventing food from sticking is crucial for both successful results and easy cleanup. Parchment paper is a baker's best friend for sheet pan use. Lining the pan with parchment creates a non-stick barrier that allows cookies to slide off easily and prevents roasted vegetables or sticky glazes from adhering to the pan surface. It also makes cleanup significantly faster – often, you can just discard the parchment.
Silicone baking mats (like Silpat) are reusable alternatives to parchment paper. They provide an excellent non-stick surface, especially beneficial for delicate items like meringues or sticky caramels. While they don't promote browning quite as much as direct contact with a hot pan, they are fantastic for easy release. Traditional greasing with butter, oil, or cooking spray is also an option, though cooking spray can sometimes leave a difficult-to-remove residue over time. For baking cakes or bars on a sheet pan, greasing and flouring the pan provides extra insurance against sticking.
Maintaining Your Sheet Pan: Cleaning and Storage
Proper Cleaning Techniques
Cleaning your sheet pan promptly after use is one of the best ways to maintain its condition and prevent stains from setting in. For most tasks involving parchment paper or silicone mats, cleanup is minimal – often just a quick wash with hot water and dish soap is sufficient.
When food has come into direct contact with the pan, wash it with hot, soapy water using a non-abrasive sponge or brush. Avoid using steel wool or harsh scouring pads, especially on non-stick or seasoned surfaces, as these can scratch and damage the finish. For bare aluminum pans, excessive scrubbing can also remove the natural patina or seasoning that develops over time and aids in non-stick performance.
Removing Stubborn Stains
Baked-on food residue can be challenging to remove. For tough spots, try soaking the sheet pan in hot water with a generous amount of dish soap for at least 30 minutes, or even overnight. This helps loosen the cooked-on bits.
If soaking isn't enough, a paste made from baking soda and water can be effective. Apply the paste to the stained areas, let it sit for 15-20 minutes, then gently scrub with a non-abrasive sponge or brush. For bare aluminum, boiling water with a few tablespoons of baking soda or cream of tartar on the stovetop (if the pan fits) can help lift stubborn stains, though exercise caution with this method. Always rinse thoroughly and dry completely after cleaning.
Storing Sheet Pans to Prevent Damage
Proper storage is crucial to prevent scratches, warping, and other damage to your sheet pans. The best method is to store them vertically in a pan organizer or rack. This not only saves cabinet space but also keeps pans separate, preventing friction that can scratch surfaces.
If you need to stack your sheet pans, place a layer of protection between them. Paper towels, thin cloths, or even cardboard sheets cut to size can prevent the pans from rubbing against each other and scratching the cooking surface, particularly important for preserving non-stick coatings or bare metal surfaces. Stacking without protection is a common cause of premature wear and tear.
Extending the Life of Your Baking Sheets
Several practices can significantly extend the lifespan of your sheet pans. Always avoid extreme temperature changes, such as plunging a hot pan into cold water, as this thermal shock is a primary cause of warping, especially in thinner pans. Allowing the pan to cool slightly before washing is a simple but effective preventative measure.
Refrain from cutting directly on the surface of your sheet pan, particularly if it has a non-stick coating. Sharp knives will scratch and damage the finish. Using parchment paper or a silicone mat not only helps with food release but also protects the pan surface from scratches during prep or serving. Consistent use of parchment or mats, proper cleaning, and careful storage are fundamental sheet pan baking tips for maximizing the durability and performance of your pans.
Advanced Sheet Pan Baking Techniques
Roasting Vegetables on a Sheet Pan
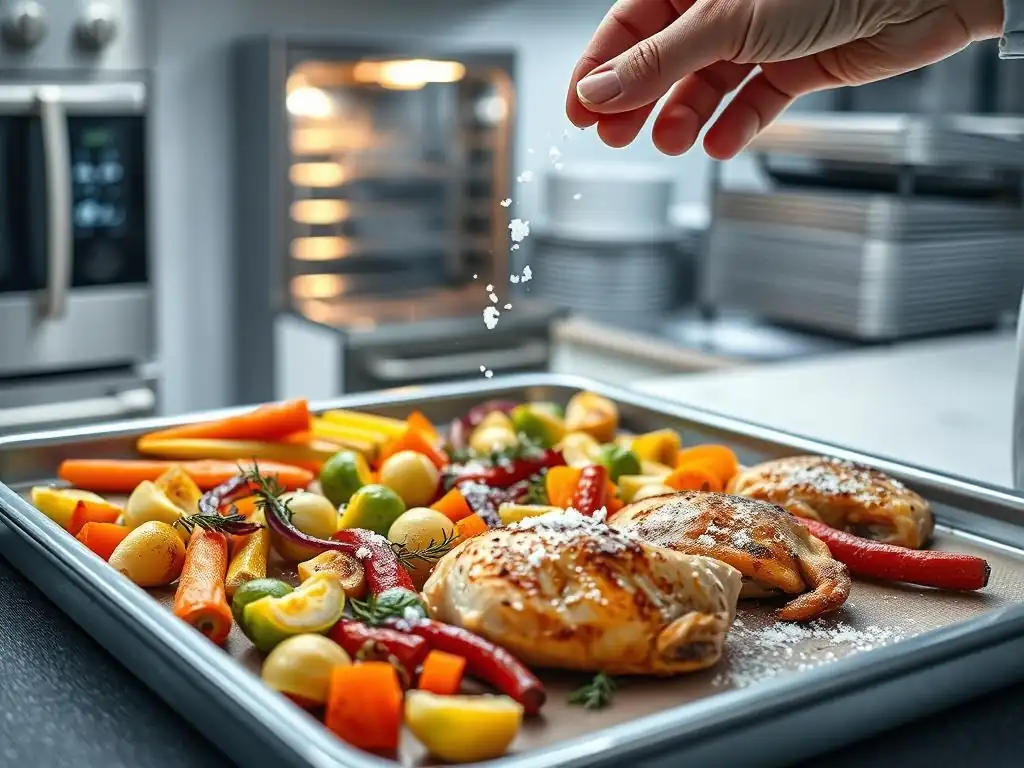
Roasting vegetables on a sheet pan is a simple yet incredibly rewarding technique. The key is to toss vegetables with oil, salt, and seasonings before spreading them in a single layer on the pan. Common temperatures range from 400°F to 425°F (200°C to 220°C). Timing varies by vegetable type and size; for example, broccoli might take 15-20 minutes, while denser vegetables like potatoes or sweet potatoes can take 25-40 minutes or longer.
For vegetables with different cooking times, you can start the longer-cooking ones first and add the quicker-cooking vegetables partway through. For instance, start roasting potatoes, then add broccoli or bell peppers during the last 15 minutes. Using parchment paper helps with cleanup and can contribute to better browning by ensuring direct contact with the pan's heat. These precise sheet pan baking tips elevate simple vegetable sides.
Sheet Pan Dinners: One-Pan Meals
Sheet pan dinners are a popular and efficient way to cook a complete meal with minimal cleanup. The concept involves combining a protein (chicken pieces, sausage, fish), vegetables, and sometimes a starch (like potatoes or chickpeas) on a single sheet pan and roasting them together.
The trick to successful sheet pan dinners is selecting ingredients that cook in roughly the same amount of time or staggering their addition to the pan. Cut denser vegetables and proteins into smaller pieces if needed, or add faster-cooking items like asparagus or cherry tomatoes during the final 10-15 minutes of roasting. High temperatures (often 400-425°F / 200-220°C) are typically used to ensure everything cooks through and browns nicely. This is a masterclass in applying practical sheet pan baking tips for busy weeknights.
The standard rimmed half-sheet pan is the quintessential pan for baking batches of cookies. For best results, use parchment paper or a silicone baking mat to prevent sticking and ensure easy release. Space cookie dough balls or scoops adequately apart (typically 2 inches) to allow for spread during baking.
Baking times and temperatures for cookies vary widely by recipe but commonly fall between 350°F and 375°F (175°C to 190°C). Check for doneness when the edges are set and lightly golden, and the center still looks slightly soft. For baking bars (like brownies or blondies), lining the sheet pan with parchment paper, leaving some overhang, allows you to easily lift the cooled bars out of the pan for clean slicing. Applying these sheet pan baking tips yields perfect cookies and bars.
Sheet Pan Desserts
Beyond cookies and bars, sheet pans are versatile for many other desserts. Sheet cakes, for instance, are baked directly in a sheet pan (often a 9x13 inch quarter-sheet or larger). Lining the pan with parchment and greasing/flouring the sides ensures the cake doesn't stick.
Other sheet pan desserts include pastries like palmiers (made with puff pastry) or even fruit tarts where the pastry is baked on the pan. The flat surface provides even heat for crusts and batters. Baking times and temperatures for desserts vary greatly depending on the specific recipe, but using the correct pan size and lining technique ensures even cooking and easy removal, fundamental sheet pan baking tips for sweets.
Troubleshooting Common Sheet Pan Baking Problems
Uneven Baking: Diagnosing and Correcting
Uneven baking is a frustrating problem often encountered with sheet pans. Common causes include inconsistent oven temperatures (ovens often have hot spots), overcrowding the pan, varying sizes of ingredients, or using a thin, low-quality pan that heats unevenly or warps.
To correct uneven baking, first ensure your oven is calibrated using an oven thermometer. If there are significant hot spots, rotate the sheet pan halfway through the baking time. Always arrange ingredients in a single layer with space between them to allow for proper air circulation. Make sure ingredients are cut into uniform sizes. If using an older, thin pan that warps frequently, consider upgrading to a heavier-gauge model for more consistent results. These simple sheet pan baking tips can solve many baking woes.
Sticking Issues: Prevention and Resolution
Food sticking to the sheet pan is another frequent issue, especially with sugary glazes, roasted potatoes, or delicate baked goods. This can happen if the pan wasn't properly greased or lined, if the non-stick coating is damaged, or if acidic items were cooked on bare aluminum without protection.
The best prevention is using parchment paper or a silicone baking mat, particularly for items prone to sticking. For non-stick pans, avoid metal utensils that can scratch the surface. If sticking occurs, soak the pan in hot, soapy water immediately after use. For stubborn residue on bare metal, a baking soda paste or careful use of a metal scraper (avoiding damage) might be needed. Effective sheet pan baking tips always include strategies for preventing and dealing with sticking.
Warping and Damage: Avoiding and Repairing
Sheet pans warp when exposed to sudden, drastic temperature changes, a phenomenon called thermal shock. Placing a cold pan directly into a very hot oven or, more commonly, putting a hot pan into cold water for washing can cause the metal to buckle dramatically. Thinner, lower-quality pans (like those around 20 gauge) are much more susceptible to warping than heavier-gauge pans.
To avoid warping, allow your sheet pan to cool down gradually for several minutes before washing it. Preheat your oven fully before placing the pan inside. Investing in thicker, professional-grade pans (16 or 18 gauge) offers much greater resistance to warping. Unfortunately, once a sheet pan is severely warped, it's very difficult to repair and may need to be replaced to ensure even baking performance. These preventative sheet pan baking tips save you money and frustration.
Sheet Pan Baking: A Beginner's Guide
Simple Sheet Pan Recipes
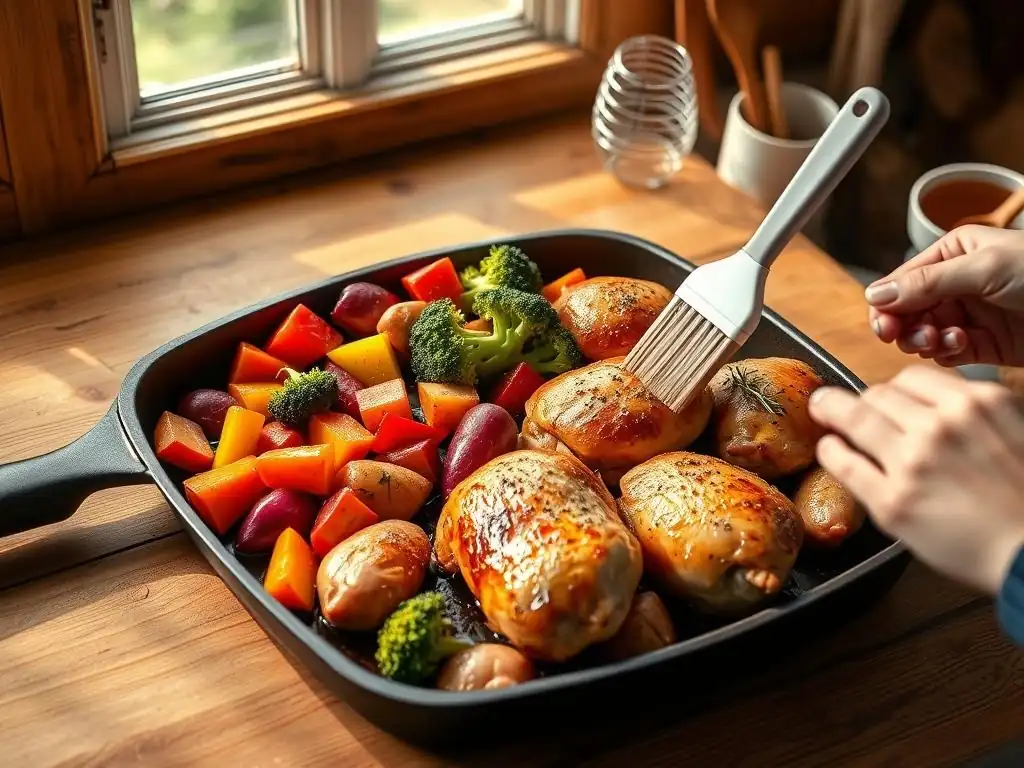
For those new to sheet pan baking, starting with simple recipes is a great way to build confidence. Roasting basic vegetables like broccoli, carrots, or potatoes tossed with olive oil, salt, and pepper is incredibly straightforward and yields delicious results.
Another easy entry point is using a sheet pan for baking pre-made items like frozen chicken nuggets or store-bought cookie dough. Simple sheet pan meals involving sausage and peppers or chicken pieces with root vegetables are also quite forgiving for beginners, as they involve minimal steps and ingredients. These introductory sheet pan baking tips make getting started easy and fun.
Essential Tools and Equipment
To begin your sheet pan baking journey, you don't need a lot of specialized equipment. The most essential item is at least one good quality, rimmed half-sheet pan (approximately 18x13 inches). Having two is even better for cooking larger quantities or multiple items simultaneously.
Beyond the pan itself, parchment paper is highly recommended for easy cleanup and preventing sticking – it's almost indispensable for many sheet pan baking tips. A basic spatula or set of tongs for turning and removing food is also necessary. As you get more comfortable, you might consider adding a silicone baking mat or a wire rack that fits inside the sheet pan for cooling or elevating food.
Building Confidence
The beauty of sheet pan baking for beginners lies in its simplicity and relatively low barrier to entry. Start with very simple recipes that require minimal prep, like roasting a single type of vegetable. As you gain confidence, gradually move on to slightly more complex tasks, such as roasting chicken pieces or attempting a simple sheet pan dinner with just two or three ingredients.
Celebrate your successes, even small ones like perfectly roasted broccoli. The forgiving nature of many sheet pan recipes means that even if things aren't absolutely perfect, the results are usually still tasty. Focus on mastering the basics of not overcrowding the pan and controlling temperature, and you'll quickly become comfortable with this versatile cooking method, applying effective sheet pan baking tips along the way.
Favorite Sheet Pan Recipes
Sheet Pan Lemon Herb Roasted Chicken and Asparagus
This is a classic and flavorful sheet pan dinner that's both healthy and easy. Bone-in, skin-on chicken thighs or breasts are often used for maximum flavor and juiciness. They are typically tossed with olive oil, lemon zest and juice, minced garlic, and fresh herbs like rosemary and thyme, along with salt and pepper.
Asparagus spears are added to the pan during the last 15-20 minutes of the chicken's cooking time, tossed simply with olive oil, salt, and pepper. The chicken is roasted at a high temperature (around 400-425°F / 200-220°C) until cooked through (internal temperature reaches 165°F / 74°C), and the asparagus is tender-crisp. This recipe perfectly utilizes the benefits of sheet pan baking for a complete meal.
Baking cookies on a sheet pan is a fundamental use. This recipe highlights how a simple technique can yield impressive results. Using your favorite chocolate chip cookie dough (homemade or store-bought), scoop portions onto a parchment-lined half-sheet pan, leaving ample space (e.g., 2-3 inches) between cookies to allow for spread.
Press extra chocolate chunks into the tops of the dough balls and sprinkle with flaky sea salt before baking. Bake at a standard cookie temperature, often 350-375°F (175-190°C), for 10-14 minutes, rotating the pan halfway through for even baking. The cookies are done when the edges are golden and the centers still look slightly soft. These essential sheet pan baking tips produce perfectly baked cookies every time.
Sheet Pan Margherita Pizza
Making pizza on a sheet pan results in a delicious, rectangular pie with a wonderfully crispy crust. Stretch or press your pizza dough (store-bought or homemade) to fit a greased or parchment-lined sheet pan, creating a slight lip around the edge.
Spread a thin layer of tomato sauce over the dough, leaving the edge clear. Sprinkle with shredded mozzarella cheese, then top with slices of fresh mozzarella and fresh basil leaves (some prefer to add basil after baking to keep it vibrant). Bake at a high temperature (425-450°F / 220-230°C) for 12-20 minutes, depending on dough thickness and desired crispiness. The cheese should be melted and bubbly, and the crust golden brown. This recipe showcases the versatility of sheet pan baking tips for baked goods beyond sweets.
Conclusion: Elevate Your Baking with Proper Sheet Pan Care
Mastering sheet pan baking is about more than just following recipes; it starts with understanding your equipment. Choosing the right size and material, like a sturdy aluminum half-sheet pan, sets the stage for success. For bare metal pans, understanding the benefits of seasoning and how to properly perform the initial process can unlock natural non-stick properties that improve with every use.
Applying fundamental sheet pan baking tips, such as preparing ingredients uniformly, avoiding overcrowding, and using parchment or silicone mats, ensures even cooking, prevents sticking, and leads to consistently excellent results whether you're roasting vegetables, cooking a full dinner, or baking delicate cookies. Coupled with proper maintenance – cleaning promptly, removing stubborn stains carefully, and storing pans correctly to prevent damage and warping – you can significantly extend the life and performance of your baking sheets. By following these guidelines, you'll elevate your sheet pan baking from basic cooking to professional-level results, enjoying delicious food and easy cleanup every time.
Frequently Asked Questions
What is sheet pan baking, and why should I try it?
Sheet pan baking involves cooking food on a flat, rectangular pan in the oven. It's popular due to its ease of use and minimal cleanup, making it perfect for busy bakers.
What are the different types of sheet pans, and which is best for me?
Sheet pans come in various materials, including aluminum, stainless steel, and non-stick. Aluminum pans are excellent for even heat distribution, while non-stick pans are ideal for delicate items.
How do I properly season a sheet pan, and why is it important?
Seasoning a sheet pan involves baking it with a thin layer of oil at a high temperature. This creates a protective layer, preventing sticking and promoting even browning over time.
How do I clean my sheet pan without damaging it?
Avoid abrasive cleaners and scrubbers. For baked-on food, soak the pan in warm, soapy water or use a baking soda paste. Gentle cleaning preserves the pan's surface and longevity.
What are some essential sheet pan baking tips for beginners?
Always use parchment paper or a silicone baking mat to prevent sticking. Ensure even spacing of items on the pan for optimal browning and rotate the pan halfway through baking for consistent results.
Final Reflection: The Enduring Power of the Humble Sheet Pan
The sheet pan, a seemingly simple kitchen tool, has quietly revolutionized home cooking, offering efficiency, ease, and delicious results. Its versatility transcends mere convenience; it's a gateway to effortless weeknight meals and impressive entertaining spreads. Mastering its use unlocks a world of culinary possibilities, transforming even the most basic ingredients into something extraordinary.
The impact of sheet pan cooking extends beyond individual kitchens; it's a reflection of our increasingly busy lives and the desire for simple, healthy, and delicious food. It's a testament to the power of mindful preparation and the joy of creating something beautiful from seemingly humble beginnings. Simplicity is the ultimate sophistication,
Leonardo da Vinci famously said, and this perfectly encapsulates the philosophy behind sheet pan cooking. The ease of cleanup, the minimal cleanup, and the ability to create complete meals in one pan resonate deeply with today's time-conscious cooks.
Now, consider your own kitchen. Think about the potential unlocked by mastering the art of sheet pan cooking. What new recipes will you explore? What flavors will you experiment with? Don't just limit yourself to the basics; embrace the versatility of this essential tool. Let the simplicity of the sheet pan inspire you to create delicious, healthy meals that nourish both your body and your soul. The journey to becoming a sheet pan pro is a rewarding one—start today!
Unleash Your Inner Baking Pro: Master the Sheet Pan!
Thanks for diving into the world of sheet pan cooking with us! We hope you now feel confident tackling any recipe with ease and efficiency. Ready to put your newfound knowledge into practice?
- Embrace the sheet pan this week: Choose your favorite sheet pan-friendly recipe (or try a new one!) and get cooking. Time to wow yourself (and maybe some friends!) with perfectly roasted veggies or crispy sheet pan chicken!
- Share your sheet pan creations: Show us your culinary masterpieces! Tag us on social media – let's inspire each other.
- Explore our other baking guides: Discover more baking tips and tricks to elevate your baking game. We've got plenty more where this came from!
Ready to transform your weeknight dinners (and weekends, too!) with the simplicity and deliciousness of sheet pan cooking?