
Fixing Dense Bread Caused by Cold Temperatures

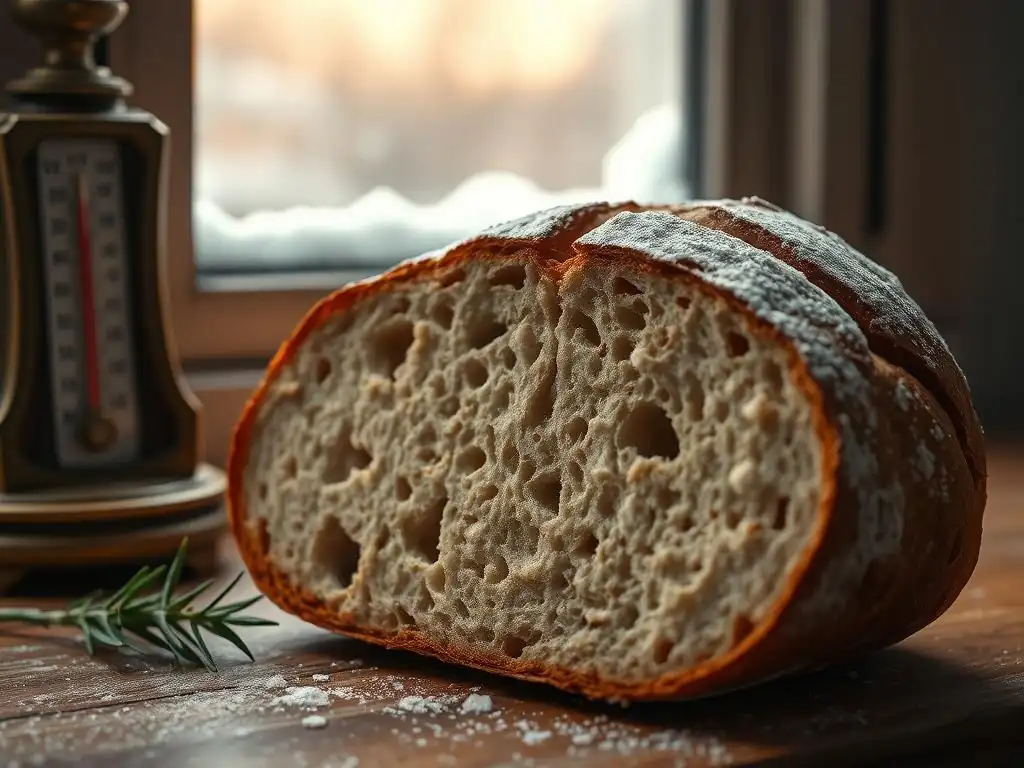
Welcome to BakeWithEase, your haven for all things baking! Ever wondered why your bread turns out dense and disappointing when the kitchen's a bit chilly? Dive into our guide, "Fixing Dense Bread Caused by Cold Temperatures," and unlock the secrets to perfectly risen loaves, even when the thermostat dips. Learn how to combat the effects of cold temperatures and transform your baking game. Ready to banish dense bread forever? Let's get baking!
- Fixing Dense Bread: How Cold Temperatures Affect Your Bake (BakeWithEase.com)
- Understanding Why Cold Weather Leads to Dense Bread
- Identifying Dense Bread Symptoms: Is Cold the Cause?
- Troubleshooting Dense Bread Caused by Cold: Practical Solutions
- Preventing Dense Bread: Proactive Measures for Cold Days
- Recipe Adjustments for Baking Bread in Cold Weather [Sourdough Bread Adaptation]
- Mastering Bread Baking in Cold Weather: Final Thoughts and Tips
- Frequently Asked Questions
- Final Reflection: The Unexpected Power of Temperature in Baking
- Unlock the Secret to Light & Fluffy Bread!
Fixing Dense Bread: How Cold Temperatures Affect Your Bake (BakeWithEase.com)
Baking is a science as much as an art, and external factors like temperature play a significant role in the outcome of your bread. One common issue bakers face, especially during colder months, is dense bread. This isn't just a minor inconvenience; it affects texture, rise, and overall enjoyment. Understanding why cold temperatures lead to dense bread is the first step towards fixing and preventing it. Cold conditions can slow down crucial processes in bread making, primarily impacting yeast activity and gluten development, resulting in a loaf that's heavy and lacks that desired airy texture.
This article will guide you through identifying the signs of dense bread caused by cold, explain the underlying reasons, and provide practical, friendly solutions to ensure your bread rises beautifully, regardless of the weather outside. We'll cover simple adjustments to your process, techniques for warming your dough safely, and even how to adapt specific recipes like sourdough for colder environments. Get ready to bake light, fluffy loaves all year round!
Understanding Why Cold Weather Leads to Dense Bread
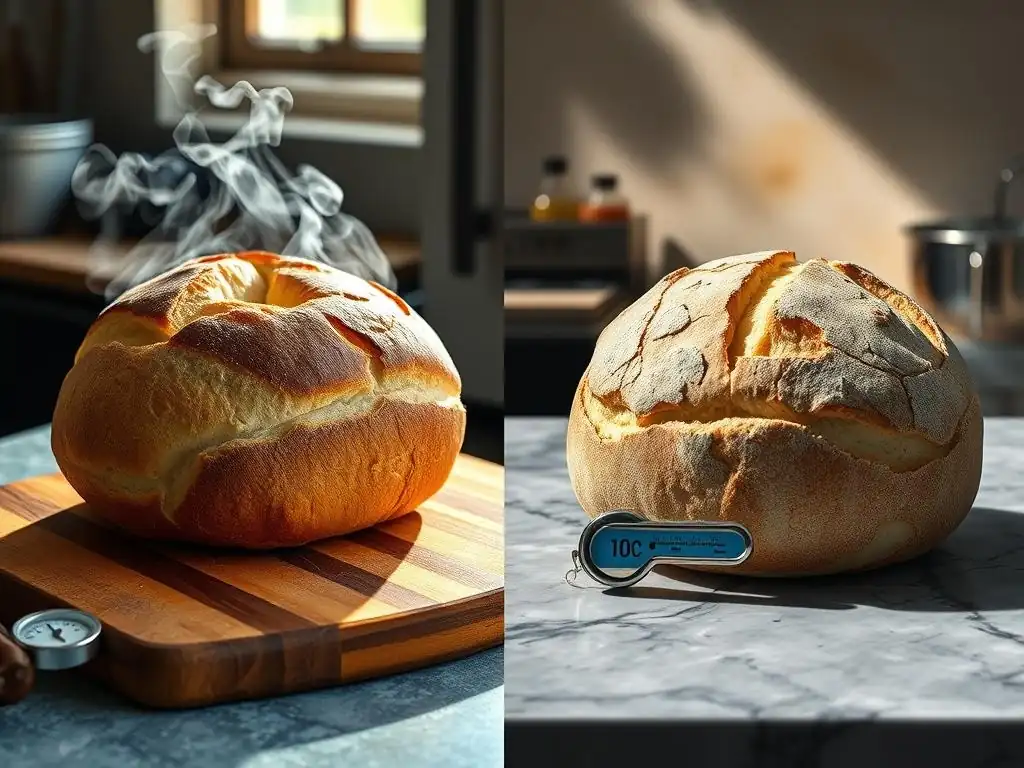
When the temperature drops, several key reactions in your bread dough slow down considerably. These processes are essential for creating the structure and texture we associate with good bread. Yeast becomes sluggish, and gluten doesn't develop as efficiently, leading to a dough that doesn't rise properly and results in a dense final product. It's like trying to run a marathon in freezing temperatures – everything just moves a bit slower and requires more effort.
The primary culprit behind dense bread in cold conditions is the impact on yeast and gluten. A cold environment directly inhibits the optimal conditions required for these ingredients to do their job effectively. Let's delve into how exactly cold temperatures throw a wrench in the works of your bread-making process.
The Impact of Cold Temperatures on Yeast Activity
Yeast is a living organism that thrives in warm environments. Its primary job in bread making is fermentation: consuming sugars in the dough and producing carbon dioxide gas. This gas is what makes bread rise. The optimal temperature range for most yeasts (like active dry or instant yeast) is typically between 75°F and 85°F ( 24°C and 29°C). As temperatures drop below this range, the yeast's metabolic rate slows down dramatically.
Below 70°F ( 21°C), yeast activity becomes significantly sluggish. If your kitchen or proofing area is cold, say 60°F ( 15°C) or even lower, the yeast will produce gas at a much slower rate than expected. This leads to under-proofing, where not enough gas is generated to create a light, airy structure. The result? A loaf that doesn't rise much during proofing or baking and turns out heavy and dense.
Gluten Development in Cold Environments: A Slower Process
Gluten, the protein network formed when flour and water are mixed and kneaded, provides the structure that traps the carbon dioxide gas produced by the yeast. Proper gluten development is crucial for a good rise and a light texture. While kneading mechanically develops gluten, the dough also benefits from time to rest, allowing the gluten strands to relax and align, becoming more extensible.
Cold temperatures affect gluten development in a couple of ways. The enzymes that help break down proteins and make gluten more pliable are less active in the cold. Furthermore, the dough itself is less pliable and stiffer when cold, making it harder to stretch and develop the gluten network effectively, whether through kneading or during the resting period. This can lead to a tighter, less elastic dough that struggles to expand fully when the yeast produces gas, contributing to cold temperatures dense bread.
Cold Dough Temperature: The Key Culprit
Ultimately, the temperature of your dough is the most critical factor influenced by cold ambient temperatures. If your ingredients are cold (e.g., flour stored in a cold pantry, cold water), and your mixing and proofing environment is cold, your dough temperature will remain low. A dough temperature below the optimal range directly impacts both yeast activity and gluten development simultaneously.
For many standard bread doughs, aiming for a final dough temperature around 75-78°F ( 24-26°C) after mixing is ideal. If your dough is significantly colder than this, perhaps down in the 60s°F ( 15-20°C), you are already starting with a handicap. This cold dough will require much longer proofing times and might still struggle to achieve the desired rise, leading to dense bread. Monitoring and managing the dough temperature is paramount when baking in cold conditions.
Identifying Dense Bread Symptoms: Is Cold the Cause?
Before you start troubleshooting, it's helpful to confirm that cold temperatures are indeed the likely culprit behind your dense bread. Several signs point towards under-proofing caused by cold conditions, which is a primary reason for a heavy loaf. Recognizing these symptoms will help you apply the right solutions.
The symptoms of dense bread due to cold often manifest both before and after baking. Paying attention to how your dough behaves during proofing and examining the final baked loaf can provide clear clues.
Recognizing the Signs of Under-Proofed Dough
Under-proofing is a direct consequence of slow yeast activity, often caused by cold temperatures. You'll typically notice that your dough hasn't increased significantly in volume during the recommended proofing time. For example, a recipe might say "proof until doubled in size," but after the specified time, your dough might have only increased by 50% or less, especially if the environment is cold.
Another sign is the "poke test." When you gently poke the surface of a properly proofed dough, the indentation should spring back slowly, leaving a small mark. If the indentation springs back immediately, the dough is likely under-proofed and needs more time.
If it doesn't spring back at all and the dough feels very slack, it might be over-proofed (less common in very cold conditions, but possible if you dramatically extended time without warmth). A dough that feels heavy and doesn't show much signs of life during proofing is a strong indicator of cold temperatures inhibiting yeast activity, leading to potential dense bread.
Checking Your Dough Temperature: A Crucial Step
As mentioned earlier, dough temperature is a key indicator. If you suspect cold is causing issues, measure your dough's internal temperature after mixing. Using an instant-read thermometer, gently insert it into the center of the dough mass. If the temperature is significantly below the ideal range (e.g., below 70°F or 21°C), it confirms that cold is a major factor affecting your yeast and gluten.
Knowing the actual temperature of your dough provides concrete evidence and helps you understand the scale of the problem. A dough temperature of 65°F ( 18°C) will behave very differently from one at 78°F ( 26°C). This measurement is a straightforward way to diagnose if cold is the root cause of your dense bread issues before it even goes into the oven.
Examining the Bread's Crumb Structure: A Tell-Tale Sign
After baking, the internal structure of your bread, known as the crumb, offers the final piece of evidence. Dense bread caused by cold temperatures and under-proofing typically has a tight, compact crumb structure with very few large holes. The texture will feel heavy and possibly slightly gummy or doughy.
In contrast, properly proofed bread will have a more open, airy crumb with varying sizes of holes distributed throughout. If you slice into your loaf and see a uniform, tightly packed interior with no significant air pockets, it's a strong sign that the dough didn't rise adequately, often due to insufficient fermentation time or temperature, pointing back to cold temperatures as a likely cause of the dense bread.
Troubleshooting Dense Bread Caused by Cold: Practical Solutions
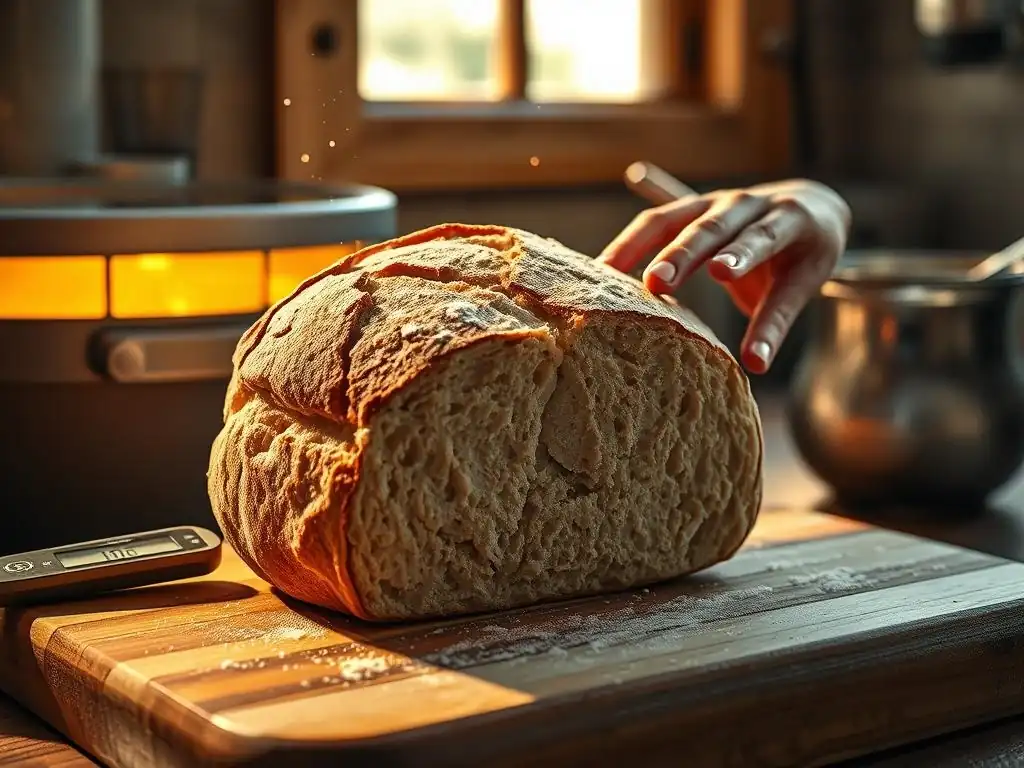
Now that you understand why cold temperatures affect your bread and how to identify the signs, let's explore practical solutions to combat dense bread. These techniques aim to compensate for the slower activity of yeast and gluten in colder environments.
Implementing one or a combination of these solutions can significantly improve your bread's rise and texture when baking during colder periods. Remember, the goal is to help the dough achieve the necessary fermentation and development despite the low ambient temperature.
Solution 1: Adjusting Proofing Time in Cold Weather
Since cold temperatures slow down yeast activity, the most straightforward solution is to simply give your dough more time to rise. The "double in size" rule still applies, but the time it takes to reach that state will be considerably longer than in a warm kitchen.
Extending Proofing Time: Patience is Key
If a recipe suggests a 1-hour proofing time at room temperature (assuming around 70-75°F or 21-24°C), and your kitchen is 60°F ( 15°C), you might need to double or even triple that time. A dough that proofs in 1 hour at 75°F might take 2.5 to 3 hours at 60°F. Don't strictly adhere to the clock; instead, watch the dough itself. Proof until it has visibly increased in volume according to the recipe's instructions (e.g., doubled).
This requires patience, but it's a simple adjustment that doesn't require any special equipment. Just find a relatively draft-free spot and let time do its work. This extended proofing allows the sluggish yeast enough time to produce the necessary gas to inflate the dough, helping to prevent dense bread.
Monitoring Dough Volume: Look for the Rise
Instead of relying solely on time, focus on the visual cues of your dough. Place your dough in a clear container or bowl so you can easily see its progress. Mark the starting level with tape or a marker. Proof the dough until it has reached the volume specified in the recipe (usually doubled). This visual check is much more reliable than a timer, especially when dealing with variables like cold temperatures that cause dense bread.
Using a clear, straight-sided container is particularly helpful for accurately judging when the dough has doubled in volume. Some bakers even use specialized proofing containers with measurement markings. This method ensures you don't bake under-proofed dough, regardless of how long it took to reach the target volume in the cold.
Solution 2: Warming Up Your Dough (Safely!)
Creating a warmer environment for your dough can significantly speed up proofing and counteract the effects of cold temperatures. There are several simple ways to do this without special equipment.
Creating a Warm Proofing Environment: Simple Methods
You can create a makeshift proofing box using your oven (turned off). Boil a pot of water and place it on the bottom rack of your cold oven. Place your covered dough on the middle rack. The steam from the hot water will warm the air inside the oven, creating a humid and warm environment ideal for proofing. Close the oven door to trap the warmth.
Another simple method is to place the covered dough near a warm appliance, like a refrigerator vent (the side, not the back) or on top of a warm (not hot) stovetop after cooking has finished. Just ensure it's not too hot, as excessive heat can kill the yeast. Aim for a consistent temperature in the 75-85°F ( 24-29°C) range if possible.
Using a Warm Oven (with Caution): A Gentle Approach
Some ovens have a proofing setting, which typically maintains a temperature around 80-90°F ( 27-32°C). If yours does, this is an excellent option. If not, you can gently warm your oven by turning it on to its lowest setting for just a minute or two, then turning it off before placing the dough inside.
Important Caution: Ovens heat up quickly. Be extremely careful not to make the oven too hot. If it feels uncomfortably warm to your hand, it's too hot for the dough and could kill the yeast, leading to dense bread. The goal is a gentle warmth, not high heat. Always turn the oven off before placing the dough inside unless using a specific proofing setting.
The Warm Water Bath Technique: A Helpful Trick
For a more direct warming method, you can use a warm water bath. Place your dough in a bowl, cover it, and then place that bowl inside a larger bowl or sink filled with warm water (around 80-90°F or 27-32°C). Ensure the water level comes partway up the sides of the dough bowl but doesn't risk spilling in.
The warmth from the water will transfer through the bowl to the dough, raising its temperature and stimulating yeast activity. You might need to change the water periodically if it cools down. This technique is particularly effective for smaller batches of dough and can significantly reduce proofing time in cold conditions, helping prevent cold temperatures dense bread.
Solution 3: Increasing Yeast Quantity in Cold Conditions
While ideally you adjust time or temperature, a small increase in yeast can help compensate for slow activity in a cold environment. This is a solution to use cautiously, as too much yeast can lead to off-flavors.
Adjusting Yeast Amount: A Small Increase Can Help
If you consistently bake in cold conditions and warming methods aren't feasible, you can try slightly increasing the amount of yeast in your recipe. If a recipe calls for, say, 1 teaspoon of instant yeast, you might try 1.25 or even 1.5 teaspoons. This provides a larger population of yeast cells to work at the slower rate, potentially helping the dough rise more adequately.
Avoid drastically increasing the yeast, as this can cause the dough to rise too quickly (leading to a poor structure) and can impart an unpleasant yeasty or alcoholic flavor to the final bread. A modest increase, perhaps 25-50% more yeast than called for, is usually sufficient to make a difference in cold temperatures without negative side effects.
Choosing the Right Type of Yeast: Instant vs. Active Dry
Instant yeast is generally more vigorous and reliable than active dry yeast, especially in less-than-ideal conditions like cold temperatures. Instant yeast can be added directly to the dry ingredients and doesn't require proofing in warm water first, though that step can sometimes give it a head start.
If your recipe calls for active dry yeast, ensure you are proofing it correctly in warm water ( 105-115°F or 40-46°C) before adding it to the dough. This step confirms the yeast is alive and active before it goes into the colder dough environment. Using instant yeast might offer a slight advantage in overcoming the sluggishness caused by cold temperatures and preventing dense bread.
Solution 4: Improving Dough Hydration in Cold Climates
Hydration (the ratio of water to flour) affects dough consistency and fermentation speed. Slightly increasing hydration can sometimes help in cold conditions.
Adding a Little Extra Water: Enhancing Dough Flexibility
A slightly wetter dough can sometimes ferment a bit faster and is generally more extensible, meaning the gluten network can expand more easily to accommodate the gas produced by the yeast. If your recipe uses a relatively low hydration (e.g., 60-65%), you might try adding an extra tablespoon or two of water.
Be cautious not to add too much water, as very wet dough can be difficult to handle and may require different techniques. A small increase in hydration can make the dough less stiff in cold temperatures, allowing for better expansion and potentially reducing the likelihood of dense bread.
Adjusting Liquid Temperature: A Warm Start
While adding warm water directly to the flour can kickstart yeast activity, it's crucial to use the correct temperature. Water that is too hot will kill the yeast. For instant yeast mixed with dry ingredients, aim for lukewarm water around 90-100°F ( 32-38°C). For active dry yeast proofed separately, use water in the 105-115°F ( 40-46°C) range.
Using warm liquid (water or milk) when mixing your dough will raise the initial dough temperature, giving the yeast a head start before the cold ambient temperature begins to slow it down. This simple step can be very effective in preventing cold temperatures dense bread right from the start of the process.
Preventing Dense Bread: Proactive Measures for Cold Days
Beyond troubleshooting mid-bake, there are steps you can take before you even start mixing to minimize the impact of cold temperatures on your bread. Being proactive is often the easiest way to ensure a successful bake.
Thinking ahead about the temperature of your ingredients and your proofing environment can save you time and frustration later. These preventative measures are simple yet effective ways to bake beautiful loaves even when it's chilly outside.
Investing in a Dough Thermometer: Accurate Temperature Readings
One of the best tools for baking success, especially in variable temperatures, is a reliable thermometer. An instant-read thermometer allows you to measure the temperature of your water, your mixing environment, and most importantly, your dough.
Knowing your dough's exact temperature after mixing is invaluable. If it's too cold, you know immediately that you need to employ warming techniques or significantly extend proofing time. This takes the guesswork out of the process and is a key step in preventing cold temperatures dense bread. You can find inexpensive digital thermometers online or in kitchen supply stores.
Maintaining a Consistent Room Temperature: Creating a Baker's Haven
Ideally, your baking environment would be consistently warm. While you can't always control your home's temperature, try to find the warmest, draft-free spot for your dough to proof. Avoid placing it near cold windows or exterior doors.
If possible, turn up the thermostat in the room where you'll be baking for an hour or two before you start. Even raising the room temperature by a few degrees, say from 60°F ( 15°C) to 65°F ( 18°C), can make a noticeable difference in yeast activity and help prevent cold temperatures dense bread.
Using a Bread Machine with a Proofing Setting: Automated Temperature Control
Many modern bread machines have a dedicated dough setting or a proofing cycle. These settings often incorporate controlled heating to maintain an optimal temperature for yeast activity. If you frequently bake bread and struggle with cold temperatures, a bread machine can be a worthwhile investment.
The automated temperature control in a bread machine eliminates the variable of ambient temperature during the crucial proofing stage. This ensures consistent fermentation, making it much easier to avoid dense bread caused by cold conditions. Simply follow the machine's instructions for the dough cycle.
Recipe Adjustments for Baking Bread in Cold Weather [Sourdough Bread Adaptation]
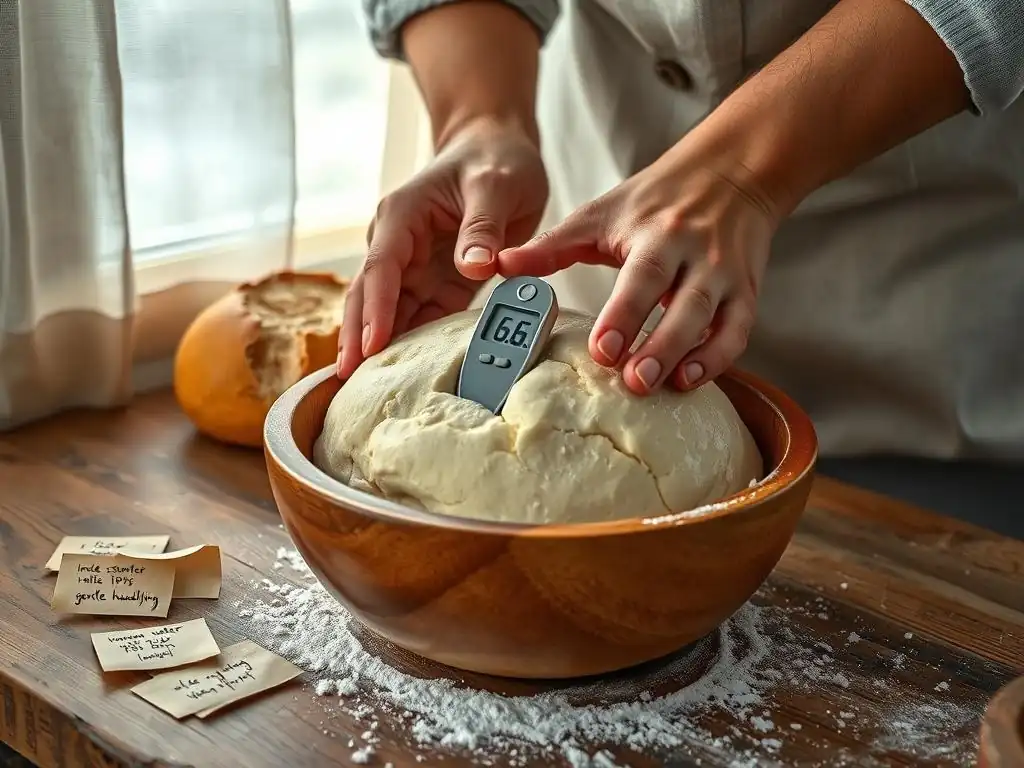
Sourdough baking in cold weather presents its own unique challenges. Sourdough starters, being wild cultures, are also highly sensitive to temperature. Adapting your sourdough process is key to success.
While the principles of yeast activity and temperature still apply, sourdough starters behave differently than commercial yeast. They are slower and more complex, requiring slightly different considerations when baking in cold temperatures.
Adapting Sourdough Bread for Cold Proofing
Sourdough starters are most active between 75-80°F ( 24-27°C). When your starter and dough are cooler, their activity slows down significantly. One common adaptation for cold weather sourdough is to use warmer water when feeding your starter and when mixing your dough. Aim for water temperatures that result in a final dough temperature in the low-to-mid 70s°F ( 21-24°C).
Another adaptation is to extend the bulk fermentation and proofing times considerably. What might take 4-6 hours at 75°F could easily take 8-12 hours or even longer at 65°F ( 18°C). Some bakers embrace cold proofing (retarding the dough in the refrigerator) for flavor development, but if your initial bulk ferment isn't sufficient due to cold temperatures, the final cold proof won't compensate, still leading to dense bread. Ensuring adequate warm bulk fermentation is often more critical than ever in cold climates.
Recommended Proofing Times for Sourdough Bread in Cold Weather
There's no single "recommended" time, as it depends heavily on your starter's vigor and the exact dough temperature. However, as a general guideline, if your recipe calls for a 4-hour bulk ferment at room temperature ( 75°F), you might need 6-8 hours or more at 68°F ( 20°C), and potentially 10-12 hours or longer at 65°F ( 18°C).
Always use visual cues (like a 50-100% increase in volume, depending on your recipe and desired crumb) and the poke test rather than relying solely on time. Consider using a small sample of dough in a straight-sided container alongside your main dough mass to accurately track volume increase. Patience is paramount when dealing with sourdough and cold temperatures to avoid dense bread.
Mastering Bread Baking in Cold Weather: Final Thoughts and Tips
Baking delicious, light bread shouldn't be limited to warm months. By understanding how cold temperatures affect your dough and implementing the right techniques, you can achieve fantastic results year-round. It's all about compensating for the reduced activity of yeast and gluten.
Don't be discouraged by a few dense loaves. Every bake is a learning opportunity. With a little patience and adjustment, you'll master the art of baking in colder climates and consistently avoid cold temperatures dense bread.
Cold Weather Baking Checklist: Ensure Success Every Time
Here's a quick checklist to run through before you start baking on a cold day:
- [ ] Check the ambient temperature in your kitchen.
- [ ] Warm your ingredients if necessary (e.g., use warm water, let eggs sit out).
- [ ] Plan for longer proofing times.
- [ ] Consider warming your proofing environment (oven method, water bath, etc. ).
- [ ] Measure your dough temperature after mixing.
- [ ] Monitor dough volume and use the poke test, not just the clock, during proofing.
- [ ] If using sourdough, ensure your starter is vigorous before baking.
Following these steps will significantly increase your chances of a successful rise and a beautifully textured loaf, free from the issue of cold temperatures dense bread.
We love seeing your baking triumphs! If you've successfully baked a light and airy loaf despite the cold, share your experience. What techniques worked best for you? Did you adjust your proofing time, warm your dough, or make other changes?
Connecting with other bakers on BakeWithEase.com or through our community channels can provide valuable insights and encouragement. Learning from each other's experiences with challenges like cold temperatures causing dense bread makes us all better bakers. Happy baking, no matter the forecast!
Frequently Asked Questions
How do cold temperatures affect bread dough?
Cold temperatures significantly slow down yeast activity, leading to insufficient rising and ultimately, dense bread. The yeast needs warmth to properly ferment and produce the gases that make bread airy.
What is the ideal temperature for bread dough fermentation?
Generally, a temperature range of 75-85°F (24-29°C) is ideal for most bread doughs. This range allows the yeast to thrive and ferment efficiently.
How can I warm up my dough if my kitchen is cold?
Several methods exist, including using a proofing drawer, placing the dough near a warm oven (not on top!), or creating a warm water bath. These provide a more consistent and warmer environment.
Can I add more yeast to compensate for cold temperatures?
Adding more yeast isn't always the best solution. It can sometimes lead to an unpleasant yeasty taste. Instead, focus on creating a warmer environment to encourage the yeast to work properly.
What are some signs that my bread dough is under-proofed due to cold?
Under-proofed dough will feel dense and heavy. It may also spring back quickly when poked, indicating insufficient gas production. The final baked loaf will likely be small and compact.
Final Reflection: The Unexpected Power of Temperature in Baking
The impact of temperature on bread baking is far more significant than many home bakers realize; a seemingly minor chill can transform a light, airy loaf into a dense, disappointing brick. Understanding this fundamental principle unlocks a world of consistent baking success, regardless of seasonal fluctuations or kitchen inconsistencies. This knowledge isn't just about avoiding dense bread; it's about mastering the art of baking itself.
The frustration of a failed loaf, hardened by unexpected cold, is a familiar experience for many. It's a stark reminder of the delicate balance required in baking, where even subtle changes in environment can dramatically affect the outcome. Baking is a science, but it's also an art. It's about understanding the ingredients and the process, and adapting to the conditions.
This quote perfectly encapsulates the journey of mastering bread baking, a journey often marked by both triumphs and the humbling lessons learned from a dense, cold-weather loaf.
Now, armed with the knowledge gleaned from this article, I invite you to approach your next baking project with a renewed sense of awareness. Consider the temperature of your ingredients, your environment, and your equipment. Don't let a cold day dictate the texture of your bread. Instead, use this understanding to conquer the challenges and consistently create delicious, light, and airy loaves, no matter the season. Embrace the science, refine your art, and enjoy the rewarding experience of baking bread that truly sings.
Unlock the Secret to Light & Fluffy Bread!
Thanks for taking the time to learn how cold temperatures can affect your bread baking! We hope you now feel more confident in tackling those chilly days. Ready to put your new knowledge into practice?
- Bake a test loaf today: Use your favorite recipe and pay close attention to the dough's consistency and rise time. Note any differences compared to warmer days. This is the key to mastering cold-weather baking!
- Share your baking triumphs (or challenges!): Let us know how it goes in the comments below – we love hearing from our community!
- Consider experimenting with alternative proofing methods: Try a proof box or even a slow cooker to maintain a consistent temperature.
Ready to rise to the occasion and bake perfect loaves, no matter the temperature?