
Simple Steps to a Perfectly Baked Basic Sourdough

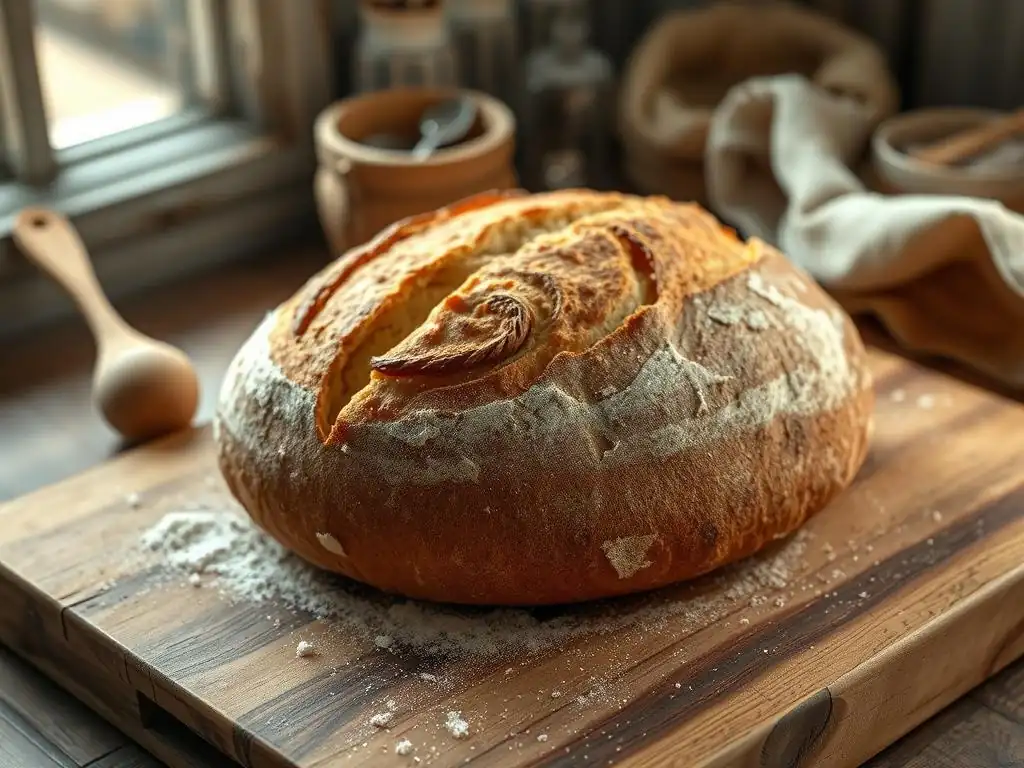
Welcome to BakeWithEase, your kitchen companion for conquering the delicious world of baking! Ever dream of pulling a perfectly baked basic sourdough from your oven, its crust crackling and its crumb airy and light? We're here to guide you, step-by-step, through the process. Discover the secrets to achieving sourdough success, even if you're just starting to explore intermediate baking techniques. Ready to unlock the magic? Let's get baking!
- Baking a Rustic Country Sourdough Loaf
- Introduction to Baking Sourdough at Home
- Essential Equipment for Sourdough Baking
- Key Ingredients for Your Rustic Sourdough
- Step-by-Step Guide to Baking a Rustic Country Sourdough
- Troubleshooting Common Sourdough Problems
- Tips and Tricks for Sourdough Success
- Sourdough Bread Recipe Variations
- Storing Your Homemade Sourdough
- Conclusion: Enjoying Your Sourdough
-
Frequently Asked Questions
- What makes BakeWithEase's basic sourdough recipe "perfectly baked"?
- Is this sourdough recipe suitable for baking beginners?
- What if I don't have a stand mixer? Can I still make this sourdough?
- How long does it take to make this basic sourdough recipe from start to finish?
- What ingredients do I need for this perfectly baked basic sourdough recipe?
- Final Reflection: The Enduring Magic of a Perfectly Baked Sourdough
- Unleash Your Inner Baker: Master the Sourdough!
Baking a Rustic Country Sourdough Loaf
Introduction to Baking Sourdough at Home
The Satisfaction of Baking Your Own Bread
There's a unique satisfaction that comes from pulling a warm, golden loaf of sourdough bread from your oven. It's a tangible reward for your patience and effort, a culmination of nurturing a living culture – your sourdough starter – and transforming simple ingredients into something truly magical.
Baking your own bread connects you to an ancient craft, offering a sense of accomplishment that store-bought loaves simply can't replicate. This journey into baking a perfectly baked basic sourdough recipe at home is not just about the final product; it's about the process, the aroma filling your kitchen, and the joy of sharing your creation.
Beyond the personal satisfaction, baking sourdough at home gives you complete control over the ingredients. You know exactly what goes into your perfectly baked basic sourdough recipe, avoiding additives and preservatives often found in commercially produced bread. This control allows you to tailor the loaf to your preferences, whether it's adjusting the hydration for a chewier crumb or experimenting with different flours for unique flavors. Embracing the art of baking sourdough means embarking on a rewarding culinary adventure that nourishes both body and soul.
What Makes This Rustic Sourdough Special?
This rustic country sourdough recipe is designed to be approachable for intermediate bakers while yielding impressive results: a loaf with a beautiful, crackling crust and an open, airy crumb. It focuses on fundamental techniques and understanding the process, making it an excellent foundation for mastering sourdough baking. Unlike some complex recipes, this version simplifies the steps without sacrificing quality, guiding you towards a perfectly baked basic sourdough recipe you'll be proud to share.
The "rustic" quality comes from its simple composition and baking method, often utilizing a Dutch oven to create the ideal steaming environment. This method mimics traditional hearth baking, promoting maximum oven spring and a robust crust development. By focusing on key stages like fermentation timing and proper shaping, this guide ensures you build the skills necessary to consistently achieve a perfectly baked basic sourdough, setting you up for success in future baking endeavors.
Essential Equipment for Sourdough Baking
Must-Have Tools: Scale, Banneton, Dutch Oven
Precision is paramount in sourdough baking, and a digital kitchen scale is your most critical tool. Measuring ingredients by weight, not volume, ensures consistency and accuracy, which is vital for replicating a successful perfectly baked basic sourdough recipe. Flour density can vary significantly, making cup measurements unreliable, so investing in a scale that measures in grams is essential for predictable results.
A banneton, or proofing basket, is used to give the shaped dough support during its final rise, helping it maintain its structure and contributing to a beautiful surface pattern. While you can improvise with a bowl lined with a floured cloth, a dedicated banneton is highly recommended. Finally, a Dutch oven is arguably the most effective tool for home bakers to achieve a bakery-quality crust and oven spring.
Its heavy lid traps steam released by the dough as it bakes, keeping the surface moist initially and allowing the loaf to expand fully before the steam dissipates and the crust crisps up. A perfectly baked basic sourdough recipe often relies on this steamy environment provided by a Dutch oven.
Recommended: Dough Scraper, Bread Lame
While not strictly mandatory, a bench scraper (or dough scraper) and a bread lame significantly improve the handling and appearance of your sourdough. A bench scraper is invaluable for portioning dough, cleaning your work surface, and helping to shape and move the sticky dough without tearing it. Its flat, firm edge makes quick work of scraping dough from counters or transferring it to the banneton.
A bread lame (pronounced "lahm") is a scoring tool, typically a handle holding a razor blade. Scoring the dough before baking serves a critical purpose: it provides controlled expansion points for the loaf as it bakes, preventing blowouts and allowing you to guide the oven spring. It also allows you to add decorative patterns to your perfectly baked basic sourdough. Using a sharp lame ensures clean cuts that open up beautifully in the oven.
Key Ingredients for Your Rustic Sourdough
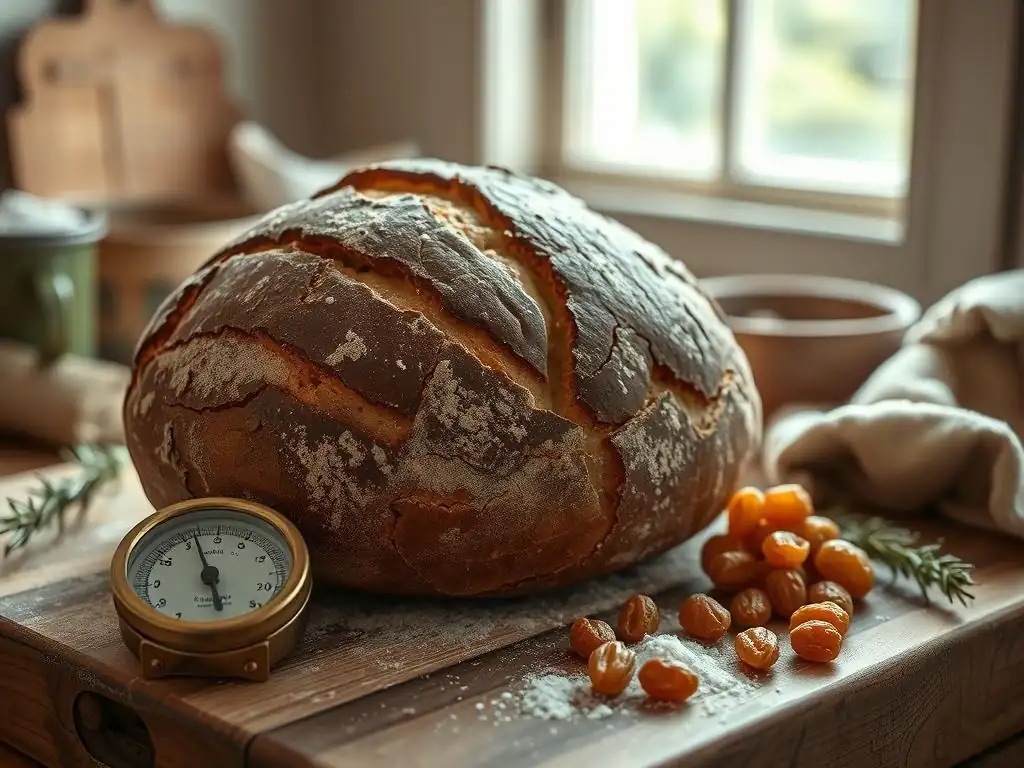
Understanding Your Sourdough Starter
Your sourdough starter is the heart of your perfectly baked basic sourdough recipe. It's a living culture of wild yeast and lactobacilli bacteria, nurtured with flour and water. A healthy, active starter is crucial for leavening the dough and developing the characteristic tangy flavor. You know your starter is ready to bake with when it has doubled (or even tripled) in size after feeding, looks bubbly and airy, and passes the float test (a small dollop floats in water).
Maintaining a consistent feeding schedule keeps your starter vigorous. For a perfectly baked basic sourdough, aim to use your starter when it's at its peak activity, typically 4-12 hours after feeding, depending on the temperature. The balance of yeast (for rise) and bacteria (for flavor and acidity) in your starter directly impacts the final loaf's texture and taste.
Bread Flour: The Foundation of Structure
Bread flour is the preferred choice for a perfectly baked basic sourdough recipe due to its higher protein content, typically ranging from 12% to 14%. This higher protein level translates to more gluten development when kneaded or folded. Gluten is the protein network that provides structure and elasticity to the dough, allowing it to trap the gases produced by the starter and achieve that desirable open crumb structure.
Using a good quality bread flour makes a significant difference in the texture and rise of your loaf. While all-purpose flour can work, bread flour provides the necessary strength to support the weight of the dough and achieve a robust oven spring. Experimenting with different brands can also be beneficial, as protein content and quality can vary.
Water: Achieving Optimal Hydration
Water plays a crucial role in sourdough baking, not just for hydrating the flour but also for activating the gluten and creating the right dough consistency. The ratio of water to flour (by weight) is known as hydration. A typical rustic sourdough might have a hydration level between 70% and 80%, meaning the water weight is 70-80% of the flour weight. Higher hydration generally leads to a more open crumb but also a stickier, harder-to-handle dough.
The temperature of the water can also influence fermentation speed. Using lukewarm water (around 80-90°F or 27-32°C) can help kickstart microbial activity, especially in a cooler kitchen. However, room temperature water is also perfectly acceptable. The key is to use filtered water if your tap water contains chlorine, which can inhibit microbial activity in your starter and dough.
Salt: Enhancing Flavor and Gluten Development
Salt is more than just a flavor enhancer in your perfectly baked basic sourdough recipe; it also plays a vital role in dough structure and fermentation control. Salt tightens the gluten network, making the dough stronger and easier to handle. This improved structure helps the dough hold its shape and rise better during baking.
Furthermore, salt helps regulate the fermentation rate by slowing down the activity of both yeast and bacteria. This slower fermentation allows for better flavor development and prevents the dough from over-proofing too quickly. Typically, salt is added after the autolyse step, giving the flour and water time to hydrate before the salt tightens the gluten. Using non-iodized salt like fine sea salt or kosher salt is generally recommended.
Step-by-Step Guide to Baking a Rustic Country Sourdough
Step 1: Preparing Your Levain
Refreshing Your Starter: Achieving Doubling in Size
To ensure your perfectly baked basic sourdough recipe gets the best possible rise, you need an active and vigorous starter. The first step is to feed your starter to create a 'levain' or 'preferment'. This is typically done by mixing a small amount of your mature starter with fresh flour and water, usually in a 1:1:1 ratio by weight (e.g., 20g starter, 20g water, 20g flour). Mix this in a clean jar and mark the starting level.
Place the levain in a warm spot (around 75-80°F or 24-27°C) and monitor its growth. For a perfectly baked basic sourdough, you want the levain to at least double in size, becoming bubbly and airy, with a slightly domed top before it starts to recede. This typically takes 4-8 hours, depending on the temperature and the starter's activity. Using the levain at its peak ensures maximum leavening power for your dough.
Judging Starter Readiness: The Visual Cues
Beyond doubling, several visual cues indicate your starter (or levain) is ready for baking your perfectly baked basic sourdough recipe. Look for numerous bubbles on the surface and throughout the mixture, indicating active fermentation. The texture should be light and airy, almost spongy.
A reliable test is the 'float test'. Gently take a small spoonful of the levain and drop it into a glass of water. If it floats, it's ready! If it sinks, it likely hasn't built up enough gas yet and needs more time. Using a levain that passes the float test is a strong indicator that your dough will rise properly.
Step 2: Mixing the Dough
Autolyse: Flour and Water Hydration
The autolyse step is a simple yet powerful technique for improving your perfectly baked basic sourdough. It involves mixing just the flour and water from your recipe and letting it rest for 30 minutes to an hour. Do not add the starter or salt at this stage.
During the autolyse, the flour fully hydrates, and enzymes naturally present in the flour begin to break down proteins. This process starts developing the gluten network without any mechanical work (like kneading or folding). The dough will feel less shaggy and more extensible after the rest, making subsequent mixing easier and improving the dough's overall structure and elasticity. This passive gluten development is a key step towards a perfectly baked basic sourdough with a great crumb.
Combining Ingredients: Levain, Flour, Water, Salt
After the autolyse, it's time to incorporate the remaining ingredients: the active levain and the salt. Add the levain to the autolysed dough and gently mix it in with your hands, squeezing and folding the dough until the levain is fully incorporated. This can take a few minutes as the dough will initially resist mixing.
Once the levain is integrated, add the salt. Mix the salt into the dough thoroughly. You might find it helpful to wet your hands slightly to prevent sticking. Continue mixing and gently folding the dough until the salt is evenly distributed. The dough will feel stickier initially, but resist the urge to add more flour. This complete mixing ensures all components are ready for the bulk fermentation phase, setting the stage for a perfectly baked basic sourdough.
Step 3: Bulk Fermentation
Importance of Bulk Fermentation: Gluten Development
Bulk fermentation, also known as the first rise, is the crucial period where the dough develops structure, flavor, and gas. It's the longest stage and happens before shaping. During this time, the yeast in the levain produces carbon dioxide, causing the dough to rise, while the bacteria produce organic acids, contributing to the characteristic sourdough tang and aiding in gluten development. Proper bulk fermentation is essential for achieving a perfectly baked basic sourdough with a good crumb and flavor.
The duration of bulk fermentation varies greatly depending on the ambient temperature and the activity of your starter. It can range from 4 hours in a warm kitchen (around 78-80°F or 26-27°C) to 12 hours or more in a cooler environment (below 70°F or 21°C). Monitoring the dough's volume increase and texture is more reliable than strictly following a time guideline.
Coil Folds: Strengthening the Dough
Throughout bulk fermentation, performing a series of coil folds (or stretch and folds) helps to strengthen the gluten network and build structure in the dough. These gentle manipulations organize the gluten strands, improving the dough's elasticity and ability to hold gas. Typically, you perform 3-5 sets of folds during the first 2-3 hours of bulk fermentation, with 30-60 minute intervals between each set.
To perform a coil fold, wet your hands slightly. Gently lift the dough from the center using both hands underneath, allowing the ends to stretch down. Then, fold the dough under itself like coiling a rope. Rotate the bowl and repeat 3-4 times until you've worked your way around the dough. This process builds tension and strength, contributing to a perfectly baked basic sourdough.
Monitoring Dough Development: Volume Increase and Bubbles
Knowing when bulk fermentation is complete is key to a perfectly baked basic sourdough. The dough should have increased significantly in volume, typically by 50% to 100%, depending on the recipe and desired outcome. Look for signs of fermentation activity, such as bubbles visible on the surface and around the edges of the dough where it meets the container.
The dough's texture will also change; it should feel lighter, more airy, and slightly puffy. A good test is the 'windowpane test': gently stretch a small piece of dough. If you can stretch it thinly enough to see light through it without tearing, the gluten is well-developed. However, for rustic sourdough, relying on visual cues of volume increase and bubbles is often sufficient. When in doubt, it's better to slightly under-ferment than over-ferment during this stage.
Step 4: Shaping the Dough
Pre-Shaping: Creating Surface Tension
After bulk fermentation, gently turn the dough out onto a lightly floured surface. The goal of pre-shaping is to create initial surface tension and give the dough a rough shape (usually a round boule or oval batard) before the final shaping. This rest allows the gluten to relax slightly after the bulk fermentation and handling.
Working gently to avoid degassing the dough too much, loosely shape it into your desired form. For a boule, gently cup your hands around the dough and pull it towards you, creating tension on the bottom surface. Let the dough rest, uncovered, for 20-30 minutes. This 'bench rest' allows the gluten to relax, making the final shaping easier and preventing the dough from tearing.
Final Shaping: A Round Boule
Final shaping is critical for giving your perfectly baked basic sourdough its structure and ability to hold its shape during proofing and baking. For a round boule, gently flatten the rested dough into a rough circle or square. Fold the top edge down to the center, then the bottom edge up to overlap the first fold.
Next, fold in the sides. Finally, starting from the top, roll the dough down towards you, tucking the seam underneath with your hands as you go, creating a tight ball with significant surface tension. The surface should be smooth and taut. This tension is vital for achieving good oven spring. Place the shaped dough seam-side up into a well-floured banneton.
Step 5: Proofing the Dough
Cold Proofing: Retarding Fermentation
Cold proofing, typically done in the refrigerator for 8-24 hours, is a common technique for baking a perfectly baked basic sourdough. Placing the shaped dough in a cold environment significantly slows down fermentation. This slower process allows for complex flavors to develop as the bacteria continue their work while the yeast activity is greatly reduced.
Cold proofing also makes the dough easier to handle and score straight from the refrigerator, as it firms up the exterior. The long, slow fermentation contributes greatly to the characteristic tangy flavor of a perfectly baked basic sourdough recipe and improves the crumb structure. The duration can be adjusted based on your schedule and desired level of tanginess.
Monitoring Proofing: The Poke Test
While cold proofing provides a buffer, it's still possible to over or under-proof the dough, especially if your refrigerator temperature fluctuates or the dough was already very active. The best way to check if your dough is ready to bake after cold proofing is the 'poke test'.
Gently press your floured finger into the side of the dough about half an inch deep. If the indentation springs back immediately, the dough is under-proofed and needs more time (though this is less common after a long cold proof). If the indentation slowly springs back but doesn't completely disappear, it's perfectly proofed and ready for baking your perfectly baked basic sourdough. If the indentation remains completely and doesn't spring back at all, the dough is likely over-proofed and may result in a flatter loaf.
Step 6: Baking Your Sourdough
Preheating: High Heat is Key
Achieving a beautiful crust and maximum oven spring for your perfectly baked basic sourdough requires a very hot oven. Preheat your oven, ideally with your Dutch oven inside, to a high temperature, typically 450-500°F (230-260°C). Allow ample time for the oven and the Dutch oven to heat thoroughly, usually at least 30-60 minutes after the oven reaches the set temperature.
This initial burst of high heat is crucial. When the dough hits the hot surface, it causes a rapid expansion of gases within the dough, known as oven spring. The hot environment also immediately starts setting the crust, but baking initially in a steamy environment prevents it from setting too quickly, allowing for maximum expansion.
Scoring: Preventing Explosions and Creating Patterns
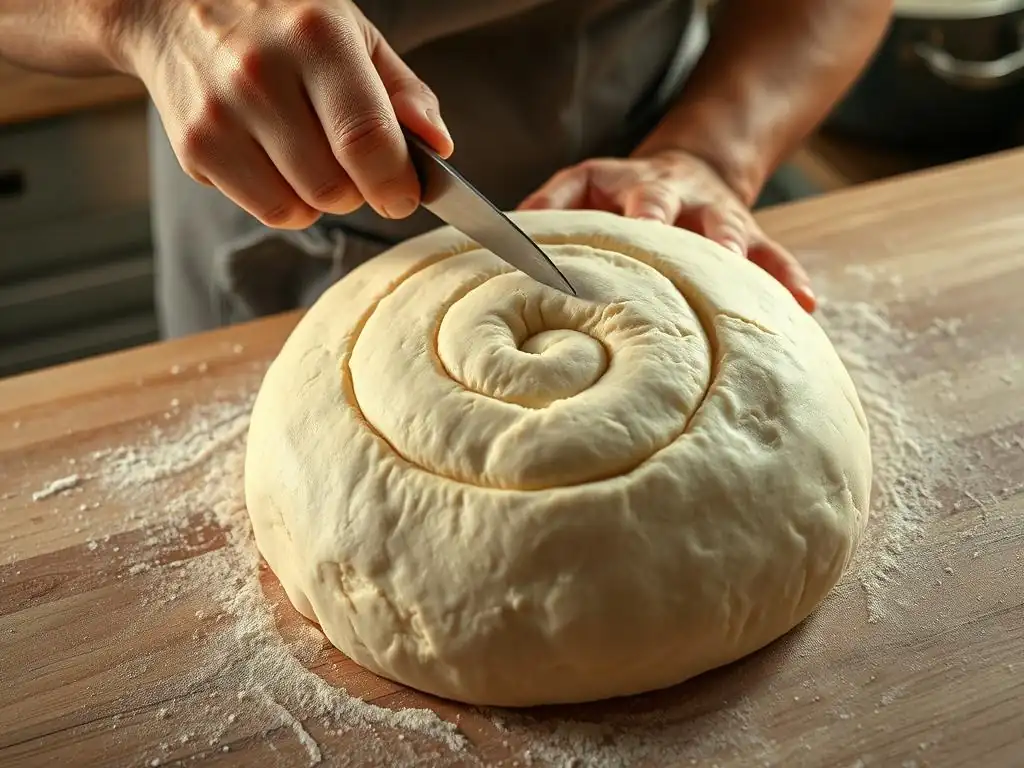
Just before transferring the dough to the hot Dutch oven, you need to score it. Scoring involves making cuts on the surface of the dough with a sharp blade (like a lame). The primary purpose of scoring is functional: it provides controlled points for the dough to expand during oven spring. Without scoring, the crust would set too quickly, and the expanding gases would likely burst out at the weakest point, resulting in an uncontrolled, unsightly crack.
Scoring also allows you to add your personal artistic touch, creating beautiful patterns on your perfectly baked basic sourdough. Common scores include a simple cross, a straight slash down the middle (for batards), or more intricate patterns involving multiple cuts. For optimal oven spring, aim for a cut that is about 1/2 inch deep.
Baking in a Dutch Oven: Trapping Steam
Baking in a preheated Dutch oven is the gold standard for achieving a perfectly baked basic sourdough at home. Carefully transfer the scored dough from the banneton into the hot Dutch oven using parchment paper or by quickly inverting the banneton. Place the lid on the Dutch oven and bake for the first 20-25 minutes.
The lidded Dutch oven traps the steam released by the dough as it heats up. This steamy environment keeps the crust moist and pliable during the critical initial phase of baking, allowing the loaf to expand fully and achieve maximum oven spring. After this initial period, remove the lid to allow the crust to dry out and brown beautifully.
Baking without a Dutch Oven: Using a Water Bath
If you don't have a Dutch oven, you can still bake a perfectly baked basic sourdough, though achieving the same crust and spring can be more challenging. The key is to create a steamy environment in your oven. One method is to place a baking steel or stone in the oven and preheat it along with a separate tray or cast iron pan on the rack below.
Just before loading your scored dough onto the hot baking surface, carefully pour a cup of hot water into the preheated tray below to create steam. Quickly close the oven door to trap the steam. You can also spray the oven walls with water using a spray bottle. This steam helps replicate the Dutch oven environment, allowing the crust to remain pliable for oven spring. Bake at the same high initial temperature, then potentially lower it slightly to finish baking.
Step 7: Cooling and Slicing
Cooling: Allowing the Crumb to Set
Once your perfectly baked basic sourdough is golden brown and sounds hollow when tapped on the bottom, remove it from the oven. The most difficult but crucial step follows: letting it cool completely on a wire rack. While it's incredibly tempting to slice into a warm loaf, doing so prematurely will result in a gummy, dense crumb.
As the bread cools, internal moisture redistributes, and the structure of the crumb sets. This process can take 2-4 hours, depending on the size of the loaf. Patience during the cooling phase is essential for achieving the desired airy, open texture in your perfectly baked basic sourdough.
Slicing: Using a Serrated Knife
Once the loaf is fully cooled, it's ready to be sliced and enjoyed! Use a sharp serrated bread knife for clean cuts that don't compress the soft crumb. A good serrated knife glides through the crust and crumb with minimal effort.
Hold the loaf steady and use a sawing motion with the serrated knife. Slice the bread to your desired thickness. Now you can finally admire the beautiful crumb structure you worked so hard to achieve with your perfectly baked basic sourdough recipe.
Troubleshooting Common Sourdough Problems
Dense Loaf: Insufficient Fermentation
A dense crumb in your perfectly baked basic sourdough is often a sign of insufficient fermentation, either during bulk fermentation or proofing. If the dough didn't develop enough gas before baking, it won't rise properly in the oven. This could be due to an inactive starter, too short of a fermentation time, or a kitchen that's too cold.
- Check Starter Activity: Ensure your starter is active and passes the float test before making your levain.
- Extend Bulk Fermentation: Allow the dough more time during bulk fermentation, monitoring for a 50-100% volume increase and visible bubbles. Consider placing the dough in a warmer spot or using a proofing box.
- Adjust Recipe: Ensure your hydration level isn't too low, as very stiff doughs can be harder for the starter to leaven effectively.
Flat Loaf: Over-Proofing
Conversely, a flat loaf with little oven spring, despite proper scoring, is frequently a result of over-proofing. If the dough ferments for too long, the gluten structure can weaken, and the yeast can exhaust their food supply. When baked, the dough doesn't have the strength or gas production left to expand properly.
- Monitor Bulk Fermentation: Pay close attention to the volume increase during bulk fermentation. Aim for the target increase (e.g., 50-100%) and stop before the dough shows signs of collapsing or becoming overly bubbly and fragile.
- Shorten Proofing Time: If cold proofing, reduce the time in the refrigerator. If proofing at room temperature, watch the dough closely and use the poke test to determine readiness.
- Adjust Temperature: A warmer kitchen accelerates fermentation. If your kitchen is warm, you may need to reduce bulk fermentation and proofing times or use cooler water.
Gummy Crumb: Under-Baking
A gummy or wet-looking crumb, even after the crust looks done, is a clear indication of under-baking. The internal temperature of the loaf did not reach a high enough point to fully set the starch and protein structure.
- Check Internal Temperature: Use an instant-read thermometer to check the internal temperature of the loaf. For a perfectly baked basic sourdough, the center should reach at least 200-210°F (93-99°C).
- Extend Baking Time: If the crust is browning too quickly, you can cover the loaf loosely with foil for the last part of the bake to prevent burning while allowing the interior to finish cooking.
- Ensure Proper Preheating: Make sure your oven and Dutch oven (if using) are fully preheated to the correct temperature. An insufficiently hot oven can lead to poor heat transfer and under-baking.
Overly Sour Loaf: Long Fermentation
While some tang is characteristic of a perfectly baked basic sourdough, an excessively sour flavor can be off-putting. This usually results from a prolonged fermentation, particularly extended cold proofing, which gives the lactobacilli bacteria more time to produce lactic and acetic acids.
- Reduce Fermentation Time: Shorten the bulk fermentation or cold proofing duration.
- Use Starter at Peak: Ensure you are using your levain when it is at its peak activity, not when it has started to recede significantly, as this can indicate higher acidity.
- Adjust Starter Feeding: Feeding your starter more frequently or with a different ratio (e.g., less starter in relation to fresh flour/water) can influence its acidity profile. A starter fed at a 1:2:2 or 1:3:3 ratio may produce a less sour loaf than a 1:1:1 ratio if used at the same time after feeding.
Tips and Tricks for Sourdough Success
Maintaining a Healthy Starter
A healthy, active sourdough starter is the bedrock of a perfectly baked basic sourdough recipe. Consistent feeding is key. If you bake frequently (several times a week), you can keep your starter at room temperature with daily feedings. For less frequent baking, storing your starter in the refrigerator and feeding it once a week is sufficient.
When you want to bake, take the starter out of the fridge, feed it, and leave it at room temperature until it is active and bubbly (usually 4-12 hours, depending on the starter). Discarding a portion before each feeding helps maintain a manageable volume and ensures the starter has enough fresh "food" to thrive. Pay attention to its smell (pleasantly yeasty and slightly acidic) and texture (bubbly and airy) as indicators of health.
Experimenting with Different Flours
While bread flour is standard for a perfectly baked basic sourdough, don't be afraid to experiment with incorporating other types of flour. Substituting a portion of the bread flour with whole wheat flour (e.g., 10-20%) will add nutty flavor and nutritional value, though it may slightly change the dough's handling characteristics and crumb structure due to the presence of bran and germ.
Rye flour is another popular addition, even in small amounts (5-10%). Rye ferments quickly and imparts a distinct flavor. Other options include spelt, einkorn, or even heritage grain flours. Each flour type absorbs water differently and impacts gluten development, so be prepared to adjust hydration slightly and observe how the dough behaves. Experimenting is part of the fun of mastering a perfectly baked basic sourdough recipe.
Incorporating Whole Grains
Adding whole grains, either cooked or as a porridge, is a fantastic way to boost the flavor, texture, and nutritional profile of your perfectly baked basic sourdough. Cooked grains like oats, quinoa, or farro can be added during the mixing stage. A porridge made from cooked grains and water/milk can also be incorporated.
Adding grains increases the hydration and can make the dough stickier, but they contribute wonderful chewiness and moisture to the final loaf. They also add visual appeal with flecks of grain throughout the crumb. Start by substituting a small percentage of your flour weight with cooked grains (e.g., 10-20%) and see how you like it. This is a great way to customize your perfectly baked basic sourdough.
Sourdough Bread Recipe Variations
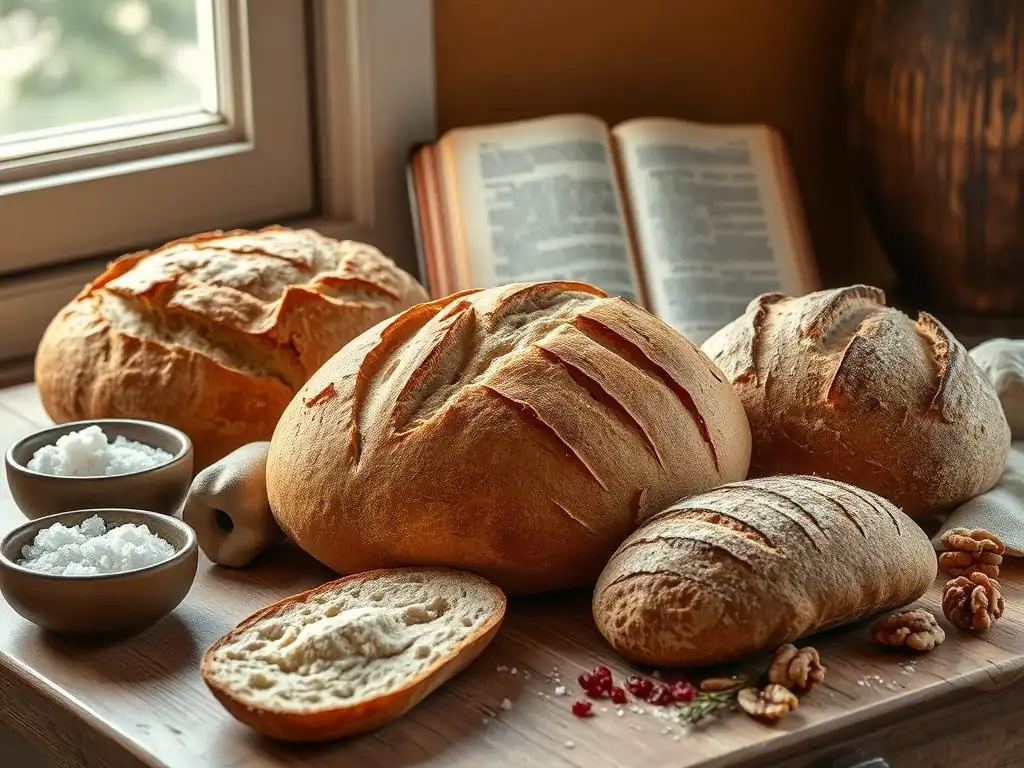
Rosemary and Olive Oil Sourdough
Elevate your perfectly baked basic sourdough by adding fragrant rosemary and rich olive oil. Incorporate 1-2 tablespoons of high-quality extra virgin olive oil into the dough during the initial mixing phase (after autolyse). Add 1-2 tablespoons of finely chopped fresh rosemary during the final set of coil folds or just before shaping.
The olive oil contributes tenderness and a subtle richness to the crumb, while the rosemary infuses the loaf with its aromatic, slightly peppery notes. This variation pairs wonderfully with savory dishes or simply enjoyed with a drizzle of olive oil. The process for baking remains the same as the perfectly baked basic sourdough recipe, just with these flavorful additions.
Jalapeño Cheddar Sourdough
For a loaf with a spicy kick and cheesy goodness, try a jalapeño cheddar variation of your perfectly baked basic sourdough. Add 1/2 cup to 1 cup of shredded sharp cheddar cheese and 1-2 finely diced jalapeños (seeds removed for less heat) during the final set of coil folds or when incorporating inclusions before shaping.
Ensure the cheese and jalapeños are evenly distributed throughout the dough. The cheese will melt into pockets during baking, creating bursts of flavor, while the jalapeños provide a pleasant warmth. This variation is fantastic served warm with butter or as a base for grilled cheese. The core steps of the perfectly baked basic sourdough recipe are followed, with the addition of these flavorful ingredients.
Storing Your Homemade Sourdough
Maintaining Freshness
To keep your perfectly baked basic sourdough fresh, store it at room temperature. Avoid refrigerating it, as this can actually make the bread stale faster. A simple bread box or a paper bag works well for short-term storage (1-2 days), allowing the crust to breathe and maintain some crispness.
For longer storage at room temperature (3-4 days), a linen bread bag or wrapping the cut end in beeswax wrap helps prevent drying out while still allowing some air circulation. Avoid plastic bags unless the bread is completely cool and you don't mind a softer crust, as plastic traps moisture and can soften the crust and encourage mold in humid conditions.
Freezing for Later
Sourdough freezes exceptionally well, allowing you to enjoy your perfectly baked basic sourdough for weeks or months to come. Ensure the loaf is completely cooled before freezing. You can freeze the entire loaf, half a loaf, or even individual slices.
Wrap the bread tightly in plastic wrap, then place it in a freezer-safe bag or aluminum foil to prevent freezer burn. To thaw, simply remove from the freezer and let it sit at room temperature. For a whole or half loaf, you can refresh the crust by warming it in a preheated oven (350°F or 175°C) for 10-15 minutes. Slices can be toasted directly from frozen.
Conclusion: Enjoying Your Sourdough
Serving Suggestions
Now that you've successfully baked a perfectly baked basic sourdough, it's time to enjoy the fruits of your labor! Sourdough's tangy flavor and chewy texture make it incredibly versatile. Serve thick slices toasted with butter, jam, or avocado. Use it for incredible sandwiches or grilled cheese.
It pairs beautifully with soups, stews, and salads. Consider making croutons or breadcrumbs from any leftover pieces. Sharing your homemade perfectly baked basic sourdough with friends and family is one of the most rewarding aspects of the process.
Continuing Your Baking Journey
Baking a perfectly baked basic sourdough is a significant achievement and often just the beginning of a lifelong passion. There is always more to learn and explore. Experiment with different hydration levels, explore alternative flours, try new shaping techniques, and play with baking times and temperatures to fine-tune your process.
Consider exploring enriched sourdough doughs like brioche or challenging yourself with higher hydration loaves. Join online communities or local baking groups to share experiences and learn from others. Each loaf offers a new opportunity to refine your skills and deepen your understanding of this ancient craft. Keep practicing, keep experimenting, and most importantly, keep enjoying the process of baking your own bread.
Frequently Asked Questions
What makes BakeWithEase's basic sourdough recipe "perfectly baked"?
Our recipe provides clear and concise instructions and precise baking times and temperatures, ensuring a consistent and delicious sourdough loaf every time. We also offer tips on oven spring and crust development.
Is this sourdough recipe suitable for baking beginners?
Yes! BakeWithEase focuses on simple recipes and techniques. Our step-by-step guide makes even sourdough accessible to beginners.
What if I don't have a stand mixer? Can I still make this sourdough?
Absolutely. While a stand mixer can simplify kneading, our recipe includes instructions for hand kneading. Just be prepared for a bit more manual effort!
How long does it take to make this basic sourdough recipe from start to finish?
The entire process, including active work and proofing, takes approximately 24-36 hours. Sourdough baking requires patience and time for fermentation.
What ingredients do I need for this perfectly baked basic sourdough recipe?
You'll need just a few key ingredients: sourdough starter, flour, water, and salt. We emphasize using high-quality ingredients for the best results.
Final Reflection: The Enduring Magic of a Perfectly Baked Sourdough
The pursuit of the perfect sourdough loaf transcends mere baking; it's a journey of patience, precision, and ultimately, profound connection to the ancient art of bread making. In a world of instant gratification, the slow fermentation and careful nurturing required for a truly exceptional sourdough stand as a powerful counterpoint, reminding us of the rewards found in deliberate processes. This simple recipe, while aiming for perfection in its execution, ultimately celebrates the beauty of imperfection inherent in the natural process.
The influence of sourdough extends far beyond the kitchen table. It represents a return to traditional methods, a mindful approach to food production, and a celebration of the symbiotic relationship between humans and nature. The tangy aroma, the satisfying crust, the airy crumb – these are sensory experiences that connect us to a culinary heritage stretching back centuries. Bread is the staff of life,
they say, and in the case of sourdough, it's a staff imbued with history, patience, and a deeply satisfying reward. This simple recipe is a gateway to understanding that connection, a starting point for a lifelong exploration of this incredible craft.
Now, consider your own journey. Will you embrace the challenge of nurturing your own sourdough starter? Will you savor the slow rise, the anticipation of the oven's warmth, and the ultimate satisfaction of slicing into a perfectly baked loaf? This recipe is not just a set of instructions; it's an invitation. An invitation to slow down, to connect with the process, and to experience the profound joy of creating something truly special with your own two hands. The perfect sourdough awaits – begin your journey today.
Unleash Your Inner Baker: Master the Sourdough!
Thanks for taking the time to explore the world of sourdough baking! We hope you gained valuable insights into creating that perfect loaf. Now it's time to put your knowledge into practice.
Here's what you can do next:
- Bake your first sourdough! Use the recipe from the article as your guide, and don't be afraid to experiment. Even small adjustments can lead to surprising results.
- Share your baking journey! Post a picture of your creation on social media and tag us – we'd love to see your sourdough success!
- Consider joining our online community forum (link removed per instructions) to connect with other sourdough enthusiasts. Get tips, share recipes, and celebrate your bakes together!
What unique twist will you add to your next sourdough masterpiece?