
Gas Bubble Tunnels Inside Cookies? Eliminate Hollow Pockets

Welcome to BakeWithEase, your trusted companion on your baking journey! Ever wondered about those mysterious tunnels lurking inside your cookies? This guide delves deep into the science behind why cookies have tunnels – the elusive culprit creating those unwanted hollow pockets. Uncover the secrets to achieving perfectly textured cookies, free from frustrating air pockets. Ready to bake better? Let's get started!
- Gas Bubble Tunnels Inside Cookies? Eliminate Hollow Pockets - BakeWithEase
- Understanding Cookie Tunnels: Why Do Cookies Have Large Air Pockets?
- Common Causes of Cookie Tunnels: Troubleshooting the Problem
- Preventing Cookie Tunnels: Solutions and Baking Techniques
- Advanced Techniques for Eliminating Cookie Tunnels
- Achieving Perfect Cookies: A Summary of Tunnel Prevention Tips
-
Frequently Asked Questions
- Why do cookies develop tunnels or hollow pockets inside?
- What role do leavening agents play in creating cookie tunnels?
- How does oven temperature affect the formation of these tunnels?
- Can the mixing process contribute to tunnel formation in cookies?
- Are there specific ingredients that can help prevent tunnels in cookies?
- Final Reflection: The Unexpected Science of a Perfect Cookie
- Unlock Perfectly Even Cookies: Banish Those Air Pockets!
Welcome to BakeWithEase, where we help you tackle common baking challenges! One frustrating issue many bakers encounter is finding large, hollow pockets or "tunnels" inside their otherwise perfect cookies. If you've ever wondered why cookies have tunnels and how to get rid of them, you're in the right place. These unwanted air bubbles can ruin the texture and appearance of your baked goods, turning a chewy delight into a crumbly disappointment. Let's dive into the science and solutions behind this common problem.
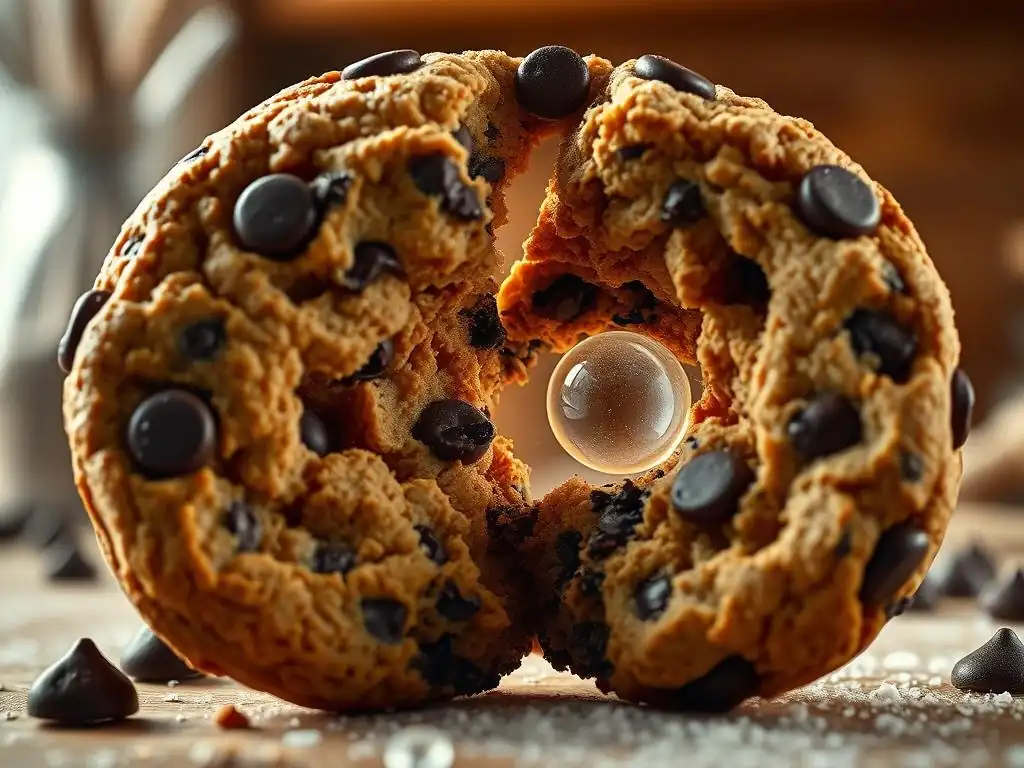
Discovering large air pockets or distinct tunnels running through the inside of your cookies can be disheartening. Instead of a uniform, dense, or chewy texture, you're left with voids that make the cookie brittle and less satisfying. These tunnels are essentially large air bubbles that expanded and set during baking, creating hollow spaces where cookie dough should be. Understanding why cookies have tunnels is the first step to achieving consistently perfect results.
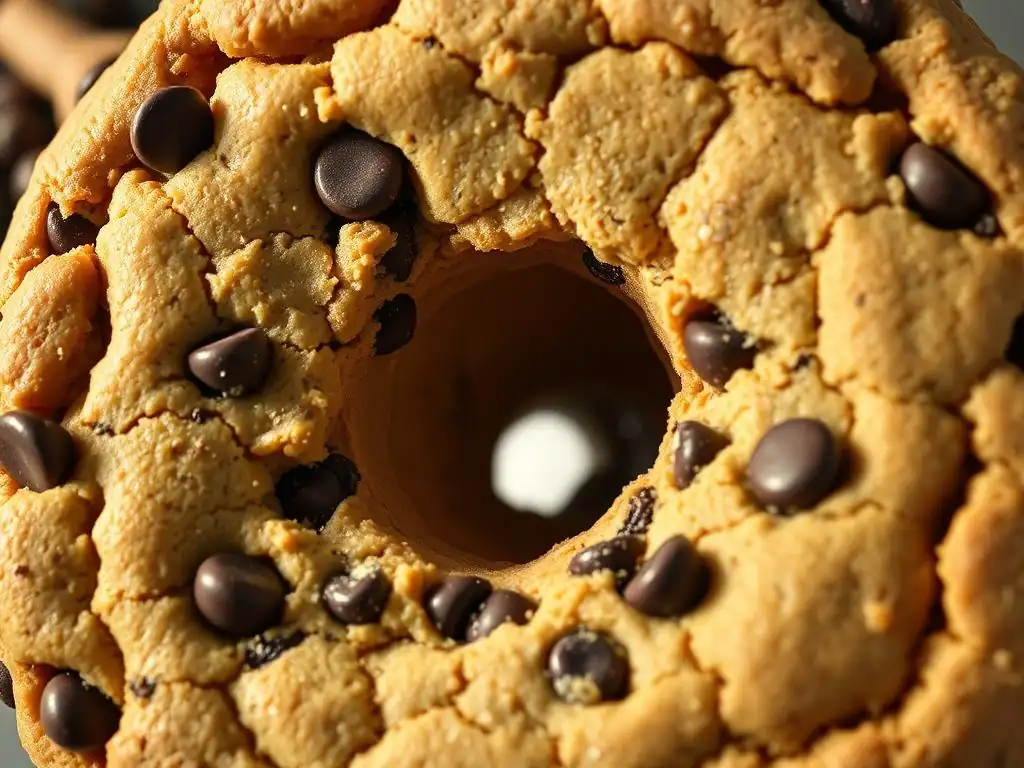
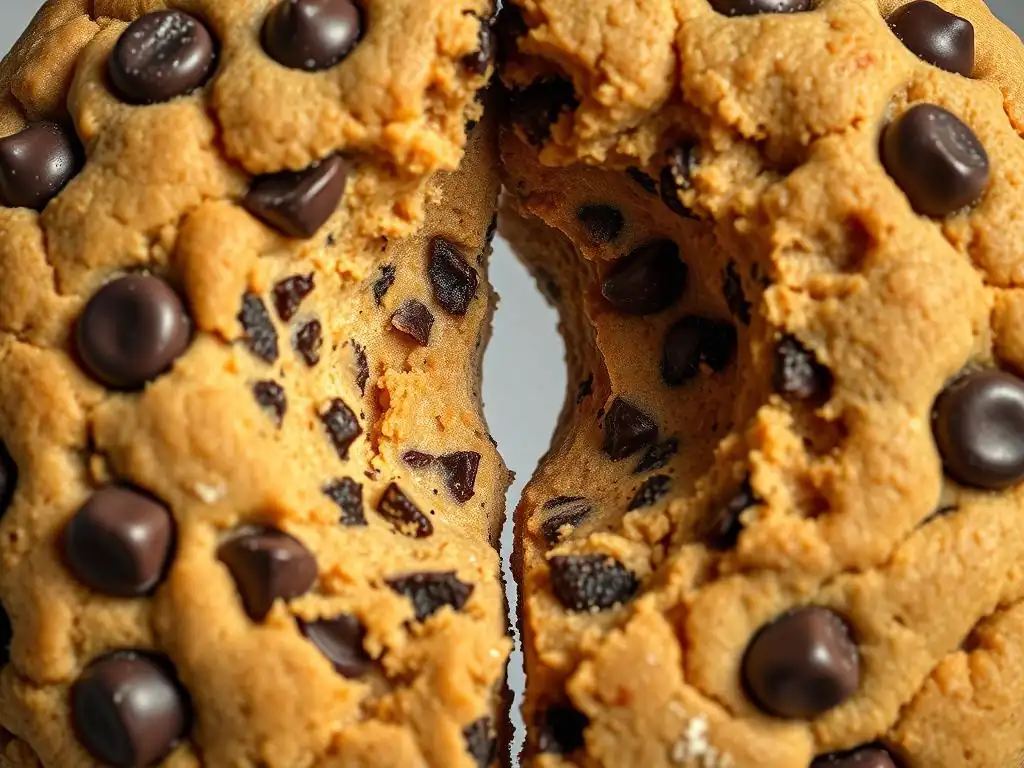
Cookie tunnels appear as elongated, hollow spaces or large bubbles within the baked cookie structure. They aren't the small, uniform air cells created by proper leavening, but rather significant voids that disrupt the texture. Imagine cutting a cookie in half and seeing a cavernous space inside – that's a tunnel. Why cookies have tunnels makes them undesirable is primarily due to the negative impact on mouthfeel and structural integrity.
These hollow pockets lead to an uneven bake; parts of the cookie might be perfectly done while the tunneled areas are fragile or overly crisp. They also affect the overall richness and chewiness you expect from a good cookie. For example, a classic chocolate chip cookie that should be soft and chewy in the center can become dry and crumbly if riddled with tunnels. Eliminating these hollow pockets ensures a more consistent and enjoyable texture from edge to center.
The primary culprit behind why cookies have tunnels is the rapid and uneven expansion of gases within the dough during baking. These gases come from two main sources: the leavening agents (baking soda and baking powder) and air incorporated into the dough during mixing. When the cookie dough hits the heat of the oven, these gases expand dramatically.
If the dough structure isn't strong or stable enough to support this expansion uniformly, or if large pockets of air were trapped during mixing, the gases will rush into these areas, creating large bubbles. As the cookie bakes and sets, these bubbles become fixed voids – the dreaded tunnels. For instance, baking powder typically produces about 2.5 times its volume in carbon dioxide gas when heated, and if this gas is released unevenly or trapped in large pockets, it directly contributes to tunnel formation, explaining why cookies have tunnels in many cases.
Now that we understand the basic science, let's explore the most frequent reasons why cookies have tunnels. Identifying the specific cause in your baking process is key to preventing these frustrating voids. Often, it's a combination of factors, but addressing the most common issues will significantly improve your cookie outcomes.
One of the most common reasons why cookies have tunnels is simply mixing the dough too much. While developing gluten is crucial for bread structure, in cookies, excessive gluten development leads to a tough texture and can contribute to tunneling. When you over-mix, you build a strong gluten network that traps air unevenly and creates a structure prone to forming large voids when gases expand in the oven.
How Over-Mixing Develops Gluten and Creates Tunnels
Flour contains proteins called glutenin and gliadin. When water is added and the mixture is agitated (mixed), these proteins link together to form gluten, a stretchy network. In cookie dough, especially with recipes using all-purpose flour, vigorous or prolonged mixing encourages significant gluten development. This tight, elastic network can trap air in large pockets rather than small, uniform bubbles. As the cookie bakes, these trapped pockets expand rapidly, and the strong gluten structure holds them in place, forming tunnels. This is a key factor in why cookies have tunnels.
Identifying Signs of Over-Mixed Cookie Dough
Recognizing over-mixed dough before it's too late can save your batch. Signs include a dough that becomes very elastic or springy – if you pull a piece, it stretches significantly before breaking, similar to bread dough. The dough might also appear shiny or greasy. Another indicator is when the dry ingredients seem too integrated, losing their floury appearance and becoming a homogeneous, almost paste-like mass quickly after adding the wet ingredients. If your dough feels tough or resists shaping, it's likely been over-mixed, contributing to why cookies have tunnels might appear.
Baking temperature plays a critical role in how cookies spread and set. An oven that's too hot or fluctuates significantly can cause the outer edges of the cookie to set too quickly while the center is still rapidly expanding, leading to tunneling. This uneven setting is a major reason why cookies have tunnels.
How High Oven Temperature Causes Rapid Expansion
When cookie dough is placed in an oven that's too hot (say, 400°F or 200°C instead of the recommended 350°F or 175°C), the leavening agents activate and the trapped air expands extremely rapidly. The surface of the cookie sets almost instantly due to the intense heat, forming a crust. However, the interior is still expanding.
This rapid internal expansion, trapped by the quickly set exterior, forces the gases into any weak spots or pre-existing air pockets, blowing them up into large tunnels before the interior structure has a chance to stabilize. This explains why cookies have tunnels when the temperature isn't right.
Signs of Baking Cookies at the Wrong Temperature
Baking at too high a temperature often results in cookies that are dark or burnt around the edges but appear pale and potentially underbaked in the center. They may also dome excessively rather than spreading evenly. Conversely, an oven that's too cool can lead to excessive spread and flat cookies, but it's less likely to cause prominent tunnels; the gases expand more slowly, allowing the structure to set more uniformly. If your cookies consistently brown too fast or have uneven textures, checking your oven temperature is crucial to understanding why cookies have tunnels.
Too Much Leavening Agent: A Recipe Imbalance
Leavening agents like baking soda and baking powder are essential for giving cookies lift and tenderness. However, using too much can generate an excessive amount of gas. This surplus gas, especially when combined with other factors like over-mixing or high heat, can overwhelm the dough's structure and lead to the formation of large, undesirable tunnels. This is another common answer to why cookies have tunnels.
The Role of Baking Soda and Baking Powder in Cookie Texture
Baking soda (sodium bicarbonate) requires an acid (like brown sugar, molasses, buttermilk, or chocolate) to react and produce carbon dioxide gas. It primarily contributes to spread and tenderness. Baking powder contains both an acid and a base, reacting in two phases: once when mixed with liquid and again when heated. It provides lift and a more cake-like texture.
Both create gases that cause dough to rise. A typical chocolate chip cookie recipe might use 1/2 to 1 teaspoon of baking soda per cup of flour. Using significantly more than recommended can create an explosion of gas, leading to uneven rise and hollows.
Measuring and Adjusting Leavening Agents for Optimal Results
Precise measurement of leavening agents is vital. Using a level measuring spoon is key; scooping directly from the box or bag can result in significantly more than intended. If you suspect excess leavening is why cookies have tunnels, consider reducing the amount slightly in your next batch, perhaps by 1/4 teaspoon per cup of flour, and observe the results. Be cautious, as too little leavening will result in dense, flat cookies. It's about finding the right balance specific to your recipe and ingredients.
Chilling cookie dough is a step many bakers skip in a hurry, but it's incredibly important for preventing tunnels and achieving optimal texture and flavor. Warm, soft dough spreads much faster in the oven, and this rapid, uncontrolled spread can contribute to tunneling.
The Importance of Chilling Cookie Dough Before Baking
Chilling dough serves several purposes: it solidifies the fat (butter), which helps the cookies spread more slowly and evenly; it allows the flour to fully hydrate, resulting in a more tender texture; and it gives flavors time to meld. Critically, chilling makes the dough firmer and less likely to spread too rapidly. A firmer dough provides more structure to contain the expanding gases in smaller, more uniform pockets rather than allowing them to consolidate into large tunnels. This is a key reason why cookies have tunnels when dough is baked warm.
How Chilling Prevents Excessive Spreading and Tunneling
When cold dough enters a hot oven, the butter takes longer to melt and spread. This slower spread gives the cookie's structure time to set around the expanding gases. Instead of the dough collapsing or expanding unevenly and trapping large air pockets, the gases are distributed more evenly throughout the firmer matrix. For instance, chilling dough for just 30 minutes can reduce spread by 15-20% compared to unchilled dough, leading to thicker cookies and significantly reducing the likelihood of developing tunnels. This is a simple yet effective way to prevent why cookies have tunnels.
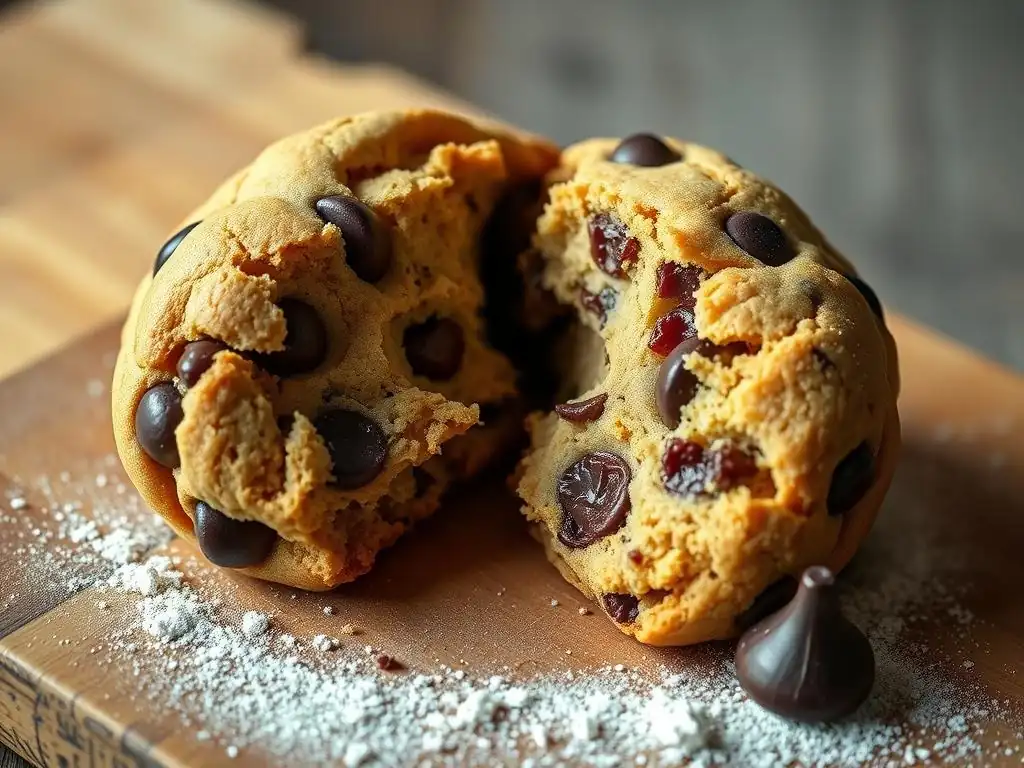
Understanding why cookies have tunnels is half the battle. Now let's focus on the practical techniques you can implement in your kitchen to banish those hollow pockets for good and achieve beautiful, consistently textured cookies.
Gentle Mixing Techniques: Avoiding Over-Development of Gluten
The way you mix your cookie dough has a profound impact on its final texture and whether or not tunnels form. Gentle mixing is paramount, especially once the dry ingredients are added.
Tips for Mixing Cookie Dough Without Over-Mixing
Once you add the flour and other dry ingredients to the wet ingredients, mix just until they are combined. This usually takes only 30-60 seconds on low speed with a mixer or a few gentle folds with a spatula. You should still see a few streaks of flour; these will incorporate during the resting or chilling period.
Avoid the temptation to mix until the dough is perfectly smooth and uniform. For example, if using a stand mixer, switch to a paddle attachment and mix on the lowest speed (like level 1 or 2) only until no dry flour is visible. This minimal mixing prevents excessive gluten development, helping avoid why cookies have tunnels.
Understanding the Stages of Cookie Dough Mixing
Cookie dough mixing typically involves creaming butter and sugar, adding eggs and liquid extracts, and then adding dry ingredients. The risk of over-mixing primarily occurs in the final stage, after the flour is added.
- Creaming: Beat butter and sugar until light and fluffy. This incorporates air, which is good, but won't cause tunnels if done correctly.
- Wet Ingredients: Mix in eggs and extracts until just combined.
- Dry Ingredients: Add dry ingredients and mix only until the last streaks of flour disappear. Stop immediately.
This minimal approach during the final stage is crucial for preventing the gluten development that contributes to why cookies have tunnels.
Accurate Oven Calibration: Ensuring Consistent Baking Temperatures
An inaccurate oven is a frequent, often overlooked reason why cookies have tunnels and other baking problems occur. Your oven's thermostat might be off by as much as 50°F (28°C) in either direction.
How to Check and Calibrate Your Oven
The most reliable way to know your oven's true temperature is to use an inexpensive oven thermometer. Place it in the center of your oven and let the oven preheat for at least 15-20 minutes after the preheat indicator light turns off. Check the thermometer reading against the oven's set temperature. If there's a significant difference (more than 15-20°F or about 10°C), you'll need to adjust your baking temperature accordingly. For example, if your oven reads 325°F (160°C) when set to 350°F (175°C), you'll need to set it to 375°F (190°C) to achieve the desired 350°F.
Using an Oven Thermometer for Precise Temperature Control
Keep an oven thermometer in your oven permanently. This allows you to monitor the temperature throughout the baking process, as oven temperatures can fluctuate. Preheating for the recommended time (usually 15-20 minutes after the light indicates it's ready) is also important to ensure the oven walls and racks are heated, providing more stable temperatures. Consistent, accurate temperature is vital for even baking and preventing the rapid, uneven expansion that explains why cookies have tunnels.
Adjusting Leavening Agents: Achieving the Right Balance
While recipes provide guidance, sometimes slight adjustments to leavening can help if you consistently see tunnels, especially if other factors like mixing and chilling are controlled.
Experimenting with Baking Soda and Baking Powder Ratios
If a recipe consistently produces tunnels, and you've ruled out over-mixing and temperature issues, consider slightly reducing the leavening agents in your next batch. For instance, if a recipe calls for 1 teaspoon of baking soda, try using 3/4 teaspoon. Or, if it uses baking powder, reduce it by 1/4 to 1/2 teaspoon. This reduces the amount of gas produced, making it less likely to overwhelm the dough structure and create large voids. Document your adjustments to see what works best for your specific recipe and ingredients.
The Impact of Different Leavening Agents on Cookie Texture
Remember that baking soda contributes more to spread and a chewier texture, while baking powder contributes more to puffiness and a cake-like texture. If you're aiming for a chewy cookie and experiencing tunnels, slightly reducing baking soda might help control spread and prevent tunnels. If you want a puffier cookie but get tunnels, reducing baking powder might be the key. Understanding the role of each helps you troubleshoot why cookies have tunnels and make informed adjustments.
Chilling dough is a non-negotiable step for many cookie recipes, not just for flavor development but crucially for preventing tunnels and controlling spread.
Recommended Chilling Times for Different Cookie Recipes
Most cookie doughs benefit from at least 30 minutes of chilling in the refrigerator. For recipes prone to tunneling or excessive spread, 1-2 hours is even better. For optimal flavor and structure, chilling overnight (8-12 hours) is often recommended. For instance, classic chocolate chip cookie dough chilled for 24 hours often results in a significantly better texture with fewer tunnels compared to dough chilled for only 30 minutes. The longer chill allows fats to solidify and gluten to relax, creating a more stable dough.
The Benefits of Overnight Dough Chilling
Beyond preventing tunnels, overnight chilling deepens the flavors as ingredients meld. The flour fully hydrates, resulting in a more tender bite. The solidified fat leads to slower, more controlled spread, producing thicker cookies with chewier centers and crisp edges. If you consistently struggle with why cookies have tunnels, making overnight chilling a standard practice for your doughs is one of the most effective solutions.
Once you've mastered the fundamentals, a few more advanced techniques can help further ensure a tunnel-free cookie experience. These methods often address trapped air directly or modify the dough's structure more subtly.
The "Thwack" Method: Releasing Air Pockets Before Baking
The "thwack" method, popularized by bakers like Sarah Kieffer, is a technique specifically designed to deflate puffier cookies during baking, which also helps release trapped air and prevent tunnels.
How to Properly "Thwack" Cookie Dough
This technique involves placing the baking sheet with cookies into the preheated oven as usual. After about 8-10 minutes (or when the edges start to set and the center is puffed), carefully open the oven and gently lift the baking sheet about 4-6 inches and let it drop back onto the oven rack. This causes the puffed cookies to deflate slightly. Close the oven and repeat this process every 2-3 minutes until the cookies are done. The controlled deflation helps push out large air pockets before the cookie fully sets, reducing the chance of tunnels.
When to Use the "Thwack" Method
The "thwack" method is most effective for recipes designed to produce thicker, puffier cookies where tunnels are a common issue due to significant rise. It's less necessary for cookies that spread very thin. If you're making a cookie known for its height and often wonder why cookies have tunnels in this style, giving the sheet a gentle thwack can be a game-changer for releasing those potential air pockets.
Sugar doesn't just provide sweetness; it also affects cookie spread and texture. Different types of sugar and their ratios can influence how gases behave in the dough.
The Role of Sugar in Cookie Baking
Sugar melts during baking and contributes to spread and crispness. Granulated sugar causes more spread and crispness than brown sugar, which contains molasses and retains more moisture, leading to a chewier texture and slightly less spread. The amount of sugar also impacts the overall structure; recipes with very high sugar content tend to spread more.
How to Adjust Sugar for Desired Cookie Texture
If you consistently get tunnels in a recipe with a high ratio of granulated sugar, you could experiment with slightly reducing the total sugar (e.g., by 1/4 cup per batch) or replacing a small portion of granulated sugar with brown sugar. For instance, if a recipe calls for 1 cup granulated sugar, try 3/4 cup granulated and 1/4 cup brown sugar.
This can reduce spread and create a slightly denser, chewier texture less prone to tunneling, helping address why cookies have tunnels in sugary recipes. However, be cautious with significant reductions, as sugar is vital for texture and moisture retention.
Using a Stand Mixer vs. Hand Mixing: Pros and Cons for Tunnel Prevention
The tool you use to mix your dough can influence how much air is incorporated and how much gluten develops, both factors in why cookies have tunnels.
Comparing Mixing Methods and Their Effects on Cookie Dough
- Hand Mixing: Using a wooden spoon or spatula requires more effort and is generally less efficient at developing gluten or incorporating excessive air. It provides more control, making it easier to stop mixing as soon as the dry ingredients are just combined. This method is often recommended for delicate doughs or when you want to minimize gluten development.
- Stand Mixer: Stand mixers are powerful and efficient. They can cream butter and sugar beautifully, incorporating air. However, they can quickly over-mix dough once the flour is added, rapidly developing gluten and incorporating too much air, increasing the risk of tunnels. Using the paddle attachment on the lowest speed and mixing only briefly is crucial.
Choosing the Right Mixing Method for Your Recipe
For recipes notoriously prone to tunneling or toughness, hand mixing the final stage after adding dry ingredients can be a safer bet. For standard cookie recipes, a stand mixer is fine, but always add dry ingredients on the lowest speed and mix for the shortest time possible. Understanding how your mixing tool affects the dough helps you control the factors that contribute to why cookies have tunnels.
Baking perfect cookies without tunnels is a achievable goal when you understand the science behind the problem and apply the right techniques. By being mindful of your ingredients, mixing process, and baking environment, you can consistently produce cookies with the ideal texture.
To recap the main points for eliminating hollow pockets and understanding why cookies have tunnels:
- Do not over-mix: Stop mixing as soon as the dry ingredients are just combined. Avoid developing excessive gluten.
- Chill your dough: Refrigerate dough for at least 30 minutes, preferably longer (1-2 hours or even overnight), to solidify fat and stabilize the dough structure.
- Check your oven temperature: Use an oven thermometer to ensure your oven is heating accurately and consistently. Bake at the correct temperature to prevent rapid, uneven expansion.
- Measure leavening precisely: Use level spoons and consider slightly reducing baking soda or powder if tunnels are a persistent issue, while being mindful of the impact on texture.
- Consider the "thwack" method: For puffier cookies, gently dropping the baking sheet during baking can help release trapped air.
- Evaluate your recipe's sugar ratio: High granulated sugar can increase spread and potentially tunneling.
By implementing these tips, you address the core reasons why cookies have tunnels and significantly improve your baking results.
If a specific recipe consistently gives you tunnels, consider these adjustments for future batches:
- Reduce baking soda/powder slightly (e.g., by 1/4 tsp per cup of flour).
- Increase the chilling time significantly (e.g., from 30 minutes to 2 hours or overnight).
- If the recipe calls for creaming butter and sugar for a very long time, reduce that time slightly, as excessive creaming can incorporate too much air.
- Ensure you are using room temperature butter as specified, but avoid butter that is overly soft or melted, as this affects spread and structure.
Experimenting with these variables based on the principles of why cookies have tunnels will help you fine-tune your favorite recipes for perfect, tunnel-free results every time. Happy baking!
Frequently Asked Questions
Tunnels form due to the rapid expansion of gas bubbles during baking. These bubbles can originate from leavening agents like baking soda and baking powder, or even steam. Uneven heat distribution can also contribute.
Leavening agents release carbon dioxide gas as they react with other ingredients. If the gas production is too rapid, it can create large bubbles that merge and form tunnels. Using too much leavening is a common cause.
How does oven temperature affect the formation of these tunnels?
High oven temperatures can cause the outer edges of the cookie to set too quickly. This traps expanding gas inside, leading to tunneling. Lowering the temperature and baking for slightly longer can help.
Overmixing the dough can develop too much gluten, creating a strong structure that traps air. This trapped air expands during baking. Gentle mixing is crucial for avoiding excessive gluten development.
Using brown sugar can help, as it's more acidic and can regulate the leavening reaction. Also, incorporating melted butter rather than softened butter can sometimes reduce air incorporation during mixing.
The quest for the perfect cookie, free from unsightly and texturally disappointing tunnels, reveals a surprisingly complex interplay of science and baking technique. Understanding the formation of gas bubbles, and subsequently, those frustrating air pockets, is not just about aesthetics; it's about mastering the fundamental principles of baking and achieving consistent, delicious results every time. This knowledge empowers us to create cookies that are not only visually appealing but also possess the ideal texture and mouthfeel.
The journey to understanding "why cookies have tunnels" has highlighted the often-overlooked importance of seemingly minor details in baking. From the precise measurement of ingredients to the careful control of baking temperature and time, each step plays a crucial role in the final product. The difference between a good cook and a great cook is attention to detail.
This quote, though not specifically about cookies, perfectly encapsulates the essence of achieving baking perfection, a pursuit that extends far beyond simply following a recipe. The subtle nuances, the understanding of the "why" behind each step, are what elevate a good cookie to an exceptional one.
Now, armed with this knowledge, I invite you to embark on your own baking adventures. Don't just follow recipes passively; actively engage with the science behind them. Experiment with different techniques, observe the changes in your dough, and learn from your successes and failures. The journey to mastering the art of cookie-making is a rewarding one, filled with delicious discoveries and the satisfaction of creating something truly special. Remember, the perfect cookie isn't just about avoiding tunnels; it's about understanding the process and embracing the journey.
Thanks for taking the time to learn how to eliminate those pesky air pockets in your cookies! You're now armed with the knowledge to bake consistently delicious treats. Ready to put your new skills to the test?
- Bake a batch of your favorite cookies using the techniques you just learned. Pay close attention to the mixing and baking steps – you'll notice a difference!
- Share your baking success (or even your baking fails – we all have them!) on social media using #BakeWithEaseNoMoreAirPockets. Let's connect and learn together!
- Experiment with different cookie recipes and see how these techniques translate across various doughs and baking times.
What unexpected ingredient or technique will you try next to perfect your cookie game?