
Baking with Whole Wheat: Tips for Delicious, Lighter Treats

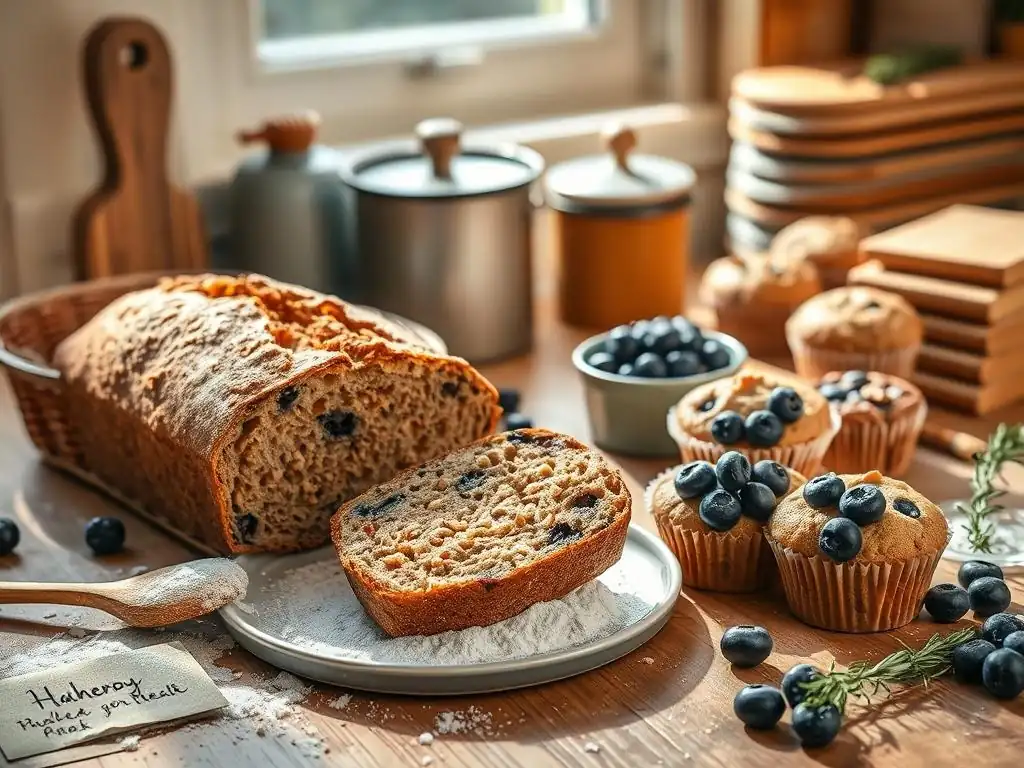
Welcome to BakeWithEase, your guide to unlocking the joys of baking! Ever wondered how to bake delicious treats that are both flavorful and a little lighter? Get ready to dive into the world of whole wheat baking! We're unveiling essential whole wheat baking tips to help you create incredible baked goods with a healthier twist. Intrigued? Keep reading to discover secrets for achieving perfect texture and flavor in every bite, and say goodbye to dense, dry results forever!
- Baking with Whole Wheat: Delicious & Nutritious Recipes - BakeWell
- Essential Whole Wheat Baking Tips for Success
- Recipes & Ideas for Delicious Whole Wheat Treats
- Troubleshooting Common Whole Wheat Baking Problems
- Storing Your Whole Wheat Baked Goods for Freshness
- Advanced Techniques for Baking with Whole Wheat
- Conclusion: Enjoy the Versatility and Goodness of Whole Wheat Baking
-
Frequently Asked Questions
- How does using whole wheat flour affect the texture of baked goods?
- What are some key differences between whole wheat flour and all-purpose flour when baking?
- What are some essential tips for successfully substituting whole wheat flour in my favorite recipes?
- How can I prevent whole wheat baked goods from becoming too dense or dry?
- Where can I find reliable whole wheat baking recipes and resources?
- Final Reflection: The Enduring Appeal of Whole Wheat Baking
- Unleash Your Inner Baker: Wholesome Treats Await!
Baking with Whole Wheat: Delicious & Nutritious Recipes - BakeWell
What is Whole Wheat Flour and How is it Different from Refined Flour?
Whole wheat flour is milled from the entire wheat kernel, which includes the bran, germ, and endosperm. This contrasts sharply with refined flours, such as all-purpose white flour, which are produced by milling only the endosperm. The bran is the outer layer, rich in fiber; the germ is the embryo, packed with nutrients and healthy fats; and the endosperm is the largest part, containing protein and starch. Because whole wheat flour retains all three components, it offers a significantly different nutritional profile and behaves differently in baking compared to its refined counterpart.
The presence of the bran and germ gives whole wheat flour its distinct color, texture, and flavor. The bran particles are sharp and can interfere with gluten development, while the germ contains fats that can affect shelf life and dough structure. When using whole wheat baking tips, understanding these differences is crucial.
For example, a typical all-purpose flour might have around 10-12% protein and very little fiber (perhaps 1-2%), while whole wheat flour can boast a similar protein percentage but significantly more fiber, often ranging from 12-14%. This difference in composition directly impacts how the flour absorbs liquid and how the dough behaves during mixing, kneading, and rising.
Nutritional Benefits of Baking with Whole Wheat
Incorporating whole wheat flour into your baking significantly boosts the nutritional value of your treats. The bran and germ components are powerhouses of nutrients often stripped away in refined flours. Whole wheat is an excellent source of dietary fiber, which aids digestion, helps regulate blood sugar levels, and contributes to a feeling of fullness. A single slice of whole wheat bread (around 40g) can provide approximately 3-4 grams of fiber, whereas a slice of white bread might only offer 1 gram.
Beyond fiber, whole wheat flour contains B vitamins (like niacin, thiamine, and riboflavin), minerals such as iron, magnesium, zinc, and selenium, and beneficial phytochemicals. For instance, magnesium, found abundantly in the wheat germ, plays a role in over 300 enzymatic reactions in the body. While some nutrients like iron and B vitamins are added back to enriched white flour, whole wheat naturally contains a broader spectrum and higher amounts of many micronutrients. Embracing whole wheat baking tips means not just creating delicious food, but also more nourishing options for your family.
Types of Whole Wheat Flour and Their Uses
Not all whole wheat flours are created equal; the type of wheat used and the milling process can result in different flours suitable for various baking applications. Hard Red Winter and Hard Red Spring wheat are common varieties used for producing robust whole wheat flours, often labeled simply as "whole wheat flour." These flours are high in protein (around 13-15%), making them excellent for yeast-leavened breads where strong gluten development is desired. The higher protein content helps create structure, essential for a good rise.
Softer wheat varieties, like Soft Red Winter or Soft White wheat, are milled into whole wheat pastry flour or whole white wheat flour. Whole wheat pastry flour has a lower protein content (typically 8-10%) and a finer texture, making it ideal for tender baked goods like muffins, biscuits, cookies, and cakes.
Whole white wheat flour, milled from white wheat varieties, offers the same nutritional benefits as red wheat but has a milder flavor and lighter color, appealing to those new to whole grain baking. Experimenting with these different types is one of the key whole wheat baking tips for achieving desired textures and flavors.
Essential Whole Wheat Baking Tips for Success

Tip #1: Increase Liquid Content for Moisture
One of the most crucial whole wheat baking tips is to adjust the liquid in your recipe. Whole wheat flour contains bran, which is very absorbent. This means it requires more liquid than refined flour to achieve the same dough consistency. If you substitute whole wheat flour 1:1 in a recipe designed for white flour without adding extra liquid, you'll likely end up with a dry, stiff dough that produces dense, crumbly results.
As a general rule of thumb, you may need to increase the liquid (water, milk, etc.) by 10-20% compared to a recipe using all-purpose flour. For example, if a white bread recipe calls for 300ml of water per 500g of flour, you might start with 330ml to 360ml when using whole wheat flour. However, the exact amount can vary depending on the specific flour's absorption rate and humidity.
It's best to add the liquid gradually, observing the dough's consistency. The dough should feel soft and slightly sticky, rather than stiff or dry. This increased hydration is fundamental to achieving a moist crumb in your whole wheat baked goods.
Tip #2: Employ Autolyse for Enhanced Gluten Development
Autolyse is a simple yet powerful technique among effective whole wheat baking tips, particularly for yeast breads. It involves mixing the flour and water (and sometimes yeast, but no salt) and letting the mixture rest for 20-60 minutes before adding the remaining ingredients and kneading. During this resting period, the flour absorbs the water more fully, and enzymatic activity begins to break down proteins, initiating gluten development without mechanical effort.
For whole wheat flour, autolyse is especially beneficial because the bran particles can hinder gluten formation. The rest period allows the gluten network to start forming more easily, making the dough more extensible and easier to handle during kneading. It also helps the bran soften, reducing its tendency to "cut" the gluten strands. Implementing an autolyse can significantly improve the texture and volume of your whole wheat loaves, leading to a lighter, less dense crumb.
Tip #3: Utilize a Longer Proofing Time
Whole wheat dough often requires a longer time to rise compared to dough made with refined flour. The bran and germ in whole wheat flour can weigh down the dough and interfere with the yeast's ability to produce carbon dioxide gas, which is what causes the dough to rise. Additionally, if using the autolyse method, the initial gluten development might be slower, necessitating a longer bulk fermentation.
Expect your first rise (bulk fermentation) and second rise (proofing) to take anywhere from 30 minutes to an hour longer than a standard white flour recipe, especially in cooler kitchen temperatures (e.g., 20-22°C or 68-72°F). Instead of relying solely on time, pay attention to visual cues: the dough should roughly double in volume and feel airy. Over-proofing can also be an issue, so finding the right balance is key. A longer, slower proof, sometimes even in the refrigerator overnight for improved flavor, can also strengthen the dough and contribute to a better final product.
Tip #4: Gently Handle Whole Wheat Dough
When it comes to whole wheat baking tips, dough handling is critical. Whole wheat dough can be more fragile than white dough because the bran particles can interrupt the gluten structure. Over-kneading or rough handling can damage the delicate gluten network, leading to a dense, tough result. While initial kneading is necessary to develop gluten, be mindful not to overwork the dough.
During shaping and proofing, handle the dough gently. Avoid excessive degassing (punching down too hard) during the shaping process. Think of it as coaxing the dough into shape rather than forcing it. For instance, when shaping a loaf, use gentle tension to create surface structure without tearing the dough or pressing out all the precious gas bubbles developed during fermentation. This gentle approach helps preserve the airy texture that contributes to a lighter crumb in your final baked goods.
Tip #5: Reduce Oven Temperature Slightly
Baking with whole wheat flour often benefits from a slightly lower oven temperature or a shorter baking time compared to recipes using only white flour. The bran and germ in whole wheat flour contain fats and sugars that can cause the crust to brown faster. While a beautifully browned crust is desirable, too high a temperature can lead to the crust burning before the interior is fully cooked, resulting in a dry, potentially underbaked center.
Reducing the oven temperature by 10-15°C (25-35°F) from what a white flour recipe might recommend is a helpful adjustment. For example, if a white bread recipe bakes at 220°C (425°F), you might bake a whole wheat loaf at 205-210°C (400-410°F). Keep an eye on the crust color and use an internal thermometer to check for doneness (most breads are done when the internal temperature reaches 90-95°C or 195-205°F). This slight temperature modification is one of the important whole wheat baking tips for ensuring even cooking and a perfect crust.
Recipes & Ideas for Delicious Whole Wheat Treats
Whole Wheat Sandwich Bread: A Beginner's Guide
Baking a loaf of whole wheat sandwich bread from scratch is a rewarding experience and a great way to utilize whole wheat baking tips. A simple recipe might involve combining 400g whole wheat flour, 100g all-purpose flour (for a slightly lighter texture), 7g instant yeast, 10g salt, 15g honey or molasses, 350ml warm water, and 20g softened butter or oil. Start by mixing the flours, yeast, honey, and most of the water, letting it autolyse for 20 minutes.
After the autolyse, add the salt and butter, then knead for about 8-10 minutes until a somewhat smooth dough forms. Remember the tip about handling gently! Place the dough in a greased bowl, cover, and let it rise until doubled, which might take 1.5 to 2 hours at room temperature. Shape the dough into a loaf, place it in a greased loaf pan (standard 9x5 inch), cover, and let it proof for another 45-60 minutes. Bake in a preheated oven at around 190°C (375°F) for 30-40 minutes, or until golden brown and the internal temperature is 90-95°C (195-205°F).
Whole Wheat Blueberry Muffins: A Healthy Breakfast Option
Whole wheat blueberry muffins are a fantastic way to enjoy whole grains in a quick bread format. Using whole wheat pastry flour or whole white wheat flour (approximately 200g) combined with about 50g of all-purpose flour can provide a tender crumb. A basic recipe would also include 100g sugar (or a bit less for a healthier version), 2 tsp baking powder, 1/2 tsp salt, 1 large egg, 240ml milk (or buttermilk for tang), 80ml melted butter or oil, and 150g fresh or frozen blueberries.
Mix the dry ingredients in one bowl and the wet ingredients in another. Make a well in the dry ingredients and pour in the wet ingredients. Mix gently until just combined – a few lumps are okay! Overmixing develops gluten and leads to tough muffins. Fold in the blueberries carefully. Portion the batter into a lined muffin tin, filling cups about two-thirds full. Bake at 200°C (400°F) for the first 5 minutes, then reduce to 175°C (350°F) for the remaining 15-20 minutes, or until a toothpick inserted comes out clean. This two-temperature method helps create a nice dome.
Whole wheat oatmeal cookies offer a delightful chewy texture and nutty flavor. A standard recipe might use 150g whole wheat flour, 150g rolled oats, 1/2 tsp baking soda, 1/4 tsp salt, 115g unsalted butter (softened), 100g brown sugar, 50g granulated sugar, 1 large egg, 1 tsp vanilla extract, and optional additions like 100g raisins or chocolate chips.
Cream the softened butter with both sugars until light and fluffy. Beat in the egg and vanilla. In a separate bowl, whisk together the whole wheat flour, rolled oats, baking soda, and salt. Gradually add the dry ingredients to the wet ingredients, mixing until just combined.
Stir in any optional additions. Drop rounded tablespoons of dough onto baking sheets lined with parchment paper. Bake in a preheated oven at 175°C (350°F) for 10-12 minutes, or until the edges are golden but the centers still look soft. Let them cool on the baking sheet for a few minutes before transferring to a wire rack to cool completely.

Elevate the classic chocolate chip cookie by using whole wheat flour and a sprinkle of sea salt. Use 180g whole wheat flour, 1 tsp baking soda, 1/2 tsp salt (plus flaky sea salt for topping), 115g unsalted butter (melted), 150g brown sugar, 50g granulated sugar, 1 large egg, 1 egg yolk, 1 tsp vanilla extract, and 200g chocolate chips (a mix of milk and dark is great).
Whisk together the melted butter and sugars in a bowl. Beat in the egg, egg yolk, and vanilla extract. In a separate bowl, whisk the whole wheat flour, baking soda, and salt. Gradually add the dry ingredients to the wet, mixing until just combined. Stir in the chocolate chips.
Chill the dough for at least 30 minutes (or longer for thicker cookies). Drop rounded tablespoons onto a parchment-lined baking sheet, leaving space between them. Sprinkle with flaky sea salt. Bake at 190°C (375°F) for 9-12 minutes, depending on desired chewiness, until the edges are golden and the centers are slightly soft.
Whole Wheat Banana Bread with Walnuts
Moist and flavorful, whole wheat banana bread is a perfect way to use ripe bananas while incorporating whole grains. You'll need about 250g whole wheat flour, 1 tsp baking soda, 1/4 tsp salt, 1/2 tsp cinnamon (optional), 115g unsalted butter (melted), 150g granulated sugar (or less for a less sweet bread), 2 large eggs, 3 very ripe bananas (mashed, about 300-350g), 60ml milk or yogurt, and 100g chopped walnuts (optional).
In a bowl, whisk together the whole wheat flour, baking soda, salt, and cinnamon. In another bowl, whisk the melted butter and sugar. Beat in the eggs one at a time. Stir in the mashed bananas and milk/yogurt. Add the dry ingredients to the wet ingredients, mixing until just combined.
Fold in the walnuts if using. Pour the batter into a greased and floured 9x5 inch loaf pan. Bake at 175°C (350°F) for 50-65 minutes, or until a toothpick inserted into the center comes out clean. Let it cool in the pan for 10 minutes before transferring to a wire rack.
Troubleshooting Common Whole Wheat Baking Problems
Dry and Crumbly Texture
A dry and crumbly texture is one of the most common issues encountered when first experimenting with whole wheat baking tips. This problem almost always stems from insufficient hydration. As discussed earlier, whole wheat flour absorbs significantly more liquid than white flour due to the presence of the bran. If you use the same amount of liquid as you would for a white flour recipe, the dough will be too dry, and the final product will reflect this lack of moisture.
To prevent dryness, remember to increase the liquid content by 10-20% when substituting whole wheat flour. Pay attention to the dough's feel during mixing – it should be softer and potentially stickier than a white flour dough. Another factor can be over-baking; whole wheat goods can brown faster, leading bakers to remove them too late, drying out the interior. Use visual cues and internal temperature checks (like 90-95°C for bread) to ensure you bake just until done.
Dense and Heavy Results
Achieving a light and airy texture can be a challenge when baking with whole wheat flour, often resulting in dense and heavy goods. This can be caused by several factors. Firstly, inadequate gluten development is a major culprit; the bran can interfere with gluten formation, making it harder for the dough to trap the gases produced by yeast or leavening agents. Not kneading enough (or not using techniques like autolyse) can lead to a weak structure.
Secondly, improper proofing can result in density. If the dough is under-proofed, it hasn't had enough time to develop sufficient gas volume before baking. Conversely, over-proofing can cause the structure to collapse in the oven. Thirdly, rough handling can deflate the dough, expelling the precious air bubbles. Ensure you're using enough liquid (as discussed in Tip #1), allowing sufficient proofing time (Tip #3), and handling the dough gently (Tip #4) to help achieve a lighter crumb.
Overpowering Whole Wheat Flavor
While many embrace the nutty, earthy flavor of whole wheat, some find it too strong, especially when transitioning from refined flour baking. If the whole wheat flavor is too overpowering, there are a few whole wheat baking tips to help temper it. One simple approach is to use a blend of whole wheat flour and a milder flour, such as all-purpose flour or whole white wheat flour. Starting with a 50/50 blend can make the flavor more approachable while still benefiting from whole grains.
Another technique, particularly for breads, is to use a preferment (like a poolish or levain) or incorporate some sourdough starter. The fermentation process in these starters can mellow the strong flavors of whole wheat flour and introduce more complex, pleasant notes. Similarly, using milk or buttermilk instead of just water can soften the flavor profile. Finally, pairing whole wheat baked goods with complementary flavors like honey, molasses, nuts, seeds, or spices (cinnamon, nutmeg) can help balance or enhance the inherent taste of the flour.
Storing Your Whole Wheat Baked Goods for Freshness

Storing Whole Wheat Bread to Prevent Staling
Proper storage is essential to keep your homemade whole wheat bread fresh and prevent it from staling too quickly. Bread begins to stale as the starch molecules crystallize, a process that happens fastest at refrigerator temperatures (around 4°C or 40°F). Therefore, the refrigerator is generally not the best place to store bread you plan to eat within a few days, despite popular belief.
For short-term storage (1-3 days), room temperature is ideal. Store the cooled loaf in a bread box, a paper bag inside a sealed plastic bag, or simply a sealed plastic bag. The paper bag helps keep the crust crisp initially, while the plastic bag prevents moisture loss. For longer storage (up to 3 months), freezing is the best option. Allow the bread to cool completely, slice it if desired, and wrap it tightly in plastic wrap, followed by a layer of aluminum foil or a freezer bag to prevent freezer burn. Thaw at room temperature when ready to use.
Whole wheat muffins and cookies can sometimes dry out faster than those made with refined flour due to the bran's absorbency. To maintain their softness, ensure they are completely cooled before storing. Warm baked goods create condensation inside the storage container, which can lead to sogginess and potential mold growth.
Store cooled whole wheat muffins and cookies in an airtight container at room temperature for 2-3 days. Placing a slice of plain bread or a paper towel in the container can sometimes help absorb excess moisture and keep them soft. For longer storage (up to a week), the refrigerator is an option, though it can sometimes affect texture. Freezing is also effective for longer periods (1-2 months). Wrap individual muffins or stack cookies with parchment paper in between before placing them in a freezer-safe container or bag. Thaw at room temperature or gently reheat before enjoying.
Advanced Techniques for Baking with Whole Wheat
Using a Soaker for Enhanced Hydration
A soaker is an advanced whole wheat baking tip that significantly improves hydration and mellows the bran's impact. It involves combining a portion of the whole wheat flour (or other grains/seeds) with a portion of the recipe's liquid (usually water, but sometimes milk or buttermilk) and letting it rest for several hours or overnight at room temperature or in the refrigerator. The ratio of flour to liquid in the soaker is typically 1:1 by weight, or sometimes even wetter.
For example, in a recipe using 500g whole wheat flour and 400ml water, you might make a soaker with 150g whole wheat flour and 150g water, letting it sit for 12 hours. The remaining 350g flour and 250ml water (plus other ingredients) are added to the soaker later to form the final dough. This extended soaking time allows the bran to fully absorb moisture, softening it and reducing its interference with gluten development. The result is a noticeably moister crumb and a less "wheaty" flavor in the final baked good.
Utilizing a Sourdough Starter with Whole Wheat Flour
Baking whole wheat goods with a sourdough starter is a fantastic way to enhance flavor, texture, and digestibility. A sourdough starter is a living culture of wild yeast and bacteria that ferments flour and water. Using a starter in whole wheat baking introduces beneficial acids and enzymes that break down components in the flour, improving gluten structure and making nutrients more bioavailable.
You can maintain a sourdough starter fed exclusively with whole wheat flour, or use a starter fed with white flour to leaven a whole wheat dough. The longer, slower fermentation provided by sourdough is particularly well-suited to whole wheat, giving the dough ample time to develop strength and flavor.
A typical sourdough whole wheat bread recipe might involve a long bulk fermentation (4-12 hours depending on temperature) and a long cold proof (8-16 hours in the refrigerator), resulting in a complex flavor profile and a well-developed crumb structure. Many find that the tang of sourdough perfectly complements the nutty notes of whole wheat.
Combining Whole Wheat with Bread Flour for Optimal Texture
One of the most practical whole wheat baking tips for achieving a lighter, airier texture in breads is to combine whole wheat flour with a strong bread flour. Bread flour typically has a higher protein content (12-14%) than all-purpose flour, meaning it can develop a stronger gluten network. Whole wheat flour, despite potentially having high protein, has the bran and germ which hinder gluten development.
By using a blend, you leverage the strong gluten-forming potential of the bread flour to support the structure, while still incorporating the nutritional benefits and flavor of whole wheat. A common starting point is a 50/50 blend (e.g., 250g whole wheat flour and 250g bread flour in a 500g recipe), but ratios can vary from 20% whole wheat up to 80% or more depending on the desired outcome.
This blend makes the dough easier to handle and contributes to better volume and a less dense crumb compared to using 100% whole wheat flour, making it an excellent strategy for many whole wheat baking tips applications.
Conclusion: Enjoy the Versatility and Goodness of Whole Wheat Baking
Frequently Asked Questions
How does using whole wheat flour affect the texture of baked goods?
Whole wheat flour can make baked goods denser and drier due to the bran and germ it contains. However, with proper techniques, you can minimize these effects and achieve a lighter texture.
What are some key differences between whole wheat flour and all-purpose flour when baking?
Whole wheat flour absorbs more liquid than all-purpose flour. It also contains the bran and germ, which contributes to a nuttier flavor and increased nutritional value, but can also impact texture.
What are some essential tips for successfully substituting whole wheat flour in my favorite recipes?
Start by substituting only 25-50% of the all-purpose flour with whole wheat. You may also need to increase the liquid in the recipe to compensate for the flour's higher absorption.
How can I prevent whole wheat baked goods from becoming too dense or dry?
Consider using vital wheat gluten to improve the dough's elasticity. Also, avoid over-mixing the batter, as this can develop too much gluten and result in a tougher product.
Where can I find reliable whole wheat baking recipes and resources?
BakeWithEase.com offers a variety of step-by-step guides and easy-to-follow recipes specifically designed for baking with whole wheat, catering to all skill levels.
Final Reflection: The Enduring Appeal of Whole Wheat Baking
The resurgence of whole wheat baking isn't just a trend; it's a conscious shift towards healthier, more sustainable eating. We've explored the challenges and triumphs of incorporating whole wheat flour into our favorite recipes, discovering that deliciousness and nutritional value can coexist beautifully. This isn't about sacrifice; it's about mindful creation.
The journey of embracing whole wheat flour has been a personal one for me, filled with both frustrating failures and exhilarating successes. The subtle nutty flavor and satisfying texture it brings to baked goods are a constant reminder of the connection between food and well-being. The best things in life are worth fighting for, and a truly delicious whole wheat loaf is certainly one of them.
– (A quote you could add here, perhaps one you've found or created yourself.) This isn't just about baking; it's about appreciating the artistry of transforming simple ingredients into nourishing delights.
Now, it's your turn. Consider the recipes and techniques we've explored. Don't be afraid to experiment, to adapt, and to find your own perfect balance of flavor and nutrition. Embrace the challenge, celebrate the successes, and most importantly, enjoy the process of creating wholesome, delicious treats that nourish both body and soul. The world of whole wheat baking awaits your exploration – what delicious adventure will you embark on next?
Unleash Your Inner Baker: Wholesome Treats Await!
Thanks for joining us on this journey into the world of whole wheat baking! We hope you've discovered new ways to create delicious and healthy treats. Ready to put your newfound knowledge into practice?
- Bake your first whole wheat masterpiece! Try one of the recipes mentioned in the article – or experiment with your own creation, using the tips we shared.
- Share your baking triumphs (and even your floury mishaps!) with us on social media! Use #BakeWithEaseWholeWheat to connect with other baking enthusiasts.
- Explore our other resources on BakeWithEase.com to discover even more baking inspiration and tips. We've got a treasure trove waiting for you!
What delicious whole wheat creation will you bake first? Let us know in the comments!