
Your GoTo Recipe for Versatile Homemade Pizza Dough

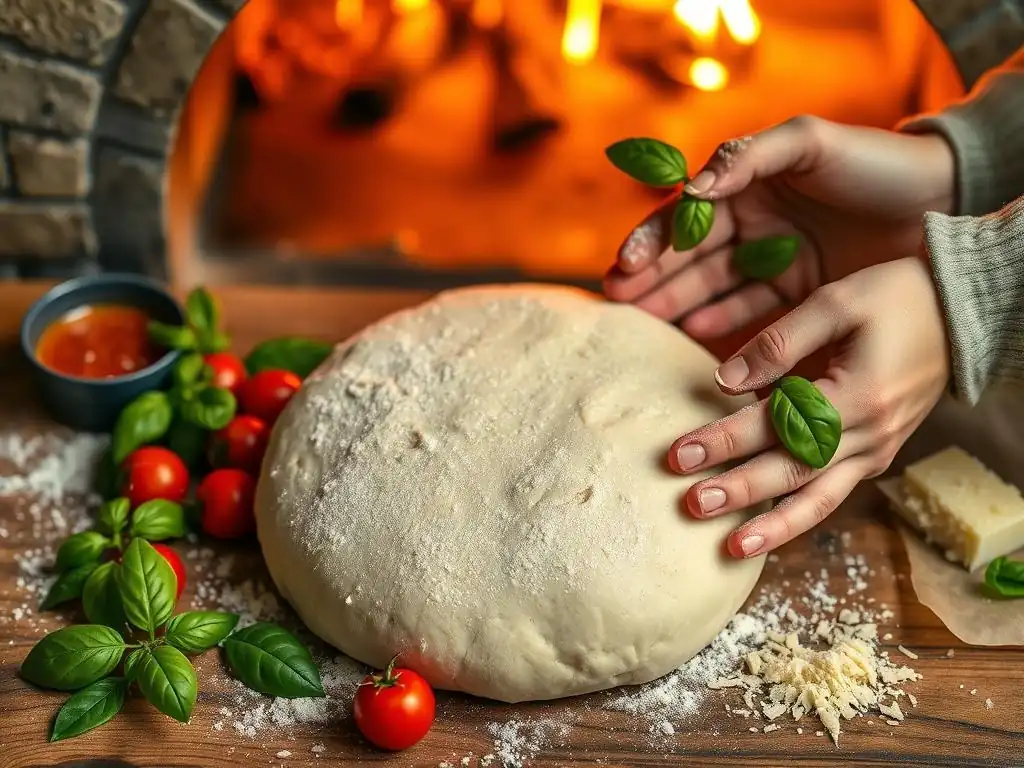
Welcome to BakeWithEase, your guide to unlocking the joy of baking! Ever wondered how to achieve that perfect, chewy crust at home? This week, we're diving into an easy homemade pizza dough recipe that will transform your pizza nights forever. Discover the secrets to a versatile dough that's surprisingly simple to make, even if you're new to baking. Ready to say goodbye to store-bought dough and hello to pizza perfection? Let's get started!
- Your Go-To Recipe for Versatile Homemade Pizza Dough: BakeWithEase
- Introduction to Easy Homemade Pizza Dough
- The Ultimate Easy Homemade Pizza Dough Recipe
- Baking Your Homemade Pizza: Tips & Techniques
- Variations and Customizations for Your Pizza Dough
- Troubleshooting Common Pizza Dough Problems
- Storing Your Homemade Pizza Dough
- Delicious Pizza Recipes Using Your Homemade Dough
- Conclusion: Enjoying the Best Homemade Pizza
- Frequently Asked Questions
- Final Reflection: The Joy of Homemade, the Simplicity of Pizza
- Unleash Your Inner Pizzaiolo!
Your Go-To Recipe for Versatile Homemade Pizza Dough: BakeWithEase
Introduction to Easy Homemade Pizza Dough
Why Make Your Own Pizza Dough? Taste, Texture & Control
Making your own pizza dough at home unlocks a world of flavor and texture that simply isn't possible with store-bought alternatives. The process allows you to control every ingredient, from the type of flour to the amount of salt, resulting in a crust tailored exactly to your preferences. Many home bakers find that their homemade pizza dough offers a superior chew and a more developed flavor profile compared to pre-made options, which often contain preservatives or stabilizers that can affect the final taste and texture. This level of control is fundamental to creating truly exceptional pizza.
Beyond taste, the texture you can achieve with an easy homemade pizza dough recipe is a game-changer. By properly kneading and allowing the dough to ferment, you develop the gluten structure necessary for a crust that is both crispy on the outside and wonderfully airy and chewy within.
You can experiment with different hydration levels to achieve varying degrees of crispness and tenderness, something difficult to replicate with a generic product. Mastering this basic dough recipe is the first step towards baking pizzas that rival those from your favorite pizzeria, giving you the satisfaction of creating something truly delicious from scratch.
BakeWithEase: Mastering the Art of Pizza Dough at Home
At BakeWithEase, we believe that everyone can master the art of baking, and that includes crafting the perfect easy homemade pizza dough. Our goal is to demystify the process, breaking it down into simple, manageable steps that even beginner bakers can follow with confidence. We provide clear instructions, helpful tips, and explanations of why each step is important, ensuring your success from the moment you combine your ingredients to the final, delicious bite of your homemade pizza.
This comprehensive guide is designed to be your trusted companion on your pizza-making journey. We cover everything from selecting the right ingredients to troubleshooting common issues, empowering you to bake delicious pizzas consistently. Whether you're aiming for a classic Neapolitan-style crust or a thick pan pizza, understanding the fundamentals of this easy homemade pizza dough recipe is key, and BakeWithEase is here to guide you every step of the way, turning potential challenges into rewarding baking experiences.
The Ultimate Easy Homemade Pizza Dough Recipe
Ingredients for Perfect Pizza Dough
Crafting the perfect pizza dough begins with selecting quality ingredients. While the list is short – flour, water, yeast, salt, and sometimes sugar or oil – the quality and type of each component significantly impact the final texture and flavor of your crust. Using fresh ingredients, especially yeast, is crucial for successful rising, and understanding the role each plays helps you achieve consistent results every time you make this easy homemade pizza dough recipe.
Below are the essential ingredients you'll need. Paying attention to the specifics of each, such as flour protein content or water temperature, will elevate your pizza dough from good to truly exceptional. This simple combination, when handled correctly, forms the foundation for countless delicious pizza creations.
High-Quality Flour is Key
Using the right flour is fundamental for a great pizza crust. Bread flour, with its higher protein content (typically 12-14%), is often recommended because it develops strong gluten networks during kneading, resulting in a chewy texture and good structure to support toppings. All-purpose flour (around 10-12% protein) can also work, offering a slightly softer crust, but bread flour generally yields superior results for a classic chewy pizza.
Yeast: Choosing Between Active Dry and Instant
Yeast is the leavening agent that makes your dough rise. Active dry yeast requires activation in warm water before use, while instant yeast can often be mixed directly with dry ingredients. Instant yeast is generally faster and more reliable for a quick rise, while active dry yeast can sometimes contribute a slightly more complex flavor due to its slower start. A typical easy homemade pizza dough recipe for a 12-14 inch pizza might use about 1 to 2 teaspoons of active dry or instant yeast.
The Importance of Water Temperature
Water temperature is critical when working with yeast. For active dry yeast, water should be warm, around 105-115°F (40-46°C), to properly activate it. For instant yeast, cooler water, around 80-90°F (27-32°C), is sufficient as it doesn't require proofing. Using water that is too hot will kill the yeast, while water that is too cold will result in slow or no activation. A kitchen thermometer can be helpful to ensure accuracy.
Salt and Sugar: Balancing Flavors
Salt is essential for flavor and also controls the rate of yeast fermentation, preventing the dough from rising too quickly. It strengthens the gluten structure, contributing to a better texture. Sugar (a pinch is often enough) provides food for the yeast, helping it activate and promoting browning of the crust during baking. For a standard recipe using 2-3 cups of flour, about 1 to 1.5 teaspoons of salt and a pinch or 1/2 teaspoon of sugar are typical.
Optional: Olive Oil for Richness
Adding a tablespoon or two of olive oil to your pizza dough recipe is optional but highly recommended. Olive oil adds richness, tenderness, and a pleasant aroma to the crust. It can also make the dough slightly easier to handle and contributes to a crispier bottom crust when baked. Extra virgin olive oil offers the best flavor.
Step-by-Step Guide to Making Pizza Dough
Making easy homemade pizza dough involves a few key steps, each contributing to the final outcome. Patience is your friend during this process, especially during the rising periods, as this is when the dough develops flavor and texture. Following these steps carefully will lead you to a successful and delicious pizza base.
This guide outlines the typical process for creating a versatile dough suitable for various pizza styles. While specific timings can vary based on room temperature and yeast activity, the fundamental techniques remain consistent. Let's walk through how to transform simple ingredients into pliable, ready-to-bake dough.
Step 1: Activating the Yeast (If Using Active Dry)
If using active dry yeast, combine it with the warm water (105-115°F or 40-46°C) and a pinch of sugar in a small bowl. Stir gently and let it sit for 5-10 minutes. You should see a foamy layer form on the surface, indicating the yeast is alive and active. If it doesn't foam, your yeast may be dead, or the water temperature was incorrect, and you'll need to start with fresh yeast.
Step 2: Combining Dry Ingredients
In a large mixing bowl, whisk together the flour and salt. If using instant yeast and not activating it separately, whisk it in with the dry ingredients now. Ensure the salt is evenly distributed but ideally doesn't come into direct contact with the yeast before the water is added, as high concentrations of salt can inhibit yeast activity initially.
Step 3: Adding Water and Mixing the Dough
Pour the yeast mixture (or just the warm water if using instant yeast mixed with dry ingredients) into the bowl with the flour and salt. If using olive oil, add it now. Use a wooden spoon, spatula, or stand mixer with a dough hook to mix the ingredients until they just come together and a shaggy dough forms. There shouldn't be any dry flour left at the bottom of the bowl.
Step 4: Kneading the Dough to Perfection
Turn the shaggy dough out onto a lightly floured surface. Knead the dough for about 8-10 minutes by hand, or 5-7 minutes using a stand mixer on low speed. Kneading develops the gluten, making the dough smooth, elastic, and less sticky. You'll know it's ready when it's smooth, springs back slowly when poked, and passes the "windowpane test" (you can gently stretch a small piece thin enough to see light through it without tearing).
Step 5: First Rise: Allowing the Dough to Develop Flavor
Shape the kneaded dough into a ball. Lightly grease a clean bowl with olive oil and place the dough inside, turning to coat. Cover the bowl tightly with plastic wrap or a damp kitchen towel. Let the dough rise in a warm, draft-free place until it has doubled in size. This typically takes 1-2 hours at room temperature (around 70-75°F or 21-24°C), but colder temperatures will require longer. This slow fermentation builds flavor.
Step 6: Punching Down the Dough
Once the dough has doubled, gently punch it down to deflate it. This redistributes the yeast, evens out the temperature, and releases large gas bubbles. Turn the dough out onto a lightly floured surface and divide it into portions depending on how many pizzas you plan to make (e.g., two balls for two 12-14 inch pizzas). Shape each portion into a smooth ball.
Step 7: Second Rise (Optional)
For an even lighter and airier crust, you can let the dough balls rest for a second, shorter rise. Cover the dough balls loosely with plastic wrap or a towel and let them rest for another 20-30 minutes before shaping. This allows the gluten to relax, making the dough easier to stretch, and gives the yeast one last boost. This step is particularly beneficial for creating a puffy crust edge.
Baking Your Homemade Pizza: Tips & Techniques
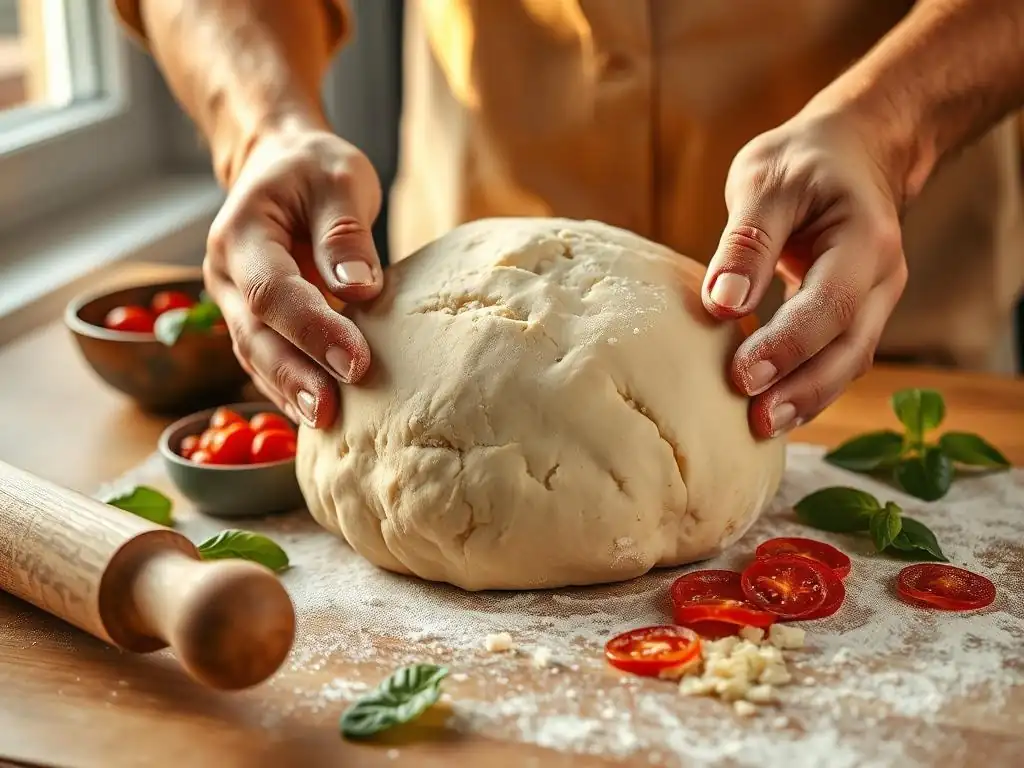
Once your easy homemade pizza dough is ready, the baking process is where it all comes together. Achieving a perfectly cooked pizza with a crispy crust and melted, bubbly toppings requires attention to detail, especially regarding oven temperature and cooking surface. These techniques are crucial for transforming your raw dough into a culinary masterpiece.
Baking pizza at home differs slightly from baking other bread or pastries due to the goal of a quick, high-heat cook. Following these tips will help you get the best possible results from your homemade pizza dough, ensuring a delicious and satisfying pizza every time.
Preheating Your Oven for Optimal Results
High heat is essential for baking pizza quickly and achieving a crispy crust with a chewy interior. Preheat your oven to the highest temperature it can safely reach, typically between 450°F and 550°F (230°C and 290°C). If you are using a pizza stone or steel, place it in the oven before turning it on and allow it to preheat for at least 30-60 minutes at this high temperature. This ensures the stone or steel is radiating enough heat to cook the bottom of the crust rapidly, preventing sogginess.
Proper preheating is not just about reaching the target temperature; it's about saturating your baking surface with heat. A well-preheated pizza stone or steel mimics the intense heat of a commercial pizza oven floor, giving your easy homemade pizza dough the thermal shock it needs to puff up quickly and develop a beautiful, charred base. Skipping or rushing this step is a common mistake that leads to undercooked or soggy crusts, even if the toppings look done.
Stretching and Shaping Your Pizza Dough
After the dough has rested (either after the first or second rise), it's time to shape it. Lightly flour your work surface and your hands. Gently press the dough from the center outwards, leaving a slightly thicker edge for the crust. You can use your fingertips to dimple the dough or carefully lift and stretch it, allowing gravity to help. Avoid using a rolling pin if you want an airy crust, as it can push out too much air. Aim for a thickness of about 1/4 inch for a standard crust, or thinner for a New York style.
If the dough is resisting stretching and keeps snapping back, it means the gluten is too tight. Cover the dough ball loosely and let it rest for another 10-15 minutes (this is called bench rest). This allows the gluten to relax, making the dough much more pliable and easier to stretch without tearing. Don't be afraid to practice; shaping pizza dough takes a little getting used to, but it becomes intuitive with repetition using your easy homemade pizza dough recipe.
Topping Your Pizza: Balance and Flavor
When topping your pizza, less is often more, especially when using an easy homemade pizza dough recipe designed for a relatively thin crust. Overloading the pizza with too much sauce, cheese, or heavy toppings can weigh down the dough, prevent it from cooking properly, and result in a soggy center. Start with a thin, even layer of sauce, leaving about a 1/2 to 1-inch border for the crust. For a 12-14 inch pizza, about 3-4 ounces of sauce is usually sufficient.
Distribute your cheese and toppings evenly across the pizza. For cheese, about 6-8 ounces of shredded low-moisture mozzarella is typical for a single pizza, though you can adjust based on preference. If using vegetables that release a lot of water (like mushrooms, onions, or peppers), consider sautéing them briefly beforehand to remove excess moisture. Arrange toppings so they are not piled high, ensuring even cooking and preventing the crust from becoming waterlogged.
Baking Time and Temperature for a Crispy Crust
The baking time for your pizza will depend heavily on your oven temperature and the thickness of your crust and toppings. At very high temperatures (500-550°F or 260-290°C), pizzas can bake in as little as 8-12 minutes. At slightly lower temperatures (450°F or 230°C), it may take 12-18 minutes. The goal is a crust that is golden brown and crispy on the bottom and edges, with melted, bubbly cheese and cooked toppings.
Always keep a close eye on your pizza, especially the first time you bake using your easy homemade pizza dough recipe and oven setup. Oven temperatures can vary, and every pizza is slightly different. If using a pizza stone or steel, the bottom crust will cook faster than the top; you might need to rotate the pizza halfway through baking for even cooking.
Checking for Doneness: The Perfect Pizza Crust
Knowing exactly when your pizza is done is key to avoiding undercooked dough or burnt toppings. The edges of the crust should be puffed up, golden brown, and possibly have some darker, slightly charred spots (especially at higher temperatures), which indicate delicious flavor development. The cheese should be fully melted and bubbly, perhaps with some browning in spots.
To check the bottom crust, carefully lift one edge of the pizza with a spatula. The bottom should be firm, golden brown, and ideally have some darker blisters if baked on a hot surface like a stone or steel. If the toppings look done but the bottom is pale or soft, you may need to bake it for a few more minutes directly on the hot stone/steel after carefully sliding it off the peel, or use a lower oven rack position if not using a stone.
Variations and Customizations for Your Pizza Dough

The beauty of mastering a basic easy homemade pizza dough recipe is the ability to customize it. Once you have the fundamental technique down, you can easily adapt the recipe to create different types of crusts or add unique flavors. Experimenting with variations keeps pizza night exciting and allows you to cater to different dietary needs or taste preferences.
Exploring variations goes beyond just toppings; it involves modifying the dough itself. From healthier whole wheat options to tangy sourdough or even gluten-free alternatives, the world of homemade pizza dough offers endless possibilities. Each variation presents unique challenges and rewards, allowing you to deepen your understanding of baking.
Whole Wheat Pizza Dough Recipe: A Healthier Option
Substituting some or all of the all-purpose or bread flour with whole wheat flour creates a more nutritious pizza dough with a nutty flavor and denser texture. Whole wheat flour absorbs more liquid than white flour, so you may need to slightly increase the water in your easy homemade pizza dough recipe to achieve the correct hydration level. Start by substituting 50% whole wheat flour and see how the dough feels, adjusting the water as needed.
Whole wheat dough typically requires a bit more kneading to develop sufficient gluten structure, and the resulting crust will be heartier and less airy than one made purely with white flour. Despite the textural differences, a whole wheat pizza crust offers a satisfying alternative and pairs wonderfully with robust toppings like roasted vegetables or strong cheeses. It's a great way to make your homemade pizza a bit healthier.
Gluten-Free Pizza Dough: Adapting the Recipe
Creating a delicious gluten-free pizza dough requires a different approach, as you're working without the gluten network that gives traditional dough its structure and elasticity. Gluten-free pizza dough recipes often rely on blends of alternative flours (like rice flour, sorghum flour, or tapioca starch) combined with binders like xanthan gum or psyllium husk to mimic the properties of gluten. These doughs are often wetter and stickier than wheat dough.
Handling gluten-free dough is also different; it's often too sticky to knead traditionally and is instead mixed until combined and then patted or pressed into shape on a baking surface. While the texture may not be identical to wheat-based crusts, many excellent gluten-free easy homemade pizza dough recipes produce delicious results that are crispy on the outside and pleasantly tender within, allowing those with gluten sensitivities to enjoy homemade pizza.
Sourdough Pizza Dough: Adding Tang and Complexity
Using an active sourdough starter instead of commercial yeast introduces a delightful tang and complexity to your pizza dough, alongside a wonderfully airy and chewy texture. Sourdough fermentation is slower and relies on wild yeasts and bacteria, which break down the flour over a longer period, typically 12-72 hours in the refrigerator after an initial bulk fermentation. This extended fermentation develops deep flavors and improves digestibility.
A sourdough easy homemade pizza dough recipe requires a healthy, active starter, typically used at its peak activity after feeding. The hydration levels can vary widely, influencing the final texture; higher hydration (70%+ water relative to flour) tends to produce a more open crumb structure. While the process takes more time than a quick yeast dough, the resulting crust with its unique flavor and texture is well worth the wait for many bakers.
Adding Herbs and Spices to Your Pizza Dough
Infusing your pizza dough with herbs and spices is an easy way to add an extra layer of flavor directly into the crust. Dried Italian herbs like oregano, basil, and thyme, garlic powder, onion powder, or even a pinch of red pepper flakes can be mixed into the dry ingredients before adding the water. Approximately 1 to 2 teaspoons of dried herbs or spices per batch of dough is a good starting point, depending on your desired intensity.
Adding herbs or spices to your easy homemade pizza dough recipe results in a more aromatic crust that complements your toppings. Imagine a garlic and herb infused crust paired with a simple cheese pizza or a spicy dough base for a pepperoni pizza. This simple customization can significantly enhance the overall flavor profile of your homemade pizza, making each bite of the crust as flavorful as the toppings.
Troubleshooting Common Pizza Dough Problems
Even with an easy homemade pizza dough recipe, you might occasionally encounter issues. Dough can be temperamental, and factors like room temperature, humidity, and even the age of your ingredients can affect the outcome. Learning to identify and fix common problems will save you frustration and help you achieve consistent success in your pizza-making endeavors.
Understanding the potential pitfalls and how to correct them is part of the baking learning curve. Don't be discouraged if your first few attempts aren't perfect. By recognizing what went wrong, you can adjust your technique or ingredients for the next batch, ensuring your homemade pizza dough turns out just right.
Dough That Won't Rise: Yeast Issues
The most common reason for dough failing to rise is inactive yeast. This can happen if your yeast is old and expired, if the water used to activate it was too hot (killing the yeast) or too cold (inhibiting activation), or if the environment for rising is too cold. Active dry yeast must show foam after 5-10 minutes in warm water; if it doesn't, discard it and start with fresh yeast. Ensure your water is within the recommended temperature range (105-115°F for active dry, 80-90°F for instant).
Another factor could be using too much salt, which can inhibit yeast activity, especially if mixed directly together before hydration. Ensure salt is whisked into the flour. Finally, find a warm spot for your dough to rise, ideally around 75-80°F (24-27°C). Placing the covered bowl in a slightly warm oven (turned off! ), near a sunny window, or on top of a warm appliance can help encourage rising for your easy homemade pizza dough recipe.
Dough That's Too Sticky: Hydration Levels
A sticky dough is often a sign of high hydration (a high ratio of water to flour). While some stickiness is normal for well-hydrated doughs that produce airy crusts, dough that is excessively sticky and difficult to handle might need adjustment. This could be due to inaccurate measuring of water or using a flour type that absorbs less liquid than anticipated.
If your dough is too sticky during kneading, add flour very gradually, a tablespoon at a time, kneading it in completely before adding more. Stop adding flour as soon as the dough is still slightly tacky but no longer sticking excessively to your hands or the work surface. Remember that different flours absorb moisture differently, so you might need to adjust the water slightly based on the specific flour you are using for your easy homemade pizza dough recipe.
Dough That's Too Tough: Over-Kneading
While kneading develops the gluten structure, over-kneading can result in a tough, dense crust. This is more common with stand mixers than hand kneading, as mixers can work the dough very quickly. Over-kneading creates an overly tight gluten network that doesn't relax easily, leading to a dough that is difficult to stretch and a baked crust that is hard or rubbery instead of chewy and tender.
You'll know you've kneaded enough when the dough is smooth, elastic, and passes the windowpane test. It should feel alive and slightly resistant but not stiff or difficult to work with. If you suspect you've over-kneaded your easy homemade pizza dough, try letting it rest for a longer period (30-60 minutes) before shaping; this can sometimes help the gluten relax slightly, though it won't completely fix the issue.
Pizza Crust That's Soggy: Baking Techniques
A soggy pizza crust is usually a result of issues during the baking process, not necessarily with the dough itself. Common culprits include not preheating your oven and baking surface (like a pizza stone or steel) adequately, using too low a baking temperature, or overloading the pizza with wet toppings. The goal is to cook the bottom crust quickly before the moisture from toppings can soak into it.
Ensure your oven and baking surface are preheated at the highest possible temperature for at least 30-60 minutes. Bake the pizza directly on the hot stone or steel using a pizza peel. If using wet toppings like fresh mozzarella (which contains more water than low-moisture), consider draining it well or adding it later in the baking process. Don't overload your pizza; use moderate amounts of sauce and toppings to allow the crust to cook through properly.
Storing Your Homemade Pizza Dough
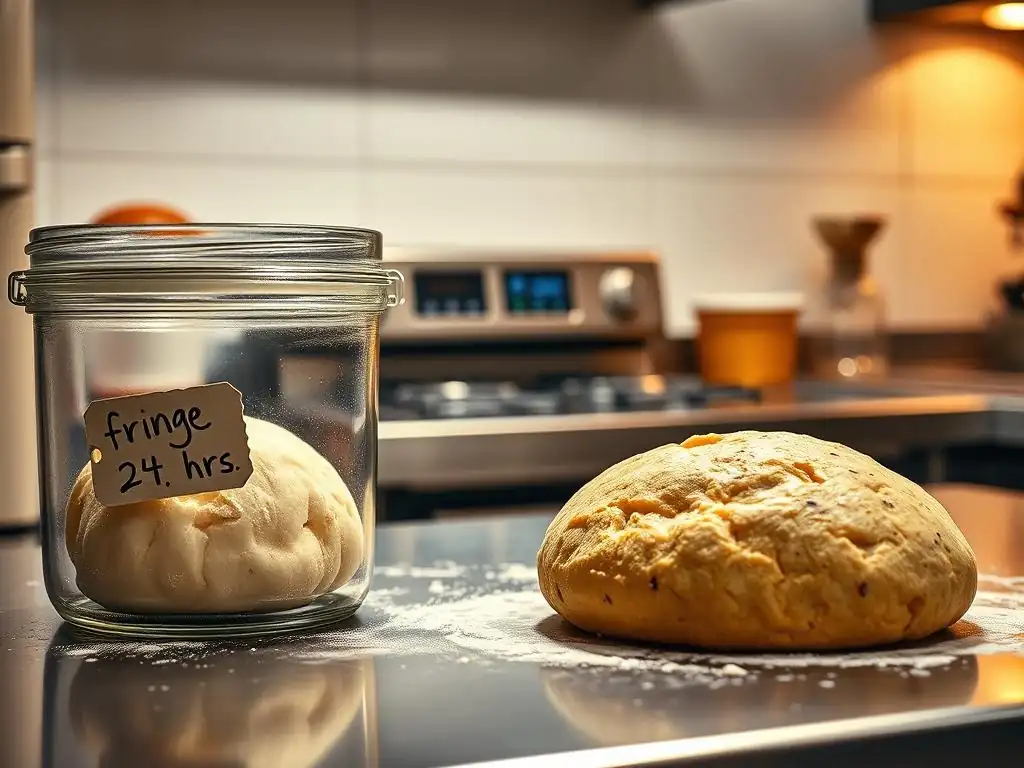
One of the great advantages of making your own easy homemade pizza dough is the ability to make it ahead of time and store it for later use. Proper storage allows you to have dough ready whenever a pizza craving strikes and can even improve the flavor and texture through cold fermentation. There are two main methods for storing dough: refrigeration and freezing.
Both refrigeration and freezing require the dough to be properly wrapped to prevent it from drying out or developing a tough skin. Understanding the best practices for each method ensures your dough remains fresh, pliable, and ready to bake when you need it, whether it's tomorrow night or next month.
Refrigerating Pizza Dough for Later Use
Refrigerating your pizza dough is an excellent way to store it for a few days and actually enhances its flavor through a process called cold fermentation. After the first rise (or even immediately after kneading), divide the dough into portions, shape each into a ball, and lightly coat with olive oil. Place each dough ball in an airtight container or a bowl tightly covered with plastic wrap. Refrigerate for up to 3-5 days.
Cold fermentation slows down yeast activity significantly but allows enzymes in the dough to break down starches into sugars, resulting in a more complex flavor and sometimes a more airy texture. When you're ready to bake, take the dough out of the refrigerator at least 30-60 minutes before shaping to allow it to come to room temperature, which makes it easier to stretch and helps with oven spring. This simple step with your easy homemade pizza dough recipe yields fantastic results.
Freezing Pizza Dough for Long-Term Storage
For longer storage, freezing is the best option. After the first rise and punching down, divide the dough into portions and shape each into a ball. Lightly coat each ball with oil. Place the dough balls on a baking sheet lined with parchment paper, ensuring they don't touch, and freeze until firm (about 2-3 hours). Once frozen solid, transfer the dough balls to individual freezer-safe bags or wrap tightly in plastic wrap followed by aluminum foil.
Frozen pizza dough can be stored for 1-2 months. To thaw, transfer the frozen dough ball to a covered container or bowl in the refrigerator and let it thaw overnight. Once thawed, let it sit at room temperature for 30-60 minutes before shaping and baking. Freezing is a convenient way to always have easy homemade pizza dough ready for impromptu pizza nights.
Delicious Pizza Recipes Using Your Homemade Dough
Having a batch of your easy homemade pizza dough ready opens the door to endless pizza possibilities. From timeless classics to creative gourmet combinations, your homemade crust provides the perfect canvas. Here are a few ideas to get you started, showcasing the versatility of your dough.
These recipes highlight how simple, quality ingredients shine when paired with a great crust. Feel free to adapt these ideas based on your favorite toppings and what's in season. The joy of homemade pizza is the ability to customize every aspect.
Classic Margherita Pizza
The Margherita is a true test of good pizza dough and quality ingredients. It features simple toppings: San Marzano tomato sauce, fresh mozzarella cheese, fresh basil leaves, and a drizzle of olive oil. The high heat of the oven quickly melts the cheese and slightly chars the crust edges, while the basil adds a burst of freshness after baking.
Using your easy homemade pizza dough recipe, stretch it thin, spread a light layer of sauce, add slices of fresh mozzarella (drained well), and bake until the crust is golden and the cheese is bubbly. Add fresh basil leaves just after it comes out of the oven. This minimalist approach allows the flavor and texture of your homemade dough to truly stand out.
Pepperoni Pizza Perfection
A perennial favorite, pepperoni pizza is satisfyingly savory and slightly spicy. Use a good quality low-moisture mozzarella cheese for the best melt and classic 'cup-and-char' pepperoni if you can find it – these curl up and crisp around the edges when baked. A simple tomato sauce provides the base.
Spread your easy homemade pizza dough with sauce, cover generously with shredded mozzarella, and arrange the pepperoni slices evenly. Bake until the crust is golden brown and the pepperoni is crispy around the edges. The slight oil from the pepperoni adds flavor to the cheese and crust.
Vegetarian Pizza Delight
Vegetarian pizzas offer a fantastic way to use fresh, seasonal produce. Popular toppings include bell peppers, onions, mushrooms, olives, spinach, artichoke hearts, and cherry tomatoes. Consider roasting or sautéing vegetables like mushrooms, onions, and peppers beforehand to remove excess moisture and concentrate their flavors, preventing a soggy crust.
Build your vegetarian pizza on your easy homemade pizza dough with a base of tomato sauce or even pesto. Layer with your favorite cheeses (mozzarella, provolone, feta) and arrange your prepared vegetables. Baking time will depend on the toppings, but ensure the crust is fully cooked and the cheese is melted and bubbly.
Gourmet Pizza Ideas
Elevate your pizza night with gourmet topping combinations using your versatile easy homemade pizza dough. Think beyond the classics: prosciutto and arugula (add prosciutto after baking, arugula tossed in vinaigrette), fig and goat cheese with balsamic glaze, pesto with chicken and sun-dried tomatoes, or even a white pizza with ricotta, garlic, and spinach.
These gourmet options often pair unique flavor profiles with different cheese combinations. Experiment with ingredients like caramelized onions, roasted garlic, different types of olives, or specialty cheeses like gorgonzola or fontina. Your easy homemade pizza dough is robust enough to handle a variety of toppings, allowing your culinary creativity to flourish.
Conclusion: Enjoying the Best Homemade Pizza
The Satisfaction of Baking Your Own Pizza
There is immense satisfaction in creating something delicious from scratch, and pizza is no exception. From kneading the dough and watching it rise to topping it with your favorite ingredients and pulling a hot, bubbly pizza from the oven, the process is incredibly rewarding. The aroma filling your kitchen is just the beginning; sharing a pizza you made yourself with friends and family is a truly special experience.
Mastering this easy homemade pizza dough recipe means you're just a few steps away from incredible pizza anytime you want. You have control over the quality, freshness, and flavor, resulting in a pizza that often surpasses what you can get from takeout. It's a skill that brings joy and deliciousness into your home, proving that baking your own pizza is not only possible but genuinely enjoyable.
BakeWithEase: Your Partner in Baking Success
At BakeWithEase, we are dedicated to helping you achieve baking success, and this easy homemade pizza dough recipe is just one example of how we simplify complex processes. Our guides, tips, and recipes are designed to build your confidence in the kitchen, turning challenging tasks into accessible and fun activities. We believe that with the right guidance, anyone can bake delicious things.
Whether you're making pizza for the first time or looking to perfect your technique, BakeWithEase provides the resources you need. We encourage you to try this easy homemade pizza dough recipe, experiment with variations, and make it your own. We're here to support your baking journey, helping you create memorable meals and discover the simple pleasure of homemade goodness.
Frequently Asked Questions
What makes this pizza dough recipe "easy"?
This recipe uses simple ingredients and straightforward instructions, making it easy for beginners to follow. The emphasis is on a no-fuss process and readily available ingredients.
Can I use this pizza dough recipe for other types of bread?
While primarily designed for pizza, the recipe's versatility allows it to be adapted for other breads like focaccia or calzones. Adjust baking times accordingly and consider adding different flavor combinations to the dough.
What if I don't have access to "00" flour, can I use regular all-purpose flour?
Yes, you can substitute all-purpose flour for "00" flour. The texture might be slightly different, but it will still create a delicious and usable pizza dough.
How long does the pizza dough need to rise?
The dough generally needs to rise for at least one hour, but a longer rise (up to 24 hours in the refrigerator) will develop a more complex flavor. Ensure proper temperature control for optimal rising.
What toppings work best with this homemade pizza dough?
This dough is versatile and pairs well with a variety of toppings. Classic combinations like margherita or pepperoni are always a good choice, but feel free to experiment with your favorite flavors.
Final Reflection: The Joy of Homemade, the Simplicity of Pizza
The ease of crafting delicious pizza at home is more than just a culinary skill; it's a gateway to connection, creativity, and countless delicious evenings. This article has explored a simple, versatile recipe for homemade pizza dough, proving that achieving restaurant-quality results doesn't require hours of complicated techniques or specialized equipment. The accessibility of this recipe empowers anyone to enjoy the rewarding experience of making pizza from scratch.
The impact of homemade food, and pizza in particular, on our cultural landscape is undeniable. It's a symbol of comfort, family gatherings, and shared experiences. Food is symbolic of love when words are inadequate.
This quote perfectly encapsulates the emotional connection we forge through the act of preparing and sharing a meal, especially one as universally loved as pizza. From casual weeknight dinners to celebratory gatherings, homemade pizza transcends mere sustenance; it becomes a vehicle for connection and joy.
Now, I invite you to roll up your sleeves, gather your ingredients, and embark on your own pizza-making adventure. Don't be intimidated by the process; embrace the simplicity and the satisfaction of creating something delicious from scratch. Let this recipe be your springboard to culinary exploration, a testament to the power of simple ingredients transformed into something extraordinary. The taste of homemade pizza, made with love and your own two hands, is an experience you won't soon forget.
Unleash Your Inner Pizzaiolo!
Thanks for joining us on this delicious journey into homemade pizza dough! You've now got the secret weapon to crafting incredible pizzas at home. Ready to take your pizza game to the next level?
- Craft your masterpiece: Use this recipe to make a pizza tonight! Experiment with your favorite toppings and share your creation with family and friends. This is your chance to become the pizza hero of your household.
- Share the dough-licious news: Tell your friends about this simple, yet effective recipe. Tag us on social media with your pizza creations – we’d love to see them!
- Explore new flavor combinations: Think beyond pepperoni! What unique ingredient will you add to your next pizza? Let your imagination run wild and discover exciting new flavor profiles.
What unexpected topping will you boldly try on your next homemade pizza?