
Common Cake Mistakes and How to Avoid Them

Welcome to BakeWithEase.com!
Ever wondered why your perfectly planned cake turns out less than perfect? You're not alone! This guide dives deep into cake baking common mistakes, offering insightful solutions and proven techniques to elevate your baking game. Discover the secrets to fluffy, moist, and consistently delicious cakes – and say goodbye to baking mishaps forever! Let's unlock the secrets together...
- Cake Baking Common Mistakes and How to Avoid Them - BakeWithEase.com
- Introduction: Mastering Cake Baking - Avoiding Common Pitfalls
- Understanding Common Cake Baking Errors: A Baker's Guide
- Mistake #1: Incorrect Ingredient Measurements - The Foundation of a Perfect Cake
- Mistake #2: Oven Temperature Issues - Achieving Even Baking
- Mistake #3: Overmixing the Batter - Preventing a Tough Cake
- Mistake #4: Using Cold Ingredients - Ensuring Proper Emulsification
- Mistake #5: Opening the Oven Door Too Early - Preventing Cake Collapse
- Mistake #6: Using the Wrong Pan Size or Type - Achieving Uniform Baking
- Mistake #7: Not Properly Preparing the Cake Pan - Preventing Sticking
- Mistake #8: Ignoring Recipe Instructions - The Importance of Following Directions
- Mistake #9: Poor Ingredient Quality - Affecting Flavor and Texture
- Mistake #10: Rushing the Cooling Process - Preventing Cracking and Crumbling
- Conclusion: Baking with Confidence - Overcoming Cake Baking Challenges
- Frequently Asked Questions
- Final Reflection: The Sweet Science of Cake Baking Success
- Unlock Your Inner Cake Boss: Master Baking Perfection!
Cake Baking Common Mistakes and How to Avoid Them - BakeWithEase.com
Introduction: Mastering Cake Baking - Avoiding Common Pitfalls
Welcome to BakeWithEase, your friendly guide to creating delicious cakes! Baking a cake can be a truly rewarding experience, filling your home with wonderful aromas and culminating in a delightful treat. However, even experienced bakers encounter challenges. Understanding the common cake baking mistakes is the first step toward consistently successful results. This guide will walk you through the typical pitfalls and provide practical tips to help you bake with confidence, turning those kitchen mishaps into sweet triumphs.
Many aspiring bakers become discouraged when their cake doesn't turn out as expected – maybe it's sunken in the middle, tough, dry, or stuck to the pan. Don't worry, these are all common issues! The good news is that most cake baking common mistakes are easily fixable once you understand the underlying principles. We'll explore everything from ingredient measurements to oven temperatures and mixing techniques, ensuring you have the knowledge to troubleshoot and avoid these problems from the start. Let's dive in and make your next baking adventure a smooth and successful one.
Understanding Common Cake Baking Errors: A Baker's Guide
Baking is often described as a science, and for good reason. It relies on precise reactions between ingredients, influenced by factors like temperature and time. When something goes wrong, it's usually due to a deviation from the intended process or recipe specifications. Identifying these frequent cake baking problems is crucial for learning and improvement.
By recognizing the signs of common cake baking errors – whether it's a cake that's too dense, doesn't rise properly, or has an uneven texture – you can start to diagnose what might have gone wrong. This section will help you pinpoint the most frequent issues encountered by home bakers and understand the fundamental reasons behind them, setting the stage for learning how to prevent them.
Identifying Frequent Cake Baking Problems
One of the most common issues bakers face is a cake that sinks in the middle. This can be caused by various factors, including opening the oven door too early, incorrect oven temperature, or using too much leavening agent. Another frequent problem is a tough or dry cake, which often results from overmixing the batter or using too little fat. Cakes sticking to the pan, uneven browning, or a lopsided rise are also high on the list of common cake baking mistakes that frustrate home cooks.
Beyond structural issues, flavor and texture problems also rank high. A cake might taste bland, too sweet, or have a strange, gummy texture. These issues are often linked to ingredient quality, incorrect proportions, or improper mixing and baking techniques. Learning to spot these signs early, even before the cake comes out of the oven (like observing how it's rising), can give you clues about what adjustments might be needed next time.
Why Do Cakes Fail? Common Culprits
Cakes fail for a multitude of reasons, but they often boil down to a few key areas: ingredient handling, temperature control, and technique. Using ingredients at the wrong temperature, like cold butter or eggs when the recipe calls for room temperature, significantly affects the emulsification process, leading to a less smooth batter and potentially a tougher cake. Similarly, inaccurate measurement of dry ingredients, particularly flour, can drastically alter the batter's consistency.
Temperature is another major culprit behind common cake baking mistakes. An oven that runs too hot can cause the cake to dome and crack, while one that's too cool might lead to a cake that's dense and doesn't brown properly. The internal temperature during baking is critical for setting the structure; if the oven door is opened too soon, the sudden drop in temperature can cause the delicate structure to collapse before it's fully set. Finally, poor technique, such as overmixing or undermixing, can disrupt the gluten development and aeration necessary for a light, tender crumb.
Mistake #1: Incorrect Ingredient Measurements - The Foundation of a Perfect Cake
Baking is a science, and like any science, precision is key. Unlike cooking, where you can often adjust ingredients as you go, baking recipes rely on specific ratios that interact chemically during the baking process. Incorrectly measuring just one ingredient can throw off the entire balance, leading to a host of common cake baking mistakes like poor texture, improper rise, or even a complete failure.
Consider the classic ratio for pound cake: roughly equal parts flour, butter, sugar, and eggs by weight. Deviating significantly from this, perhaps by adding too much flour (if measuring by volume incorrectly) or too little fat, will fundamentally change the outcome. A little extra flour can make a cake dry and dense, while too much sugar might cause it to spread excessively or have a gummy texture. Accurate measurements are the invisible backbone of a successful bake.
The Importance of Accurate Measurements in Cake Baking
Accurate measurement ensures that the chemical reactions necessary for a cake's structure and texture occur correctly. Leavening agents like baking soda and baking powder rely on precise amounts of acidic and alkaline ingredients, moisture, and heat to produce the gas that makes cakes rise. Too much leavening can cause a cake to rise too quickly and then collapse, while too little will result in a flat, dense cake.
Moreover, the ratio of wet to dry ingredients dictates the batter's consistency, which in turn affects how the cake bakes and its final texture. Too much liquid can lead to a soggy cake, while too little results in a dry crumb. Fats like butter and oil contribute moisture, tenderness, and flavor; using too little means a dry cake, while too much can make it greasy and heavy.
Even sugar, beyond sweetness, affects tenderness, moisture retention, and browning. Using kitchen scales for dry ingredients like flour and sugar (where 1 cup of all-purpose flour should ideally weigh around 120-125 grams) provides far greater accuracy than volume measurements, which can vary wildly based on how you scoop and level.
Avoiding Measurement Errors: Tips and Techniques
To avoid common cake baking mistakes related to measurement, invest in reliable tools: a digital kitchen scale for dry ingredients and liquids, and a set of standard measuring cups and spoons. For dry ingredients measured by volume (if a scale isn't used), use the "spoon and level" method: gently spoon the flour into the measuring cup until it overflows, then level it off with a straight edge (like the back of a knife) without packing it down. Never scoop directly from the bag, as this compacts the flour, adding significantly more than intended.
For liquids, use clear measuring cups with a spout and place them on a flat surface, reading the measurement at eye level. Measuring sticky substances like honey or syrup can be easier if you lightly grease the measuring cup or spoon first. Always measure ingredients over a bowl or piece of parchment paper, not directly over your mixing bowl, to avoid accidentally adding too much if you spill. Double-checking your measurements against the recipe before adding them to the bowl can prevent many common cake baking mistakes.
Troubleshooting: What to Do if You've Measured Incorrectly
If you suspect you've made a measurement error before baking, it might be possible to correct it, depending on the ingredient. If you added too much flour, you might be able to carefully remove some using a spoon, although this is difficult to do accurately. Adding a tiny bit more liquid might help compensate for excess dry ingredients, but this is risky as it changes the recipe's balance. If you added too much salt or baking powder, it's often best to start over, as these ingredients have powerful effects even in small amounts.
If you discover the error after baking (e.g., the cake is too dry), note it down. You can potentially salvage the cake by adding a simple syrup glaze, a soak (like coffee or liqueur), or serving it with a moist frosting or sauce. While you can't fix the internal structure or texture caused by common cake baking mistakes in measurement after the fact, you can improve its palatability. The best "troubleshooting" is prevention – being meticulous with your measurements from the start.
Mistake #2: Oven Temperature Issues - Achieving Even Baking
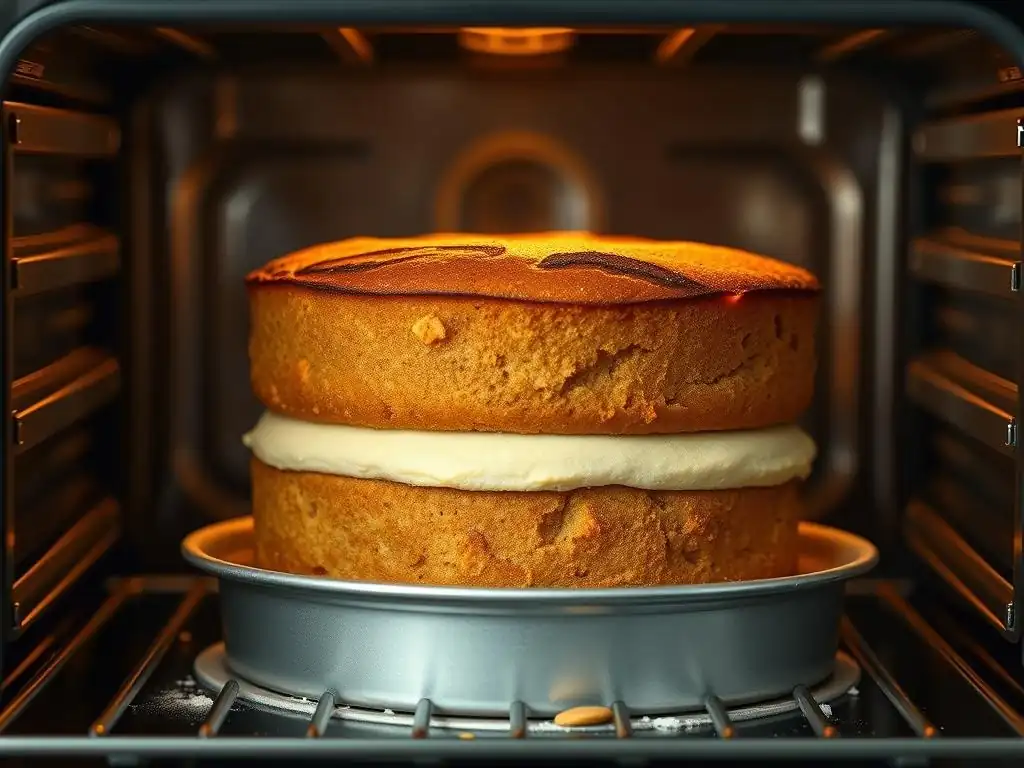
The oven is where the magic happens, transforming a liquid batter into a stable, delicious cake. However, ovens are notorious for not always displaying their true temperature. An inaccurate oven temperature is one of the most frequent common cake baking mistakes, leading to cakes that bake unevenly, develop strange textures, or fail to rise properly.
Think about it: if a recipe calls for 350°F (175°C) for 30 minutes, but your oven is actually running at 380°F (190°C), your cake will likely bake too quickly on the outside, potentially burning before the inside is cooked through. Conversely, if it's running cold at 320°F (160°C), the cake might take much longer to bake, resulting in a dry texture, or it might not have enough heat to set properly, leading to a sunken center.
Understanding Oven Temperature and Its Impact on Cake Texture
Oven temperature controls the rate at which the cake bakes, the activation of leavening agents, the setting of the protein structure, and the browning (Maillard reaction and caramelization) on the crust. When the temperature is correct, these processes happen in harmony. The cake rises steadily as gases expand, the structure sets firmly but remains tender, and the crust develops a beautiful golden-brown color and appealing flavor.
An oven that's too hot accelerates the outer baking process, causing the edges and top to set and brown before the interior has had a chance to fully rise and cook. This often results in a domed cake with potential cracks on top and possibly an underbaked center. An oven that's too cool slows everything down. Leavening might exhaust its power before the structure is set, leading to a flat or sunken cake. The cake might also take so long to bake that it dries out.
Calibrating Your Oven for Accurate Baking
The best way to combat common cake baking mistakes due to temperature issues is to use an oven thermometer. These inexpensive gadgets hang or sit inside your oven and display the actual temperature. Place it in the center of your oven and check it periodically. You might be surprised to find your oven is off by 20-50°F (10-30°C) or even more!
Once you know how far off your oven is, you can adjust the temperature setting accordingly. If your oven reads 325°F when set to 350°F, you'll know to set it to 375°F for recipes requiring 350°F. Most ovens also have a calibration setting (check your manual) that allows you to permanently adjust the internal thermometer, though an external oven thermometer is still recommended for verification and monitoring hot spots. Always preheat your oven for at least 15-20 minutes after it reaches the set temperature to ensure it's truly stabilized.
Signs of an Oven That's Too Hot or Too Cold
Observable signs can tell you if your oven temperature is contributing to common cake baking mistakes. If your cakes consistently dome excessively, crack on top, and have dark edges while the center seems undercooked, your oven is likely running too hot. You might also notice that the cake bakes much faster than the recipe specifies.
Conversely, if your cakes are consistently flat, dense, take significantly longer to bake than the recipe indicates, and lack good browning, your oven is probably running too cold. The cake might also pull away from the sides of the pan too early if it's baking too slowly or unevenly. Using an oven thermometer provides concrete data, but these visual cues can help you troubleshoot even without one.
Mistake #3: Overmixing the Batter - Preventing a Tough Cake
Mixing cake batter seems simple, but the duration and intensity of mixing have a significant impact on the final texture. Overmixing is one of the most frequent common cake baking mistakes that leads to a tough, dry, or rubbery cake. This is particularly true once flour is added to the wet ingredients.
When flour is mixed with liquid, gluten begins to develop. Gluten provides structure, which is essential, but too much gluten development in a cake batter results in a tough texture, similar to bread dough. Cakes require just enough structure to hold their shape, but not so much that they lose their tender, delicate crumb.
The Science Behind Mixing Cake Batter
Cake recipes typically involve creaming butter and sugar, adding eggs, alternating dry and wet ingredients, and then mixing until just combined. The initial creaming incorporates air (aeration), which provides lift. Adding eggs emulsifies the mixture. When dry ingredients (containing flour) are added, gluten development begins. The goal is to mix only until the flour is fully incorporated and the batter is smooth, but before excessive gluten strands form.
Different mixing methods (like the creaming method, reverse creaming, or one-bowl method) have slightly different approaches to managing gluten development and fat distribution, but the principle remains: minimize mixing once the flour hits the liquid. Overmixing develops too much gluten, squeezes out air bubbles needed for lift, and can create tunnels or a gummy texture in the finished cake.
Recognizing the Signs of Overmixing
It can be tricky to know if you've overmixed if you're new to baking. One clear sign during mixing is if the batter becomes very smooth, elastic, and develops a shiny surface, almost like bread dough or muffin batter. You might also notice the batter becoming slightly thicker or stringy.
After baking, an overmixed cake will likely have a tough or chewy texture instead of a tender, delicate crumb. You might even see visible tunnels or holes running through the cake's interior, which are formed by the overdeveloped gluten structure. If your cakes consistently have these characteristics despite correct measurements and temperature, overmixing is a likely culprit among common cake baking mistakes.
Gentle Mixing Techniques for a Tender Crumb
To avoid overmixing, especially after adding flour, use a low speed on your mixer or mix by hand with a spatula or whisk. Add the dry ingredients in stages, alternating with any liquid ingredients (like milk or buttermilk), and mix only until just combined after each addition. Scrape down the sides and bottom of the bowl frequently to ensure everything is incorporated evenly without excessive mixing.
For the final addition of dry ingredients, stop mixing as soon as you no longer see streaks of dry flour. It's okay if there are a few tiny lumps; these will usually dissolve during baking. Using the reverse creaming method, where dry ingredients are mixed with fat before liquids are added, is another technique specifically designed to coat flour particles in fat, inhibiting gluten development and resulting in an exceptionally tender cake.
Mistake #4: Using Cold Ingredients - Ensuring Proper Emulsification
Many cake recipes specify using ingredients at room temperature, particularly butter and eggs. Ignoring this instruction is one of the common cake baking mistakes that can significantly impact the cake's texture and rise. Cold ingredients don't emulsify properly with other ingredients, leading to a less smooth batter and potentially a dense, unevenly textured cake.
Think about trying to mix cold, hard butter with sugar – it's difficult to cream properly. Room temperature butter, on the other hand, is soft and pliable, allowing the sugar crystals to create tiny air pockets during the creaming process. These air pockets contribute significantly to the cake's lift and tender crumb.
Why Room Temperature Ingredients Matter in Cake Baking
Room temperature butter (around 65-70°F or 18-21°C) is soft enough to incorporate air when creamed with sugar, but still firm enough to hold those air bubbles. This creates a stable structure that expands in the oven. Cold butter, being hard, cannot trap air effectively, resulting in a denser cake. Butter that is too soft or melted will also fail to create a stable structure, potentially leading to a greasy or flat cake.
Room temperature eggs also emulsify better into the batter. Cold eggs can cause the mixture to curdle or separate, leading to a less cohesive batter and potentially affecting the final texture. Additionally, room temperature eggs are less likely to seize up the fat in the batter when added, ensuring a smooth, homogenous mixture.
How to Bring Ingredients to Room Temperature Quickly
Ideally, you should plan ahead and take butter and eggs out of the refrigerator about 30-60 minutes before you start baking. However, if you're short on time, there are tricks to speed up the process. To quickly soften butter, cut it into small cubes or thin slices and let it sit for 10-15 minutes.
You can also gently microwave it on a very low power setting (like 10-20%) for short bursts (5-10 seconds), flipping the pieces, until softened but not melted. Alternatively, place the wrapped butter in a resealable bag and submerge it in warm (not hot) water for 10-15 minutes.
To quickly warm eggs, place them in a bowl of warm tap water for 5-10 minutes. Do not use hot water, as this can start to cook the egg. These methods help avoid one of the simple yet impactful common cake baking mistakes.
The Impact of Cold Ingredients on Cake Texture and Rise
Using cold ingredients prevents proper emulsification and aeration, which are critical for a light and tender cake. When butter and sugar aren't creamed effectively due to cold butter, the batter lacks the necessary trapped air, resulting in a denser cake. Cold eggs can cause the batter to separate, leading to an inconsistent texture and potentially a less stable structure that might not rise evenly.
Compare a cake made with properly creamed room temperature butter and sugar to one made with cold ingredients. The former will typically have a finer, more even crumb and a higher rise, while the latter might be dense, slightly greasy, and have a heavier texture. Ensuring your ingredients are at the specified temperature is a simple step that makes a big difference in preventing common cake baking mistakes.
Mistake #5: Opening the Oven Door Too Early - Preventing Cake Collapse
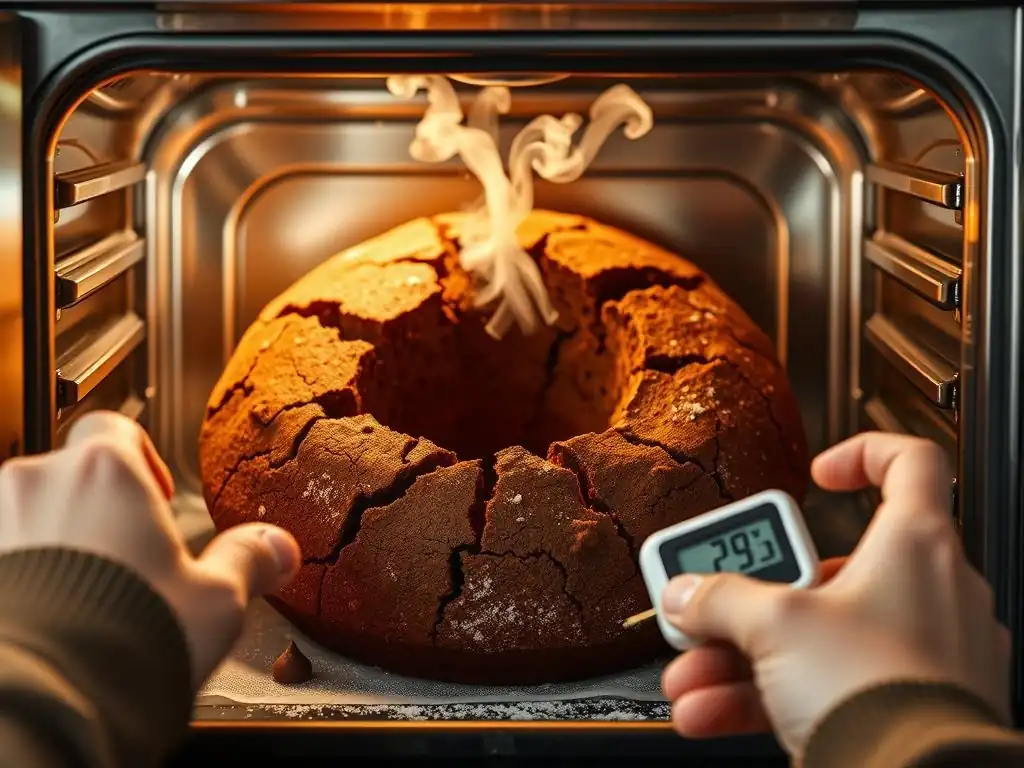
It's tempting to peek at your cake while it's baking, especially if you're worried about common cake baking mistakes like it not rising or browning properly. However, opening the oven door, particularly in the first two-thirds of the baking time, can be detrimental and cause your cake to sink.
When you open the oven door, you allow a rush of cooler air into the oven. This sudden drop in temperature can shock the cake, which is still in a delicate phase where its structure is setting. The expanding gases that are causing the cake to rise contract rapidly with the temperature change, and if the structure hasn't set enough to support itself, the cake will collapse in the center.
The Importance of Maintaining a Consistent Oven Temperature
A consistent oven temperature is vital for proper cake baking. The heat provides the energy for chemical reactions, activates leavening agents, sets the protein structure (coagulation of egg proteins and gluten development), and evaporates moisture. These processes need steady heat to occur at the correct rate.
Fluctuations in temperature, whether from an inaccurate thermostat (Mistake #2) or from opening the door, disrupt this delicate balance. During the initial phase of baking, the batter is mostly liquid. As it heats, leavening agents produce gas, causing it to expand. The structure begins to set as the temperature increases. If the temperature drops too soon, the structure isn't strong enough to hold the expanded form, leading to a fallen cake, a classic among common cake baking mistakes.
Knowing When It's Safe to Open the Oven Door
The general rule of thumb is to avoid opening the oven door for at least the first two-thirds of the total baking time specified in the recipe. For a cake that bakes for 30 minutes, this means waiting at least 20 minutes before peeking. If you can see the cake through the oven door window, resist the urge to open it!
Once the cake looks mostly set around the edges and has achieved a good rise, you can carefully open the door to test for doneness. The standard test is inserting a wooden skewer or toothpick into the center; if it comes out clean or with a few moist crumbs attached (but no wet batter), the cake is likely done. If you test and the cake isn't ready, close the door gently but quickly to minimize heat loss and continue baking.
Mistake #6: Using the Wrong Pan Size or Type - Achieving Uniform Baking
Cake recipes are developed using specific pan sizes and types because these factors significantly influence baking time, temperature distribution, and the final shape and texture of the cake. Using the wrong pan is a common cake baking mistake that can lead to underbaked centers, burnt edges, or a cake that overflows or doesn't fill the pan properly.
A standard 8-inch or 9-inch round cake pan holds a different volume of batter than a 9x13 inch rectangular pan, or a loaf pan. The material of the pan (metal, glass, silicone) also affects how heat is conducted. Dark metal pans absorb and distribute heat quickly, potentially leading to darker crusts and faster baking, while lighter metal pans reflect heat more, resulting in lighter crusts and slightly longer baking times. Glass pans also retain heat more than metal, which can sometimes lead to overbaking around the edges.
Understanding the Impact of Pan Size on Baking Time
Pan size directly affects the depth of the batter. A recipe designed for two 8-inch round pans will have a thinner layer of batter in each pan compared to putting the same amount of batter into one 9-inch pan or a single 8-inch pan. Thinner batter layers bake faster and more evenly because heat penetrates to the center more quickly.
If you use a pan that is too small for the amount of batter, the batter will be too deep. This can cause the edges to set and potentially burn before the center is fully cooked. The cake might also overflow the pan.
Conversely, using a pan that is too large means the batter layer is too shallow. The cake will bake very quickly, potentially drying out, and it won't have the height or structure intended by the recipe. Adjusting baking time and temperature might be necessary if substituting pan sizes, but it's best to stick to the recipe's specification to avoid common cake baking mistakes.
Choosing the Right Cake Pan for Your Recipe
Always use the pan size and type specified in the recipe whenever possible. Standard metal pans (aluminum or non-stick) are generally recommended for even heat distribution. If a recipe calls for a dark metal pan, and you use a light one, you might need to increase the baking time slightly (perhaps by 5-10 minutes) or raise the oven temperature by 25°F (15°C) to achieve similar browning. If using a glass pan instead of metal, reduce the oven temperature by 25°F (15°C) as glass conducts heat differently and retains it longer.
Pay attention to the pan dimensions specified (e.g., 8-inch round, 9x13 inch rectangle, 9x5 inch loaf). Volume can vary slightly between pans of the same stated size from different manufacturers, but sticking closely to the specified dimensions is your best bet to avoid common cake baking mistakes related to pan choice.
Mistake #7: Not Properly Preparing the Cake Pan - Preventing Sticking
Few things are more frustrating in baking than a beautiful cake that refuses to come out of the pan, leaving half of it stuck behind. Improperly preparing the cake pan is a common cake baking mistake that leads to heartbreak and difficulty releasing the cake.
Cake batter adheres to surfaces as it bakes and cools. Without a barrier between the cake and the pan, the finished product will inevitably stick, tearing or crumbling when you try to invert it. Proper pan preparation creates a non-stick surface, ensuring your cake releases cleanly and intact.
The Best Methods for Greasing and Flouring a Cake Pan
The most common method for preventing sticking is to grease and flour the pan. First, apply a layer of fat to the inside surfaces of the pan. You can use softened butter, shortening, or a non-stick cooking spray specifically designed for baking (some contain flour). Ensure you cover all surfaces, including the corners and sides, reaching all the way up the walls.
Next, add a few tablespoons of flour (for a standard 8 or 9-inch pan) to the greased pan. Tilt and rotate the pan, tapping it gently, to coat the entire greased surface evenly with flour. Once coated, invert the pan and tap out any excess flour. For chocolate cakes, you can use cocoa powder instead of flour to avoid a white residue on the cake's exterior. This grease-and-flour method creates a barrier that prevents the batter from sticking directly to the metal.
Using Parchment Paper for Easy Cake Release
For added insurance against sticking, particularly with delicate cakes or intricate pans, using parchment paper is highly recommended. For round pans, you can trace the bottom of the pan onto parchment paper and cut out a circle to fit perfectly in the base. For rectangular pans, you can cut a strip of parchment paper to line the bottom and extend up the two longer sides, creating "handles" to lift the cake out.
Combine parchment paper with greasing the sides of the pan for maximum non-stick power. First, grease the entire inside of the pan. Then, place the parchment paper circle or strip in the bottom. The grease helps the parchment paper adhere smoothly. You can also lightly grease the parchment paper itself before adding the batter for extra security. This two-pronged approach is highly effective in preventing common cake baking mistakes like sticking.
Mistake #8: Ignoring Recipe Instructions - The Importance of Following Directions
It might seem obvious, but one of the most frequent common cake baking mistakes is not following the recipe instructions precisely. Recipes are carefully developed and tested, with specific steps, ingredient amounts, and temperatures designed to achieve a particular result. Deviating from these instructions, whether intentionally or accidentally, can lead to unexpected and often undesirable outcomes.
Skipping steps, substituting ingredients without understanding the impact, or altering mixing times can disrupt the delicate balance of the recipe. For instance, a recipe might specify "cream butter and sugar until light and fluffy" for a reason – this step incorporates crucial air. Simply melting the butter and mixing it with sugar will yield a completely different, denser cake.
Why Following a Cake Recipe Matters
Following a recipe is like following a scientific protocol. Each step, ingredient, and measurement plays a role in the final chemical and physical transformation of the batter in the oven. The order of adding ingredients matters because it affects how fats, liquids, and dry ingredients interact and emulsify. The mixing time and method affect gluten development and aeration. The specified temperature and baking time are calibrated for the specific volume of batter and pan size.
Ignoring instructions can lead to common cake baking mistakes such as improper leavening, poor texture development, uneven baking, or a cake that doesn't rise correctly. For example, if a recipe says to sift the dry ingredients, it's to aerate them and remove lumps; skipping this can result in a denser cake or pockets of unincorporated leavening.
Understanding Baking Terminology
Recipes use specific terminology that is important to understand. Phrases like "cream butter and sugar," "fold in," "cut in," "sift," "whisk until stiff peaks," or "mix until just combined" all describe specific techniques with distinct purposes.
Cream butter and sugar: Beat softened butter with sugar until pale, fluffy, and increased in volume, incorporating air.Fold in: Gently combine a lighter mixture (like whipped egg whites or whipped cream) into a heavier one using a spatula, preserving air.Cut in: Incorporate cold fat (like butter or shortening) into dry ingredients using a pastry blender or your fingertips until the mixture resembles coarse crumbs.Sift: Pass dry ingredients through a sieve or sifter to aerate them and remove lumps.Whisk until stiff peaks: Beat egg whites or cream until they hold their shape firmly when the whisk is lifted.Mix until just combined: Stir ingredients only until no dry streaks remain, avoiding overmixing.
Understanding these terms and executing the techniques correctly is essential for avoiding common cake baking mistakes and achieving the intended result.
Mistake #9: Poor Ingredient Quality - Affecting Flavor and Texture
Even if you follow a recipe perfectly and avoid all the technical common cake baking mistakes, using poor quality or stale ingredients can still result in a disappointing cake. The flavor, texture, and overall success of your bake are directly tied to the quality and freshness of the ingredients you use.
Ingredients like flour, leavening agents, fats, and extracts degrade over time. Stale flour can taste off and affect texture. Expired baking powder or soda will lose their leavening power, resulting in a flat cake. Rancid butter or oil will impart an unpleasant flavor. Subpar extracts might lack potency or have an artificial taste.
The Importance of Fresh, High-Quality Ingredients
Fresh ingredients provide the best flavor and perform optimally in chemical reactions. Flour, while having a long shelf life, can go stale and absorb odors. It's best stored in an airtight container. Leavening agents like baking powder and baking soda are crucial for lift; they lose potency over time, typically within 6-12 months of opening. You can test baking powder by adding a teaspoon to a little hot water – it should fizz vigorously. Baking soda fizzes when mixed with an acid (like vinegar or lemon juice).
Fats like butter and oil contribute flavor, moisture, and tenderness. Use fresh, unsalted butter for best results unless the recipe specifies otherwise. Ensure oils haven't gone rancid (they'll smell or taste unpleasant). Eggs should be fresh, as their structure and emulsifying properties are best when new. Pure extracts, like pure vanilla extract, offer superior flavor compared to artificial versions.
Choosing the Right Flour, Sugar, and Fats for Cake Baking
Different flours have varying protein content, affecting gluten development. All-purpose flour (around 10-12% protein) is standard for many cakes. Cake flour (around 6-8% protein) is finer and lower in protein, resulting in a more tender, delicate crumb, often used for lighter cakes like sponge cakes. Bread flour (higher protein) should generally be avoided in cakes as it leads to toughness.
Sugar not only sweetens but also contributes to moisture, tenderness, and browning. Granulated sugar is standard. Finer sugars like superfine or caster sugar dissolve more easily, leading to a smoother texture. Brown sugar adds moisture and molasses flavor.
Fats like unsalted butter (preferred for flavor and creaming ability) and oil (adds moisture and tenderness, especially in oil-based cakes) are chosen based on the desired texture and flavor profile. Using the type of fat specified in the recipe is important; substituting oil for butter in a creaming method cake, for instance, will significantly change the outcome. Being mindful of these ingredient nuances helps avoid common cake baking mistakes.
Mistake #10: Rushing the Cooling Process - Preventing Cracking and Crumbling
You've successfully baked your cake, and it looks perfect! It's tempting to immediately remove it from the pan or frost it. However, rushing the cooling process is a common cake baking mistake that can lead to the cake sticking, cracking, crumbling, or becoming dense.
Cakes continue to "bake" slightly from residual heat after being removed from the oven. More importantly, as they cool, their structure stabilizes. Trying to handle or remove a hot cake from its pan before it's ready can cause it to break apart because the structure hasn't fully set.
Why Cooling Cakes Properly is Essential
Proper cooling allows the cake's internal structure to firm up as it transitions from hot to room temperature. It also allows moisture to redistribute evenly throughout the cake. Removing a hot cake from the pan too soon risks it collapsing or tearing due to its fragile state. The cake is also more likely to stick to the pan when hot.
Allowing the cake to cool slightly in the pan before inverting helps it pull away from the sides naturally as it contracts slightly upon cooling. Then, transferring it to a wire rack allows air circulation on all sides, preventing the bottom from becoming soggy from trapped steam.
The Best Methods for Cooling Cakes
Once the cake is out of the oven, let it cool in its pan on a wire rack for the amount of time specified in the recipe, typically 10-20 minutes for most standard cakes. This allows the cake to firm up enough to be handled without breaking.
After the initial cooling period in the pan, carefully invert the cake onto the wire rack to cool completely. Ensure the rack allows air to circulate underneath the cake. For layer cakes, cooling completely on a wire rack is crucial before attempting to level, slice, or frost them.
Trying to frost a warm cake will result in melted frosting and crumbling. A cake is typically considered completely cool when it has reached room temperature throughout, which can take anywhere from 1 to 3 hours depending on its size and density. Patience during this final step helps prevent frustrating common cake baking mistakes.
Conclusion: Baking with Confidence - Overcoming Cake Baking Challenges
Mastering cake baking isn't about being perfect every time, but about understanding the process and learning from your experiences. By familiarizing yourself with these common cake baking mistakes – from inaccurate measurements and oven issues to overmixing and improper cooling – you are well-equipped to avoid many potential pitfalls. Each bake is an opportunity to learn and refine your skills.
Remember that even professional bakers encounter challenges. The key is to approach baking with patience, pay attention to detail, and not be afraid to troubleshoot. With practice and the knowledge gained from understanding these common cake baking errors, you'll find yourself baking delicious, beautiful cakes more consistently. Happy baking, and enjoy the sweet rewards of your efforts!
Resources for Continued Learning and Baking Success
For those eager to deepen their baking knowledge and continue overcoming common cake baking challenges, BakeWithEase.com offers a wealth of resources. Explore our extensive collection of recipes, specifically designed with clear instructions and helpful tips for every skill level.
Delve into our "Baking Techniques" section for detailed guides on specific methods like creaming butter, folding, or preparing different types of pans. Our "Ingredient Spotlights" provide in-depth information on how different components work in baking and how to choose the best quality ingredients. We also offer troubleshooting guides for specific types of cakes. Continuously learning and practicing are the surest ways to build confidence and achieve baking success.
Frequently Asked Questions
What is the most common mistake bakers make when baking cakes?
The most common mistake is often overmixing the batter. This leads to a tough cake due to gluten development. Avoid overmixing after adding the flour.
Why does my cake sometimes sink in the middle?
A sunken cake is frequently caused by opening the oven door too early or underbaking. Ensure your cake is fully baked before removing it from the oven and avoid temperature fluctuations.
What are some common issues with cake texture?
Cake texture issues can stem from using incorrect measurements or improper mixing techniques. Always follow the recipe closely and use accurate measuring tools.
How can I prevent my cake from sticking to the pan?
To prevent sticking, properly grease and flour your cake pan. Parchment paper lining the bottom is also a reliable method for easy release.
What causes a dry cake, and how can I fix it?
Dry cake is often the result of overbaking or using too much flour. Shorten the baking time and ensure accurate flour measurement for a moister cake.
Final Reflection: The Sweet Science of Cake Baking Success
The seemingly simple act of baking a cake is fraught with potential pitfalls, yet mastering these challenges unlocks a world of delicious possibilities. From deflated layers to dry crumb, even the most experienced bakers encounter setbacks. This article has explored some of the most common mistakes, offering practical solutions to ensure your next cake is a masterpiece.
The pursuit of the perfect cake transcends mere culinary skill; it's a journey of precision, patience, and a deep understanding of ingredients and their interactions. It's a reflection of our desire to create something beautiful and share it with others. Baking is at once child's play and adult joy. And love, of course.
This quote perfectly captures the essence of the baking experience, encompassing both the simple pleasure and the profound satisfaction of creating something truly special. The ongoing influence of baking, particularly cake baking, in our culture is undeniable; it's a symbol of celebration, comfort, and connection.
Now, consider your own baking journey. What have you learned from this exploration of common cake mistakes? Perhaps you've identified a recurring issue in your own baking, or maybe you've discovered a new technique to elevate your skills. I encourage you to embrace the challenges, learn from your failures, and most importantly, enjoy the process. The next time you embark on a cake-baking adventure, remember these tips, and let the sweet aroma of success fill your kitchen. The perfect cake awaits.
Unlock Your Inner Cake Boss: Master Baking Perfection!
Thanks for joining us on this delicious journey into the world of cake baking! We hope you gained valuable insights into common pitfalls and discovered tips to elevate your baking game. Ready to put your new knowledge into practice?
- Bake your masterpiece today! Try out one of the recipes mentioned, focusing on the techniques we discussed to avoid those frustrating mistakes.
- Share your baking triumph! Snap a photo of your perfectly baked creation and share it on social media – tag us! We'd love to see it.
- Leave a comment below and tell us: What's your biggest cake-baking challenge, and how are you going to tackle it now?