
DIY Measuring Tools: Crafting Your Own GramtoCup Conversion Chart

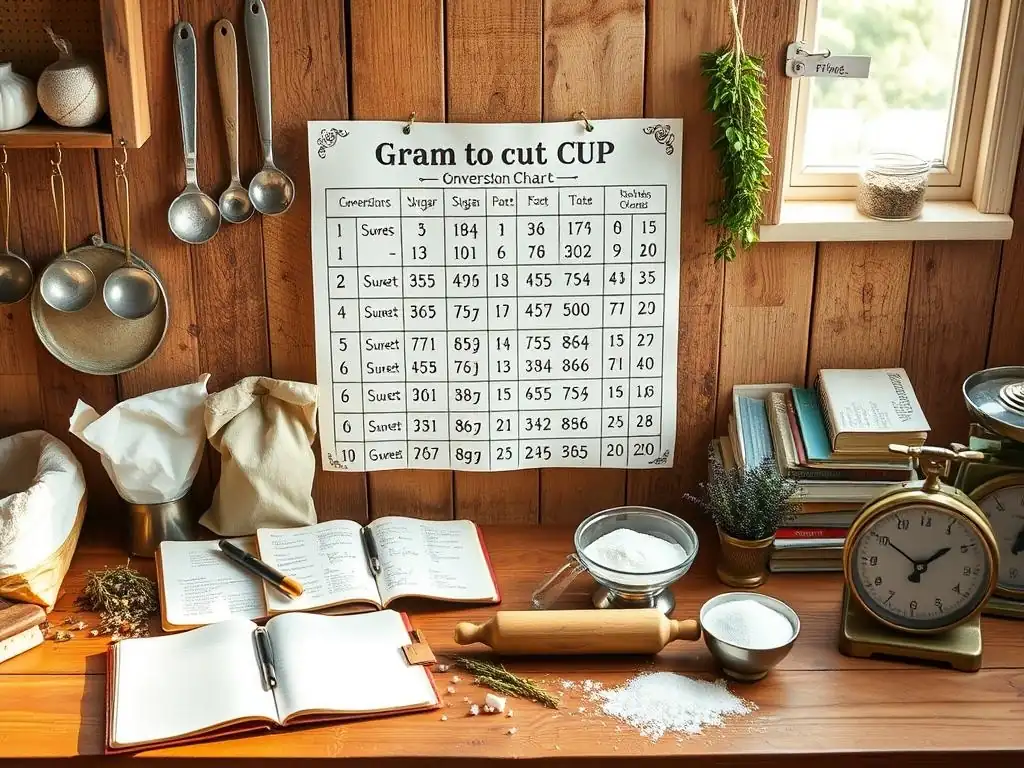
Welcome to BakeWithEase, where simplifying the joy of baking is our passion! Ever felt lost in translation between grams and cups? You're not alone! Unlock the secret to baking success with our guide to creating your own homemade gram to cup chart. Discover how to accurately measure ingredients, even without fancy tools, and finally conquer those recipes that call for precise measurements. Intrigued? Let's dive in and transform your baking game!
- DIY Measuring Tools: Crafting Your Own Gram to Cup Conversion Chart for Baking
- Introduction: The Importance of Accurate Baking Measurements
- Understanding Grams and Cups: A Baker's Primer
- Why Create a DIY Gram to Cup Chart?
-
Step-by-Step Guide: Crafting Your Own Gram to Cup Conversion Chart
- Step 1: Gather Your Baking Ingredients and Tools
- Step 2: Choose Your Key Baking Ingredients for Conversion (Flour, Sugar, Butter, etc.)
- Step 3: Accurately Weigh Ingredients in Grams Using a Kitchen Scale
- Step 4: Measure the Corresponding Volume in Cups
- Step 5: Record Your Measurements in a Clear, Organized Chart
- Step 6: Repeat the Process for Multiple Ingredients and Variations (e.g., All-Purpose Flour vs. Cake Flour)
- Tips for Accuracy and Maintaining Your Homemade Chart
- Examples of Gram to Cup Conversions for Common Baking Ingredients
- Beyond the Chart: Enhancing Your Baking Precision
- Troubleshooting Common Conversion Issues
- Conclusion: Embrace the Power of Your Homemade Baking Chart
-
Frequently Asked Questions
- How accurate is a DIY gram to cup conversion chart compared to using a digital scale?
- What ingredients are most difficult to convert from grams to cups using a homemade chart?
- Can I use the same gram to cup conversion ratio for all types of flour?
- Why is it important to have a reliable gram to cup conversion chart when baking?
- Where can I find the best resources for creating my own gram to cup conversion chart?
- Final Reflection: The Enduring Power of Practical Knowledge
- Unlock Baking Precision: Craft Your Perfect Gram-to-Cup Converter!
DIY Measuring Tools: Crafting Your Own Gram to Cup Conversion Chart for Baking
Introduction: The Importance of Accurate Baking Measurements
Why Precise Measurements Matter in Baking
Achieving consistent, delicious results in baking hinges significantly on accurate ingredient measurements. Unlike cooking, where a pinch of this or a dash of that often works, baking is a science that relies on precise ratios. Using too much flour, for example, can result in a dry, dense cake, while insufficient leavening will prevent your bread from rising properly. Even small errors in measurement can throw off the delicate balance of ingredients, impacting texture, flavor, and overall outcome.
Consider a simple cookie recipe: if it calls for 150 grams of butter, and you mistakenly measure 180 grams using a loosely packed cup, the extra fat will change the cookie's spread and texture, potentially making it greasy or overly flat. Similarly, a recipe requiring 200 grams of flour might yield a significantly different result if you scoop and level cups inconsistently, potentially adding an extra 20-30 grams of flour. Precision ensures repeatability, allowing you to recreate your favorite baked goods perfectly every time you step into the kitchen.
The Gram to Cup Conversion Challenge: A Common Baking Issue
One of the most frequent stumbling blocks for bakers, especially those using recipes from different regions or sources, is navigating the difference between metric (grams) and volume (cups) measurements. Many professional recipes and those from outside the United States primarily use grams for dry and even some wet ingredients because it offers superior accuracy based on mass, not volume. However, home bakers often rely on standard cup measures, which can vary wildly depending on scooping technique, ingredient density, and even the type of measuring cup used.
This discrepancy becomes particularly challenging when trying to convert a recipe given in grams to cups. A simple online conversion tool might tell you that 1 cup of all-purpose flour is approximately 120 grams, but this is just an average. The actual weight of your cup of flour can be anywhere from 110 grams (lightly spooned) to 150 grams (heavily scooped and packed). This inherent variability makes relying solely on generic conversions risky and is a major reason why baked goods sometimes don't turn out as expected when converting recipes.
Introducing the Homemade Gram to Cup Chart: Your Baking Solution
To overcome the inaccuracies inherent in generic conversions, crafting your own homemade gram to cup chart is an incredibly effective strategy. This personalized tool allows you to determine the actual weight in grams of a standard cup measure for the specific ingredients you use, measured with your own equipment and technique. It bridges the gap between the precision of metric measurements and the convenience of volume measurements, tailored specifically to your baking environment.
Developing a personalized homemade gram to cup chart transforms generic approximations into precise figures relevant to your kitchen. Instead of guessing that a cup of your brown sugar is roughly 200 grams, you'll know exactly what it weighs when packed into your measuring cup. This level of detail eliminates much of the guesswork and inconsistency associated with converting recipes, leading to more reliable baking results and a greater understanding of how ingredients behave by weight versus volume.
Understanding Grams and Cups: A Baker's Primer
Grams: The Precision of Metric Measurement in Baking
Grams represent a unit of mass in the metric system, offering a highly precise way to measure ingredients in baking. When a recipe calls for 100 grams of sugar, it means exactly that amount by weight, regardless of whether the sugar is superfine, granulated, or powdered (though density will affect how much space it occupies). Using a digital kitchen scale, you can measure out precisely 100 grams every single time, ensuring consistency across batches and recipes.
This precision is particularly critical for ingredients like flour, sugar, and leavening agents, where small variations can have significant impacts. For instance, using 5 grams too much baking powder (which weighs very little) can lead to an unpleasant metallic taste and rapid, uncontrolled leavening. Measuring by grams eliminates variables like how tightly flour is packed or how finely sugar is ground, making it the preferred method for professional bakers seeking repeatable, high-quality outcomes.
Cups: The Convenience of Volume Measurement in Baking
Cups, as a unit of volume measurement, are widely used in baking, particularly in the United States. They offer a convenient and quick way to portion ingredients without needing a scale. Recipes often call for "1 cup flour" or "1/2 cup sugar," making it easy for home bakers to follow along with standard measuring cups readily available in most kitchens. This familiarity and ease of use contribute to their popularity.
However, the ease of use comes with inherent variability. The volume occupied by a cup of flour can differ based on how it's scooped (dipping the cup directly into the flour bag vs. spooning it in) and its moisture content. A cup of loosely spooned all-purpose flour might weigh around 120 grams, while a cup scooped directly from the bag and leveled could easily weigh 135-140 grams. This significant difference in weight for the same listed volume is the primary drawback of relying solely on cup measurements for critical ingredients.
The Relationship Between Grams and Cups: Density Matters!
The key to understanding the relationship between grams and cups lies in the concept of density. Density is defined as mass per unit volume. For baking ingredients, this means how much a certain volume (like a cup) of a specific ingredient weighs. Different ingredients have different densities. For example, a cup of granulated sugar is much denser than a cup of powdered sugar, and both are denser than a cup of flour.
| Ingredient Type | Approximate Grams per US Cup (Levelled) |
|---|---|
| All-Purpose Flour | ~120-130 grams |
| Granulated Sugar | ~200 grams |
| Brown Sugar (packed) | ~220 grams |
| Powdered Sugar | ~110-120 grams |
| Butter | ~227 grams |
| Water | ~237 grams |
Note: These are general approximations; actual weights can vary.
This table illustrates why a simple 1:1 conversion doesn't work across all ingredients. A homemade gram to cup chart accounts for these density differences as they apply to your specific ingredients and measuring technique, making it a far more reliable conversion tool than a generic online chart.
Why Create a DIY Gram to Cup Chart?
Accuracy and Consistency: Tailoring to Your Ingredients
Creating your own homemade gram to cup chart provides unparalleled accuracy because it's based on the actual ingredients and tools you use in your kitchen. Generic conversion charts provide averages, but the density of your flour might differ slightly based on brand, humidity, or storage. Similarly, the way you level a cup of sugar might vary slightly from the "standard" method used to create a generic chart.
By measuring your own ingredients with your own cups and scale, you capture these specific nuances. For instance, if you always spoon your all-purpose flour into the cup and level it, you might find your "cup" consistently weighs 125 grams, not 120 or 135. Using this specific 125g figure in your homemade gram to cup chart ensures that every time a recipe calls for "1 cup flour," you are consistently adding 125 grams, leading to more predictable and reliable outcomes in your baking.
Cost-Effectiveness: Saving Money on Specialized Measuring Tools
While investing in a good digital kitchen scale is highly recommended for accurate baking, you don't necessarily need a full set of specialized measuring cups and spoons calibrated to metric weights if you build your own conversion system. Standard US volume measuring cups are relatively inexpensive and widely available. The primary "cost" of creating a homemade gram to cup chart is the time and effort spent on the initial measurement process.
Instead of purchasing metric measuring cups or relying on often-inaccurate visual estimations when converting, your DIY chart leverages the tools you already have (standard cups and a scale) to create a precise conversion specific to your needs. This approach saves money while simultaneously improving the accuracy of your measurements compared to relying on free, generic online converters that don't account for real-world ingredient and technique variations.
Customization: Creating a Chart Specific to Your Baking Needs
A significant advantage of a homemade gram to cup chart is its complete customization. You can focus on the ingredients you use most frequently. Do you bake primarily with bread flour and whole wheat flour? Include detailed conversions for those. Are you working on a specific recipe that uses a unique type of sugar or starch? You can add that too. Your chart becomes a living document tailored precisely to your baking habits and the recipes you love.
This level of customization is impossible with pre-made charts. You can even include notes about different methods (e.g., "AP Flour - spooned & leveled" vs. "AP Flour - scooped"). This makes your homemade gram to cup chart an incredibly powerful, personal tool that grows with your baking journey, ensuring that your conversions are always relevant and accurate for your specific kitchen and recipes.
Step-by-Step Guide: Crafting Your Own Gram to Cup Conversion Chart
Step 1: Gather Your Baking Ingredients and Tools
Before you begin, collect all the necessary items. You'll need a reliable digital kitchen scale, your standard set of volume measuring cups (ensure they are standard US or the type you normally use), and the common baking ingredients you wish to convert. Common ingredients include all-purpose flour, granulated sugar, brown sugar, powdered sugar, butter, milk, and water.
Make sure your kitchen scale is calibrated correctly. Most digital scales have a tare function, which allows you to zero out the weight of the container. This is essential for accurate measurements. Have a notebook, spreadsheet, or a dedicated document ready to record your findings. A pen or pencil is also helpful for jotting down notes during the process.
Step 2: Choose Your Key Baking Ingredients for Conversion (Flour, Sugar, Butter, etc.)
Select the ingredients that you use most often and that are critical for successful recipe outcomes. Flour and sugar are prime candidates, as their density significantly impacts volume-to-weight conversions. Consider different types of flour (all-purpose, cake, bread) and sugar (granulated, brown, powdered) if you use them regularly, as their densities vary.
Other essential ingredients to include are fats like butter (often measured in sticks, but converting to grams per cup or per stick is useful) and liquids like milk or water. You might also include leavening agents like baking powder or soda, cocoa powder, or even chocolate chips – anything that appears frequently in recipes you use where precise measurement matters. Prioritize the ingredients that seem to cause the most conversion confusion for you.
Step 3: Accurately Weigh Ingredients in Grams Using a Kitchen Scale
Place an empty container (like a bowl or cup) on your digital kitchen scale. Turn the scale on and press the "tare" or "zero" button to reset the display to 0 grams. This step is crucial to ensure you are only weighing the ingredient itself, not the container.
Carefully add the ingredient to the container until you reach a specific, easy-to-work-with gram amount. For example, you might start with 100 grams of all-purpose flour. Pour or spoon the flour into the container until the scale reads 100g. Be as precise as possible. Repeat this process for each ingredient you've chosen, weighing out a specific amount like 50g, 100g, or 200g depending on the ingredient and typical recipe quantities. Record the exact gram amount you measured.
Step 4: Measure the Corresponding Volume in Cups
Now, take the specific gram amount of the ingredient you just weighed (e.g., 100 grams of flour) and carefully transfer it into your standard volume measuring cup. Use the method you typically employ when measuring by volume. For flour, this might mean spooning it into the cup and leveling it off with a straight edge, or perhaps you're used to dipping the cup directly into the flour bag. Consistency in your technique here is key to making your homemade gram to cup chart accurate for your baking.
Fill the measuring cup using your usual method until it is level. Note the volume measurement (e.g., "just under 1 cup," "exactly 3/4 cup," "1 cup plus 2 tablespoons"). This step might require a bit of estimation if the grams don't perfectly fill a standard cup measure. You are essentially determining what volume your standard measuring cup holds when filled with a specific gram weight of that ingredient using your technique.
Step 5: Record Your Measurements in a Clear, Organized Chart
Create a table or list to record your findings. A simple format works best: Ingredient, Grams Weighed, Corresponding Volume. For example:
| Ingredient          | Grams Weighed | Volume Measured (using my cup & method) |
| :------------------ | :------------ | :-------------------------------------- |
| All-Purpose Flour   | 100 g         | ~3/4 cup                                |
| Granulated Sugar    | 200 g         | ~1 cup                                  |
| Brown Sugar (packed)| 220 g         | ~1 cup                                  |
| Butter              | 227 g         | ~1 cup (2 sticks)                       |
Record the exact gram amount you weighed and the volume you measured. Be as specific as possible with the volume, noting if it was slightly over or under a standard mark. This data forms the basis of your personalized homemade gram to cup chart.
Step 6: Repeat the Process for Multiple Ingredients and Variations (e.g., All-Purpose Flour vs. Cake Flour)
Work through your list of chosen ingredients, repeating steps 3 through 5. It's beneficial to measure different amounts of the same ingredient to confirm consistency and build a more robust dataset. For instance, measure 50g, 100g, and 200g of all-purpose flour and note the corresponding volumes. This helps average out any minor inconsistencies.
Also, perform this process for variations of ingredients. Measure cake flour separately from all-purpose flour, as their densities differ. Measure packed brown sugar versus lightly spooned brown sugar if you use both methods. The more data points you gather for the specific ingredients and techniques you use, the more accurate and comprehensive your homemade gram to cup chart will become, greatly enhancing your baking precision.
Tips for Accuracy and Maintaining Your Homemade Chart
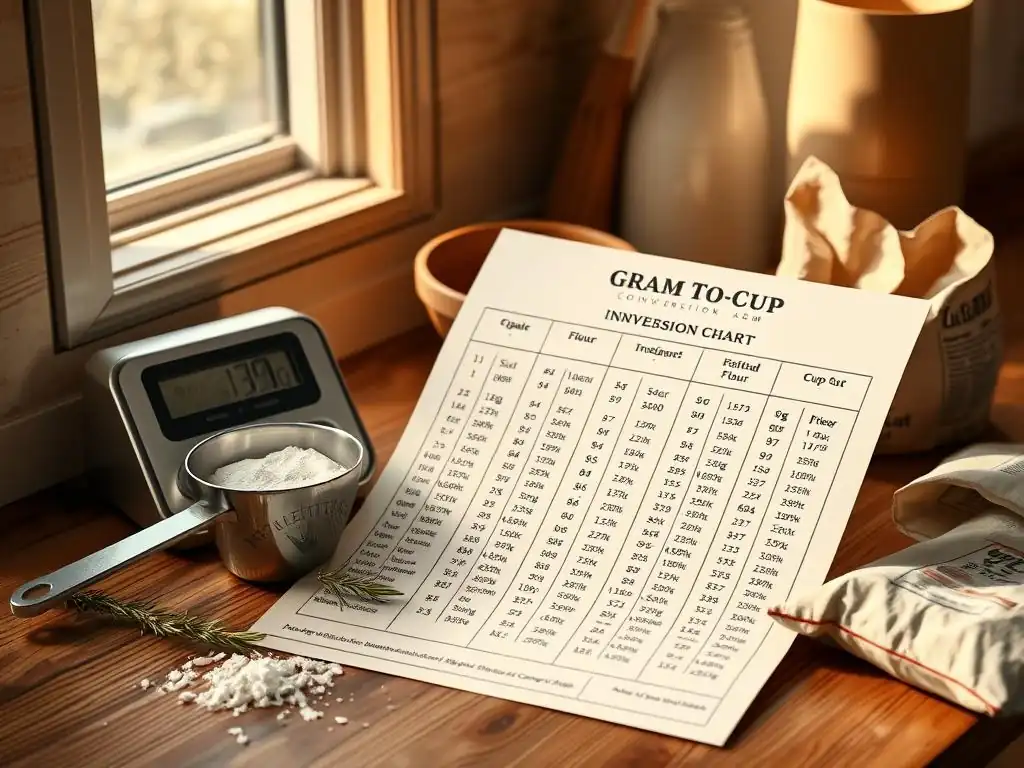
Using a Reliable Kitchen Scale: Calibration is Key
The foundation of an accurate homemade gram to cup chart is a reliable kitchen scale. A digital scale is highly recommended over a mechanical one due to greater precision, typically measuring in 1-gram increments. Ensure your scale is placed on a flat, stable surface when in use.
Regularly check if your scale needs calibration. Some scales have a specific calibration function or require a known weight (like a coin or a specific calibration weight) to verify accuracy. If your scale seems inconsistent, consult its manual for calibration instructions. A scale that is even slightly off can throw off all your gram measurements, rendering your entire homemade gram to cup chart less reliable. Treat your scale as a vital baking tool and maintain it properly.
Addressing Ingredient Variations: Accounting for Density Differences
Even within the same ingredient type, variations exist that affect density. For example, different brands of all-purpose flour can have slightly different protein contents and milling characteristics, leading to minor density variations. Humidity also plays a role; flour stored in a humid environment might weigh slightly more per cup than flour stored in a dry one.
Your homemade gram to cup chart accounts for the specific conditions and ingredients in your kitchen at the time of measurement. While you don't need to remeasure every time the weather changes, be aware that extreme shifts in humidity or changing flour brands might necessitate a quick re-check of a key ingredient like flour or powdered sugar. Your chart should be seen as a guide based on your typical conditions, offering significantly better accuracy than generic charts but still subject to the natural variability of ingredients.
Storing and Maintaining Your DIY Gram to Cup Conversion Chart
Once you've created your homemade gram to cup chart, store it in a convenient location in your kitchen where you can easily access it while baking. This could be a laminated sheet tacked inside a cupboard door, a note on your phone, or a dedicated page in your baking binder. Keeping it handy encourages you to use it and reinforces the habit of precise measurement.
Consider your chart a living document. As you bake more, you might encounter new ingredients or realize you need more detailed conversions for existing ones (e.g., different types of nuts, seeds, or specialty flours). Add these to your chart over time. If you change brands of a staple ingredient like flour or sugar, it's a good idea to re-verify the conversion for that specific ingredient to maintain the chart's accuracy. Regularly updating your homemade gram to cup chart ensures it remains your most valuable baking tool.
Examples of Gram to Cup Conversions for Common Baking Ingredients
Gram to Cup Conversion for Flour (All-Purpose, Cake, Bread)
Flour is perhaps the most critical ingredient where volume measurement causes inconsistency. The "spoon and level" method is generally recommended for volume measuring flour to minimize packing, but even then, variations occur. Let's look at typical homemade gram to cup chart findings:
- All-Purpose Flour (Spoon & Level): You might find that 1 cup consistently weighs around 125 grams. So, your chart entry would be:
AP Flour (Spoon & Level): 1 cup = ~125 g. This means if a recipe calls for 250g of AP flour, you'd measure 2 cups using your method. - Cake Flour (Spoon & Level): Cake flour is typically lighter than AP flour. Your measurements might show 1 cup weighs closer to 115 grams. Chart entry:
Cake Flour (Spoon & Level): 1 cup = ~115 g. - Bread Flour (Spoon & Level): Bread flour is often denser than AP flour. Your chart might indicate 1 cup weighs around 135 grams. Chart entry:
Bread Flour (Spoon & Level): 1 cup = ~135 g.
These specific figures, derived from your own measurements for your homemade gram to cup chart, are far more reliable than generic online conversions which might average AP flour at 120g or 130g. Using your personalized numbers ensures consistent results.
Gram to Cup Conversion for Sugar (Granulated, Brown, Powdered)
Sugar conversions also highlight density differences. Granulated sugar is free-flowing and relatively consistent, while brown sugar requires packing, and powdered sugar is very fine and aerated.
- Granulated Sugar: A cup of granulated sugar is quite dense. Your chart will likely show 1 cup weighing very close to 200 grams. Chart entry:
Granulated Sugar: 1 cup = ~200 g. - Brown Sugar (Packed): Recipes usually specify "packed" brown sugar for volume measurements. When firmly packed into a cup, brown sugar is even denser than granulated. Your measurements might show 1 cup packed weighs around 220 grams. Chart entry:
Brown Sugar (Packed): 1 cup = ~220 g. - Powdered Sugar (Sifted or Fluffed): Powdered sugar is light and prone to clumping. Recipes often call for sifting or fluffing before measuring. A cup of fluffed or sifted powdered sugar will weigh significantly less than granulated, perhaps around 110-120 grams. Chart entry:
Powdered Sugar (Fluffed/Sifted): 1 cup = ~110-120 g.
These examples demonstrate why a single "sugar" conversion isn't sufficient; your homemade gram to cup chart needs entries for each type of sugar you use, measured according to the standard method for that type.
Gram to Cup Conversion for Fats (Butter, Oil)
Fats are often measured differently. Butter is typically sold in sticks with volume/weight markings, while oil is usually measured by volume. Converting butter to grams is straightforward using the package markings (1 stick = 1/2 cup = ~113 grams), but confirming this with your scale is good practice for your homemade gram to cup chart.
- Butter: A standard US stick of butter is marked as 1/2 cup. Weighing a stick will confirm it's approximately 113 grams. Chart entry:
Butter: 1 stick (1/2 cup) = ~113 g. This is a standard conversion that rarely varies significantly. - Oil (Vegetable, Canola, etc.): Liquid fats like oil are less prone to density variations based on scooping technique compared to dry ingredients. Water is the standard for liquid density (1 ml = 1 g), and most oils are slightly less dense than water. Your chart might show 1 cup of oil weighs around 210-225 grams. Chart entry:
Oil: 1 cup = ~210-225 g.
Including these fats in your homemade gram to cup chart ensures you have a comprehensive conversion tool for common baking ingredients.
Gram to Cup Conversion for Liquids (Water, Milk)
Liquids like water and milk are generally measured accurately by volume, as they conform to the shape of the container and are not subject to packing issues like dry ingredients. Their densities are also relatively consistent.
- Water: Water is the basis of the metric system's mass-volume relationship (at a specific temperature and pressure). 1 milliliter of water weighs 1 gram. Since 1 US cup is approximately 237 ml, 1 cup of water weighs about 237 grams. Chart entry:
Water: 1 cup = ~237 g. - Milk: Milk is slightly denser than water due to dissolved solids and fat content. A cup of milk will weigh a little more than a cup of water, perhaps around 240-245 grams depending on the fat content. Chart entry:
Milk: 1 cup = ~240-245 g.
While liquid volume measurements are generally reliable, including these in your homemade gram to cup chart adds completeness and allows you to convert any recipe given in grams back to your preferred cup measurements with confidence.
Beyond the Chart: Enhancing Your Baking Precision
Using Online Gram to Cup Conversion Calculators
While your homemade gram to cup chart is tailored to your specific kitchen, online conversion calculators can still be useful tools. They are quick for getting approximate conversions for ingredients you don't frequently use or haven't added to your chart yet. Many baking websites offer these free tools.
However, remember the limitations: these calculators use average densities. Use them as a starting point or for less critical ingredients. For staple ingredients like flour and sugar in recipes where precision is paramount, always refer to the specific values you determined for your homemade gram to cup chart. Think of online tools as a helpful supplement, not a replacement, for your personalized data.
Understanding Baker's Percentage for Advanced Accuracy
For those looking to delve deeper into baking precision, understanding baker's percentage is the next step. This system expresses every ingredient's weight as a percentage of the flour's weight, which is always set at 100%. For example, a recipe might call for 100% flour, 60% water, 2% salt, and 1% yeast.
Working with baker's percentages requires measuring everything by weight (grams), making your kitchen scale and potentially your homemade gram to cup chart (if converting a percentage recipe to cups) invaluable. This method allows for easy scaling of recipes and provides a deep understanding of ingredient ratios, leading to highly consistent and predictable results, especially in bread baking.
Experimenting and Refining Your Homemade Conversions
Your journey with your homemade gram to cup chart shouldn't end after the initial creation. Baking is an ongoing learning process, and your chart can evolve with you. As you bake more, pay attention to the results. If a recipe converted using your chart consistently yields a slightly different texture than expected, revisit the conversion for the key ingredients in that recipe.
Perhaps the humidity has changed significantly, or you've refined your measuring technique. Don't be afraid to re-measure and adjust the values on your chart. Experiment with different ways of measuring (e.g., sifting flour vs. not sifting) and add those variations to your chart. This iterative process of measuring, baking, and refining makes your homemade gram to cup chart an increasingly accurate and powerful tool over time.
Troubleshooting Common Conversion Issues
Dealing with Inconsistent Cup Measurements
One of the main reasons for creating a homemade gram to cup chart is to combat the inconsistency of volume measurements. If, while creating your chart, you find that repeatedly measuring the "same" volume of flour (e.g., 1 cup) results in significantly different gram weights (e.g., 120g one time, 135g the next), it indicates an issue with your volume measuring technique or possibly the ingredient itself (clumping, settling).
Focus on standardizing your technique. For flour, always use the spoon-and-level method. For brown sugar, always pack it firmly. For liquids, always measure at eye level on a flat surface. Consistent technique is crucial when creating the chart. If an ingredient is clumping (like powdered sugar), sift it before measuring volume. If inconsistencies persist even with a standardized technique, your measuring cups themselves might be slightly inaccurate, though this is less common.
Addressing Errors in Gram Readings
Errors in gram readings are almost always due to issues with the digital kitchen scale. Ensure it's on a stable, level surface away from drafts or vibrations. Always tare (zero out) the container before adding the ingredient. Avoid adding ingredients too quickly, which can sometimes cause the scale to misread or fluctuate.
If you suspect your scale is inaccurate, try weighing a known object, like a new dollar bill (approximately 1 gram) or a specific coin, to see if the reading is correct. If readings are inconsistent or jump around, the scale's battery might be low, it might need recalibration, or it could be faulty. A properly functioning scale is non-negotiable for accurate gram measurements and, consequently, for a reliable homemade gram to cup chart.
Adjusting for Altitude and Humidity
While your homemade gram to cup chart accounts for the density of ingredients in your typical environment, extreme changes in altitude or humidity can still impact baking outcomes, particularly for recipes relying on leavening. Higher altitudes affect atmospheric pressure, causing baked goods to rise more quickly, and drier air can impact ingredient hydration. High humidity can add moisture to dry ingredients like flour and sugar, slightly increasing their weight per volume.
Your homemade gram to cup chart provides accurate mass conversions for your local conditions. However, if you move to a significantly different climate or altitude, it might be beneficial to re-verify the conversions for key ingredients like flour and sugar, as their moisture content (and thus density) might change. Additionally, high-altitude baking often requires recipe adjustments beyond just measurement, such as reducing leavening or sugar. Your chart handles the measurement part, but climate effects might still require recipe tweaks.
Conclusion: Embrace the Power of Your Homemade Baking Chart
Level Up Your Baking Skills with Accurate Measurements
Creating a homemade gram to cup chart is more than just a useful tool; it's an investment in your baking skills. By understanding the precise relationship between the volume you measure and the weight of your specific ingredients, you gain a deeper intuition for how ingredients behave. This knowledge translates directly into more consistent, predictable, and ultimately, more successful baking experiences.
No longer will you have to wonder if a failed recipe was due to inaccurate conversions. Your personalized homemade gram to cup chart removes that variable, allowing you to troubleshoot other aspects of the baking process with confidence. It empowers you to tackle recipes from any source, regardless of whether they list ingredients in grams or cups, knowing you can convert them accurately using data you trust – your own.
BakeWithEase and the Art of Perfect Baking
At BakeWithEase, our goal is to make baking accessible, enjoyable, and successful for everyone. Mastering accurate measurements is a cornerstone of achieving that perfect bake, and your homemade gram to cup chart is a powerful step in that direction. It embodies the spirit of understanding the fundamentals and tailoring techniques to your own kitchen.
By crafting your own homemade gram to cup chart, you're not just converting units; you're building confidence, improving consistency, and gaining a deeper appreciation for the science behind the art of baking. Embrace the precision it offers, keep it handy, and watch as your baking results reach new levels of perfection. Happy baking!
Frequently Asked Questions
How accurate is a DIY gram to cup conversion chart compared to using a digital scale?
While a DIY chart is convenient, it's less accurate than a digital scale. Volume measurements (cups) can vary based on how ingredients are packed. For precise baking, a scale is recommended.
What ingredients are most difficult to convert from grams to cups using a homemade chart?
Flour and sugar are notoriously difficult. The density of flour changes based on humidity and how it's measured. Sugar can also vary based on grain size (e.g., granulated vs. powdered).
Can I use the same gram to cup conversion ratio for all types of flour?
No, you cannot use the same ratio for all flours. Different types of flour have different densities. Always consult a chart specific to the type of flour you're using (e.g., all-purpose, bread, cake).
Why is it important to have a reliable gram to cup conversion chart when baking?
A reliable chart helps ensure consistent results. Inaccurate measurements can lead to failed recipes, especially in baking where precise ingredient ratios are crucial for texture and rise.
Where can I find the best resources for creating my own gram to cup conversion chart?
BakeWithEase.com offers simple recipes, techniques, and tips for bakers. Refer to reliable baking websites and cookbooks for accurate conversion ratios for common baking ingredients.
Final Reflection: The Enduring Power of Practical Knowledge
The ability to accurately measure ingredients, a seemingly small detail in cooking and baking, is actually a cornerstone of culinary success and creative expression. Mastering this fundamental skill empowers us to confidently adapt recipes, experiment with new flavors, and ultimately, to create delicious and consistent results in the kitchen. This simple act of crafting a personalized gram-to-cup conversion chart transcends mere measurement; it's a testament to self-reliance and a deeper understanding of the culinary process.
Creating our own gram-to-cup conversion chart isn't just about convenience; it's about reclaiming agency in the kitchen. It's a tangible connection to a time when resourcefulness was paramount, a reminder that knowledge and skill can be cultivated even in the face of limited resources. The best way to find yourself is to lose yourself in the service of others.
While not directly about baking, this quote speaks to the inherent satisfaction of mastering a skill and using it to enrich one's life and potentially, the lives of others. The act of creating this chart fosters a deeper appreciation for the precision and artistry involved in cooking and baking.
You now possess the tools to confidently navigate the world of recipes, no longer bound by pre-packaged measurements or the limitations of readily available conversion charts. Consider this: what other areas of your life could benefit from this same spirit of self-reliance and creative problem-solving? Take the initiative to create your own solutions, to master your own tools, and to discover the immense satisfaction that comes from building your own knowledge. The journey of learning is ongoing, and the skills you've gained in creating this chart are a testament to your capacity for growth and innovation.
Unlock Baking Precision: Craft Your Perfect Gram-to-Cup Converter!
Thanks for diving into the world of precise baking with us! You've now got the knowledge to create your own personalized gram-to-cup conversion chart – a game-changer for baking success. Ready to put your new skills to the test?
- Craft your custom chart: Grab a pen and paper (or fire up a spreadsheet!) and create your own gram-to-cup conversion chart based on the ingredients you use most often. This personalized chart will be your secret weapon in the kitchen!
- Share your baking wisdom: Show off your newly crafted chart and inspire other bakers! Share a picture on social media using #BakeWithEaseChart and tag us – let's build a community of precision bakers.
- Explore new recipes: Use your new skills to tackle a challenging recipe you've always avoided – you've got this!
Ready to elevate your baking game and never struggle with measurements again? What's the first recipe you'll tackle with your perfectly crafted gram-to-cup conversion chart?