
Why Is My Focaccia Dough Not Bubbly?

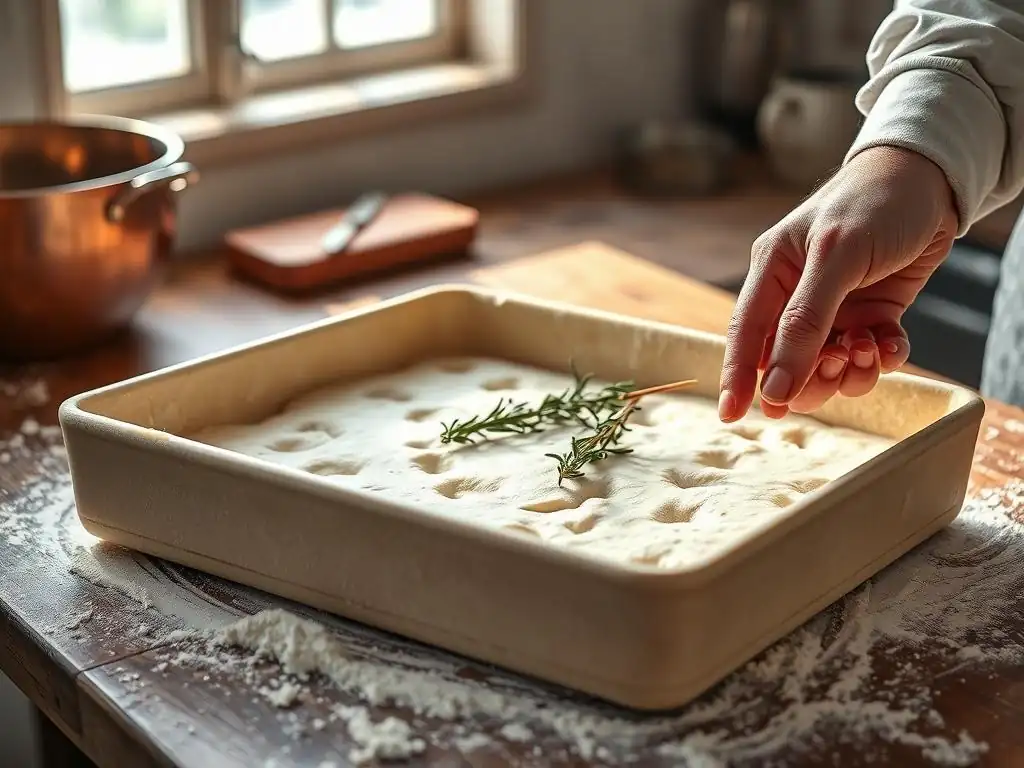
Welcome to BakeWithEase, your companion in the exciting world of baking! Ever wondered why your focaccia dough just isn't getting that signature bubbly texture? You're not alone! We'll dive into the secrets behind achieving that perfect, airy focaccia, exploring common pitfalls and simple solutions. Get ready to transform your dough and unlock the delicious potential hidden within. Let's get baking!
- Why Is My Focaccia Dough Not Bubbly? Troubleshooting Guide
- Understanding Focaccia Dough Bubbles: The Key to Perfect Focaccia
- Common Reasons for Focaccia Dough Not Bubbling & How to Fix Them
- Focaccia Baking Tips for Guaranteed Bubbles
- Troubleshooting Checklist: Is Your Focaccia Dough Not Bubbly?
- Achieving the Perfect Bubbly Focaccia: A Summary of Key Factors.
-
Frequently Asked Questions
- Why is my focaccia dough not bubbly?
- What role does water temperature play in focaccia dough development and bubble formation?
- Could the type of flour I use affect the bubbles in my focaccia?
- How does the amount of oil in focaccia dough influence bubble formation?
- What are some troubleshooting tips if my focaccia dough still isn't bubbly after proofing?
- Final Reflection: The Pursuit of the Perfect Focaccia Bubble
- Unleash Your Focaccia's Inner Bubbles!
Why Is My Focaccia Dough Not Bubbly? Troubleshooting Guide
Understanding Focaccia Dough Bubbles: The Key to Perfect Focaccia
What Makes Focaccia Dough Bubbly? The Science Behind the Air Pockets
The magic behind those desirable air pockets in your focaccia lies primarily with yeast and its metabolic process. When yeast, a living microorganism, is combined with water and food (like the sugars present in flour), it begins to ferment. This fermentation produces various byproducts, including carbon dioxide gas (CO2) and alcohol. As the yeast consumes sugars and produces CO2, these gas bubbles get trapped within the elastic network formed by the gluten in the dough.
This process continues throughout the dough's rising or proofing stages. The longer and more effectively the yeast ferments, and the stronger the gluten network is, the more gas is produced and retained, leading to a higher volume and a more open, bubbly structure. Think of it like blowing up a balloon: the yeast fills the balloon (the gluten network) with air (CO2). The temperature and humidity of the environment significantly impact how quickly and vigorously the yeast ferments, directly influencing the rate of bubble formation. A warm, humid environment typically speeds up this process compared to a cool one.
Why Bubbly Focaccia Matters: Texture, Taste, and Visual Appeal
The presence of numerous, well-distributed bubbles is a hallmark of excellent focaccia. Texturally, these air pockets create a light, airy crumb that contrasts beautifully with the crisp, golden crust. A focaccia dough not bubbly results in a dense, heavy bread that lacks the characteristic chewiness and delightful mouthfeel. The open structure also allows the generous amount of olive oil typically used in focaccia to pool within the indentations and pockets, moistening the crumb and infusing it with rich flavor.
Beyond texture, those bubbles contribute significantly to the overall taste experience. The fermentation process that creates the bubbles also develops complex flavors in the dough. A long, slow fermentation, often encouraged to produce more bubbles, allows enzymes to break down starches into sugars and amino acids, resulting in a more nuanced and delicious bread. Visually, a bubbly surface is incredibly appealing – it's the classic look of a well-made focaccia, inviting you to tear off a piece and enjoy. A flat, dense loaf simply doesn't have the same aesthetic appeal or promise of a light, flavorful bite.
Common Reasons for Focaccia Dough Not Bubbling & How to Fix Them
Inactive or Old Yeast
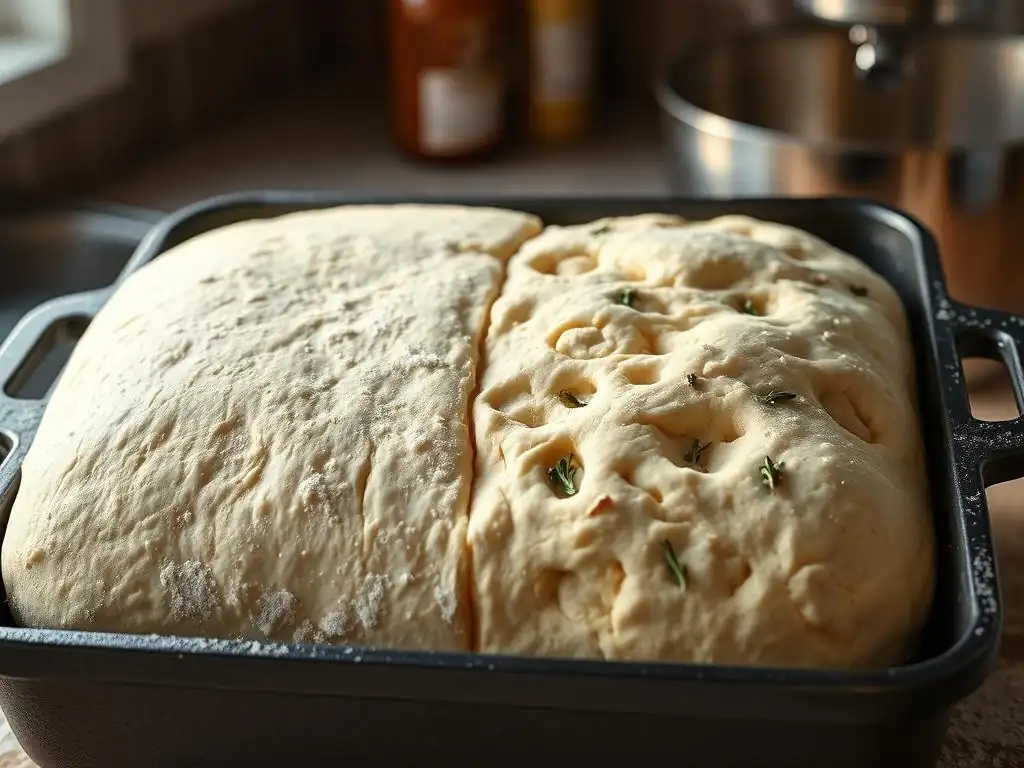
Yeast is a living organism, and like all living things, it has a shelf life. If your yeast is old or has been stored improperly (e.g., left open in a warm pantry), it may lose its vitality. Inactive yeast simply won't produce enough carbon dioxide gas to make your focaccia dough bubbly. This is one of the most common culprits when a dough fails to rise or shows minimal bubble activity. Using yeast that's past its expiration date is a sure way to end up with a flat loaf.
Even within its shelf life, how yeast is stored matters. Dry yeast, whether active dry or instant, is best kept in an airtight container in the refrigerator or freezer to maintain its potency. Once opened, its lifespan decreases, so using it within a few months, especially if stored at room temperature, is advisable. If you suspect your yeast might be the issue behind your focaccia dough not bubbly, it's wise to test its viability before committing it to your recipe.
Testing Yeast Viability
Testing active dry yeast is a simple and effective way to ensure it's alive and ready to work. You'll need a small amount of warm water (around 105-115°F or 40-46°C), a pinch of sugar, and your yeast. Pour about 1/4 cup of the warm water into a small bowl, stir in the sugar, and then sprinkle the yeast over the top. Let it sit for 5-10 minutes without stirring.
If the yeast is active, you should see it dissolve and then begin to foam up significantly, creating a frothy layer on the surface. This foam indicates that the yeast is consuming the sugar and producing CO2 gas. If there's little to no activity, foam, or bubbling after 10-15 minutes, your yeast is likely dead or inactive and won't make your focaccia dough bubbly.
You'll need to discard it and use fresh yeast. Instant yeast doesn't strictly need to be proofed this way as it can be mixed directly with dry ingredients, but testing it in warm water can still confirm its viability if you're unsure.
Using Fresh Yeast vs. Adjusting Proofing Time
If you've confirmed your yeast is active but still experience issues, consider the type of yeast and your recipe's proofing time. Instant yeast is more potent and faster-acting than active dry yeast. Recipes often specify which type to use, and substituting one for the other might require adjusting quantities or proofing times. For example, you typically use about 25% less instant yeast than active dry yeast by weight.
When using active dry yeast, ensure the water temperature for activating it is correct (105-115°F). Water that's too cool won't activate it, and water that's too hot can kill it. Instant yeast is more forgiving with temperature and can often be mixed directly into the dry ingredients and dough liquids. If you're using a recipe designed for instant yeast but using active dry, or vice-versa, you might need to slightly increase or decrease the proofing time respectively, or adjust the amount of yeast used, to achieve the desired level of bubble development in your focaccia dough.
Incorrect Dough Hydration
Hydration refers to the ratio of water to flour by weight in a dough, typically expressed as a percentage (water weight / flour weight * 100). Focaccia is known for being a high-hydration dough, often ranging from 70% to 85% or even higher. This high water content is crucial for achieving that characteristic open, airy, and bubbly crumb structure. Water allows the flour proteins (gliadin and glutenin) to hydrate and form the gluten network that traps the fermentation gases.
If your dough is too low in hydration (e.g., 60-65%), it will be stiffer, denser, and harder for the gas bubbles to expand within. A very low-hydration dough will produce a tighter crumb with fewer, smaller bubbles. Conversely, an excessively high-hydration dough can be difficult to handle and might lack the structural integrity to hold large bubbles, sometimes resulting in a collapsed crumb. Getting the hydration right is fundamental to preventing your focaccia dough not bubbly issue.
How Hydration Affects Focaccia Dough Development
Proper hydration is essential for optimal gluten development. When flour meets water, the proteins begin to link up, forming the elastic gluten network. In a high-hydration dough like focaccia, the abundance of water allows these proteins to move more freely and form longer, stronger chains with less physical kneading effort. This strong yet flexible network is what enables the dough to capture and hold the large volumes of CO2 gas produced by the yeast during fermentation.
Furthermore, the water content directly impacts the dough's viscosity and extensibility. A well-hydrated dough is more extensible (can be stretched without tearing) and less resistant to expansion. This allows the trapped gas bubbles to grow larger and merge, creating the signature irregular, open crumb and bubbly surface of focaccia. Without sufficient water, the dough will be too tight and resistant, restricting bubble growth and resulting in a dense texture, contributing to the focaccia dough not bubbly problem.
Achieving the Right Hydration: Measuring Water Accurately
To ensure you have the correct hydration level specified in your recipe, it is absolutely critical to measure your ingredients, especially water and flour, by weight using a kitchen scale, not by volume (cups). Flour density can vary significantly depending on how it's scooped and packed, leading to large inconsistencies when measured by volume. For instance, a cup of flour can weigh anywhere from 120g to 150g or more. Water, while more consistent by volume (1 ml ≈ 1g), should still be weighed for precision in baking, especially in high-hydration recipes where small errors have a big impact.
For example, if a recipe calls for 500g of flour and 400g of water, that's 80% hydration (400/500 * 100). If you accidentally measure 150g per cup of flour instead of the assumed 125g, but use the correct volume of water cups, your hydration percentage will be off. Using a scale guarantees you are hitting the exact water-to-flour ratio intended by the recipe developer, giving your dough the best chance to develop the structure needed for bubbles.
Adjusting Hydration Levels
Sometimes, even with accurate measurements by weight, you might need to slightly adjust hydration based on the specific flour you are using or the ambient humidity. Different flours absorb water differently; for example, a high-protein bread flour typically absorbs more water than an all-purpose flour. If your dough feels significantly stiffer or wetter than described in the recipe (e.g., "very wet and sticky"), you might need to make small adjustments.
If the dough feels too dry and isn't coming together or is very stiff early in the mix, you can add a tablespoon of water at a time, incorporating it fully before adding more, until the desired consistency is reached. If it feels excessively wet and soupy, you might need to add a tablespoon of flour at a time.
It's generally easier to add more water to a dry dough than more flour to a wet dough, so err on the side of caution. Pay attention to how the dough feels and looks relative to the recipe's description, and make minor adjustments if necessary to combat the focaccia dough not bubbly issue related to hydration.
Insufficient Proofing Time
Proofing, also known as fermentation or rising, is the period during which the yeast is active, producing CO2 gas that makes the dough rise and become airy. Focaccia typically undergoes at least one, often two, proofing stages: the bulk fermentation (the initial rise of the entire dough mass) and the final proof (after the dough is shaped or placed in the pan). If these proofing times are cut short, the yeast won't have enough time to produce sufficient gas, and the gluten network won't have adequate time to relax and become extensible enough to hold large bubbles.
Under-proofing is a common reason for a focaccia dough not bubbly. The dough might look like it has risen slightly, but it hasn't reached its full potential for gas production and structural development. This results in a dense, heavy crumb with small, tight holes instead of an open, airy structure. While recipes provide time estimates (e.g., "proof for 1-2 hours"), these are just guidelines. The actual proofing time depends heavily on factors like room temperature, yeast activity, and hydration level.
Understanding the Proofing Process
The proofing process is dynamic and depends significantly on temperature. Yeast is most active in warm environments, typically between 75-85°F (24-30°C). At these temperatures, dough can double in size in 1-2 hours during bulk fermentation. Cooler temperatures slow fermentation; for instance, proofing in the refrigerator (around 40°F or 4°C) can take 12-48 hours but develops more complex flavors and often leads to a more open structure due to longer enzyme activity.
Humidity also plays a role, preventing the dough surface from drying out, which can restrict expansion. Covering your dough loosely with plastic wrap or a damp towel during proofing helps maintain humidity. The key is not just watching the clock but observing the dough itself. The visual cues and feel of the dough are the most reliable indicators of whether it is properly proofed.
Signs of Under-Proofed vs. Over-Proofed Dough
Knowing what to look for is crucial. An under-proofed dough will look dense, feel heavy, and when poked, the indentation will spring back immediately. It hasn't developed enough gas or relaxed sufficiently. When baked, it will have limited oven spring and a tight, dense crumb, confirming your focaccia dough not bubbly issue.
A properly proofed dough, on the other hand, will have significantly increased in volume (often doubled or tripled during bulk ferment), the surface may show visible bubbles, and it will feel light and airy. The classic "poke test" is a good indicator: gently press your finger into the dough about half an inch deep. If the indentation springs back slowly, leaving a small indent, the dough is likely proofed correctly.
If it springs back immediately, it needs more time. If it collapses entirely, it is likely over-proofed. Over-proofed dough has exhausted its food source or its gluten structure has weakened, and while it might initially look bubbly, it often collapses in the oven, resulting in a flat loaf with large, irregular holes or a dense, collapsed center.
Optimizing Proofing Time: Temperature, Humidity, and Dough Behavior
To optimize proofing and ensure your focaccia dough becomes bubbly, control the environment if possible. A warm spot in your kitchen, like near a sunny window (but not too hot), or a proofing box can provide consistent temperatures. If your kitchen is cool, proofing will take longer. You can create a makeshift proofing environment by placing the covered dough in a turned-off oven with the light on (which usually provides a gentle warmth).
Always prioritize the dough's appearance and the poke test over the recipe's time estimate. If the recipe says "proof for 2 hours" but your kitchen is cool, it might take 3 or 4 hours. Conversely, in a very warm kitchen, it might be ready in 1.5 hours. For focaccia, paying close attention to the final proof in the pan is also key; you want it to look puffy and airy with visible surface bubbles before dimpling and baking. Patience during proofing is often the key to resolving a focaccia dough not bubbly situation.
Improper Dough Handling: Degassing the Dough
Unlike many bread doughs that benefit from being punched down vigorously after the first rise to redistribute yeast and even out temperature, focaccia dough is typically handled very gently, especially after the initial bulk fermentation. The goal with focaccia is to preserve the gas bubbles that have formed during proofing, not to knock them all out. Aggressive kneading or punching down the dough before the final proof will expel the built-up CO2 gas, leading to a dense loaf with minimal bubbles.
Focaccia dough often undergoes stretching and folding instead of traditional kneading during or after the initial mix. This develops gluten gently while helping to incorporate air. After the bulk ferment, the dough is usually transferred to its baking pan with minimal handling – often just poured or gently stretched into place. Any rough handling at this stage will destroy the delicate structure of air pockets, resulting in a focaccia dough not bubbly.
Gentle Handling Techniques
When transferring the dough from the proofing bowl to the baking pan, use a dough scraper or well-oiled hands to lift and gently ease it out. Avoid kneading or folding it repeatedly. If the dough resists stretching in the pan, let it rest for 10-15 minutes before gently coaxing it to the edges. This rest period allows the gluten to relax, making the dough more pliable without forcing it and deflating the bubbles.
During the final proof in the pan, the dough should puff up and develop visible bubbles on the surface. When it's time to dimple the dough (a crucial step we'll discuss later), do so firmly but gently enough not to completely flatten the dough or push all the air out. The dimpling redistributes some gas and creates pockets, but the overall airy structure should remain. Handling the dough with care preserves the airy network built during fermentation, which is essential for a bubbly focaccia.
The Importance of Minimal Kneading
Many focaccia recipes, especially high-hydration ones, rely on the "no-knead" or "minimal-knead" method combined with stretching and folding. This technique involves mixing the dough until just combined, then performing a series of stretches and folds over an hour or two during the early stages of bulk fermentation. This method develops gluten more gently than continuous kneading and helps build structure while trapping air.
Excessive or rough kneading, particularly after the initial mixing and before the final proof, can damage the gluten network and expel precious gas bubbles. If you're using a stand mixer, mixing only until the dough passes the windowpane test (can be stretched thin without tearing) is sufficient. For hand-mixing, rely on the stretch and fold technique. Remember, for focaccia, the goal isn't a smooth, tight dough like brioche, but a relaxed, extensible dough capable of holding large bubbles. Overworking the dough is a common reason for a focaccia dough not bubbly.
Issues with Gluten Development
Gluten is the protein network formed when water interacts with the proteins gliadin and glutenin in flour. This network is like the framework that gives the dough its structure and elasticity, allowing it to stretch and expand as the yeast produces gas. Without adequate gluten development, the dough won't be strong enough to trap the CO2 bubbles, and they will simply escape, resulting in a flat, dense loaf – another potential cause of a focaccia dough not bubbly.
The amount and quality of gluten developed depend on the type of flour used (bread flour has more protein than all-purpose), the hydration level, and the mixing or kneading technique employed. A weak gluten network cannot support the weight of the rising dough or contain the expanding gases, leading to a poor rise and a tight crumb.
Understanding Gluten's Role
Think of the gluten network as millions of tiny, elastic balloons connected together. As yeast creates gas, these balloons inflate, causing the dough to expand. A well-developed gluten network means these balloons are strong and flexible, capable of stretching significantly without popping or tearing, thus holding onto the maximum amount of gas. In focaccia, the high hydration helps facilitate the formation of this network with relatively less physical effort.
If the gluten is underdeveloped, the network is weak and full of gaps. The gas bubbles escape easily, and the dough lacks the structure to rise properly. This is why simply mixing ingredients isn't enough; the dough needs time and some form of manipulation (kneading or stretching/folding) to build this essential structure.
Kneading Techniques
For focaccia, especially higher hydration versions, traditional intensive kneading isn't always necessary or even desirable. Techniques like the "stretch and fold" method are highly effective. This involves letting the dough rest for 20-30 minutes after mixing, then gently stretching one side up and folding it over the center, rotating the bowl, and repeating 3-4 times. This process is typically repeated every 20-30 minutes for the first 1-2 hours of bulk fermentation.
This gentle approach aligns the gluten strands and builds strength without overworking the dough or tearing the delicate network. For those who prefer using a stand mixer, mixing on low speed for 5-8 minutes until the dough starts to pull away from the sides of the bowl and passes the windowpane test is usually sufficient. Avoid mixing on high speed for too long, as this can overwork the dough.
Fixing Overworked or Underdeveloped Gluten
If your focaccia dough feels very tight, tears easily when stretched, or snaps back immediately, it might be overworked. Overworking can break down the gluten structure. Resting the dough for 20-30 minutes can sometimes help the gluten relax, but severely overworked dough is difficult to salvage for a very bubbly result.
If the dough feels very slack, doesn't hold its shape at all, and tears immediately when you try to stretch it thin (fails the windowpane test), it is likely underdeveloped. This can often be fixed by performing additional sets of stretch and folds during the bulk fermentation, or if using a mixer, mixing for a few more minutes.
Sometimes, simply extending the bulk fermentation time allows enzymes in the flour to naturally develop gluten over time, a process called autolysis. Giving the dough more time and gentle handling can help build the necessary structure to prevent a focaccia dough not bubbly outcome.
Oven Temperature Problems
The final stage of creating a bubbly focaccia happens in the oven. When the dough hits the heat, the trapped gases expand rapidly, and the water in the dough turns to steam, which also contributes to expansion. This sudden growth is known as "oven spring." For proper oven spring and bubble setting, a high initial oven temperature is crucial.
If your oven temperature is too low, the crust will set too slowly, and the dough won't experience that rapid expansion needed to inflate the bubbles to their full size before the structure solidifies. The yeast activity also peaks early in the bake before the yeast dies off from the heat, contributing to the initial rise. An oven that's too cool hinders both gas expansion and yeast activity at the critical moment, resulting in a flatter, less bubbly focaccia dough.
The Ideal Oven Temperature
Focaccia is typically baked at relatively high temperatures, often between 400°F and 450°F (200°C to 230°C). This high heat ensures that the dough experiences significant oven spring in the first 10-15 minutes of baking. The outside of the dough quickly forms a crust, while the inside continues to expand rapidly, pushing against the crust and creating large internal bubbles and surface blisters.
Some recipes might even suggest starting at a higher temperature (e.g., 450°F) for the first 10 minutes to maximize oven spring, then reducing the temperature slightly (e.g., to 400°F) to allow the inside to cook through without the top burning. The specific temperature and time depend on the recipe, the thickness of the focaccia, and your oven.
How Oven Temperature Affects Bubble Formation
A hot oven provides the necessary thermal shock to the dough. The rapid transfer of heat causes the CO2 gas and steam within the dough to expand dramatically. This expansion is what inflates the bubbles. Simultaneously, the heat sets the gluten structure, effectively freezing the bubbles in place.
If the oven is too cool, the dough heats up slowly. The gas expansion is less vigorous, and the gluten structure sets gradually rather than rapidly. This slower process means the bubbles don't expand as much, and some gas may escape before the structure is strong enough to hold it. This leads to a denser crumb with smaller, less prominent bubbles, exacerbating the focaccia dough not bubbly situation.
Ensuring Accurate Oven Temperature
Oven thermostats are notoriously inaccurate. The temperature displayed on your oven dial or digital screen may be significantly different from the actual temperature inside the oven cavity. It's highly recommended to use an independent oven thermometer placed inside the oven to verify the temperature.
Preheating your oven for a sufficient amount of time (at least 20-30 minutes, sometimes longer) is also crucial, especially when baking at high temperatures. This allows the oven walls and racks to absorb heat, creating a more consistent and radiant heat environment, which is beneficial for oven spring. If your oven consistently runs cool, you may need to preheat it to a higher setting than the recipe indicates to achieve the target temperature, or consider getting it calibrated. Accurate oven temperature is a key factor in getting a beautiful, bubbly focaccia dough.
Focaccia Baking Tips for Guaranteed Bubbles
The Importance of Good Quality Flour
Using the right flour is foundational for a bubbly focaccia. Look for a good quality bread flour or an all-purpose flour with a relatively high protein content, ideally between 12% and 14%. These flours contain more of the proteins (gliadin and glutenin) that form gluten. A higher protein content means a stronger gluten network can be developed, which is essential for trapping the large amounts of CO2 gas needed for those impressive bubbles.
While you can make focaccia with lower protein flours, achieving the same level of openness and bubble structure will be more challenging. The stronger the gluten framework, the better it can stretch and hold the expanding gases during proofing and baking. Check the protein content on the flour packaging; it's usually listed in the nutritional information. Investing in a quality flour suitable for bread making is a simple step to improve your chances of getting a bubbly focaccia dough.
Using Olive Oil Correctly
Olive oil is not just for flavor in focaccia; it plays a significant role in texture and appearance, including promoting bubbles. Generously coating the proofing bowl with olive oil prevents the high-hydration dough from sticking and contributes to the development of a thin, crisp crust. More importantly, a liberal amount of olive oil should be poured over the dough in the pan before the final proof and dimpling.
This layer of oil not only adds flavor but also helps create a barrier that encourages the dough surface to fry slightly in the hot oven, contributing to a crispy crust. When you dimple the dough, the oil pools in the indentations, and during baking, this oil helps to create those characteristic crispy, chewy pockets while also contributing to the dough's overall extensibility, allowing bubbles to expand freely underneath. Don't be shy with the olive oil – many recipes call for a generous 1/4 cup or more drizzled over the top of a standard 9x13 inch pan of dough.
The Dimpling Technique
Dimpling the focaccia dough is more than just a decorative step; it's essential for achieving the classic texture and look, including contributing to bubble formation. After the final proof in the pan, before adding toppings, you use your fingertips (often oiled to prevent sticking) to press firmly down into the dough, creating indentations that go almost all the way to the bottom of the pan.
This process redistributes the gas bubbles within the dough, helping to create a more irregular, open structure. It also allows the olive oil and any toppings to settle into the pockets, infusing the bread with flavor and creating areas that become particularly crispy during baking. Proper dimpling encourages some bubbles to migrate and merge, forming larger pockets, while also slightly compressing other areas, leading to the delightful contrast between dense, chewy parts and airy, bubbly pockets.
Finishing Touches: Salt and Toppings
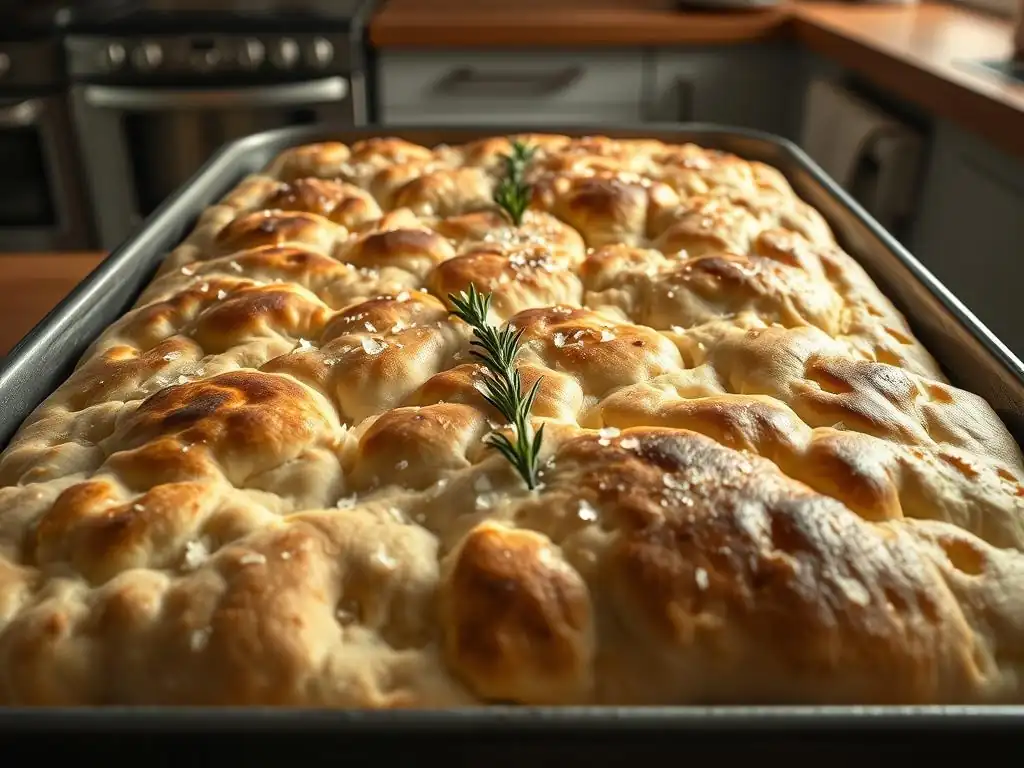
While salt and toppings don't directly create the bubbles, they enhance the overall focaccia experience and work in harmony with the bubbly texture. Flaky sea salt, like Maldon or Fleur de Sel, sprinkled generously over the dimpled, oiled dough before baking provides bursts of essential flavor and a wonderful textural contrast against the soft, airy crumb and crisp crust. Salt also plays a role in controlling yeast activity and strengthening the gluten network, though its primary function at this stage is flavor.
Toppings like fresh rosemary, olives, cherry tomatoes, or caramelized onions add additional flavor layers that complement the rich dough and olive oil. They settle into the dimples alongside the oil, becoming slightly roasted and intensely flavorful. These finishing touches complete the sensory experience of a perfect focaccia, which relies on that bubbly, open structure to carry and showcase these elements effectively.
Troubleshooting Checklist: Is Your Focaccia Dough Not Bubbly?
Step-by-Step Guide to Diagnose and Fix Your Dough
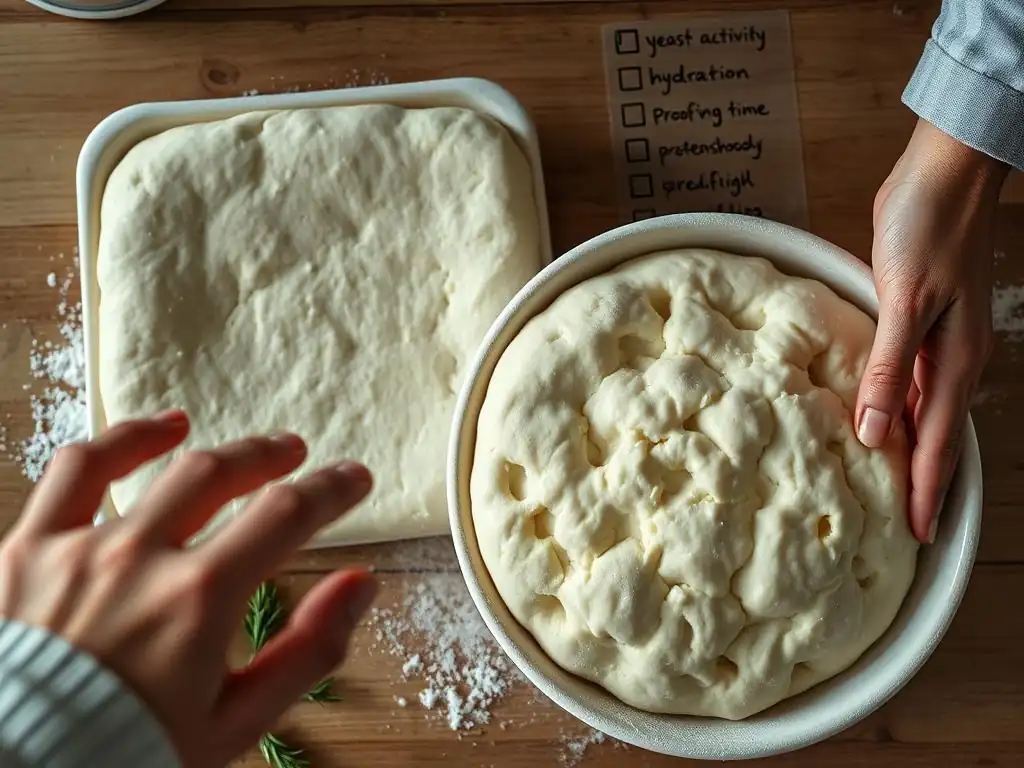
- Check Your Yeast: Did you use fresh yeast? Was it stored properly? Perform the yeast viability test (warm water + sugar) if unsure. If it doesn't foam, get new yeast.
- Verify Hydration: Did you measure flour and water by weight? Is your hydration level appropriate for focaccia (typically 70-85% or higher)? If the dough feels too stiff or too wet compared to the recipe description, carefully adjust with small amounts of water or flour.
- Assess Proofing Time: Did the dough increase significantly in volume during bulk fermentation and final proof? Does it pass the poke test (indentation springs back slowly)? If it sprang back immediately, it needs more time. If it collapsed, it might be over-proofed (less likely the cause of no bubbles, but can lead to collapse). Adjust proofing time based on your kitchen temperature.
- Evaluate Dough Handling: Were you gentle with the dough, especially after the first rise? Did you avoid aggressive kneading or punching down? Use gentle stretching and folding or minimal mixer time.
- Examine Gluten Development: Does the dough feel somewhat elastic and pass the windowpane test after initial mixing/folding? If it's very slack or tears easily, it might be underdeveloped. Perform extra stretch and folds if needed.
- Confirm Oven Temperature: Did you preheat your oven adequately? Is the actual temperature inside the oven accurate using an oven thermometer? If your oven runs cool, adjust the thermostat setting or preheat longer.
By systematically checking each of these factors, you can pinpoint the likely cause of your focaccia dough not bubbly and take steps to correct it for future bakes.
Troubleshooting Checklist: Yeast, Hydration, Proofing, Handling, Oven
- [ ] Yeast: Is it fresh and active? (Test viability if unsure)
- [ ] Hydration: Is water/flour measured by weight? Is the ratio correct? (Adjust consistency if needed)
- [ ] Proofing: Was the dough given enough time to rise sufficiently? (Check volume and poke test)
- [ ] Handling: Was the dough handled gently, preserving gas? (Avoid aggressive kneading/punching)
- [ ] Gluten: Is the gluten network developed but not overworked? (Check dough elasticity/windowpane)
- [ ] Oven: Is the oven preheated to the correct, accurate temperature? (Use an oven thermometer)
Achieving the Perfect Bubbly Focaccia: A Summary of Key Factors.
Creating a beautiful, bubbly focaccia is a rewarding process that relies on understanding a few key principles. The primary driver of bubbles is active yeast producing carbon dioxide gas during fermentation. This gas must then be successfully trapped within a strong, elastic gluten network, which is best developed in a high-hydration dough using gentle handling techniques like stretching and folding.
Ensuring your yeast is fresh and active, accurately measuring your high-hydration dough ingredients by weight, allowing sufficient proofing time based on dough behavior and temperature, handling the dough gently to preserve gas, ensuring adequate (but not excessive) gluten development, and baking at a high, accurate oven temperature are all critical steps. Combined with the generous use of olive oil and the proper dimpling technique, these factors work together to transform a simple dough into a light, airy, and wonderfully bubbly focaccia.
Don't be discouraged if your first attempt results in a focaccia dough not bubbly; baking is a science and an art, and practice makes perfect.
Frequently Asked Questions
Why is my focaccia dough not bubbly?
A lack of bubbles often indicates that your yeast is inactive or the proofing time was insufficient. Check your yeast's expiration date and ensure the dough is kept in a warm, draft-free environment for proper fermentation.
What role does water temperature play in focaccia dough development and bubble formation?
Water that is too hot can kill the yeast, preventing it from activating and producing bubbles. Water that's too cold can slow down yeast activity, leading to insufficient bubble formation. Aim for lukewarm water (around 105-115°F).
Could the type of flour I use affect the bubbles in my focaccia?
Yes, the protein content of the flour is crucial. Lower protein flour might not create the gluten structure needed to trap the air bubbles properly. Use bread flour or a strong all-purpose flour for best results.
How does the amount of oil in focaccia dough influence bubble formation?
While oil is essential for focaccia's flavor and texture, too much early in the process can inhibit gluten development, which traps the bubbles. Add most of the oil after the initial mixing and kneading.
What are some troubleshooting tips if my focaccia dough still isn't bubbly after proofing?
Try extending the proofing time in a warmer location. You can also gently stretch and fold the dough to redistribute the yeast and encourage further fermentation. If all else fails, consider adding a tiny pinch of instant yeast to the dough.
Final Reflection: The Pursuit of the Perfect Focaccia Bubble
The quest for that signature bubbly focaccia crust is more than just a baking challenge; it's a reflection of our dedication to mastering a craft and the joy found in the process. A perfectly bubbly focaccia, with its airy pockets and golden-brown surface, is a testament to understanding fermentation, hydration, and the subtle nuances of dough handling. This article explored the common pitfalls that lead to a flat, disappointing loaf, highlighting the importance of each step from ingredient selection to the final bake.
The journey of baking, much like life itself, is filled with both triumphs and setbacks. The frustration of a deflated focaccia can be disheartening, but the lessons learned from each attempt are invaluable. The only way to do great work is to love what you do.
- Steve Jobs. This quote resonates deeply with the baking process; the passion and attention to detail invested in each loaf directly impact the final result. The pursuit of that perfect bubble is a metaphor for perseverance and the satisfaction derived from mastering a skill.
Now, consider your own baking journey. What have you learned from your focaccia experiments? Perhaps you've discovered the magic of a specific flour, the importance of a longer bulk fermentation, or the subtle art of creating the perfect surface tension. Don't be discouraged by a less-than-perfect loaf; embrace the learning process, adjust your technique, and continue to strive for that perfect, bubbly crust. The reward, both in taste and personal satisfaction, is well worth the effort.
Unleash Your Focaccia's Inner Bubbles!
Thanks for taking the time to explore the world of bubbly focaccia with us! We hope you gained valuable insights into achieving that perfect, airy crumb. Now it's time to put your new knowledge into practice.
- Master the Art of Focaccia: Try again with your focaccia recipe, focusing on the techniques we discussed—this time, you'll notice a difference! Pay close attention to your hydration levels and proofing time. This is your chance to bake the focaccia of your dreams!
- Share Your Success (or Questions!): We'd love to see your bubbly creations (or hear about any lingering questions)! Share your photos and experiences on our BakeWithEase social media pages.
- Explore Beyond Focaccia: Ready for a new challenge? Check out our other baking guides— we have plenty of recipes and tips for similar artisan breads.
Ready to unleash your inner baking genius and conquer that perfect focaccia rise?