
Preventing Bread From Sticking to the Pan or Baking Stone

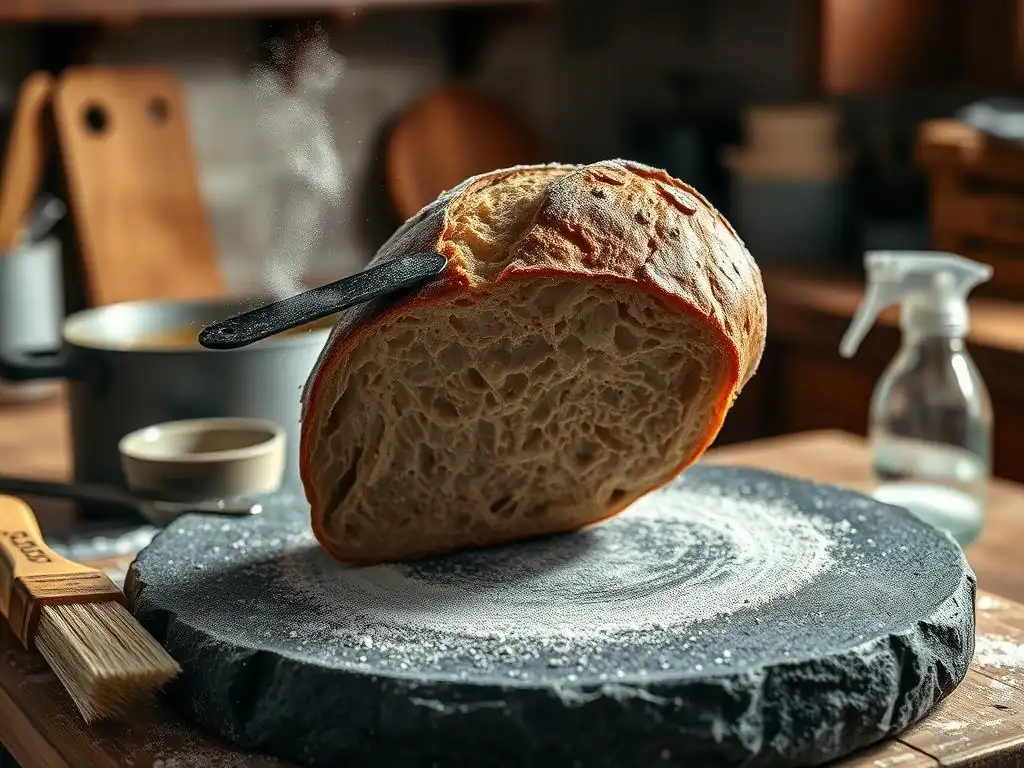
Welcome to BakeWithEase, your guide to confident baking! Ever wondered how to stop bread sticking and ruining your beautiful loaf? Discover the secrets to a perfectly released bake, leaving you with nothing but delicious, crusty bread and a clean pan. Keep reading for proven techniques and expert tips that will transform your baking experience!
- Preventing Bread From Sticking: A Comprehensive Guide
- Introduction: The Sticky Situation - Why Bread Sticks and How to Avoid It
- Understanding Why Bread Sticks: Common Causes
-
How to Stop Bread Sticking: Proven Methods and Techniques
- Method 1: Thoroughly Greasing Your Pan - The Foundation of Non-Stick
- Method 2: Using Parchment Paper - A Baker's Best Friend
- Method 3: Flour Power - Dusting Your Pan for Extra Protection
- Method 4: Seasoning Your Baking Pan - Creating a Natural Non-Stick Surface
- Method 5: Choosing the Right Pan Material - Long-Term Non-Stick Solutions
- Troubleshooting Specific Bread Types and Sticking Issues
- Baking Stone Specific Tips: Preventing Sticking on the Stone
- Advanced Techniques for Preventing Bread From Sticking
- Conclusion: Baking Success - Say Goodbye to Sticky Bread!
-
Frequently Asked Questions
- How can I prevent my bread from sticking to the baking pan?
- What type of grease works best for preventing bread from sticking?
- If I'm using a baking stone, how do I prevent the bread from sticking?
- Is there a difference between preventing sticking for sweet breads versus savory breads?
- Can the type of pan I use affect whether the bread sticks?
- Final Reflection: The Joy of a Perfectly Released Loaf
- Unleash Your Inner Baker: Perfect Bread, Every Time!
Preventing Bread From Sticking: A Comprehensive Guide
Introduction: The Sticky Situation - Why Bread Sticks and How to Avoid It
There are few things more frustrating in baking than pulling a beautifully risen loaf from the oven, only to find it's stubbornly glued to the pan or baking stone. This common issue can ruin the shape of your bread, damage your bakeware, and dampen the satisfaction of a successful bake. Understanding why bread sticks is the first step in preventing it, turning potential frustration into consistent baking success.
It's a challenge every baker faces at some point, but thankfully, there are tried-and-true methods to ensure your loaves release cleanly every time. Mastering how to stop bread sticking is a fundamental skill that elevates your baking game.
This guide will walk you through the primary reasons your bread might be sticking and, more importantly, provide you with a comprehensive toolkit of techniques to prevent it. From simple greasing methods to understanding the properties of different bakeware materials and handling tricky high-hydration doughs, we'll cover everything you need. By implementing these strategies, you'll not only solve existing sticking problems but also proactively avoid them in future baking endeavors, making your baking process smoother and more enjoyable.
Mastering Non-Stick Baking Techniques
Achieving non-stick bread baking relies on creating an effective barrier between the dough and the baking surface. This isn't just about preventing a mess; it's crucial for the bread's structure and crust development. When bread sticks, the bottom crust can tear or remain pale and underdeveloped where it was adhered, impacting the overall texture and appearance of the final product.
Different techniques create this barrier in various ways, offering solutions suitable for different types of bread and baking equipment. For instance, a simple layer of fat works wonders for many standard loaves, while a physical layer like parchment paper provides robust protection for wetter doughs or delicate pastries baked in pans.
Beyond simple greasing or lining, advanced techniques and understanding material science play a significant role in mastering how to stop bread sticking. The thermal properties of your pan or stone, the surface texture, and even how well the material has been maintained (like seasoning on cast iron) all influence adhesion.
By combining the right preparation method with the appropriate bakeware for your specific dough, you significantly reduce the likelihood of sticking. This holistic approach ensures that whether you're baking a simple sandwich loaf or a complex artisan boule on a stone, you have the knowledge to achieve a perfect, non-stick release.
Understanding Why Bread Sticks: Common Causes
Insufficient Greasing: The Primary Culprit
One of the most frequent reasons bread adheres to a baking pan is simply inadequate greasing. A pan needs a continuous, protective layer of fat to prevent the dough from bonding with the metal or ceramic surface as it expands and bakes. If there are dry spots or areas where the grease layer is too thin, the dough can make direct contact, and the starches and sugars will essentially glue themselves to the pan under high heat.
This is particularly common in the corners and along the bottom edges of loaf pans, which are often the hardest areas to coat thoroughly. Many bakers underestimate the amount of grease needed or miss small sections, leading to frustrating sticking points.
The effectiveness of greasing also depends on the type of fat used and the pan material. While a thin layer of oil or butter is often sufficient for standard aluminum or steel pans, less seasoned or older pans might require a more generous application or a different type of fat altogether, such as solid shortening, which provides a more robust barrier.
For example, a well-greased standard loaf pan typically requires about 1-2 teaspoons of solid shortening or 1-2 tablespoons of melted butter or oil, ensuring full coverage of the bottom and sides. Without this crucial step, the dough's natural stickiness, especially in warmer temperatures during proofing and baking, becomes a significant issue, making it difficult to learn how to stop bread sticking effectively.
The Wrong Type of Pan: Material Matters
The material of your baking pan significantly impacts the likelihood of bread sticking. Different materials have varying surface properties and heat conductivity, which affect how the dough interacts with the pan during baking. For instance, bright, shiny aluminum pans conduct heat efficiently but can sometimes lead to sticking if not properly prepared, especially with sugary doughs.
Dark-coated or non-stick pans are designed to minimize sticking, but their non-stick properties can degrade over time with use and improper cleaning, potentially becoming more prone to sticking than a well-maintained standard pan. Cast iron, while excellent for heat retention and crust development, requires regular seasoning to build up a natural non-stick surface; unseasoned or poorly seasoned cast iron is notorious for sticking.
Silicone bakeware is inherently non-stick due to the material's properties, but it can sometimes result in less browning on the crust compared to metal pans, and flexible silicone forms often require placement on a baking sheet for stability, which can affect heat distribution to the bottom. Choosing the right pan material starts with considering the type of bread you're baking and your willingness to maintain the pan. For standard sandwich loaves, a well-maintained non-stick or a properly greased aluminum pan works well.
For rustic loaves requiring high heat and good crust development, a seasoned cast iron pan or a Dutch oven (which creates steam) is often preferred, but requires careful preparation to prevent adhesion. Understanding these material differences is key to figuring out how to stop bread sticking based on your equipment.
Dough Hydration Levels: A Key Factor in Sticking
The amount of water relative to flour in your dough, known as hydration, is a major contributor to stickiness. Doughs with higher hydration percentages (typically 70% water or more relative to the flour weight) are inherently wetter, softer, and much stickier than lower hydration doughs (around 60-65% water).
While high hydration often results in a more open crumb structure and a lighter loaf, it also increases the challenge of handling the dough and preventing it from sticking to proofing baskets, work surfaces, and baking pans/stones. For example, a ciabatta dough might have an 80% hydration, making it very slack and sticky compared to a bagel dough at 55-60% hydration, which is much stiffer and easier to handle without significant sticking.
When a high-hydration dough hits a hot baking surface, the increased moisture can create more points of contact and a stronger bond with the pan or stone before the crust has a chance to set. This is why techniques like using parchment paper or dusting with specific flours (like rice flour or semolina) are particularly recommended for wet doughs. These methods create a physical barrier that the dough struggles to penetrate, ensuring a clean release.
Without accounting for the increased stickiness of high-hydration doughs, standard greasing might be insufficient, leading to the loaf sticking firmly to the pan or stone. Recognizing dough hydration as a key factor is vital for anyone learning how to stop bread sticking with various recipes.
Baking Stone Issues: Heat and Surface Texture
Baking stones and steels are fantastic for creating crisp crusts on artisan loaves and pizzas, but they can also be sources of sticking if not used correctly. The primary issues are insufficient preheating and the natural texture of the stone or steel surface. A baking stone needs to be thoroughly preheated at a high temperature (often 450°F to 500°F or even higher) for a significant amount of time, typically 30-60 minutes, to ensure it reaches thermal equilibrium.
When dough is placed on a properly preheated stone, the bottom crust begins to set almost instantly, minimizing the window for sticking. However, if the stone is not hot enough, the dough sits on a relatively cooler surface for too long, allowing moisture to create a sticky bond with the stone's porous surface before the crust can firm up.
The surface texture of the stone or steel also plays a role. While smooth, they still offer more points of contact than, say, a greased metal pan. Dusting the stone or the peel used to transfer the dough with a fine layer of cornmeal or semolina acts as tiny ball bearings, helping the dough slide off easily and preventing it from sticking directly to the hot surface.
This is especially important for freeform loaves baked directly on the stone. Without proper preheating and the use of a release agent like cornmeal, even a perfectly proofed loaf can adhere to the stone, making it difficult to remove and potentially damaging the crust, highlighting specific challenges when learning how to stop bread sticking on different surfaces.
How to Stop Bread Sticking: Proven Methods and Techniques
Method 1: Thoroughly Greasing Your Pan - The Foundation of Non-Stick
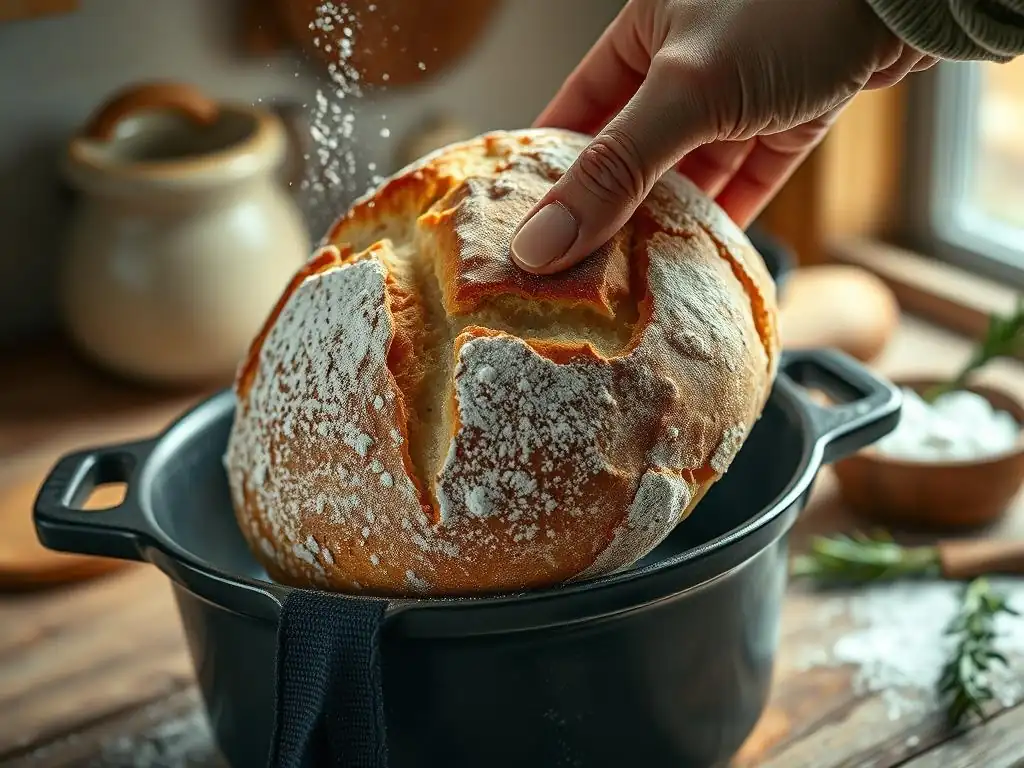
Greasing a bread pan is the most fundamental step in preventing sticking for many types of loaves, especially those baked directly in a tin, like sandwich breads or enriched doughs. The goal is to create a complete barrier of fat between the dough and the pan surface. This method is effective because the fat prevents the dough's starches and sugars from bonding directly with the metal or ceramic under heat. It's a simple yet critical technique that, when done correctly, dramatically improves the chances of a clean release.
Achieving thorough coverage means paying attention to every part of the pan. Use a pastry brush, a piece of paper towel, or even your fingers to spread the chosen fat evenly over the bottom, up the sides, and into all four corners. Don't forget the lip of the pan if the dough is expected to rise above it.
For a standard 9x5 inch loaf pan, a generous tablespoon of melted butter or oil, or about a teaspoon of solid shortening, is usually sufficient, provided it's spread completely. Ensuring there are no dry patches is paramount; even a small missed spot can become a sticking point.
Choosing the Right Grease: Butter, Oil, and Shortening
The type of fat you choose for greasing can depend on the bread recipe and your preference, but all work by creating a non-stick layer. Butter provides a wonderful flavor and helps promote bnice browning on the crust, though it contains water which can sometimes slightly reduce its non-stick power compared to pure fat. Unsalted butter is often preferred to avoid adding extra salt.
Vegetable oils like canola, sunflower, or grapeseed oil are neutral in flavor and have high smoke points, making them excellent general-purpose options. Olive oil can be used, but its distinct flavor might not be suitable for all breads, and it has a lower smoke point.
Solid vegetable shortening is often considered one of the most effective greasing agents because it's 100% fat and remains solid at room temperature, making it easy to apply a thick, even layer that melts into a continuous barrier during baking. Some bakers even use baking sprays which combine oil and flour, offering a convenient way to apply a thin, even coating, though some sprays can leave a sticky residue over time. For most standard loaves, any of these options applied thoroughly will significantly help how to stop bread sticking to the pan.
Applying the Grease: Ensuring Full Coverage
Proper application is just as important as choosing the right grease. The pan should ideally be at room temperature or slightly warm, which helps solid fats spread more easily. If using melted butter or oil, pour a small amount into the pan and use a pastry brush or a crumpled piece of paper towel to spread it evenly across the entire interior surface. Pay particular attention to the corners and the seam where the bottom meets the sides, as these are common areas for sticking.
For solid shortening, scoop out a small amount with your fingers or a piece of paper towel and rub it firmly into the pan, ensuring a visible layer covers all surfaces. You don't need a thick, pooling layer – just a complete and even coating. Holding the pan up to the light can help you spot any missed areas.
For pans with intricate designs, like Bundt pans, using a brush is essential to get the grease into all the nooks and crannies. After greasing, some bakers like to dust the pan with a light layer of flour (see Method 3) for extra insurance, especially with sticky or sugary doughs. This double-layer approach is a reliable way to ensure your efforts to how to stop bread sticking are successful.
Method 2: Using Parchment Paper - A Baker's Best Friend
Parchment paper is an invaluable tool for preventing bread from sticking, offering a reliable physical barrier between the dough and the baking surface. It's particularly useful for sticky doughs, delicate loaves, or when you want absolute certainty of a clean release without relying solely on greasing or pan seasoning. Parchment paper can be used in loaf pans, on baking sheets, or even placed on a hot baking stone, providing a non-stick surface regardless of the bakeware material or condition.
Using parchment paper also simplifies cleanup, as the baked bread lifts cleanly off the paper, leaving minimal residue in the pan or on the stone. It's a versatile solution that works with almost any type of bread, from dense rye loaves to airy focaccia. While it adds a small cost compared to just greasing, the peace of mind and ease of release it provides make it a worthwhile investment for many bakers. It's a go-to technique for anyone asking how to stop bread sticking reliably.
Cutting and Fitting Parchment Paper to Your Pan
To use parchment paper effectively in a loaf pan, you can simply cut a strip long enough to cover the bottom and extend up the two long sides, creating 'handles' that help you lift the baked loaf out. For a standard 9x5 inch pan, a strip about 13-15 inches long and 9 inches wide usually works well. You can also cut a piece to fit just the bottom of the pan. For round pans or freeform loaves on a baking sheet, simply place a sheet of parchment paper directly on the surface.
If you're using parchment in a round pan where you need it to conform to the shape, you can cut a circle for the bottom and strips for the sides, or a common technique is to crumple a larger piece of parchment into a ball, then uncrumple it. This makes the paper more pliable and easier to fit smoothly into the curves of the pan. A light layer of grease in the pan before placing the parchment can help the paper stay in place while you add the dough.
Using Parchment Paper with Baking Stones
Using parchment paper with a baking stone or steel is an excellent way to prevent sticky doughs from adhering to the hot surface. You shape your dough on a piece of parchment paper cut to size, then use a pizza peel or a flat baking sheet as a temporary carrier to slide the dough on the parchment onto the preheated stone. This method is particularly useful for high-hydration doughs that are difficult to transfer directly from a proofing basket or peel without deforming or sticking.
The parchment paper provides a perfect non-stick surface from the moment the dough touches the hot stone. While the paper might slightly affect the bottom crust's color or crispness compared to direct stone contact, the difference is often minimal, especially for home ovens, and the guarantee of a non-stick release is a significant benefit. Most parchment paper is rated for oven temperatures well above typical bread baking temperatures (often up to 425°F or 450°F), making it safe for use on a hot stone.
Method 3: Flour Power - Dusting Your Pan for Extra Protection
Dusting a greased pan with flour provides a second layer of non-stick protection, particularly beneficial for doughs containing sugar or those known to be sticky. The flour particles embed themselves in the grease, creating a slightly textured surface that makes it harder for the dough to form a strong bond with the pan. This method is commonly used for cakes and quick breads, but it's also effective for enriched or sweet bread doughs baked in pans.
To dust a greased pan, add a tablespoon or two of flour to the pan after you've applied the grease. Tilt and rotate the pan, tapping the sides and bottom, to coat the entire greased surface with a thin, even layer of flour. Once coated, invert the pan and tap out any excess flour; you want a thin film, not clumps. This simple step adds an extra layer of confidence when you're trying to how to stop bread sticking.
Best Flours for Dusting: Rice Flour, Semolina, All-Purpose Flour
While all-purpose wheat flour is the most common choice for dusting pans, other flours can offer advantages, especially for baking stones or proofing baskets. All-purpose flour works well for greased pans, providing a standard non-stick layer. However, it can sometimes burn slightly on the bottom of the bread if excess is left in the pan or on a hot stone, potentially giving a slightly bitter flavor or dark spots.
Rice flour is an excellent alternative, particularly for dusting proofing baskets or peels for baking stones, because it is less likely to absorb moisture from the dough and tends not to burn at high temperatures as readily as wheat flour. Its fine texture creates a smooth, non-stick surface. Semolina flour, with its slightly coarser, gritty texture, is also popular for dusting peels and baking stones.
The small, hard semolina particles act like tiny ball bearings, helping the dough slide effortlessly onto the hot surface. Using the right type of flour for dusting is a nuanced technique for achieving a clean, non-stick bake.
When to Use Flour Instead of Grease
Flour dusting is primarily used in addition to greasing for baking pans to provide extra insurance, especially with sweet or sticky doughs. However, flour (or cornmeal/semolina) is often used instead of grease when baking freeform loaves directly on a baking stone or when proofing dough in a banneton (proofing basket).
For baking stones, dusting the peel or stone with cornmeal or semolina allows the shaped dough to slide easily from the peel onto the hot surface without sticking. For bannetons, dusting generously with rice flour or all-purpose flour prevents the wet dough from sticking to the basket as it proofs, ensuring it releases cleanly when inverted onto a baking surface. In these contexts, grease would not be appropriate or effective, making flour the primary non-stick agent.
Method 4: Seasoning Your Baking Pan - Creating a Natural Non-Stick Surface
Seasoning is a process applied specifically to cast iron bakeware, including bread pans. It involves baking thin layers of oil onto the surface of the pan at high temperatures, creating a polymerized layer of fat that bonds to the iron. This layer protects the pan from rust and, over time, builds up into a smooth, natural non-stick surface. A well-seasoned cast iron bread pan can provide excellent heat distribution and a beautiful crust with minimal sticking, often requiring only a light re-greasing before each use.
Unlike non-stick coatings which can wear out, a seasoned surface improves with use, provided it is properly maintained. Seasoning is essential for getting the best performance from cast iron and is a key part of how to stop bread sticking when using this durable material. It requires an initial investment of time and effort but pays off with a pan that can last for generations.
How to Season Cast Iron Bread Pans
Seasoning a new or stripped cast iron bread pan involves several steps to build up the protective layer. First, wash the pan with hot, soapy water and a stiff brush, then dry it immediately and thoroughly to prevent rust. Next, apply a very thin, even layer of a high smoke point cooking oil (like flaxseed oil, grapeseed oil, or vegetable oil) to the entire pan surface, inside and out. Wipe off any excess oil with a paper towel; you want a microscopic film, not a visible layer.
Place the pan upside down in a preheated oven (usually 400°F to 500°F, depending on the oil used) with a baking sheet or aluminum foil on the rack below to catch any drips. Bake for about an hour, then turn off the oven and let the pan cool completely inside. This process polymerizes the oil onto the iron. For a robust seasoning, repeat this oiling and baking cycle several times (3-5 cycles are recommended) to build a durable, non-stick layer.
Maintaining a Seasoned Pan
Maintaining a seasoned cast iron bread pan is crucial for preserving its non-stick properties. After baking, clean the pan while it's still warm (but cool enough to handle) using hot water and a stiff brush or scraper. Avoid using soap unless absolutely necessary, as it can strip the seasoning. If you do use a little soap, follow up with a light re-seasoning. Dry the pan completely on the stovetop over low heat or in a warm oven to prevent rust.
Once dry, apply a very thin coat of oil (just a few drops rubbed in with a paper towel) to the interior surface before storing. This replenishes the seasoning slightly and protects against rust. Regular use of the pan, especially for baking with fats, also contributes to building and maintaining the seasoned layer. Proper care ensures your cast iron pan remains naturally non-stick, making it easier to how to stop bread sticking with every bake.
Method 5: Choosing the Right Pan Material - Long-Term Non-Stick Solutions
Selecting the appropriate pan material can be a long-term strategy for minimizing sticking issues. Different materials have inherent non-stick qualities or properties that make them easier to manage. While technique is always important, starting with bakeware suited to your baking style and the types of bread you make can make a significant difference in preventing sticking and achieving desired crust characteristics.
Investing in quality bakeware made from materials known for their non-stick properties or ease of seasoning can save you frustration in the long run. Considering the pros and cons of different materials helps you choose the best tools for your baking needs and supports your efforts to how to stop bread sticking effectively.
Non-Stick Coating Pans: Pros and Cons
Non-stick coated pans are popular for their ease of use and promise of a clean release with minimal greasing. The coating, typically a PTFE (Teflon) or ceramic-based material, provides a very smooth surface that dough struggles to adhere to. They are generally affordable and require less effort in terms of preparation compared to standard metal pans or cast iron.
However, non-stick coatings have a limited lifespan. They can be scratched by metal utensils, abrasive cleaners, or even stacking pans without protection. Once scratched, the non-stick properties are compromised, and the pan can become more prone to sticking than other types. The coatings can also degrade over time, especially if exposed to very high temperatures (often above 450°F), which can happen during bread baking. A typical non-stick pan might last anywhere from 5 to 10 years with regular use and proper care before the coating begins to lose effectiveness.
Cast Iron Pans: The Durable Option
Cast iron bread pans are renowned for their durability, excellent heat retention, and ability to produce beautiful, evenly browned crusts. With proper seasoning and maintenance, they develop a natural non-stick surface that improves over time. Cast iron can withstand very high temperatures, making it suitable for a wide range of bread baking, including recipes that start at high heat.
The main drawbacks are their weight and the requirement for regular seasoning and specific cleaning methods (avoiding soap) to prevent rust and maintain the non-stick layer. They also take longer to heat up than thinner metal pans. However, a well-cared-for cast iron pan is a lifelong tool for how to stop bread sticking while achieving superior baking results.
Silicone Bakeware: A Flexible Alternative
Silicone bakeware, including bread forms, offers excellent non-stick properties without the need for greasing or seasoning. Dough releases very easily from flexible silicone. It's lightweight, easy to clean, and can withstand a wide range of temperatures, from freezing to baking (typically up to 450°F or 500°F).
The main disadvantage of silicone bread forms is their flexibility, which means they usually need to be placed on a rigid baking sheet for support during baking. This can sometimes result in less direct heat transfer to the bottom of the loaf compared to metal pans, potentially leading to a paler bottom crust. While very non-stick, silicone might not always deliver the same crust development as metal or cast iron, but it's a great option for easy release, especially for how to stop bread sticking with delicate or sticky doughs.
Troubleshooting Specific Bread Types and Sticking Issues
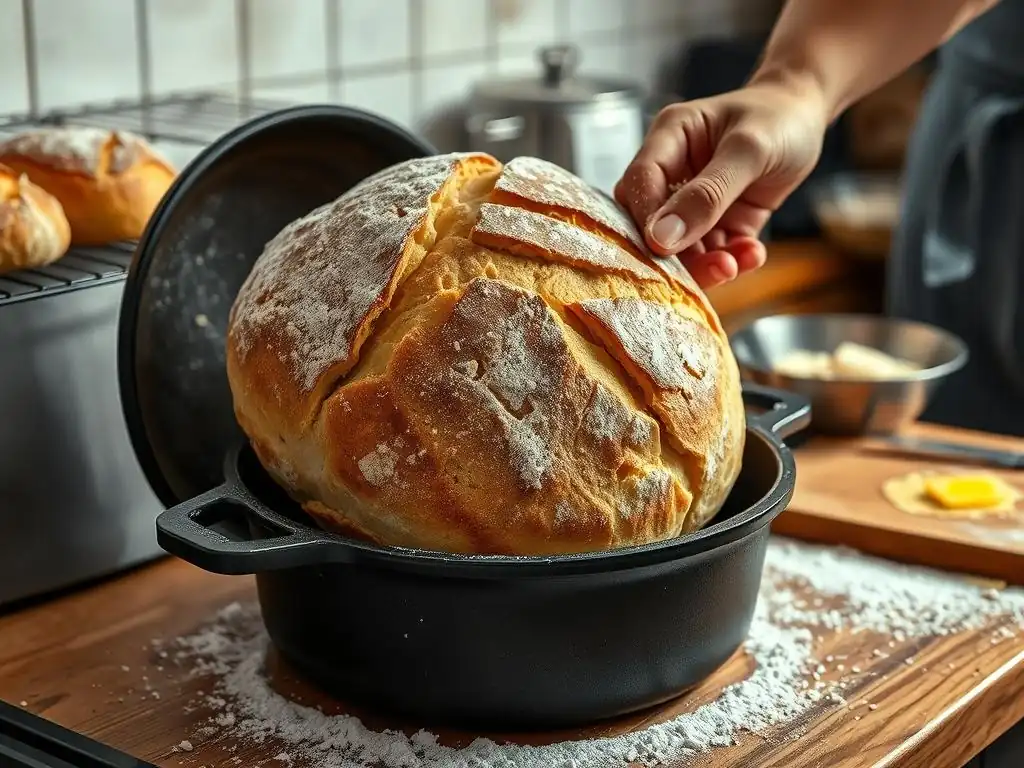
Different types of bread dough present unique sticking challenges due to their composition and hydration levels. Addressing these specific issues requires tailoring your non-stick techniques to the dough characteristics. Understanding these nuances is key to mastering how to stop bread sticking across your entire repertoire.
High-Hydration Doughs: Extra Precautions Needed
High-hydration doughs, such as those used for ciabatta, focaccia, or many no-knead recipes (often 75% water or more), are notoriously sticky. Their wet nature means they have a greater tendency to cling to surfaces. Standard greasing alone is often insufficient for these doughs, especially when baked on a stone or transferred from a proofing basket. For example, an 80% hydration dough will feel significantly stickier and more difficult to handle than a 65% hydration dough.
When working with high-hydration doughs, relying on physical barriers is crucial. Proofing in a heavily floured banneton (using rice flour works wonders) and then transferring the dough onto a piece of parchment paper before sliding it onto a hot baking stone is a highly effective method. If baking in a pan, lining the pan completely with parchment paper is the most reliable way to prevent the dough from sticking. Using wet hands or a bench scraper during handling can also help manage the stickiness without adding excessive flour to the dough itself.
Sweet Doughs: Dealing with Sugar Caramelization
Sweet bread doughs, like brioche, cinnamon rolls, or challah, contain higher amounts of sugar and often fat. While the fat helps with tenderness and some non-stick quality, the sugar can caramelize at baking temperatures, creating a sticky, almost glue-like residue that bonds firmly to the pan. This caramelization is a common cause of sticking, even in otherwise well-greased pans. For instance, a brioche dough might contain 10-15% sugar and 20%+ fat relative to the flour weight, making it particularly prone to sticking due to the sugar content.
To prevent sweet doughs from sticking, more generous greasing is often required. Using solid shortening or a baking spray that contains flour can provide a more robust barrier against the sugary residue. Lining the pan with parchment paper is also an excellent preventive measure. For very sweet doughs, some bakers lightly dust the greased pan with a mixture of flour and sugar (e.g., a 1:1 ratio) to create a non-stick surface that also contributes to a pleasant crust.
Sticky Rye Bread: Mastering the Technique
Rye flour behaves differently than wheat flour due to its lower gluten content and higher proportion of pentosans, which are complex carbohydrates that become mucilaginous (gel-like) when wet. This gives rye dough a characteristic stickiness that can be challenging to handle, even at moderate hydration levels. A 100% rye dough at 75% hydration might feel much stickier than a 100% wheat dough at the same hydration. This stickiness extends to how it interacts with baking surfaces.
When baking rye bread, liberal use of flour (especially rye flour or rice flour) on your work surface, hands, and proofing basket is often necessary during shaping and proofing. For baking, using parchment paper in the pan or on the baking stone is highly recommended to ensure a clean release. If baking in a pan, a well-greased and floured pan is also an option, but the stickiness of rye dough often makes parchment paper the most reliable method for how to stop bread sticking with this particular type of bread.
Baking Stone Specific Tips: Preventing Sticking on the Stone
Baking stones and steels are fantastic for achieving a crispy bottom crust, but they require specific techniques to prevent dough from sticking to their hot surface. Unlike pans, you can't grease a stone or steel in the same way, so alternative methods are needed to create a non-stick barrier.
Proper Preheating: Essential for a Non-Stick Stone
The single most important factor in preventing bread from sticking to a baking stone or steel is proper and thorough preheating. The stone needs to be screaming hot so that when the dough hits the surface, the bottom crust sets immediately. This rapid crust formation prevents the dough's moisture from creating a sticky bond with the stone. For most artisan breads, the oven and stone should be preheated to a high temperature, typically 450°F (230°C) or even 500°F (260°C), for at least 30 minutes, and preferably 45-60 minutes, after the oven reaches the set temperature.
Using an oven thermometer placed near the stone is helpful to ensure the oven is truly at the correct temperature. If the stone is not sufficiently hot, the dough will sit and steam on the surface, increasing the likelihood of sticking. A properly preheated stone ensures that the bottom of your loaf develops a beautiful, non-stick crust instantly.
Using Cornmeal or Semolina: A Traditional Solution
Dusting your pizza peel or the baking stone itself with a fine layer of cornmeal or semolina is a traditional and effective method for preventing freeform loaves from sticking to a hot stone. These coarse grains act like tiny ball bearings, allowing the shaped dough to slide smoothly off the peel and onto the stone. Cornmeal provides a slightly coarser texture, while semolina is finer but equally effective.
To use this method, sprinkle a light, even layer of cornmeal or semolina over your pizza peel before placing the shaped dough on it. Ensure the bottom of the dough is in contact with the grains. When you're ready to bake, give the peel a little shake to ensure the dough moves freely, then confidently slide it onto the preheated stone.
Avoid using too much cornmeal or semolina, as excess can burn on the stone during baking, potentially creating smoke and a slightly bitter flavor. Just a thin coating is sufficient to help how to stop bread sticking to the hot surface.
Cleaning Your Baking Stone: Maintaining a Smooth Surface
Keeping your baking stone clean helps maintain a smooth surface, which is important for preventing sticking over time. While stones develop a natural patina and stains from use, excessive burnt-on flour or debris can create rough spots where dough is more likely to adhere. After baking, allow the stone to cool completely in the oven. Do not attempt to clean a hot stone with water, as this can cause it to crack.
Once cool, use a stiff brush or a bench scraper to scrape off any burnt-on food particles or flour residue. Avoid using soap, as the porous nature of the stone can absorb soap, which can then leach into your bread during future bakes. For stubborn spots, you can use a little hot water and a scraper, but ensure the stone is completely dry before its next use (leaving it in a cooling oven or baking something else can help). Regular scraping keeps the surface relatively smooth and less prone to sticking.
Advanced Techniques for Preventing Bread From Sticking
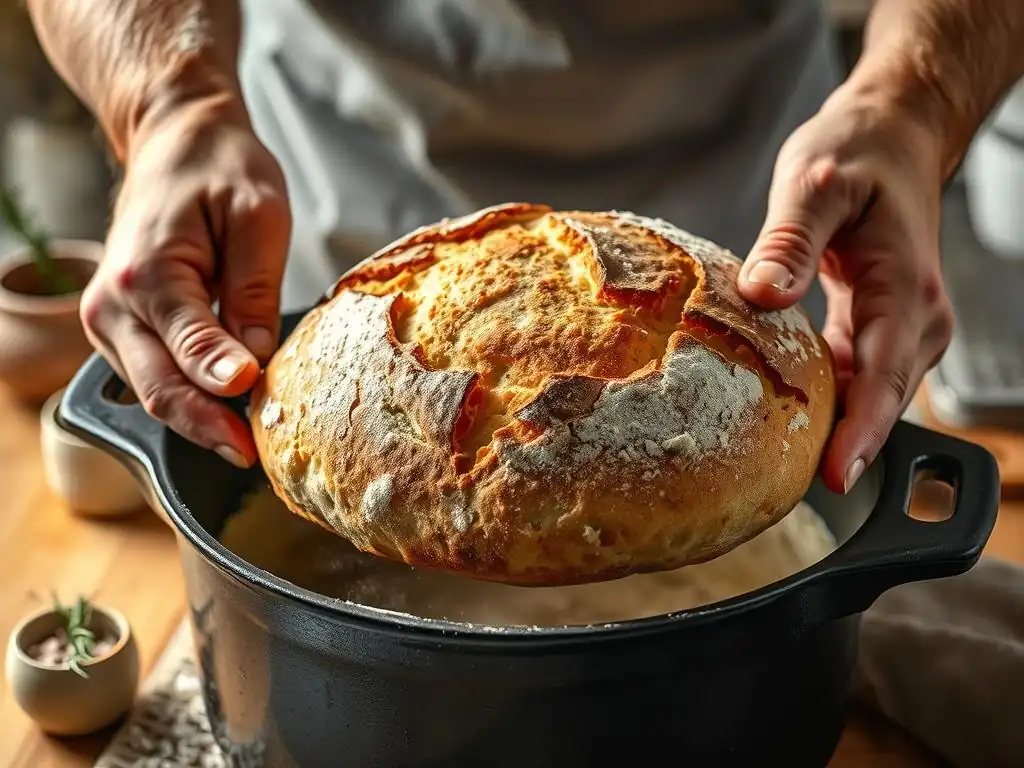
Beyond the fundamental methods, a couple of advanced techniques can provide additional layers of protection or offer reusable non-stick solutions for how to stop bread sticking.
Double Pan Method: Creating a Barrier Against Sticking
The double pan method involves placing your bread pan inside another slightly larger pan or placing a baking sheet on the oven rack directly below your bread pan. This technique creates an air gap between the bottom of the bread pan and the direct heat source from the oven element or baking stone below. While primarily used to prevent the bottom crust from burning, this air layer can also help moderate the heat reaching the base of the pan, potentially reducing sticking caused by excessive heat caramelizing sugars or bonding dough to the surface.
This method is less about creating a non-stick surface on the pan itself and more about controlling the temperature at the pan's base. It can be useful for very sensitive doughs or when using pans that tend to transfer heat aggressively to the bottom crust. It's not a substitute for greasing or lining but can be used in conjunction with those methods for added insurance, particularly in ovens with strong bottom heating elements.
Using a Baking Mat: Reusable Non-Stick Solution
Baking mats, typically made from silicone (like Silpat) or PTFE (similar to Teflon), offer a reusable, non-stick surface that can be placed on a baking sheet or even directly on an oven rack (check manufacturer's instructions). They provide an excellent non-stick barrier for freeform loaves, rolls, or shaped doughs that would otherwise be baked directly on a metal sheet or stone.
Simply place the baking mat on your desired baking surface, place the dough on the mat, and bake as usual. Dough releases effortlessly from these mats. They are durable, easy to clean (usually just wipe clean or rinse), and eliminate the need for disposable parchment paper or constant greasing of baking sheets. While they might slightly affect the crispness or browning of the bottom crust compared to baking directly on a hot stone, they are highly effective for preventing sticking and offer a convenient, eco-friendly option for how to stop bread sticking on flat surfaces.
Conclusion: Baking Success - Say Goodbye to Sticky Bread!
Dealing with bread that sticks to the pan or baking stone is a common frustration, but it doesn't have to be a recurring problem. By understanding the core reasons behind sticking – insufficient preparation, inappropriate bakeware, dough hydration, and surface temperature – you are well-equipped to implement effective preventive measures. From the foundational technique of thorough greasing to the reliable barrier of parchment paper, the protective dusting of flour, the long-term benefits of seasoning cast iron, and the strategic use of baking mats, you now have a comprehensive set of tools at your disposal.
Applying the right technique for the right situation – whether it's a sticky high-hydration dough needing parchment, a sweet dough requiring extra greasing, or a freeform loaf destined for a hot stone and a sprinkle of cornmeal – is key to consistent baking success. With practice and attention to detail, preventing bread from sticking will become second nature, allowing you to focus on the joy of baking and the delicious aroma of freshly baked bread. Say goodbye to damaged loaves and sticky messes, and hello to perfectly released, beautifully crusted bread every time.
Key Takeaways: Mastering Non-Stick Bread Baking
- Greasing is Fundamental: Always grease pans thoroughly, covering all surfaces, especially corners and seams. Use butter, oil, or shortening appropriate for the pan and dough.
- Parchment is Powerful: For sticky or delicate doughs, or for baking on stones, parchment paper provides a reliable physical non-stick barrier.
- Dusting Adds Protection: Flour, cornmeal, or semolina can be used to dust greased pans or baking surfaces/peels for extra non-stick insurance, particularly useful for rustic loaves or preventing sticking on stones.
- Bakeware Matters: Choose and maintain your pans and stones. Season cast iron, understand the limits of non-stick coatings, and leverage the properties of silicone.
- Know Your Dough: High hydration and sweet doughs require extra attention and specific techniques (like parchment) due to their inherent stickiness or sugar content.
- Preheat Your Stone: Ensure baking stones are thoroughly preheated to a high temperature to set the crust instantly and prevent sticking.
- Consider Advanced Aids: Baking mats offer a reusable non-stick surface, and the double pan method can help regulate bottom heat.
Mastering how to stop bread sticking is achievable with these methods. Practice them, observe how your dough and bakeware behave, and adjust your approach as needed. Happy baking!
Frequently Asked Questions
How can I prevent my bread from sticking to the baking pan?
The key is proper preparation! Always grease and flour your baking pan, or use parchment paper. A well-prepared pan will release the bread easily.
What type of grease works best for preventing bread from sticking?
Solid shortening, butter, or even cooking spray can work. Ensure you coat the entire surface of the pan, including corners, for best results. Some prefer butter for added flavor.
If I'm using a baking stone, how do I prevent the bread from sticking?
High heat can cause sticking. Use parchment paper between the dough and the stone, or lightly dust the stone with semolina flour or cornmeal before placing the dough.
Is there a difference between preventing sticking for sweet breads versus savory breads?
While the methods are similar, sweet breads, due to their higher sugar content, are more prone to sticking. Ensure thorough greasing and flouring, or use parchment paper as a precaution.
Can the type of pan I use affect whether the bread sticks?
Yes, absolutely! Non-stick pans are designed to prevent sticking. However, even with non-stick, it's still a good idea to grease lightly. Dark pans can also lead to sticking if not properly prepared.
Final Reflection: The Joy of a Perfectly Released Loaf
The seemingly simple act of preventing bread from sticking to the pan is, in reality, a gateway to a deeper understanding of baking and the satisfaction of a perfectly crafted loaf. A flawlessly released loaf isn't just about aesthetics; it's about the culmination of careful preparation, precise technique, and a deep respect for the ingredients. This article explored various methods, from preparing the pan to mastering the art of scoring, all contributing to that crucial moment of release.
The impact of a successfully baked loaf extends far beyond the kitchen table. It's a symbol of patience, precision, and the rewarding feeling of creating something beautiful from simple elements. The act of baking bread, and the struggle to prevent sticking, connects us to a long history of culinary tradition. Bread is the staff of life,
a simple phrase that speaks volumes about its importance throughout history and across cultures. The frustration of a stuck loaf mirrors the challenges we face in life, reminding us that even the simplest tasks require attention to detail and a willingness to learn.
Now, consider your own baking journey. What have you learned from this exploration of preventing bread from sticking? I encourage you to experiment with the techniques discussed, to find what works best for you and your oven. Don't be discouraged by a few stuck loaves; each attempt brings you closer to mastering the art, and the reward of that perfectly released, golden-brown crust is worth the effort. Embrace the process, savor the aroma, and enjoy the fruits of your labor – a loaf of bread that's as beautiful as it is delicious.
Unleash Your Inner Baker: Perfect Bread, Every Time!
Thanks for taking the time to learn about preventing bread from sticking! You've just unlocked a crucial key to baking success. Now it's time to put your new knowledge into action.
- Master the Art of Prepping: Try our recommended flour-and-water mixture for optimal pan release – your loaves will thank you! This is the single most effective change you can make.
- Share Your Baking Triumphs: Post a picture of your perfectly-released bread on social media and tag #BakeWithEase – let's inspire each other!
- Explore Further: Dive deeper into our baking tips and tricks section for even more advice on achieving bakery-quality results.
Ready to bake your best loaf yet? What's your favorite tip for preventing bread from sticking?