
Room Temperature Butter: Mastering Softening Techniques for Perfect Creaming

Welcome to BakeWithEase, your companion in the wonderful world of baking! Ever wondered if you're really getting the most out of your ingredients? Our latest guide dives deep into a seemingly simple, yet crucial technique: softening butter. Discover the secrets to achieving that perfectly creamy texture, and unlock the potential for truly exceptional baked goods. Is your butter actually room temperature? Find out now and elevate your baking game!
- BakeWithEase' Guide to Softening Butter for Baking Success
- Understanding Room Temperature Butter and Its Importance in Baking
- Techniques for Softening Butter to Room Temperature
- Troubleshooting Common Butter Softening Mistakes
- Room Temperature Butter: Best Practices for Different Baking Recipes
- Storing Softened Butter: Maintaining Optimal Consistency
- Beyond the Basics: Advanced Butter Softening Tips and Tricks
- Room Temperature Butter Alternatives: When Substitutes are Necessary
- Conclusion: Mastering the Art of Softening Butter for Baking Excellence
-
Frequently Asked Questions
- How does using room temperature butter affect baking?
- What is considered "room temperature" for butter in baking?
- What are some quick methods for softening butter if I forget to take it out in advance?
- Why is it important to avoid melting the butter when trying to soften it?
- What are the signs that butter is too soft for creaming?
- Final Reflection: The Unexpected Joy of Perfectly Softened Butter
- Unlock Perfectly Creamy Butter: Your Baking Journey Starts Now!
BakeWithEase' Guide to Softening Butter for Baking Success
Achieving the perfect texture in baked goods often hinges on a seemingly simple step: using butter at the correct temperature. While recipes frequently call for "room temperature butter," understanding why and how to get there is crucial for success. Butter that is too cold won't cream properly, leading to dense cakes or cookies. Conversely, melted butter can ruin the structure and texture of your dough or batter. This guide from BakeWithEase delves into the nuances of softening butter room temperature baking, providing you with the knowledge and techniques to consistently achieve ideal results.
Mastering the art of softening butter room temperature baking is a fundamental skill for any baker, from beginner to expert. It impacts everything from the height of your cakes to the chewiness of your cookies and the smoothness of your frostings. By understanding the science behind butter temperature and learning reliable methods for softening, you'll elevate your baking game significantly. We'll explore various techniques, common pitfalls to avoid, and how the optimal butter consistency varies depending on the specific recipe you're tackling.
Understanding Room Temperature Butter and Its Importance in Baking
Why Room Temperature Butter Matters for Baking Recipes
Using butter at room temperature, typically around 65-70°F (18-21°C), is vital because it allows the butter to properly emulsify with sugar and other ingredients during the creaming process. When butter is cold and hard, it won't blend effectively with sugar crystals. As you beat softened butter with sugar, the sugar crystals cut into the butter, creating tiny air pockets. This aeration is critical; these trapped air bubbles expand in the oven, contributing to the leavening and resulting in a lighter, fluffier texture in cakes, cookies, and other baked goods.
Consider a standard butter cake recipe that requires creaming butter and sugar. If you use cold butter, the mixture will remain dense and clumpy, trapping minimal air. When baked, the cake will likely be heavy and flat. In contrast, properly softened butter creams into a light, fluffy, pale yellow mixture that can increase significantly in volume – sometimes doubling or tripling depending on the beating time. This visual change is a direct indicator of successful aeration, which directly impacts the final crumb structure and rise of your baked item.
The Science Behind Softening Butter: Emulsification and Aeration
Butter is an emulsion primarily composed of fat, water, and milk solids. At cold temperatures, the fat is solid, and the components are tightly bound. As butter warms to room temperature, the fat softens, becoming pliable but not liquid. This state is perfect for creaming with sugar. The sugar crystals act like tiny knives, cutting through the softened fat matrix and helping to distribute the water and milk solids evenly. This creates a stable emulsion where fat surrounds minute pockets of air and sugar.
During the baking process, the water in the butter turns to steam, further expanding the air pockets created during creaming. The fat melts, coating the flour particles and inhibiting gluten development, which contributes to tenderness. The milk solids contribute to browning and flavor. If butter is melted, the emulsion breaks, and the water separates from the fat. When melted butter is used, it coats the dry ingredients too heavily, leading to a dense, greasy texture and significantly less rise because the crucial aeration step during creaming was bypassed.
Achieving the Ideal Butter Consistency for Creaming
The ideal consistency for room temperature butter used in creaming is often described as "softened but not greasy" or "presses easily with a finger but holds its shape." If you gently press a finger into the stick of butter, it should leave an indentation without your finger sinking all the way through or butter smearing excessively. It should feel cool to the touch, not warm or oily. This texture indicates that the fat crystals have softened sufficiently to incorporate air and sugar effectively.
Butter that is too cold will resist creaming, leaving lumps of butter in your mixture even after prolonged beating. This uneven distribution of fat will lead to inconsistent texture in the final product. Butter that is too warm or partially melted will look greasy and won't hold the air pockets created during creaming. The sugar may dissolve prematurely, and the resulting baked good will be dense and potentially tough. Aiming for that perfect pliable, yet still solid, state is key for successful softening butter room temperature baking.
Techniques for Softening Butter to Room Temperature
The Patient Approach: Naturally Softening Butter at Room Temperature
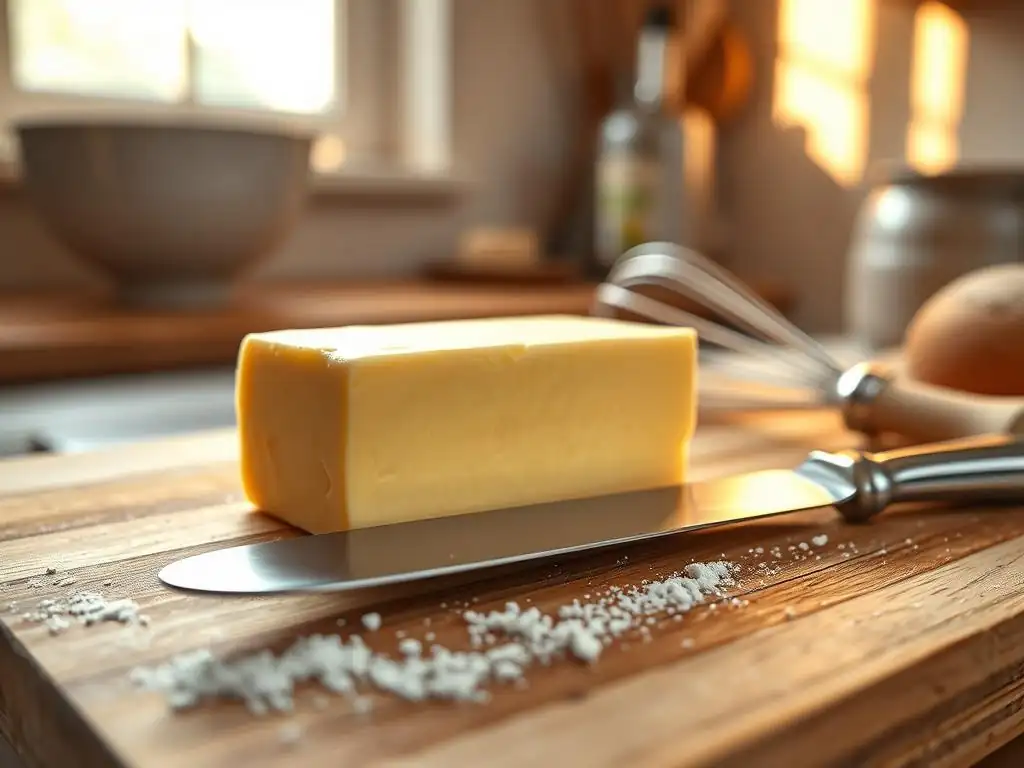
The simplest and often best method for softening butter room temperature baking is simply to leave it out at room temperature. Place the wrapped sticks of butter on the counter away from direct sunlight or heat sources. The time required will vary depending on your room temperature. In a typical kitchen around 70°F (21°C), a standard 4-ounce (113g) stick of butter can take anywhere from 30 minutes to 1 hour to reach the ideal consistency. Larger quantities or colder environments will take longer.
To speed up this natural process slightly without resorting to quick methods, you can cut the butter into smaller pieces, perhaps ½-inch cubes (about 1.3 cm). Spreading these cubes out on a plate or piece of parchment paper exposes more surface area to the air, allowing it to warm more evenly and quickly. Even with this technique, it's essential to monitor the butter's consistency to ensure it doesn't become too soft, especially if your kitchen is on the warmer side. Aim for that "presses easily but holds shape" feel.
Speeding Things Up: Quick Methods for Softening Butter
Sometimes, you need softened butter now. While not always ideal, several techniques can accelerate the process, but they require careful attention to avoid melting the butter. These methods are useful when you forget to take the butter out in advance and need to get started on your recipe.
Softening Butter in the Microwave: A Careful Approach
Using the microwave is a common quick method, but it's also the riskiest because butter can go from cold to melted very quickly and unevenly. To attempt this, cut the stick of butter into 1-inch cubes (about 2.5 cm) and place them on a microwave-safe plate. Microwave on the lowest power setting (often 10% or 20% power) for very short intervals, typically 5-10 seconds at a time. After each interval, check the butter by pressing it. Flip the pieces over if necessary to promote even warming.
Stop microwaving as soon as the butter yields to gentle pressure and feels soft but still holds its shape, even if some parts still feel slightly firm. The residual heat will continue to soften it slightly. It's crucial not to wait until the butter looks visibly soft or shiny, as this often means it's already starting to melt. This method requires vigilance and patience with the low power settings to avoid disaster.
Using a Grater for Evenly Softened Butter
Grating cold butter is an effective way to achieve a consistency similar to softened butter very quickly. Use the large holes of a box grater to grate a cold stick of butter onto a plate or into your mixing bowl. The friction from grating and the increased surface area exposed to the air will bring the butter up to temperature rapidly.
Once grated, the butter pieces will be thin and pliable, resembling the texture of softened butter. You can then proceed with your recipe, such as creaming it with sugar. This method works particularly well for recipes where the butter is incorporated into dry ingredients, like some biscuit or scone recipes, but it also works for creaming, though the texture will be slightly different than naturally softened butter. It's a reliable alternative when you're short on time and need softened butter for baking.
The Bag and Rolling Pin Technique for Softening Butter
This method involves placing cold butter in a zip-top bag and flattening it with a rolling pin. Cut the stick of butter lengthwise into four pieces. Place these pieces inside a sturdy plastic bag, arranged side-by-side without overlapping too much. Seal the bag, pressing out excess air. Use a rolling pin to gently pound and then roll the butter until it forms a thin, even sheet, about ¼-inch thick (approx. 6 mm).
The physical manipulation and increased surface area will quickly warm the butter to a softened state. Once flattened, you can break the sheet into pieces. While this doesn't yield the exact same texture as naturally softened butter, it makes it pliable and ready for creaming much faster than waiting. It's a good hands-on method that gives you control over the process.
Softening Butter in the Oven: Warm Oven Method
This technique utilizes the residual heat of a slightly warm oven. Turn your oven on to its lowest setting (usually around 150-200°F or 65-95°C) for just a minute or two, then turn it off. Place the stick(s) of butter (still wrapped or unwrapped on a plate) inside the turned-off oven. Close the door and let the butter sit in the gentle warmth for 5-10 minutes.
Check the butter frequently by pressing it. The goal is to let the ambient warmth of the oven penetrate the butter slowly and evenly. Be very careful not to leave it in too long or in an oven that is still on, even at a low setting, as this will quickly lead to melted butter. This method provides a more controlled environment than the microwave but still requires monitoring to ensure the butter reaches the desired softened state without melting.
Troubleshooting Common Butter Softening Mistakes
Avoiding Melted Butter: Recognizing the Signs of Over-Softening
Over-softened or melted butter is one of the most common pitfalls in softening butter room temperature baking. Signs that your butter is too soft include a greasy or shiny appearance, oil separating from the solids, or if your finger sinks completely through the stick with no resistance. Melted butter is liquid or semi-liquid and cannot be used for creaming as it won't incorporate air.
The difference between softened and melted is crucial. Softened butter is pliable; melted butter is liquid. Using melted butter in a recipe that calls for softened butter will result in a dense, often greasy, and flat baked good because the critical aeration step during creaming cannot occur. Always err on the side of slightly under-softened rather than over-softened, as you can always beat it longer to warm it up slightly in the mixer.
What to Do If You've Melted Your Butter
If you accidentally melt your butter, don't panic, but be aware that you may need to adjust your recipe or wait. The best course of action is to try to salvage it by chilling it down until it reaches the correct softened consistency again. Place the bowl of melted butter in the refrigerator, stirring it every 5-10 minutes.
Keep a close eye on it and test the consistency frequently by pressing a spoon or your finger into it. You want it to firm up just enough to reach that pliable, soft-but-holds-its-shape stage. This chilling process can take 20-40 minutes depending on the amount of butter and how melted it was. Avoid putting it in the freezer, as it might solidify too quickly and unevenly. This recovery method is effective but requires patience.
Ensuring Even Softening: Tips for Consistent Results
Unevenly softened butter can lead to pockets of hard butter in your batter, resulting in an inconsistent texture in your final product. To ensure even softening when leaving butter out naturally, cut it into smaller, uniform pieces. For quick methods like the microwave, cut into cubes and rotate/stir frequently. When using the warm oven method, ensure the butter isn't touching a hot spot or the oven rack directly.
Another tip for even softening, especially when using the natural method, is to place the butter near, but not directly on, a warm surface like the back of a stove that's been used, or on top of a running dishwasher. The ambient warmth will help bring it to temperature more uniformly. Remember, consistency is key in baking, and consistent butter temperature is a major factor in achieving reliable results with softening butter room temperature baking.
Room Temperature Butter: Best Practices for Different Baking Recipes
Softening Butter for Cakes: Achieving a Light and Fluffy Texture
For most cakes, especially those using the creaming method, achieving perfectly softened butter is paramount for a light and airy crumb. The goal is maximum aeration during the creaming of butter and sugar. This requires butter that is soft enough to easily incorporate sugar crystals and trap air bubbles, ideally between 65-70°F (18-21°C).
If the butter is too cold, it won't cream properly, leading to a dense cake. If it's too warm, the air bubbles won't be stable, and the cake might collapse slightly or have a greasy texture. For a typical 9x13 inch cake recipe using 1 cup (2 sticks or 227g) of butter, allowing the butter to sit out for 1-2 hours is often sufficient in a standard kitchen environment. Cutting the sticks in half or quarters can help speed this up slightly.
The ideal butter temperature for cookies can vary depending on the desired outcome. For chewy cookies that spread a bit, slightly warmer softened butter (around 70-72°F or 21-22°C) can be beneficial, as it promotes more spread during baking. For cookies that need to hold their shape more, like shortbread or certain cut-out cookies, butter that is just barely softened (closer to 65°F or 18°C) is often preferred.
The creaming process for cookies still requires softened butter to incorporate sugar and air, contributing to texture and tenderness. However, over-softened butter can lead to excessive spread and flat, greasy cookies. Many cookie recipes benefit from chilling the dough after mixing, which re-solidifies the butter slightly, helping the cookies maintain structure during baking. This chilling step is less common but sometimes used in cake batters.
Softening Butter for Frosting: Creating a Smooth and Creamy Finish
For buttercream frostings, perfectly softened butter is essential for achieving a smooth, spreadable, and lump-free consistency. The butter needs to be soft enough to whip up light and fluffy, incorporating air and blending seamlessly with powdered sugar and liquid ingredients. The ideal temperature is similar to cake butter, around 68-70°F (20-21°C).
If the butter is too cold, the frosting will be lumpy and difficult to whip smooth. If it's too warm or melted, the frosting will be greasy, potentially separating, and won't hold its shape for piping. For a standard buttercream using 1 cup (2 sticks or 227g) of butter, allowing it to sit out for 45-75 minutes is usually sufficient. Whipping the softened butter alone for a few minutes before adding other ingredients can help ensure it's uniformly soft and airy.
Storing Softened Butter: Maintaining Optimal Consistency
How Long Does Softened Butter Last?
Once butter has been softened to room temperature, its shelf life at that temperature is relatively short compared to refrigerated butter. While some sources say butter can be kept at room temperature for a day or two in a covered dish away from light, for optimal quality and safety, especially when using it for baking, it's best to use softened butter within a few hours of it reaching the desired consistency. Butter left out for extended periods can develop off-flavors or become rancid due to oxidation and exposure to light and air.
For baking purposes, it's ideal to soften only the amount of butter you need for your recipe and use it shortly after it reaches the target temperature. If you soften too much, it's better to re-refrigerate it and re-soften it later rather than leaving it out for too long. Properly wrapped, refrigerated butter can last for several months, while unwrapped or poorly stored butter can pick up odors and flavors from the refrigerator.
Proper Storage Techniques for Softened Butter
If you need to store butter that has been softened but not yet used, the best approach is to return it to the refrigerator. Wrap it tightly in its original paper or plastic wrap, or place it in an airtight container to protect it from absorbing odors and prevent oxidation. While it won't be instantly ready for baking again, refrigerating it preserves its quality.
When you're ready to bake, you'll need to go through the softening process again. Avoid repeatedly softening and chilling the same stick of butter, as this can slightly alter its texture and properties over time. For longer-term storage of butter you plan to use for baking, keeping it refrigerated and then softening it as needed is the most reliable method for maintaining its quality and ensuring successful softening butter room temperature baking.
Beyond the Basics: Advanced Butter Softening Tips and Tricks
Using a Food Processor to Soften Butter Quickly
A food processor can be a surprisingly effective tool for quickly softening butter, especially when you're working with larger quantities. Cut cold butter into 1-inch cubes (about 2.5 cm) and place them in the bowl of a food processor fitted with the steel blade. Pulse the butter for short bursts, about 5-10 seconds at a time.
Scrape down the sides of the bowl after each few pulses to ensure all the butter is evenly processed. The friction from the blades and the movement of the butter will warm it up rapidly. Stop pulsing as soon as the butter is no longer in distinct cubes and has a soft, paste-like consistency that resembles true softened butter. This method is very fast but requires careful monitoring to avoid turning the butter into a melted or oily state.
The Double Boiler Method: Gentle Softening for Sensitive Recipes
For particularly delicate recipes or when you need absolute control over the softening process, a makeshift double boiler can be used for gentle warming. Place the butter in a heatproof bowl set over a pot of warm (not boiling) water. Ensure the bottom of the bowl does not touch the water. The steam and gentle heat from the water will gradually warm the butter.
Stir the butter frequently as it softens. This method is slower than the microwave or food processor but provides a much more even and controlled warming, significantly reducing the risk of melting. It's particularly useful if your kitchen is cold or you're working with a large batch of butter. Remove the bowl from the heat as soon as the butter reaches the desired soft consistency.
Room Temperature Butter Alternatives: When Substitutes are Necessary
Shortening vs. Butter: Texture and Flavor Considerations
While butter is often preferred for its flavor, shortening is sometimes used in baking, and it behaves differently at room temperature. Vegetable shortening is typically solid at room temperature and has a higher melting point than butter. When a recipe calls for "softened shortening," it means bringing it to a similar pliable consistency as softened butter. However, shortening doesn't contain water and isn't an emulsion in the same way butter is, so it doesn't contribute to leavening through steam like butter does.
Using shortening instead of butter will result in baked goods that are often more tender and have less spread, but they will lack the rich flavor that butter provides. For example, a pie crust made with shortening will be flakier than one made with all butter, but an all-butter crust is often considered more flavorful. If substituting shortening for softened butter, use a 1:1 ratio by weight, but be aware that the final texture and flavor will differ.
Oil vs. Butter: Fat Content and Baking Results
Liquid oils (like vegetable, canola, or olive oil) are sometimes used as a substitute for softened butter, but they are not interchangeable in most recipes that rely on the creaming method. Oil is 100% fat, while butter is approximately 80-82% fat, with the remainder being water and milk solids. Using oil in place of softened butter will significantly change the texture and structure of the baked good.
Recipes specifically designed for oil (like many quick breads or muffins) will often have a moist, tender crumb but lack the aeration and structure provided by creaming butter and sugar. If you substitute oil for softened butter in a creaming method recipe, you will likely end up with a dense, oily, and flat result because oil cannot trap air bubbles in the same way softened butter does. Substitution ratios vary, but typically you'd use about 3/4 cup of oil for 1 cup of butter, though this is not recommended for recipes heavily reliant on the creaming process.
Conclusion: Mastering the Art of Softening Butter for Baking Excellence
Mastering the techniques for softening butter room temperature baking is a foundational skill that significantly impacts the success of countless recipes. From achieving light and fluffy cakes to perfectly structured cookies and smooth frostings, the correct butter consistency is key. While natural softening is often preferred, knowing reliable quick methods allows you to bake successfully even when time is short.
By understanding why room temperature butter matters – its role in aeration and emulsification – and recognizing the signs of ideal consistency versus over-softened or melted butter, you gain greater control over your baking outcomes. Practice these techniques, pay attention to your butter's texture, and you'll consistently achieve the perfect softened butter needed to elevate your baked goods from good to truly excellent. Happy baking!
Frequently Asked Questions
How does using room temperature butter affect baking?
Using room temperature butter allows for proper creaming with sugar, creating air pockets that lead to a lighter and more tender baked good. This improved aeration is crucial for cakes and cookies.
What is considered "room temperature" for butter in baking?
Ideally, room temperature butter should be around 65-68°F (18-20°C). It should be soft enough to press but still hold its shape, not melted or greasy.
What are some quick methods for softening butter if I forget to take it out in advance?
You can cut the butter into smaller cubes for faster softening, or use a microwave at very low power in short bursts, checking frequently to avoid melting. Another option is to grate the butter.
Why is it important to avoid melting the butter when trying to soften it?
Melted butter won't cream properly with sugar, resulting in a dense and greasy final product. The emulsification process is compromised, affecting the texture.
What are the signs that butter is too soft for creaming?
If the butter is shiny, greasy, or loses its shape entirely, it's too soft. In this case, chill it briefly in the refrigerator to firm it up slightly before using.
Final Reflection: The Unexpected Joy of Perfectly Softened Butter
The seemingly simple act of softening butter is, in reality, the cornerstone of countless baking triumphs and failures. A seemingly minor detail, the correct consistency of your butter directly impacts the texture, rise, and overall deliciousness of your baked goods. Mastering this seemingly insignificant step elevates your baking from good to truly exceptional.
The quest for the perfect cream—that light and airy texture that defines so many beloved recipes—is a journey many bakers undertake. It's a journey marked by experimentation, occasional frustration, and ultimately, the rewarding satisfaction of a perfectly risen cake or flawlessly crumbly cookie. Baking is a labor of love, and the details matter. Even the smallest adjustments can make a world of difference.
This quote, though not directly about butter softening, perfectly encapsulates the essence of this often-overlooked aspect of baking. The subtle nuances of butter texture profoundly impact the final product, reminding us that even the most basic steps deserve our attention and care.
Now, consider your own baking journey. Have you experienced the frustration of tough, dense cookies or a cake that stubbornly refused to rise? Perhaps the culprit was simply the state of your butter. I urge you to take a moment to reflect on your own baking process and consider the role of butter consistency.
Experiment with the techniques outlined in this article, and observe the transformative effect on your creations. Embrace the small details, for it is in these seemingly insignificant moments that true baking mastery is found. The journey to perfect room temperature butter is not just about technique; it's about understanding the fundamental building blocks of deliciousness.
Unlock Perfectly Creamy Butter: Your Baking Journey Starts Now!
Thanks for taking the time to learn about the secrets of perfectly softened butter! We hope you now feel confident tackling any creaming recipe. Ready to put your new skills to the test?
- Whip up your favorite cookie recipe today! Use your newfound butter-softening expertise to create perfectly textured, melt-in-your-mouth cookies.
- Share your baking triumphs (and challenges!) with our community on social media using #BakeWithEaseButter. Let’s inspire each other!
- Try a new recipe that requires creamed butter – you might be surprised at how much easier it is now!
Ready to experience the difference perfectly softened butter makes in your baking? What's your go-to creamed butter recipe that you can't wait to try?