
Solving the Mystery of Gummy Bread Crumb

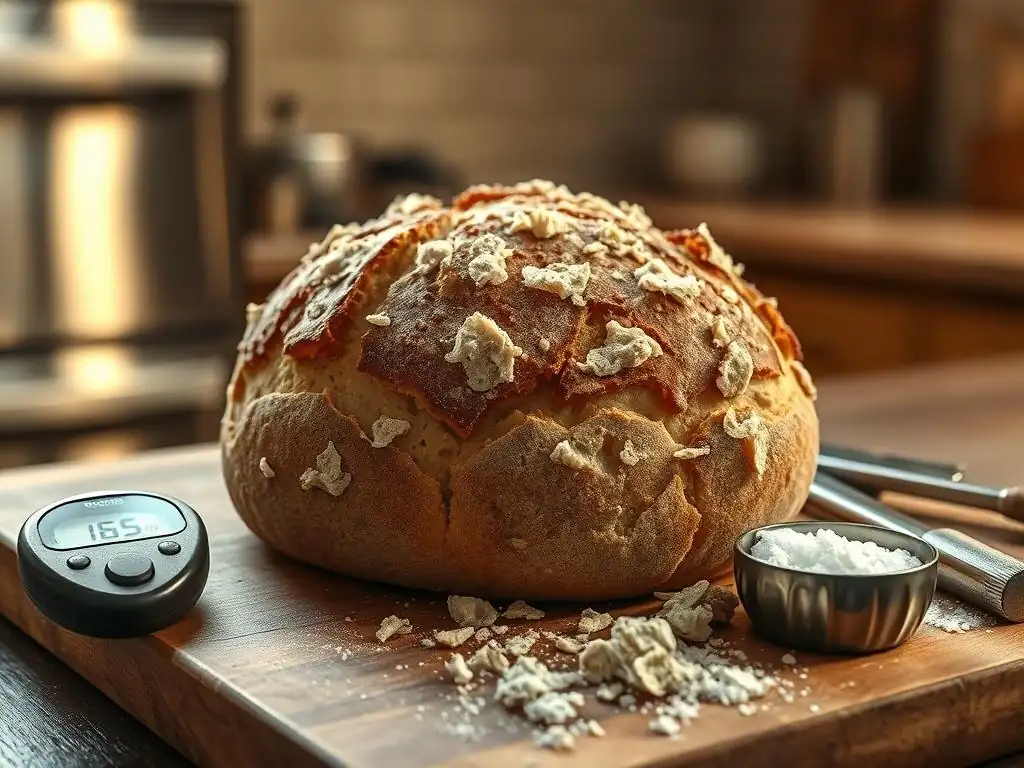
Welcome to BakeWithEase, your trusted companion on your baking journey! Ever wondered why your lovingly baked bread sometimes suffers from that dreaded gummy bread crumb? Don't despair! We're about to unlock the secrets to achieving that perfect, airy texture. Dive in to discover our essential gummy bread crumb troubleshooting tips and transform your baking game forever!
- Troubleshooting Bread Texture: Achieving a Perfect Crumb
- Understanding Bread Texture Issues
- Troubleshooting Bread Texture: Achieving the Perfect Crumb
- Identifying and Preventing Texture Problems: A Summary
-
Frequently Asked Questions
- What is gummy bread crumb and why does it happen?
- How can I prevent gummy bread crumb when baking bread?
- What role does gluten play in preventing gummy bread crumb?
- Can the type of flour I use affect the texture of my bread crumb?
- Besides underbaking and gluten, are there other factors that contribute to gummy bread crumb?
- Final Reflection: The Enduring Mystery (and Delicious Solution) of Gummy Bread Crumbs
- Unlock Your Gummy Bread Crumb Secrets!
Troubleshooting Bread Texture: Achieving a Perfect Crumb
Understanding Bread Texture Issues
What is Undesirable Bread Texture and How Does it Affect Bread Quality?
Undesirable bread texture often manifests as a dense, heavy crumb, sometimes with large, irregular holes, or most commonly, a sticky, wet, or gummy bread crumb. This is a significant issue because the texture is as crucial to the enjoyment of bread as its flavor and aroma. A perfect loaf should have a tender crumb that springs back slightly when pressed, with a consistent structure appropriate to the bread type – whether it's the airy, open structure of a ciabatta or the fine, even crumb of a sandwich loaf.
A gummy bread crumb specifically feels unpleasant in the mouth, sticking to the palate and lacking the satisfying chew or tenderness of properly baked bread. It can make the bread feel undercooked even if the crust looks done. This poor texture significantly detracts from the overall quality, making the bread less appealing for sandwiches, toast, or simply eating plain. It's a common frustration for home bakers and understanding its root causes is the first step in effective gummy bread crumb troubleshooting tips.
Common Causes of Undesirable Bread Texture in Homemade Bread
Achieving that ideal bread texture involves balancing several key factors. When one or more of these elements are out of sync, it can lead to disappointing results, including a dense or gummy bread crumb. Identifying the specific cause is crucial for applying the correct gummy bread crumb troubleshooting tips. Often, multiple factors can contribute to the problem simultaneously.
The primary culprits behind poor texture range from issues during the mixing and kneading process to problems during proofing and baking, and even how the bread is handled after it comes out of the oven. Understanding the role each stage plays helps pinpoint where things might have gone wrong and how to prevent future texture problems.
Insufficient Baking Time: The Impact on Internal Structure
One of the most frequent causes of a gummy bread crumb is simply not baking the bread long enough. While the crust might look golden brown and appealing, the interior needs sufficient time at temperature to fully set its structure and for the starches to gelatinize and then retrograde properly. If removed from the oven too soon, the internal moisture hasn't had a chance to evaporate adequately, leaving the crumb dense and wet, resulting in that undesirable gummy texture.
The internal temperature is a critical indicator of doneness. For most lean bread (like baguettes or simple loaves), a target internal temperature of 190-200°F (88-93°C) indicates it's likely fully baked. Enriched bread (containing fats like butter or eggs) often needs to reach 200-210°F (93-99°C). Without reaching these temperatures, the starches remain partially uncooked, contributing significantly to a gummy crumb.
Over-Proofing: The Effect on Gluten and Structure
Proofing, the final rise before baking, is essential for developing a light, airy texture. However, over-proofing can have the opposite effect, leading to a collapsed or dense crumb, sometimes contributing to gumminess, especially if combined with other issues like underbaking. When dough over-proofs, the gluten structure, which provides the framework for the bread, becomes weakened and stretched too thin.
The yeast consumes most of its available sugars and produces too much gas, eventually exhausting itself. When the over-proofed dough is baked, the weakened structure cannot support the initial oven spring, and the dough collapses slightly. This collapse can lead to a dense layer, often at the bottom of the loaf, which can feel heavy and gummy. It's a common pitfall that requires careful monitoring during the final rise.
Hydration Imbalance: Too Much or Too Little Moisture
The ratio of water to flour, known as hydration, profoundly impacts bread texture. While higher hydration doughs (like ciabatta, often 75-85% hydration) can yield wonderfully open and airy crumbs, they are also more challenging to handle and require precise baking to avoid a gummy bread crumb. Too much water for the flour type or insufficient baking can leave the interior excessively wet and dense.
Conversely, dough that is too dry (low hydration) can result in a dense, dry, and crumbly texture rather than a gummy one. However, getting the hydration just right for your specific flour, recipe, and environment is key. Different flours absorb water differently; for instance, whole wheat flour typically absorbs more water than white bread flour. Misjudging hydration is a frequent cause of texture problems, making it a prime target for gummy bread crumb troubleshooting tips.
Gluten Development Issues: Weak or Overworked Dough
Gluten, formed when proteins in flour (glutenin and gliadin) combine with water and are developed through kneading, creates the elastic network that traps gas produced by yeast, allowing the bread to rise and hold its shape. Insufficient gluten development means the dough lacks the strength to support a good rise, resulting in a dense, heavy loaf. This density can contribute to a gummy bread crumb, especially if the loaf is also underbaked.
On the other hand, over-kneading can also damage the gluten structure. While less common for hand kneading, it's possible with powerful stand mixers. Overworked dough can become tight and eventually break down, leading to a crumb that might be tough or dense rather than achieving the desired tender elasticity. Proper gluten development is fundamental to achieving the right texture.
Incorrect Oven Temperature: Impacting Rise and Texture
Baking temperature plays a crucial role in bread texture. An oven that is too cool will cause the bread to rise too slowly and spread out before the crust sets, potentially leading to a dense crumb. More importantly, a low temperature might not provide enough heat energy to properly cook the interior in a timely manner, increasing the risk of an underbaked, gummy bread crumb.
Conversely, an oven that is too hot might cause the crust to set too quickly, restricting oven spring and potentially leaving the interior undercooked while the outside is burnt. Using an oven thermometer to verify your oven's actual temperature is highly recommended, as many home ovens can be off by 25-50°F (14-28°C) or more from the dial setting. Accurate temperature is vital for effective gummy bread crumb troubleshooting tips related to baking.
Staling and Storage: How They Affect Freshness and Texture
Even a loaf with a perfect texture straight from the oven can develop issues if not stored correctly or if it simply becomes stale. Staling is primarily a process where starch molecules recrystallize, causing the bread to become hard and dry. However, improper storage, particularly wrapping warm bread, can trap moisture and lead to a soggy crust and a dense, potentially gummy bread crumb over time due to condensation.
Storing bread in the refrigerator can also accelerate staling and negatively impact texture, making it tough and dry much faster than storing it at room temperature. While not a cause of initial gummy bread crumb, poor storage can certainly degrade the texture rapidly, highlighting the importance of proper handling even after baking.
Troubleshooting Bread Texture: Achieving the Perfect Crumb
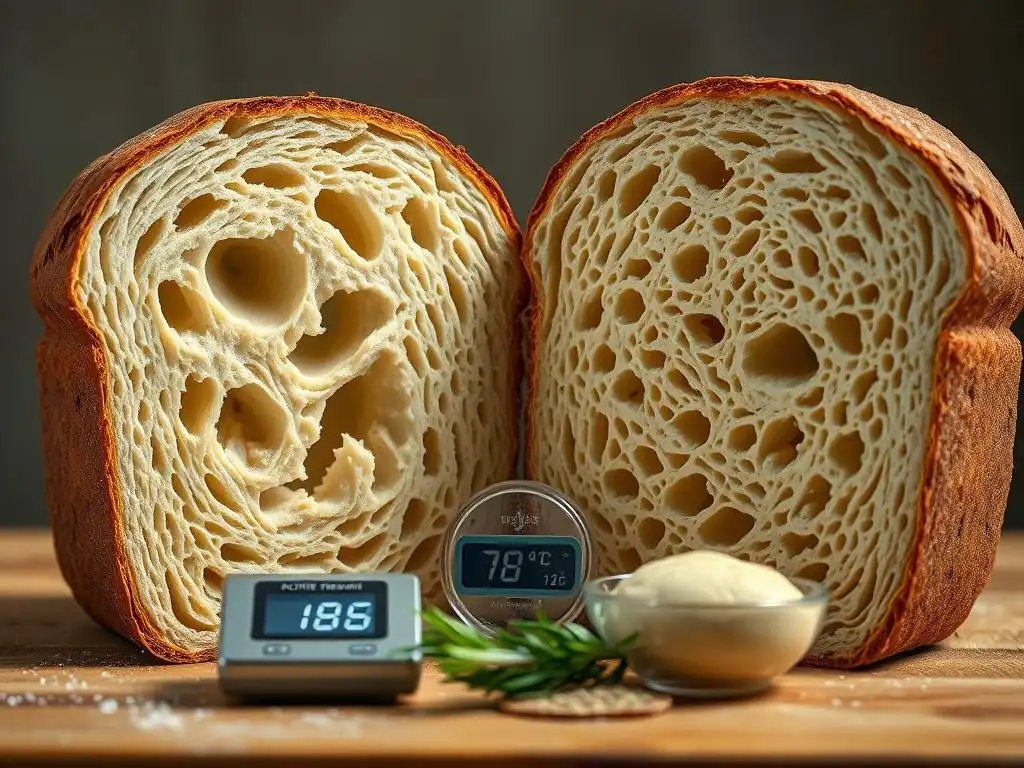
Tackling texture issues, including the dreaded gummy bread crumb, involves addressing the potential causes systematically. By focusing on key stages of the baking process – baking time, proofing, hydration, gluten development, and post-bake handling – you can significantly improve your results. Implementing effective gummy bread crumb troubleshooting tips requires attention to detail and understanding how each element contributes to the final loaf.
Improving bread texture is a journey of practice and observation. Don't be discouraged by less-than-perfect loaves. Each bake is an opportunity to learn. By making small adjustments based on the common causes of poor texture, you'll gradually refine your technique and consistently achieve bread with a beautiful, tender crumb.
Baking Time and Temperature: Ensuring a Thorough and Even Bake
Proper baking is non-negotiable for a good crumb. Underbaking is a leading cause of gummy bread crumb, as the interior doesn't reach the temperature needed to fully cook and set. Ensuring your oven is accurately calibrated and baking for the correct duration are fundamental gummy bread crumb troubleshooting tips.
Using a baking stone or steel can also help ensure a more even bake and provide a strong burst of initial heat from below, which can improve oven spring and crust development, indirectly benefiting crumb texture by ensuring the loaf cooks through efficiently. Preheating your oven thoroughly, often for 30-60 minutes after it reaches the set temperature, is vital for achieving consistent results.
Using a Thermometer to Check for Doneness: Target Internal Temperatures
Relying solely on visual cues like crust color can be misleading when assessing if the interior of your bread is fully cooked. A digital instant-read thermometer is an invaluable tool for accurately determining doneness and preventing a gummy bread crumb. Insert the thermometer into the center of the loaf from the bottom or side, avoiding any large air pockets.
As mentioned earlier, aim for specific internal temperature ranges:
- Lean bread (no fat/sugar): 190-200°F (88-93°C)
- Enriched bread (with fat/sugar/eggs): 200-210°F (93-99°C)
- Rye bread: Can sometimes go slightly higher, up to 215°F (102°C)
Reaching these temperatures indicates the starches have fully gelatinized and the structure is set. This is one of the most reliable gummy bread crumb troubleshooting tips for underbaking.
Adjusting Baking Time for Different Bread Types and Sizes
Baking time isn't a one-size-fits-all measurement. It depends heavily on the recipe, the size and shape of the loaf, the hydration level, and your specific oven. A large boule will take longer to bake through than smaller rolls or a flatter focaccia. High-hydration doughs might require slightly longer baking times to ensure the interior dries out sufficiently.
If you're baking a new recipe or a different size loaf than usual, start checking the internal temperature a bit before the recipe's suggested minimum time. If the temperature hasn't been reached, continue baking and check again every 5-10 minutes. Note the total baking time and temperature required in your oven for that specific bread for future reference. This iterative process is key to refining your gummy bread crumb troubleshooting tips for different types of bread.
Mastering Proofing: Finding the Optimal Rise
Proofing is a delicate balance. Under-proofing results in a dense, heavy loaf, while over-proofing can lead to collapse and a gummy layer. Learning to read your dough and proof it correctly is essential for a good crumb structure and is a vital step in gummy bread crumb troubleshooting tips.
The ideal proofing time varies greatly depending on the ambient temperature, the amount of yeast used, and the dough's hydration. Rather than strictly adhering to times given in a recipe, learn to rely on visual cues and the poke test to determine when your dough is perfectly proofed.
Visual Cues for Proper Proofing: Recognizing Ideal Volume and Shape
Properly proofed dough should have significantly increased in volume, typically doubling or almost doubling, depending on the recipe and desired outcome. It should look pillowy and well-aerated, not tight or dense. The surface should appear smooth and slightly domed.
Pay attention to the edges and sides; they should look rounded and full, not sharp or deflated. If you see large, isolated bubbles on the surface or the dough looks like it's starting to spread outwards rapidly rather than rising upwards, it might be on the verge of over-proofing. Recognizing these signs is crucial for timely intervention in gummy bread crumb troubleshooting.
The Poke Test: Assessing Proofing Stage
The poke test is a classic method to gauge if dough is ready to bake. Gently flour your finger and lightly but firmly press it into the side of the dough to a depth of about half an inch (1-2 cm).
- If the indentation springs back immediately and completely, the dough is likely under-proofed. It needs more time.
- If the indentation springs back very slowly, only partially filling in (leaving a small indent), the dough is likely perfectly proofed and ready to bake.
- If the indentation remains completely or mostly unchanged, the dough is likely over-proofed. While you can still bake it, the texture might be compromised.
Mastering this simple test is one of the most effective gummy bread crumb troubleshooting tips for proofing issues.
Controlling Proofing Temperature: Maintaining Ideal Conditions
Proofing speed is highly dependent on temperature. Yeast is most active in temperatures between 75-85°F (24-30°C). Proofing in a warm environment will be faster than in a cool one. Consistency in temperature helps achieve more predictable proofing times.
If your kitchen is cool, you can create a warmer environment by placing the dough in a turned-off oven with the light on, or in a microwave alongside a cup of hot water (do not turn on the microwave!). If your kitchen is very warm, you might need to proof in a slightly cooler spot or reduce the amount of yeast slightly to slow things down. Controlling the proofing temperature is a key variable in preventing both under- and over-proofing, which can contribute to a gummy bread crumb.
Managing Hydration: Balancing Moisture for Optimal Crumb
Hydration is perhaps one of the most influential factors on crumb structure. Getting it right is fundamental to avoiding a gummy bread crumb and achieving the desired texture. It's not just about adding the amount of water specified in a recipe; it's about understanding how different factors influence the dough's consistency.
Successfully managing hydration involves precision in measurement, understanding flour characteristics, and being adaptable to environmental conditions. These are critical gummy bread crumb troubleshooting tips related to dough mixing.
Accurate Measurement of Ingredients: The Importance of Precision
Baking is a science, and precision matters, especially with hydration. Using a digital kitchen scale to weigh your ingredients, particularly flour and water, is far more accurate than using volume measurements (cups). A cup of flour can vary significantly in weight depending on how packed it is, sometimes by as much as 20-30 grams. This variability can drastically alter the hydration percentage, leading to dough that is too wet or too dry.
Weighing ensures you are using the exact ratio intended by the recipe developer. For instance, a recipe calling for 500g flour and 350g water has a hydration of 70% (350/500 = 0.7). If you accidentally use less flour or more water due to imprecise measuring, that percentage changes, directly impacting the dough's consistency and potential for a gummy bread crumb.
Adjusting Hydration Based on Flour Type: Understanding Flour Absorption Rates
Different types of flour absorb water differently due to variations in protein and starch content. Bread flour, with its higher protein content (typically 12-14%), generally absorbs more water than all-purpose flour (10-12% protein). Whole wheat flour and other whole grain flours absorb significantly more water than white flours because they contain the bran and germ, which are very thirsty.
If a recipe is written for bread flour and you substitute all-purpose or whole wheat flour cup-for-cup or gram-for-gram without adjusting the water, you will likely end up with a dough that is too wet (if using all-purpose) or too dry (if using whole wheat). Be prepared to slightly decrease water for lower-protein flours or increase it for higher-absorption flours like whole wheat or rye. This adaptability is key among advanced gummy bread crumb troubleshooting tips.
Adapting to Environmental Humidity: Accounting for Atmospheric Moisture
Even the humidity in the air can affect how much water your flour absorbs. In very humid environments, flour might absorb some moisture from the air, meaning you might need slightly less added water. Conversely, in very dry climates, you might need a little extra water.
While this effect is usually subtle, it can be noticeable, especially in high-hydration doughs. Pay attention to how the dough feels as you mix it. Does it seem stickier than expected? Hold back a tablespoon or two of water. Does it feel too dry? Add a teaspoon or two more water gradually until the dough reaches the desired consistency described in the recipe. This tactile assessment is a valuable skill for gummy bread crumb troubleshooting.
Gluten Development: Achieving Strength and Elasticity
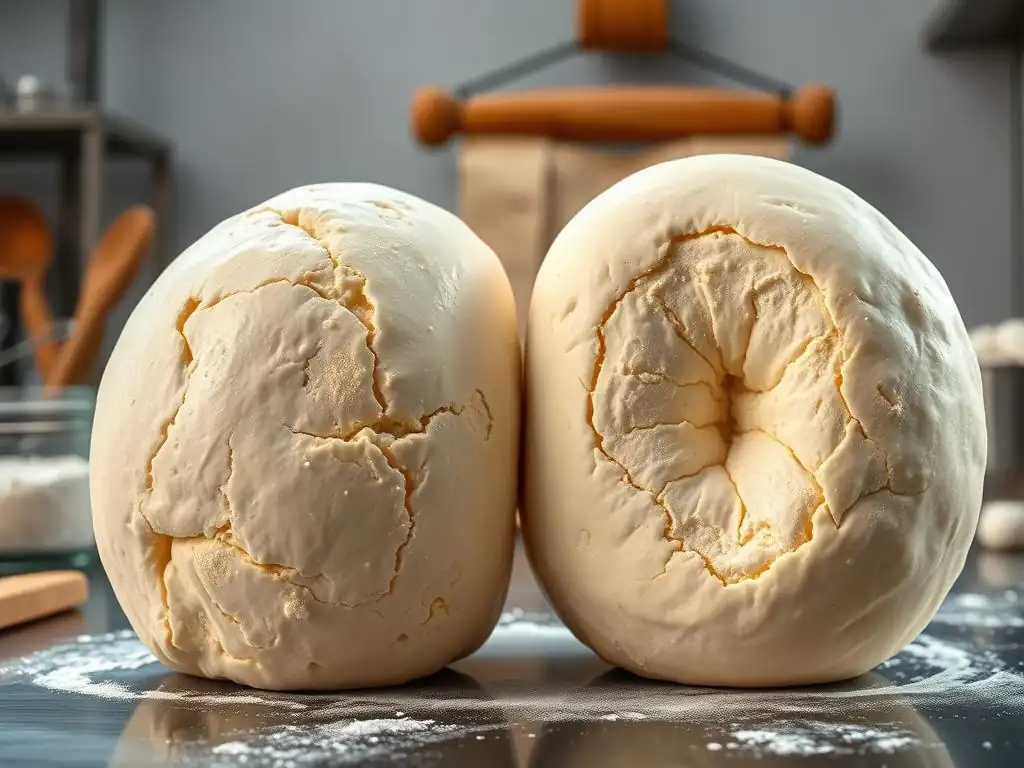
Developing a strong, elastic gluten network is fundamental to creating bread with a good structure and open crumb, helping to prevent a gummy bread crumb. Gluten provides the framework that allows the dough to rise and hold its shape during proofing and baking. Proper kneading is how this network is built.
Whether you knead by hand or machine, the goal is to stretch and align the gluten proteins. Insufficient kneading is a common cause of dense bread, while over-kneading (less common in home baking) can also be detrimental.
Proper Kneading Techniques: Hand Kneading vs. Machine Kneading
Kneading by hand involves repeatedly folding, stretching, and pressing the dough. This process physically works the gluten strands, strengthening them. It typically takes 10-20 minutes of active hand kneading to develop sufficient gluten for most loaf bread, depending on the flour and hydration. The dough will transform from a shaggy, sticky mass into a smooth, elastic ball that is less sticky.
Using a stand mixer with a dough hook is faster, usually taking 6-10 minutes on medium-low speed. It's important not to run the mixer too fast, as this can overheat the dough and potentially damage the gluten. Monitor the dough; it should pull away from the sides of the bowl and eventually slap against the bottom.
The Windowpane Test: Assessing Gluten Strength
The windowpane test is a classic method to check if gluten is sufficiently developed. Carefully pinch off a small piece of dough (about the size of a golf ball) and gently stretch or pull it between your fingers.
If the dough can be stretched very thin without tearing, to the point where you can see light passing through it (like a windowpane), the gluten is well-developed. If it tears easily before becoming thin, it needs more kneading. This test is a reliable indicator when applying gummy bread crumb troubleshooting tips related to kneading.
Avoiding Over-Kneading: Recognizing Signs of Dough Breakdown
While less common than under-kneading, it is possible to over-knead dough, especially with a powerful stand mixer. Over-kneaded dough can become very tight and resistant to stretching initially, but if kneading continues, the gluten structure can actually begin to break down.
Signs of over-kneading include dough that feels very slack and doesn't hold its shape, or dough that tears easily and feels wet or greasy even if the hydration is correct. Once gluten is broken down, it's difficult to repair. It's generally better to slightly under-knead and allow the gluten to finish developing during the first bulk fermentation rest period than to risk over-kneading.
Cooling and Storage: Preserving Freshness and Texture
The process isn't over when the bread comes out of the oven. How you handle and store your loaf significantly impacts its final texture and how long it stays fresh. Improper cooling is a common reason for a dense or gummy bread crumb even if the bread was baked properly.
Allowing the bread to cool completely before slicing is one of the most critical, yet often overlooked, gummy bread crumb troubleshooting tips. Proper storage then helps maintain the ideal texture you worked hard to achieve.
Allowing Bread to Cool Completely: Preventing Condensation
Hot bread is still undergoing internal processes. Starches are setting, and moisture is migrating. Slicing into a hot loaf releases steam rapidly, but also disrupts the setting structure, leading to a dense, potentially gummy bread crumb. More importantly, placing warm bread into an airtight container or bag traps steam, causing condensation.
This condensation makes the crust soggy and introduces excess moisture back into the crumb, almost guaranteeing a gummy bread crumb. Always let your bread cool completely on a wire rack, exposed to air, for at least 1-2 hours for smaller loaves or rolls, and 2-4 hours (or even longer for very large, dense loaves like rye) before slicing or storing. The internal temperature needs to drop significantly.
Proper Storage Techniques: Maintaining Crust and Crumb Quality
Once completely cool, store your bread to maintain its texture. For crusty bread, storing it cut-side down on a cutting board or in a paper bag helps keep the crust crisp while protecting the cut surface. This is ideal for the first day or two.
For softer sandwich bread, storing it in a bread box or a loosely sealed plastic bag or reusable bread bag helps maintain softness. Avoid airtight containers for crusty bread, as they will soften the crust quickly. For longer storage, bread can be frozen (well-wrapped after cooling completely) and thawed later, usually with minimal loss of quality. Freezing is a great way to preserve texture if you won't eat the loaf within a couple of days.
Identifying and Preventing Texture Problems: A Summary
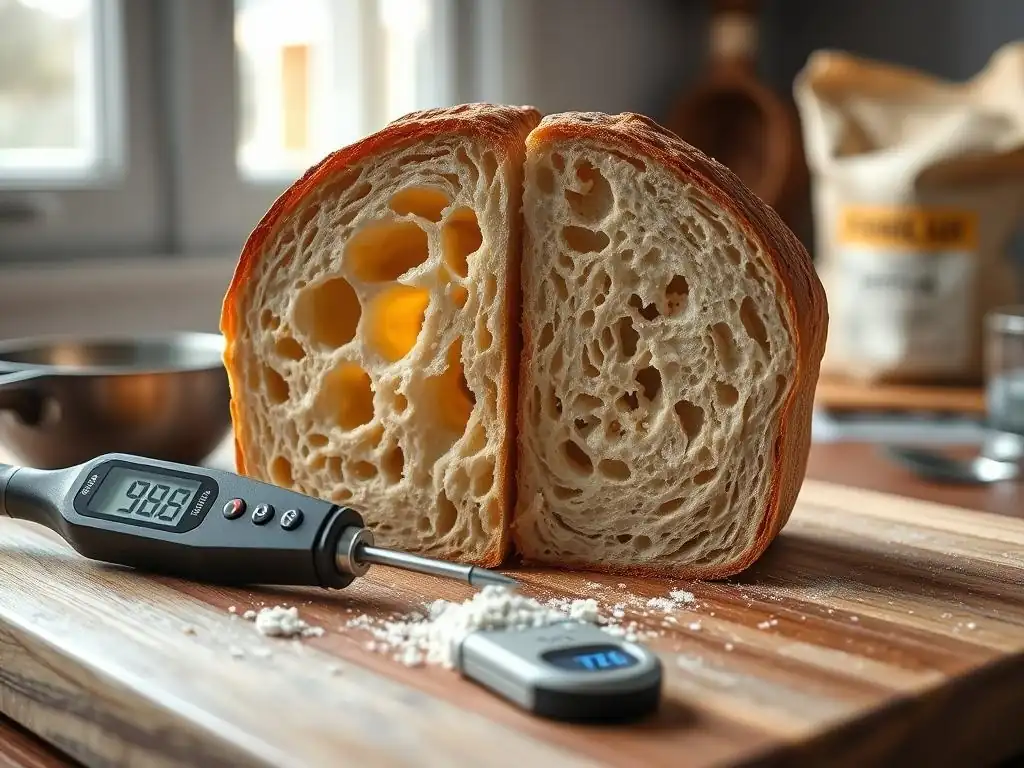
Achieving the perfect bread texture requires attention throughout the baking process. By understanding the common causes of issues like a gummy bread crumb and applying targeted gummy bread crumb troubleshooting tips, you can dramatically improve your results. Regular practice and careful observation of your dough and your oven's behavior are your best tools.
Remember that baking is a skill that improves with experience. Don't be afraid to experiment slightly with hydration levels, proofing times, or baking duration once you understand the fundamentals.
Quick Checklist: Preventing Texture Issues Before Baking
Here's a quick list to run through before you even start mixing, designed to help you proactively prevent a gummy bread crumb and other texture woes:
- [ ] Use a digital scale for accurate ingredient measurements.
- [ ] Understand your flour type and adjust hydration if necessary (e.g., increase water for whole wheat).
- [ ] Ensure your yeast is active and not expired.
- [ ] Plan for sufficient kneading time to develop gluten (check with the windowpane test).
- [ ] Know the target internal temperature for your bread type.
- [ ] Calibrate your oven or use an oven thermometer to confirm accuracy.
- [ ] Plan for adequate cooling time on a wire rack after baking.
Recognizing Signs of Texture Problems: Early Detection and Correction
Learning to spot potential issues early can save your loaf or at least inform your next bake.
- During Kneading: Dough feels very sticky and doesn't develop strength after sufficient kneading time (could be hydration or under-kneading) or feels very tight then suddenly slack (over-kneading).
- During Proofing: Dough doesn't rise much (under-proofing, inactive yeast, not warm enough) or rises rapidly and then starts to deflate (over-proofing). The poke test is key here.
- After Baking (Cooling): You slice into the loaf while it's still warm and notice the crumb looks dense, wet, or steamy. This is a strong indicator of potential gummy bread crumb due to underbaking or insufficient cooling.
- After Cooling: The fully cooled loaf feels heavy for its size, the crumb is dense, sticky, or collapses when pressed. This confirms a texture issue, potentially from underbaking, over-proofing, or hydration imbalance.
Recipe Adaptations for Specific Breads: Sourdough, Whole Wheat, and Gluten-Free
Different bread types have unique characteristics that influence texture and require specific considerations for gummy bread crumb troubleshooting tips.
- Sourdough: Sourdough often uses higher hydration and longer, slower proofing times. Underbaking is a very common cause of gummy bread crumb in sourdough. Ensure your starter is active, allow for proper bulk fermentation and final proof (using the poke test), and bake thoroughly, often aiming for the higher end of the temperature range (200-210°F or 93-99°C internal). Baking in a Dutch oven is popular as it traps steam initially, promoting better oven spring and crust development, which helps the interior cook through.
- Whole Wheat: Whole wheat flour absorbs more water but also has sharper bran particles that can slightly interfere with gluten development. You'll typically need higher hydration than white bread. Ensure sufficient kneading (or incorporate a long autolyse rest period) to hydrate the bran and develop gluten. Whole wheat bread can also benefit from slightly longer baking times or a slightly higher internal temperature target (205-210°F or 96-99°C) to ensure the dense crumb is fully cooked and not gummy.
- Gluten-Free: Gluten-free baking relies on alternative flours and often binders like xanthan gum or psyllium husk to provide structure, as there's no gluten network. Texture issues here might manifest differently but can still result in dense or wet spots. Follow recipes specifically designed for gluten-free flours precisely, paying attention to hydration ratios and recommended baking times/temperatures. Gluten-free doughs often don't show the same visual cues for proofing as wheat dough; relying on recipe times and visual rise is often necessary. Ensuring these loaves are fully baked is just as critical to avoid a gummy texture.
Frequently Asked Questions
What is gummy bread crumb and why does it happen?
Gummy bread crumb refers to bread with a dense, sticky texture inside. This often happens due to undercooking or insufficient gluten development.
How can I prevent gummy bread crumb when baking bread?
Ensure your bread reaches the correct internal temperature using a thermometer. Also, be careful not to overproof the dough, as this can lead to collapse and a gummy texture.
What role does gluten play in preventing gummy bread crumb?
Adequate gluten development is crucial. Proper kneading techniques and sufficient time for gluten to form create a strong network that supports the bread's structure, preventing a gummy interior.
Can the type of flour I use affect the texture of my bread crumb?
Yes, the type of flour matters. Bread flour, with its higher protein content, creates more gluten, leading to a less gummy crumb compared to all-purpose flour.
Besides underbaking and gluten, are there other factors that contribute to gummy bread crumb?
Yes, excessive moisture in the dough can contribute. Be precise with your measurements and avoid adding too much liquid to the recipe, which can lead to a dense, gummy crumb.
Final Reflection: The Enduring Mystery (and Delicious Solution) of Gummy Bread Crumbs
The quest for perfectly textured bread, free from the dreaded gummy crumb, remains a constant challenge for home bakers. This seemingly small detail significantly impacts the overall enjoyment of a loaf, transforming a potentially delightful experience into a disappointing one. The solutions presented in this article, from adjusting hydration levels to perfecting oven temperature, are not just technical fixes; they are keys to unlocking the true potential of your baking.
The struggle with gummy bread crumb transcends mere culinary frustration; it represents a deeper connection to the craft of baking. It's a testament to the delicate balance required to transform simple ingredients into something truly special. The journey of perfecting a recipe, of understanding the "why" behind each step, is as rewarding as the final product itself. Baking is a science, but it's also an art. The more you understand the science, the more you can express your artistry.
This quote perfectly encapsulates the ongoing learning process involved in achieving consistently excellent bread.
Now, armed with the troubleshooting tips explored in this article, I invite you to embark on your own baking adventures. Don't be discouraged by initial setbacks – every gummy crumb is a lesson learned, a step closer to mastering the art of bread making. Experiment with the techniques discussed, adapt them to your own style, and most importantly, enjoy the process. The satisfaction of slicing into a perfectly textured loaf, the aroma filling your kitchen, is a reward worth striving for. Your next loaf awaits!
Here's a Call to Action (CTA) based on the provided information:
Unlock Your Gummy Bread Crumb Secrets!
Thanks for diving into the world of gummy bread crumbs with us! We hope you now feel more confident in tackling this baking mystery. Ready to put your newfound knowledge into practice?
- Master the Perfect Crumb: Try our recommended techniques from the article and share your results – we'd love to see your amazing creations!
- Experiment with Different Flours: Notice how different flours affect the texture? Share your discoveries in the comments!
- Join our Baking Community: Connect with fellow bakers and share your tips and tricks for avoiding gummy bread crumbs – let's learn together!
So, what unique flour blend will you experiment with to perfect your bread crumbs? Let's hear your baking journey in the comments below!