
Troubleshooting Bread That Sinks After Baking

Welcome to BakeWithEase, where the joy of baking meets simplicity! If you've ever wondered why bread sinks after baking, you're not alone. This intriguing question is just one of the many baking mysteries we're here to unravel. Whether you're a novice baker or a seasoned pro perfecting your sourdough, our collection of straightforward recipes and expert techniques will empower you to achieve baking success. So, dive in and discover the essential tips and hacks that will not only enhance your skills but also elevate your creations to new heights. Let’s embark on this delicious journey together!
- Troubleshooting Bread That Sinks After Baking: A BakeWithEase Guide
- Understanding Why Your Bread Collapses After Baking
- Diagnosing the Causes of Sunken Bread
- Solutions: Preventing Bread Collapse
- Specific Scenarios and Troubleshooting Tips
- Achieving Baking Success: Tips for a Perfect Loaf
-
Frequently Asked Questions
- Why does my bread sink in the middle after baking?
- How can I tell if my bread is properly baked to prevent sinking?
- Could too much liquid cause my bread to sink after baking?
- What role does gluten play in preventing bread from sinking?
- Is it possible that my oven temperature is the reason my bread sinks?
- Final Reflection: Understanding the Art of Bread Baking
- Unlock Your Baking Potential: Rise to the Occasion!
Troubleshooting Bread That Sinks After Baking: A BakeWithEase Guide
Understanding Why Your Bread Collapses After Baking
The Dreaded Bread Sink: Identifying the Problem
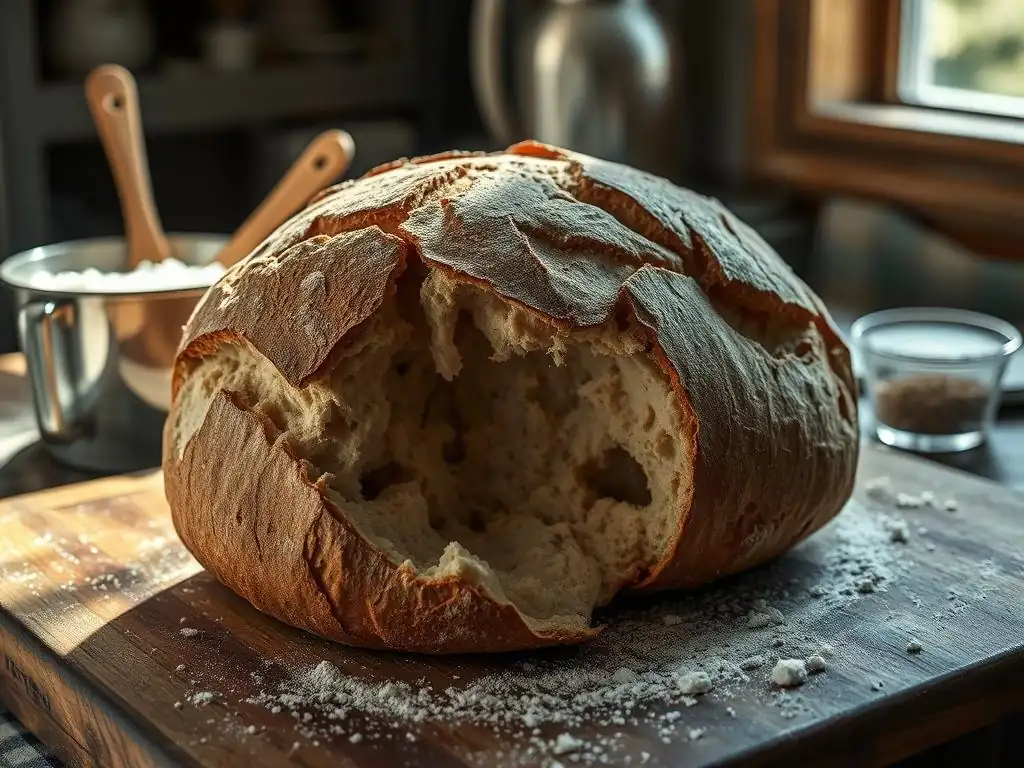
Nothing is quite as disheartening in baking as pulling a loaf of bread from the oven, proud of its initial rise, only to watch it slowly deflate into a sad, sunken shape. This collapse, often happening during cooling but sometimes even in the final stages of baking, results in a dense, heavy crumb instead of the light, airy texture you were aiming for.
It's a common issue for bakers, both new and experienced, and pinpointing exactly why bread sinks baking requires a bit of detective work. The tell-tale signs include a concave top crust, a dense band at the bottom of the loaf, and a generally squat appearance compared to its glorious pre-collapse state.
Understanding the symptoms is the first step to preventing this issue. A loaf that sinks typically indicates an internal structural failure. The gas bubbles created by yeast during fermentation and proofing couldn't be adequately supported by the gluten network or set properly during baking. While frustrating, a sunken loaf is a valuable learning experience, offering clues about where things might have gone awry in your process. It's a clear signal that one or more critical steps, from mixing to baking, need adjustment for future baking success.
Why Did My Bread Sink in the Oven? Common Causes
The question "Why did my bread sink baking?" has several potential answers, often related to the delicate balance required in bread making. One primary reason is improper proofing – either over-proofing or under-proofing the dough. Over-proofed dough runs out of steam in the oven, lacking the structural integrity to hold its shape, while under-proofed dough hasn't built enough internal strength or gas bubbles to support a robust structure during the oven spring and subsequent cooling.
Another significant factor contributing to why bread sinks baking is weak gluten development. Gluten provides the elastic network that traps the gases produced by the yeast, allowing the bread to rise and hold its shape.
If the dough isn't kneaded enough, or if the type of flour used has low protein content, the gluten structure might be too weak to support the rising dough, leading to collapse. Furthermore, issues like incorrect oven temperature (too low), excessive hydration (too much water), or even ingredient imbalances (like too much yeast or not enough salt) can all play a role in causing your beautiful loaf to become a sunken disappointment.
Diagnosing the Causes of Sunken Bread
Proofing Problems: Over-Proofing vs. Under-Proofing
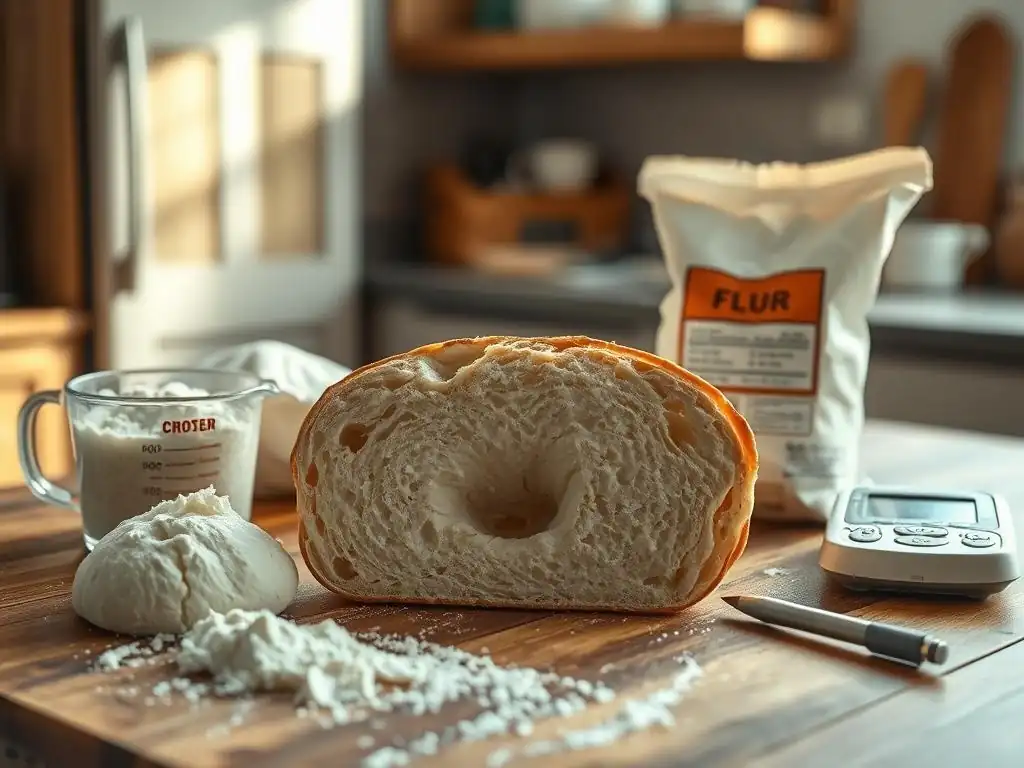
Proofing is a critical stage where the yeast produces carbon dioxide, causing the dough to rise. Getting this timing right is paramount, as both too little and too much proofing can lead to a sunken loaf. Over-proofing allows the yeast to produce too many gas bubbles, stretching the gluten network beyond its capacity to hold them. This weakens the dough's structure. Conversely, under-proofing means the dough hasn't developed enough gas or internal structure to achieve a good rise and maintain it through baking.
The ambient temperature significantly impacts proofing time. For instance, dough left to proof at a warm 75°F (24°C) might be ready in 60-90 minutes, whereas the same dough at a cooler 68°F (20°C) could take 2-3 hours or even longer. Understanding your environment and how it affects the dough's activity is crucial for accurate proofing. A common mistake is relying solely on a recipe's suggested time without considering temperature variations or the dough's visual cues.
Over-Proofed Dough: The Signs of Too Much Rise
Over-proofed dough looks significantly larger than doubled, often appearing puffy and fragile. When you gently poke it with a floured finger, the indentation will remain and not spring back at all, or it might even deflate slightly. The surface might also show signs of small bubbles or appear slack. Baking over-proofed dough often results in a loaf that rises dramatically in the oven (oven spring), but then collapses as the weakened gluten structure can't support the rapid expansion and subsequent setting.
The large, unstable gas bubbles in over-proofed dough consolidate and become too large for the fragile gluten network to contain. This is a key reason why bread sinks baking when proofing goes too far. The yeast may also have consumed most of the available sugars, leaving less fuel for the final burst of activity in the oven. The resulting loaf is typically dense at the bottom with a coarse, irregular crumb at the top, often accompanied by a sour or overly yeasty flavor.
Under-Proofed Dough: Is Your Dough Ready to Bake?
Under-proofed dough, on the other hand, hasn't reached its full volume potential. When poked, the indentation springs back quickly and completely. The dough feels dense and tight. While it might still rise in the oven, the internal structure hasn't developed sufficiently to support a large, airy loaf. The gluten network might still be too tight, restricting the expansion of gas bubbles during baking.
Baking under-proofed dough can lead to a loaf with significant oven spring, sometimes even causing bursting or cracking on the crust (unless scored properly). However, this rapid expansion can sometimes outpace the dough's ability to set, leading to a collapse during cooling. The crumb of an under-proofed loaf is typically dense, compact, and even-textured, lacking the open holes characteristic of well-proofed bread. It's a common reason why bread sinks baking or ends up with a heavy texture.
Gluten Development Issues: Weak Gluten Structure
Gluten is the protein network formed when water is added to flour and the mixture is kneaded or mixed. This network is vital because it gives dough its elasticity and extensibility, allowing it to stretch and hold the carbon dioxide gas produced by the yeast. A weak gluten structure is like trying to build a house with flimsy materials – it simply won't stand up properly, especially under the pressure of rising gas.
If the dough isn't kneaded long enough, or if the flour has insufficient protein (like cake flour versus bread flour), the gluten network won't be strong enough. This means the dough won't be able to trap gas effectively or provide the necessary support during the oven spring and cooling stages. A loaf baked with weak gluten is prone to spreading outwards rather than rising upwards and is a prime candidate for why bread sinks baking.
The Importance of Gluten Strength in Bread Baking
The strength and elasticity of the gluten network determine the bread's texture and volume. A well-developed gluten structure allows the dough to expand significantly without tearing, creating a light, open crumb. Think of gluten as tiny elastic balloons within the dough, capturing the yeast's gas. If the balloons are weak or not connected properly, they can't hold the air effectively.
In recipes requiring a significant rise, such as artisan loaves or sandwich bread, a strong gluten network is non-negotiable. It provides the scaffolding that supports the structure throughout fermentation, proofing, baking, and cooling. Insufficient gluten development is a frequent culprit when troubleshooting why bread sinks baking, leading to flat, dense results.
How to Develop Gluten Properly: Kneading Techniques
Gluten develops through mechanical action – kneading or mixing. As the dough is worked, the gluten proteins (glutenin and gliadin) link together, forming a strong, elastic network. The time and intensity of kneading depend on the flour type and the desired bread structure. For example, a lean dough made with bread flour might require 10-15 minutes of vigorous hand kneading or 8-10 minutes in a stand mixer.
Different techniques like the stretch-and-fold method, often used in no-knead or high-hydration doughs, also develop gluten over time with less effort. This method involves periodically stretching and folding the dough onto itself during bulk fermentation, allowing gluten to develop gradually. Regardless of the method, the goal is to reach a point where the dough is smooth, elastic, and passes the "windowpane test" – stretching a small piece thin enough to see light through it without tearing. Proper gluten development is key to preventing why bread sinks baking.
Oven Temperature Inconsistencies: Affecting Bread Structure
The oven temperature plays a critical role in successful bread baking. An oven that is too cool or fluctuates significantly can negatively impact the loaf's structure. When bread enters a sufficiently hot oven, it experiences a rapid expansion known as oven spring. This happens as the yeast gets a final burst of activity and trapped gasses expand rapidly before the structure sets.
If the oven is too cool, this initial burst of oven spring is diminished or absent. The crust also forms too slowly, failing to provide adequate support for the rising interior. This can lead to the loaf spreading outwards or collapsing later as the internal structure struggles to set properly. Understanding your oven's true temperature is essential for consistent results and helps address why bread sinks baking.
Is Your Oven Temperature Accurate? Calibration Tips
Many home ovens are not calibrated perfectly, meaning the temperature displayed on the dial or screen might not be the actual temperature inside. Variations of 25°F (approx. 14°C) or more are common. To check your oven's accuracy, use a reliable oven thermometer. Place it in the center of the oven and check the temperature after it has preheated for at least 20-30 minutes.
If your oven consistently reads lower or higher than the set temperature, you'll need to adjust your baking temperature accordingly. For example, if your oven reads 375°F (190°C) when set to 400°F (200°C), you'll know to set it higher for your recipes. Consistent temperature is vital for the crust to set at the right time, providing structure and preventing why bread sinks baking. Some ovens can also be professionally calibrated.
The Impact of Oven Temperature on Bread Rise and Shape
A properly hot oven ensures a strong oven spring, giving the loaf its initial height and volume. The heat penetrates the dough, setting the gluten structure and killing the yeast, halting fermentation. The high temperature also promotes the Maillard reaction and caramelization on the crust, contributing to flavor, color, and a firm exterior that helps support the loaf's shape as it cools.
If the oven temperature is too low, the yeast continues to produce gas for too long, potentially leading to over-expansion before the structure sets. The crust also remains soft and pliable for too long, offering little support. This combination can result in a loaf that expands sideways, doesn't achieve good height, or collapses upon cooling. Conversely, an oven that's too hot can cause the crust to set too quickly, restricting oven spring and potentially leading to a dense interior. Getting the temperature right is a crucial step in preventing why bread sinks baking.
Hydration Levels: Too Much Moisture in the Dough
Dough hydration refers to the ratio of water to flour by weight. For example, a dough with 600g of water and 1000g of flour has 60% hydration. Higher hydration doughs (70%+) are often favored for creating open, airy crumbs, but they are also more challenging to handle and require a stronger gluten structure to support the extra moisture.
Excessive hydration, particularly when combined with insufficient gluten development or improper proofing, can make the dough too slack and weak to hold its shape during baking and cooling. The high water content essentially weighs down the structure, making it prone to collapse. This is a common reason why bread sinks baking, especially for bakers experimenting with wetter doughs before mastering gluten development.
Dough Hydration: Finding the Right Balance
The ideal hydration level depends on the type of flour used, the desired crumb structure, and the baker's skill level. All-purpose flour typically works well in the 60-65% hydration range for beginner bakers. Bread flour, with its higher protein content, can handle higher hydration levels, often up to 70-75% or even more for artisan loaves.
Finding the right balance involves understanding how the dough feels. A well-hydrated dough should feel moist and slightly sticky but still manageable after kneading. If the dough feels excessively wet, sloppy, and doesn't hold any shape, the hydration might be too high for the flour or gluten development. Adjusting hydration is a key technique when troubleshooting why bread sinks baking.
Adjusting Hydration for Different Flour Types
Different flours absorb water differently due to variations in protein and starch content. Whole wheat flour, for instance, typically requires more water than white bread flour because the bran and germ absorb moisture. Rye flour also requires careful hydration adjustments as its non-gluten-forming proteins behave differently.
When using a new flour or recipe, it's often best to start with a moderate hydration level and adjust as needed based on the dough's feel during mixing and kneading. Sometimes, adding a tablespoon or two of extra flour during kneading can help if the dough is too wet, or adding a little more water if it's too dry. Understanding how your specific flour behaves with water is crucial to avoid issues like why bread sinks baking.
Ingredient Imbalances: Yeast, Sugar, and Salt
While often overlooked compared to proofing or kneading, the balance of yeast, sugar, and salt in your recipe significantly impacts dough activity and structure. Too much or too little of any of these can throw off the delicate ecosystem within your dough, contributing to issues like why bread sinks baking.
Yeast is the leavening agent, producing the gas that makes bread rise. Sugar provides food for the yeast, fueling fermentation. Salt controls yeast activity, enhances flavor, and strengthens the gluten structure. An imbalance disrupts these functions, leading to unpredictable results and potentially a collapsed loaf.
The Role of Yeast in Bread Making
Yeast, specifically Saccharomyces cerevisiae, consumes sugars in the dough and produces carbon dioxide gas and alcohol. This gas is trapped by the gluten network, causing the dough to expand. The amount of yeast used influences the speed of fermentation and proofing. Using too much yeast can cause the dough to rise too quickly, potentially leading to over-proofing before the gluten structure is fully ready, a common reason why bread sinks baking.
Conversely, too little yeast will result in a slow, sluggish rise. While this isn't typically a direct cause of collapse after baking, it can lead to an under-proofed loaf which may collapse during cooling due to insufficient internal structure. Ensuring you use the correct type and amount of yeast specified in your recipe is fundamental.
Sugar and Salt: Their Impact on Yeast Activity
Sugar is yeast's primary food source, speeding up fermentation. However, too much sugar can actually inhibit yeast activity by creating an environment with high osmotic pressure, drawing water out of the yeast cells. Recipes with high sugar content (like brioche or challah) often require more yeast to compensate.
Salt, while essential for flavor and strengthening gluten, slows down yeast activity. It controls the rate of fermentation, preventing the dough from rising too quickly and allowing the gluten network time to develop alongside gas production. Too little salt can lead to uncontrolled, rapid rising and weak gluten, increasing the risk of why bread sinks baking. Too much salt can significantly slow or even kill the yeast. Precision in measuring these ingredients is vital for a balanced dough and a stable loaf.
Solutions: Preventing Bread Collapse

Optimizing Proofing Time for Perfect Bread
Getting proofing right is arguably the most challenging aspect for many bakers, but mastering it is key to preventing why bread sinks baking. Instead of strictly adhering to time estimates in recipes, focus on the dough's visual cues and feel. These are more reliable indicators of readiness, as proofing time varies greatly depending on room temperature, dough temperature, and yeast activity.
Developing a feel for properly proofed dough takes practice. Keep a baking journal noting temperatures and proofing times alongside results. This helps you learn how your environment affects your dough. Aim for a consistent proofing environment if possible, perhaps using a proofing box or your oven with the light on (but not turned on) to maintain a stable, slightly warm temperature.
Visual Cues for Properly Proofed Dough
A properly proofed loaf should have increased significantly in volume, usually doubling or nearly doubling, depending on the recipe and desired outcome. The surface should appear smooth and slightly rounded, not tight or overly stretched. The most reliable test is the poke test: gently press a floured finger about half an inch into the dough. If the indentation springs back slowly and only partially (leaving a slight dent), the dough is likely perfectly proofed.
If the indentation springs back completely and quickly, it needs more time (under-proofed). If the indentation remains fully and the dough starts to deflate slightly, it's likely over-proofed. Learning to read these signals is crucial for avoiding issues like why bread sinks baking.
Proofing Environment: Temperature and Humidity Control
Yeast is most active in a warm, humid environment, typically between 75-85°F (24-29°C). Proofing at lower temperatures (cold proofing in the refrigerator) slows down yeast activity significantly but allows for longer flavor development. A stable temperature is more important than a specific high temperature; significant fluctuations can stress the dough.
Humidity prevents the dough surface from drying out, which can restrict expansion. You can create a humid environment by placing a pan of hot water in the oven (turned off) or loosely covering the dough with plastic wrap or a damp towel. Controlling these environmental factors helps ensure consistent proofing results and minimizes the risk of why bread sinks baking.
Strengthening Gluten for a Sturdier Loaf
Adequate gluten development is the backbone of a well-structured loaf. It provides the necessary elasticity and strength to support the rising dough and prevent collapse. Investing time in proper kneading or using techniques that promote gluten development is crucial.
If you're consistently getting sunken loaves and suspect weak gluten is why bread sinks baking, try increasing your kneading time slightly or ensuring you are using the correct technique for your dough type. Don't be afraid to feel the dough – it should become smoother, less sticky (though hydration plays a role here), and more elastic as gluten develops.
Kneading Techniques for Strong Gluten Development
For traditional kneading, whether by hand or machine, the goal is to stretch and fold the dough repeatedly. This aligns the gluten proteins, strengthening the network. Hand kneading typically involves folding the dough onto itself and pushing it away with the heel of your hand, rotating, and repeating. Machine kneading uses hooks that mimic this action. The duration depends on the dough and mixer speed; over-kneading can also weaken gluten.
Alternative methods like the stretch-and-fold technique, often used for high-hydration doughs, achieve gluten development through periodic gentle stretching and folding over a longer period (during bulk fermentation). This method builds strength without the vigorous action of traditional kneading. Regardless of method, observe the dough's transformation from shaggy to smooth and elastic.
Using Bread Flour for Better Gluten Structure
Bread flour is specifically milled from hard wheat varieties and has a higher protein content (typically 12-14%) compared to all-purpose flour (10-12%). This higher protein level means more glutenin and gliadin are available to form the gluten network, resulting in a stronger, more elastic dough capable of supporting a larger rise.
If you are struggling with sunken loaves using all-purpose flour, switching to bread flour might provide the necessary structural support to prevent why bread sinks baking. While some recipes work perfectly with AP flour, loaves aiming for significant height and an open crumb often benefit greatly from the higher protein content of bread flour.
Ensuring Accurate Oven Temperature
An inaccurate oven temperature is a sneaky culprit behind many baking failures, including why bread sinks baking. Even if your proofing and dough development are perfect, baking at the wrong temperature can ruin the final structure. Taking steps to verify and adjust your oven's temperature is a simple yet impactful solution.
Consistent, accurate heat ensures that your loaf bakes evenly, the crust sets at the right time to support the rising interior, and the internal structure solidifies properly. Don't underestimate the importance of this step in achieving consistently successful bread.
Using an Oven Thermometer for Precise Baking
The most straightforward way to ensure accurate oven temperature is to use an inexpensive oven thermometer. Place it in the center of your oven and check it regularly. Different racks can have slightly different temperatures, so placing it where your bread will bake is ideal.
Always allow your oven ample time to preheat – usually 20-30 minutes after it indicates it has reached the set temperature, as the internal elements and walls need time to fully heat up and radiate consistent heat. Relying solely on the oven's indicator can be misleading. Using a thermometer helps you identify discrepancies and adjust your settings, directly addressing a potential reason why bread sinks baking.
Adjusting Baking Time and Temperature for Best Results
Once you know your oven's actual temperature, you can adjust your baking strategy. If your oven runs cool, you might need to set it 25°F (14°C) higher than the recipe calls for. If it runs hot, set it lower. You might also need to adjust baking time. A cooler oven will require longer baking time, while a hotter oven might need less.
Observe your bread as it bakes. Is the crust browning too quickly or too slowly? Is the loaf rising as expected? Learning to read these signs helps you make on-the-fly adjustments. For example, if the crust is browning too fast but the interior isn't done, you can loosely tent the loaf with foil. Proper temperature management is crucial for preventing why bread sinks baking.
Controlling Hydration Levels in Your Dough
Managing dough hydration is key to achieving the desired texture and preventing structural issues. While high-hydration doughs offer the potential for a beautiful, open crumb, they are inherently more challenging. If you're consistently experiencing loaves that spread excessively or collapse, reducing the hydration level slightly in your recipe can provide the dough with more structure and make it easier to handle, helping to prevent why bread sinks baking.
Conversely, if your dough feels too stiff and dense, it might be under-hydrated, which can also lead to a dense crumb, though typically not collapse after baking. Finding the sweet spot for your flour and skill level is an ongoing process.
Measuring Flour and Water Accurately
Precision is paramount in baking, especially with hydration. Weighing your flour and water using a digital kitchen scale is far more accurate than using volume measurements (cups). A cup of flour can vary significantly in weight depending on how it's scooped and packed. Using weight ensures you have the exact ratio of water to flour, allowing for consistent hydration levels batch after batch.
For example, 500 grams of flour and 325 grams of water yield a 65% hydration dough (325/500 = 0.65). If you used cup measures, the same recipe could inadvertently have a significantly different hydration level each time, making it difficult to troubleshoot why bread sinks baking.
Adjusting Hydration Based on Dough Feel
Even with precise measurements, factors like flour type, brand, and even ambient humidity can affect how much water flour absorbs. Therefore, it's helpful to be able to adjust hydration slightly based on the dough's feel during mixing and kneading. Start with the recipe's specified amount of water, but be prepared to add a tiny bit more water if the dough feels too dry and stiff, or a little more flour (just a tablespoon or two) if it feels excessively wet and sloppy.
A well-hydrated dough for kneading should be moist and slightly tacky but should pull away from the sides of the bowl (in a mixer) or be manageable to knead by hand without sticking excessively. Learning to read the dough's consistency is a skill that comes with practice and helps you fine-tune hydration to prevent why bread sinks baking.
Balancing Ingredients for Optimal Bread Structure
The proportions of yeast, sugar, and salt in a recipe are carefully calculated to ensure proper fermentation, flavor development, and structural integrity. Deviating from these proportions can disrupt the delicate balance and lead to problems like why bread sinks baking.
Always measure your ingredients accurately, preferably by weight for consistency. Understand the role each ingredient plays so you can troubleshoot potential issues if your results aren't as expected.
The Role of Yeast in Bread Making
Yeast is responsible for leavening. Too much yeast can cause the dough to ferment and proof too quickly, potentially leading to over-proofing and collapse. Too little yeast means a slow rise and potentially under-proofing if you don't allow sufficient time. Active dry yeast, instant yeast, and fresh yeast behave differently and are used in different quantities. Ensure you're using the type specified in the recipe and activating it correctly if required (like active dry yeast in warm water).
Using the right amount of yeast for the amount of flour and the intended proofing time is crucial. For example, a recipe designed for a long, cold fermentation will use significantly less yeast than one intended for a quick, warm proof. Getting the yeast quantity right is fundamental to preventing why bread sinks baking.
Understanding the Role of Sugar and Salt in Bread Making
Sugar provides food for the yeast and contributes to crust browning and flavor. While necessary, excessive sugar can hinder yeast activity. Salt controls fermentation rate, strengthens gluten, and enhances flavor. Too little salt results in uncontrolled rising and weak structure, increasing the risk of collapse. Too much salt slows yeast excessively and can make the dough tough.
In a standard lean bread recipe, salt is typically around 1.8-2.2% of the flour weight. Sugar content varies greatly depending on the recipe type. Maintaining the correct balance of these ingredients is vital for creating a stable dough that rises predictably and holds its shape through baking and cooling, helping to avoid why bread sinks baking.
Specific Scenarios and Troubleshooting Tips
Troubleshooting Sourdough Bread That Collapses
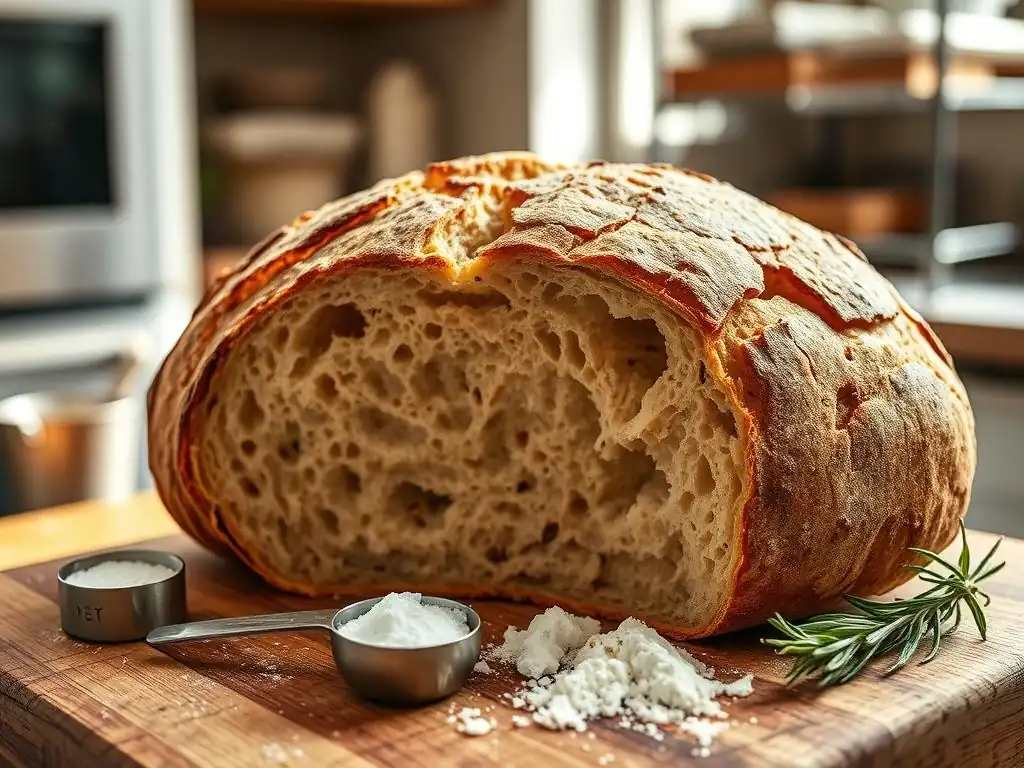
Sourdough baking adds another layer of complexity to troubleshooting why bread sinks baking. Sourdough relies on a wild yeast and bacteria culture (the starter) for leavening. The health and activity of the starter, along with the unique fermentation process, present distinct challenges.
Sourdough loaves are particularly susceptible to collapse if the starter isn't strong enough, or if proofing isn't managed correctly. The long fermentation times also mean the gluten network is under stress for longer periods, requiring careful handling and development.
Sourdough Starter Activity and Bread Collapse
A weak or inactive sourdough starter is a primary reason why sourdough bread sinks baking. The starter needs to be active and bubbly, capable of doubling in volume a few hours after feeding, before being used in a recipe. If your starter isn't vigorous, it won't produce enough gas to properly leaven the dough, resulting in a dense loaf prone to collapse.
Ensure your starter is regularly fed and maintained. Using it at its peak activity (typically a few hours after feeding, when it's bubbly and has roughly doubled) is crucial. A sluggish starter won't provide the necessary lift or structure to prevent why bread sinks baking.
Sourdough Proofing Challenges
Sourdough proofing can be tricky because the fermentation is slower and influenced by both yeast and lactic acid bacteria activity. Over-proofing is a common issue, as it's easy to misjudge the dough's readiness during the long bulk fermentation or final proof. Over-proofed sourdough will appear very fragile and gassy and may collapse upon handling or during baking.
Cold proofing in the refrigerator is often used for sourdough to slow down fermentation and develop flavor, but it also makes judging readiness more challenging. Look for visual cues like a significant increase in volume (though maybe not quite double for high-hydration doughs) and the dough feeling airy but still having some structure. Learning the poke test specifically for sourdough is helpful. Preventing over-proofing is critical to avoiding why bread sinks baking in sourdough.
Troubleshooting Whole Wheat Bread That Collapses
Whole wheat flour contains the bran and germ of the wheat kernel, which are removed in white flour. While nutritious, the sharp edges of the bran can cut the developing gluten strands, making it harder to build a strong network. This is a key reason why whole wheat bread can be denser and more prone to collapsing than white bread, requiring specific techniques to achieve a good rise.
The bran also absorbs more water than the endosperm, meaning whole wheat dough typically requires higher hydration. Getting this balance right is crucial, as too little water results in a dry, dense loaf, while too much can exacerbate structural weakness. Understanding these unique properties helps address why bread sinks baking when using whole wheat.
The Unique Challenges of Whole Wheat Baking
The bran in whole wheat flour disrupts the gluten network, making it less extensible and elastic than dough made with white flour. This means the dough can't trap gas as effectively or support as large a rise. Additionally, enzymes in the germ can sometimes degrade gluten over long fermentation periods.
These factors combine to make achieving a light, airy whole wheat loaf more difficult. Bakers often need to employ strategies specifically designed to strengthen the gluten despite the presence of bran, which directly impacts the loaf's ability to hold its shape and avoid why bread sinks baking.
Tips for Baking Whole Wheat Bread That Rises Well
To counteract the challenges of whole wheat, consider using a blend of whole wheat and bread flour (e.g., 50/50) to benefit from bread flour's stronger gluten. Ensure adequate hydration – whole wheat dough will feel different than white dough and often requires more water. Allow for a longer rest period after mixing (autolyse) before adding salt and yeast; this allows the flour to hydrate fully and gluten development to begin.
Knead whole wheat dough thoroughly to develop the gluten as much as possible. Some bakers sift out the largest bran particles, soak them, and add them back later to minimize gluten disruption. Careful proofing is also essential; aim for a significant but not excessive rise before baking. These techniques help build a stronger structure to prevent why bread sinks baking in whole wheat loaves.
Troubleshooting Enriched Dough That Collapses
Enriched doughs contain ingredients like butter, eggs, milk, and sugar, which add richness and tenderness but can also affect gluten development and dough structure. Fats (butter, egg yolks) can coat gluten strands, inhibiting their formation, while sugar can osmotically stress yeast.
These ingredients make enriched doughs softer, heavier, and sometimes more prone to collapsing if the gluten structure isn't sufficiently developed to support the extra weight and richness. This is another specific scenario where understanding the ingredients' impact is key to preventing why bread sinks baking.
The Impact of Fat and Eggs on Bread Structure
Fats tenderize bread by shortening gluten strands, making the crumb soft and delicate. While desirable for richness, excessive fat can weaken the overall gluten network, reducing the dough's ability to hold its shape and rise high. Eggs add protein, fat, and liquid. The protein contributes to structure, but the fat in the yolk can interfere with gluten development, similar to butter.
Recipes for enriched dough often require longer kneading times or specific techniques to ensure adequate gluten development despite the presence of these ingredients. The added weight from butter, eggs, and sugar also puts more stress on the dough's structure, making robust gluten essential to prevent why bread sinks baking.
Baking Enriched Dough for a Stable Rise
To ensure enriched dough rises well and doesn't collapse, focus on thorough kneading to develop a strong gluten network before adding soft fats like butter. Often, butter is added gradually after the initial dough has been mixed and kneaded to a certain point. Allow sufficient, but not excessive, proofing time; enriched doughs can sometimes over-proof quickly due to the presence of sugar feeding the yeast.
Baking temperature is also important; enriched doughs often benefit from a slightly lower oven temperature than lean doughs to prevent the crust from browning too quickly before the rich interior is fully baked and set. Ensuring the internal temperature reaches around 190-200°F (88-93°C) is a good indicator of doneness. Careful handling and proper gluten development are key to preventing why bread sinks baking with enriched doughs.
Achieving Baking Success: Tips for a Perfect Loaf
Mastering the Art of Bread Baking: Key Takeaways
Achieving consistently perfect loaves requires understanding the fundamental science behind bread making. The most common reasons why bread sinks baking revolve around a few key areas: proofing (over or under), gluten development (too weak), oven temperature (inaccurate or too low), hydration (too high), and ingredient balance.
- Proofing: Learn to read your dough, not just the clock. Use the poke test and observe volume increase.
- Gluten: Knead sufficiently to develop a strong, elastic network.
- Oven: Use an oven thermometer and ensure adequate preheating and correct temperature.
- Hydration: Measure accurately by weight and adjust based on dough feel.
- Ingredients: Measure precisely and understand the role of yeast, sugar, and salt.
Addressing these areas systematically will significantly improve your bread baking results and help you avoid the disappointment of why bread sinks baking.
Recipe Recommendations for Beginner Bakers
For beginners, starting with simpler recipes is advisable. Lean doughs with moderate hydration, such as a basic white sandwich bread or a simple rustic loaf recipe, are excellent starting points. These recipes typically have fewer variables and are easier to handle, allowing you to focus on mastering fundamental techniques like kneading and proofing without the added complexity of high hydration or enriching ingredients.
Look for recipes that provide clear instructions and visual cues for proofing. As you gain confidence and a feel for the dough, you can gradually move on to more complex recipes. Successfully baking simpler loaves builds the foundational skills necessary to tackle challenges like why bread sinks baking in more advanced recipes.
Advanced Baking Techniques for Experienced Bakers
For experienced bakers looking to refine their skills and tackle challenging loaves, exploring advanced techniques can be rewarding. This includes working with very high hydration doughs (75%+), incorporating techniques like autolyse and preferments (like a poolish or biga) for enhanced flavor and structure, or experimenting with long, cold fermentation periods.
Understanding how these techniques impact gluten development, fermentation rate, and dough handling is crucial. Mastering these methods allows for greater control over crumb structure, flavor, and crust development, helping to troubleshoot and prevent why bread sinks baking even in the most complex bread styles. Practice, experimentation, and careful observation are key to continued improvement.
Frequently Asked Questions
Why does my bread sink in the middle after baking?
Bread sinking is often due to underbaking or an imbalance of ingredients. Too much moisture or not enough gluten development can also contribute to the collapse.
How can I tell if my bread is properly baked to prevent sinking?
Use a thermometer to check the internal temperature; most breads are done between 200-210°F. A hollow sound when tapped on the bottom is another indicator.
Could too much liquid cause my bread to sink after baking?
Yes, excessive liquid weakens the structure of the dough, leading to a collapse as it cools. Follow the recipe measurements carefully.
What role does gluten play in preventing bread from sinking?
Gluten provides the necessary structure to hold the bread's shape. Insufficient kneading or using the wrong type of flour can result in weak gluten development.
Is it possible that my oven temperature is the reason my bread sinks?
Absolutely! An inaccurate oven temperature can lead to uneven baking and a sunken loaf. Invest in an oven thermometer to ensure accuracy.
Final Reflection: Understanding the Art of Bread Baking
The journey of mastering bread baking is as much about understanding the science behind it as it is about the joy of creating something delicious. In today's fast-paced world, where homemade bread can often be overlooked in favor of store-bought options, the importance of knowing why bread sinks during baking has never been more relevant. Bread baking is not just a culinary skill; it is a connection to our past and a way to nourish our present.
The nuances of bread baking reflect broader themes in our cultural and social landscape, where the act of creating something from scratch fosters a sense of community and belonging. As we navigate through the complexities of our lives, the simple act of kneading dough can ground us and remind us of the beauty in patience and practice. Baking is both an art and a science, where every ingredient plays a crucial role in the final outcome.
This ongoing influence of baking not only enriches our culinary skills but also strengthens our connections with family and friends, as we share the fruits of our labor.
As you reflect on the lessons shared in this article, I invite you to embrace the challenges of bread baking with an open heart and a curious mind. Consider each loaf as an opportunity to learn, grow, and connect with those around you. Whether you are a seasoned baker or just starting out, let the experience of troubleshooting your bread inspire you to explore new recipes, share your creations, and foster a love for this timeless craft. Remember, every loaf tells a story—make yours a tale of resilience and discovery.
Unlock Your Baking Potential: Rise to the Occasion!
Thanks for taking the time to delve into the mysteries of sinking bread! We hope you gained valuable insights into preventing this common baking woe. Now it's time to put that knowledge into practice.
- Bake a perfect loaf: Try the troubleshooting tips we discussed – focusing on one key area (e.g., proofing time, flour type) at a time to identify your bread's unique needs. Take notes and enjoy the process!
- Share your baking journey: Tell us about your experiences (both triumphs and setbacks!) in the comments below. Let's build a supportive baking community!
- Experiment with a new recipe: Challenge yourself with a slightly different bread recipe to test your newfound skills and expand your baking repertoire.
What adjustments will you make to your next bread-baking adventure?