
Easy Pain aux Raisins Recipe: Perfect for Intermediate Bakers

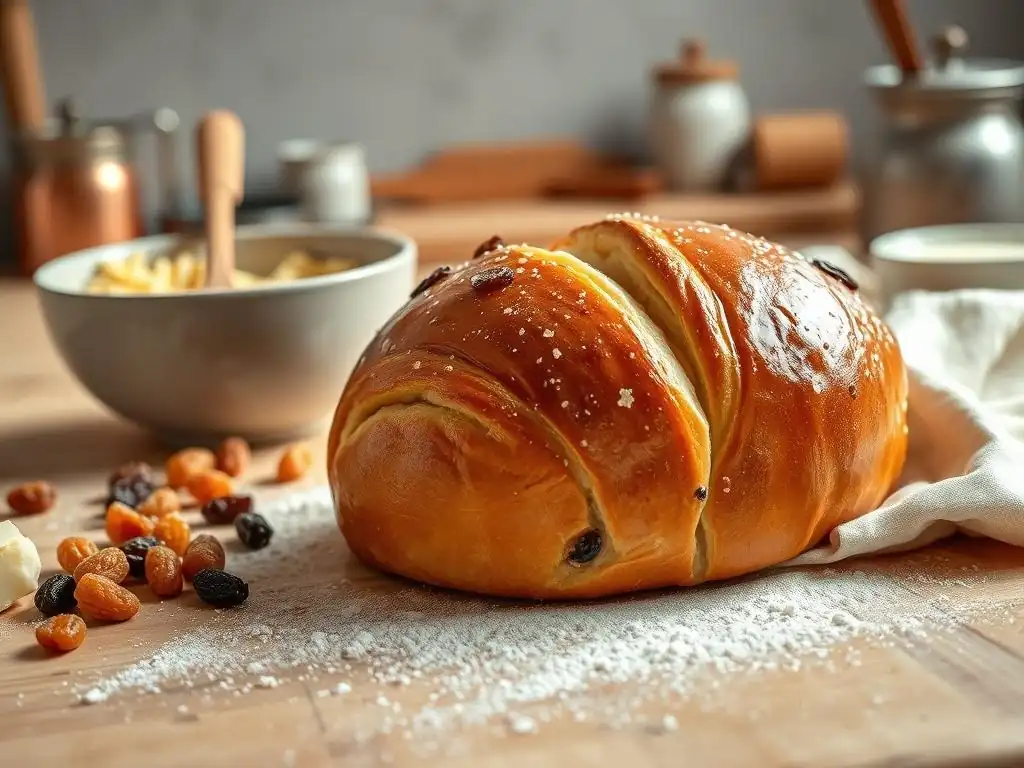
Welcome to BakeWithEase, your trusted guide to unlocking baking brilliance! Are you ready to elevate your skills and create bakery-worthy treats at home? This week, we're diving into the delightful world of laminated dough with our Easy Pain aux Raisins Recipe, perfect for intermediate bakers looking for a rewarding challenge. Intrigued by the secrets to achieving flaky layers and a perfectly balanced sweet filling? Keep reading to discover our step-by-step guide and create these delicious pastries yourself!
- Authentic Pain aux Raisins Recipe: A Baker's Delight
- Introduction to Pain aux Raisins: A Classic Viennoiserie
- Pain aux Raisins Ingredients: The Foundation of Flavor
- Step-by-Step Guide to Baking Authentic Pain aux Raisins
- Tips and Tricks for Baking Perfect Pain aux Raisins
- Troubleshooting Common Pain aux Raisins Baking Problems
- Serving Suggestions and Variations for Your Pain aux Raisins
- Conclusion: Mastering the Art of Pain aux Raisins
-
Frequently Asked Questions
- ### What makes this pain aux raisins recipe "easy" for intermediate bakers?
- ### What specific skills should I have before attempting this recipe?
- ### What are the key ingredients for a successful pain aux raisins?
- ### Can I substitute any ingredients in this recipe?
- ### How long does it take to make this pain aux raisins recipe from start to finish?
- Final Reflection: The Sweetness of Shared Effort
- Unleash Your Inner Baker: Craft Your Perfect Pain aux Raisins!
Authentic Pain aux Raisins Recipe: A Baker's Delight
Introduction to Pain aux Raisins: A Classic Viennoiserie
Pain aux Raisins, often translated as "raisin bread" or "raisin pastry," is a beloved French viennoiserie, a category of baked goods that includes croissants, pain au chocolat, and other delights made from a rich, laminated dough. These swirled pastries, filled with creamy crème pâtissière and plump raisins, offer a delightful combination of textures and flavors. While they might seem intimidating to make at home, mastering the technique is incredibly rewarding and well within the reach of intermediate bakers looking to expand their skills.
Originating from the same laminated dough base as croissants, pain aux raisins requires patience and attention to detail, particularly during the lamination process. However, the result—a flaky, buttery spiral filled with sweet, luscious cream and chewy raisins—is truly worth the effort. This easy pain aux raisins recipe breaks down the process into manageable steps, guiding you through creating this classic pastry from scratch, right in your own kitchen.
Why This Pain aux Raisins Recipe Delivers Authentic Flavor
Achieving that authentic French bakery flavor in pain aux raisins comes down to a few key elements: the quality of the ingredients, the proper development of the laminated dough, and the richness of the crème pâtissière. This recipe emphasizes using high-quality butter with a high fat content, which is crucial for creating distinct, flaky layers during the lamination process. Unlike standard butter, European-style butter contains around 82% butterfat, compared to the typical 80% in many other types, contributing significantly to both texture and flavor.
Furthermore, this approach focuses on developing strong gluten structure in the initial dough ( détrempe) before incorporating the butter. This strength is essential to withstand the repeated rolling and folding required for lamination. The crème pâtissière is made from scratch using traditional methods, ensuring a smooth, rich filling that complements the buttery pastry. By following these steps, you'll achieve a pain aux raisins that boasts a crispy, flaky exterior, a tender interior, a creamy filling, and bursts of sweetness from the raisins, mirroring the quality found in the best boulangeries.
Mastering Laminated Dough: A Skill for Every Baker
Mastering laminated dough, the foundation of pain aux raisins, is a significant step for any intermediate baker. This technique involves repeatedly folding a layer of butter into a dough, creating hundreds of alternating layers of dough and fat. When baked, the water in the butter turns to steam, pushing the dough layers apart and resulting in that characteristic light, airy, and flaky texture. This process, while requiring precision and temperature control, builds fundamental skills applicable to a wide range of pastries, including croissants, puff pastry, and Danish pastries.
The lamination process typically involves several "turns," or folds, with chilling periods in between. Each turn multiplies the number of layers, exponentially increasing the potential for flakiness. For example, a simple book fold creates three layers; two book folds result in nine layers; three book folds yield 27 layers, and so on.
This recipe guides you through the necessary turns, emphasizing the importance of keeping the dough and butter cold to prevent the butter from melting into the dough, which would inhibit layer formation. Once you conquer laminated dough for this easy pain aux raisins recipe, you'll feel empowered to tackle other challenging and rewarding pastries.
A Brief History of Pain aux Raisins in French Bakeries
While the exact origins of pain aux raisins are debated, it belongs firmly to the tradition of Viennoiseries, a term referring to baked goods made in the style of Vienna. This tradition was popularized in Paris in the 19th century, notably by Austrian baker August Zang. Zang introduced techniques and pastries common in Vienna, including kipferl (the precursor to the croissant), to the Parisian market. Over time, French bakers adapted these techniques, developing the specific laminated dough we use today for croissants, pain au chocolat, and, of course, pain aux raisins.
Pain aux raisins quickly became a staple in French bakeries and homes, often enjoyed for breakfast or as an afternoon snack ( goûter). Its appeal lies in its comforting combination of flavors and textures. The inclusion of crème pâtissière sets it apart from a simple raisin bread, elevating it to a richer, more indulgent pastry. Today, it remains a beloved classic, found in virtually every boulangerie across France and enjoyed by pastry lovers worldwide.
Pain aux Raisins Ingredients: The Foundation of Flavor
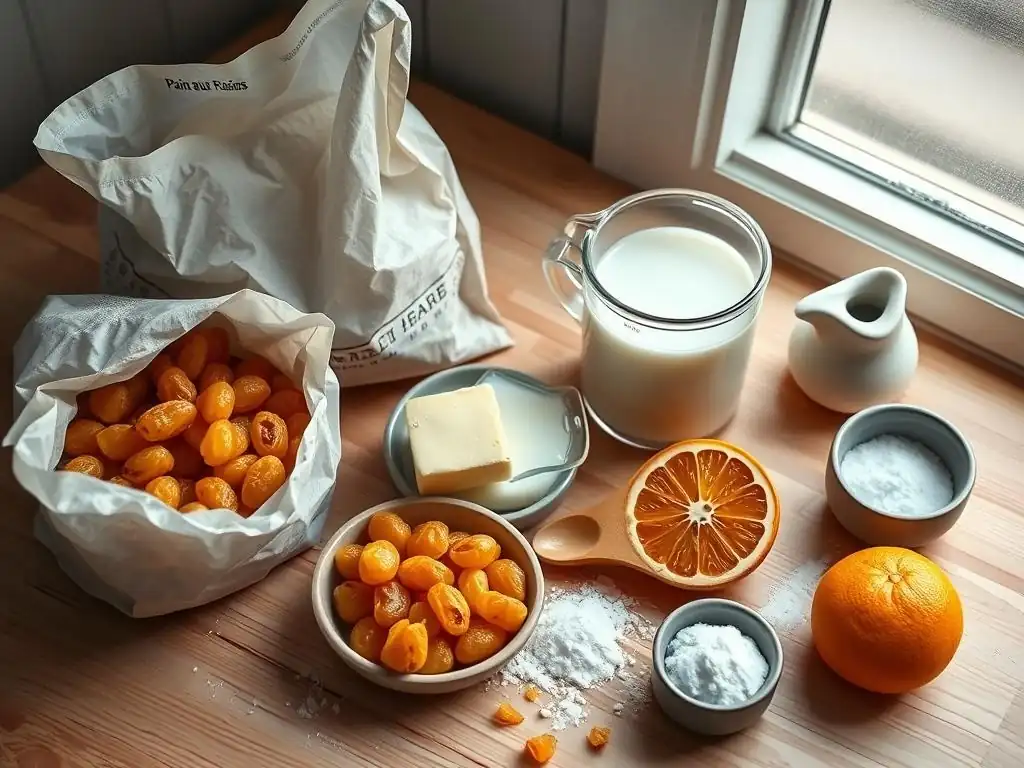
The success of your pain aux raisins hinges significantly on the quality and type of ingredients you use. Opting for the right kind of flour, butter, and even raisins makes a noticeable difference in the final texture and taste. This section details the essential components needed for a truly authentic experience.
Essential Ingredients for Traditional Pain aux Raisins
To create perfect pain aux raisins, you'll need a specific set of ingredients, each playing a vital role. These include strong bread flour, high-fat European-style butter, golden raisins (often soaked), and the components for a rich crème pâtissière. Using these high-quality ingredients is the first step towards achieving that desired flakiness and rich flavor profile that defines authentic pain aux raisins.
Strong Bread Flour for Optimal Gluten Development
Using strong bread flour is crucial for the dough structure in this easy pain aux raisins recipe. Strong bread flour typically has a protein content ranging from 12% to 14%, which is higher than all-purpose flour. This higher protein level allows for the development of strong gluten networks when the dough is kneaded. Gluten is the protein structure that provides elasticity and strength to the dough, enabling it to be rolled thinly, folded repeatedly during lamination, and hold its shape without tearing.
Without sufficient gluten development, the dough would be weak and unable to support the layers of butter. During baking, the steam created by the melting butter needs this strong gluten framework to push against, creating those distinct, airy layers. Using strong flour ensures your détrempe (the initial dough) has the necessary resilience to undergo the rigorous lamination process and produce a light, flaky final pastry.
European-Style Butter: High Fat Content for Flakiness
European-style butter is non-negotiable for achieving optimal flakiness in laminated doughs like pain aux raisins. As mentioned earlier, it contains a minimum of 82% butterfat, compared to the roughly 80% found in many other types of butter. This higher fat content means less water is present in the butter. During baking, the water in the butter turns to steam and separates the dough layers. If there's too much water, the butter can melt too quickly and seep into the dough, resulting in a greasy, dense texture rather than distinct, flaky layers.
The higher melting point of European-style butter also makes the lamination process easier. It stays solid and pliable longer when chilled, allowing you to roll and fold the dough without the butter melting out. This creates clearer, more defined layers of dough and butter, which are key to achieving that signature crispy, shatteringly flaky exterior of a well-made pain aux raisins.
Golden Raisins: Soaked in Rum for Enhanced Taste
Golden raisins are traditionally used in pain aux raisins for their sweet, slightly tart flavor and chewy texture. While regular raisins can be used, golden raisins often have a slightly milder, fruitier profile. To enhance their flavor and plumpness, they are typically soaked before being added to the pastry. Soaking rehydrates the dried fruit, preventing them from drawing moisture out of the pastry cream during baking, which could make the cream dry.
A common and delicious practice is to soak the raisins in rum. The rum infuses the raisins with a warm, aromatic depth of flavor that complements the richness of the pastry cream and butter. The alcohol also helps to soften the raisins further. If you prefer not to use alcohol, you can soak them in warm water, orange juice, or even a little warm tea for a similar plumping effect and a different subtle flavor note.
Crème Pâtissière Ingredients: Milk, Eggs, Sugar, Vanilla
Crème Pâtissière, or pastry cream, is the luscious filling that distinguishes pain aux raisins. It's a classic custard made from simple ingredients: milk, egg yolks, sugar, and a thickener, usually flour or cornstarch. Vanilla is a key flavoring agent, often used in the form of a vanilla bean, extract, or paste.
The combination of egg yolks and starch provides the thickening power, creating a rich, smooth, and stable cream that won't run out of the pastry during baking. The sugar provides sweetness, balancing the richness of the cream and the butter. Using a vanilla bean scraped for its seeds imparts the most authentic and intense vanilla flavor, visible as tiny black specks in the finished cream. Making crème pâtissière from scratch allows you to control the consistency and flavor, ensuring it perfectly complements your pain aux raisins.
Ingredient Sourcing: Local Bakeries and Specialty Shops
Sourcing high-quality ingredients can significantly impact the success of your easy pain aux raisins recipe. For items like European-style butter and strong bread flour, consider visiting local bakeries or specialty food shops. Bakeries often sell the same professional-grade ingredients they use, which are typically superior to standard supermarket options. Specialty shops may carry a wider variety of flours, including specific bread flours with higher protein content, and imported butters.
For vanilla beans, check organic grocery stores or spice shops, as they often have fresher, more aromatic beans than those found in conventional supermarkets. While standard golden raisins are widely available, exploring different varieties or sources might yield plumper, more flavorful fruit. Building relationships with local food suppliers can not only provide access to better ingredients but also offer valuable insights and tips from experienced professionals.
Step-by-Step Guide to Baking Authentic Pain aux Raisins
Baking pain aux raisins involves several distinct stages, from preparing the dough and pastry cream to assembling and baking the final pastries. Follow this guide carefully to navigate each step successfully and achieve delicious results.
Part 1: Crafting the Détrempe - The Heart of the Dough
The détrempe is the initial dough made from flour, water (or milk), yeast, sugar, and salt. It's the base that the butter will be incorporated into during lamination. Getting this right is fundamental to the entire process.
Activating Fresh Yeast for a Robust Rise
Yeast is essential for leavening the dough, giving the pain aux raisins its lightness and contributing to flavor development. While instant yeast can be mixed directly into the dry ingredients, using active dry yeast typically requires activation. To activate active dry yeast, you'll usually dissolve it in a small amount of warm liquid (around 40-45°C or 105-115°F) with a pinch of sugar. Within 5-10 minutes, the mixture should become foamy on top, indicating the yeast is alive and active.
Using fresh yeast, if available, can sometimes yield a more complex flavor profile. Fresh yeast should be crumbled directly into the liquid and will dissolve quickly. It's crucial to ensure your yeast is active, as inactive yeast will result in a flat, dense dough that won't rise properly during proofing or baking. Always check the expiration date on your yeast and store it correctly (usually in the refrigerator or freezer for longer shelf life).
Kneading the Dough to Achieve a Smooth Texture
After combining the détrempe ingredients, the dough needs to be kneaded. Kneading develops the gluten structure, transforming a shaggy mass into a smooth, elastic dough. You can knead by hand or using a stand mixer fitted with a dough hook. Kneading by hand typically takes 10-15 minutes, while a mixer might take 5-8 minutes on medium speed.
You'll know the dough is sufficiently kneaded when it is smooth, pulls away cleanly from the sides of the bowl (if using a mixer), and passes the "windowpane test." To perform the windowpane test, pinch a small piece of dough and gently stretch it between your fingers. If you can stretch it thin enough to see light through it without tearing, the gluten is well-developed. A properly kneaded dough is essential for withstanding the stress of lamination.
First Proofing: Allowing the Dough to Rest and Develop
The first proofing, or bulk fermentation, allows the yeast to begin its work, producing carbon dioxide which causes the dough to rise. More importantly for laminated doughs, this stage also allows the gluten to relax, making the dough easier to roll out without excessive resistance. Typically, the dough is proofed at room temperature for 1-2 hours, or until it has roughly doubled in size.
Alternatively, a slower, colder proof in the refrigerator overnight is often preferred for laminated doughs. This slow fermentation develops more complex flavors and also chills the dough thoroughly, which is crucial for the next step: incorporating the butter. A well-rested dough is pliable and less likely to spring back when rolled, making the lamination process significantly smoother.
Incorporating the Butter Block: Creating Distinct Layers
This is where the magic of lamination begins. A cold, pliable block of butter is enclosed within the chilled détrempe. The goal is to create a flat, even layer of butter within the dough. The dough is typically rolled into a rectangle, the butter block is placed on one half, and the other half is folded over to encase the butter. It's vital that the butter is cold but flexible – not hard and brittle, which would break, and not soft and greasy, which would melt into the dough.
After encasing the butter, the dough is gently rolled out again into a larger rectangle and then folded. Common folds include the single fold (folding in thirds, like a letter) or the book fold (folding both ends to the center line, then folding in half). This recipe will specify the type and number of turns. Each fold creates new layers of dough and butter. Chilling the dough between turns is absolutely essential to keep the butter solid and defined. A typical recipe might require 2-4 turns with chilling periods of 30-60 minutes between each turn.
Second Proofing: Enhancing Flavor and Dough Strength
After the lamination turns are complete, the dough undergoes a final chilling period, often overnight. This extended cold rest serves multiple purposes. Firstly, it allows the gluten to fully relax, making the dough easy to roll thinly for shaping. Secondly, the slow, cold fermentation continues to develop complex flavors within the dough, contributing to the authentic taste of your pain aux raisins.
Furthermore, this rest period allows the structure created by lamination to stabilize. The layers become more defined and less likely to meld together. This results in a dough that will puff up beautifully in the oven, producing those coveted flaky layers. Skipping or shortening this cold rest period can lead to a less flavorful dough and less distinct layers in the final pastry.
Part 2: Preparing the Crème Pâtissière (Pastry Cream)
The smooth, rich crème pâtissière is a key component of pain aux raisins. It's relatively straightforward to make, but requires careful heating and whisking to achieve the correct consistency.
Combining Milk, Eggs, Sugar, and Vanilla Bean
Start by gently heating the milk, often infused with vanilla. If using a vanilla bean, split it lengthwise, scrape out the seeds, and add both the pod and seeds to the milk. Heat the milk mixture over medium heat until it's just simmering, then remove the pod. In a separate bowl, whisk together the egg yolks, sugar, and thickener (flour or cornstarch) until pale and creamy.
Tempering the egg mixture is crucial to prevent scrambling. Slowly pour about half of the hot milk into the egg mixture while whisking constantly. This gently raises the temperature of the eggs. Once tempered, pour the warmed egg mixture back into the pot with the remaining milk. This process ensures a smooth custard base without lumps.
Cooking the Pastry Cream: Achieving a Thick, Silky Texture
Return the pot with the combined mixture to medium heat. Whisk continuously, paying close attention to the bottom of the pot to prevent sticking and scorching. The mixture will gradually thicken. Bring it to a gentle boil for 1-2 minutes while still whisking vigorously. Boiling briefly ensures that the starch thickener is fully activated and the cream is stable.
The crème pâtissière should be thick enough to coat the back of a spoon. It will continue to thicken slightly as it cools. Cook it too little, and it will be runny; cook it too much, and it can become lumpy or scorched. Aim for a smooth, silky consistency that holds its shape when spread.
Cooling the Pastry Cream: Using Plastic Wrap to Prevent Skin
Once the pastry cream is cooked, remove it from the heat and transfer it to a clean bowl. To prevent a skin from forming on the surface as it cools, immediately press a piece of plastic wrap directly onto the surface of the cream. Ensure there are no air pockets between the plastic and the cream.
Allow the cream to cool slightly at room temperature before transferring it to the refrigerator. Chill it thoroughly for at least 2-3 hours, or until completely cold and set. Cold pastry cream is much easier to spread neatly onto the dough during assembly. Proper cooling is essential for the structure of the assembled pain aux raisins.
Part 3: Assembling and Baking the Pain aux Raisins
With the laminated dough chilled and the pastry cream ready, it's time to assemble and bake your pain aux raisins. Precision in rolling and shaping is key here.
Rolling Out the Dough: Maintaining Consistent Thickness
Take the chilled laminated dough from the refrigerator. On a lightly floured surface, gently roll the dough out into a large rectangle. The dimensions will depend on how many pain aux raisins you plan to make, but a typical size might be around 40-50 cm (16-20 inches) in width and 30-40 cm (12-16 inches) in height. It's crucial to maintain a consistent thickness across the entire rectangle, usually around 3-4 mm (about 1/8 inch).
Uneven thickness will lead to uneven baking and less uniform spirals. Roll gently and evenly, using just enough flour to prevent sticking. If the dough resists rolling or springs back, cover it and let it rest in the refrigerator for 10-15 minutes to allow the gluten to relax before continuing. Patience here pays off in the final shape and texture.
Spreading the Pastry Cream and Rum-Soaked Raisins
Once the dough is rolled to the correct dimensions and thickness, spread an even layer of the chilled crème pâtissière over the entire surface, leaving a small border (about 1-2 cm or 1/2 inch) along one long edge. This border will help seal the roll later. Ensure the cream is spread edge-to-edge on the other three sides.
Next, scatter the plumped, rum-soaked golden raisins evenly over the pastry cream. Distribute them generously but avoid clumping in one area. The cream acts as an adhesive, holding the raisins in place as you roll the dough. The combination of creamy filling and chewy raisins is what makes this easy pain aux raisins recipe so delightful.
Rolling and Shaping: Creating the Classic Spiral
Starting from the long edge opposite the border you left bare, tightly roll the dough into a log. Roll it as evenly as possible, keeping the roll taut to prevent gaps in the spiral. Once rolled, gently press the seam to seal it. For easier slicing, it's highly recommended to chill the rolled log in the refrigerator or even the freezer for 15-30 minutes until it is firm.
Using a sharp knife or a piece of dental floss (unwaxed, unflavored), slice the log into individual pastries, typically about 2-3 cm (1 inch) thick. Dental floss provides a clean cut without squashing the layers. Place the sliced pastries cut-side up on baking sheets lined with parchment paper, leaving ample space between them as they will expand during the final proof and baking.
Final Proofing: Ensuring a Light and Airy Texture
The sliced pain aux raisins need a final proofing period before baking. This allows the yeast to produce more gas, causing the pastries to puff up and become light and airy. Place the baking sheets in a warm, draft-free place for 1-2 hours, or until the pastries have visibly increased in size and look puffy. They should look light and airy, but not so proofed that the layers are separating excessively.
The ideal proofing temperature is around 24-26°C (75-80°F). Be careful not to over-proof, as this can lead to a loss of structure in the oven. If your kitchen is cool, you can create a warm environment by placing the sheets in a slightly warm oven (turned off!) with a pan of hot water on the rack below. Just ensure the oven isn't too hot, which would melt the butter.
Baking to a Deep Golden Brown: Monitoring Oven Temperature
Preheat your oven to the correct temperature, typically around 180-200°C (350-400°F), depending on your oven. Baking pain aux raisins requires a relatively hot oven to ensure the layers puff up quickly before the butter melts completely. An egg wash (a beaten egg mixed with a little milk or water) is often brushed on the surface just before baking to give them a beautiful golden-brown color and a slight sheen.
Bake for 15-25 minutes, or until the pastries are deeply golden brown, flaky, and feel light when lifted. Baking time will vary depending on your oven and the size of your pastries. Monitor them closely during the last few minutes to prevent burning. A well-baked pain aux raisins will have a crispy exterior and a tender, layered interior with the cream set but still soft.
Tips and Tricks for Baking Perfect Pain aux Raisins
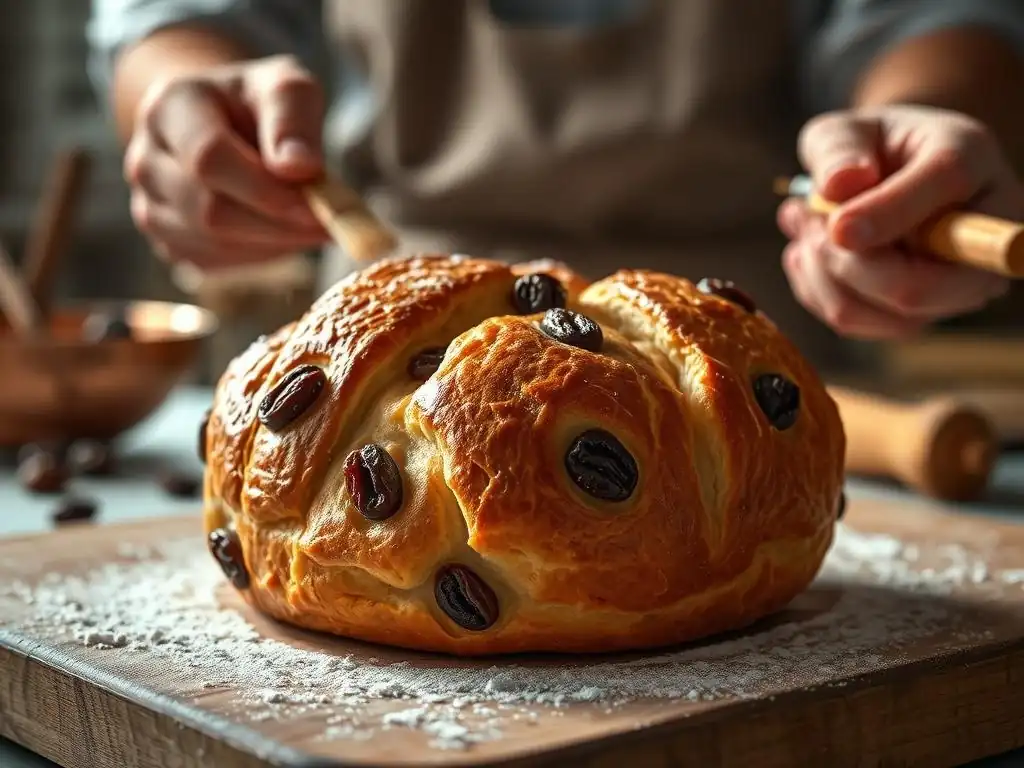
Achieving bakery-quality pain aux raisins at home is possible with attention to detail and a few helpful tips. These pointers address common challenges in working with laminated dough and fillings.
Achieving Exceptional Flakiness: Temperature Control is Key
The single most critical factor for achieving exceptional flakiness in your pain aux raisins is temperature control. Both the dough and the butter block must be kept cold throughout the lamination process and during chilling periods. The ideal temperature for rolling and folding is cool enough to keep the butter solid and distinct from the dough, typically around 10-15°C (50-59°F).
If the dough or butter becomes too warm, the butter will melt into the dough, obliterating the layers and resulting in a dense, greasy pastry. If the butter is too cold and hard, it will break into chunks during rolling, leading to uneven layers. If you notice the dough becoming sticky or the butter starting to ooze, stop immediately, wrap the dough, and return it to the refrigerator for at least 30 minutes to firm up before continuing. Working quickly and keeping everything chilled is paramount for flaky success in this easy pain aux raisins recipe.
Preventing Cream Leakage: Proper Sealing Techniques
A common issue when baking filled pastries is the filling leaking out during baking. For pain aux raisins, this means the crème pâtissière oozing onto the baking sheet. To prevent this, ensure you leave that small border (about 1-2 cm) along the long edge of the rolled dough before spreading the cream and raisins.
When rolling the dough into a log, make sure to roll it tightly and evenly, pressing the final seam firmly to seal it completely. This seam is the outer layer of the spiral and acts as a barrier. When slicing the log, use a very sharp knife or dental floss for a clean cut that doesn't squeeze the filling out or distort the layers. Placing the cut pastries cut-side up on the baking sheet also helps contain the cream within the spiral structure as it bakes.
Ensuring Even Baking: Rotating the Baking Sheet
Ovens often have hot spots, meaning the temperature is not uniform throughout the baking chamber. To ensure your pain aux raisins bake evenly and achieve a consistent golden-brown color on all sides, rotate the baking sheet halfway through the baking time.
For example, if you're baking for 20 minutes, open the oven carefully around the 10-minute mark, turn the baking sheet 180 degrees, and close the oven door quickly to minimize heat loss. If using multiple baking sheets on different racks, you might also swap their positions (top to bottom) when rotating. This simple step helps prevent some pastries from browning too quickly while others remain pale.
Storing and Reheating: Maintaining Freshness and Texture
Pain aux raisins are best enjoyed fresh, ideally warm from the oven. However, they can be stored for later. Once completely cooled, store them in an airtight container at room temperature for 1-2 days. For longer storage, they can be refrigerated for up to 3-4 days. The flakiness will diminish over time, especially in the refrigerator.
To revive the texture and enjoy them warm, reheat pain aux raisins in a preheated oven at 160°C (325°F) for about 5-10 minutes. Avoid using a microwave, which will make them soft and chewy rather than crispy. If frozen (they freeze well for up to a month in an airtight container), thaw them overnight in the refrigerator before reheating in the oven.
Troubleshooting Common Pain aux Raisins Baking Problems
Even with a detailed easy pain aux raisins recipe, baking can sometimes present challenges. Here are solutions to some common issues you might encounter.
Dough Not Rising: Check Yeast Viability and Temperature
If your détrempe or assembled pain aux raisins aren't rising during proofing, the most likely culprit is inactive yeast. Ensure your yeast is fresh and active by performing the activation test (foaming in warm liquid) if using active dry yeast. Using water or milk that is too hot will kill the yeast, while liquid that is too cold won't activate it.
Another reason for poor rising is the proofing environment being too cold. Yeast activity slows significantly at low temperatures. Ensure your proofing area is warm and draft-free, ideally between 24-26°C (75-80°F). Insufficient kneading can also hinder rising, as the gluten structure needs to be developed enough to trap the gas produced by the yeast.
Pastry Cream Too Thin: Ensure Sufficient Cooking Time
If your crème pâtissière is too runny after chilling, it wasn't cooked long enough or didn't reach a boil. The starch thickener (flour or cornstarch) needs to be heated to a boil for 1-2 minutes to fully activate and provide maximum thickening power.
If the cream is still warm and seems too thin, you can return it to the pot and cook it gently over medium heat, whisking constantly, bringing it back to a boil for a minute or two. Be careful not to scorch it. If the cream is already cold and too thin, there's little you can do to fix its consistency without reheating, which might alter its texture. Ensure you measure your ingredients accurately, especially the starch.
Pain aux Raisins Not Baking Evenly: Calibrate Oven Temperature
Uneven baking, where some pastries are too dark or light compared to others on the same sheet, often points to an oven temperature issue or hot spots. While rotating the baking sheet helps, an inaccurate oven thermostat is a common problem. Ovens can be off by as much as 20-30°C (50-75°F).
Consider purchasing an inexpensive oven thermometer to check your oven's actual temperature. If it's significantly different from the setting, you'll need to adjust accordingly. For instance, if your oven reads 180°C when set to 200°C, you'll know to set it higher. Also, avoid opening the oven door unnecessarily during baking, as this causes significant temperature drops and can lead to uneven results.
Problem: Soggy Bottoms - Solution: Using a Perforated Baking Sheet
Soggy bottoms on pastries occur when moisture gets trapped underneath during baking. This can happen if the baking sheet doesn't allow for proper air circulation or if the oven temperature isn't quite right. For pain aux raisins, which contain a moist filling, this can be a particular issue.
Using a perforated baking sheet (sometimes called an air-bake sheet) can help. These sheets have tiny holes that allow hot air to circulate more freely around the bottom of the pastry, promoting even baking and preventing moisture buildup. If you don't have a perforated sheet, ensure your oven is properly preheated and consider placing the baking sheet on a rack in the lower third of the oven to ensure sufficient heat reaches the bottom.
Serving Suggestions and Variations for Your Pain aux Raisins
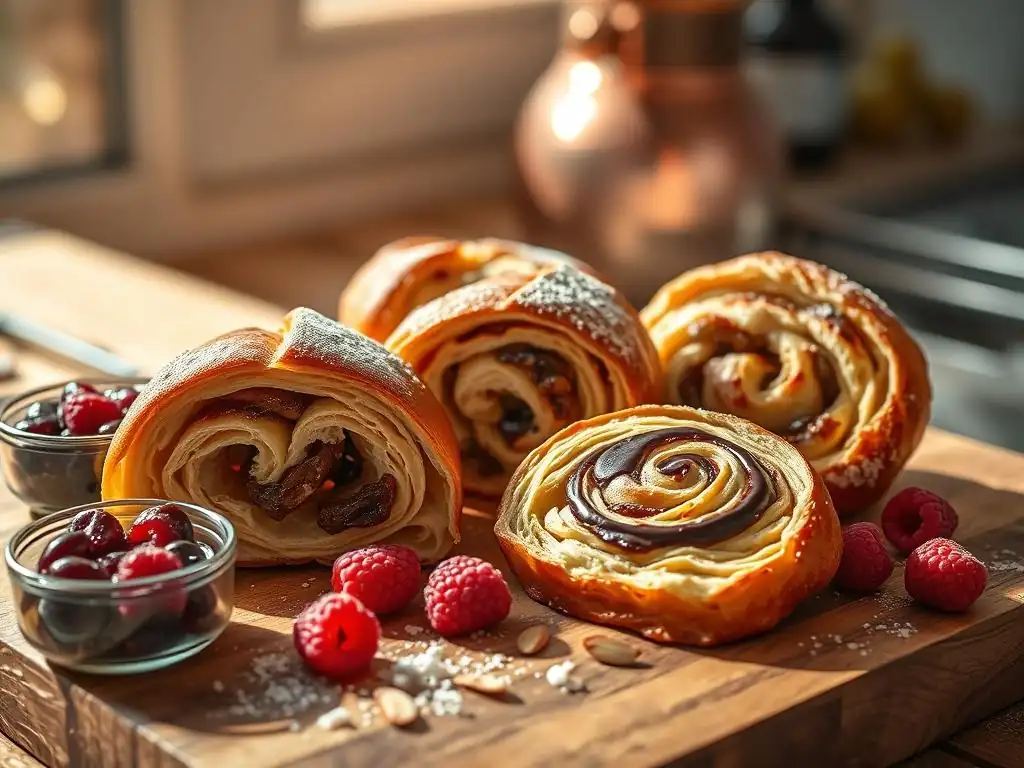
Once your beautiful pain aux raisins emerge from the oven, the real reward is enjoying them. Here are some ideas for serving and adding delightful variations.
Enjoying Your Freshly Baked Pain aux Raisins: Warm or at Room Temperature
The absolute best way to enjoy your homemade pain aux raisins is warm, shortly after they've cooled enough to handle comfortably. When warm, the butter is still slightly melty, the layers are at their crispiest, and the pastry cream is soft and yielding. The aroma filling your kitchen is an added bonus!
If you can't eat them all immediately, they are also delicious at room temperature. The flavors meld beautifully as they cool, and the texture remains pleasant, though slightly less flaky than when warm. Serve them as part of a leisurely breakfast, a mid-morning treat, or with a cup of coffee in the afternoon.
Variations: Adding Orange Zest or Candied Citrus Peel
While the classic pain aux raisins uses plain raisins and vanilla crème pâtissière, you can introduce subtle variations to add complexity. A popular addition is orange zest. Finely grated zest from an organic orange can be added to the crème pâtissière or sprinkled over the cream before adding the raisins. The citrus aroma pairs wonderfully with the sweetness of the raisins and the richness of the pastry.
Another delightful variation is to incorporate finely chopped candied citrus peel, such as orange or lemon peel, alongside the raisins. This adds a different kind of sweetness and a slightly chewy texture. A mix of golden raisins and candied peel offers a burst of bright, intense flavor that complements the other components of this easy pain aux raisins recipe.
Apricot Glaze: Enhancing Appearance and Flavor
A common finishing touch for viennoiseries like pain aux raisins is a light apricot glaze. This glaze adds a beautiful sheen to the baked pastries and a subtle fruity sweetness. To make the glaze, gently heat apricot jam (preferably a good quality one with real fruit pieces) with a little water or rum until it is liquid and smooth. Strain the mixture to remove any fruit chunks.
As soon as the pain aux raisins come out of the oven, while they are still hot, gently brush the warm apricot glaze over their surfaces. The heat of the pastry will help the glaze set into a thin, shiny layer. This not only makes them look more professional but also adds an extra layer of flavor.
Serving Suggestion: Pairing with a Latte or Espresso
For the ultimate French bakery experience, pair your warm pain aux raisins with a classic coffee beverage. The rich, buttery pastry and sweet filling are perfectly complemented by the robust flavor of a latte or a shot of espresso.
The bitterness of the coffee cuts through the sweetness of the pastry, creating a balanced and satisfying combination. A cappuccino or even a strong black tea would also be excellent companions. Enjoying this pairing slowly, perhaps while reading a book or chatting with a friend, elevates the simple act of eating a pastry into a delightful ritual.
Conclusion: Mastering the Art of Pain aux Raisins
Successfully baking authentic pain aux raisins at home is a significant achievement for any intermediate baker. It demonstrates mastery of laminated dough, the ability to create a classic pastry cream, and patience throughout a multi-step process. You've navigated the crucial steps from crafting the initial dough and incorporating the butter to assembling, proofing, and finally baking these beautiful swirled pastries.
This easy pain aux raisins recipe has guided you through the essential techniques, emphasizing the importance of ingredient quality, temperature control, and careful execution. The result of your effort is a batch of flaky, buttery pastries filled with rich cream and sweet raisins – a true taste of a French boulangerie. Take pride in your accomplishment; you've created something truly special from simple ingredients and learned valuable baking skills along the way.
Baking is often a labor of love, and sharing the fruits of your labor is one of the most rewarding parts. Don't keep your delicious pain aux raisins all to yourself! Share them with family, friends, or colleagues. Their appreciation for your homemade viennoiseries will be a wonderful affirmation of your baking skills.
Consider bringing them to a brunch, offering them as a thoughtful homemade gift, or simply enjoying them together over coffee. Explaining the process, especially the lamination, can also be fun and help others appreciate the effort involved. Sharing your baking not only spreads joy but also provides valuable feedback and encourages you to keep practicing and improving.
Expanding Your Baking Repertoire: Exploring Other Viennoiseries
Now that you've successfully tackled pain aux raisins, you have a solid foundation for exploring other delightful viennoiseries. The laminated dough technique you mastered is the same base for classic croissants and pain au chocolat. Trying these variations will further hone your skills and expand your baking repertoire.
Croissants offer the pure, unadulterated flavor and texture of the laminated dough, while pain au chocolat adds the joy of melted chocolate. You can also explore other filled Danish pastries using the same dough base and different fillings like fruit or cheese. Each new pastry will reinforce your understanding of lamination and proofing, making future baking projects even more successful.
Call to Action: Tag Your Photos with #PainAuxRaisinsMastered
We love seeing your baking successes! Share photos of your beautiful, flaky pain aux raisins on social media. Tag your pictures with #PainAuxRaisinsMastered and #BakeWithEase so we can admire your creations and celebrate with you.
Connecting with other bakers online is a great way to find inspiration, share tips, and be part of a supportive community. Show off those perfect spirals, the golden-brown crust, and the creamy interior. Your success with this easy pain aux raisins recipe could inspire others to try their hand at this classic French pastry!
Frequently Asked Questions
### What makes this pain aux raisins recipe "easy" for intermediate bakers?
The recipe is considered "easy" because it breaks down the traditional, more complex process into manageable steps, focusing on simplified dough preparation and clear instructions. It assumes some basic baking knowledge.
### What specific skills should I have before attempting this recipe?
You should be comfortable with basic dough handling, like kneading and proofing, as well as familiar with laminating dough (creating layers of butter and dough).
### What are the key ingredients for a successful pain aux raisins?
Besides flour, butter, sugar, and yeast, the crème pâtissière (pastry cream) and raisins soaked in rum are crucial for the authentic flavor and texture of pain aux raisins.
### Can I substitute any ingredients in this recipe?
While some substitutions are possible, like using milk instead of water, altering the core ingredients like flour or butter may affect the final texture and flavor. It's best to follow the recipe closely for optimal results.
### How long does it take to make this pain aux raisins recipe from start to finish?
The entire process, including dough preparation, proofing, filling, shaping, and baking, typically takes around 4-5 hours, but this can vary depending on your environment and skill level.
The simple act of baking, especially a seemingly complex pastry like pain aux raisins, can be a powerful metaphor for life's challenges. Mastering the technique, from kneading the dough to achieving that perfect golden-brown crust, offers a tangible sense of accomplishment that extends far beyond the kitchen. This recipe, designed for intermediate bakers, proves that even seemingly daunting tasks can be broken down into manageable steps, leading to delicious rewards.
The enduring appeal of bread, particularly this classic French pastry, lies in its ability to connect us to history and tradition. It's a food that has brought families and communities together for generations, fostering a sense of shared experience and warmth. Bread is the staff of life,
a simple phrase, yet it speaks volumes about the fundamental role of baking in human culture. The process of making pain aux raisins, from gathering the ingredients to sharing the finished product, embodies this connection, reminding us of the simple joys found in shared effort and the satisfaction of creating something beautiful and delicious.
Now, I invite you to roll up your sleeves, gather your ingredients, and embark on this baking journey. Don't be intimidated by the seemingly complex steps; embrace the process, savor the aroma of rising dough, and relish the pride of creating something truly special. The reward isn't just a delicious loaf of pain aux raisins; it's the experience itself – a testament to your capabilities and a reminder of the sweet rewards that come from perseverance and a willingness to try something new. So, what are you waiting for? Let the baking begin!
Unleash Your Inner Baker: Craft Your Perfect Pain aux Raisins!
Thanks for taking the time to explore this delicious Pain aux Raisins recipe! We hope you gained valuable insights and feel confident in tackling this delightful challenge. Ready to bring your baking skills to the next level?
- Bake your own Pain aux Raisins today! Use the recipe as your guide, and don't be afraid to experiment with different raisins or add-ins.
- Share your baking journey with us! Snap a picture of your creation and tag us on social media – we'd love to see your results.
- Challenge a friend to bake along! Double the fun and compare your delicious results.
What unique twist will you add to your Pain aux Raisins to make it truly your own?