
What to Look for in the Interior: The Perfect Croissant Crumb

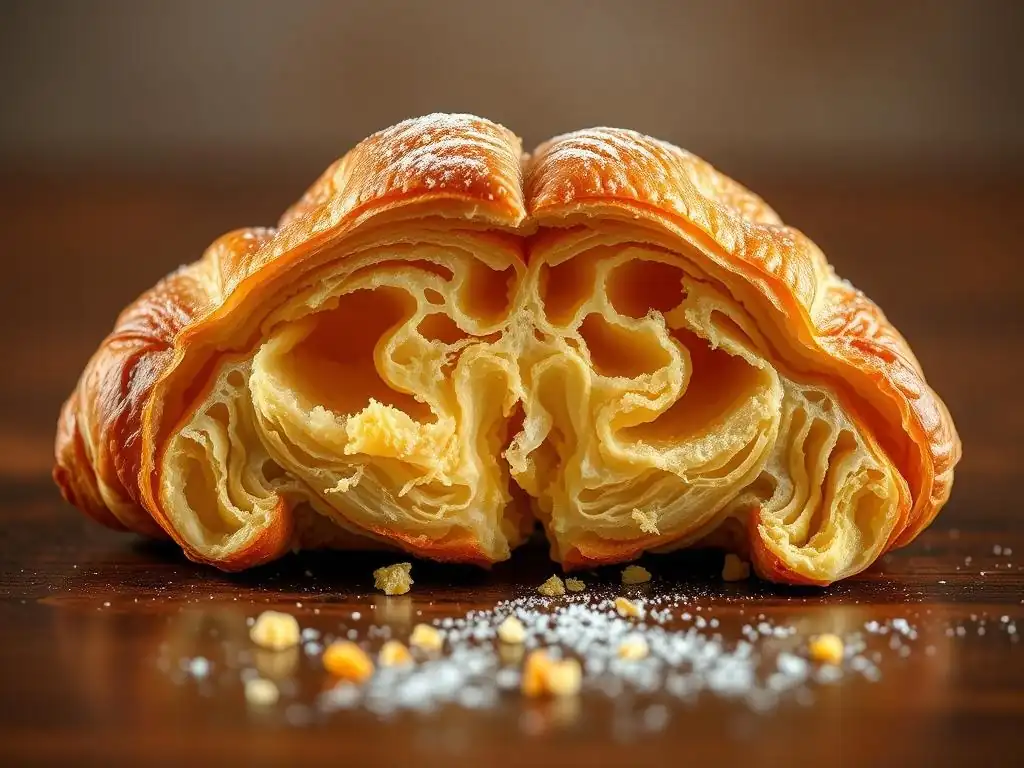
Welcome to BakeWithEase, your guide to unlocking baking brilliance! Ever wondered what separates a good croissant from a perfect one? In this article, we'll delve into the secrets behind achieving the perfect croissant crumb texture. Discover the tell-tale signs of a masterfully crafted interior and learn how to replicate it in your own kitchen. Ready to elevate your croissant game? Let's get started!
- Achieving the Ideal Croissant Crumb Texture: An Introduction
- Understanding the Importance of Croissant Crumb Structure
- Key Characteristics of a Perfect Croissant Crumb Texture
- Factors Influencing Croissant Crumb Development
- Troubleshooting Common Croissant Crumb Issues
- Techniques for Enhancing Croissant Crumb Texture
- Expert Tips for Achieving the Perfect Croissant Crumb
- Conclusion: Enjoying the Rewards of a Perfectly Crafted Croissant Crumb
-
Frequently Asked Questions
- What exactly is a "perfect croissant crumb texture"?
- Why is the crumb texture so important in a croissant?
- What are the most common reasons for a dense or undesirable croissant crumb?
- How can I ensure my croissant dough is properly laminated for a good crumb?
- Can the type of flour I use affect the final croissant crumb?
- Final Reflection: The Enduring Allure of the Perfect Croissant Crumb
- Unlock the Secrets of the Perfect Croissant Crumb!
Achieving the Ideal Croissant Crumb Texture: An Introduction
Baking a croissant is a journey of precision, patience, and passion. While the golden, flaky exterior is the first thing that catches the eye, the true test of a masterful croissant lies within: the perfect croissant crumb texture. This internal structure is not just about aesthetics; it's a direct indicator of proper dough handling, lamination, proofing, and baking. Achieving that airy, open, and delicate interior is the hallmark of a professional-quality croissant, and it's entirely possible to bake at home with the right knowledge and technique.
Understanding what constitutes a desirable crumb is the first step towards baking excellence. It's about more than just seeing holes; it's about the nature of those holes, their distribution, and the delicate layers surrounding them. The ideal interior should feel light and tender, almost melting in your mouth, providing a delightful contrast to the crisp, buttery shell. This guide will walk you through identifying, understanding, and ultimately achieving that sought-after perfect croissant crumb texture.
Understanding the Importance of Croissant Crumb Structure
Why Croissant Crumb Texture Matters to the Overall Baking Experience
The internal structure, or crumb, of a croissant is fundamental to the overall eating experience. A croissant isn't just about the taste of butter and dough; it's about the interplay of textures. The crisp, shattering exterior gives way to a soft, airy interior. If the crumb is dense, gummy, or dry, this crucial textural contrast is lost, diminishing the pleasure of every bite. A well-developed crumb contributes significantly to the perception of richness and lightness.
Furthermore, the crumb directly impacts how the croissant feels in your mouth. A tender, open crumb dissolves beautifully, carrying the buttery flavor throughout. A poor crumb, on the other hand, can feel heavy, chewy, or even stale, regardless of how fresh the croissant is. Mastering the perfect croissant crumb texture elevates a simple pastry into a truly memorable culinary delight.
The Visual Appeal of a Honeycomb Croissant Crumb
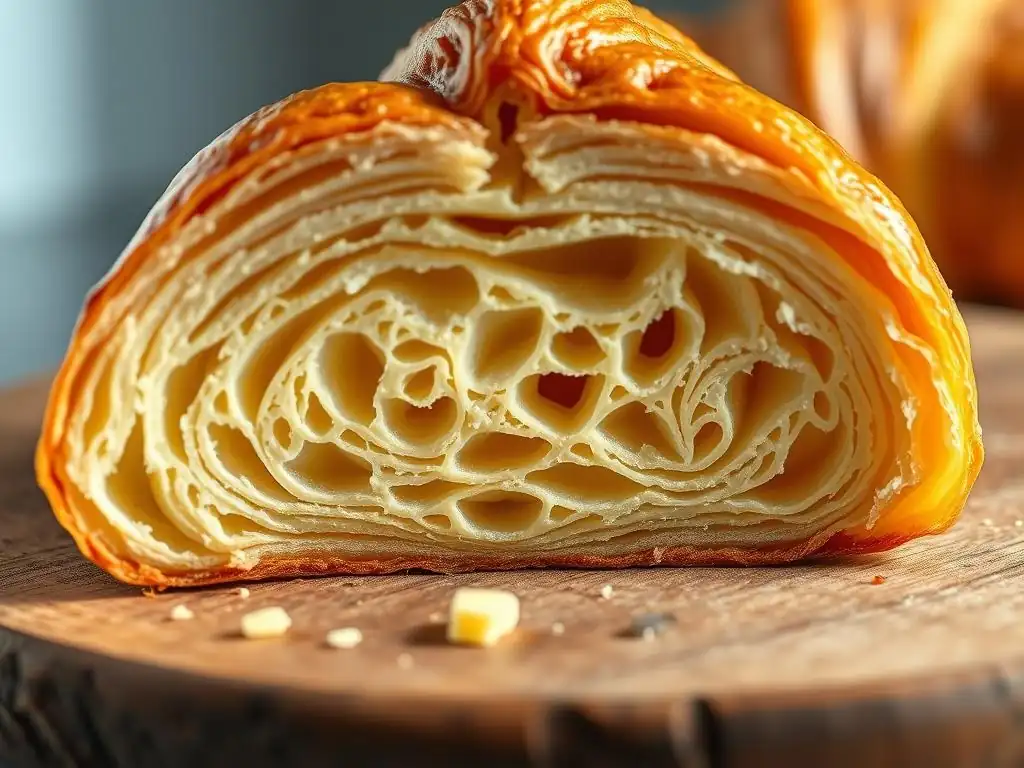
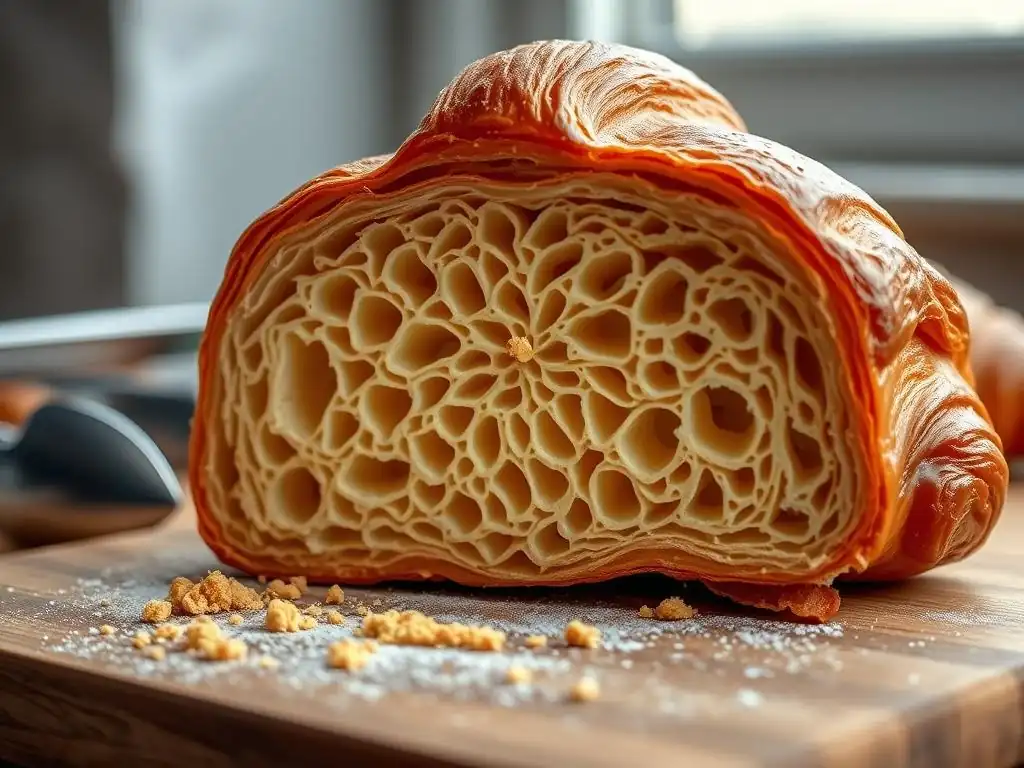
The term "honeycomb" is frequently used to describe the visual ideal for a croissant's interior, and for good reason. When you slice open a well-baked croissant, you should see a network of irregular, open air pockets separated by very thin layers of dough. This intricate pattern resembles the structure of a honeycomb or delicate lace. It's a visual promise of lightness and flakiness.
This distinct honeycomb structure is the direct result of successful lamination and proofing. The layers of dough and butter, folded repeatedly, create the potential for separation. During proofing and baking, the steam from the butter and the expansion of gases lift these layers apart, forming the characteristic voids. A dense interior with small, uniform holes indicates issues during these critical stages, whereas the beautiful honeycomb signifies a perfect croissant crumb texture achieved through careful technique.
Key Characteristics of a Perfect Croissant Crumb Texture
Identifying the Honeycomb Structure in Croissant Dough
Identifying the honeycomb structure involves looking closely at the cross-section of a baked croissant. The air pockets should be varied in size and shape, not uniform like those in standard bread. You should see distinct, thin walls of baked dough separating these pockets. This isn't just about emptiness; it's about the structure created by the separated layers. Imagine a delicate, airy sponge rather than a tight, dense foam.
A true honeycomb structure signifies that the lamination was successful in creating many thin layers, and the proofing and baking processes allowed these layers to separate properly. When you press gently on a piece of the interior, it should yield easily and spring back slightly, indicating tenderness and resilience. This visual inspection is a primary way to assess if you've achieved a near-perfect croissant crumb texture.
Evaluating the Air Pockets and Layers within the Crumb
Beyond just seeing the honeycomb, evaluate the quality of the air pockets and the layers. The pockets should be relatively open, with some larger voids alongside smaller ones, demonstrating good lift. The walls between these pockets should be incredibly thin and delicate, almost transparent in places, showing that the layers separated fully without collapsing or becoming gummy.
The layers themselves should be distinct and visible, running horizontally across the crumb. If the interior looks uniform with no visible layers or if the walls are thick and doughy, it suggests insufficient lamination, improper proofing, or issues during baking. The goal is a light, ethereal structure where the air pockets dominate the volume, resulting in that coveted perfect croissant crumb texture.
The Role of Moisture in a Desirable Croissant Crumb
While we want an airy crumb, we certainly don't want a dry one. A desirable croissant crumb should have a pleasant level of moisture. It shouldn't feel wet or gummy, but it also shouldn't be dry and crumbly. This moisture contributes to the tenderness and richness of the interior. The steam generated during baking from the butter and dough's water content is crucial not only for lifting layers but also for setting the internal structure with appropriate hydration.
An overly dry crumb might indicate overbaking, insufficient hydration in the dough, or proofing in an environment that was too dry, causing the surface to skin over. A gummy or dense crumb often points to underbaking or insufficient proofing. The ideal crumb holds together delicately but feels moist and tender on the palate, a key component of the perfect croissant crumb texture.
Factors Influencing Croissant Crumb Development
Flour Selection and its Impact on Croissant Crumb
The type of flour you use is a critical factor influencing the development of the perfect croissant crumb texture. Flour provides the structural network (gluten) that traps gases and steam, creating the airy pockets. Different flours have varying protein content, which directly affects gluten development. For croissants, you generally need a flour with sufficient protein to build a strong yet elastic dough capable of holding its structure through lamination and proofing.
Using a flour with too low protein might result in a weak dough that tears during lamination or collapses during proofing, leading to a dense crumb. Conversely, a flour that is too strong or handled too aggressively can result in a tough, chewy crumb. Selecting the right balance is key to facilitating the development of those delicate layers and achieving the desired perfect croissant crumb texture.
Choosing High-Protein Flour for Optimal Croissant Crumb Texture
For optimal croissant crumb texture, many bakers recommend using a bread flour or a strong all-purpose flour with a protein content typically ranging from 12% to 14%. This higher protein level allows for the development of a robust gluten network that can withstand the repeated rolling and folding of lamination. The elasticity provided by strong gluten is essential for the dough layers to stretch thinly around the butter block without tearing.
A strong gluten network also provides the necessary structure to support the dough's expansion during proofing and the oven spring during baking. This strength helps the layers separate cleanly and hold their shape, creating those beautiful, open air pockets. While some bakers experiment with blends, starting with a reliable high-protein flour is a solid foundation for achieving a light and airy perfect croissant crumb texture.
The Significance of Lamination in Croissant Baking
Lamination is perhaps the most iconic step in croissant making and is absolutely fundamental to developing the perfect croissant crumb texture. This process involves encasing a block of cold butter within the dough and then repeatedly rolling and folding the dough (turns) to create alternating layers of dough and butter. Each fold doubles or triples the number of layers. For example, after three single folds, you can have over 20 layers of dough separated by butter!
The success of lamination hinges on keeping both the dough and butter cold and pliable. If the butter is too soft, it can squeeze out or blend into the dough, preventing distinct layers from forming. If it's too hard, it can break through the dough. Proper lamination creates the potential for the hundreds of thin layers that, when baked, yield the characteristic flaky exterior and the open, airy perfect croissant crumb texture within.
Creating Distinct Layers for a Honeycomb Crumb Structure
The distinct layers created during lamination are the direct precursors to the honeycomb crumb structure. As the croissants bake, the water in the butter turns to steam. This steam is trapped between the dough layers, forcing them apart. The fat from the melting butter also helps separate the layers and contributes to the tender texture. The more distinct and numerous the layers created during lamination, the greater the potential for significant lift and separation during baking.
If lamination is done incorrectly – perhaps the butter melts into the dough, the layers are not even, or the dough tears – you won't have the necessary separation points. This will result in a dense, doughy interior with a poor crumb structure, lacking that desirable honeycomb. Achieving defined layers through careful rolling and folding is paramount for developing the perfect croissant crumb texture.
Temperature Control During Proofing
Proofing is a critical, often underestimated, stage where temperature control plays a vital role in developing the perfect croissant crumb texture. Proofing allows the yeast to ferment, producing carbon dioxide gas that expands the dough. It also allows the gluten network to relax and become more extensible. Croissants require a warm, humid environment, typically around 75-80°F (24-27°C) with 70-80% humidity.
If the proofing temperature is too low, the yeast activity will be slow, resulting in insufficient rise and a potentially dense crumb. If it's too high, the butter within the layers can melt and seep out before baking, fusing the layers together and leading to a flat, greasy croissant with a poor crumb structure. Proper temperature ensures the dough expands gently, maintaining the integrity of the layers, which is essential for the final perfect croissant crumb texture.
Managing Temperature for Proper Dough Rise and Crumb Formation
Managing the temperature precisely during proofing is key to achieving the correct dough rise and facilitating optimal crumb formation. The ideal proofing temperature allows the yeast to produce gas at a steady rate, causing the dough to expand and the layers to puff up without the butter melting. This expansion is what separates the layers, setting the stage for the honeycomb structure.
A common pitfall is proofing in an environment that is too hot or dry. Too much heat melts the butter, ruining the lamination. Too little humidity can cause the surface of the dough to dry out and form a skin, restricting expansion. Aiming for a consistent warm, humid environment ensures the dough proofs evenly and fully, leading to a light, airy structure and contributing significantly to the perfect croissant crumb texture.
Baking Time and Temperature: Achieving the Right Crumb
Baking is the final stage where the potential created during lamination and proofing is realized. The oven temperature and baking time are crucial for setting the structure and developing the perfect croissant crumb texture. Croissants are typically baked at a relatively high temperature, often starting around 400°F (200°C) for the first 10-15 minutes, then sometimes reduced to around 375°F (190°C) to finish baking through without burning the exterior.
The initial high heat provides "oven spring," causing rapid expansion as gases and steam vigorously push the layers apart, creating the airy pockets. It also quickly sets the outer layers, developing the flaky crust. The subsequent lower temperature allows the interior to cook through completely, ensuring the dough is not raw or gummy while preventing the exterior from becoming too dark. Incorrect baking temperature or time can result in a dense, undercooked interior or a dry, overcooked crumb, missing the mark on the perfect croissant crumb texture.
How Baking Conditions Affect the Internal Structure of Croissants
The conditions inside the oven profoundly affect the internal structure. The rapid heat transfer during the initial high-temperature phase is what causes the dramatic separation of layers. The steam generated from the butter and dough expands rapidly, creating pressure that forces the hundreds of dough layers apart. This action is what primarily forms the open air pockets characteristic of the honeycomb.
If the oven temperature is too low, you won't get sufficient oven spring, and the layers might not separate properly, leading to a denser crumb. If the baking time is too short, the interior may remain undercooked and gummy. Conversely, baking too long or at too high a temperature can dry out the interior, resulting in a crumb that is brittle and lacks tenderness. Precise control over baking time and temperature is the final step in locking in that perfect croissant crumb texture.
Troubleshooting Common Croissant Crumb Issues
Dense and Compact Crumb: Causes and Solutions
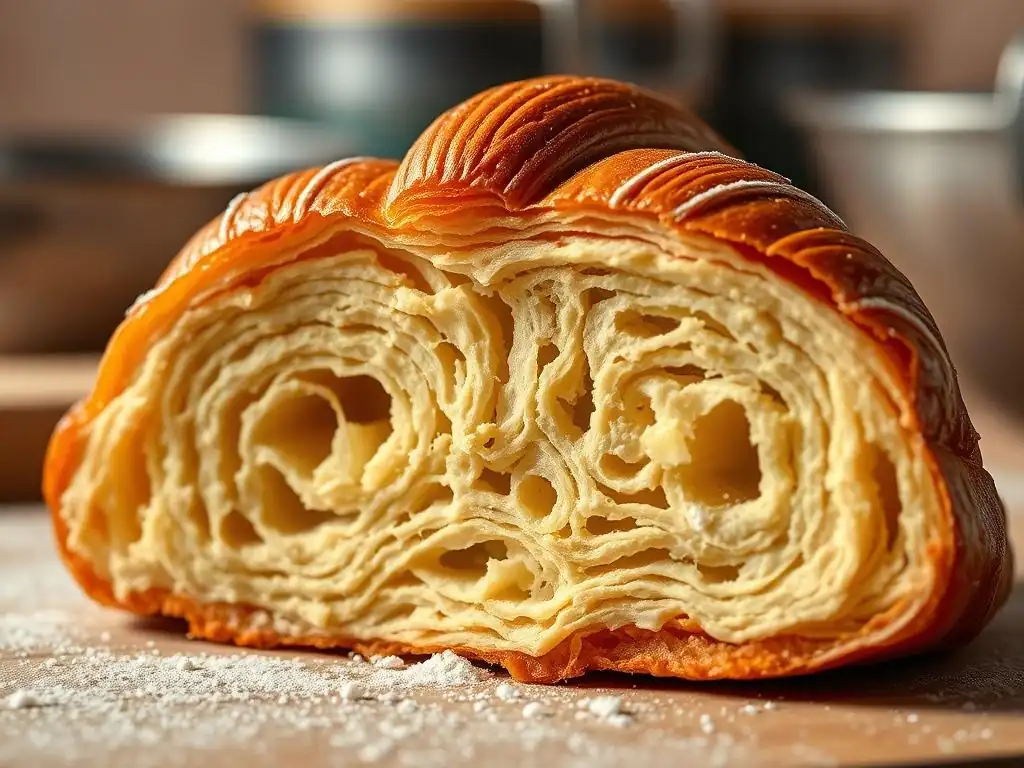
A dense, compact crumb is one of the most common and disappointing issues in croissant baking. This usually means the dough didn't rise sufficiently during proofing or didn't get adequate oven spring. Several factors can contribute: insufficient yeast activity (dead yeast, incorrect water temperature), under-proofing (not enough time or warmth), butter melting during proofing (too hot), insufficient lamination (not enough layers created), or baking at too low a temperature.
To troubleshoot, check your yeast activity first. Ensure your proofing environment is warm (75-80°F) and humid, and allow sufficient time for the dough to visibly increase in size (often doubling). Make sure your butter stays cold and distinct during lamination. Finally, verify your oven temperature with a thermometer and ensure it's hot enough to provide strong initial oven spring. Addressing these points will help prevent a dense interior and move you closer to the perfect croissant crumb texture.
Uneven Crumb Structure: Identifying and Rectifying the Problem
An uneven crumb structure, where some areas are open and others are dense or doughy, often indicates inconsistencies in dough handling or temperature management. This could stem from uneven rolling during lamination, causing some layers to be thicker than others. It might also result from inconsistent temperature during proofing or baking, where parts of the croissant expand differently.
Rectifying an uneven crumb involves focusing on consistency. Ensure your dough is rolled evenly during each turn of lamination, maintaining a uniform thickness. Check that your proofing environment has consistent temperature and humidity throughout. When baking, position the croissants evenly in the oven and consider rotating the baking sheet halfway through to ensure even heat distribution. Consistent technique at every step is key to achieving a uniformly airy and perfect croissant crumb texture.
Dry and Crumbling Crumb: How to Achieve a Moist Interior
A dry and crumbling crumb lacks the desirable tenderness and mouthfeel. This issue is often related to insufficient moisture retention during baking. Possible causes include overbaking (too long or too hot), using flour with too low hydration, or proofing in an environment that was too dry, which can dry out the dough surface and hinder proper expansion and moisture trapping.
To achieve a moist interior, ensure your dough hydration is correct according to your recipe. During proofing, use a humid environment (a proofing box or oven with a pan of hot water works well) to prevent the surface from drying out. Most importantly, monitor baking time and temperature carefully. Remove the croissants when they are golden brown and the internal temperature reaches around 190-200°F (88-93°C), but before they become excessively dark or feel hard. Proper baking ensures the interior is cooked through but retains moisture, resulting in a tender, perfect croissant crumb texture.
Techniques for Enhancing Croissant Crumb Texture
Mastering the Art of Dough Handling
Gentle and precise dough handling is crucial for developing a perfect croissant crumb texture. Overworking the dough at any stage can develop the gluten too much, leading to a tough crumb. During lamination, roll the dough firmly but without excessive pressure that could force butter out or tear layers. Keep the dough cold and allow it to rest between turns to relax the gluten.
When shaping, handle the dough lightly to avoid deflating the air pockets created during proofing. Use a sharp knife or pastry wheel to cut shapes cleanly, minimizing damage to the delicate layers. Think of handling the dough as coaxing it into shape, rather than forcing it. This careful approach preserves the integrity of the laminated structure, which is essential for achieving that light, open perfect croissant crumb texture.
Proper Proofing Techniques for a Light and Airy Crumb
Proper proofing is arguably the most critical step for achieving a light and airy perfect croissant crumb texture. The goal is to allow the yeast to produce enough gas to significantly expand the dough volume, separating the layers, but without allowing the butter to melt. This requires a balance of warmth and humidity. Aim for a temperature between 75-80°F (24-27°C) and around 70-80% humidity.
Proofing time is also crucial – it's often judged by feel rather than strict timing. A properly proofed croissant should look puffy and significantly increased in size (often appearing jiggly) but still hold its shape. Gently pressing the side should leave a slight indentation that slowly springs back. Under-proofing results in a dense crumb; over-proofing (where the butter melts or the structure collapses) leads to a flat, greasy result. Mastering this delicate balance is key to a beautiful crumb.
Optimizing Baking Conditions for Perfect Crumb Development
Optimizing baking conditions is the final step in ensuring the perfect croissant crumb texture comes to fruition. Preheat your oven thoroughly, ideally for at least 20-30 minutes, to ensure it reaches and holds the target temperature. Placing a baking stone or steel in the oven can help maintain consistent heat and provide better bottom heat, contributing to oven spring.
Bake at the recommended temperature, typically starting high (e.g., 400°F / 200°C) for initial lift, then potentially reducing (e.g., 375°F / 190°C) to ensure the interior cooks through. Don't overcrowd the baking sheet, as this can impede airflow and result in uneven baking. Observe the croissants as they bake; they should puff up dramatically in the first phase and turn a deep golden brown. Trust the visual cues and internal temperature (190-200°F) to know when they are perfectly done.
Expert Tips for Achieving the Perfect Croissant Crumb
Use High-Quality Butter with a High Melting Point
The quality and type of butter are paramount in croissant making. European-style butters typically have a higher fat content (around 82-84%) and lower water content compared to many American butters (around 80% fat). This higher fat content contributes to better flavor and tenderness. More importantly, look for butter with a relatively high melting point. Some specialized butters are designed specifically for lamination and remain solid at slightly higher temperatures, reducing the risk of melting during proofing and handling.
Using cold, firm, high-quality butter is essential for creating those distinct layers during lamination. If the butter is too soft or has a low melting point, it will incorporate into the dough rather than staying in separate layers, which will severely inhibit the development of the perfect croissant crumb texture. Invest in good butter; it makes a significant difference.
Chill Dough Thoroughly Between Turns During Lamination
Patience is a virtue in croissant making, especially during lamination. Chilling the dough thoroughly between each turn is non-negotiable for achieving a successful outcome and a perfect croissant crumb texture. After each fold and roll, the dough needs to rest in the refrigerator for at least 30-60 minutes (or even longer). This serves several purposes:
- It allows the gluten to relax, making the dough easier to roll out thinly without tearing.
- It keeps the butter cold and firm, ensuring it remains in distinct layers rather than melting into the dough.
- It prevents the dough from becoming too warm and sticky, which makes handling difficult and risks damaging the layers.
Skipping or shortening the chilling time is a common mistake that leads to poor lamination and ultimately a dense, disappointing crumb.
Perform a Final Proof in a Humid Environment
The final proof is where the croissants gain most of their volume before baking. Performing this proof in a humid environment is vital for achieving a light, airy perfect croissant crumb texture. Humidity prevents the surface of the dough from drying out and forming a skin. A dry skin restricts the dough's ability to expand fully and evenly, leading to a less open crumb and potentially misshapen croissants.
A simple way to create a humid environment at home is to place the shaped croissants on a baking sheet inside a cold oven with a pan of hot water placed on the rack below. The steam from the hot water creates the necessary humidity. Ensure the water is hot, but the oven is off to prevent melting the butter. Proofing in a humid space ensures the dough remains pliable and expands optimally, contributing significantly to the final volume and open crumb structure.
Conclusion: Enjoying the Rewards of a Perfectly Crafted Croissant Crumb
Achieving the perfect croissant crumb texture is a rewarding challenge that signifies mastery over key baking techniques. It's a journey involving precise measurements, careful dough handling, meticulous lamination, controlled proofing, and accurate baking. Each step builds upon the last, contributing to that final, breathtaking interior.
When you slice open your croissant and reveal that beautiful, airy honeycomb structure, you know your efforts have paid off. The tender, moist crumb contrasting with the crisp, flaky exterior is the ultimate sensory delight. By understanding the factors that influence crumb development and practicing these techniques, you are well on your way to consistently baking croissants with that sought-after perfect croissant crumb texture, ready to be savored in every buttery bite.
Frequently Asked Questions
What exactly is a "perfect croissant crumb texture"?
A perfect croissant crumb texture is characterized by a light and airy interior with a honeycomb-like structure. It should be tender and flaky, not dense or doughy.
Why is the crumb texture so important in a croissant?
The crumb texture directly impacts the overall eating experience. A good crumb indicates proper lamination and proofing, resulting in a light and flavorful pastry. A poor crumb suggests problems in the baking process.
What are the most common reasons for a dense or undesirable croissant crumb?
Common culprits include insufficient proofing, improper lamination (butter layers melting or not separating properly), and incorrect oven temperature. These issues prevent the dough from rising fully and creating the desired air pockets.
How can I ensure my croissant dough is properly laminated for a good crumb?
Keep your butter and dough cold throughout the lamination process. Roll the dough evenly and avoid tearing. Allow for sufficient resting time between folds to relax the gluten.
Can the type of flour I use affect the final croissant crumb?
Yes, the type of flour is crucial. Use a strong bread flour with a high protein content to develop the necessary gluten structure for a light and airy crumb. Lower protein flours can result in a denser crumb.
Final Reflection: The Enduring Allure of the Perfect Croissant Crumb
The pursuit of the perfect croissant crumb isn't merely a culinary quest; it's a reflection of our desire for excellence in even the smallest details. The seemingly simple act of biting into a flaky, buttery croissant reveals a complex interplay of technique, ingredient quality, and sheer artistry. This article has explored the nuanced characteristics that define a truly exceptional crumb, from the delicate layers to the airy lightness, highlighting the importance of understanding the process to appreciate the final product.
The quest for the perfect croissant crumb transcends the simple enjoyment of a pastry; it speaks to a deeper appreciation for craftsmanship and the beauty found in seemingly mundane things. It's a testament to the power of dedication and precision, a reminder that even the smallest details can contribute to an extraordinary experience. Perfection is not achieved when there is nothing more to add, but rather when there is nothing more to take away.
This quote, often attributed to Antoine de Saint-Exupéry, perfectly encapsulates the essence of the perfect croissant crumb – a delicate balance achieved through careful refinement.
Consider the next time you encounter a croissant, the journey it took to reach your plate. Take a moment to appreciate the layers, the texture, the subtle nuances of flavor. Don't just eat it; experience it. Let the perfect croissant crumb be a reminder that attention to detail, whether in baking, art, or life itself, can elevate the ordinary to the extraordinary. Embrace the pursuit of perfection, not for the sake of perfection itself, but for the joy and satisfaction it brings.
Unlock the Secrets of the Perfect Croissant Crumb!
Thanks for joining us on this delicious journey into the world of croissant baking! We hope you've gained a deeper appreciation for the art of achieving that perfect, flaky crumb. Now it's time to put your newfound knowledge into practice.
- Bake your own masterpiece! Try out the techniques we discussed and experiment with different flours and folding methods to find your signature croissant. Don't be afraid to get a little messy!
- Share your baking journey! Post pictures of your croissants on social media and tag us – we'd love to see your creations and celebrate your success! Use #BakeWithEaseCroissant.
- Challenge yourself to master the lamination: Watch our tutorial video on our YouTube channel (link in bio) for a deeper dive into the process.
Ready to transform your baking game and create the most delectable croissants your taste buds have ever experienced?