
The Science of Melting Quality Chocolate for Baking Success

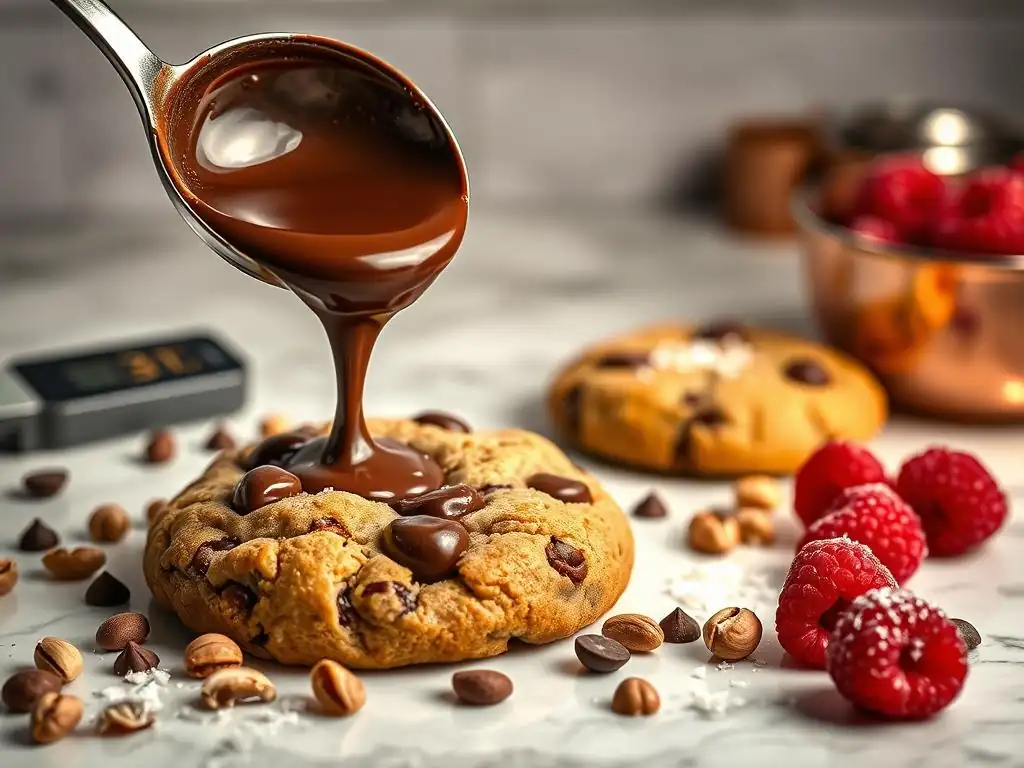
Welcome to BakeWithEase, your companion on a delightful journey into the world of baking! Ever wondered about the secret to achieving that perfectly smooth, glossy finish when working with chocolate? Our latest deep dive into Premium Baking Ingredients unveils the science behind melting chocolate for baking success. Discover the techniques and tips that will elevate your creations from good to gourmet – and unlock the full potential of every delicious bite. Intrigued? Let's melt away the mystery together!
- The Science of Melting Quality Chocolate for Baking Success: A BakeWithEase Guide
- Understanding Chocolate for Baking: The Key to Perfect Melting
- Mastering the Art of Melting Chocolate for Baking
- Factors Affecting Chocolate Melting: Temperature, Moisture, and Stirring
- Troubleshooting Common Chocolate Melting Problems
- Using Melted Chocolate in Baking: Applications and Techniques
- Recommended Tools and Products for Melting Chocolate
- Beyond the Basics: Advanced Chocolate Melting Techniques
- Conclusion: Achieving Chocolate Melting Perfection for Baking Success.
- Frequently Asked Questions
- Final Reflection: The Enduring Delight of Perfectly Melted Chocolate
- Unlock Your Inner Chocolatier: Master the Art of Melting Chocolate!
The Science of Melting Quality Chocolate for Baking Success: A BakeWithEase Guide
Understanding Chocolate for Baking: The Key to Perfect Melting
Exploring Different Types of Baking Chocolate and Their Properties
Baking chocolate isn't a one-size-fits-all ingredient. Understanding the different types is crucial for successful melting and predictable results in your baked goods. Dark chocolate, for example, typically contains a higher percentage of cocoa solids and cocoa butter, often ranging from 50% to over 80%. This higher cocoa butter content contributes to its fluidity when melted, making it ideal for dipping, coating, and creating smooth ganaches. The lack of or minimal sugar compared to eating chocolate also means it's less prone to scorching.
Milk chocolate, on the other hand, includes milk solids and sugar, in addition to cocoa solids and cocoa butter. Its cocoa solid percentage is lower, often between 30% and 40%. The presence of milk solids and sugar makes milk chocolate more sensitive to heat; it melts at a lower temperature but is also more susceptible to seizing or burning if heated too quickly or exposed to moisture.
White chocolate contains cocoa butter, sugar, milk solids, and vanilla, but no cocoa solids. It melts at the lowest temperature of all and is the most delicate to handle due to its high sugar and milk content, requiring very gentle heat to avoid scorching or a grainy texture.
Why Quality Chocolate Matters: Taste, Texture, and Performance in Baking
Using quality chocolate is perhaps the most impactful decision you can make when melting chocolate for baking. High-quality baking chocolate contains a higher proportion of cocoa butter relative to cocoa solids and minimal additives like vegetable oils. Cocoa butter is the fat responsible for chocolate's smooth texture and ability to melt evenly. When you melt chocolate with a good amount of cocoa butter, it becomes beautifully fluid and glossy, perfect for incorporating into batters, making glazes, or creating delicate chocolate work.
Poor-quality chocolate, often labeled as "chocolate flavored coating" or containing hydrogenated oils, behaves differently. It may contain less cocoa butter and more sugar or alternative fats that don't melt with the same smooth consistency. When melted, it can be thicker, less glossy, and may not set up properly or develop the desired snap. The flavor is also significantly impacted; quality chocolate offers complex, rich notes, while lower-grade options can taste waxy or overly sweet. Investing in good chocolate ensures superior flavor, a luxurious texture in your final product, and a much smoother process when melting chocolate for baking.
Mastering the Art of Melting Chocolate for Baking
The Double Boiler Method: Gentle Heat for Consistent Results
The double boiler method is widely regarded as the safest and most reliable way to melt chocolate for baking, especially for delicate types like white or milk chocolate. This technique uses indirect heat, preventing the chocolate from coming into direct contact with the heat source, which drastically reduces the risk of burning or seizing. You simply place the chocolate in a heatproof bowl set over a saucepan of simmering, not boiling, water. The steam from the water gently and evenly heats the bowl, allowing the chocolate to melt slowly and smoothly.
This method provides excellent control over the melting process. As the chocolate begins to melt, you can gently stir it, ensuring all pieces heat evenly. The gentle heat maintains the chocolate's temper (the crystalline structure that gives it snap and shine) better than direct heat, although full tempering requires specific temperature control. For successful melting chocolate for baking using a double boiler, ensure the bottom of the bowl does not touch the water, as this would negate the indirect heating principle.
Step-by-Step Guide to Using a Double Boiler for Melting Chocolate
- [ ] Gather your equipment: A saucepan, a heatproof bowl that fits snugly over the saucepan without touching the bottom, a rubber spatula, and your baking chocolate.
- [ ] Chop the chocolate: Finely chop the chocolate into small, uniform pieces. Smaller pieces melt more evenly and quickly. A good rule of thumb is pieces no larger than a small M&M.
- [ ] Add water to the saucepan: Fill the saucepan with about an inch or two of water. You don't need much, just enough to create steam.
- [ ] Heat the water: Bring the water to a gentle simmer over medium heat. Do not let it boil vigorously.
- [ ] Place the bowl over the saucepan: Set the bowl containing the chopped chocolate over the simmering water. Ensure the bottom of the bowl is above the water level.
- [ ] Let the chocolate melt: Allow the chocolate to sit over the steam. It will start to soften and melt around the edges.
- [ ] Stir gently: Once the chocolate begins to melt, stir it gently and occasionally with the rubber spatula. Avoid vigorous stirring, which can cool the chocolate unevenly.
- [ ] Remove from heat: As soon as most of the chocolate is melted and just a few small lumps remain, remove the bowl from the saucepan. The residual heat will melt the remaining pieces.
- [ ] Stir until smooth: Continue stirring the chocolate gently off the heat until it is completely smooth and glossy.
Troubleshooting Common Double Boiler Issues: Seizing, Burning, and Uneven Melting
Seizing is the most common fear when melting chocolate for baking. It happens when a tiny amount of water or steam gets into the chocolate, causing it to instantly turn into a thick, grainy, unworkable paste. To prevent this, ensure your bowl is completely dry, the saucepan isn't overfilled (preventing splashing), and the steam isn't condensing and dripping into the chocolate. If seizing occurs, sometimes you can rescue it by whisking in a tablespoon or two of hot (not just warm) liquid, like melted butter, vegetable oil, or cream, depending on the recipe.
Burning occurs if the water boils too vigorously or the bowl touches the water, applying direct, excessive heat. Burnt chocolate has a distinct, acrid smell and becomes hard and unusable. There's no saving burnt chocolate; you must discard it and start over. Uneven melting usually happens if the chocolate pieces aren't chopped finely or uniformly enough, or if you don't stir it occasionally. Gentle, consistent stirring and fine chopping are key to achieving a smooth, homogenous melted chocolate.
Microwave Melting: A Quick and Convenient Option (When Done Right)
Melting chocolate in the microwave is undeniably faster than a double boiler, making it a popular choice for quick tasks when melting chocolate for baking. However, it requires careful attention to avoid overheating, which can easily scorch the chocolate or alter its structure, leading to a poor texture. The key is using low power levels and short heating intervals, stirring frequently.
Microwaves heat from the inside out, which is why chocolate can look fine on the surface while being burnt underneath. Using a lower power setting, such as 50% or 70%, allows the heat to distribute more evenly throughout the chocolate mass. Stirring helps distribute the heat further and lets you monitor the melting progress closely. While convenient, the microwave method is generally less forgiving than a double boiler, especially for larger quantities or sensitive chocolates like white or milk chocolate.
Best Practices for Melting Chocolate in the Microwave: Power Levels and Timing
To successfully melt chocolate for baking in the microwave, start with finely chopped chocolate in a microwave-safe bowl. Begin by heating for 30 seconds on 50% power. Remove the bowl and stir the chocolate thoroughly, even if it doesn't look melted. Return the bowl to the microwave and heat for subsequent intervals of 15-20 seconds on 50% power, stirring well after each interval.
Continue heating and stirring in these short bursts until the chocolate is mostly melted, with only a few small lumps remaining. Remove the bowl from the microwave and stir continuously. The residual heat in the bowl and the already melted chocolate will be sufficient to melt the remaining lumps, resulting in a smooth, glossy consistency. This gradual approach prevents hot spots and reduces the risk of scorching.
Avoiding Microwave Mishaps: Preventing Chocolate from Burning or Solidifying
The primary microwave mishap when melting chocolate for baking is burning. Chocolate burns quickly and is irrecoverable. This is almost always due to overheating – either using too high a power level or heating for too long without stirring. Always use 50% power and heat in very short intervals, stirring diligently between each one. Never try to melt chocolate in one continuous long blast.
Another issue can be the chocolate solidifying or becoming grainy after melting. While less common than seizing from water, overheating in the microwave can sometimes cause the cocoa butter and cocoa solids to separate or sugar crystals to form, leading to a grainy texture. This is a form of damage from excessive heat. To avoid this, stick to the low power, short interval method described above and remove the chocolate from the microwave when it's almost melted, relying on residual heat to finish the job.
Choosing the Right Chocolate: Guittard vs. Valrhona - Which Melts Better?
When you're serious about melting chocolate for baking, the brand and type make a difference. Guittard and Valrhona are both highly regarded brands offering premium baking chocolates, but they have slightly different characteristics that can affect melting. Valrhona, a French chocolatier, is known for its high cocoa butter content and specific single-origin or blend profiles.
Their chocolates, often sold as fèves (small oval discs), tend to melt exceptionally smoothly and maintain excellent fluidity, making them a favorite for delicate pastry work, ganaches, and tempering. Their high cocoa butter contributes to a luxurious mouthfeel and a glossy finish when properly melted and used.
Guittard, an American chocolate maker, also produces high-quality baking chocolate, available in various forms like wafers, chips, and bars. Guittard offers a wide range of cocoa percentages and flavor profiles. While also melting well, some of their formulations, particularly certain types of chocolate chips designed to hold their shape in cookies, may contain stabilizers (like lecithin) that slightly affect the melting viscosity compared to couverture chocolate (which both brands also offer).
For applications requiring the smoothest, most fluid melted chocolate (like fine coatings or tempering), Valrhona's couverture fèves are often preferred by professionals, though Guittard's baking bars and wafers designed for melting perform beautifully as well. The "better" choice depends on your specific baking application and desired flavor profile, but both offer superior melting properties compared to standard grocery store chocolate chips.
Factors Affecting Chocolate Melting: Temperature, Moisture, and Stirring
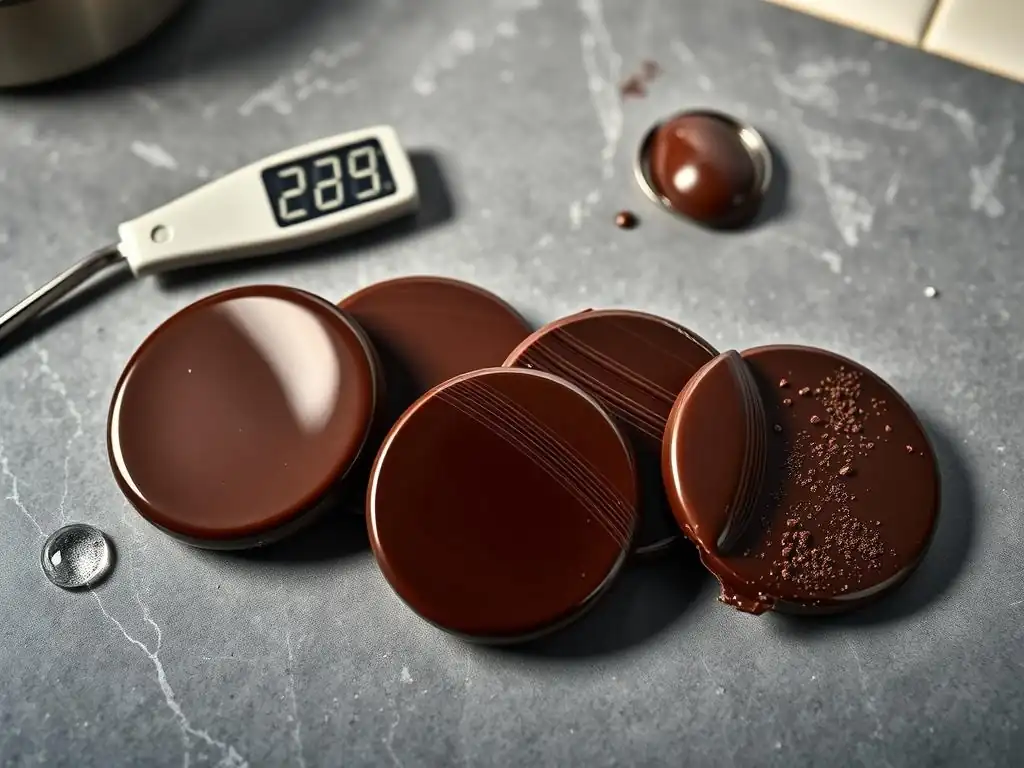
The Ideal Temperature Range for Melting Chocolate Without Burning
Controlling temperature is paramount when melting chocolate for baking. Different types of chocolate melt at different temperatures due to their composition. Dark chocolate, with less sugar and more cocoa butter, typically melts between approximately 105°F and 115°F (40°C to 46°C). Milk and white chocolate, containing milk solids and more sugar, melt at lower temperatures, usually between 95°F and 100°F (35°C to 38°C). Exceeding these temperature ranges significantly increases the risk of burning the chocolate.
Using a thermometer can be helpful, especially when working with large quantities or when aiming for precision, like before tempering. However, for basic melting, the key is gentle, indirect heat (double boiler) or low, controlled heat (microwave). Overheating causes the cocoa butter to separate from the cocoa solids, altering the texture and potentially leading to a grainy or burnt result. Always heat just until melted, relying on residual heat to finish the process.
The Importance of Keeping Moisture Out: Preventing Chocolate Seizing
Moisture is the arch-nemesis of melting chocolate for baking. Even a single drop of water or steam introduced into melted chocolate can cause it to seize instantly. Seizing is when the chocolate rapidly transitions from a smooth liquid to a thick, lumpy, unworkable paste. This happens because sugar crystals, which are present in chocolate, are hydrophilic (water-attracting). When water is introduced, the sugar dissolves slightly and then recrystallizes, binding to the cocoa solids and causing the mass to tighten up dramatically.
To prevent seizing, ensure all your equipment (bowl, spatula) is completely dry before it touches the chocolate. When using a double boiler, make sure the water is simmering gently, not boiling violently, to minimize splashing, and ensure the bowl creates a tight seal over the pot to prevent steam from entering. If using the microwave, ensure the bowl is dry. Avoid melting chocolate on a humid day or near a sink where splashes might occur. Vigilance against moisture is key to smooth, successful melting.
Gentle Stirring: Promoting Even Melting and a Smooth Consistency
Stirring is a critical, yet often overlooked, step when melting chocolate for baking. As the chocolate begins to melt, stirring helps to distribute the heat evenly throughout the mass. This prevents the chocolate at the bottom or edges from overheating while the center remains solid. Gentle stirring encourages the solid pieces to come into contact with the already melted chocolate, which helps them melt more efficiently and smoothly.
However, excessive or vigorous stirring can actually cool the chocolate down, especially if you lift the spatula out frequently or introduce air. It can also potentially encourage sugar bloom later if the chocolate is not properly tempered. The goal is a steady, gentle motion that keeps the chocolate moving and ensures uniform heating. Continue stirring gently even after removing the chocolate from the heat source until it is completely smooth and free of lumps.
Troubleshooting Common Chocolate Melting Problems
Fixing Seized Chocolate: Techniques and Tips to Restore Smoothness
Seized chocolate is frustrating, but sometimes it can be rescued. The traditional method involves whisking in a small amount of hot liquid, typically a tablespoon or two at a time, until the chocolate becomes smooth again. The type of liquid depends on what you're making. For a rich, fudgy result, whisk in hot heavy cream or melted butter. For something less rich, hot vegetable oil can work.
Alternatively, for some applications like brownies or cakes where a perfectly smooth texture isn't paramount, you can try whisking in enough hot milk or water (several tablespoons) to turn the seized chocolate into a pourable sauce, essentially making a quick ganache-like mixture. However, this changes the composition of the chocolate, so it may not be suitable for all recipes, particularly those requiring tempered chocolate or specific fat content. It's often best to prevent seizing in the first place by keeping moisture away.
Preventing Chocolate Bloom: Understanding Fat and Sugar Crystallization
Chocolate bloom is the appearance of grayish streaks or a dull film on the surface of chocolate, often mistaken for mold. It's caused by the crystallization of either fat (fat bloom) or sugar (sugar bloom) and, while harmless, it affects the appearance and texture. Fat bloom occurs when chocolate is stored at fluctuating temperatures, causing the cocoa butter to melt and rise to the surface, recrystallizing as visible crystals. Sugar bloom happens when moisture condenses on the chocolate's surface (often from moving cold chocolate into a warm, humid room), dissolving sugar, which then recrystallizes as a grainy layer.
Proper storage is the best prevention: keep chocolate in a cool, dry place with a stable temperature, ideally between 60-70°F (15-21°C). Avoid refrigeration unless absolutely necessary, and if you do refrigerate, wrap it tightly and allow it to come to room temperature slowly before unwrapping to prevent condensation. While blooming doesn't ruin the chocolate for melting into batters or ganaches (as the crystals will re-melt), it makes tempering difficult and affects the quality if you plan to use the melted chocolate for coating or molding.
Addressing Lumpy or Grainy Chocolate: Achieving a Silky Texture
Lumpy or grainy melted chocolate is usually a sign of uneven melting, overheating, or sometimes, sugar bloom if moisture was involved during storage or melting. If your chocolate is lumpy but not burnt and doesn't appear seized (thick paste), it likely just needs more gentle heat and stirring. Return it to the double boiler for a short time, stirring continuously until the lumps disappear. Ensure the heat is low and the stirring is thorough.
If the chocolate appears grainy and dry, it might be seized due to moisture, in which case you can attempt the hot liquid rescue method mentioned earlier. If it's grainy and seems oily, it could be slightly overheated, causing some separation of cocoa butter. Gentle stirring might bring it back together, but severely overheated chocolate with separated fat is difficult to fully recover to a silky texture. Starting with good quality chocolate and using a careful melting method (like the double boiler) are the best ways to achieve a consistently smooth, silky melted chocolate for baking.
Using Melted Chocolate in Baking: Applications and Techniques
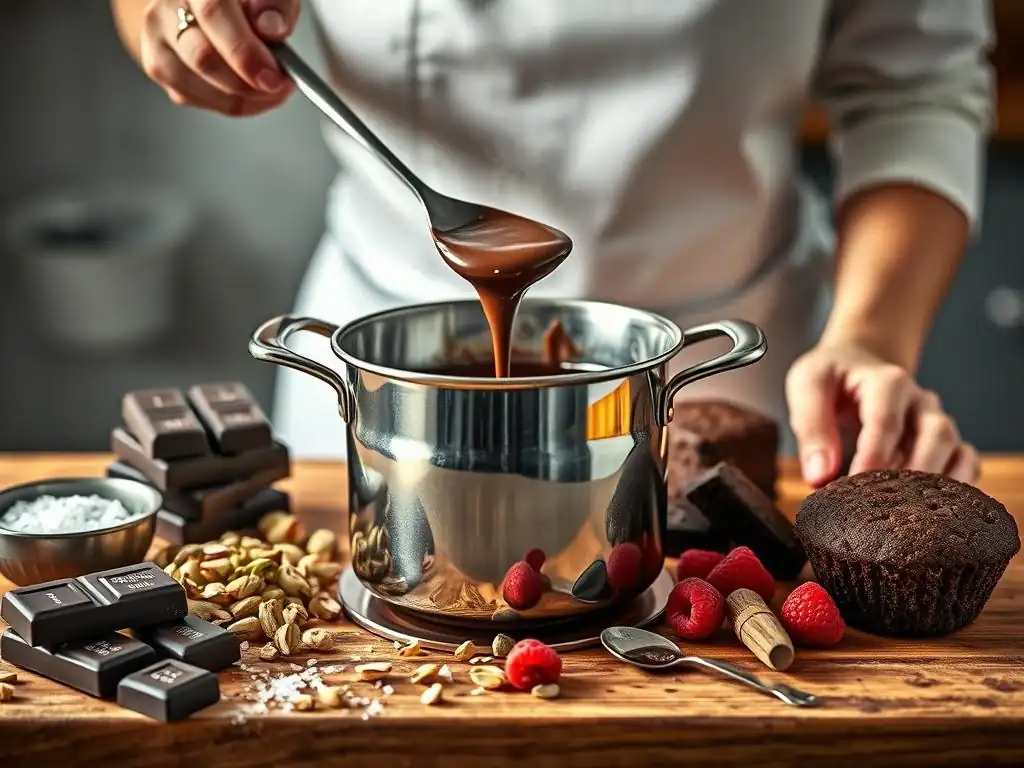
Tempering Chocolate: Achieving a Glossy Finish and Crisp Snap
Tempering chocolate is a process of carefully melting, cooling, and reheating chocolate to specific temperatures to control the crystallization of cocoa butter. Properly tempered chocolate hardens with a beautiful glossy sheen, a firm snap when broken, and resists melting easily at room temperature. This is essential for coatings, dipping candies, making chocolate decorations, or molding chocolates. Untempered melted chocolate will set up dull, streaky (fat bloom), soft, and without snap.
The process involves melting chocolate to a specific temperature to melt all cocoa butter crystals (around 115°F/46°C for dark, 105°F/40°C for milk/white), then cooling it while stirring to encourage the formation of stable cocoa butter crystals (around 80-82°F/27-28°C for dark, 78-80°F/26-27°C for milk/white), and finally warming it slightly to the working temperature (around 88-91°F/31-32°C for dark, 86-88°F/30-31°C for milk/white) to melt out unstable crystals, leaving only the desirable ones.
Tempering Chocolate with the Seeding Method: A Step-by-Step Guide
The seeding method is one of the easiest ways to temper chocolate, especially for home bakers. It involves melting a portion of the chocolate and then adding finely chopped, untempered chocolate ("seed") to cool it down and introduce stable cocoa butter crystals.
- [ ] Chop your chocolate: Finely chop about 2/3 of the total chocolate you plan to temper. Leave the remaining 1/3 as finely chopped pieces for seeding.
- [ ] Melt the main portion: Gently melt the 2/3 portion of chocolate using a double boiler until it reaches its initial melting temperature (e.g., 115°F/46°C for dark). Ensure no solid lumps remain.
- [ ] Remove from heat: Take the bowl off the double boiler.
- [ ] Add seed chocolate: Add the remaining 1/3 of finely chopped, untempered chocolate to the melted chocolate.
- [ ] Stir continuously: Stir the mixture constantly with a rubber spatula. The heat from the melted chocolate will melt the seed chocolate while simultaneously cooling the entire mixture.
- [ ] Monitor temperature: Continue stirring until the temperature drops to the target cooling temperature (e.g., 80-82°F/27-28°C for dark). You should see the chocolate thicken slightly. Ensure all seed chocolate has melted.
- [ ] Reheat slightly: If needed, briefly place the bowl back over the warm (but not simmering) water for just a few seconds, stirring constantly, until the chocolate reaches its working temperature (e.g., 88-91°F/31-32°C for dark). Do not exceed the working temperature.
- [ ] Test the temper: Dip the tip of a knife or spoon into the chocolate. It should set within a few minutes at room temperature with a glossy finish and no streaks.
- [ ] Use immediately: Keep the chocolate at its working temperature while using it. If it cools too much, gently warm it back up to the working temp over the warm water bath.
Tempering Chocolate with the Tablier Method: A Professional Technique
The tablier (or marble slab) method is a more traditional professional technique for tempering, requiring a clean, cool surface, typically marble or granite. It offers excellent control over cooling but can be messier and requires practice.
- [ ] Melt the chocolate: Gently melt all the chocolate using a double boiler to its initial melting temperature (e.g., 115°F/46°C for dark).
- [ ] Pour onto surface: Pour about 2/3 of the melted chocolate onto a clean, cool marble or granite slab.
- [ ] Work the chocolate: Using a metal scraper and a spatula, spread the chocolate thin and then scrape it back together repeatedly. This motion cools the chocolate rapidly and encourages the formation of stable cocoa butter crystals.
- [ ] Monitor temperature and texture: Continue working the chocolate until it cools to the target cooling temperature (e.g., 80-82°F/27-28°C for dark) and starts to thicken and look slightly pasty.
- [ ] Combine with remaining chocolate: Scrape the worked chocolate from the slab and add it back to the bowl with the remaining 1/3 of warm, melted chocolate.
- [ ] Stir to combine and warm: Stir the mixture thoroughly. The warmer chocolate in the bowl will gently warm the cooled, worked chocolate, bringing the entire batch up to the working temperature (e.g., 88-91°F/31-32°C for dark).
- [ ] Test and use: Test the temper on a knife tip. Use the tempered chocolate immediately, maintaining the working temperature.
Incorporating Melted Chocolate into Cake Batter: Chocolate Bundt Cake
Adding melted chocolate directly into cake batter is a fantastic way to infuse deep, rich chocolate flavor and create a moist, tender crumb, like in a classic chocolate bundt cake. The key is to ensure the melted chocolate isn't too hot when you add it to the other ingredients. Hot chocolate can scramble eggs or melt butter prematurely, affecting the batter's structure.
After melting your chocolate for baking (using a double boiler or microwave), let it cool slightly for about 5-10 minutes until it's still liquid but no longer steaming hot. It should feel warm to the touch, not hot. Whisk or gently fold the cooled melted chocolate into the wet ingredients (like eggs, sugar, butter, and vanilla extract) before combining them with the dry ingredients. This helps distribute the chocolate evenly throughout the batter, preventing streaks of unmixed chocolate and ensuring a consistent flavor and color in the finished cake.
Creating Chocolate Ganache: Ratios and Techniques for Different Uses
Chocolate ganache is a simple yet luxurious mixture of melted chocolate and hot cream, used for glazes, fillings, truffles, and more. The ratio of chocolate to cream determines the ganache's consistency. A common ratio for a pourable glaze is 1 part chocolate to 1 part heavy cream (by weight), while a thicker ganache suitable for truffles or frosting might use a 2:1 or even 2.5:1 ratio of chocolate to cream. A 1.5:1 ratio often yields a versatile ganache that can be poured warm or whipped when cool.
To make ganache, finely chop your baking chocolate. Heat heavy cream in a saucepan until it just begins to simmer around the edges – do not boil. Pour the hot cream over the chopped chocolate in a heatproof bowl.
Let it sit undisturbed for a few minutes to allow the heat from the cream to melt the chocolate. Then, starting in the center and working your way outwards, gently whisk or stir the mixture until it is completely smooth, glossy, and emulsified. Avoid incorporating too much air if you want a smooth glaze; gentle stirring is better than vigorous whisking.
Using Ghirardelli Chocolate for Rich Chocolate Ganache
Ghirardelli offers a range of baking chocolates, including their popular baking bars and wafers, which are excellent choices for making rich chocolate ganache. Their 60% Cacao Bittersweet Baking Bar is a favorite for a classic dark chocolate ganache, offering a balance of intensity and sweetness. For a sweeter or milk chocolate ganache, their Premium Baking Bars in Milk Chocolate or Semi-Sweet are good options.
When using Ghirardelli or any other quality chocolate for ganache, the cocoa butter content plays a role in the final texture. Chocolates with higher cocoa butter will produce a smoother, more fluid ganache when warm and a firmer, more stable ganache when set. Follow the standard technique: heat the cream, pour it over finely chopped Ghirardelli chocolate, let it sit, then stir gently until smooth. For a particularly rich ganache, consider adding a small amount of butter at the end and stirring until melted.
Drizzling and Coating with Melted Chocolate: Achieving Professional-Looking Results
Melting chocolate for baking is essential for creating beautiful drizzles and coatings on cakes, cookies, pastries, and candies. For successful drizzling, the melted chocolate needs to be smooth and fluid. Ensure the chocolate is completely melted and free of lumps. If it seems too thick, you can thin it slightly by stirring in a very small amount of melted cocoa butter or a neutral oil like vegetable oil (a teaspoon at a tablespoon of chocolate is a starting point), but be careful not to add too much, which can make the chocolate greasy and prevent it from setting properly.
For coating items like cake pops or strawberries, tempered chocolate provides the best results: a thin, crisp shell that sets quickly and has a beautiful shine. If you don't need a perfect temper (e.g., coating brownies that will be refrigerated), simply melted quality chocolate can work, though it might not set as firmly or look as glossy. Dip items into the melted chocolate, allowing excess to drip off, or use a spoon or piping bag to drizzle decorative patterns. Working efficiently while the chocolate is at the correct temperature is key to achieving clean lines and smooth finishes.
Recommended Tools and Products for Melting Chocolate
Best Double Boilers for Melting Chocolate: Reviews and Recommendations
While you can create a makeshift double boiler with a pot and a bowl, dedicated double boilers offer convenience and better heat distribution. They usually consist of a saucepan with an insert pot or bowl that fits snugly on top. Look for models made of stainless steel for even heating and durability. A good double boiler minimizes the risk of water splashing into the chocolate and ensures gentle, consistent heat, making melting chocolate for baking safer and more reliable.
Cuisinart Double Boiler Review: Features, Pros, and Cons
The Cuisinart Stainless Steel 1.5-Quart Double Boiler Insert is designed to fit into most 2-quart or larger saucepans.
- Features: Made from stainless steel, features a long handle and a helper handle for easy lifting and pouring. The insert design ensures it sits above the water.
- Pros: Durable stainless steel construction, fits existing cookware, handles make it easy to manage hot chocolate, provides even, gentle heat.
- Cons: Requires a separate saucepan, capacity might be small for very large batches, no lid included.
Wilton Double Boiler Review: Features, Pros, and Cons
Wilton offers a non-stick double boiler pot, often marketed towards candy making but suitable for melting chocolate for baking.
- Features: Two-piece set with a bottom pot and a non-stick insert pot, pouring spouts on the insert.
- Pros: Non-stick surface makes cleanup easy, pouring spouts are convenient for drizzling or molding, designed specifically as a set.
- Cons: Non-stick coating may degrade over time, can be less durable than stainless steel, specific size may not be versatile.
Top Chocolate Melting Pots: Electric Options for Precise Temperature Control
Electric chocolate melting pots are countertop appliances designed specifically for melting and holding chocolate at a consistent temperature. They offer convenience and precise temperature control, which can be particularly useful when working with larger quantities or maintaining chocolate at a working temperature for dipping or tempering (though most basic models don't reach tempering temperatures).
Nostalgia Chocolate Melting Pot Review: Features, Pros, and Cons
The Nostalgia Electric Chocolate Melting Pot is a simple, popular model for home use.
- Features: Small capacity pot with a warming base, includes trays and tools for dipping and molding.
- Pros: Easy to use, keeps chocolate warm and liquid for dipping, includes accessories, affordable.
- Cons: Limited temperature control (usually just "warm"), not suitable for precise tempering, small capacity, plastic components may not be very durable.
Spatulas and Utensils for Melting Chocolate: Ensuring Smooth and Even Melting
Having the right tools for stirring is crucial when melting chocolate for baking. A heatproof rubber or silicone spatula is ideal. These spatulas are flexible enough to scrape down the sides and bottom of the bowl, ensuring all the chocolate is incorporated and melts evenly. Their heat resistance means they won't melt or warp in the hot chocolate.
Avoid wooden spoons, as they can retain moisture and potentially cause seizing. Also, metal spoons can conduct heat away from the chocolate too quickly or scratch delicate bowl surfaces. A good quality silicone spatula allows for gentle, continuous stirring, promoting a smooth, lump-free consistency as your chocolate melts. Ensure the spatula is clean and completely dry before use.
Beyond the Basics: Advanced Chocolate Melting Techniques
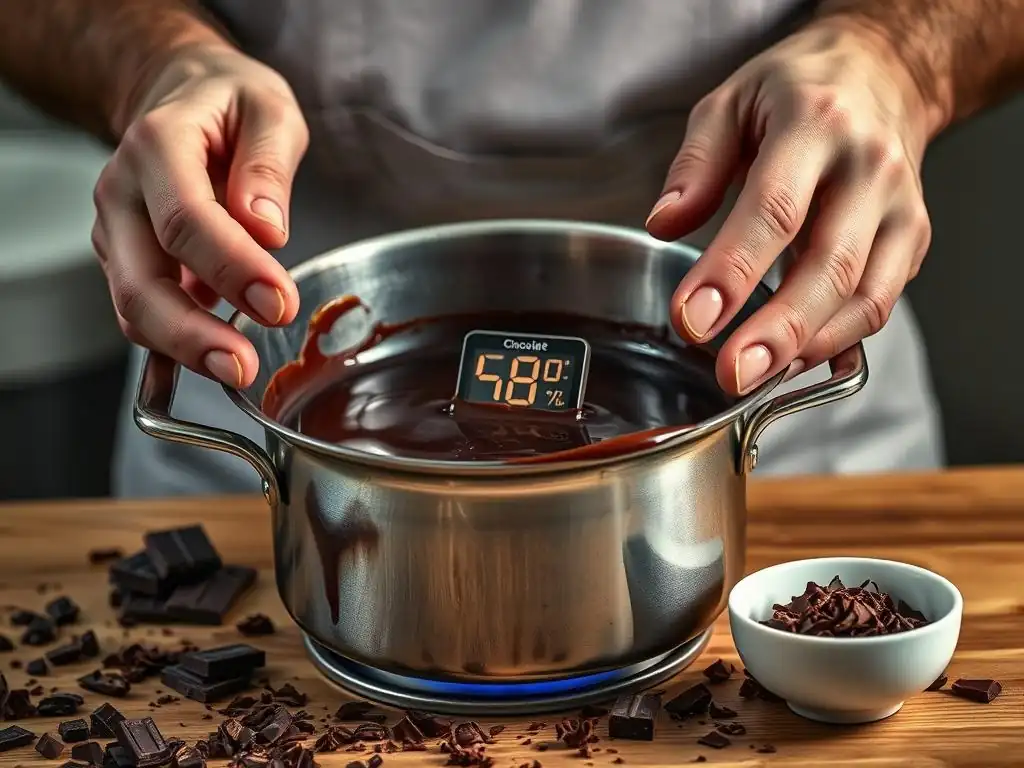
Melting Chocolate with Infusions: Adding Flavors and Aromas
Melting chocolate for baking can be elevated by infusing it with complementary flavors during the melting process. This can be done by adding spices, herbs, or citrus zest to the cream when making ganache, or directly to the chocolate while it's melting. For example, you could add a cinnamon stick, a few cardamom pods, or a strip of orange zest to the cream as it heats for ganache. Strain the cream before pouring it over the chocolate.
Alternatively, you can add finely ground spices like chili powder, espresso powder, or even dried lavender directly to the chopped chocolate before melting. The gentle heat helps release the volatile oils and aromas, infusing the melted chocolate with complex notes. Be mindful of proportions, as too much of a strong flavor can overpower the chocolate. Start with a small amount and adjust to your preference.
Melting Chocolate for Chocolate Sculptures and Decorations
Creating chocolate sculptures and intricate decorations requires specific techniques for melting chocolate for baking, often involving tempering. Tempered chocolate is essential for these applications because it sets hard, holds its shape, has a glossy finish, and is stable at room temperature. Untempered chocolate would be soft, dull, and prone to melting or blooming.
For pouring into molds, the tempered chocolate must be at the correct working temperature to flow smoothly and fill all the details. For creating sculpted elements or delicate pieces, the chocolate is often melted, tempered, and then spread thinly on a surface to cool slightly until it reaches a specific consistency – firm enough to work with (cut, shape, curl) but still pliable. Using high-quality couverture chocolate with a good amount of cocoa butter is paramount for achieving the best results in chocolate artistry.
Using Compound Chocolate vs. Real Chocolate: Understanding the Differences
When melting chocolate for baking, you might encounter "compound chocolate" (also called confectionery coating). It looks like chocolate but is made with vegetable oils (like palm kernel oil) instead of cocoa butter. Real chocolate, by definition, contains cocoa butter as its primary fat. The difference in fat content fundamentally changes how they melt and behave.
Compound chocolate is much easier to melt; it doesn't require tempering to set up hard and shiny because the vegetable oils behave differently than cocoa butter. It simply needs to be melted gently until fluid (often around 90-100°F/32-38°C) and then it will harden as it cools. However, it lacks the complex flavor and smooth mouthfeel of real chocolate made with cocoa butter. While convenient for simple coatings where ease is prioritized over flavor and texture, for truly high-quality baked goods, using real chocolate and mastering the art of melting chocolate for baking is indispensable.
Conclusion: Achieving Chocolate Melting Perfection for Baking Success.
Frequently Asked Questions
How does temperature affect melting chocolate?
Temperature control is crucial. Too high a temperature can cause the chocolate to burn or seize, resulting in a grainy texture.
What is the best method for melting chocolate for baking?
The double boiler method is generally recommended for even heating, preventing scorching. Alternatively, you can use a microwave at low power in short bursts.
Why is it important to use quality chocolate when melting it for baking?
Quality chocolate contains a higher percentage of cocoa butter, which allows it to melt smoothly and create a more desirable texture and flavor in your baked goods.
What should I do if my chocolate seizes while melting?
Try adding a small amount of hot liquid (water or milk) to the seized chocolate, stirring vigorously. This can sometimes help re-emulsify the mixture.
Can I melt chocolate chips for baking?
Yes, you can, but be aware that chocolate chips often contain stabilizers to help them retain their shape, which may affect the final texture compared to using baking chocolate bars. They are best suited for recipes where the chocolate is not the primary flavor component.
Final Reflection: The Enduring Delight of Perfectly Melted Chocolate
The science of melting chocolate may seem trivial, but mastering this seemingly simple process is the cornerstone of countless baking triumphs. A perfectly melted chocolate, smooth and glossy, elevates a simple brownie to a decadent masterpiece, transforms a humble cake into a showstopper, and imbues even the most basic cookie with an irresistible richness. The impact of this seemingly small detail is far greater than one might initially assume.
The pursuit of the perfect melt has shaped my own baking journey, teaching me patience, precision, and the profound connection between science and artistry. It's a lesson in paying attention to detail, understanding the nuances of ingredients, and appreciating the transformative power of heat. The best things in life are simple, but not easy.
This quote perfectly encapsulates the experience of mastering the art of melting chocolate; it’s a simple act, yet achieving consistent, flawless results requires dedication and practice. The subtle shifts in texture and flavor, the delicate balance between heat and time – these are the elements that elevate a simple ingredient into something truly special.
Now, I invite you to take this knowledge and apply it to your own baking adventures. Don't be afraid to experiment, to tweak the techniques, and to discover your own perfect method for melting chocolate. Embrace the process, savor the aroma, and revel in the satisfaction of creating something delicious and beautiful. The journey of mastering the melt is a journey of culinary self-discovery, and the rewards are truly sweet.
Unlock Your Inner Chocolatier: Master the Art of Melting Chocolate!
Thanks for diving into the science of melting chocolate with us! We hope you now feel confident and excited to create perfectly smooth, luscious chocolate creations. Ready to put your newfound knowledge into practice?
- Craft your dream chocolate dessert: This is your chance to experiment! Try that recipe you've been eyeing, or create your own masterpiece using the techniques you just learned.
- Share your chocolate triumphs (or even your delicious fails!): We'd love to see what you bake! Tag us on social media with #BakeWithEaseChocolate.
- Explore advanced chocolate techniques: Search our site for more articles on tempering, ganaches, and other delicious chocolate adventures.
What incredible chocolate treat will you make first?