
Dough Docker Uncovered: Prevent Hollow Pizzas and Bubbly Pastries

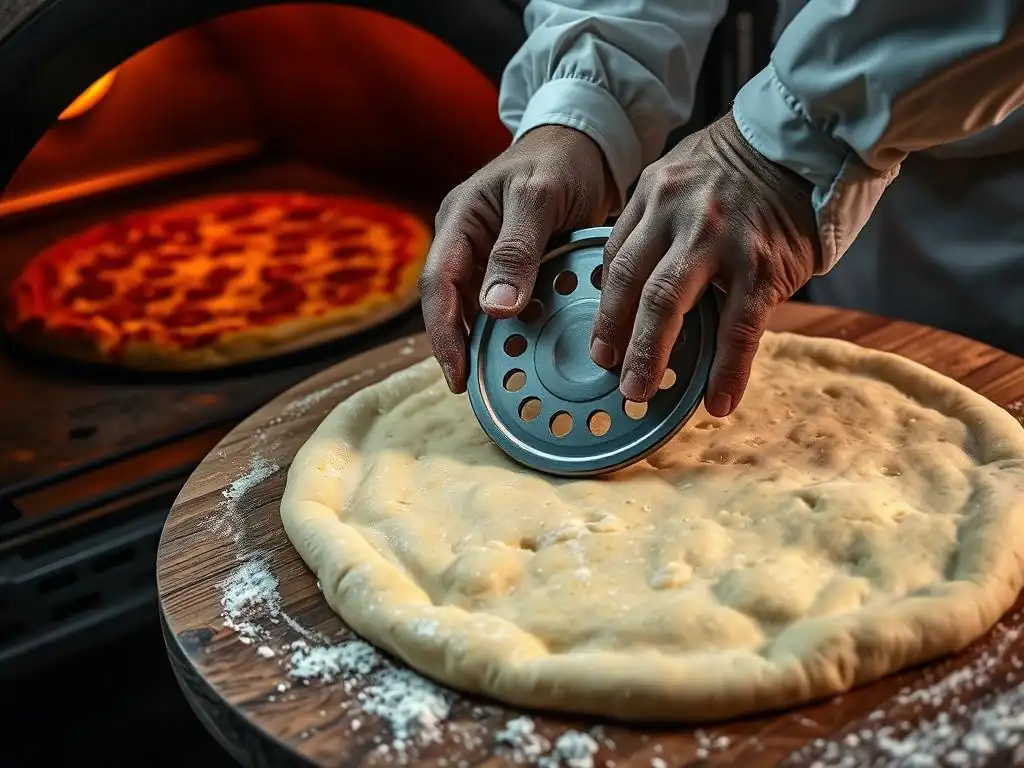
Welcome to BakeWithEase, your haven for simplifying the sweet science of baking! Ever wondered how to avoid sunken dough and finally achieve that perfectly even bake? You're in the right place. Dive into our guide, "Dough Docker Uncovered: Prevent Hollow Pizzas and Bubbly Pastries," and discover the secrets to flawless breads and pastries. Let's unlock the techniques to elevate your baking game, one perfectly risen loaf at a time!
- Understanding Sunken Dough: The Key to Perfect Baking
- Introducing the Dough Docker: Your Secret Weapon Against Air Pockets
- How to Use a Dough Docker for Flawless Results
- Choosing the Right Dough Docker for Your Baking Needs
- Mastering Dough Docking Techniques for Different Dough Types
- Troubleshooting Common Dough Docking Issues
- Beyond the Basics: Advanced Dough Docking Techniques
- Maintaining Your Dough Docker for Long-Lasting Use
- Achieving Perfect Baking: The Dough Docker Advantage
- Preventing Sunken Dough: Expert Baking Tips and Tricks
- Frequently Asked Questions
- Final Reflection: The Rise and Fall (and Rise Again!) of Dough
- Unlock Your Baking Potential: Perfect Crusts, Every Time!
Understanding Sunken Dough: The Key to Perfect Baking
Baking is a delightful science, but sometimes results fall short of expectations. One common frustration is dealing with dough that doesn't behave as intended, leading to imperfections like sunken centers or large, unsightly bubbles. Understanding how to avoid sunken dough is crucial for achieving consistently excellent baked goods, whether you're crafting a rustic pizza or a delicate pastry. It's about controlling the dough's structure and how it reacts to the heat of the oven.
Preventing sunken dough and managing unwanted bubbles requires a grasp of the underlying processes that occur during baking. Factors such as gluten development, yeast activity (in yeasted doughs), and moisture content all play significant roles. When these elements aren't balanced, or when air becomes trapped in undesirable ways, the final product can suffer from structural weaknesses, leading to collapse or uneven texture. Addressing these issues proactively is far easier than trying to fix them after baking.
What Causes Sunken Dough and Unsightly Bubbles?
Sunken dough often results from structural failure. In bread or pizza dough, this can happen if the gluten structure isn't strong enough to support the rise, or if the leavening (yeast or baking powder/soda) produces gas too rapidly without adequate support. For instance, over-proofing yeast dough can weaken the gluten network, causing it to collapse in the oven. In cakes or quick breads, opening the oven door too early can cause a sudden temperature drop, leading to the center sinking before it's fully set. Understanding these triggers is vital for bakers looking for how to avoid sunken dough.
Unsightly bubbles, particularly in flat doughs like pizza crusts or pie pastry, are typically caused by trapped air or steam expanding rapidly during baking. While some bubbling is desirable for texture, large, isolated blisters can create an uneven surface, making toppings slide off pizza or causing pastry layers to separate improperly. This uneven expansion is a direct result of air pockets that weren't properly managed before the dough hit the heat.
The Role of Air Pockets in Dough Imperfection
Air pockets are inherent in dough – they are essential for leavening and creating a light texture. However, their size, distribution, and location are critical. In yeasted doughs, carbon dioxide produced by fermentation forms tiny bubbles throughout the network of gluten. In laminated doughs like puff pastry, layers of butter create steam that separates the dough into flaky layers. These are examples of controlled air/steam pockets.
Uncontrolled air pockets, on the other hand, can lead to problems. A large air bubble trapped under the surface of a pizza crust can expand dramatically, creating a single, large blister instead of a uniformly bubbly edge. Similarly, in a pie crust, steam trapped under the surface can cause the crust to puff up unevenly, preventing proper contact with the filling. These isolated pockets are a primary target when considering methods for how to avoid sunken dough and improve dough aesthetics.
Introducing the Dough Docker: Your Secret Weapon Against Air Pockets
Dealing with unwanted air pockets in dough can be a challenge, but thankfully, there's a simple, effective tool designed specifically for this purpose: the dough docker. This seemingly humble gadget is a baker's secret weapon against uneven crusts and prevents those frustrating large bubbles that can ruin the appearance and texture of your baked goods. It provides a systematic way to manage air before baking even begins.
A dough docker is essentially a roller or a pad fitted with numerous small spikes or pins. Its purpose is to gently puncture the surface of the dough, creating tiny holes that allow trapped air or steam to escape during baking. This process, known as "docking," helps ensure that the dough bakes more evenly, preventing large bubbles from forming and contributing to a more uniform rise and texture. It's a direct method for how to avoid sunken dough caused by uncontrolled expansion.
What is a Dough Docker and How Does It Work?
A dough docker works on a simple mechanical principle. As you roll or press the docker over the surface of flattened dough, its pins create small perforations. These perforations act as vents. When the dough is exposed to heat in the oven, any trapped air or steam that would normally expand rapidly and form large bubbles can now escape through these tiny holes.
Consider pizza dough: without docking, a large air bubble near the center might expand and lift the crust dramatically in one spot. Docking provides multiple escape routes, allowing the air to disperse more evenly, resulting in a flatter, more consistent base. For pie crusts, it prevents the bottom crust from puffing up away from the filling. It's a straightforward technique with a significant impact on the final product, making it a valuable tool for anyone concerned with how to avoid sunken dough.
Dough Docker vs. Fork: Which Method is Best?
Historically, home bakers often used a fork to prick dough, achieving a similar result to docking. While a fork can work for small areas or thin doughs, a dough docker offers significant advantages, especially for larger surfaces or thicker doughs. Using a fork involves manually pricking the dough repeatedly, which is time-consuming and can lead to inconsistent spacing and depth of the holes. It's easy to miss spots or prick too deeply in some areas and not enough in others.
A dough docker, particularly a roller type, provides a quick, uniform method. With one or two passes, you can create hundreds of evenly spaced perforations across the entire surface of the dough. This consistency is key to preventing uneven bubbling and ensuring a reliably flat crust. While a fork might suffice for a single small tart, for a large pizza or multiple pie crusts, a dough docker is far more efficient and effective, offering a superior method for how to avoid sunken dough imperfections consistently.
How to Use a Dough Docker for Flawless Results
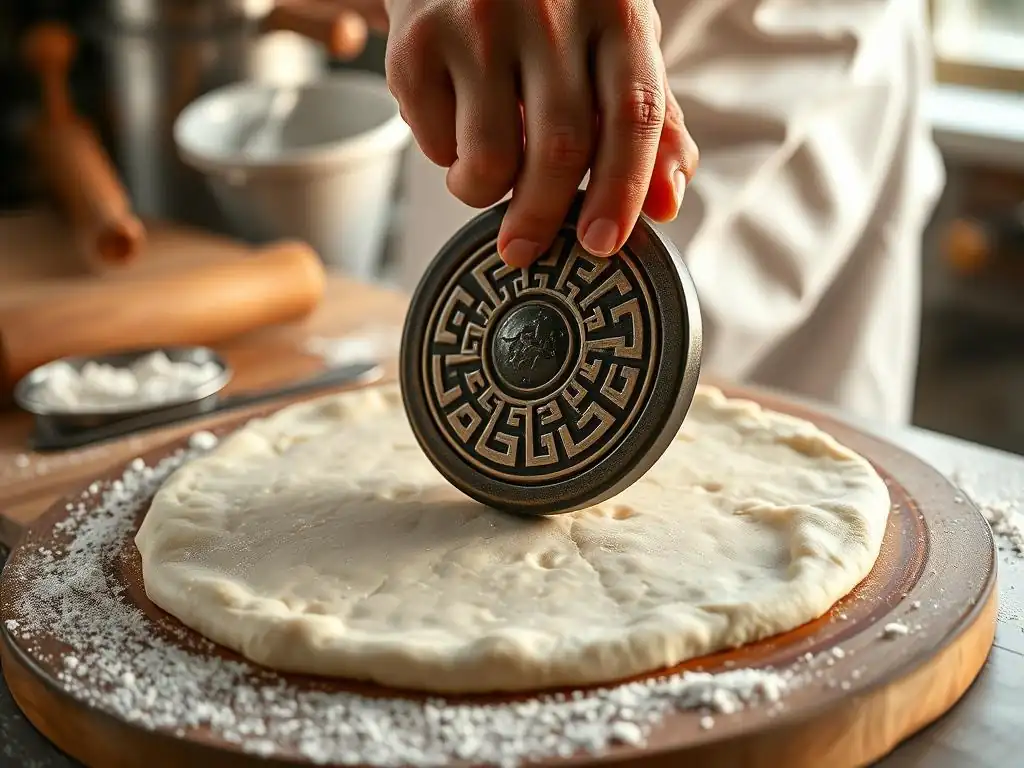
Using a dough docker is straightforward, but employing the right technique is key to maximizing its benefits and achieving truly flawless results. It's not just about randomly poking holes; it's about understanding when and how to apply this tool to specific types of dough to prevent issues like sunken centers or excessive bubbling. Proper docking is a fundamental step for anyone learning how to avoid sunken dough in various baked goods.
The process is quick and requires minimal effort, yet its impact on the final texture and appearance of your baked goods is significant. Whether you're working with a delicate pastry or a robust pizza dough, a few passes with a dough docker can make the difference between a mediocre result and a professional-looking finish. Let's explore the steps and best practices for using this essential tool effectively across different dough types.
Step-by-Step Guide to Docking Dough Effectively
Here is a simple guide to using your dough docker:
- Prepare Your Dough: Roll or flatten your dough to the desired thickness and shape on a lightly floured surface or parchment paper. Ensure it's ready for its final form before baking.
- Select Your Docker: Choose the appropriate dough docker for the job (more on types later). A roller is great for large, flat areas, while a hand-held pad might work for smaller or irregularly shaped pieces.
- Apply Even Pressure: Gently but firmly roll or press the docker over the entire surface of the dough. The goal is to create small holes that go about halfway through the dough's thickness, not all the way through to your work surface. Avoid pressing too hard, which could tear the dough.
- Cover the Surface: Make sure you cover the entire area that needs docking. Overlap your passes slightly with a roller to ensure no spots are missed. For a standard 12-inch pizza crust, two or three passes in different directions are usually sufficient.
- Proceed with Recipe: Once docked, your dough is ready for the next step in your recipe, whether that's adding sauce and toppings, adding filling, or pre-baking.
Following these steps ensures consistent ventilation, which is a core strategy for how to avoid sunken dough and unwanted bubbles.
Best Practices for Using a Dough Docker on Pizza Dough
Pizza dough is one of the most common applications for a dough docker. Docking is particularly useful for thin-crust pizzas or when you want a very flat, even base without large, airy pockets in the center.
- Dock After Shaping: Always dock the dough after you have rolled or stretched it to its final pizza shape and size. Docking before shaping would distort the pattern of holes.
- Focus on the Center: While docking the entire surface is fine, paying particular attention to the center area helps prevent the middle from bubbling up excessively while the edges (where you might want a bit more puff) are left less docked or undocked.
- Consider Edge Preference: If you like a puffy, airy crust edge (cornicione), avoid docking the outer 1-2 inches of the pizza. This allows the air to concentrate and create that desirable bubbly rim. If you prefer a flatter edge, dock closer to the edge.
- Light Flour Dusting: A very light dusting of flour on the dough's surface before docking can help prevent the dough from sticking to the docker's pins.
Implementing these practices significantly improves the consistency of your pizza crust, directly addressing one common scenario where bakers wonder how to avoid sunken dough or overly bubbly centers.
Using a Dough Docker for Pie Crusts and Pastries
Dough dockers are invaluable when working with pie crusts, tart shells, and certain types of pastries, especially those that are pre-baked or blind-baked before filling.
- Blind Baking: Docking is essential for blind-baking pie or tart shells. The holes allow steam trapped beneath the crust to escape, preventing the bottom crust from puffing up away from the pie plate or shrinking excessively down the sides. Dock the bottom and about an inch up the sides of the pastry shell before lining it with parchment paper and pie weights.
- Filled Pies: For single-crust pies that are filled before baking, light docking of the bottom crust can still be beneficial, though sometimes the weight of the filling is sufficient to prevent puffing. Use less vigorous docking than for blind baking.
- Pastries: For pastries like puff pastry or some cookie doughs where controlled expansion or a flat shape is desired, light docking can manage the rise. However, be mindful of the pastry type; some rely on significant puffing (like croissants, which are not docked) while others benefit from controlled venting.
Using a dough docker effectively on these delicate doughs is a key technique in preventing issues like sunken centers or uneven layers, helping you master how to avoid sunken dough in your sweet creations.
Choosing the Right Dough Docker for Your Baking Needs
Selecting the right dough docker might seem trivial, but the variety available caters to different baking tasks and preferences. Just like choosing the right knife for cutting or the right whisk for beating, the appropriate dough docker can make the task easier and yield better results. Understanding the options helps you pick the tool that best suits the types of dough you work with most often and your personal baking style, contributing to your ability to how to avoid sunken dough effectively.
The market offers various designs, materials, and sizes, each with its own advantages. Considering these factors before purchasing ensures you get a tool that is not only effective but also durable and comfortable to use. Let's break down the main types and considerations.
Types of Dough Dockers: A Comparison
Dough dockers primarily come in two main forms: rollers and pads.
- Roller Dockers: These are the most common type, resembling a small paint roller with a cylindrical barrel covered in spikes. They are ideal for quickly and efficiently docking large, flat surfaces like pizza dough or sheets of pastry. You simply roll them across the dough. They are fast and provide very consistent spacing. A typical roller might have a barrel width of 4-6 inches and feature hundreds of pins.
- Pad Dockers (or Handheld): These are flat or slightly curved pads with spikes, often with a handle on the back. They are used by pressing the pad down onto the dough. Pad dockers offer more control over the areas being docked and can be useful for smaller items like individual pastries, bread rolls, or irregularly shaped doughs where a roller might be awkward. They allow for more targeted docking.
Choosing between a roller and a pad depends largely on the volume and type of dough you handle. For frequent pizza or large pastry sheet baking, a roller is highly recommended. For smaller, more intricate work, a pad might be preferable. Both are effective tools for how to avoid sunken dough caused by trapped air.
Material Matters: Selecting the Best Dough Docker Material
Dough dockers are commonly made from plastic or metal. Each material has its pros and cons:
- Plastic Dockers: These are typically more affordable and lightweight. High-quality food-grade plastic is durable and easy to clean. However, cheaper plastics might be less robust, and the pins could potentially break over time with heavy use. Plastic is non-reactive, which is always a plus in baking.
- Metal Dockers (often Stainless Steel): Metal dockers, particularly those made from stainless steel, are generally more durable and long-lasting. They can be heavier, which might require less pressure to dock the dough effectively. Stainless steel is also easy to clean and hygienic. They tend to be more expensive than plastic versions.
For most home bakers, a good quality plastic roller docker is perfectly adequate and offers a great balance of performance and cost. For heavy-duty or professional use, a metal docker might be a worthwhile investment. Both materials, when properly used, will help you learn how to avoid sunken dough.
Size and Design Considerations for Optimal Docking
Beyond the basic type and material, consider the size and specific design features:
- Barrel Width (for Rollers): A wider barrel (5-6 inches) covers more area quickly, great for large pizzas. A narrower barrel (3-4 inches) offers more maneuverability for smaller items or tighter spaces.
- Pin Length and Spacing: The length and spacing of the pins determine the depth and density of the perforations. Shorter, closer pins create more frequent, shallower holes, suitable for thin pastries. Longer, wider-spaced pins create deeper, fewer holes, possibly better for thicker doughs like some bread focaccia.
- Handle Comfort: For roller dockers, an ergonomic handle makes extended use more comfortable. For pad dockers, a secure grip is important.
Selecting a docker with features that match your typical baking projects will make the tool more effective and pleasant to use, aiding your efforts in how to avoid sunken dough consistently.
Mastering Dough Docking Techniques for Different Dough Types
The way you dock dough isn't a one-size-fits-all approach. Different dough types have varying consistencies, elasticity, and intended outcomes, requiring slightly different docking techniques to achieve the best results. Mastering these nuances is key to leveraging the dough docker's full potential and effectively addressing the question of how to avoid sunken dough and other structural flaws specific to each dough.
From the robust nature of pizza dough to the delicate flakiness of pastry, applying the correct docking pressure and coverage is crucial. Understanding when and why to dock each type ensures you get the desired texture and appearance, preventing common baking frustrations.
Docking Pizza Dough: Achieving a Flat and Even Base
For pizza dough, the primary goal of docking is to prevent large, uneven bubbles from forming in the center of the crust, which can displace toppings or create a very irregular surface.
- Technique: Roll the dough out to your desired thickness and shape. Use a roller docker and apply gentle, even pressure across the entire surface, or at least the central area, leaving the outer edge (about 1-1.5 inches) undocked if you want a puffy crust. One or two passes in perpendicular directions are usually sufficient for a 12-14 inch pizza. The holes should be small dots, not large tears.
- Why it Works: The small holes allow trapped air and steam to escape during the high heat of pizza baking, encouraging the dough to bake flat and evenly across the docked area while allowing the undocked edge to puff naturally from internal steam and yeast activity. This is a fundamental step for how to avoid sunken dough in the middle of your pizza.
Docking Pastry Dough: Preventing Puffing and Bubbling
Pastry doughs like shortcrust or puff pastry used for tarts, quiches, or pie shells often need docking, especially for blind baking.
- Technique: Roll out the pastry and fit it into your pie plate or tart pan. Trim the edges. Then, use a roller or pad docker to generously prick the bottom and partially up the sides of the dough. The holes should be relatively close together. For blind baking, it's hard to over-dock the bottom crust; aim for consistent perforations.
- Why it Works: Pastry doughs contain significant fat, which creates steam during baking. Without docking, this steam gets trapped under the crust, causing it to puff up dramatically, shrink from the sides of the pan, or bake unevenly. The docker holes provide vents for this steam, keeping the crust flat and in shape during pre-baking. This is critical for how to avoid sunken dough and misshapen shells when blind baking.
Docking Bread Dough: When and Why It's Necessary
Docking bread dough is less common than for pizza or pastry, as many bread types rely on significant, controlled expansion. However, there are specific instances where light docking or strategic piercing is beneficial.
- Focaccia: Traditional focaccia is often dimpled with fingertips rather than docked with a tool, creating intentional depressions that fill with olive oil and seasonings. However, a docker can be used very lightly to create a more uniform, fine-textured surface if preferred, helping manage overall lift without large blisters.
- Flatbreads: Some flatbreads that you want to remain relatively flat (like certain types of pita that you don't want to puff into a pocket) might benefit from light docking to limit ballooning.
- Before Adding Toppings: For some enriched doughs used as bases for savory tarts or open-faced sandwiches, a light docking might be used before adding heavy or wet toppings to ensure the base bakes through evenly without excessive localized bubbling.
In bread baking, docking is used selectively and often very lightly, focusing on managing surface texture or limiting excessive, unwanted puffing in specific contexts, rather than the extensive docking used to how to avoid sunken dough or large bubbles in flat doughs like pizza or pastry.
Troubleshooting Common Dough Docking Issues
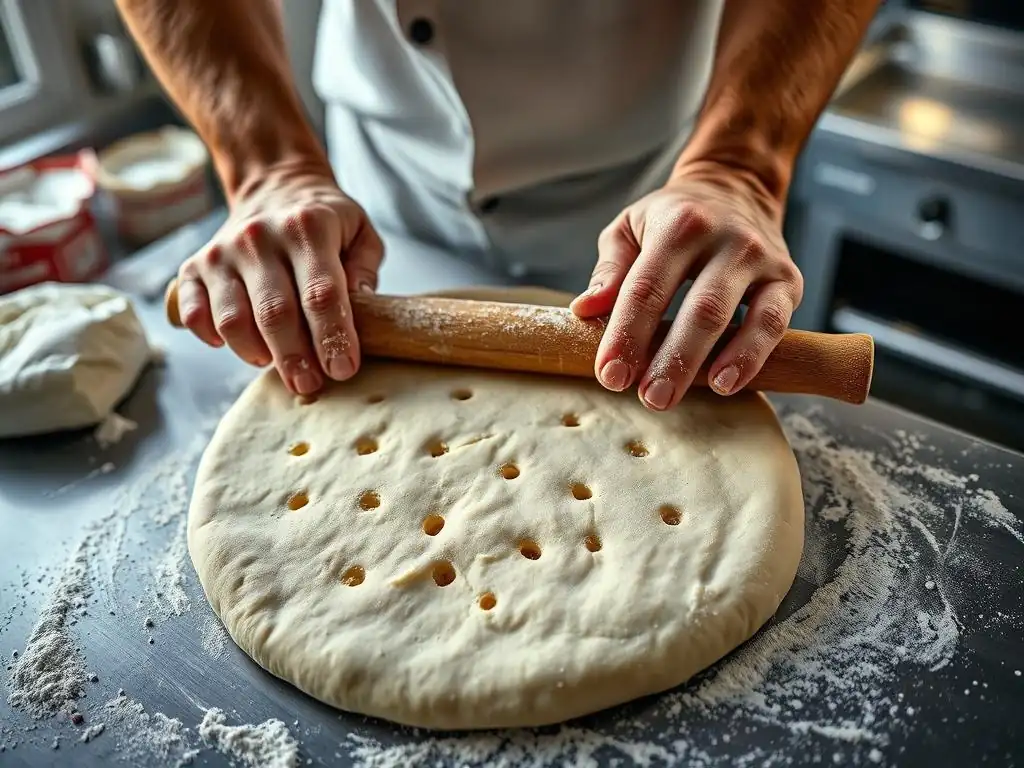
Even with a dough docker, you might occasionally encounter minor issues. Knowing how to identify and troubleshoot these problems ensures you get the most out of your tool and consistently achieve the desired results. Addressing these hiccups is part of mastering how to avoid sunken dough and other textural problems.
Common issues include unevenly spaced holes, pressing too hard, or dough sticking to the docker. Fortunately, these are usually easy to fix with slight adjustments to your technique or tool maintenance.
Uneven Docking: Causes and Solutions
Uneven docking means some areas of your dough have many holes, while others have few or none. This can lead to inconsistent baking, with some parts bubbling excessively while others remain flat.
- Causes:
- Not applying even pressure across the entire surface.
- Not overlapping passes sufficiently with a roller docker.
- Using a pad docker and missing spots.
- Dough being unevenly thick in different areas.
- Solutions:
- Ensure you are applying consistent downward pressure as you roll or press.
- When using a roller, overlap each pass by about 1-2 inches to guarantee full coverage.
- Take your time and visually inspect the dough surface to confirm it's evenly covered with perforations.
- Try to roll your dough to a uniform thickness before docking.
Consistent technique is key to preventing uneven docking and ensuring that your efforts to how to avoid sunken dough and bubbles are effective across the entire surface.
Over-Docking: Avoiding a Tough Crust
While under-docking can lead to bubbles, over-docking can also be detrimental, potentially resulting in a tough or cracker-like crust, especially with certain dough types.
- Causes:
- Pressing too hard, causing the pins to go all the way through the dough and potentially tear it.
- Making too many passes, creating an excessive number of holes that are too close together.
- Using a docker with pins that are too long or sharp for the dough's thickness.
- Solutions:
- Use only enough pressure for the pins to penetrate about halfway through the dough's thickness. You should see small dots, not deep punctures or tears.
- Limit the number of passes. For most applications like pizza, one or two passes with a roller are sufficient.
- Consider the dough type; thin pastry requires less aggressive docking than a slightly thicker pizza dough.
The goal is to create just enough ventilation, not to perforate the dough excessively. Moderation is important when learning how to avoid sunken dough while maintaining a tender crust.
Dough Sticking to the Docker: Prevention Tips
Dough sticking to the pins of your docker can be frustrating and pull up pieces of your carefully rolled dough.
- Causes:
- Dough is too sticky or wet.
- Not using enough flour (or any) on the surface of the dough or the docker.
- Dough is too warm.
- Solutions:
- Ensure your dough is properly hydrated and not excessively sticky. If it is, try chilling it slightly before rolling and docking.
- Lightly dust the surface of your rolled dough with flour before docking. A very thin, almost invisible layer is usually enough.
- You can also lightly dust the docker pins themselves with flour using a pastry brush or by dipping the roller/pad into a shallow dish of flour and tapping off the excess.
- Work with dough that is at the appropriate temperature for rolling (often slightly cool).
Taking these simple preventative steps will keep your docker clean and your dough intact, making the docking process smooth and effective for how to avoid sunken dough.
Beyond the Basics: Advanced Dough Docking Techniques
Once you're comfortable with the fundamental uses of a dough docker, you can explore more advanced techniques that cater to specific baking goals or dough characteristics. These methods can help you fine-tune your results and achieve even greater control over the final texture and appearance of your baked goods, further enhancing your ability to how to avoid sunken dough and achieve professional-level outcomes.
Experimenting with variables like dough temperature, flour type, and combining docking with other techniques can unlock new possibilities in your baking repertoire.
Docking Cold vs. Warm Dough
The temperature of your dough can influence how it responds to docking.
- Cold Dough: Chilled dough is firmer and less sticky, making it easier to roll out thinly and dock cleanly. The holes created in cold dough tend to hold their shape better during handling before baking. This is often preferred for pastry doughs and pizza doughs that benefit from a cold fermentation. Docking cold dough is often easier and less likely to cause sticking.
- Warm Dough: Warmer doughs, especially yeasted doughs that have begun to rise, are softer and more elastic. Docking warm, risen dough needs a gentler touch to avoid deflating it too much. The holes might also spring back slightly more. If docking a proofed dough, be very gentle.
For most general docking purposes (pizza, pastry), working with dough that is slightly cool or at a standard room temperature (around 70-75°F or 21-24°C) after its initial shaping is ideal. This balance allows for easy rolling and effective perforation, contributing to the prevention of sunken dough.
Using a Dough Docker with Different Flour Types
Different flours affect dough elasticity and structure, which in turn can slightly influence docking.
- High-Gluten Flour (e.g., Bread Flour): Doughs made with high-gluten flour are more elastic and can be quite springy. When docking, these doughs might require slightly firmer pressure to ensure the holes remain open, as the gluten structure will try to pull them closed.
- Low-Gluten Flour (e.g., Pastry Flour): Doughs made with low-gluten flour are more tender and less elastic. Use a lighter touch when docking to avoid tearing the dough. The holes will likely stay put more readily.
- Whole Wheat or Alternative Flours: Doughs containing whole wheat or other alternative flours might be less elastic or have more 'breaks' in the gluten structure. Dock gently and ensure the dough is well-hydrated to prevent tearing during docking.
Understanding the characteristics of your flour helps you adjust your docking pressure and technique for optimal results and to better understand how to avoid sunken dough based on your ingredients.
Achieving a Crispy Crust with Proper Docking
While docking primarily prevents large bubbles and uneven puffing, it can also indirectly contribute to a crispier crust, particularly in pizza and flatbreads.
- How it Helps: By creating numerous small vents, docking allows moisture (steam) to escape more readily from the base of the dough during baking. This rapid release of steam helps the crust dry out and crisp up more effectively than if moisture were trapped beneath large bubbles.
- Combine with Other Techniques: For maximum crispiness, combine proper docking with high baking temperatures, preheating your baking surface (like a pizza stone or steel), and using minimal toppings, especially in the center of the pizza.
Proper docking is one piece of the puzzle in achieving that coveted crispy crust, working in tandem with heat and bake time to manage moisture release, a key factor in how to avoid sunken dough that is also soggy.
Maintaining Your Dough Docker for Long-Lasting Use
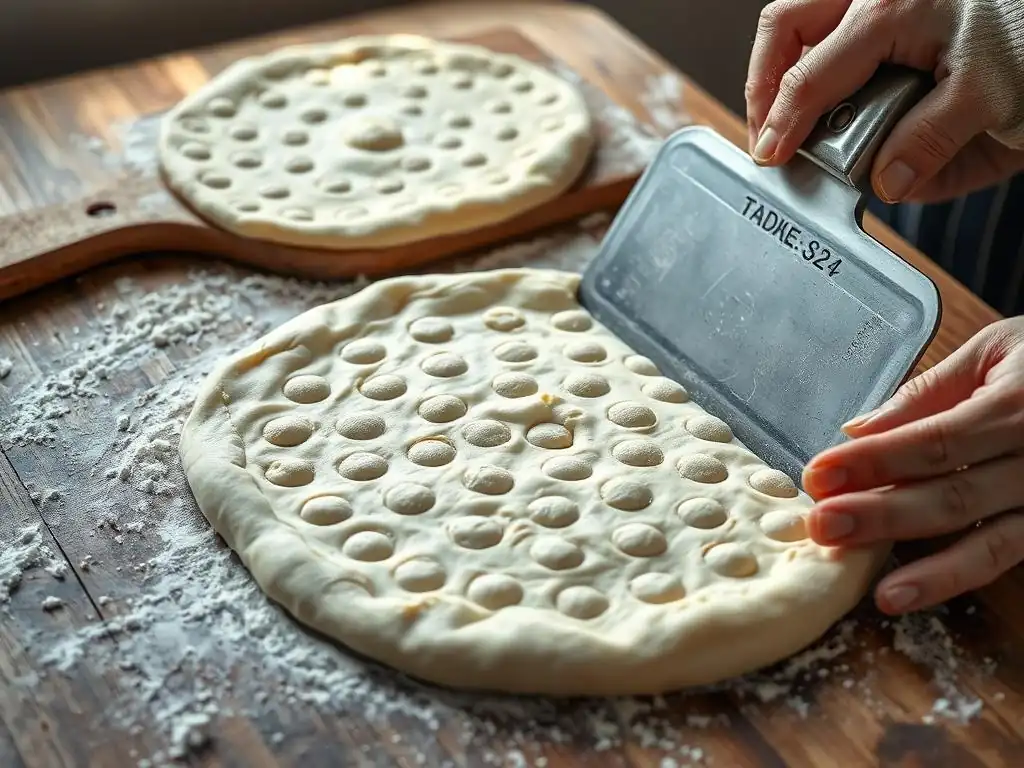
Like any kitchen tool, proper care and maintenance of your dough docker will ensure it remains effective and lasts for years. Keeping it clean and storing it correctly prevents damage and keeps it hygienic for food preparation. Simple cleaning routines are all that's needed.
A well-maintained dough docker is always ready when you need it, ensuring you can consistently apply this useful technique to how to avoid sunken dough and other baking issues.
Cleaning and Storing Your Dough Docker
Cleaning a dough docker requires getting into all those small spaces between the pins.
- Immediate Cleaning: The easiest time to clean a dough docker is immediately after use, before any residual dough has a chance to dry and harden onto the pins.
- Method:
- Use a stiff brush (like a pastry brush or even a clean toothbrush dedicated to kitchen use) to quickly brush away any dough scraps stuck between the pins.
- Wash the docker in warm, soapy water. A brush or sponge can help dislodge any remaining bits.
- Rinse thoroughly under running water.
- Shake off excess water.
- Drying: It's crucial to dry your dough docker completely, especially metal ones, to prevent rust (though stainless steel is resistant). Air drying is fine, but ensure it's in a position where water can drain away from the pin area. You can also use a clean towel to pat it dry as much as possible.
- Storage: Store your dough docker in a drawer or container where the pins won't get bent or damaged. Some come with protective covers for the pins, which is ideal.
Proper cleaning and drying are essential steps in maintaining the longevity and hygiene of your docker, keeping it ready to help you how to avoid sunken dough.
Extending the Life of Your Dough Docker
Beyond basic cleaning, a few practices can help extend your docker's lifespan:
- Avoid Excessive Force: Don't press so hard that you bend or break the pins. The goal is perforation, not penetration through the entire dough and into your work surface.
- Use on Appropriate Surfaces: Dock dough on a cutting board, a silicone mat, or parchment paper. Avoid docking directly on hard, unforgiving surfaces like stone countertops, which can dull or damage the pins.
- Store Carefully: Protect the pins from impact or bending by storing the docker properly, ideally not at the bottom of a heavy drawer where other tools could crush it.
- Check for Damage: Periodically inspect your docker for bent or broken pins. A docker with damaged pins won't work effectively and might tear the dough. If pins are significantly damaged, it might be time for a replacement.
By following these simple tips, your dough docker will remain a reliable tool in your kitchen for years, consistently assisting you in how to avoid sunken dough and achieving beautifully baked goods.
Achieving Perfect Baking: The Dough Docker Advantage
In the quest for perfect baked goods, minimizing imperfections like sunken centers and large, unwanted bubbles is a constant goal for bakers of all levels. While many factors contribute to successful baking, the targeted use of a dough docker offers a simple yet powerful advantage in controlling dough structure and achieving consistent, aesthetically pleasing results. It’s a direct answer to the common question of how to avoid sunken dough in specific applications.
Incorporating a dough docker into your baking routine, particularly for flat doughs like pizza and pastry, can dramatically improve the outcome of your creations. It's a small tool with a big impact on texture and appearance.
Say Goodbye to Sunken Dough and Hello to Professional Results
Sunken dough in the center of a pie or tart, or a giant bubble dominating your pizza crust, can be disheartening after putting effort into baking. These issues detract from both the look and the even texture of the final product.
By using a dough docker, you actively manage the air and steam within the dough, preventing those uncontrolled expansions that lead to structural flaws. The result is a more uniform bake, a flatter pizza base perfect for toppings, and a pie crust that stays put in its pan. This simple step elevates your baking from homemade to professional-looking, giving you confidence in your ability to how to avoid sunken dough.
The Dough Docker: An Essential Tool for Every Baker
Considering its affordability, ease of use, and significant impact on common baking frustrations, the dough docker truly earns its place as an essential tool in any baker's kitchen. Whether you're a beginner just learning the ropes or an experienced baker refining your techniques, this tool simplifies the process of managing air pockets.
From ensuring a perfectly flat base for your signature pizza to achieving a flawlessly blind-baked tart shell, the dough docker consistently helps you achieve better results. It's a practical solution for anyone asking how to avoid sunken dough and uneven textures in their flat baked goods.
Preventing Sunken Dough: Expert Baking Tips and Tricks
Beyond the specific use of a dough docker, mastering how to avoid sunken dough involves understanding broader baking principles. Here are a few expert tips to complement the use of your dough docker:
- Accurate Measuring: Use a kitchen scale for precise ingredient measurements, especially flour. Incorrect ratios can affect dough structure.
- Proper Gluten Development: For yeasted doughs and some pastry, developing the right amount of gluten provides the necessary structure to support the dough's rise without collapsing. Don't under-knead.
- Avoid Over-Proofing: If using yeast, don't let the dough rise for too long or in too warm a place. Over-proofed dough can collapse in the oven.
- Mind the Temperature: Ensure your oven is accurately preheated to the correct temperature. An oven thermometer can help. Baking at the right temperature is crucial for setting the dough's structure.
- Be Patient: Avoid opening the oven door too early, especially when baking cakes or delicate pastries. Sudden temperature changes can cause them to sink.
- Cool Properly: Allow baked goods to cool on a wire rack as specified in the recipe. Cooling in the pan for too long can sometimes lead to steam build-up and a soggy or slightly sunken bottom.
Combining these fundamental best practices with the targeted technique of dough docking provides a comprehensive approach to preventing sunken dough and achieving consistently excellent results in a wide range of baked goods.
Frequently Asked Questions
How does a dough docker help prevent sunken dough?
A dough docker creates small perforations in the dough. These perforations allow air to escape during baking, preventing large bubbles and subsequent sinking.
What types of baked goods benefit most from using a dough docker?
Dough dockers are especially useful for flatbreads, pizzas, and pastries where an even, flat surface is desired. They prevent unwanted puffing and sinking, resulting in a more uniform bake.
Can I use a substitute for a dough docker if I don't have one?
Yes, a fork or a toothpick can be used as a substitute. Simply poke holes evenly across the dough's surface to achieve a similar effect.
Will using a dough docker affect the texture of my baked goods?
When used properly, a dough docker should not significantly affect the texture. It mainly prevents uneven rising and sinking, leading to a more consistent texture throughout.
How do I clean a dough docker after using it?
Most dough dockers can be cleaned with warm soapy water and a brush. Ensure all dough residue is removed to prevent buildup and maintain hygiene.
Final Reflection: The Rise and Fall (and Rise Again!) of Dough
Mastering dough is more than just a culinary skill; it's a journey of understanding, patience, and ultimately, delicious results. The seemingly simple act of mixing flour and water holds a world of complexity, as we've explored in our deep dive into preventing sunken pizzas and bubbly pastries. From the science of gluten development to the crucial role of hydration, the subtle nuances of dough manipulation can make or break your baking endeavors.
The quest for perfectly risen dough resonates deeply with our collective desire for control and mastery over the seemingly unpredictable. It's a reflection of our relationship with food, a testament to the satisfaction of transforming simple ingredients into something beautiful and nourishing. The best things in life are simple, but not easy.
This quote perfectly encapsulates the challenge and reward of working with dough. The seemingly simple act of baking becomes a profound act of creation, demanding precision and understanding.
Now, armed with the knowledge gleaned from this exploration, I invite you to step into your kitchen with renewed confidence. Don't be intimidated by the occasional sunken crust or bubbly surface. Instead, view each baking attempt as an opportunity to learn, to refine your technique, and to savor the journey. Experiment with different flours, hydration levels, and proofing methods. Embrace the imperfections, for they are the stepping stones to mastery. The next time you knead dough, remember the power you hold to transform simple ingredients into culinary masterpieces.
Unlock Your Baking Potential: Perfect Crusts, Every Time!
Thanks for taking the time to explore the secrets of achieving perfectly crisp, bubble-free crusts! You've now got the knowledge to elevate your baking game. Ready to put it into practice?
- Master the Dough Docker: Immediately try the techniques outlined in the article on your next pizza or pastry dough. Note the difference!
- Share your dough-docker success stories: Post a photo of your perfectly risen creation on social media and tag #BakeWithEaseDoughDocker. Let’s see those amazing results!
- Explore our other baking guides for more tips and tricks to become a baking pro.
What delicious creation will you perfect with your newfound dough-docker expertise?