
Working with Ganache: A Simple Decorating Guide

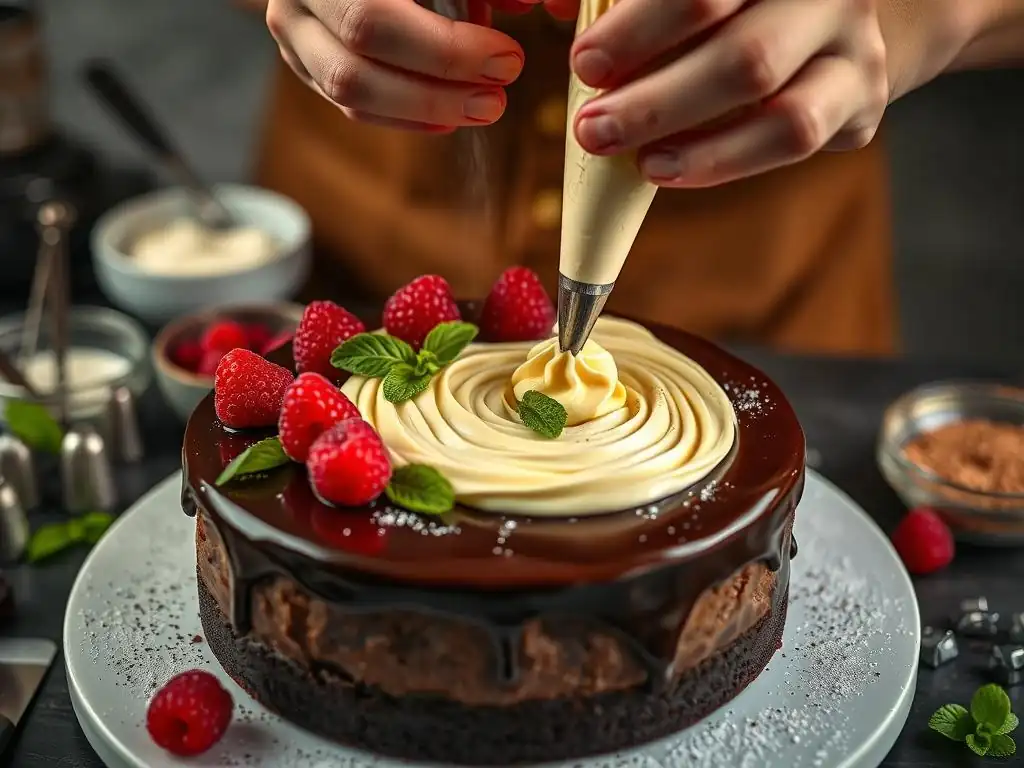
Welcome to BakeWithEase, your haven for all things baking! Ever dreamt of creating professional-looking desserts without the fuss? This guide unlocks the secrets to achieving just that. Dive in to discover easy ganache decorating techniques that will transform your treats from simple to stunning. But that's just the beginning... what other creative designs can you bring to life with this newfound skill? Explore further and let your baking journey begin!
- Mastering Chocolate Ganache: A Baker's Guide to Versatile Cake Decoration
- Introduction to Chocolate Ganache for Cake Decoration
- Exploring Different Chocolate Ganache Types
- Essential Tools and Ingredients for Chocolate Ganache
- Step-by-Step Guide to Homemade Chocolate Ganache
- Applying Chocolate Ganache: Achieving a Professional Finish
- Simple Chocolate Ganache Decorating Techniques
- Troubleshooting Chocolate Ganache Issues
- Advanced Chocolate Ganache Decorating Techniques
- Storing Chocolate Ganache and Decorated Cakes
- Conclusion: Unleashing Your Creativity with Chocolate Ganache
- Frequently Asked Questions
- Final Reflection: The Enduring Allure of Ganache
- Unleash Your Inner Pastry Artist!
Mastering Chocolate Ganache: A Baker's Guide to Versatile Cake Decoration
Chocolate ganache is a simple yet luxurious mixture that can elevate even the simplest cake into a showstopper. At its core, it's a blend of chocolate and cream, but its versatility allows for a wide range of applications, from a smooth, glossy glaze to a rich, decadent frosting or filling. Learning how to work with ganache opens up a world of easy ganache decorating techniques that can transform your baked goods.
This guide will walk you through everything you need to know about making and using chocolate ganache, ensuring you can achieve beautiful, professional-looking results right in your home kitchen. Whether you're aiming for elegant drips, smooth coatings, or intricate piping, mastering this fundamental technique is a valuable step in your baking journey.
Introduction to Chocolate Ganache for Cake Decoration
Stepping into the world of cake decoration can feel intimidating, but some techniques are surprisingly simple and yield stunning results. Chocolate ganache is one such technique, offering both incredible flavor and remarkable flexibility. It's a staple in professional kitchens and easily achievable for home bakers.
Understanding the basics of ganache is the first step towards unlocking its potential. It's more than just melted chocolate; it's an emulsion, a stable mixture of fat (from the cream and cocoa butter) and liquid, which gives it its unique texture and ability to set beautifully.
What is Chocolate Ganache and Its Benefits for Cake Decorating?
Chocolate ganache is traditionally a two-ingredient mixture: chocolate and heated heavy cream. The hot cream melts the chocolate, and whisking creates a smooth, glossy emulsion. The ratio of chocolate to cream dictates its final consistency – more chocolate results in a firmer ganache, while more cream yields a pourable glaze.
Its benefits for cake decorating are numerous. Firstly, it's incredibly forgiving; mistakes can often be gently reheated and fixed. Secondly, it provides a rich, intense chocolate flavor that complements many cake types, from vanilla bean to deep chocolate. Finally, it offers diverse applications, allowing for everything from simple glazes and elegant drips to sturdy frostings perfect for piping or crumb coating. Learning easy ganache decorating techniques starts with understanding this fundamental mixture.
Beyond its aesthetic appeal, ganache provides a stable and delicious layer. When set, it creates a firm shell that can protect the cake and provide a smooth surface for additional decorations. Its rich flavor and smooth texture make it a favorite for both decorators and those enjoying the final product.
Elevating Your Cakes: Why Choose Chocolate Ganache?
Choosing chocolate ganache for your cake decorating projects brings a level of sophistication and richness that is hard to match with other frostings. Unlike buttercream, which is often butter-based, ganache relies on the pure flavor of chocolate, offering a more intense and often less sweet profile, depending on the type of chocolate used.
Consider a simple vanilla cake. Topping it with a glossy dark chocolate ganache drip transforms it into an elegant dessert suitable for a special occasion. Or imagine a chocolate cake filled and frosted with milk chocolate ganache – it becomes a deeply satisfying treat. Ganache's ability to set firmly also makes it ideal for stacking tiered cakes, providing structural support and a delicious adhesive layer. Mastering even easy ganache decorating techniques can significantly elevate your baking repertoire.
The ability to control the consistency by adjusting the chocolate-to-cream ratio is another major advantage. A thin ganache creates a beautiful mirror-like glaze, perfect for a sleek, modern look. A thicker ganache can be whipped into a fluffy frosting or used as a sturdy filling, offering versatility that few other decorating mediums can provide.
Exploring Different Chocolate Ganache Types
While the basic method for making ganache remains consistent, the type of chocolate used dramatically changes the flavor, color, and even the required ratio of ingredients due to varying cocoa butter content. Understanding these differences is key to selecting the right ganache for your specific cake and desired easy ganache decorating techniques.
Each type of chocolate – dark, milk, and white – offers a unique profile and requires a slightly different approach to achieve the perfect ganache consistency. Experimenting with these variations will broaden your understanding and skill in working with this versatile medium.
Dark Chocolate Ganache: Intense Flavor and Elegance
Dark chocolate ganache is often considered the classic choice for its deep, intense flavor and rich, dark color. It pairs wonderfully with chocolate, red velvet, or even fruit-flavored cakes. The higher cocoa solid content in dark chocolate means it sets up more firmly than milk or white chocolate ganache at the same ratio.
A common starting ratio for a pourable dark chocolate ganache is equal parts chocolate and heavy cream by weight (1:1). For a thicker frosting or filling, a ratio of 2 parts chocolate to 1 part cream (2:1) is often used. For example, using 200g of dark chocolate chips or finely chopped bar chocolate with 100g of hot heavy cream will yield a thick ganache suitable for frosting or piping simple borders, showcasing easy ganache decorating techniques. Using good quality chocolate, ideally with 60-70% cocoa content, will result in the best flavor.
When making dark chocolate ganache, it's crucial not to overheat the chocolate, as this can cause it to seize or become grainy. Gentle heating and patient whisking are key. The resulting ganache, when cooled, is perfect for elegant drips, smooth coatings, or as a rich filling that complements strong flavors.
Milk Chocolate Ganache: Creamy and Classic Appeal
Milk chocolate ganache offers a sweeter, creamier, and milder chocolate flavor compared to its dark counterpart. Its lighter color makes it versatile for different cake designs and provides a comforting, familiar taste that is widely appealing. Due to the lower cocoa solid and higher sugar content in milk chocolate, a different ratio is needed to achieve similar consistencies to dark ganache.
A common ratio for a medium-thick milk chocolate ganache suitable for frosting or drips is around 2.5 to 3 parts milk chocolate to 1 part heavy cream by weight (2.5:1 or 3:1). For instance, combining 250g of milk chocolate with 100g of hot cream should yield a consistency that thickens nicely for spreading or creating gentle drips, demonstrating easy ganache decorating techniques with a sweeter profile. Using a quality milk chocolate will ensure a smooth texture and rich flavor.
Milk chocolate melts more easily than dark chocolate, so it's important to be mindful of temperature during preparation. This type of ganache is excellent for cakes where a less intense chocolate flavor is desired, or for those who prefer a sweeter frosting. It whips up beautifully into a light and airy frosting similar to whipped cream but with added chocolate richness.
White Chocolate Ganache: Sweetness and Delicate Texture
White chocolate ganache is the sweetest and often the most delicate in texture, offering a creamy, vanilla-like flavor without the bitterness of cocoa solids (as white chocolate contains cocoa butter but no cocoa solids). It's perfect for cakes where a light color is needed or when pairing with bright, fruity flavors like raspberry or lemon. White chocolate requires the highest ratio of chocolate to cream to set firmly.
A typical ratio for a workable white chocolate ganache is around 3 to 3.5 parts white chocolate to 1 part heavy cream by weight (3:1 or 3.5:1). For example, mixing 300g of good quality white chocolate (ensure it's real white chocolate containing cocoa butter) with 100g of hot heavy cream will produce a ganache that sets firm enough for frosting or piping simple details, allowing for easy ganache decorating techniques with a sweet base.
White chocolate is the most prone to seizing or burning when heated, so gentle heat is paramount. It's best to pour the hot cream over the chocolate and let it sit for a minute before gently whisking. This ganache can also be whipped once cooled to a frosting-like consistency, offering a light alternative to buttercream that holds its shape well for piping.
Essential Tools and Ingredients for Chocolate Ganache
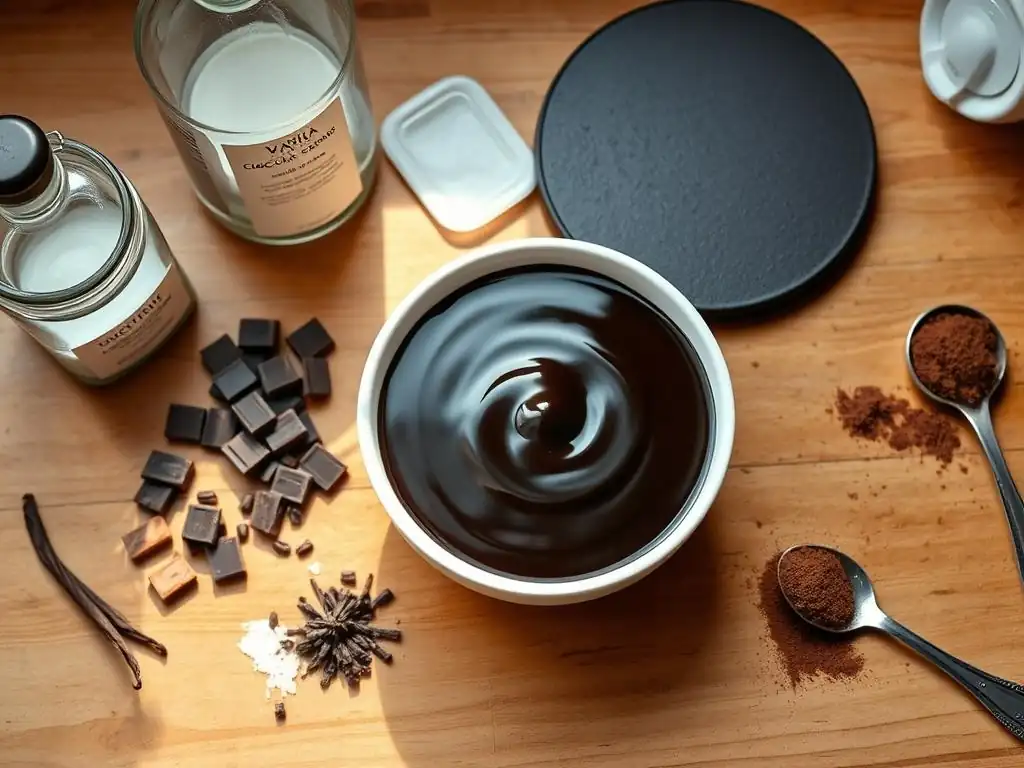
Creating beautiful chocolate ganache and applying it effectively requires more than just chocolate and cream. Having the right tools and understanding the importance of ingredient quality can significantly impact your results, making easy ganache decorating techniques even more achievable and successful.
Investing in a few key items will make the process smoother and help you achieve that professional finish you're aiming for. From accurate measurements to smooth application, the right equipment is your ally in the kitchen.
High-Quality Chocolate and Cream: The Foundation of Great Ganache
The quality of your ingredients is the single most important factor in making delicious and stable chocolate ganache. Using high-quality chocolate, whether chips or chopped bar chocolate, that contains real cocoa butter is essential. Compound chocolate (often labeled as "baking chips" or "wafers" containing vegetable oil instead of cocoa butter) will not create a proper ganache emulsion and will result in a greasy, less flavorful product. Aim for chocolate specifically designed for melting or baking.
Heavy cream (sometimes called whipping cream in the US) is also crucial. It must have a minimum fat content of around 30% (typically 35-36% is ideal) to properly emulsify with the chocolate. Lower fat creams will not create a stable ganache. For a standard batch using 300g of chocolate, you might need between 100g and 300g of heavy cream, depending on the desired consistency and chocolate type. Using fresh, cold heavy cream that is heated just to a simmer (not a rolling boil) is key to a smooth ganache.
- Choose real chocolate with cocoa butter listed as an ingredient.
- Use heavy cream with at least 30% fat content.
- Weigh your ingredients for accuracy, especially when working with specific ratios.
Key Decorating Tools for Flawless Ganache Application
Applying ganache smoothly and beautifully requires a few basic tools. A heatproof bowl and a whisk are fundamental for the initial mixing. Beyond that, consider tools for application. An offset spatula is indispensable for smoothing ganache over the top and sides of a cake. A bench scraper or straight icing smoother can help achieve perfectly smooth sides on a ganache-covered cake, a crucial step for many easy ganache decorating techniques.
For creating controlled drips, a piping bag with a small round tip (like Wilton #3 or #4) or even a squeeze bottle works well. If you plan to pipe borders or swirls, a set of piping bags and various tips (star, round, etc.) will be necessary. A turntable is also incredibly helpful for rotating the cake while smoothing or applying drips, ensuring even coverage and symmetrical designs.
- Heatproof bowl and whisk for mixing.
- Offset spatula for spreading.
- Bench scraper or straight icing smoother for smooth sides.
- Piping bags or squeeze bottles for drips and piping.
- Turntable for easy rotation.
Step-by-Step Guide to Homemade Chocolate Ganache
Making chocolate ganache is surprisingly simple, requiring just two ingredients and a little patience. While seemingly straightforward, paying attention to temperature and technique is vital for achieving a smooth, glossy, and stable emulsion. This section will guide you through the process, highlighting the key steps to successful ganache making for your easy ganache decorating techniques.
There are a couple of primary methods for melting the chocolate with the cream, each with its own advantages. Regardless of the method, the goal is to gently melt the chocolate and combine it seamlessly with the warm cream.
Achieving the Ideal Ratio: Chocolate to Cream for Desired Consistency
The ratio of chocolate to cream is the most critical factor determining the final consistency of your ganache. As discussed, dark, milk, and white chocolate require different ratios due to their varying compositions. Generally, a higher chocolate-to-cream ratio results in a thicker ganache that sets firmer, suitable for frosting, filling, or piping. A lower ratio yields a thinner, more pourable ganache, ideal for glazes or drips.
Here are some approximate starting ratios by weight:
- Dark Chocolate (60-70% cocoa):
- Pourable Glaze/Drip: 1:1 (e.g., 200g chocolate to 200g cream)
- Frosting/Filling/Piping: 2:1 (e.g., 200g chocolate to 100g cream)
- Milk Chocolate:
- Pourable Glaze/Drip: 2:1 to 2.5:1 (e.g., 250g chocolate to 100g cream)
- Frosting/Filling/Piping: 3:1 to 3.5:1 (e.g., 300g chocolate to 100g cream)
- White Chocolate:
- Pourable Glaze/Drip: 2.5:1 to 3:1 (e.g., 300g chocolate to 100g cream)
- Frosting/Filling/Piping: 3.5:1 to 4:1 (e.g., 350g chocolate to 100g cream)
Remember these are starting points; slight adjustments may be needed based on the specific brand of chocolate and desired texture. Weighing your ingredients is crucial for accuracy.
The Gentle Double Boiler Method for Smooth Ganache
The double boiler method is a classic and gentle way to make ganache, reducing the risk of overheating the chocolate. Place finely chopped chocolate (or chips) in a heatproof bowl that fits snugly over a saucepan containing a few inches of simmering water, ensuring the bottom of the bowl does not touch the water.
Heat the heavy cream in a separate saucepan until it just begins to simmer around the edges – do not boil vigorously. Remove the cream from the heat and pour it over the chocolate in the bowl set over the simmering water. Let it sit undisturbed for 5-10 minutes to allow the heat from the cream and steam to melt the chocolate gently.
Then, starting in the center of the bowl, gently whisk in small circles, gradually expanding outwards until the mixture is smooth, glossy, and fully emulsified. Avoid aggressive whisking, which can incorporate too much air. This method is ideal for achieving a perfectly smooth base for your easy ganache decorating techniques.
Once smooth, remove the bowl from the heat and the water bath. Allow the ganache to cool and thicken at room temperature or in the refrigerator, stirring occasionally, until it reaches the desired consistency for your decoration project.
Microwave Method: Quick Ganache for Time-Saving Decorating
For a faster process, the microwave method is a convenient alternative, especially for smaller batches. Place the finely chopped chocolate or chips in a microwave-safe bowl. Heat the heavy cream in a separate container in the microwave until it is very hot but not boiling, typically 1-2 minutes depending on the amount.
Pour the hot cream over the chocolate in the microwave-safe bowl. Let it sit undisturbed for 5-10 minutes to allow the residual heat to melt the chocolate. Then, gently whisk from the center outwards until smooth and glossy. If a few small unmelted pieces remain, microwave the mixture in very short bursts (5-10 seconds) at a low power setting (like 50%), stirring well after each burst, until fully melted. Be extremely cautious not to overheat.
This method is quick and efficient, perfect when you're in a hurry to get to the easy ganache decorating techniques. As with the double boiler method, allow the ganache to cool and thicken to the desired consistency before using it on your cake. Stirring it periodically as it cools helps ensure even thickening.
Applying Chocolate Ganache: Achieving a Professional Finish
Applying ganache beautifully is an art form, but it's one that is easily mastered with practice and attention to a few key steps. Whether you're aiming for a smooth pour-over glaze or a sturdy frosting, proper preparation of your cake is crucial for a flawless finish using your easy ganache decorating techniques.
Taking the time to prepare your cake correctly will prevent common issues like crumbs mixing into the ganache and ensure a smooth, even surface for your decoration. This foundation is essential for achieving professional-looking results.
Preparing Your Cake for Optimal Ganache Adhesion
Before applying ganache, your cake must be completely cooled. Warm cakes will melt the ganache and cause it to slide off. Ideally, the cake should be chilled in the refrigerator for at least 30 minutes, or even frozen for a short period (15-20 minutes), especially if it's very soft or delicate. Chilling helps the cake become firm and less prone to crumbling.
Ensure the cake surface is level. If needed, use a serrated knife to gently trim off any domes. Brush away any loose crumbs from the top and sides. For best results, especially when doing a pour-over or smooth coating, place the chilled cake on a wire rack set over a baking sheet. The baking sheet will catch any excess ganache drips, which can often be scraped up and reused. This setup is perfect for implementing many easy ganache decorating techniques.
Having a firm, level, and crumb-free cake is the critical first step to achieving a smooth and professional ganache coating.
The Importance of a Crumb Coat for a Flawless Finish
A crumb coat is a thin layer of frosting (often a thin ganache or buttercream) applied to the cake before the final layer. Its purpose is to trap any loose crumbs, preventing them from mixing into your final, visible ganache layer. This is particularly important for cakes that are prone to crumbling.
Apply a very thin layer of slightly cooled, spreadable ganache (or buttercream) all over the cake using an offset spatula. Ensure complete coverage, sealing in all crumbs. Refrigerate the crumb-coated cake for at least 30 minutes, or until the crumb coat is firm to the touch. This hardens the layer, effectively locking in any potential crumbs. Once the crumb coat is firm, you have a smooth base ready for your final ganache application, setting the stage for successful easy ganache decorating techniques.
While not strictly necessary for every single cake, a crumb coat is highly recommended, especially for pour-over ganache or when striving for perfectly smooth sides. It makes the final application much cleaner and easier.
The Single Pour Method: Achieving a Smooth and Even Ganache Coating
The single pour method is ideal for creating a beautifully smooth, glossy finish on the top and sides of a cake using a pourable ganache (typically a 1:1 dark, 2:1 milk, or 2.5:1 white ratio, cooled to the right consistency – often around 85-90°F or 30-32°C, it should flow like thick honey). Ensure your chilled, crumb-coated cake is on a wire rack over a baking sheet.
Start by pouring a generous amount of ganache onto the center of the cake's top. Using an offset spatula, gently guide the ganache towards the edges, allowing it to naturally spill over the sides. Avoid spreading too much; let gravity do most of the work. Once the top is covered and ganache is flowing down the sides, use the offset spatula to gently encourage it down the sides, smoothing as you go. Work quickly but carefully.
Don't try to achieve perfect smoothness right away. Once the cake is fully covered, stop touching it and allow the excess ganache to drip off. As it sets, the drips will naturally become cleaner. This method, once mastered, is one of the most impressive easy ganache decorating techniques for achieving a sleek look.
Simple Chocolate Ganache Decorating Techniques
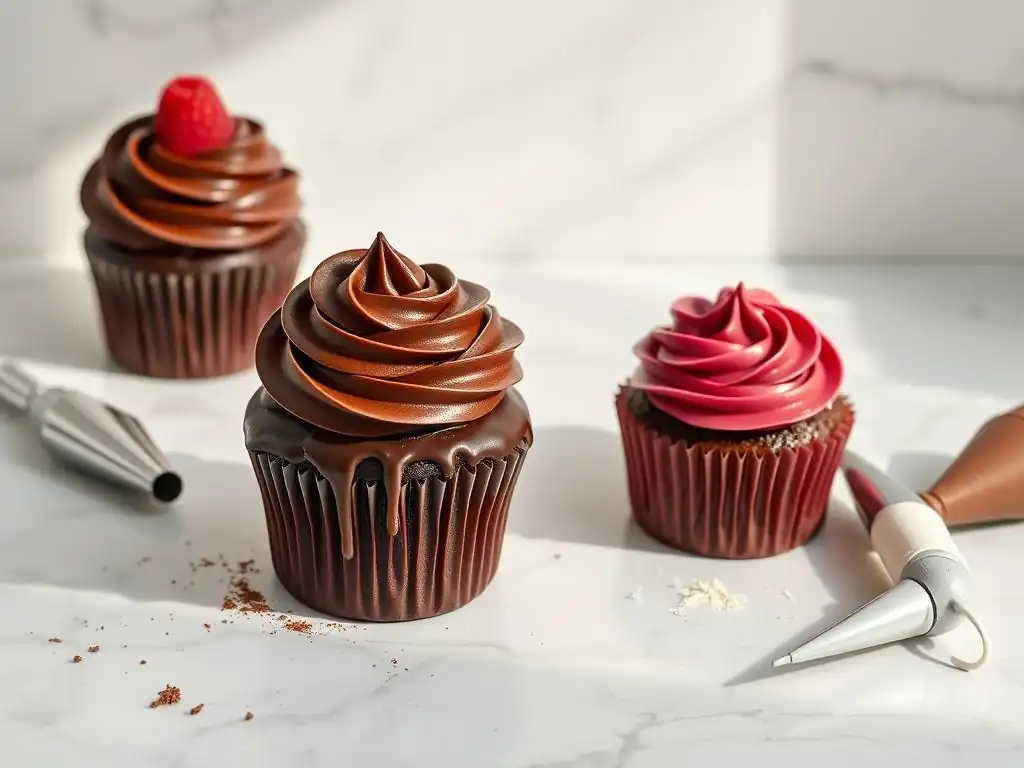
Once you have your beautiful ganache ready, a world of simple yet stunning decorating possibilities opens up. You don't need to be a professional decorator to create eye-catching effects with ganache. These easy ganache decorating techniques are perfect for beginners looking to add flair to their cakes.
From elegant drips to classic piped borders, ganache is incredibly versatile and forgiving, making it an ideal medium for practicing your decorating skills.
Easy Drip Cakes: A Beginner's Guide to Elegant Drips
Drip cakes are incredibly popular and surprisingly easy to create using ganache. For elegant drips, use a pourable ganache consistency (like a 1:1 dark chocolate ganache or similar ratios for milk/white, cooled to a temperature where it flows but isn't too thin, typically around 80-85°F or 27-29°C). The cake should be well-chilled, ideally with a firm crumb coat or frosting layer.
Transfer the slightly cooled ganache to a piping bag with a small round tip or a squeeze bottle. Starting at the top edge of the cake, gently squeeze the ganache, letting it cascade down the sides. Control the length of the drips by how much ganache you release. For longer drips, hold the bag/bottle slightly longer in one spot. For shorter drips, apply less pressure or move faster along the edge. After creating the drips around the entire circumference, fill in the top of the cake by pouring or spreading the remaining ganache within the drip border.
Allow the ganache drips to set by refrigerating the cake. This technique is one of the most effective easy ganache decorating techniques for adding a touch of modern elegance with minimal effort.
Chocolate Ganache Piping: Creating Borders, Swirls, and Rosettes
Thicker ganache (like a 2:1 dark chocolate or 3:1 milk/white ratio, cooled to a peanut butter-like consistency) is perfect for piping. Unlike buttercream, ganache holds its shape beautifully once set, making it ideal for defined borders, swirls, and even simple rosettes.
Transfer the thickened, but still pliable, ganache into a piping bag fitted with your desired tip (e.g., a star tip for borders or rosettes, a round tip for dots or lines). Hold the bag at a consistent angle and pressure to create uniform shapes. Practice on a piece of parchment paper first to get a feel for the consistency and flow.
You can pipe simple shell borders along the top or bottom edge of the cake, create swirls on top of cupcakes, or pipe small rosettes for decoration. Ganache that is too warm will be too soft to hold shape, while ganache that is too cold will be difficult to pipe. Aim for a consistency that is firm but easily squeezed through the tip. Piping with ganache is a fundamental skill among easy ganache decorating techniques.
Using Ganache as a Filling: Adding Richness and Moisture to Your Cake
Ganache makes a luxurious filling, adding intense chocolate flavor and moisture between cake layers. For a filling, you can use a slightly thicker consistency (similar to frosting ratios) or even a whipped ganache. Whipped ganache is lighter and airier, achieved by chilling the ganache until firm and then whipping it with an electric mixer until light and fluffy, similar to whipped cream.
To use as a filling, ensure your cake layers are cool and level. Spread an even layer of thickened or whipped ganache onto the first cake layer using an offset spatula. Place the next layer on top and repeat. You can create a dam of frosting (like buttercream or even thicker ganache) around the edge of the layer before adding the filling to prevent it from squeezing out when the next layer is added.
Using ganache as a filling not only enhances flavor but also adds weight and stability to the cake, especially helpful for tiered cakes. This simple application is an often overlooked but highly effective easy ganache decorating technique.
Troubleshooting Chocolate Ganache Issues
Even with the right ratio and method, sometimes things don't go exactly as planned when making ganache. Common issues include ganache that is too thick, too thin, or grainy. Understanding how to fix these problems is key to successfully executing your easy ganache decorating techniques.
Don't despair if your first batch isn't perfect. Ganache is quite forgiving, and most issues can be resolved with a little adjustment.
Thick Ganache Solutions: Achieving the Right Consistency
If your ganache has become too thick for your intended use (e.g., you wanted a pourable glaze but it's frosting consistency), it's usually because the ratio of chocolate to cream was too high or it has cooled too much.
To thin thick ganache, gently heat it. You can do this by placing the bowl over a pan of warm water (not simmering this time, just warm) or by microwaving it in very short bursts (5-10 seconds) at a low power setting, stirring thoroughly after each burst. Alternatively, you can stir in a tablespoon or two of additional warm heavy cream, one spoon at a time, whisking gently until the desired consistency is reached.
Be patient when thinning ganache. Overheating can cause it to break or become greasy. Gentle, gradual warming or adding small amounts of cream are the safest approaches to restore the ideal consistency for your easy ganache decorating techniques.
Thin Ganache Solutions: Thickening Techniques
Conversely, if your ganache is too thin (e.g., you wanted frosting but it's a glaze), the ratio of cream to chocolate was likely too high, or it hasn't cooled enough.
To thicken thin ganache, the easiest way is to simply let it cool down further. Place the bowl in the refrigerator, stirring every 15-20 minutes, until it reaches the desired thickness. This can take anywhere from 30 minutes to a couple of hours, depending on the batch size and temperature. If cooling alone isn't sufficient, you can gently melt a small amount of additional chocolate (using a double boiler or microwave carefully) and whisk it into the existing ganache. Start with a small amount, like 25-50g, and add more if needed, whisking until fully incorporated and smooth.
Patience is key when thickening by cooling. Avoid the temptation to freeze it solid, as this can affect the texture. Gradual cooling and stirring are best for achieving the right thickness for your easy ganache decorating techniques.
Preventing Grainy Ganache: Tips for a Smooth Texture
Grainy ganache is often caused by overheating the chocolate, introducing water into the mixture, or aggressive whisking that incorporates too much air or causes the emulsion to break. Using low-quality chocolate with vegetable oils instead of cocoa butter can also result in a grainy or greasy texture.
To prevent grainy ganache:
- Use high-quality chocolate with real cocoa butter.
- Heat the cream gently to just a simmer, not a rolling boil.
- Pour hot cream over chocolate and let it sit to melt gently before whisking.
- Whisk gently from the center outwards; avoid vigorous whipping.
- Ensure no water gets into the chocolate while melting (e.g., steam from a double boiler).
If your ganache does become grainy or appears separated (greasy), sometimes it can be rescued. Gently warm the ganache slightly and whisk in a tablespoon of warm milk or cream, starting from the center. Whisking gently may help bring the emulsion back together, restoring the smooth texture needed for successful easy ganache decorating techniques.
Advanced Chocolate Ganache Decorating Techniques
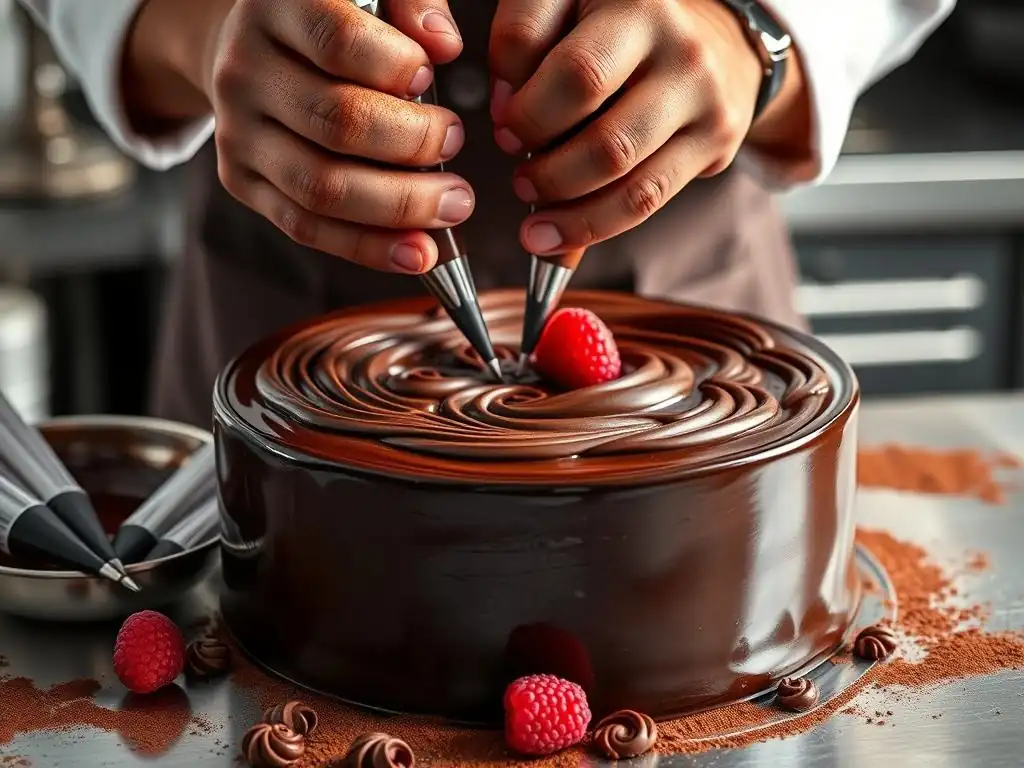
Once you've mastered the basics and feel comfortable with easy ganache decorating techniques, you might be ready to explore more advanced applications. Ganache can be used to create dramatic and artistic elements that truly elevate your cakes.
These techniques require a bit more practice and precision but build upon the fundamental principles of working with ganache.
Crafting Chocolate Shards and Sails for Dramatic Flair
Chocolate shards and sails add impressive height and visual interest to cakes. They are made by spreading tempered chocolate or a specific type of ganache onto a flat surface and shaping it before it fully sets. While true chocolate sails often use tempered chocolate, a firm ganache can also be used for simpler, thicker shards.
For ganache shards, use a very thick ganache (like a 3:1 or 4:1 dark chocolate ratio, or even thicker for milk/white). Spread the slightly cooled but still pliable ganache thinly onto parchment paper or a silicone mat using an offset spatula. You can create texture by swirling or dragging the spatula. Before it fully hardens, cut or break it into desired shapes (shards, triangles). For sails, spread the ganache onto parchment paper, then gently lift the paper and drape it over something curved (like a rolling pin or crumpled foil) to create a curved shape as it sets.
Chill the ganache shards/sails until completely firm before carefully peeling them off the paper. Arrange them creatively on your cake for a modern, artistic look. This technique moves beyond simple applications into more sculptural easy ganache decorating techniques.
Creating a Marble Effect with Ganache: A Step-by-Step Guide
A marble effect using ganache creates a sophisticated, swirled pattern on the surface of your cake. This technique typically involves using two different colors or types of ganache, often white and dark or milk.
Prepare two batches of ganache in different colors – for example, a white chocolate ganache and a dark chocolate ganache, both cooled to a pourable consistency (similar to the drip cake temperature, around 80-85°F or 27-29°C). Pour spoonfuls or streams of each color onto the top of your chilled, crumb-coated cake, alternating between the colors. Do not cover the entire surface perfectly. Then, using a skewer or toothpick, gently swirl the colors together with a figure-eight motion, being careful not to over-mix.
Allow the marbled ganache to drip naturally down the sides, guiding it gently with an offset spatula if needed, but again, avoid overworking it. The swirling will create the beautiful marble pattern as it sets. This technique adds a touch of artistic flair using relatively easy ganache decorating techniques principles.
Sculpting Ganache Flowers: Adding Artistic Touches to Your Cakes
Thick, firm ganache (especially a well-chilled 2:1 dark or 3:1 milk/white ratio, or even a specially formulated modeling ganache) can be kneaded like clay and sculpted into shapes, including flowers. This technique requires a very stable ganache consistency.
Chill the thick ganache until very firm. Scoop out a portion and knead it with your hands until it becomes pliable and smooth. If it's too sticky, dust your hands with a little cornstarch or cocoa powder. Roll small pieces of ganache into balls, then flatten them between your fingers or on a surface into thin petals. Shape the petals around a central cone (also made of ganache or cake pop dough) to form roses or other flowers.
This technique is more labor-intensive than simple piping but allows for highly detailed and realistic edible decorations. It's a step beyond basic easy ganache decorating techniques and enters the realm of edible sculpting.
Storing Chocolate Ganache and Decorated Cakes
Knowing how to properly store leftover ganache and cakes decorated with ganache is important for maintaining freshness, texture, and food safety. Ganache, being a dairy product, needs careful handling.
Proper storage ensures your hard work lasts longer and tastes its best.
Best Practices for Storing Unused Ganache
Unused chocolate ganache can be stored for future use. The best way to store it depends on how soon you plan to use it.
- Room Temperature: If using within 1-2 days (and your kitchen is cool, below 70°F or 21°C), pour the ganache into an airtight container and cover the surface directly with plastic wrap to prevent a skin from forming. Store away from direct sunlight or heat.
- Refrigerator: For longer storage (up to 2 weeks), pour the ganache into an airtight container, cover the surface with plastic wrap, and refrigerate.
- Freezer: For even longer storage (up to 1-2 months), transfer the cooled ganache to a freezer-safe airtight container or freezer bag, removing as much air as possible.
When ready to use refrigerated or frozen ganache, let it come to room temperature. You will likely need to gently rewarm it (using a double boiler or short microwave bursts) and whisk it to restore its smooth consistency before using it for your easy ganache decorating techniques or other purposes.
Maintaining Freshness in Ganache-Covered Cakes
Cakes decorated with ganache should generally be stored at cool room temperature (below 70°F or 21°C) for 2-3 days, provided the filling and cake itself are also safe at room temperature. Ganache, once set, is relatively stable. Cover the cake loosely with plastic wrap or store it in a cake carrier to protect it from drying out or absorbing odors.
If the cake has perishable fillings (like fresh fruit, pastry cream, or whipped cream) or if your kitchen is warm, it's best to refrigerate the cake. Cover it loosely to prevent condensation from forming on the ganache, which can affect its appearance. Ganache will firm up significantly when refrigerated, so allow the cake to sit at room temperature for 30-60 minutes before serving to soften the ganache to an optimal texture.
Avoid freezing decorated cakes with delicate ganache decorations like thin shards or drips, as these can be fragile and break when frozen or thawed. For longer storage of the undecorated cake or cake components, freezing is an option, but final ganache decoration is best done closer to serving time.
Conclusion: Unleashing Your Creativity with Chocolate Ganache
Chocolate ganache is a fundamental technique in baking that offers incredible versatility for cake decoration. From its simple two-ingredient base, you can create everything from glossy glazes and elegant drips to rich frostings and sculptural elements. Mastering the proper ratios, techniques for melting and cooling, and application methods provides a solid foundation for countless decorating possibilities.
We've explored various types of ganache, essential tools, step-by-step preparation, and a range of easy ganache decorating techniques that are accessible to bakers of all levels. Troubleshooting common issues ensures that even if things don't go perfectly the first time, you have the knowledge to correct them.
Enhance Your Cakes with Simple Yet Stunning Ganache Techniques
Don't underestimate the power of simple ganache applications. A smooth ganache coating or elegant chocolate drips can transform a plain cake into a sophisticated dessert. Piping basic borders or swirls adds a touch of classic decoration that is both beautiful and achievable. Even using ganache as a simple filling significantly enhances the overall flavor and texture of your cake.
Start with the basics: master a simple pourable ganache for drips and a thicker ganache for frosting. These two consistencies alone open up numerous easy ganache decorating techniques that will impress your friends and family. Practice makes perfect, and ganache is a rewarding medium to practice with.
Continue Your Baking Journey: Explore New Decorating Possibilities
Learning to work with chocolate ganache is just one step in your baking and decorating journey. As you become more comfortable, challenge yourself with new techniques. Experiment with different chocolate flavors, try creating whipped ganache, or attempt more intricate piping designs.
The principles learned here, such as understanding consistency, temperature control, and smooth application, are transferable to other decorating mediums like buttercream or glazes. Keep baking, keep experimenting, and most importantly, have fun unleashing your creativity in the kitchen with delicious chocolate ganache.
Frequently Asked Questions
What is ganache and what is it typically used for?
Ganache is a simple mixture of chocolate and cream. It's primarily used for frosting cakes, glazing pastries, and creating chocolate truffles. Its versatility makes it a baking staple.
How do I make a basic ganache for decorating?
A basic ganache is made by heating cream and pouring it over chopped chocolate. The ratio of chocolate to cream depends on the desired consistency. Stir until smooth for a glossy finish.
What are some easy ganache decorating techniques for beginners?
Beginners can try techniques like simple drizzles, using a piping bag for basic borders, or spreading it smoothly with an offset spatula for a rustic cake finish. These are all very accessible.
How can I adjust the consistency of my ganache if it's too thick or too thin?
If it's too thick, add a little more heated cream, one tablespoon at a time, until you reach the right consistency. If it's too thin, add more melted chocolate in small increments.
Can I flavor my ganache, and if so, how?
Yes, you can easily flavor ganache! Add extracts like vanilla or peppermint, liqueurs, or even a pinch of salt. Incorporate the flavoring after the chocolate and cream are combined for best results.
Final Reflection: The Enduring Allure of Ganache
The art of ganache decorating, once a skill reserved for professional pastry chefs, is now readily accessible to home bakers everywhere. This simple yet elegant technique adds a touch of sophistication to any dessert, transforming ordinary cakes and cupcakes into stunning masterpieces. The ease of its application, coupled with its versatility, makes it a truly democratic decorating method, empowering anyone with a passion for baking to create beautiful confections.
The enduring appeal of ganache lies not just in its visual impact, but also in its ability to connect us to a richer culinary heritage. It's a testament to the power of simple ingredients transformed into something exquisite. The smooth, rich texture and the satisfying process of working with it create a deeply rewarding experience. As the renowned chef Julia Child once said, Find something you're passionate about and keep tremendously interested in it.
For many, that passion is found in the artistry of ganache.
Now, it's your turn. Don't be intimidated by the seemingly complex world of cake decorating. Take the techniques outlined in this guide, experiment with different flavors and colors, and unleash your inner pastry artist. Embrace the imperfections, learn from each attempt, and most importantly, have fun! The joy of creating something beautiful with your own hands is a reward in itself, and with ganache, that reward is deliciously sweet.
Unleash Your Inner Pastry Artist!
Thanks for joining us on this sweet journey into Ganache decorating! We hope you've gained the confidence to create beautiful and delicious treats. Now it's time to put your new skills to the test!
- Master a new Ganache technique: Try out one of the decorating methods we discussed – maybe the swirl technique or the elegant drip – and share your creation with us on social media using #BakeWithEaseGanache!
- Experiment with different flavors: Explore the endless possibilities by adding extracts, spices, or even fruit purees to your Ganache. What unique flavor combinations can you dream up?
- Share your Ganache creations: Tag us in your photos – we'd love to see your beautiful work and feature it on our page!
So, what delicious Ganache masterpiece will you create today?