
Rest Periods Explained: Why Resting Your Dough is NonNegotiable for Croissants


Welcome to BakeWithEase, where baking becomes a joy, not a chore! Are you ready to unlock the secrets to truly exceptional croissants? Many home bakers stumble when it comes to those flaky, buttery layers, often missing a crucial step. Dive into our guide and discover why understanding rest periods for croissant dough is non-negotiable. Learn how these seemingly small pauses can make or break your pastry dreams, and prepare to elevate your baking to a whole new level. Intrigued? Let's get started!
- Understanding Rest Periods in Croissant Dough: A BakeWithEase Guide
- The Crucial Role of Resting Dough in Achieving Flaky Croissants
- The Science Behind Resting: What Happens to Croissant Dough During Rest?
- Different Types of Rest Periods in Croissant Making: A Detailed Breakdown
- Consequences of Skipping Rest Periods: What Happens if You Don't Rest Your Dough?
-
Best Practices for Resting Croissant Dough: BakeWithEase Tips and Tricks
- Maintaining Consistent Temperature: Key to Successful Dough Resting
- Preventing Dough from Drying Out: Cover tightly with plastic wrap or place in a sealed container.
- Troubleshooting Common Resting Issues: Dough too warm (return to fridge), dough too cold (allow to sit at room temperature for a short period).
- Mastering Croissant Dough Rest Periods: Your Path to Perfect Croissants at Home
- Frequently Asked Questions
- Final Reflection: The Unsung Hero of Flaky Perfection
- Unleash Your Inner Croissant Master: Take the Next Step!
Understanding Rest Periods in Croissant Dough: A BakeWithEase Guide
Welcome back to BakeWithEase! Today, we're diving deep into a fundamental, yet often overlooked, step in crafting those perfect, flaky croissants at home: the rest period. While it might seem like inactive time, these periods are critical for developing the texture, flavor, and ease of handling that define a great croissant. Skipping or rushing rest periods croissant dough is a common pitfall for home bakers, leading to disappointing results.
Think of resting your croissant dough as allowing the ingredients to work their magic undisturbed. It's during these pauses that the complex interactions between flour, water, yeast, and butter truly come into play. Properly managing the various rest periods croissant dough undergoes is arguably as important as the mixing or lamination itself. This guide will explain why these seemingly simple breaks are indispensable for achieving bakery-quality croissants right in your own kitchen.
The Crucial Role of Resting Dough in Achieving Flaky Croissants
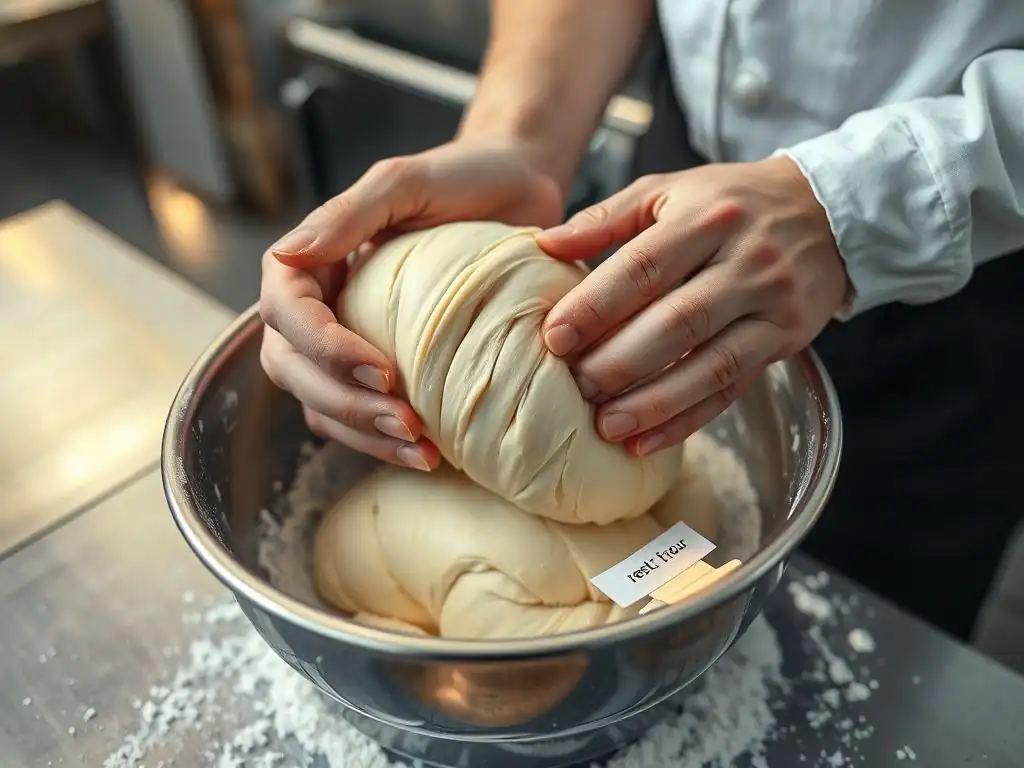
Achieving those signature light, airy layers in a croissant hinges significantly on how the dough is treated between steps, particularly concerning rest. These crucial pauses allow the dough to relax and the gluten structure to develop appropriately, setting the stage for successful lamination and a spectacular final product. Without adequate rest periods, the dough becomes resistant, difficult to work with, and the intricate layers necessary for flakiness are compromised.
The interaction between the dough and the butter block during lamination is delicate. Sufficient rest ensures the dough has the right elasticity and extensibility to be rolled thinly without tearing, allowing the butter to remain encapsulated within distinct layers. Insufficient rest periods croissant dough will fight back, leading to uneven layers, potential butter squeeze-out during rolling, and ultimately, a denser, less flaky croissant.
Why Are Rest Periods So Important for Croissant Baking?
Rest periods are vital for several interconnected reasons in croissant production. Primarily, they facilitate gluten relaxation, which is essential after the stress of mixing and rolling. Imagine stretching a rubber band repeatedly – it becomes tense and resistant. Dough behaves similarly. Resting allows the gluten network to loosen up, making the dough pliable and easy to roll thinly without tearing. This is absolutely critical for creating the numerous, distinct layers that define a croissant's texture.
Furthermore, rest periods, especially those in the refrigerator, are crucial for controlling dough temperature. Maintaining a cool dough temperature is paramount for keeping the butter block solid during the lamination process. If the dough is too warm or not rested sufficiently between turns, the butter can melt into the dough rather than remaining in separate layers. This leads to a greasy dough that bakes up dense and heavy, completely defeating the purpose of lamination.
Connecting Rest Periods to Gluten Development in Croissant Dough
Gluten development begins the moment flour and water combine, and it's accelerated by kneading or mixing. While some gluten development is necessary for structure, excessive tension makes the dough difficult to handle for the precise rolling required in croissants. Rest periods allow the gluten strands, which have been stretched and aligned during mixing and rolling, to relax and realign. This relaxation makes the dough less elastic and more extensible – meaning it's easier to stretch and roll out thinly without snapping back.
Specifically, between each fold or "turn" during lamination, a rest period is essential. After rolling and folding the dough with the butter enclosed, the gluten network is once again under tension. A rest of typically 30-60 minutes in the refrigerator allows this tension to dissipate. This ensures that when you go to roll the dough for the next turn, it stretches easily and evenly, creating uniform layers of dough and butter. This controlled gluten relaxation through rest periods croissant dough is fundamental to building the structure that will puff up into flaky layers in the oven.
The Science Behind Resting: What Happens to Croissant Dough During Rest?
Resting croissant dough isn't just about waiting; it's a period of significant physical and chemical transformation within the dough structure. When dough rests, particularly in a cool environment like the refrigerator, several key processes occur that are indispensable for successful croissant baking. These processes involve the gluten network, the yeast activity, and the physical state of the butter.
During these rest periods, enzymes naturally present in the flour, like proteases, begin to break down some of the protein bonds in the gluten network. This enzymatic activity further contributes to the dough's relaxation and extensibility. Simultaneously, the yeast activity slows down significantly in the cold, allowing for a slow, controlled fermentation that develops flavor without causing the dough to overproof prematurely before the final proofing stage.
Gluten Relaxation: Allowing for Easier Shaping and Lamination
As mentioned, the primary benefit of resting, especially after mixing and between turns, is gluten relaxation. When dough is mixed or rolled, the gluten proteins (glutenin and gliadin) form a network that gives the dough structure and elasticity. This network is under tension. Resting allows these long, stretched-out protein chains to untangle and relax. This reduces the dough's elasticity (its tendency to spring back) and increases its extensibility (its ability to be stretched without tearing).
This relaxed state is absolutely critical for the lamination process. Rolling dough thinly around a butter block requires the dough to stretch significantly and evenly. If the gluten hasn't relaxed, the dough will be tough, difficult to roll, and prone to tearing. Tears in the dough can cause butter to leak out during baking, ruining the layers. Proper rest periods croissant dough ensure the dough is pliable enough to create the numerous, paper-thin layers required for flakiness, often aiming for 48 distinct layers after three folds.
Temperature Control: Maintaining the Ideal Dough Temperature for Butter Incorporation
Temperature is a non-negotiable factor in croissant lamination, and rest periods are the primary tool for managing it. The goal during lamination is to keep the butter block cold and solid, while the dough is also cool but still pliable. The ideal temperature range for working with laminated dough is typically between 40°F and 50°F (4°C to 10°C). If the dough or butter gets too warm, the butter softens or melts, integrating into the dough rather than remaining as separate layers.
Resting the dough in the refrigerator between turns chills both the dough and the butter. This firms up the butter, making it less likely to squeeze out during rolling, and cools the dough, making it easier to handle and less sticky. A rest period of 30-60 minutes in the fridge between folds is standard practice to ensure the dough and butter are at the optimal temperature for the next rolling step. Skipping this chilling period almost guarantees a messy, unsuccessful lamination with compromised layers.
Preventing Gluten Overdevelopment: Avoiding Tough Croissants
While some gluten development is necessary, overworking the dough or failing to rest it properly can lead to overdeveloped gluten. This results in a dough that is excessively elastic and tough, even after resting. Think of it like a muscle that's been overworked – it becomes stiff and resistant. In dough, this translates to a final baked product that is dense, chewy, and tough, lacking the desired tender, airy crumb.
Proper rest periods, particularly the initial rest after mixing and the rests between lamination steps, allow the gluten to relax and prevent this overdevelopment. The enzymatic activity during resting also helps to mellow the gluten structure. By respecting the required rest periods croissant dough needs, you ensure the gluten network is strong enough for structure but relaxed enough for extensibility and a tender final texture.
Different Types of Rest Periods in Croissant Making: A Detailed Breakdown

Croissant making involves not just one, but several distinct rest periods, each serving a specific purpose. Understanding and respecting each of these pauses is key to success. These rests occur at different stages of the process, from the initial dough mixing all the way through to the final proofing before the croissants hit the oven.
Let's break down the typical rest periods you'll encounter when making croissants at home. Each one contributes uniquely to the dough's texture, flavor, and handling properties. Mastering these resting stages is a hallmark of a skilled croissant baker.
The Initial Dough Rest: After Mixing the Croissant Dough
Immediately after the dough ingredients are combined and kneaded, the dough needs its first significant rest. This initial rest allows the gluten network, which was just developed under tension during mixing, to begin relaxing. It also allows the flour to fully hydrate and the yeast activity to begin slowly, especially if resting in a cool environment.
This period is crucial for making the dough pliable enough to incorporate the butter block smoothly in the next step. Trying to enclose a butter block in a tight, unrelaxed dough is incredibly difficult and often results in an uneven distribution of butter, leading to poor layers.
How Long to Rest the Dough After Mixing: 2-4 Hours
The initial rest period for croissant dough typically lasts between 2 to 4 hours. Some recipes even call for an overnight rest in the refrigerator, which offers additional benefits in terms of flavor development through slow fermentation. A shorter rest of 2-3 hours is often sufficient for gluten relaxation if the dough was mixed properly, but a longer rest won't hurt and can improve flavor.
During this time, the dough should be covered tightly to prevent a skin from forming. A light film of oil on the surface or placing it in a sealed container works well. The dough will increase slightly in volume during this rest, but significant proofing is not the goal at this stage.
The Best Temperature for the Initial Dough Rest: 40-45°F (4-7°C)
The ideal temperature for the initial dough rest is the refrigerator temperature, typically between 40°F and 45°F (4°C to 7°C). Resting at this cool temperature slows down yeast activity, preventing premature proofing. More importantly for croissants, it chills the dough thoroughly. A well-chilled dough is essential for the subsequent step of incorporating the cold butter block; the temperatures need to be similar for successful lamination.
Resting at room temperature is generally not recommended for the initial rest in croissant making, as it can lead to too much yeast activity and a warm dough that makes lamination difficult. The cool temperature is key to managing both fermentation and dough temperature for the delicate lamination process ahead.
Lamination Rest Periods: Between Folds and Turns
After the initial rest and the butter block has been enclosed, the lamination process begins, involving a series of rolling and folding steps (turns). Between each turn, a mandatory rest period is required. This is perhaps the most critical type of rest period croissant dough undergoes for layer development.
Each turn stretches the dough and butter layers, putting the gluten under tension. The rest period allows this tension to dissipate, making the dough easy to roll again for the next turn. It also gives the butter time to firm up again after being softened slightly during rolling.
Why Rest is Needed Between Lamination Steps: To allow the gluten to relax and prevent the butter from melting and leaking.
As previously discussed, the primary reasons for resting between lamination turns are gluten relaxation and temperature control. Rolling stretches the dough, creating tension in the gluten network. Without rest, the dough will spring back, making it difficult or impossible to roll thinly and evenly for the next turn. This leads to uneven layers and potential tearing.
Equally important, the physical process of rolling generates friction and warms the dough and butter. Resting in the refrigerator cools everything back down. This ensures the butter remains solid and distinct from the dough layers. If the butter warms up and melts into the dough, the layers are lost, and you end up with a greasy, dense product instead of a flaky one.
Optimizing Rest Time for Effective Butter Incorporation: 30-60 Minutes
The standard rest period between lamination turns is typically between 30 and 60 minutes in the refrigerator. The exact time needed can depend on the ambient kitchen temperature, the temperature of your refrigerator, and how warm the dough became during rolling. A good rule of thumb is to rest until the dough feels firm and cool to the touch, and no longer feels elastic or resistant when gently poked.
Some recipes might suggest slightly longer rests, up to 90 minutes, especially in warmer conditions or if you're feeling any resistance from the dough. It's better to rest slightly longer than not long enough. Rushing this step by even 15 minutes can compromise the layers significantly. Patience during these rest periods croissant dough requires is paramount.
Final Proofing Rest: Before Baking Your Croissants
Once the croissants are shaped, they undergo their final and longest rest period: the proofing stage. This is where the yeast, which has been slowed by the cold temperatures during the previous rests, becomes active again in a warmer environment. The yeast ferments the sugars, producing carbon dioxide gas, which causes the croissants to expand and develop their final airy structure.
Proper final proofing is essential for achieving the signature light and airy interior crumb of a croissant. It allows the dough to reach its optimal volume and texture before the heat of the oven sets the structure. Under-proofed croissants will be dense and heavy, while over-proofed ones may collapse during baking.
Achieving Optimal Rise and Flakiness Through Proper Proofing Rest
During the final proof, the carbon dioxide produced by the yeast inflates the pockets between the layers of dough and butter created during lamination. As the croissants bake, the water in the butter turns to steam, further separating these layers. The structure developed during proofing allows this steam to expand effectively, resulting in maximum lift and flakiness.
The duration of the final proof can vary significantly depending on the ambient temperature. It typically takes 2-3 hours at room temperature (around 70-75°F or 21-24°C). Some bakers opt for a slower, cold proof overnight in the refrigerator, which develops more flavor and can make the morning bake easier. If cold-proofing, allow the croissants to sit at room temperature for 30-60 minutes before baking to take the chill off.
Signs Your Croissants are Properly Proofed: Increased volume, light and airy texture, slow spring back when gently pressed.
Knowing when your croissants are perfectly proofed is a skill that comes with practice, but there are clear signs to look for. First, they should have significantly increased in volume, often doubling in size. They should look visibly puffy and feel light and airy when gently lifted.
The most reliable test is the "poke test." Gently press the side of a croissant with your fingertip. If the indentation springs back slowly, only partially filling, the croissants are properly proofed. If the indentation springs back immediately, they need more time. If the indentation remains completely, they are likely over-proofed. Mastering this final rest period croissant dough needs is the last step before achieving baking success.
Consequences of Skipping Rest Periods: What Happens if You Don't Rest Your Dough?
Attempting to rush the croissant-making process by skipping or shortening the necessary rest periods is a surefire way to end up with disappointing results. While it might save time, it fundamentally disrupts the delicate balance required for flaky, airy croissants. The consequences are often immediately visible and significantly impact the final texture and appearance.
Ignoring the required rest periods croissant dough needs leads to a cascade of problems, from difficult handling during preparation to a tough, dense, and potentially greasy baked product. Let's look at the specific issues that arise.
Tough and Dense Croissants: The Result of Insufficient Gluten Relaxation
One of the most immediate consequences of insufficient rest, particularly after mixing and between lamination turns, is a dough that is tense and resistant. This lack of gluten relaxation makes the dough incredibly difficult to roll out thinly and evenly. You'll find yourself fighting the dough as it constantly springs back.
This struggle during rolling leads to uneven layers – some thick, some thin, or even torn. In the oven, these uneven layers won't puff up uniformly. The resulting croissant will lack the signature open, airy interior and delicate flakiness. Instead, it will be dense, heavy, and have a tough, chewy texture, a far cry from the light, crisp layers you're aiming for.
Butter Leakage: Compromising the Flaky Layers
Rest periods, especially the chilled rests between lamination steps, are crucial for keeping the butter block cold and solid. If you skip or shorten these rests, the butter warms up from handling and rolling friction. Warm butter is soft and pliable, and if it gets too warm, it will melt.
When the butter melts prematurely during lamination or proofing, it seeps into the dough layers instead of remaining as distinct sheets. This is known as "butter leakage" or "butter bleed." In the oven, there's no solid butter to create steam and push the layers apart. The result is a greasy dough that bakes into a flat, heavy, and dense pastry lacking any flakiness. You might see pools of butter on your baking sheet.
Difficulty in Shaping: Fighting the Dough
Trying to shape croissants with dough that hasn't had adequate rest is an exercise in frustration. The dough will be elastic and resistant, constantly wanting to spring back to its original shape rather than holding the triangle or crescent form you're trying to achieve. Cutting the dough might be difficult, and rolling the triangles into shape will be a struggle.
This difficulty in handling often leads to misshapen croissants, uneven thickness, and compressed layers. The tension in the dough makes it difficult to create the gentle coil of a crescent shape. Ultimately, the final appearance and texture are compromised simply because the dough wasn't given the time it needed to become pliable and cooperative. Respecting rest periods croissant dough requires is essential for ease of handling and beautiful shaping.
Best Practices for Resting Croissant Dough: BakeWithEase Tips and Tricks
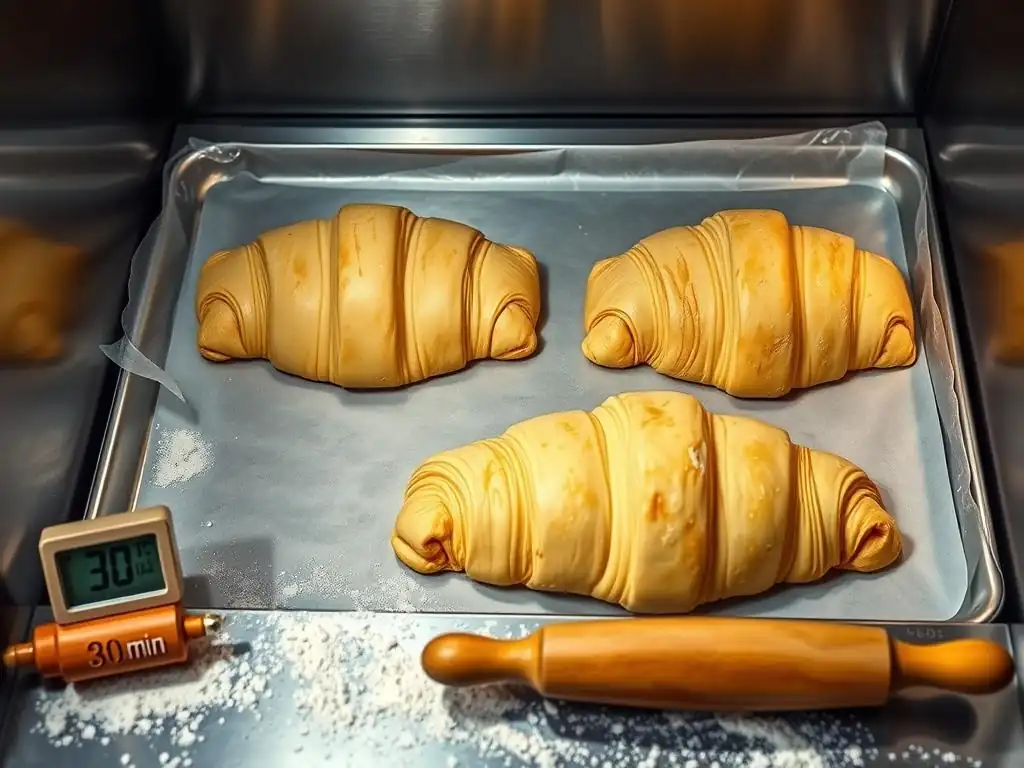
Mastering the art of resting croissant dough involves more than just knowing when to rest; it's also about knowing how to rest effectively. Following a few best practices can make a significant difference in the outcome, ensuring your dough is perfectly conditioned for each stage of the process.
Here are some BakeWithEase tips to help you optimize your rest periods croissant dough needs and set yourself up for croissant success:
Maintaining Consistent Temperature: Key to Successful Dough Resting
Consistency is key, especially when it comes to temperature during rest periods. The refrigerator temperature should ideally be between 40°F and 45°F (4°C to 7°C). Avoid placing the dough in the warmest or coldest spots (like right against the back wall where it might freeze). Ensure your fridge is calibrated correctly.
During lamination rests, minimize the time the dough spends outside the refrigerator. Work quickly when rolling and folding, and return the dough to the fridge promptly. If your kitchen is warm, consider chilling your rolling pin or work surface slightly (but not so cold it freezes the dough).
Preventing Dough from Drying Out: Cover tightly with plastic wrap or place in a sealed container.
Dough forms a dry skin very quickly when exposed to air, especially in the cold environment of a refrigerator. This dry skin can prevent even rising and lead to cracks in the dough during rolling, causing butter leakage. Therefore, it's essential to cover your dough properly during every rest period.
Wrap the dough tightly in plastic wrap, ensuring no part is exposed. Alternatively, place the dough in an airtight container. For the initial rest, you can lightly oil the surface of the dough before covering. For shaped croissants during final proofing, covering loosely with plastic wrap or placing the entire baking sheet in a large plastic bag or proofing container works well, ensuring there's enough space for them to expand without touching the plastic.
Troubleshooting Common Resting Issues: Dough too warm (return to fridge), dough too cold (allow to sit at room temperature for a short period).
Sometimes, despite best efforts, your dough might not be at the ideal temperature or consistency after a rest.
- Dough too warm: If your dough feels too warm or soft after a scheduled rest, particularly between lamination turns, simply return it to the refrigerator for an additional 15-30 minutes. It's far better to extend the rest than to try to work with warm dough and risk melting the butter.
- Dough too cold: If your dough feels too stiff or brittle straight from the fridge, it might be too cold to roll easily. Allow it to sit at room temperature for a short period (5-15 minutes) until it becomes slightly more pliable. Be careful not to let it get too warm. You want it firm but not hard.
These minor adjustments can save your croissants from potential issues caused by temperature imbalances during the critical rest periods croissant dough undergoes.
Mastering Croissant Dough Rest Periods: Your Path to Perfect Croissants at Home
Making croissants is often seen as the pinnacle of home baking, a challenge that requires precision, patience, and a good understanding of dough dynamics. While the lamination process itself is intricate, recognizing and respecting the crucial role of rest periods is equally, if not more, important for success. These pauses are not downtime; they are active stages where essential transformations occur within the dough.
By understanding why rest periods croissant dough needs are non-negotiable – from gluten relaxation and temperature control to flavor development and ease of handling – you empower yourself to tackle this rewarding baking project. Each rest contributes specifically to the final flaky texture and beautiful structure of the croissant.
Rest Periods as a Key Technique in Croissant Baking at Home
Treating rest periods not as interruptions but as integral techniques is a mindset shift that will elevate your croissant baking. Just as you focus on the technique of folding or shaping, dedicate attention to ensuring your dough rests for the appropriate duration and at the correct temperature. Using a thermometer to check your refrigerator temperature and setting timers for rests will become standard practice.
Embracing the patience required for these multiple rest periods croissant dough demands is the true secret to achieving bakery-quality results. It's the slow, controlled process that allows the magic of lamination to truly shine in the oven. Don't rush; let the dough tell you when it's ready for the next step.
BakeWithEase: Resources for Perfecting Your Croissant Baking Skills
Mastering croissants takes practice, but with a solid understanding of fundamentals like rest periods, you're well on your way. BakeWithEase is here to support your baking journey with detailed guides, tips, and recipes. Keep exploring our resources to refine your techniques and build confidence in tackling challenging bakes like croissants.
Frequently Asked Questions
Why are rest periods so important when making croissant dough?
Rest periods allow the gluten to relax, making the dough easier to handle and preventing it from snapping back during lamination. This results in a flakier, more tender final product.
How long should I rest croissant dough between folds?
Generally, resting the dough for 30 minutes to 1 hour in the refrigerator between folds is recommended. This allows the gluten to relax and the butter to firm up, preventing it from melting into the dough.
What happens if I skip the rest periods when making croissants?
Skipping rest periods will likely result in a tough, shrunken, and poorly laminated croissant. The gluten will be too strong, and the butter may melt, ruining the layers.
Can I rest croissant dough for too long?
Yes, over-resting can lead to over-proofed dough that is difficult to shape and may collapse during baking. Monitor the dough's rise and adjust resting times accordingly, especially in warmer environments.
Where should I rest my croissant dough?
Croissant dough should be rested in the refrigerator to keep the butter cold and prevent it from melting. Cover the dough tightly to prevent it from drying out.
Final Reflection: The Unsung Hero of Flaky Perfection
The meticulous resting of croissant dough isn't merely a suggestion; it's the cornerstone of achieving that coveted, ethereal flakiness. Ignoring this crucial step is akin to building a house on a faulty foundation – the result will be unstable and ultimately disappointing. The science behind gluten relaxation and the development of flavor during these periods is undeniable, impacting the final product in ways that are both visible and delicious.
The impact of understanding rest periods extends far beyond the realm of baking. It highlights the importance of patience and process in achieving excellence in any endeavor. The difference between ordinary and extraordinary is that little extra.
This quote, while often attributed to Jimmy Johnson, perfectly encapsulates the transformative power of seemingly insignificant steps, like allowing your dough to rest, that ultimately elevate the final outcome. The quiet, unseen work of rest is a powerful metaphor for the importance of allowing time for growth and development in all aspects of life.
Consider the lessons learned here. Don't rush the process; embrace the pauses. Whether you're crafting croissants or navigating life's complexities, remember the power of rest. Take the time to allow your creations, and yourself, to fully develop. The results will be far more rewarding than any shortcut could ever provide. The next time you're faced with a challenging task, remember the humble croissant and its unwavering need for rest – a testament to the beauty of patience and precision.
Unleash Your Inner Croissant Master: Take the Next Step!
Thanks for diving deep into the world of croissant dough resting! You now understand the crucial role it plays in achieving flaky, buttery perfection. Ready to put your newfound knowledge into practice?
Here's what you can do next:
- Bake a batch of croissants! Use what you've learned to create your most amazing croissants yet. Don't be afraid to experiment – even slight variations in resting time can yield exciting results.
- Share your croissant journey: Snap a picture of your creations and share them on social media – tag us @BakeWithEase so we can see your delicious results!
- Consider trying a different laminated dough recipe. Mastering croissants opens up a world of possibilities, like pain au chocolat or palmiers!
What unique resting technique will you try in your next baking adventure?