
Troubleshooting Common High Altitude Baking Problems

Welcome to BakeWithEase, your trusted companion in the wonderful world of baking! Are you ready to conquer the unique challenges of high altitude baking? This guide delves into common issues faced when baking at higher elevations, offering practical solutions and expert tips to ensure your cakes rise perfectly and your cookies don't crumble. Curious about mastering the art of baking above sea level? Read on to unlock the secrets!
- Troubleshooting Common High Altitude Baking Problems: Bake with Ease
- Understanding High Altitude Baking Challenges
- Common High Altitude Baking Problems and Solutions
- High Altitude Baking Tips for Specific Baked Goods
- Mastering High Altitude Baking: Key Takeaways
-
Frequently Asked Questions
- What is high altitude baking, and why is it different?
- What are some common problems encountered in high altitude baking?
- How can I adjust my recipes for high altitude baking?
- Why is it important to reduce the amount of leavening when high altitude baking?
- Where can I find more detailed high altitude baking tips and recipes?
- Final Reflection: Scaling the Peaks of Perfect Baking
- Unlock Your High-Altitude Baking Secrets!
Troubleshooting Common High Altitude Baking Problems: Bake with Ease
Understanding High Altitude Baking Challenges
Why Baking at High Altitude is Different
Baking at higher elevations presents unique challenges compared to baking at sea level. The primary factors at play are lower atmospheric pressure and drier air. As altitude increases, the air pressure decreases. This lower pressure means that gases, like the carbon dioxide produced by leavening agents (baking powder, baking soda, yeast), expand more readily and quickly.
It also causes liquids to evaporate faster and boil at a lower temperature. For example, water boils at 212°F (100°C) at sea level, but at 5,000 feet, it boils around 203°F (95°C), and at 10,000 feet, it boils around 194°F (90°C). This lower boiling point means foods cook at a lower temperature, affecting the setting of structure in baked goods.
The drier air often found at high altitudes also impacts baking significantly. Moisture evaporates from ingredients and batters more rapidly, both during preparation and baking. This can lead to dry, dense, or crumbly textures if recipes aren't adjusted. Understanding these fundamental differences in atmospheric conditions is the first step to successful high altitude baking. It requires a different approach than simply following a sea-level recipe, necessitating adjustments to ingredients, temperatures, and baking times to achieve the desired results.
The Science Behind High Altitude Baking Adjustments
The science behind high altitude baking adjustments centers on counteracting the effects of lower pressure and increased evaporation. When leavening gases expand too quickly under lower pressure, they can cause the structure of a cake or bread to stretch too much before it has a chance to set, leading to collapse. To combat this, recipes often require a reduction in leavening agents. For instance, many high altitude baking tips suggest reducing baking powder by 1/8 to 1/4 teaspoon for every teaspoon called for at sea level, especially above 3,500 feet. Similarly, yeast quantities might be slightly decreased.
Simultaneously, the faster evaporation of liquids at higher altitudes necessitates increasing the moisture content in recipes. This can involve adding extra liquid (water, milk, eggs) or sometimes fat. This added moisture helps prevent dryness and ensures a tender crumb. Furthermore, increasing the oven temperature slightly (often by 15-25°F) is a common adjustment.
This helps the structure of the baked good set faster before the over-expanded gases can cause it to collapse. Adjusting baking time, usually by shortening it, is also crucial because the lower boiling point means internal temperatures are reached faster, and rapid evaporation can lead to over-baking if not monitored closely. These scientific principles form the basis of effective high altitude baking tips and techniques.
Common High Altitude Baking Problems and Solutions
Problem 1: Cakes Collapsing in the Center
Why Cakes Collapse at High Altitude
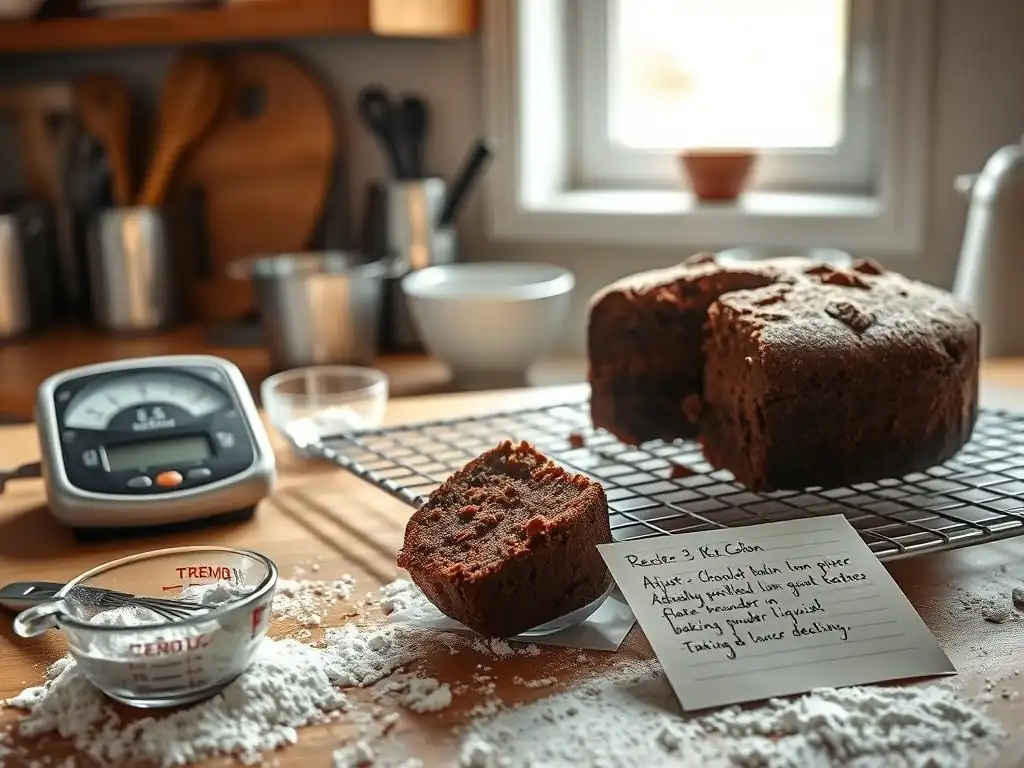
One of the most frustrating issues encountered in high altitude baking is a cake that rises beautifully in the oven only to sink dramatically in the center, leaving a dense, crater-like depression. This is primarily due to the lower atmospheric pressure. Leavening agents produce carbon dioxide gas, which creates air pockets that lift the batter. At higher altitudes, with less pressure pushing down, these gases expand much more rapidly and forcefully than they would at sea level.
This rapid expansion causes the cake's structure to stretch too thin and too quickly before the proteins in the flour and eggs have had a chance to coagulate and set in the oven's heat. Because liquids also boil at a lower temperature, the batter takes longer to reach the temperature where its structure stabilizes. The combination of aggressive gas expansion and a slower setting structure leads to the weakened network collapsing under its own weight, resulting in that sunken center.
Solution: Reducing Leavening Agents (Baking Powder & Baking Soda)
To prevent cakes from collapsing, a key high altitude baking tip is to reduce the amount of leavening agents used in the recipe. Since the lower pressure causes gases to expand more, you simply don't need as much leavening to achieve the desired rise. Overuse of baking powder or baking soda at high altitude exacerbates the problem of over-expansion and subsequent collapse.
A general guideline for elevations between 3,500 and 6,500 feet is to reduce baking powder by about 1/8 to 1/4 teaspoon per teaspoon called for in the original recipe. For elevations above 6,500 feet, the reduction might be closer to 1/4 to 1/2 teaspoon per teaspoon. Similarly, baking soda may need a slight reduction. This adjustment helps control the rate of expansion, allowing the cake's structure more time to set properly before the gases become too forceful.
Solution: Increasing Oven Temperature for Faster Setting
Another effective strategy to combat cake collapse at high altitude is to increase the baking temperature slightly. While liquids boil at a lower temperature, the oven itself is still hotter, and increasing the thermostat helps the cake's batter reach its setting point more quickly. A faster setting structure is better equipped to withstand the internal pressure from the expanding gases.
Most high altitude baking tips recommend increasing the oven temperature by 15°F to 25°F (about 8°C to 14°C) compared to the sea-level recipe. For example, if a recipe calls for 350°F (175°C), you might bake it at 365°F or 375°F (185°C or 190°C). This higher heat accelerates the coagulation of proteins and starch gelatinization, providing a stronger framework that can support the cake's rise without collapsing. Remember to check for doneness a bit earlier, as the higher temperature can also lead to faster browning.
Solution: Adding More Flour to Strengthen the Structure
Increasing the amount of flour in a cake recipe is another common adjustment for high altitude baking. Flour contains proteins (gluten) and starch that provide the structural support for the cake. At higher altitudes, with the increased stress from rapidly expanding gases, a slightly stronger structure is often needed to prevent collapse.
Adding a small amount of extra flour helps build a more robust network within the batter. A typical adjustment for elevations above 3,500 feet might be to add 1 to 2 tablespoons of flour per cup of flour specified in the original recipe. This additional flour provides more structure to support the expanded air cells, reducing the likelihood of the cake sinking. It's a delicate balance, however; adding too much flour can result in a dry or tough cake, so start with a small increase and adjust based on results.
Problem 2: Dry and Crumbly Baked Goods
Why Baked Goods Dry Out Quickly at High Altitude
Baked goods often turn out dry and crumbly at high altitudes due to the increased rate of moisture evaporation. As altitude increases, the air tends to be drier, and the lower atmospheric pressure causes water and other liquids in the batter or dough to evaporate more quickly, both before and during baking. This rapid loss of moisture means that by the time the internal structure of the baked good is set, a significant amount of its liquid content has already dissipated into the air.
Furthermore, because water boils at a lower temperature at high altitude, the overall cooking process occurs at a slightly lower internal temperature range. This can sometimes prolong the baking time needed to achieve the desired internal doneness or browning, inadvertently leading to more moisture loss during the extended bake. The combined effect of drier air, faster evaporation, and potentially longer bake times contributes to a final product that lacks sufficient moisture, resulting in a dry, sometimes sandy or crumbly texture.
Solution: Increasing Liquid Content (Water, Milk, or Juice)
To counteract the rapid evaporation at high altitude, increasing the liquid content in a recipe is a standard adjustment. Adding more moisture helps ensure that there is enough liquid remaining in the baked good after evaporation to maintain a tender and moist texture. This is one of the most straightforward high altitude baking tips.
Depending on the recipe and altitude, you might need to add anywhere from 1 to 4 tablespoons of extra liquid per cup of liquid called for in the original recipe. The type of liquid added should match the recipe – milk in a cake, water in bread, etc. Start with a smaller increase and observe the results. The batter or dough might seem slightly wetter than you are used to at sea level, but this extra moisture is crucial for preventing dryness and achieving a pleasant texture.
Solution: Adding Fat (Butter, Oil, or Shortening) for Moisture
Increasing the fat content is another effective way to add moisture and tenderness to baked goods at high altitude. Fats, like butter, oil, or shortening, coat flour particles and interfere with gluten development, resulting in a more tender crumb. They also contribute to a richer mouthfeel and help retain moisture.
Adding a small amount of extra fat can significantly improve the texture of high altitude baked goods, making them less likely to be dry and crumbly. A common adjustment might be to add 1 to 2 tablespoons of butter or oil per cup of fat in the original recipe, or per standard batch size (like adding 2 tablespoons to a typical cake recipe). This added fat helps to lubricate the structure and slow down moisture loss during baking, leading to a moister final product.
Solution: Reducing Baking Time to Prevent Over-Baking
Since liquids boil at a lower temperature at high altitude and evaporation is faster, baked goods can sometimes reach their optimal internal temperature or risk drying out more quickly than at sea level, even if the external appearance isn't fully browned. Over-baking is a major contributor to dryness, regardless of altitude, but the conditions at high altitude make it a greater risk.
Monitoring baking time closely and potentially reducing it is a critical high altitude baking tip. Start checking for doneness several minutes earlier than the recipe indicates. Use visual cues (like browning edges or a set center) and tests (like the toothpick test for cakes or internal temperature for bread) to determine when the item is truly done, rather than relying solely on the clock. Removing baked goods from the oven as soon as they are properly cooked minimizes moisture loss and helps prevent a dry, crumbly texture.
Why Cookies Spread Excessively at High Altitude
Cookies baked at high altitude often spread more than desired, resulting in thin, flat discs instead of plump, chewy, or tender cookies. This excessive spread is primarily linked to the lower boiling point of water and the rapid melting of fats under high altitude conditions. As the oven heats the cookie dough, the fat melts and the water in the dough turns to steam. At lower atmospheric pressure, this steaming process happens at a lower temperature.
This means the fat melts and spreads while the dough's structure is still relatively weak. Unlike cakes or bread, cookies don't have a strong gluten network or significant leavening trying to lift them vertically. Their structure sets as the proteins and starches are heated. If the fat melts and spreads too much before this structure sets, the cookie will flatten out excessively. The faster evaporation also contributes, potentially making the dough less hydrated initially, which can sometimes paradoxically lead to more spread if not adjusted correctly.
Solution: Chilling the Dough Thoroughly Before Baking
A highly effective high altitude baking tip for combating excessive cookie spread is to thoroughly chill the cookie dough before baking. Chilling solidifies the fats (like butter) in the dough. When the cold dough enters the hot oven, the solidified fat takes longer to melt and spread compared to fat in room-temperature dough.
This delay in fat melting gives the cookie's structure (from flour, eggs, etc.) more time to set in the heat of the oven before the fat has fully liquefied and spread out. Chilling for at least 30-60 minutes, or even several hours, can significantly reduce spread. Baking cookies directly from the refrigerator or even freezer is a common technique used at high altitude to help them hold their shape better and achieve a thicker texture.
Solution: Using Less Sugar in the Cookie Recipe
Reducing the amount of sugar in a cookie recipe is another useful adjustment for high altitude baking to control spread. Sugar is hygroscopic, meaning it attracts and holds onto moisture, and it also contributes to tenderness and browning. However, sugar also liquefies and spreads when heated in the oven.
Using slightly less sugar means there is less material in the dough that will melt and spread during baking. A typical reduction might be 1 to 2 tablespoons of sugar per cup called for in the original recipe. While this adjustment can help limit spread, be mindful that sugar also impacts texture and sweetness. Reducing it too much could result in a less tender or less sweet cookie, so it's a balance to find the right amount for your desired result.
Solution: Increasing the Flour Content Slightly
Similar to cake adjustments, adding a small amount of extra flour can help strengthen the structure of cookie dough at high altitude, which in turn helps limit excessive spreading. Flour provides the matrix that holds the cookie together as it bakes.
By adding just a tablespoon or two of extra flour per cup of flour in the recipe, you create a slightly more robust structure. This stronger framework is better able to resist the tendency to spread as the fats melt and liquids evaporate. As always, add flour cautiously, as too much can lead to tough or dry cookies. This adjustment works best in conjunction with chilling the dough and potentially reducing sugar for optimal high altitude cookie baking results.
Problem 4: Bread Rising Too Quickly and Then Deflating
Why Bread Dough Over-Proofs at High Altitude
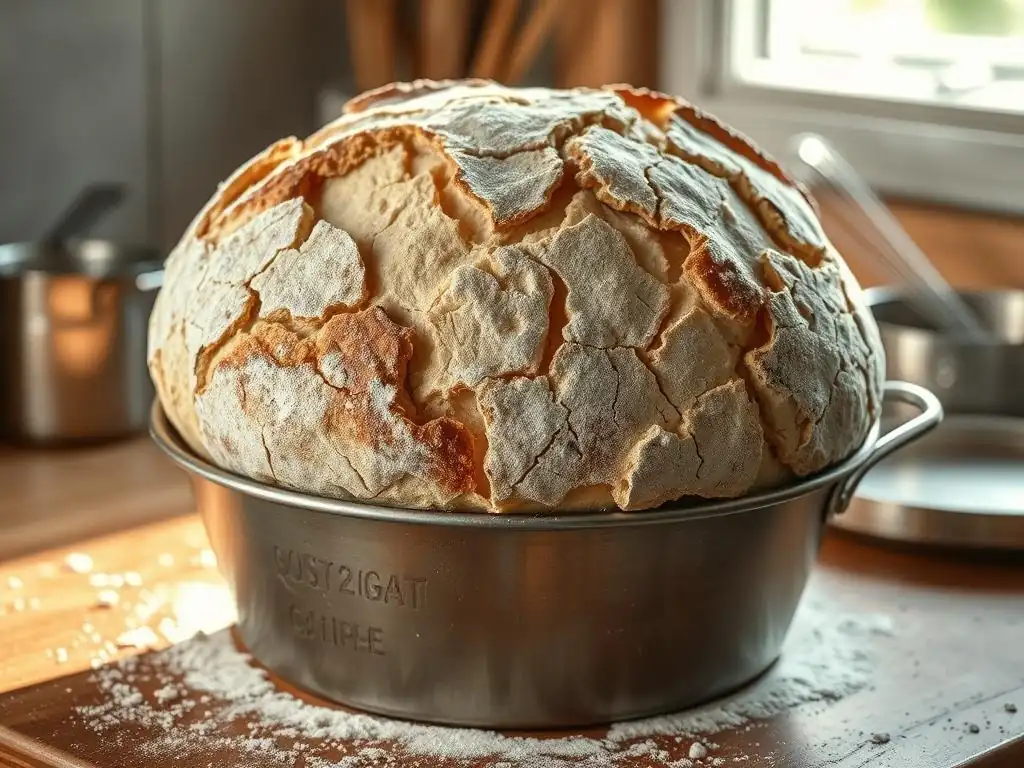
Bread dough often rises much faster and higher at high altitude than at sea level, sometimes leading to over-proofing and subsequent collapse during or after baking. Yeast activity is influenced by temperature and pressure. At lower atmospheric pressure, the carbon dioxide gas produced by the yeast expands more readily. This causes the dough to inflate very quickly during the initial rise (bulk fermentation) and the final rise (proofing).
If the dough rises too quickly and isn't baked at the right moment, the gluten structure can become overstretched and weakened, similar to the issue with cakes. The yeast can also exhaust its food supply or produce off-flavors if the rise is too prolonged due to rapid expansion. This over-expansion and weakening of the gluten network makes the dough unable to hold its structure, leading to deflation, either before it goes into the oven or as soon as it hits the heat. The resulting bread is often dense, with large, uneven holes, or completely collapsed.
Solution: Reducing Yeast Quantity in the Recipe
To control the rapid rise of bread dough at high altitude, reducing the amount of yeast is a fundamental adjustment. Less yeast means less carbon dioxide is produced, slowing down the rate of expansion and allowing the gluten structure more time to develop strength to support the rise.
For elevations above 3,500 feet, consider reducing the yeast by 1/4 to 1/3 of the amount called for in the original recipe. For example, if a recipe uses 2 teaspoons of yeast, try using 1.5 or 1.75 teaspoons. This seemingly small change can significantly impact the rate of fermentation, preventing the dough from rising too quickly and becoming overstretched before it's ready to bake.
Solution: Monitoring Dough Temperature Closely
Yeast activity is highly sensitive to temperature. Warmer temperatures accelerate fermentation, while cooler temperatures slow it down. At high altitude, where the gases expand faster, controlling the dough temperature is crucial to prevent over-proofing.
Keeping the dough slightly cooler during both the bulk fermentation and proofing stages can help slow down the yeast's activity and the rate of gas production. Aim for a dough temperature in the lower end of the optimal range for yeast (around 70-75°F or 21-24°C) rather than the higher end. Using cooler water or milk in the recipe, or letting the dough rise in a slightly cooler spot in your kitchen, can help manage the fermentation speed and prevent the dough from getting ahead of itself.
Solution: Shortening the Proofing Time
Because yeast activity is faster at high altitude, the dough will reach its optimal proofed state more quickly than at sea level. Relying on the time specified in a sea-level recipe will almost certainly lead to over-proofing.
The most important high altitude baking tip for bread is to monitor the dough's volume and feel rather than just the clock. The dough is ready to bake when it has roughly doubled in size (for the first rise) or increased by about 50-75% (for the second rise), and when an indentation made gently with your finger springs back slowly, but not completely. This typically happens in significantly less time than indicated in sea-level recipes – sometimes 20-40% less time. Be vigilant and check the dough frequently as it proofs.
Problem 5: Tough or Rubbery Texture
Why High Altitude Can Lead to a Tough Texture
Baked goods can sometimes develop a tough or rubbery texture at high altitude, particularly cakes, muffins, and cookies. This is often a result of increased gluten development. Gluten is formed when proteins in flour (glutenin and gliadin) combine with liquid and are agitated, such as during mixing. While gluten is essential for structure in bread, excessive gluten development in tender baked goods leads to toughness.
At high altitude, recipes often call for adding more liquid to combat dryness. While necessary, this extra liquid, combined with potential over-mixing (which is easy to do when trying to ensure everything is incorporated), can lead to increased gluten formation. Furthermore, the faster evaporation means the mixture might appear drier than it is during mixing, tempting bakers to mix longer, thus developing more gluten. The lower boiling point and faster setting structure can also sometimes impact how the gluten network sets, potentially contributing to a tougher result if not managed carefully.
Solution: Avoiding Over-Mixing the Dough or Batter
The most crucial step to prevent toughness in high altitude baking is to avoid over-mixing. Once the dry ingredients are combined with the wet ingredients, mix only until the ingredients are just combined. Over-mixing develops gluten, which is desirable for chewy bread but detrimental to the tender crumb of cakes, muffins, and many cookies.
For batters like cakes and muffins, this means stopping mixing as soon as you no longer see streaks of dry flour. A few small lumps are acceptable and often preferred over a smooth, over-mixed batter. For cookies, mix until the dough just comes together. Using a light hand and mixing on a lower speed can help prevent excessive gluten development, ensuring a tender texture in your high altitude baked goods.
Solution: Ensuring Accurate Measuring of Ingredients
Accurate measurement of ingredients, especially flour, is vital to prevent toughness at high altitude. Adding too much flour, even unintentionally through improper measuring, is a common cause of dry and tough baked goods. At high altitude, where structure is already a concern, using too much flour exacerbates the problem by increasing the potential for excessive gluten development and absorbing too much moisture.
Use the spoon-and-level method for measuring flour: gently spoon the flour into your measuring cup until it overflows, then level off the excess with a straight edge without packing the flour down. Avoid scooping flour directly from the bag with the measuring cup, as this compacts the flour and results in using significantly more than the recipe intends. Precise measurement ensures the correct balance of wet and dry ingredients needed for a tender crumb in high altitude baking.
Solution: Consider Using Bread Flour
While avoiding over-mixing is key for cakes and muffins, some high altitude bread recipes might benefit from using bread flour. Bread flour has a higher protein content than all-purpose flour (typically 12-14% protein compared to 10-12%). This higher protein level means it can develop a stronger gluten network, which is sometimes needed to support the more aggressive rise that occurs at high altitude.
Using bread flour can provide a more robust structure that is less likely to collapse after the rapid initial expansion. However, this is a specific adjustment for bread and isn't suitable for tender items like cakes or muffins, where a lower protein flour like cake flour or all-purpose flour is preferred. For bread, if you find your loaves consistently collapsing or lacking structure, swapping some or all of the all-purpose flour for bread flour can be an effective high altitude baking tip.
High Altitude Baking Tips for Specific Baked Goods
Adjusting Cake Recipes for High Altitude Success
Baking moist and level cakes at high altitude requires careful adjustments. Beyond the general tips of reducing leavening, increasing temperature, and adding liquid/flour, specific types of cakes may need fine-tuning. For instance, butter cakes, which rely heavily on creaming butter and sugar for leavening and structure, are particularly susceptible to collapse and dryness. Reducing the sugar slightly (1-2 tablespoons per cup) not only helps with structure but also reduces the moisture-holding capacity of the sugar, which is less needed when adding extra liquid.
Angel food cakes and other foam-based cakes, which rely solely on whipped egg whites for leavening, are highly affected by rapid expansion. For these, reducing the sugar (which can weigh down the foam) and slightly increasing the flour (for structure) are often recommended.
Baking these at a slightly lower increased temperature (perhaps only +15°F) might be better than a higher one to prevent the delicate foam from setting too quickly before the center is cooked. Always use accurate measurements and check for doneness with a cake tester inserted into the center – it should come out clean or with just a few moist crumbs.
Achieving the perfect cookie texture at high altitude – not too thin and not too puffy – involves balancing spread and tenderness. While chilling the dough, reducing sugar, and adding a touch more flour are primary strategies, the type of fat and leavening also play a role. Cookies made with butter tend to spread more than those made with shortening or a mix. At high altitude, using a higher ratio of shortening or chilling butter-based dough very well is key.
Baking time and temperature are also critical high altitude baking tips for cookies. While you might increase the oven temperature slightly for cakes (15-25°F), some bakers find that baking cookies at the standard temperature or only slightly higher (10-15°F) but for a shorter time works best. This allows the edges to set before the center spreads too much. Watch cookies constantly, as they can go from perfectly baked to over-baked and dry very quickly at high altitude. Look for golden edges and a slightly soft center.
Adapting Bread Recipes for High Altitude Environments
Adapting bread recipes for high altitude focuses on controlling yeast activity and strengthening the gluten structure. As mentioned, reducing yeast quantity and controlling dough temperature are vital. You may also find that your dough requires slightly more water than a sea-level recipe, even after accounting for the initial liquid increase, as evaporation continues throughout the longer fermentation process.
Kneading time might need adjustment. While hand kneading times might remain similar, machine kneading can develop gluten faster, so monitor closely and stop when the dough reaches the desired elasticity. The first rise (bulk fermentation) and second rise (proofing) will be significantly shorter; rely on visual cues (doubling in size) and the poke test rather than the clock. Some bakers also find that adding a small amount of vital wheat gluten (1-2 teaspoons per cup of flour) can help strengthen the dough's structure to support the rapid high altitude rise, especially in whole wheat or low-gluten flours.
High Altitude Pastry Baking: Avoiding Common Pitfalls
Pastries like pie crusts, scones, and biscuits rely on creating flaky layers by incorporating cold fat into flour. High altitude conditions, with drier air and faster evaporation, can make doughs like pie crust potentially drier and harder to work with. Adding a touch more liquid (water, milk, or buttermilk) than a sea-level recipe calls for can help achieve the right consistency and prevent a crumbly dough that's difficult to roll out.
For scones and biscuits, rapid expansion from leavening can sometimes lead to a crumbly texture if the structure isn't strong enough. Ensure your leavening is fresh and measured accurately (though slight reductions might be needed for very high altitudes or specific recipes). Baking at a slightly increased temperature (15-25°F) is often recommended for these items as it helps the fat create steam quickly, lifting the layers before the dough spreads too much. As always, avoid overworking the dough to prevent toughness, which is particularly important for flaky pastries.
Mastering High Altitude Baking: Key Takeaways
Summarizing Essential High Altitude Baking Adjustments
Mastering high altitude baking involves understanding the unique environmental factors – lower pressure and drier air – and making specific adjustments to counteract their effects.
The core high altitude baking tips boil down to: reducing leavening agents (baking powder, baking soda, yeast) to prevent over-expansion and collapse; increasing liquid content to compensate for faster evaporation and prevent dryness; potentially increasing flour slightly to strengthen structure; adding a bit more fat for moisture and tenderness; increasing oven temperature slightly to help structure set faster; and crucially, shortening baking times and relying on visual cues and doneness tests rather than relying solely on sea-level recipe times.
These adjustments often work in combination. For example, a high altitude cake recipe might call for slightly less baking powder, a bit more milk, a tablespoon or two of extra flour, and baking at 375°F instead of 350°F for a slightly shorter duration. Successful high altitude baking requires experimentation and patience, as the perfect adjustment can vary slightly depending on your exact elevation, local climate conditions, and even your specific oven.
Resources for Further Learning and Recipe Adaptation
Embarking on the journey of high altitude baking can feel daunting, but many resources are available to help you adapt. Look for cookbooks specifically written for high altitude baking, as these recipes are already formulated with the necessary adjustments. Many university extension offices in mountainous regions also publish excellent guides and charts with specific recommendations for various altitudes and baked goods, offering reliable high altitude baking tips.
Online communities and forums dedicated to high altitude cooking and baking are also valuable resources for sharing experiences and asking questions. While specific links cannot be provided here, searching for terms like "high altitude baking guide" or "high altitude recipe adjustments chart" will yield helpful information. Don't be afraid to start with a few key adjustments in your favorite recipes and keep notes on what works and what doesn't. Practice and observation are key to becoming a confident high altitude baker.
High Altitude Baking Recipe Conversion Chart
While a universal chart covering every recipe and altitude is impossible, a general high altitude baking recipe conversion chart provides a starting point for common adjustments based on elevation. These charts typically categorize adjustments by altitude ranges, such as 3,000-5,000 feet, 5,000-7,000 feet, and above 7,000 feet, as the necessary changes become more significant at higher elevations.
A typical chart might suggest for 5,000-7,000 feet: reduce baking powder by 1/4 tsp per tsp, reduce sugar by 1-2 tbsp per cup, increase liquid by 2-4 tbsp per cup, increase flour by 1-2 tbsp per cup, and increase oven temperature by 15-25°F. For bread, it might advise reducing yeast by 1/4 and shortening rise times by 1/4 to 1/3.
These charts serve as valuable high altitude baking tips, offering a structured approach to modifying your favorite sea-level recipes and increasing your chances of success. Always remember these are guidelines; your own experimentation will fine-tune the perfect adjustments for your kitchen.
Frequently Asked Questions
What is high altitude baking, and why is it different?
High altitude baking refers to baking at elevations typically above 3,000 feet. At these altitudes, lower air pressure and humidity affect how ingredients react, leading to faster evaporation and increased leavening.
What are some common problems encountered in high altitude baking?
Common issues include cakes collapsing, breads drying out quickly, cookies spreading too thin, and baked goods having a gummy texture. These problems often stem from imbalances in moisture, leavening, and gluten development.
How can I adjust my recipes for high altitude baking?
Typical adjustments involve reducing leavening agents (baking powder/soda), increasing liquid (water/milk), and adding flour. Experimentation is often needed to find the perfect balance for your specific altitude.
Why is it important to reduce the amount of leavening when high altitude baking?
Lower air pressure causes baked goods to rise faster. Reducing leavening prevents them from over-expanding and collapsing before the structure sets. This ensures a more stable and evenly textured final product.
Where can I find more detailed high altitude baking tips and recipes?
BakeWithEase.com offers a wealth of information, including step-by-step guides, adjusted recipes, and troubleshooting advice specifically tailored for baking at high altitudes. You'll find resources for pastries, breads, cakes, and more.
Final Reflection: Scaling the Peaks of Perfect Baking
High-altitude baking, once a daunting challenge, is now increasingly accessible thanks to a deeper understanding of the science behind it. Mastering the art of baking at higher elevations isn't just about following recipes; it's about understanding the unique atmospheric conditions and adapting your techniques accordingly. This knowledge empowers home bakers everywhere to confidently create delicious treats, regardless of their location.
The impact of altitude on baking extends far beyond simply adjusting ingredient ratios. It's a testament to human ingenuity, our ability to adapt and overcome seemingly insurmountable obstacles. The pursuit of perfect baked goods at altitude reflects a broader human desire for connection and comfort, a desire to share delicious creations with loved ones, no matter the environment. Baking is at once child's play and adult joy. And love, of course.
- Alma Flor Ada. This quote perfectly encapsulates the emotional connection we forge through baking, a connection that transcends geographical limitations.
Now, it's your turn to conquer those high-altitude baking challenges. Don't let the thin air intimidate you; embrace the opportunity to learn, experiment, and refine your skills. Remember the tips and techniques discussed in this article, and most importantly, remember the joy of creating something delicious. Each successful bake, each perfectly risen cake, is a testament to your perseverance and a delicious reward for your efforts. So, gather your ingredients, preheat your oven, and embark on your high-altitude baking adventure!
Unlock Your High-Altitude Baking Secrets!
Thanks for taking the time to explore the world of high-altitude baking! We hope you now feel more confident tackling those tricky altitude adjustments. Ready to put your new knowledge into practice?
- Bake your dream cake (or cookies, or bread!): Try one of the recipes you've bookmarked, and carefully follow the altitude-adjusted instructions. We'd love to see your results!
- Share your baking triumphs (and challenges!): Post a picture of your creation on social media and tag us – let's build a supportive high-altitude baking community!
- Experiment with a new recipe: Explore some of the additional resources we've mentioned to discover even more high-altitude baking techniques and recipes.
What delicious high-altitude creation will you bake first?