
Basic Sourdough Recipe: The Bulk Fermentation Explained Simply


Welcome to BakeWithEase, your companion on the delicious journey of baking! Are you ready to unlock the secrets of naturally leavened bread? Dive in and discover our Simple Sourdough Starter Recipe Guide and learn how to master the art of sourdough baking. But first, let's unravel one of the most crucial steps: bulk fermentation. What makes it so vital for flavor and texture, and how can you ensure it's perfectly executed every time? Let's find out...
- Introduction to Sourdough Bulk Fermentation for Beginners
- Preparing for Bulk Fermentation: Essential Steps & Ingredients
- Simple Sourdough Starter Recipe Guide: Step-by-Step Instructions
- The Bulk Fermentation Process: A Detailed Guide
- Shaping Your Sourdough Loaf After Bulk Fermentation
- Proofing Your Sourdough Loaf: Preparing for Baking
- Baking Your Sourdough Loaf: Achieving a Perfect Crust and Crumb
- Troubleshooting Common Bulk Fermentation Issues
- Simple Sourdough Starter Recipe: Variations and Adaptations
- Conclusion: Mastering Simple Sourdough with Ease
-
Frequently Asked Questions
- What is a sourdough starter, and why is it important for sourdough baking?
- How often should I feed my sourdough starter, especially when following a simple sourdough starter recipe guide?
- What does "bulk fermentation" mean in the context of a basic sourdough recipe like the one BakeWithEase offers?
- How do I know when my sourdough dough has finished bulk fermenting, according to the BakeWithEase simple sourdough starter recipe guide?
- What are common mistakes to avoid when following a simple sourdough starter recipe guide for bulk fermentation?
- Final Reflection: The Humble Loaf, A Journey of Patience and Flavor
- Unleash Your Inner Baker: Master the Sourdough Art!
Introduction to Sourdough Bulk Fermentation for Beginners
Understanding the Importance of Bulk Fermentation in Sourdough Baking
Bulk fermentation, often called the first rise, is arguably the most critical phase in any simple sourdough starter recipe guide. This is the period after mixing your ingredients but before shaping, where the magic truly happens. During this time, the wild yeast and bacteria in your sourdough starter are actively working, consuming sugars in the flour and producing carbon dioxide gas and organic acids. The gas causes the dough to rise, while the acids are essential for developing the characteristic tangy flavor and improving the dough's structure.
This extended fermentation allows for the complex biochemical reactions that give sourdough its unique qualities. It's not just about increasing volume; it's about building gluten strength through enzymatic activity and manual folds, and deepening the flavor profile as the bacteria produce lactic and acetic acids. A successful bulk fermentation lays the foundation for good oven spring, a well-developed crumb structure, and that delicious sourdough tang you're aiming for in your basic sourdough recipe. Getting this step right is key to mastering a simple sourdough starter recipe guide.
BakeWithEase's Simple Approach to Sourdough Starter Recipes
At BakeWithEase, we believe that making delicious sourdough doesn't have to be complicated. Our simple sourdough starter recipe guide is designed to demystify the process, making it accessible even if you're new to baking with natural leavening. We focus on clear, step-by-step instructions and explanations for each stage, including the often-intimidating bulk fermentation. Our goal is to build your confidence by explaining the why behind each step.
Our approach emphasizes understanding your dough and your starter rather than rigidly following strict timings, which can vary greatly based on temperature and starter activity. We provide visual cues and tactile tests to help you gauge the dough's progress accurately during bulk fermentation. By breaking down the process into manageable steps and offering practical tips, we aim to help you bake beautiful, flavorful sourdough loaves consistently, making your simple sourdough starter recipe guide journey enjoyable and successful.
Preparing for Bulk Fermentation: Essential Steps & Ingredients
Reviewing Your Active Sourdough Starter: A Key to Success
Before you even think about mixing your dough for a simple sourdough starter recipe guide, assessing your starter's activity is paramount. An active starter is the engine of your sourdough. Approximately 4 to 8 hours after feeding (depending on temperature and hydration), a healthy starter should have significantly increased in volume, ideally doubling or even tripling. Look for lots of bubbles on the surface and throughout the jar's sides.
A classic test for readiness is the float test: gently drop a small spoonful of your starter into a glass of water. If it floats, it's typically active enough to leaven your bread. If it sinks, it might need more time or another feeding. Using an active, vigorous starter ensures that your dough will have the necessary power to rise during bulk fermentation and ultimately achieve good oven spring in your basic sourdough recipe.
Ingredients Checklist for Your Basic Sourdough Recipe
A basic sourdough recipe requires surprisingly few ingredients, highlighting the simplicity at its core. You'll need:
- Active Sourdough Starter: Your leavening agent, typically at peak activity.
- Flour: Often a mix of strong bread flour for structure and perhaps some all-purpose or whole wheat for flavor. A common ratio might be 90% bread flour and 10% whole wheat.
- Water: Filtered or non-chlorinated water is best, as chlorine can inhibit microbial activity. The amount of water relative to flour (hydration) significantly impacts the dough's feel and the final crumb. Many simple sourdough starter recipe guides use 70-75% hydration.
- Salt: Essential for flavor, controlling fermentation speed, and strengthening the gluten network. Typically around 2% of the total flour weight.
Using accurate measurements, preferably by weight using a digital scale, is crucial for consistency in your basic sourdough recipe. For example, for a single loaf using 500 grams of flour, you might use 100 grams of active starter, 375 grams of water (75% hydration), and 10 grams of salt (2%). This precision ensures the right balance for optimal bulk fermentation.
Recommended Equipment for Easy Sourdough Bulk Fermentation
Having the right tools can make the bulk fermentation process much smoother in your simple sourdough starter recipe guide. While you don't need a professional bakery setup, a few items are highly recommended. A large, clear container or straight-sided bowl is invaluable for monitoring the dough's volume increase accurately. Look for one with measurement markings if possible. Glass or clear plastic allows you to see bubble formation on the sides.
A digital kitchen scale is non-negotiable for precision in a basic sourdough recipe, as explained earlier. An instant-read thermometer is also very useful for checking both the ambient temperature and the dough's internal temperature, as fermentation speed is highly temperature-dependent. Lastly, a dough scraper or bench knife helps handle the often-sticky dough with minimal sticking, making folds and transfers easier during and after bulk fermentation.
Simple Sourdough Starter Recipe Guide: Step-by-Step Instructions
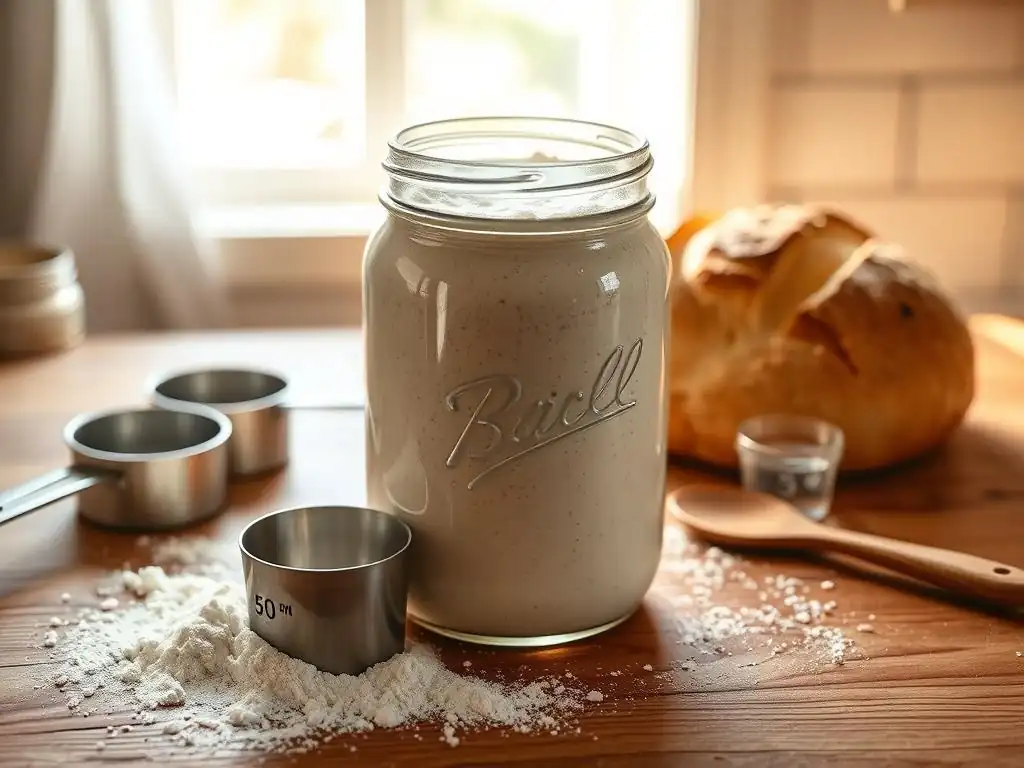
Mixing the Dough: Achieving the Right Consistency
The first step in your simple sourdough starter recipe guide is combining your ingredients. Start by weighing your water and active starter into your mixing bowl. Gently whisk or stir to disperse the starter. Then, add your weighed flour. At this stage, if the recipe calls for an autolyse period, do not add the salt yet. Use your hands or a sturdy spoon to mix everything together until there are no dry flour pockets remaining.
You'll end up with a shaggy, messy dough. It won't look smooth or elastic yet, and that's perfectly fine. The goal here is just to ensure all the flour is hydrated. Avoid overmixing at this point. This initial mix sets the stage for the gluten development that will continue during the rest period and subsequent folds in the bulk fermentation process.
Initial Dough Rest: Autolyse Explained
Following the initial mix, many basic sourdough recipes incorporate an autolyse phase. This involves letting the shaggy dough (flour and water only, before adding salt and sometimes starter) rest for a period, typically 20 to 60 minutes. If you added the starter with the water and flour, this rest period still functions similarly, though it's sometimes called a "rest period" or "fermentolyse."
The autolyse allows the flour to fully hydrate and gives enzymes naturally present in the flour time to start breaking down proteins. This process initiates gluten development without any manual work, making the dough easier to handle later and potentially improving its extensibility. After the autolyse, you'll notice the dough is already slightly smoother and more pliable before you even begin the bulk fermentation proper by incorporating the salt and starter (if they were held back).
The Bulk Fermentation Process: A Detailed Guide
Understanding Bulk Fermentation: What It Is and Why It Matters
Bulk fermentation is the cornerstone of a successful simple sourdough starter recipe guide. It's the time during which the entire mass of dough ferments as one unit, from the moment all ingredients are mixed until the dough is divided and shaped. This phase is critical for two main reasons: gas production and gluten development. Yeast produces CO2, causing the dough to rise and develop an open structure, while lactic acid bacteria produce organic acids that contribute flavor and help condition the gluten.
This period typically lasts several hours, depending on the ambient temperature and the starter's activity. It's during bulk fermentation that you'll perform a series of folds to build strength and structure in the dough. Unlike the final proof (which happens after shaping), bulk fermentation allows the gluten network to be developed and strengthened across the entire dough mass, leading to better oven spring and a more desirable crumb texture in your basic sourdough recipe.
Monitoring Dough Temperature for Optimal Fermentation
Temperature is one of the most significant factors influencing the speed and outcome of bulk fermentation in any simple sourdough starter recipe guide. Yeast and bacteria are more active in warmer conditions. A dough temperature between 75°F and 80°F (24°C-27°C) often results in a bulk fermentation lasting around 3-5 hours, depending on hydration and starter strength. Cooler temperatures, such as 70°F (21°C), will slow down fermentation, potentially extending the process to 6-10 hours or even longer.
Monitoring your dough's internal temperature using a thermometer can help you predict fermentation time and adjust accordingly. If your kitchen is cool, find a warmer spot or use a proofing box/oven with the light on to maintain a consistent temperature. Conversely, if it's too warm, you might need to use cooler water or find a slightly cooler spot. Consistent temperature management is key to predictable results in your basic sourdough recipe.
Performing Folds: Strengthening the Dough Structure
Throughout bulk fermentation, you'll perform a series of folds. The primary purpose of these folds is to build strength and tension in the dough's gluten network. As the dough ferments, it relaxes, and folding helps realign the gluten strands, creating a stronger structure capable of trapping the gases produced by fermentation. This leads to better volume and an open, airy crumb.
Folds also help to equalize the temperature throughout the dough and distribute the yeast and bacteria more evenly. Typically, folds are performed during the first 2-3 hours of bulk fermentation, allowing the dough to rest and relax between sets. The number and frequency of folds can be adjusted based on the dough's hydration and how quickly it develops strength.
Types of Folds: Stretch and Folds vs. Coil Folds
Two common types of folds are used during bulk fermentation in a simple sourdough starter recipe guide. Stretch and folds are performed by wetting your hands slightly, grabbing one side of the dough, stretching it upwards gently, and folding it over the center of the dough mass. You rotate the bowl and repeat this process 3-4 times, effectively folding the dough onto itself from all sides.
Coil folds are done by placing the dough on a lightly wet surface or in its container. You slide your wet hands underneath the center of the dough and lift it, allowing the ends to naturally tuck underneath the dough mass as you lift. You then gently lower it back down. This method is often preferred for higher hydration doughs as it's less aggressive and easier to manage sticky dough. Both methods achieve the goal of building tension and strength.
Frequency of Folds: Adapting to Your Dough's Needs
The typical frequency for performing folds in a basic sourdough recipe is every 30 to 60 minutes during the initial part of bulk fermentation. For example, you might perform 4 sets of folds spaced 45 minutes apart. However, this is not a strict rule; you should observe your dough.
If your dough is very wet or weak, you might perform folds more frequently at the beginning (e.g., every 30 minutes) to help it gain strength faster. As the dough develops strength and holds its shape better between folds, you can increase the time between sets or stop folding altogether. You'll know you can stop folding when the dough feels significantly stronger, smoother, and maintains some tension without spreading out excessively between sets. This adaptability is part of mastering your simple sourdough starter recipe guide.
Determining When Bulk Fermentation Is Complete
Knowing when bulk fermentation is finished is crucial and requires careful observation, as timing is less important than the dough's state. The most reliable indicator is a significant increase in volume. For most basic sourdough recipes aiming for a balanced flavor and structure, the dough should have increased by about 75% to 100% from its initial volume. Using a straight-sided container with markings makes this assessment much easier.
Beyond volume, look for visual cues like a domed surface and the presence of numerous small bubbles visible just beneath the surface and along the sides of the container. The dough should also feel airy and slightly jiggly. It should have some tension but still be extensible. Over-fermenting can lead to a loss of structure and a very slack, difficult-to-handle dough, while under-fermenting results in a dense crumb and poor oven spring.
Visual Cues: Observing Dough Volume and Air Bubbles
Visual cues are your primary method for determining the end of bulk fermentation in a simple sourdough starter recipe guide. As mentioned, aim for a volume increase of roughly 75% to 100%. This is a general guideline; some bakers stop at 50% for a tighter crumb, while others push closer to 100% for a more open crumb, depending on the flour and desired result.
Observe the texture of the dough's surface and edges. You should see small bubbles forming, particularly around the perimeter where the dough meets the container. The top surface should transition from flat to slightly domed. These are all signs that the yeast is actively producing gas and the gluten network is developed enough to trap it effectively, indicating your basic sourdough recipe is progressing well through this critical stage.
The Float Test: A Simple Way to Check Fermentation
Note: The float test is more commonly used to check the readiness of your active starter before mixing. However, a similar principle can sometimes be applied cautiously to a small piece of dough to gauge fermentation progress, though volume increase and visual cues are generally more reliable for the bulk dough.
To perform a float test on dough during bulk fermentation (use this as a secondary check, not primary), gently pinch off a very small piece of dough, about the size of a pea. Drop this piece into a glass of water. If the dough is sufficiently fermented, the gases produced will make the small piece buoyant, causing it to float on the surface.
If it sinks, it likely needs more time. Remember, this is a less precise indicator for the entire bulk dough compared to monitoring the overall volume increase and feel, but it can offer an additional data point in your simple sourdough starter recipe guide journey.
Shaping Your Sourdough Loaf After Bulk Fermentation
Gently Removing the Dough from the Bulk Fermentation Container
Once bulk fermentation is complete, the next step in your simple sourdough starter recipe guide is to transfer the dough for shaping. This needs to be done gently to preserve the airy structure you've worked hard to build. Lightly flour your work surface. Using a dough scraper or a wet hand, carefully ease the dough out of its container onto the floured surface.
Avoid pulling or tearing the dough aggressively. Let gravity assist you. If the dough is sticking, use a bit more flour on your scraper or hand, but try not to incorporate excessive dry flour into the dough itself. The goal is to transition the dough mass from the container to the bench while minimizing deflation, keeping those precious air pockets intact for a beautiful crumb in your basic sourdough recipe.
Pre-Shaping for a Tighter Structure
Pre-shaping is a brief intermediate step after removing the dough from bulk fermentation, especially if you are making more than one loaf. Its purpose is to gently organize the dough and create some initial surface tension, making the final shaping much easier and more effective. For a single loaf, you might gently form the dough into a rough ball or rectangle, depending on your final desired shape (boule or batard).
After pre-shaping, allow the dough to rest on the bench for about 20 to 30 minutes, uncovered or lightly covered with a damp cloth or plastic wrap to prevent a skin from forming. This rest period, often called the "bench rest," allows the gluten to relax after being handled, making the dough pliable and ready for the final shaping step of your simple sourdough starter recipe guide.
Final Shaping: Creating Your Desired Loaf Shape
Final shaping is where you create the surface tension that will help your basic sourdough recipe loaf hold its shape during proofing and baking, contributing to good oven spring. For a boule (round loaf), you'll typically fold the edges of the dough towards the center and then use your hands to create tension by rotating the dough against the work surface, tucking the dough underneath itself to form a taut skin on top.
For a batard (oval loaf), the technique involves folding the dough into a rectangle, then rolling it up tightly from one end, sealing the seam, and gently elongating it while building tension. Once shaped, the dough is immediately placed seam-side up into a proofing basket (banneton) that has been well-floured (often with rice flour to prevent sticking). This basket supports the dough during its final proof.
Proofing Your Sourdough Loaf: Preparing for Baking
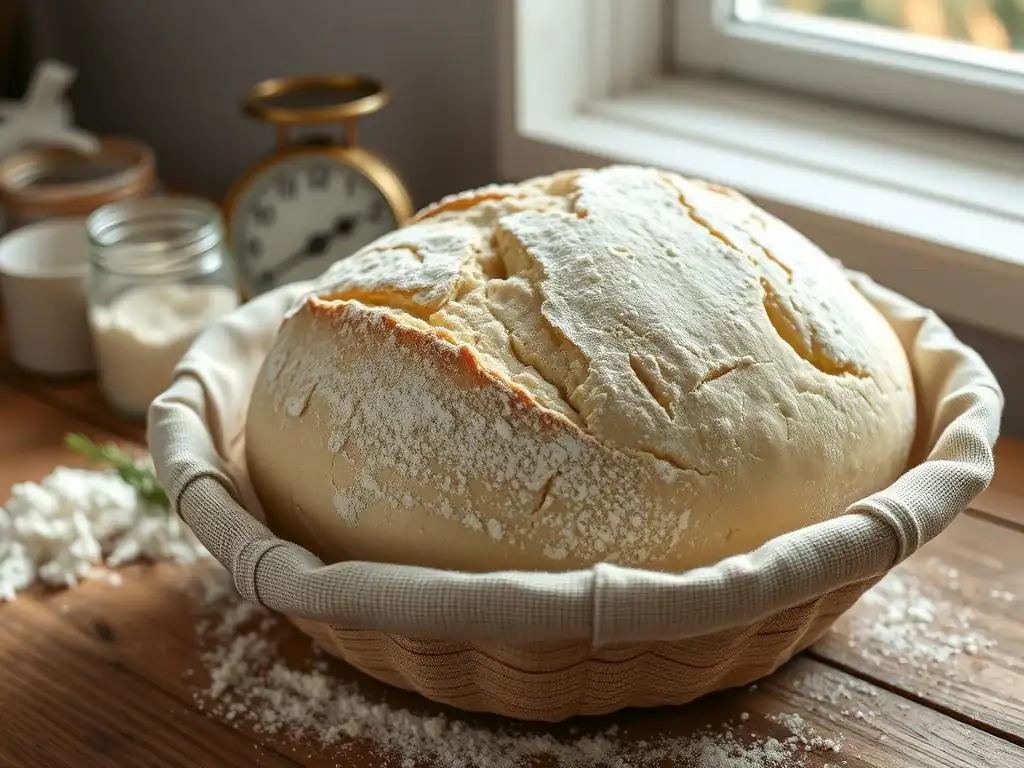
Cold Proofing vs. Room Temperature Proofing: Which is Best?
After shaping, your sourdough loaf enters the final proofing stage before baking. You have two primary options: cold proofing in the refrigerator or proofing at room temperature. Cold proofing, typically done at temperatures around 38-40°F (3-4°C) for 12 to 48 hours (or even longer), significantly slows down fermentation. This extended cold period allows for deeper flavor development as the bacteria continue their work, creates a firmer dough that's easier to score, and offers great flexibility in your baking schedule.
Room temperature proofing is much faster, usually taking 1 to 4 hours depending on the ambient temperature and how far you pushed the bulk fermentation. It's suitable if you need to bake the same day. However, it offers less flavor development compared to a long cold proof, and the dough can become over-proofed more quickly. For many bakers, cold proofing is a preferred step in their simple sourdough starter recipe guide for its benefits in flavor and handling.
Signs of Proper Proofing: Avoiding Over-Proofing
Knowing when your shaped loaf is perfectly proofed is essential to avoid the disappointment of an under or over-proofed bake. A common test is the "poke test": gently press your floured finger into the side of the loaf about half an inch deep. If the indentation springs back immediately, the dough is under-proofed and needs more time. If it springs back slowly, leaving a slight indentation, it's likely ready to bake. If the indentation stays completely or springs back very little, the dough is likely over-proofed.
Visually, a properly proofed loaf will look puffy and have increased slightly in volume since shaping, but it shouldn't have completely doubled or spread out excessively in the proofing basket. The surface should look smooth and perhaps a little bubbly. Over-proofed dough will often feel very fragile, spread out, and may even start to collapse slightly, making it difficult to score and resulting in poor oven spring. Getting this timing right is a key part of mastering your simple sourdough starter recipe guide.
Baking Your Sourdough Loaf: Achieving a Perfect Crust and Crumb
Preheating Your Oven: Essential for Oven Spring
Achieving a beautiful, well-risen loaf with a great crust in your basic sourdough recipe starts with a properly preheated oven. Sourdough requires a high initial temperature to achieve maximum "oven spring" – the rapid expansion of the dough during the first 10-15 minutes of baking. This is because the yeast gets a final burst of activity in the heat, and trapped gases expand rapidly.
Preheat your oven to a high temperature, typically between 450°F and 500°F (230°C-260°C), for at least 30-60 minutes. If you are using a Dutch oven or baking stone, it is crucial to preheat this vessel inside the oven as well. Placing the dough onto a super-hot surface provides the necessary thermal shock for that explosive initial rise, contributing significantly to the structure and appearance of your finished loaf.
Scoring Your Loaf: Controlling the Expansion
Scoring, or making cuts on the surface of your dough just before baking, serves both functional and aesthetic purposes in your simple sourdough starter recipe guide. Functionally, scoring allows the baker to control where the loaf expands during oven spring. Without scores, the crust will eventually break randomly as the dough expands, often resulting in less predictable shapes and blowouts.
Aesthetically, scoring allows you to create beautiful patterns on your loaf. Use a very sharp blade, such as a baker's lame or a razor blade, held at a shallow angle (around 20-30 degrees) to make clean cuts. The depth and pattern of your scores will influence the final shape and 'ear' (the flap of crust that lifts along a score). Experimenting with simple slashes or more intricate designs is a fun part of the sourdough process.
Baking with Dutch Oven vs. Baking Stone
Two popular methods for baking sourdough at home are using a Dutch oven or a baking stone (or steel). Baking in a preheated Dutch oven is highly recommended for beginners following a simple sourdough starter recipe guide because it effectively traps the steam released by the dough during the initial baking phase. This humid environment keeps the crust pliable, allowing the loaf to expand fully before the crust hardens, resulting in excellent oven spring and a blistered crust. You typically bake covered for the first 20-25 minutes, then uncovered to finish browning.
Baking on a preheated baking stone or steel also provides good heat transfer to the base of the loaf, promoting oven spring. However, this method requires you to generate steam manually in the oven, often by placing a tray of hot water or ice cubes on a rack below the stone. While effective, managing external steam can be trickier than the self-contained environment of a Dutch oven. Both methods, when done correctly, can yield fantastic results for your basic sourdough recipe.
Cooling Your Sourdough: Allowing the Flavors to Develop
Once your beautiful sourdough loaf is out of the oven, resist the urge to slice into it immediately! Cooling is a crucial, often overlooked, step in the simple sourdough starter recipe guide. As the loaf cools on a wire rack, moisture redistributes evenly throughout the crumb, and the internal structure sets properly. The complex flavors developed during the long fermentation periods also continue to mature and deepen during the cooling process.
Slicing into a hot loaf can result in a gummy, dense texture because the starches haven't fully set. Allow your loaf to cool completely, ideally for at least 1-2 hours (longer for larger loaves), before cutting. This patience is rewarded with the perfect crumb structure and the full depth of flavor you worked so hard to achieve in your basic sourdough recipe.
Troubleshooting Common Bulk Fermentation Issues
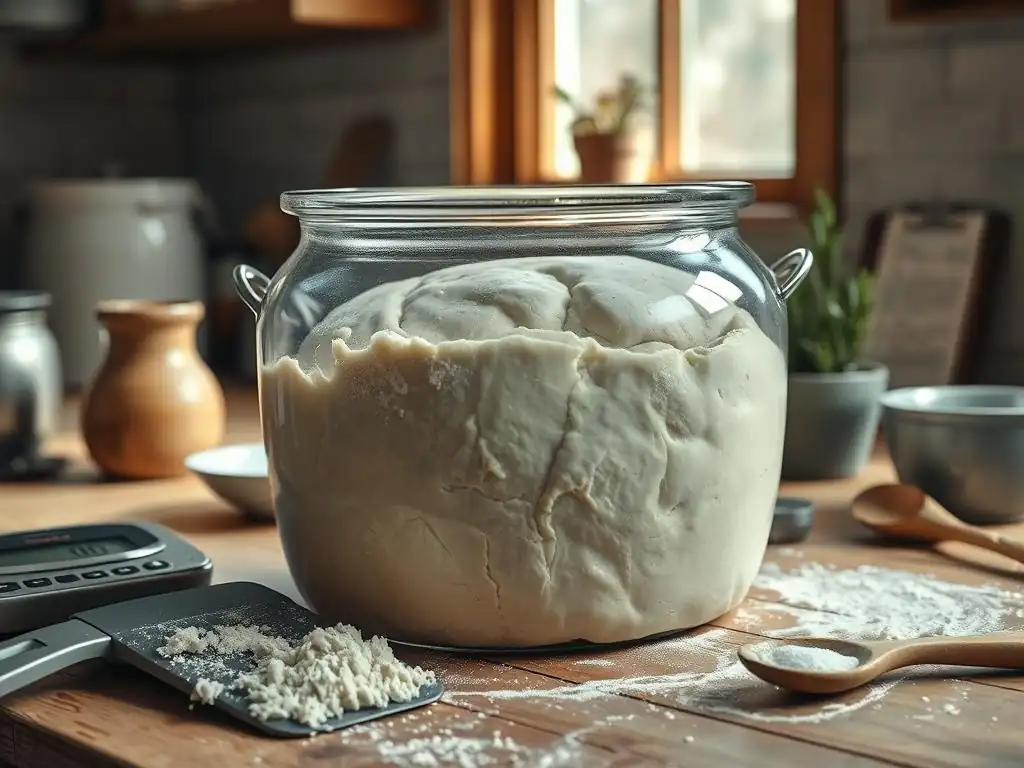
Dough Not Rising: Potential Causes and Solutions
One frustrating issue in a simple sourdough starter recipe guide is discovering your dough hasn't risen adequately during bulk fermentation. The most common culprit is an inactive or weak sourdough starter. Ensure your starter is vigorous and passes the float test before mixing. Another major factor is temperature; fermentation slows dramatically in cool environments. Try moving your dough to a warmer spot (75-80°F is ideal) or using a proofing box.
Insufficient time is also a possibility, especially if your kitchen is cool; be prepared for bulk fermentation to take 8-12 hours or more in colder conditions. Finally, check your recipe ratios – too much salt or not enough starter relative to the flour can inhibit fermentation. If your starter is active and temperature is controlled, simply giving the dough more time is often the solution.
Over-Proofed Dough: Rescuing Your Sourdough
Recognizing over-proofed dough during or after bulk fermentation is important. Signs include the dough looking very bubbly, spreading out excessively, feeling extremely fragile, or even starting to collapse. This happens when the yeast has consumed most of the available sugars before shaping, leaving little energy for oven spring. While you can't fully "fix" severely over-proofed dough, you can often salvage it.
If caught just slightly over-proofed, you might try shaping it very gently and baking immediately, accepting that oven spring might be limited. For significantly over-proofed dough that lacks tension, trying to shape a traditional loaf might fail. Instead, consider turning it into a flatbread like focaccia or using it for pizza dough. These forms don't rely as heavily on structure built during bulk fermentation and can still yield delicious results from your basic sourdough recipe ingredients.
Sticky Dough: Tips for Handling Difficult Dough
Sticky dough is a common challenge in a simple sourdough starter recipe guide, especially with higher hydration levels. While some stickiness is normal, excessively sticky dough can be frustrating. This often indicates high hydration, insufficient gluten development during mixing/folds, or temperature issues. Ensure you are using accurate measurements (weighing ingredients).
To handle sticky dough, use wet hands instead of floured ones when performing folds; water prevents sticking without adding dry flour into the dough matrix. A dough scraper is invaluable for manipulating and dividing sticky dough on the work surface, which should be lightly floured. Ensure you've performed enough sets of folds during bulk fermentation to build sufficient gluten strength. If the dough remains stubbornly difficult, slightly reducing the hydration in your next basic sourdough recipe attempt can make a big difference in handling.
Simple Sourdough Starter Recipe: Variations and Adaptations
Adding Flavors: Herbs, Seeds, and More
Once you're comfortable with the basic simple sourdough starter recipe guide, you can easily adapt it by incorporating various flavorings. Herbs like rosemary, thyme, or dried oregano can be added during the initial mixing phase. Seeds such as sesame, poppy, sunflower, or flax seeds add texture and nutty flavors; they can be mixed into the dough or used to coat the exterior before proofing.
Other popular additions include olives, sun-dried tomatoes, roasted garlic, or cheese. These are typically added towards the end of the mixing phase or gently folded in during the early stages of bulk fermentation to ensure even distribution without disrupting gluten development too much. Experimenting with these additions allows you to personalize your basic sourdough recipe and explore a world of delicious variations.
Adjusting Hydration Levels for Different Results
One of the most impactful ways to adapt a simple sourdough starter recipe guide is by adjusting the hydration level – the ratio of water to flour. Lower hydration doughs (e.g., 60-65% hydration) are significantly easier to handle, less sticky, and result in a denser, more uniform crumb. They are great for beginners building confidence.
Higher hydration doughs (e.g., 75-85% or even higher) are more challenging to work with due to their stickiness but can yield a more open, airy crumb with larger holes and a slightly crispier crust. They require more careful handling and potentially more coil folds during bulk fermentation to build structure. Understanding how hydration affects dough handling and the final loaf allows you to tailor your basic sourdough recipe to your skill level and desired outcome.
Conclusion: Mastering Simple Sourdough with Ease
Recap of the Bulk Fermentation Process
Mastering the simple sourdough starter recipe guide hinges significantly on understanding and executing the bulk fermentation process effectively. We've covered its critical role in developing flavor, structure, and rise. Key steps include starting with an active starter, accurately measuring ingredients, mixing the dough, potentially using an autolyse, and then the main event: the bulk fermentation period itself.
During bulk fermentation, you'll monitor temperature, perform a series of folds (like stretch and folds or coil folds) to build strength, and crucially, learn to read your dough to determine when it has increased sufficiently in volume (around 75-100%) and shows signs of readiness like surface bubbles. Getting this stage right sets you up for successful shaping, proofing, and ultimately, a beautiful bake from your basic sourdough recipe.
Further Resources for Sourdough Baking at BakeWithEase
Your journey with a simple sourdough starter recipe guide doesn't end here! BakeWithEase.com is packed with resources to help you continue learning and improving your sourdough skills. Explore our guides on maintaining a healthy sourdough starter, troubleshooting common issues beyond bulk fermentation, and delve into variations of the basic sourdough recipe, including different flours and shapes.
We offer detailed articles on shaping techniques, proofing strategies (like using a proofing box), and advanced baking methods. Whether you're looking to perfect your crumb, achieve a stunning 'ear', or experiment with rye or whole wheat sourdough, you'll find step-by-step instructions and friendly advice to support your baking adventures. Keep exploring and baking with ease!
Frequently Asked Questions
What is a sourdough starter, and why is it important for sourdough baking?
A sourdough starter is a living culture of wild yeast and bacteria used to leaven bread, instead of commercial yeast. It's important because it gives sourdough its characteristic tangy flavor and chewy texture.
How often should I feed my sourdough starter, especially when following a simple sourdough starter recipe guide?
For a healthy and active starter, feed it regularly – typically once or twice a day at room temperature. This provides the necessary nutrients for the yeast and bacteria to thrive.
What does "bulk fermentation" mean in the context of a basic sourdough recipe like the one BakeWithEase offers?
Bulk fermentation refers to the first rise of the entire dough mass after mixing. It's a crucial stage for developing flavor and structure in the bread.
How do I know when my sourdough dough has finished bulk fermenting, according to the BakeWithEase simple sourdough starter recipe guide?
Look for a significant increase in volume, typically 50-100%, and the presence of bubbles throughout the dough. A slightly acidic smell is also a good indicator.
What are common mistakes to avoid when following a simple sourdough starter recipe guide for bulk fermentation?
Over-fermenting leads to a weak gluten structure and a flat loaf. Under-fermenting results in a dense and gummy texture. Accurate timing and observation are key!
Final Reflection: The Humble Loaf, A Journey of Patience and Flavor
The enduring appeal of sourdough bread lies not just in its taste, but in the process itself; a testament to the power of simple ingredients transformed by time and care. In a world obsessed with instant gratification, the slow fermentation of sourdough offers a powerful counterpoint, a reminder of the rewards of patience and attention to detail. This simple recipe, focusing on bulk fermentation, aims to demystify this ancient process, making it accessible to even the most novice baker.
The journey of creating sourdough bread, from nurturing a starter to shaping the final loaf, is a deeply rewarding experience. It's a connection to a culinary history stretching back centuries, a tangible link to traditions passed down through generations. Bread is the staff of life,
a simple phrase, yet it encapsulates the profound significance of this staple food, and the satisfaction derived from making it from scratch. The process itself fosters mindfulness, requiring observation and adaptation, skills that extend far beyond the kitchen.
Now, consider your own journey. Will you embark on this adventure of creating your own sourdough starter? Perhaps the simplicity of this recipe will inspire you to embrace the slow rhythm of fermentation, to find joy in the subtle nuances of flavor, and to experience the profound satisfaction of crafting something beautiful and delicious with your own two hands. The world awaits the taste of your perfectly risen loaf.
Unleash Your Inner Baker: Master the Sourdough Art!
Thanks for taking the time to explore the magic of sourdough bulk fermentation! You've now got the knowledge to elevate your baking game. Ready to put your new skills to the test?
- Bake your first perfect sourdough loaf: Use the recipe and techniques from this article as your guide. Don't be afraid to experiment!
- Share your sourdough journey: Post a picture of your creation on social media and tag #BakeWithEaseSourdough – we'd love to see your results!
- Join our baking community: Head over to the BakeWithEase forum to connect with other passionate bakers and share tips.
What unique twist will you add to your next sourdough creation?