
The 5 Most Common Cake Problems and How to Master Them

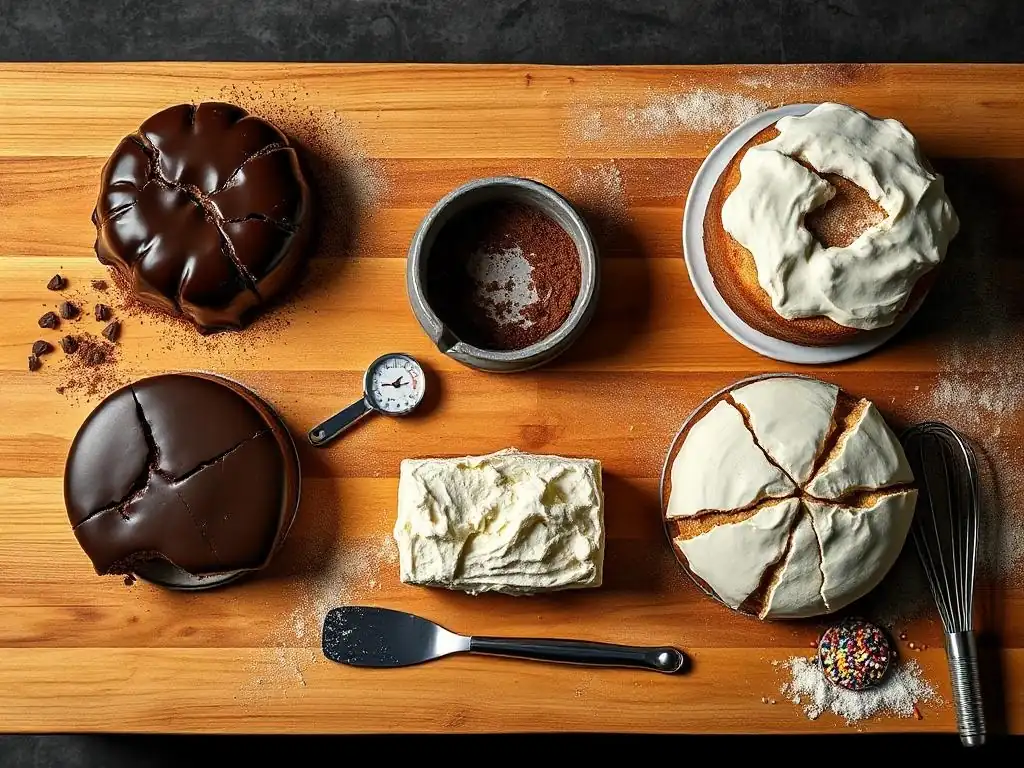
Welcome to BakeWithEase, your partner in creating delicious treats! Are you tired of cake fails and baking blunders? Unlock the secrets to perfect cakes with our guide to " Cake baking common problems solutions." Discover how to troubleshoot the 5 most common cake issues and bake your way to success! Ready to transform your baking from frustrating to fabulous? Let's get started!
- BakeWithEase: Troubleshooting Your Cake Baking Woes
- Problem #1: Dry Cake - Causes and Solutions for Moist Cakes
- Problem #2: Dense and Heavy Cake - Achieving a Light and Airy Texture
- Problem #3: Cake Sinking in the Middle - Preventing Collapsed Cakes
- Problem #4: Uneven Cake Layers - Achieving Perfectly Level Cakes
- Problem #5: Cracked Cake Top - Preventing Surface Cracks
- Mastering Cake Baking: Key Takeaways and Final Tips
- Frequently Asked Questions
- Final Reflection: Mastering the Sweet Science of Cake Baking
- Unlock Your Inner Cake Boss!
BakeWithEase: Troubleshooting Your Cake Baking Woes
Baking a cake should be a joyful experience, but sometimes, even with the best recipe, things don't go quite as planned. From dry textures to sinking centers, encountering common cake problems can be frustrating. But don't worry! Understanding the 'why' behind these issues is the first step to finding effective cake baking common problems solutions. At BakeWithEase, we're here to help you identify the culprits and provide simple, reliable methods to overcome these hurdles, turning your baking woes into baking triumphs.
Whether you're a beginner just starting your baking journey or looking to refine your skills, mastering these common cake issues is key to consistently delicious results. Let's dive into the top five challenges faced by home bakers and discover practical solutions to achieve that perfect bake every time.
Problem #1: Dry Cake - Causes and Solutions for Moist Cakes
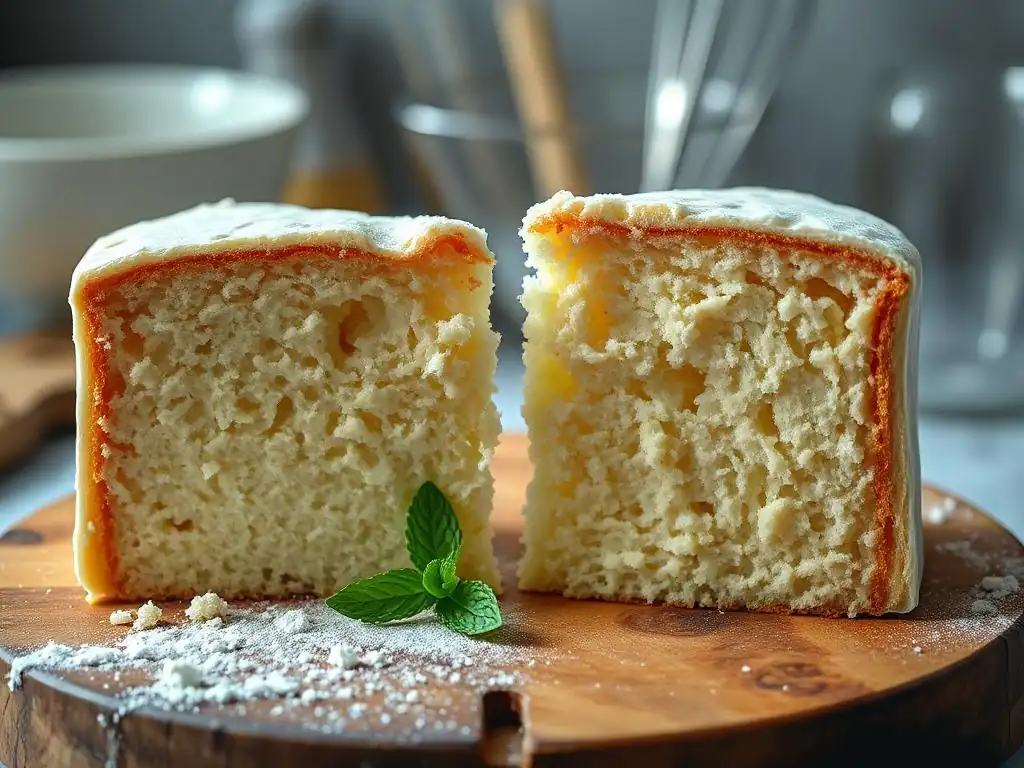
A dry cake is perhaps one of the most disappointing outcomes after spending time and effort in the kitchen. Instead of a tender, melt-in-your-mouth slice, you end up with something crumbly and lacking moisture. This common cake problem often stems from a few key areas in the baking process. Identifying these causes is crucial for finding the right cake baking common problems solutions.
Common culprits include inaccurate ingredient measurements, particularly dry ingredients like flour, and issues related to baking time and temperature. For instance, simply scooping flour directly from the bag with a measuring cup can add up to 25% more flour than intended by weight, as it compacts the flour. This excess flour absorbs moisture, leading to a dry crumb. Similarly, using too little fat or sugar, which contribute to moisture and tenderness, can also result in a dry cake.
Understanding the Culprits Behind Dry Cake
The primary reasons for a dry cake usually boil down to either too much dry ingredient, too little wet ingredient, or excessive baking time/temperature. When a recipe calls for 200 grams of flour, and you accidentally use 230 grams due to improper measuring, that extra 30 grams acts like a sponge, soaking up the precious moisture from eggs, milk, and butter. This imbalance fundamentally alters the intended structure and texture, making the cake dense and dry.
Furthermore, the quality and temperature of your ingredients play a role. Using cold eggs or butter straight from the fridge can affect emulsion, preventing the fat from properly coating the flour particles and inhibiting gluten development, which contributes to tenderness. Room temperature ingredients integrate more smoothly, creating a more homogenous batter that bakes evenly and retains moisture better. A difference of just 15-20°F in butter temperature can significantly impact creaming and the resulting cake texture.
Hydration Hacks: How to Add Moisture to Your Cake Batter
To combat dryness, focus on ensuring adequate moisture in your batter and protecting it during baking. One simple hack is to ensure all wet ingredients, including eggs, milk, yogurt, or sour cream, are at room temperature before mixing. This allows them to emulsify better with fats and integrate more fully into the batter, distributing moisture evenly. Using ingredients like buttermilk, yogurt, or sour cream instead of plain milk can also boost moisture and tenderness due to their fat and acid content.
Consider adding a small amount of liquid like milk, a simple syrup, or even a liqueur brushed onto the cake layers after baking and cooling slightly. This post-bake hydration can significantly improve texture. For example, a simple syrup made from equal parts sugar and water brought to a boil can be brushed onto a cake layer using a pastry brush. Even just 2-3 tablespoons per layer can make a noticeable difference in moisture without making the cake soggy.
Baking Time Adjustments: Preventing Over-Baking
Over-baking is one of the quickest ways to ruin a cake's texture, turning a potentially moist crumb into a dry disaster. Every extra minute in the oven after the cake is done allows more moisture to evaporate. Ovens can vary significantly; what takes 30 minutes in one oven might take 25 or 35 in another. Relying solely on the recipe's time is risky.
Instead, start checking for doneness a few minutes before the recipe's minimum suggested time. Use the toothpick test: insert a toothpick into the center of the cake. It should come out with a few moist crumbs attached, not completely clean. A clean toothpick often indicates the cake is already slightly overdone. Also, the cake should begin to pull away slightly from the edges of the pan, and the top should spring back gently when lightly pressed. Removing the cake promptly once it meets these criteria is essential for locking in moisture.
Problem #2: Dense and Heavy Cake - Achieving a Light and Airy Texture
Instead of a light, fluffy cloud, your cake turned out like a brick. A dense, heavy texture is another common cake problem that can leave bakers scratching their heads. This issue often relates to how leavening agents are handled, the development of gluten, and the balance of ingredients in the recipe. Finding effective cake baking common problems solutions for density involves understanding these fundamental baking principles.
Achieving a light and airy texture relies on creating and retaining air pockets within the batter. Leavening agents produce gas (usually carbon dioxide), which expands during baking, causing the cake to rise. However, if the batter structure isn't right or if too much gluten develops, these air pockets can be compromised, resulting in a heavy crumb.
The Science of Leavening Agents: Baking Powder and Baking Soda Explained
Leavening agents are the unsung heroes of airy cakes. Baking soda (sodium bicarbonate) is a single-acting leavener that reacts with acid (like buttermilk, yogurt, or brown sugar) and moisture to produce carbon dioxide immediately upon mixing. It requires an acidic ingredient to activate fully. Baking powder, on the other hand, is typically double-acting. It contains baking soda, an acid (like cream of tartar), and a starch filler. It produces gas in two stages: a small amount when mixed with liquid, and the majority when exposed to heat in the oven.
Using the correct type and amount of leavening for a recipe is critical. Too little won't provide enough lift, resulting in a dense cake. Too much can cause rapid rising followed by collapse, or leave a soapy, metallic taste. Ensure your leavening agents are fresh; baking powder typically lasts 6-12 months, while baking soda can last longer but loses potency over time. You can test baking powder freshness by adding a teaspoon to hot water – it should fizz vigorously. For baking soda, add a teaspoon to a tablespoon of vinegar – it should also fizz strongly.
Gluten Development: The Role of Mixing Techniques
Gluten is a protein network formed when flour (specifically, the proteins gliadin and glutenin) is mixed with liquid and agitated. While essential for the structure of bread, too much gluten development in a cake batter makes it tough and dense. Cake flour, for instance, is lower in protein (around 7-8%) compared to all-purpose flour (10-12%), which helps minimize gluten formation.
Mixing technique is paramount. The "creaming method" (beating butter and sugar together until light and fluffy) incorporates air early on and helps coat flour particles with fat, inhibiting excessive gluten development. When adding dry ingredients, mixing should be done gently and only until just combined. Overmixing the batter after flour is added develops gluten strands, similar to kneading dough, leading to a tough, dense cake. A general guideline is to stop mixing as soon as you no longer see streaks of dry flour.
Ingredient Ratios: Balancing Wet and Dry Ingredients for Optimal Texture
The balance between wet and dry ingredients, as well as the ratio of fat and sugar to flour, significantly impacts cake texture. Recipes are carefully formulated to ensure there's enough liquid to activate leaveners and hydrate starches, enough fat and sugar to tenderize the crumb, and enough flour and eggs to provide structure. Deviating from these ratios, even slightly, can lead to issues.
For example, a recipe might call for a specific ratio of sugar to flour (often close to 1:1 by weight in many butter cakes) or fat to flour (sometimes around 1:1 or slightly less). Sugar acts as a tenderizer by interfering with gluten development and retaining moisture. Fat shortens gluten strands and adds richness.
Too little sugar or fat relative to flour can result in a tougher, denser cake. Conversely, too much sugar or fat can weaken the structure, leading to other problems like sinking. Accurate measurement, preferably by weight for flour, sugar, and fat, is the best way to ensure these crucial ratios are correct.
Problem #3: Cake Sinking in the Middle - Preventing Collapsed Cakes
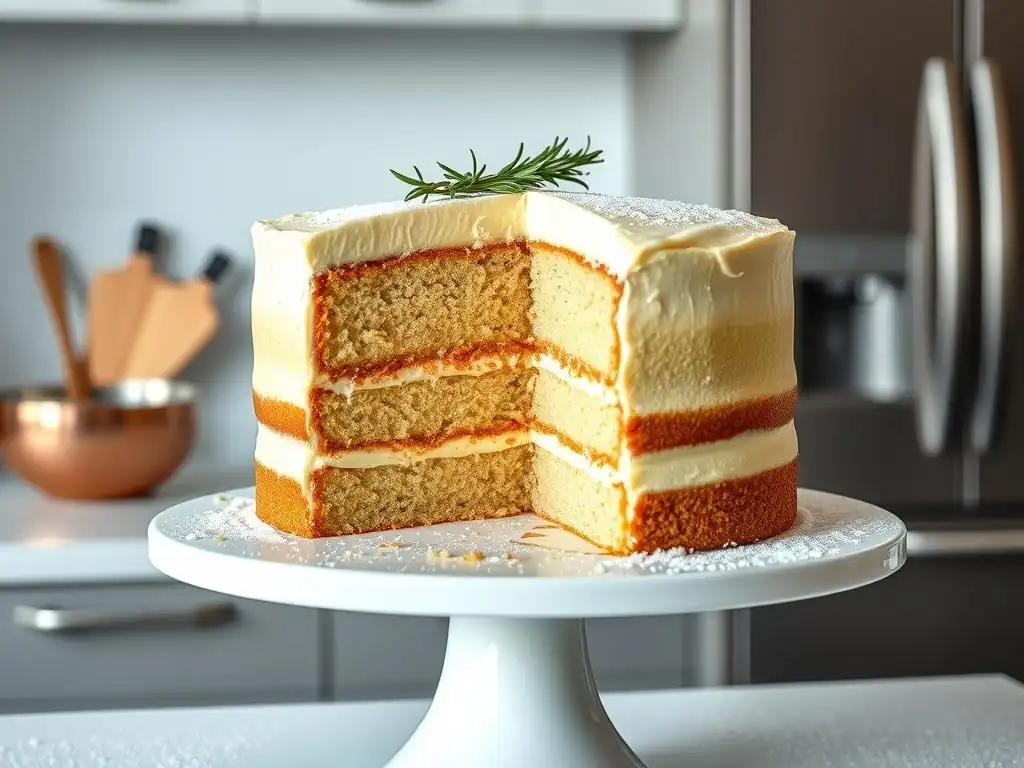
It's disheartening to see your beautiful cake rise perfectly in the oven only to sink dramatically in the center as it cools. A collapsed cake is a common issue that often points to problems with baking temperature, batter structure, or cooling methods. Understanding the causes of cake sinking is vital for implementing the right cake baking common problems solutions and achieving a level, stable finished product.
Sinking happens when the internal structure of the cake isn't strong enough to support itself after rising. This can be due to the cake not being fully baked through, rapid temperature changes, or issues with the batter itself. The center, being the last part to cook, is particularly vulnerable to collapse if conditions aren't ideal.
Oven Temperature and Stability: Maintaining Consistent Heat
An inaccurate or fluctuating oven temperature is a major culprit behind sinking cakes. If the oven is too hot, the outside of the cake sets too quickly, while the inside remains underbaked. As the cake cools, the underbaked center lacks structure and collapses. Conversely, an oven that isn't hot enough won't allow the cake to rise properly or set firmly. Relying on the oven's internal thermostat can be misleading; many home ovens are off by 25-50°F or more.
Using an independent oven thermometer is highly recommended to verify and maintain the correct temperature throughout the baking process. Preheat your oven for at least 15-20 minutes after it indicates it's reached temperature to ensure the heat is stable and the oven cavity is evenly heated. Avoid opening the oven door unnecessarily during baking, especially in the first two-thirds of the baking time. Each time the door is opened, the internal temperature can drop significantly, potentially causing the cake to fall.
Overmixing and Undermixing: Achieving the Right Batter Consistency
Both overmixing and undermixing can contribute to a cake sinking in the middle. As discussed earlier, overmixing develops too much gluten, creating a tough structure. It also incorporates excess air initially, which can cause the cake to rise too quickly and then collapse as the weak gluten structure can't support the rapid expansion. The batter might appear smooth but lacks the necessary internal support.
Undermixing, on the other hand, leaves pockets of unmixed ingredients, such as flour or leavening agents. This results in an inconsistent batter where some areas rise properly while others do not, leading to an uneven structure that is prone to sinking in the weaker spots, usually the center. Ensure ingredients are fully incorporated and the batter is smooth before pouring into the pan. For most cakes, this means mixing until just combined after adding dry ingredients, often just 30-60 seconds on low speed.
Structural Support: Pan Preparation and Cooling Techniques
Proper pan preparation and cooling are the final steps in ensuring your cake maintains its structure. Greasing and flouring the pan correctly allows the cake to release cleanly but also provides some support as it bakes and rises along the pan's sides. Using the correct size pan specified in the recipe is also crucial; a pan that is too large will result in a thin cake that might overbake quickly, while one that is too small can cause the batter to overflow or the center to sink because it takes too long to cook through.
Cooling the cake correctly is just as important as baking it properly. Leaving a cake in the hot pan for too long after removing it from the oven can continue to cook the edges while the center steams, potentially leading to a sunken middle. Conversely, removing it from the pan too soon can cause it to collapse because its structure hasn't set.
Most recipes recommend letting the cake cool in the pan on a wire rack for 10-15 minutes before inverting it onto the rack to cool completely. The wire rack allows air circulation, preventing moisture buildup that could weaken the structure.
Problem #4: Uneven Cake Layers - Achieving Perfectly Level Cakes
Achieving perfectly level cake layers is essential for professional-looking stacked cakes, but it's a common challenge for home bakers. Often, cakes dome in the center while the edges remain lower, requiring trimming that results in wasted cake and less height. Uneven layers are typically caused by inconsistencies in ingredient measurement, batter distribution, or uneven heat within the oven. Finding the right cake baking common problems solutions will help you bake flat, even layers every time.
While a slight dome is natural as the center is the last part to finish baking, an excessive dome or uneven rising across the pan indicates an issue that can be corrected. The goal is to promote even baking and rising throughout the batter for a consistently level surface.
Accurate Measuring: The Importance of Precise Ingredient Quantities
Accurate measurement is foundational to consistent baking results, especially when aiming for level layers. As mentioned before, scooping flour directly from the bag can add significant excess, leading to a denser center that may dome excessively as it tries to rise against the heavy batter. Using a kitchen scale to weigh ingredients, particularly flour, sugar, and fat, eliminates this variability. For example, a cup of all-purpose flour should weigh approximately 120-130 grams, depending on the source and humidity. Weighing ensures you use the exact amount the recipe developer intended.
For ingredients measured by volume, like liquids, use liquid measuring cups placed on a flat surface, reading at eye level. For dry ingredients measured by volume (if you don't have a scale), spoon the flour lightly into the measuring cup and level it off with a straight edge, rather than scooping. This reduces the chance of compacting the ingredient and using too much, which contributes to uneven baking and doming.
Even Batter Distribution: Tips for Leveling Your Cake Pans
How you fill and prepare your cake pans also impacts the final shape of the layer. Ensure you divide the batter evenly among the prepared pans. Using a kitchen scale to weigh the batter in each pan is the most precise method, ensuring each layer starts with the exact same amount of batter. This is particularly helpful when baking multiple layers of the same size.
Once the batter is in the pan, gently spread it towards the edges using an offset spatula or the back of a spoon, creating a slight dip in the center. This counteracts the natural tendency of the edges to set faster than the center. Giving the pan a few gentle taps on the counter can also help remove any large air bubbles and settle the batter evenly. Avoid tilting the pan excessively, as this can cause the batter to be thicker on one side than the other.
Oven Hotspots: Rotating Cakes for Uniform Baking
Uneven heat distribution within your oven, known as hotspots, can cause one side or area of the cake to bake faster than others, leading to uneven rising and doming. Most ovens have hotter and cooler spots; often, the back or sides are warmer than the front or center. Using an oven thermometer can help you identify these areas.
To mitigate the effect of hotspots, rotate your cake pans halfway through the baking time. For example, if your cake bakes for 30 minutes, rotate the pans 180 degrees after 15 minutes. This exposes all sides of the cake to different areas of the oven, promoting more uniform baking and minimizing uneven doming. If baking multiple layers on different racks, you might also consider switching their positions, though this requires opening the oven door, so do it quickly and decisively.
Problem #5: Cracked Cake Top - Preventing Surface Cracks
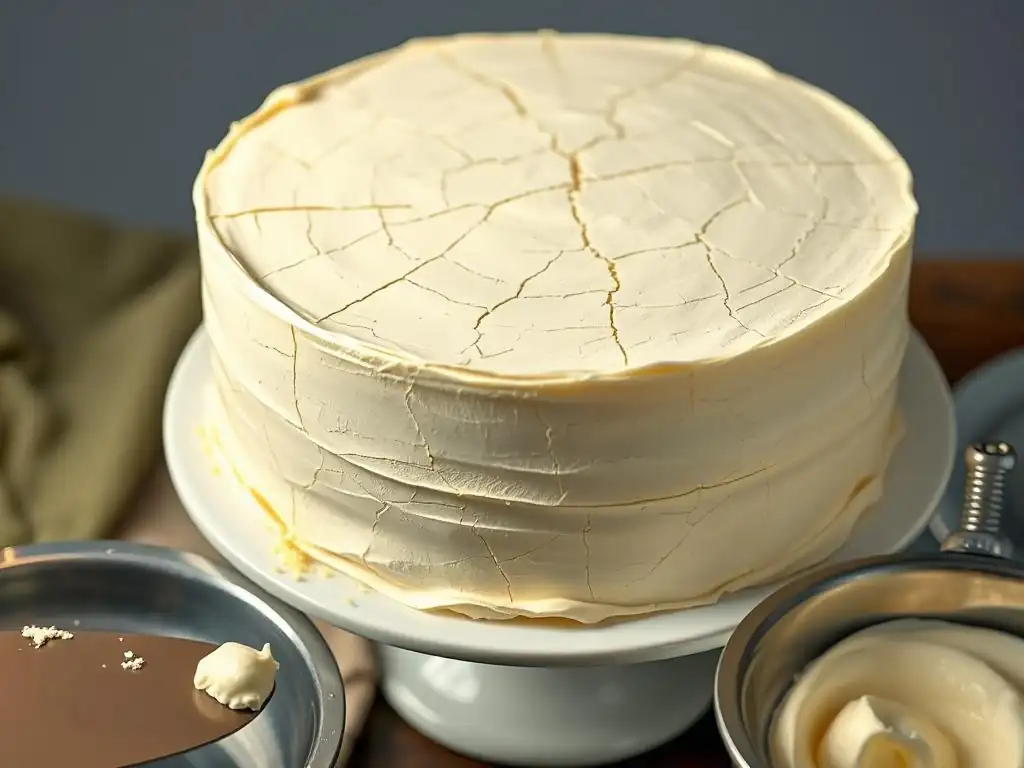
A large crack across the top of your cake, while sometimes charmingly rustic, is usually a sign that something went slightly awry during the baking process. This common cake problem is often linked to issues with oven temperature, batter consistency, or how the cake cools. Finding the right cake baking common problems solutions for cracked tops involves ensuring the cake rises evenly and the top doesn't set too quickly.
Cracking occurs when the top surface of the cake sets and forms a crust before the cake has finished rising. As the interior continues to expand due to the leavening action, the inflexible crust on top has no choice but to split open to accommodate the rising batter underneath.
The Role of Oven Temperature and Moisture
High oven temperatures are a frequent cause of cracked cake tops. If the oven is too hot, the top and edges of the cake bake and set rapidly, forming a crust. The interior continues to rise and expand, but the rigid crust cracks under the pressure. Ensuring your oven temperature is accurate, ideally verified with an oven thermometer, is the first step. Baking at the correct temperature allows the cake to rise more gradually, giving the top crust time to stretch and expand along with the rising batter.
Low moisture levels in the oven can also contribute to a dry, quickly setting crust. While difficult to control precisely in a home oven, some bakers place a pan of hot water on the bottom rack of the oven during baking. This creates a more humid environment, keeping the cake surface moist and pliable for longer, allowing it to stretch with the rising cake rather than crack. This technique is particularly useful for cakes baked for longer periods or at lower temperatures.
Proper Mixing Techniques to Avoid Overmixing
As discussed in relation to dense cakes, overmixing the batter can also lead to a cracked top. Overmixing develops gluten, which makes the batter more elastic but less able to stretch evenly as it rises. A batter with excessive gluten tends to rise unevenly and is more likely to crack under the tension.
Mix the batter only until the ingredients are just combined, especially after adding the flour. For most cake recipes using the creaming method, this means mixing on low speed for just 30-60 seconds until no dry streaks of flour remain. The batter should look smooth but not overworked. Gentle handling of the batter after mixing is also important; avoid excessive stirring or beating when transferring it to the pan.
Cooling Your Cake Correctly to Prevent Cracking
While most cracking happens during baking, rapid temperature changes during cooling can sometimes exacerbate or cause surface cracks. Taking a very hot cake directly from the oven and exposing it to a cold draft or placing it on a cold surface can cause the cake structure to contract too quickly, potentially leading to minor cracks or fissures on the surface.
Allow the cake to cool in its pan on a wire rack for the time specified in the recipe (usually 10-15 minutes). This allows the structure to stabilize gradually. Then, carefully invert the cake onto the wire rack to cool completely. The wire rack ensures air circulation around the entire cake, promoting even cooling and preventing moisture buildup on the bottom, which could weaken the structure. Avoid moving or handling the cake excessively while it is still warm and delicate.
Mastering Cake Baking: Key Takeaways and Final Tips
Troubleshooting common cake problems is a fundamental part of becoming a confident baker. While encountering issues like dry, dense, sunken, uneven, or cracked cakes can be frustrating, each problem offers a valuable learning opportunity. By understanding the underlying causes – often related to ingredient measurement, mixing techniques, oven temperature, and cooling methods – you gain the knowledge to implement effective cake baking common problems solutions.
Here are some key takeaways to help you master these common cake issues:
- Measure Accurately: Use a kitchen scale for dry ingredients whenever possible. If using volume, spoon and level flour gently.
- Room Temperature Ingredients: Ensure butter, eggs, and dairy are at room temperature for better emulsification and texture.
- Know Your Oven: Use an oven thermometer to verify accuracy and preheat thoroughly. Rotate cakes halfway through baking.
- Don't Overmix: Mix batter only until just combined, especially after adding flour, to avoid excess gluten development.
- Bake Until Just Done: Use the toothpick test and visual cues (cake pulling from edges) to avoid over-baking.
- Cool Properly: Allow cakes to cool in the pan for the recommended time before inverting onto a wire rack.
[ ] Always use an oven thermometer.
[ ] Weigh dry ingredients whenever possible.
[ ] Bring refrigerated ingredients to room temperature.
[ ] Mix batter gently and only until combined.
[ ] Use the toothpick test to check for doneness.
[ ] Cool cakes on a wire rack.
Mastering cake baking common problems solutions is a journey. Don't be discouraged by imperfections. Each bake provides feedback. Pay attention to what happened, refer back to potential causes, and adjust your technique next time. With practice and patience, you'll be baking beautiful, delicious cakes consistently. Happy baking!
Frequently Asked Questions
What causes a cake to sink in the middle?
A sunken cake is often due to uneven heat in the oven or opening the oven door prematurely. Also, check if your leavening agent (baking powder or soda) is expired.
Why is my cake dry?
Overbaking is a primary cause of dry cake. Too much flour or not enough fat (butter or oil) can also contribute to dryness.
My cake is too dense and doesn't rise properly. What did I do wrong?
This could be caused by overmixing the batter, which develops too much gluten. Also, ensure your ingredients are at the correct temperature (usually room temperature).
How can I prevent my cake from sticking to the pan?
Always grease and flour your cake pan thoroughly. Alternatively, use parchment paper to line the bottom of the pan for easy release.
What causes cracks on the top of my cake?
Cracks are often caused by the oven being too hot. It could also be due to too much flour in the batter, causing it to dry out quickly and crack.
Final Reflection: Mastering the Sweet Science of Cake Baking
The seemingly simple act of baking a cake is, in reality, a delicate dance between science and artistry. A perfectly risen, moist, and flavorful cake is a testament to careful attention to detail, and understanding the common pitfalls is the key to unlocking consistent success. This article has explored five frequent challenges – from collapsed cakes to dry crumb – and provided practical solutions to overcome them. These solutions are not just recipes for fixing mistakes, but rather a deeper understanding of the fundamental principles behind successful baking.
The journey of mastering cake baking is a deeply personal one. It's about more than just creating a delicious dessert; it's about the process of learning, experimenting, and ultimately, finding joy in the creation. The best things in life are homemade,
a sentiment that rings especially true when it comes to the satisfaction of a perfectly baked cake. This journey reflects a larger cultural shift towards valuing homemade goods and the connection to tradition and craftsmanship they represent. The pursuit of the perfect cake, therefore, is a microcosm of a wider appreciation for mindful creation and the satisfaction derived from mastering a skill.
Now, it's your turn. Consider the challenges you've faced in your own baking adventures. What lessons have you learned? What techniques have you perfected? Don't be afraid to experiment, to embrace the occasional failure, and to learn from each experience. The path to mastering the sweet science of cake baking is a rewarding one, filled with delicious discoveries and the immense satisfaction of creating something beautiful and delicious from scratch. So, grab your apron, gather your ingredients, and embark on your own baking journey – the perfect cake awaits!
Unlock Your Inner Cake Boss!
Thanks for taking the time to level up your baking game! We hope you now feel confident tackling those pesky cake challenges. Ready to put your new skills to the test?
- Bake your masterpiece! Choose your favorite recipe (or try a new one!) and put those troubleshooting tips into action. We bet your next cake will be perfect.
- Share your success (or ask for help!): Tag us on social media with your baking triumph or ask any lingering questions in the comments below—we're a supportive community!
- Explore our other baking guides: Dive deeper into the world of cake decorating, frosting techniques, or even explore a whole new type of baking!
Ready to create your dream cake? What's the first recipe you’ll be tackling?