
How Altitude Affects Your Cake (and How to Adjust)

Welcome to BakeWithEase, your haven for baking brilliance! Ever wondered why your cake stubbornly refuses to rise at high altitude? Unlocking the secrets of baking at altitude is easier than you think. Discover how elevation changes everything and, more importantly, how to adjust your favorite recipes for perfect results, every time. Dive in and banish flat cakes forever!
- Understanding How Altitude Affects Your Cake Baking
- How to Bake at Altitude: Key Adjustments for Perfect Cakes
- Troubleshooting Common High Altitude Cake Issues
-
Practical Step-by-Step Guide on How to Bake at Altitude
- Step 1: Assess Your Altitude and Understand Its Impact
- Step 2: Choose Cake Recipes Suitable for High Altitude Baking
- Step 3: Make Precise Ingredient and Temperature Adjustments
- Step 4: Monitor Baking Progress and Make Real-Time Corrections
- Step 5: Test and Refine Your High Altitude Baking Techniques
- Expert Tips and Hacks for Successful Cake Baking at High Altitude
- Summary: Mastering How to Bake at Altitude for Flawless Cakes Every Time.
- Frequently Asked Questions
- Final Reflection: Scaling the Heights of Baking Success
- Unlock Your High-Altitude Baking Secrets!
Understanding How Altitude Affects Your Cake Baking
Why Altitude Matters for Baking Cakes
Baking is often described as a science, and nowhere is that more apparent than when you attempt to bake at higher elevations. The atmospheric pressure changes significantly as you gain altitude, and this fundamental shift directly impacts how ingredients behave in your cake batter. At sea level, the air pressure is relatively high, providing resistance that helps cakes rise steadily and maintain their structure. However, as you ascend, the air pressure drops.
For instance, at just 3,000 feet (about 900 meters) above sea level, the atmospheric pressure is noticeably lower, and this effect becomes even more pronounced at 5,000 feet (approx. 1,500 meters) or higher. This reduced pressure means that leavening gases (from baking soda, baking powder, or yeast) face less resistance, causing cakes to rise much faster than they would at lower elevations. Understanding this initial principle is crucial when learning how to bake at altitude successfully.
Beyond the pressure change, the boiling point of water also decreases at higher altitudes. At sea level, water boils at 212°F (100°C). However, at 5,000 feet, water boils at around 202°F (94.4°C), and at 10,000 feet (approx. 3,000 meters), it boils at roughly 193°F (89.4°C).
This lower boiling point affects the moisture in your cake batter. Water and other liquids evaporate more quickly during baking. This rapid evaporation, combined with the faster rise, can lead to a cake structure that sets too quickly on the outside while the inside is still developing, often resulting in dry textures, cracks, or even collapse. Recognizing these environmental factors is the first step in mastering high altitude baking and troubleshooting common cake issues.
The Science Behind Baking at High Altitudes
The scientific principles at play when baking at high altitudes revolve around the behavior of gases and liquids under reduced atmospheric pressure. Leavening agents, such as baking powder and baking soda, produce carbon dioxide gas. At lower pressure, these gases expand more readily and rapidly within the cake batter. This accelerated expansion causes the cake to rise faster and higher than anticipated.
If the cake's structure hasn't had time to set properly before this rapid expansion occurs, it can't support the increased volume, leading to problems like sunken centers or coarse, crumbly textures. Imagine inflating a balloon with less resistance – it expands much faster. This is similar to what happens with air bubbles in your cake batter at altitude.
Furthermore, the reduced boiling point of water and other liquids means that moisture evaporates more quickly from the batter. This rapid moisture loss can dry out the cake prematurely, affecting its texture and tenderness. Fats and sugars also behave differently; sugar becomes more concentrated as water evaporates, potentially affecting tenderness and browning.
Eggs can also lose moisture faster. Because the lower boiling point means the internal temperature of the cake during baking is slightly lower (as it's tied to the boiling point of water), proteins might not set as firmly, and starches might not gelatinize as completely as they would at sea level. This combination of rapid rise, quick moisture loss, and altered setting temperatures necessitates specific adjustments when learning how to bake at altitude effectively.
Common Cake Problems Caused by High Altitude
Baking at high altitudes without adjusting a standard sea-level recipe often leads to predictable, frustrating outcomes. One of the most frequent issues is a cake that rises dramatically during the initial baking phase but then collapses in the center, leaving a dense, heavy layer. This happens because the leavening gases expand too quickly under low pressure, stretching the underdeveloped structure of the cake beyond its capacity before it has a chance to set. The weakened structure cannot support the rapid expansion, and gravity takes over, causing the center to sink as the gases escape.
Another prevalent problem is a cake that turns out dry, crumbly, or tough. This is primarily due to the increased rate of liquid evaporation at lower boiling points. The moisture escapes the cake faster than it would at sea level, resulting in a finished product that lacks tenderness and can feel dry in the mouth.
Additionally, rapid crust formation can occur due to the faster evaporation from the surface, sometimes leading to cracked tops as the interior continues to expand beneath a rigid crust. Other issues include cakes that dome excessively and then crack, or cakes with a very coarse, open crumb structure instead of a fine, even one. Recognizing these common pitfalls is the first step in applying the necessary adjustments when tackling how to bake at altitude successfully.
How to Bake at Altitude: Key Adjustments for Perfect Cakes
Adjusting Oven Temperature for High Altitude Baking
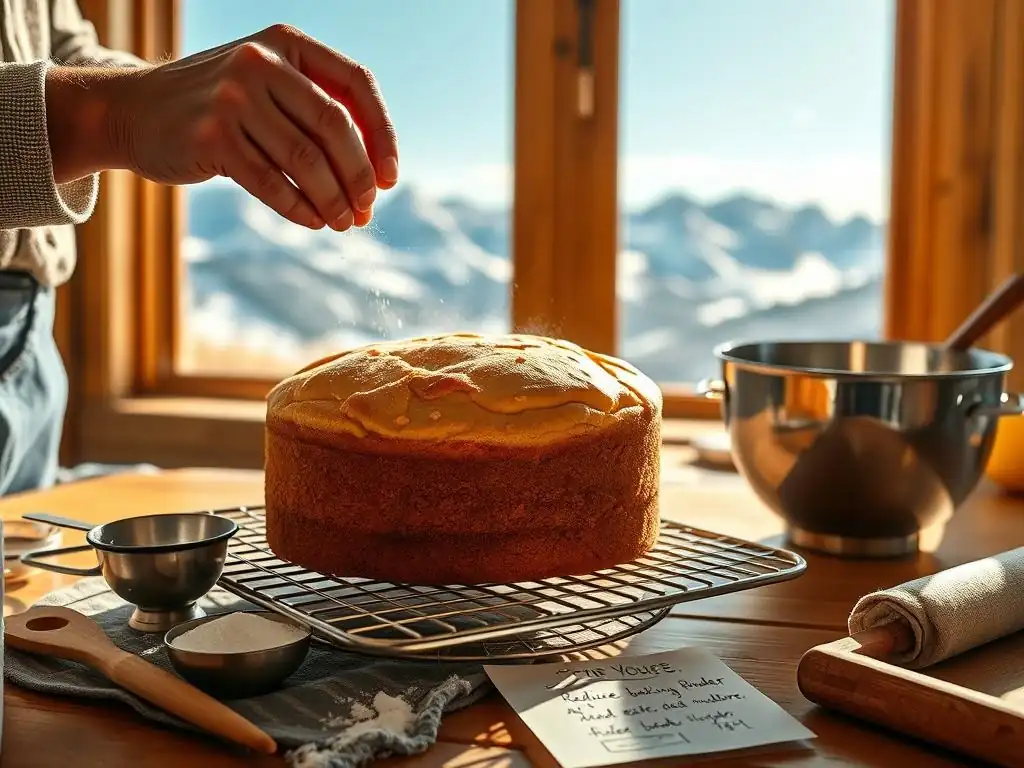
One of the primary adjustments when learning how to bake at altitude is modifying the oven temperature. Because liquids evaporate faster and leavening gases expand more quickly at higher elevations, baking at a slightly higher temperature for a shorter period is often recommended. Increasing the oven temperature by about 15-25°F (approximately 8-14°C) helps the cake structure set more rapidly.
This faster setting provides more support for the rapidly expanding gases, reducing the likelihood of collapse and promoting a more stable rise. For example, if a recipe calls for baking at 350°F (175°C) at sea level, you might try 365°F or 375°F (around 185-190°C) when baking at 5,000 feet or higher.
The increased temperature also helps to set the crust and internal structure before the moisture loss becomes excessive, contributing to a better overall texture. While you increase the temperature, you will typically decrease the baking time (which we'll discuss later). This strategy aims to get the cake baked through and set quickly enough to counteract the effects of lower pressure and faster evaporation.
It's important to monitor the cake closely when using a higher temperature, as it can brown faster. Using an oven thermometer is also highly recommended to ensure your oven is accurately reaching and maintaining the adjusted temperature, which is a critical step in mastering how to bake at altitude.
Modifying Ingredient Quantities: Flour, Sugar, and Leavening Agents
Adjusting the proportions of key ingredients is fundamental to successful high altitude baking. Flour provides structure to the cake. At higher altitudes, with reduced pressure and faster rise, the standard amount of flour may not be sufficient to support the expanded volume. Adding a small amount of extra flour helps to strengthen the cake's structure.
A general guideline is to add 1 to 2 tablespoons of all-purpose flour per cup of flour called for in the original recipe, especially at altitudes above 3,000 feet. For instance, if a recipe uses 2 cups of flour, you might add an extra 2-4 tablespoons. This added structure helps the cake maintain its shape and prevent collapse.
Leavening agents (baking powder and baking soda) are responsible for the cake's rise. Since gases expand more readily at altitude, the standard amount of leavening will often cause the cake to rise too quickly, leading to a coarse texture or collapse. Reducing the amount of baking powder or baking soda is crucial.
A common starting point is to decrease baking powder by 1/8 to 1/4 teaspoon per teaspoon called for in the recipe. For baking soda, the reduction might be slightly less drastic, perhaps 1/8 teaspoon per teaspoon. Experimentation is key, but reducing the leavening helps to control the rise, allowing the structure more time to set.
Sugar can also contribute to tenderness but can weaken the structure and compete with other ingredients for moisture. Reducing sugar by 1 to 3 tablespoons per cup is often necessary to strengthen the structure and prevent excessive browning, which happens faster at higher temperatures and with concentrated sugar. These careful modifications are vital steps in learning how to bake at altitude effectively.
Altering Liquid Content to Combat Dryness and Crumbling
Combating the increased rate of moisture evaporation is a major challenge when baking at high altitudes. To prevent dry and crumbly cakes, it's often necessary to increase the liquid content in the recipe. This could involve adding a small amount of milk, water, buttermilk, or another liquid specified in the original recipe.
The amount to add varies depending on the altitude and the specific recipe, but a common starting point is to add 1 to 2 tablespoons of liquid per cup of liquid called for in the recipe, or per cup of flour. For example, if a recipe uses 1 cup of milk, you might add an extra 2-4 tablespoons. This extra moisture helps to compensate for the faster evaporation rate, ensuring the cake remains tender and moist.
Increasing the number of eggs can also help. Eggs contribute moisture and structure, and an extra egg (especially an egg yolk for richness and moisture) can sometimes improve high-altitude cake texture. Using ingredients like sour cream, yogurt, or buttermilk, which contain fats and acids that retain moisture, can also be beneficial.
While increasing liquid helps combat dryness, it's a delicate balance; too much liquid can result in a heavy, dense cake. It's often best to make gradual adjustments and test the results. Mastering how to bake at altitude involves finding the right balance of liquid to create a moist yet structurally sound cake.
Tips for Adjusting Baking Time When Baking at Altitude
Because you've likely increased the oven temperature when baking at high altitudes, the cake will generally bake faster than it would at sea level. Therefore, it's essential to reduce the baking time specified in the original recipe. While there's no single formula, a good starting point is to check for doneness several minutes before the original recipe's minimum baking time. For instance, if a recipe says bake for 30-35 minutes, start checking at 25 minutes.
Keep a close eye on the cake through the oven door (avoid opening it too early, which can cause collapse). Look for visual cues: the cake should be pulling slightly away from the sides of the pan, the top should be golden brown, and a toothpick inserted into the center should come out clean or with only a few moist crumbs attached. Since high altitude baking can sometimes lead to rapid crust formation, the visual appearance might be deceiving.
Relying on the toothpick test is particularly important. By reducing the baking time and monitoring carefully, you prevent the cake from drying out or becoming overbaked, which are common issues when learning how to bake at altitude without adjusting the time.
Troubleshooting Common High Altitude Cake Issues
How to Fix Cakes That Collapse or Sink at High Altitudes
A sunken cake center is a classic sign of insufficient structural support against the rapid expansion of leavening gases at high altitude. To fix this, you need to strengthen the cake's framework and control the rise. The primary adjustments involve adding a small amount of extra flour (as discussed earlier, typically 1-2 tablespoons per cup) and reducing the amount of leavening agent (reducing baking powder by 1/8 to 1/4 teaspoon per teaspoon).
The extra flour reinforces the cell walls, making them better able to withstand the pressure from the expanding gases. Reducing the leavening slows down the rate of gas production, allowing the structure more time to set before the maximum rise is achieved.
Additionally, ensuring your oven temperature is accurate and potentially slightly higher than sea level recommendations (15-25°F increase) helps the structure set faster. Avoid opening the oven door during the first two-thirds of the baking time, as the sudden temperature change and draft can cause a partially set cake to collapse. Using cake pans with straight sides rather than sloped ones can also provide better support. Implementing these adjustments systematically when learning how to bake at altitude should help prevent those frustrating sunken centers.
Preventing Dry and Crumbly Cakes at Elevated Heights
Dryness and crumbliness in high-altitude cakes stem from the accelerated evaporation of moisture. The key to preventing this is to increase the liquid content in the batter. As mentioned before, adding 1 to 2 tablespoons of liquid (milk, water, etc.) per cup of flour or liquid in the recipe is a common strategy. This extra moisture compensates for what is lost during the faster evaporation process.
Another effective technique is to slightly increase the fat content. Fat coats flour particles, inhibiting gluten development and contributing to tenderness and moisture retention. This could involve adding an extra tablespoon or two of butter or oil, or substituting some of the liquid with a richer ingredient like sour cream or yogurt.
Reducing the amount of sugar slightly (1-3 tablespoons per cup) also helps, as excessive sugar can compete for moisture. Finally, baking the cake at a slightly higher temperature for a shorter time (as discussed) helps set the structure quickly before excessive moisture loss occurs. Paying attention to these details is crucial when troubleshooting how to bake at altitude for a moist crumb.
Solutions for Cakes That Rise Too Quickly or Crack
Cakes that rise too quickly often indicate that the leavening agents are working too efficiently under the lower atmospheric pressure. This rapid rise can lead to a coarse, open crumb structure or cause the cake to dome excessively and crack as the outer crust sets before the interior is finished expanding. The primary solution is to reduce the amount of baking powder and/or baking soda used in the recipe (reducing baking powder by 1/8 to 1/4 teaspoon per teaspoon is a standard adjustment). This slows down the rate of gas production, resulting in a more controlled and even rise.
Adding a small amount of extra flour (1-2 tablespoons per cup) helps strengthen the batter's structure, allowing it to better contain the expanding gases and resist cracking. Baking at a slightly higher temperature (15-25°F increase) helps the crust set faster, which can sometimes exacerbate cracking if the rise is still too rapid. However, combined with reduced leavening and increased flour, the higher temperature helps the internal structure set more quickly, ideally in tandem with the controlled rise.
Using cake strips around the pan (soaked fabric strips that insulate the sides) can also help the cake bake more evenly from the edges to the center, promoting a level top and reducing doming and cracking. These combined strategies are essential for achieving a smooth, even rise when learning how to bake at altitude.
Practical Step-by-Step Guide on How to Bake at Altitude
Step 1: Assess Your Altitude and Understand Its Impact
Before you even gather your ingredients, determine your elevation. Most common high-altitude adjustments are necessary above 3,000 feet (approx. 900 meters), with more significant changes needed as you approach 5,000 feet (approx. 1,500 meters) and beyond. You can find your altitude using online tools or smartphone apps. Knowing your specific elevation gives you a starting point for the degree of adjustments required. Baking at 7,000 feet (approx. 2,100 meters) will require more significant modifications than baking at 4,000 feet (approx. 1,200 meters).
- Check your local altitude using a reliable source.
- Understand that effects become more pronounced at higher elevations.
- Mentally prepare for the need to modify standard recipes.
Understanding the why behind the adjustments (lower pressure, faster evaporation) makes it easier to troubleshoot as you go. This initial assessment is the foundational step in learning how to bake at altitude successfully.
Step 2: Choose Cake Recipes Suitable for High Altitude Baking
While you can adapt almost any recipe, some types of cakes are more forgiving at high altitudes than others. Cakes with a denser crumb, like pound cakes or loaf cakes, often fare better with fewer adjustments than light, airy cakes like sponge or chiffon cakes, which rely heavily on precise leavening and structure. Recipes specifically developed for high altitudes are the easiest starting point. Look for cookbooks or websites that offer high-altitude variations.
- Consider starting with denser cake types.
- Look for recipes explicitly designed for high altitude baking.
- Be prepared to experiment and modify standard recipes.
If you're adapting a favorite sea-level recipe, be prepared to make systematic changes. Don't try to change everything at once on your first attempt; start with the most common adjustments (leavening, flour, liquid) and fine-tune from there. Selecting the right starting recipe can greatly simplify the process of learning how to bake at altitude.
Step 3: Make Precise Ingredient and Temperature Adjustments
Based on your altitude and the type of cake, carefully make the necessary modifications to the recipe ingredients and oven temperature before you start mixing.
- Reduce leavening: Decrease baking powder/soda by 1/8 to 1/4 teaspoon per teaspoon called for.
- Increase flour: Add 1 to 2 tablespoons of flour per cup of flour in the recipe.
- Increase liquid: Add 1 to 2 tablespoons of liquid per cup of liquid or flour in the recipe.
- Reduce sugar (optional but recommended): Decrease sugar by 1 to 3 tablespoons per cup.
- Increase oven temperature: Raise the temperature by 15-25°F (8-14°C).
Measure these adjustments precisely. Use level measurements for dry ingredients. It's helpful to write down the original recipe and your planned adjustments side-by-side. Accuracy in this step is paramount for successful how to bake at altitude outcomes.
Step 4: Monitor Baking Progress and Make Real-Time Corrections
Once the cake is in the oven at the adjusted temperature, monitor its progress closely. Remember that the baking time will likely be shorter. Start checking for doneness several minutes before the original recipe's minimum time.
- Avoid opening the oven door during the initial rise (first 15-20 minutes for most cakes).
- Observe the cake's rise – is it rising too fast? Is the top browning quickly?
- Use a toothpick or cake tester to check for doneness in the center. It should come out clean or with moist crumbs.
- Look for the cake pulling away from the sides of the pan.
Be prepared to take the cake out sooner than expected. Overbaking is a common cause of dryness at altitude. Developing a keen eye for the signs of doneness is a skill you'll hone as you practice how to bake at altitude.
Step 5: Test and Refine Your High Altitude Baking Techniques
Baking at altitude requires experimentation. Your first attempt with adjustments might not be perfect. Treat each bake as a learning opportunity. Keep notes on the original recipe, your adjustments, the baking time, and the outcome (texture, rise, moisture).
- Evaluate the finished cake: Was it dry? Did it collapse? Was the crumb too coarse?
- Based on the outcome, decide which adjustments need further tweaking for the next bake.
- If the cake was dry, add slightly more liquid next time. If it collapsed, add a bit more flour or reduce leavening further.
- Try baking the same recipe multiple times, making small, incremental changes each time.
Over time, you will develop a feel for how specific recipes need to be adjusted at your particular elevation. This iterative process of testing and refining is key to mastering how to bake at altitude and consistently producing delicious cakes.
Expert Tips and Hacks for Successful Cake Baking at High Altitude
Using Humidity and Oven Calibration to Improve Cake Texture
The ambient humidity in a high-altitude environment can fluctuate, and this affects how quickly moisture evaporates from your batter. In very dry conditions, you might need to increase liquids slightly more than usual. Conversely, on a humid day, you might need slightly less.
While you can't control the weather, being mindful of humidity is part of the nuanced approach to high altitude baking. Some bakers even place a pan of water on the bottom rack of the oven (below the cake) to increase the humidity during baking, which can help keep the cake moist and prevent a hard crust from forming too quickly.
Ensuring your oven is accurately calibrated is perhaps one of the most important, yet often overlooked, steps for successful baking at any altitude, but especially at high elevations where precise temperature control is critical. A miscalibrated oven can easily lead to over- or under-baking, exacerbating high-altitude issues like dryness or collapse. Use an independent oven thermometer to check your oven's actual temperature.
If it's off by more than 15-20°F (8-11°C), you'll need to adjust your target temperature accordingly (e.g., if your oven runs 20°F cool, and you want to bake at 375°F, set the oven to 395°F). Accurate temperature is fundamental to applying high altitude baking adjustments effectively.
Substituting Ingredients for Better High Altitude Performance
Sometimes, simply adjusting quantities isn't enough, and substituting certain ingredients can yield better results when learning how to bake at altitude. For instance, using cake flour instead of all-purpose flour can sometimes help. Cake flour has a lower protein content, which can lead to a more tender cake, potentially counteracting the toughening effect of increased flour or rapid moisture loss. However, you still need to add the extra tablespoons of flour for structure, even with cake flour.
Using different types of fats can also influence texture and moisture. Substituting some butter with oil can lead to a moister cake, as oil is 100% fat while butter is about 80% fat and 20% water/milk solids. Adding ingredients known for moisture retention, like a tablespoon or two of corn syrup or honey (reducing sugar slightly to compensate), can also be beneficial. Some recipes specifically for high altitude might call for slightly more egg, particularly egg yolks, for added richness and moisture. Experimenting with these ingredient substitutions can be a valuable hack in your high altitude baking repertoire.
How to Use Pressure and Pan Size to Your Advantage When Baking
While you can't change the atmospheric pressure outside your kitchen, you can influence the pressure within your batter and the heat distribution, which indirectly helps counteract high-altitude effects. Using slightly smaller pans than a sea-level recipe might call for can result in a thicker cake. A thicker cake takes longer to bake through, allowing the structure more time to set against the rapid rise before it's fully expanded, potentially preventing collapse. For example, if a recipe calls for two 9-inch pans, you might try two 8-inch pans or even three 8-inch pans for a thinner layer that bakes faster.
Adjusting the mixing method can also help. Overmixing can develop too much gluten, leading to a tough cake, which is already a risk with added flour. Mix just until ingredients are combined. Some high-altitude bakers also slightly increase the amount of liquid relative to fat compared to sea-level recipes, as the liquid helps distribute heat and facilitates the setting of the internal structure. Understanding how seemingly small factors like pan size and mixing technique influence the bake can provide subtle advantages when mastering how to bake at altitude.
Summary: Mastering How to Bake at Altitude for Flawless Cakes Every Time.
Baking delicious cakes at high altitude presents unique challenges due to lower atmospheric pressure, faster leavening gas expansion, and increased moisture evaporation. However, by understanding the science and applying systematic adjustments, you can consistently achieve excellent results. The key is to modify standard sea-level recipes to compensate for these environmental factors.
Successful high altitude baking involves a multi-pronged approach:
- Reducing leavening agents to control the rise.
- Increasing flour slightly to strengthen the cake's structure.
- Adding extra liquid to counteract moisture loss and prevent dryness.
- Potentially reducing sugar to aid structure and prevent excessive browning.
- Increasing the oven temperature slightly while reducing baking time to set the structure faster.
Key High Altitude Adjustments Summary (Approximate Guidelines for ~5,000 ft / 1,500 m):
- Leavening (Baking Powder/Soda): Reduce by 1/8 - 1/4 tsp per tsp.
- Flour: Add 1 - 2 tbsp per cup.
- Liquid: Add 1 - 2 tbsp per cup of liquid or flour.
- Sugar: Reduce by 1 - 3 tbsp per cup (optional but recommended).
- Oven Temp: Increase by 15°F - 25°F (8°C - 14°C).
- Baking Time: Reduce, check for doneness earlier.
Beyond these primary adjustments, factors like oven calibration, humidity, ingredient substitutions (like cake flour or oil), and even pan size play a role. Mastering how to bake at altitude is an iterative process of testing, observing, and refining your techniques. Don't be discouraged by initial failures. Keep notes, make small changes, and learn from each bake. With practice and patience, you'll be able to confidently bake moist, perfectly risen cakes no matter how high you are.
Frequently Asked Questions
How does high altitude affect cake baking?
At higher altitudes, there is less air pressure. This causes liquids to evaporate more quickly and leavening agents to rise faster, potentially resulting in a collapsed cake.
What are the key adjustments I need to make to my cake recipe at altitude?
Common adjustments involve reducing the amount of baking powder or baking soda, increasing the amount of liquid, and slightly increasing the oven temperature to help set the cake structure faster.
Why does my cake rise too quickly and then fall at high altitude?
This happens because the reduced air pressure causes leavening agents to react more rapidly. The air bubbles form and expand quickly, then burst before the cake structure has set, leading to a sunken center.
What happens if I don't adjust my cake recipe for altitude?
Without adjustments, your cake is likely to be dry, have a coarse texture, and potentially collapse in the middle. It might also have a bitter taste due to unreacted baking soda.
Are all cake recipes equally affected by altitude?
No, some recipes are more forgiving than others. Recipes with a higher fat content or a more stable structure are generally less affected. However, it's always wise to make small adjustments when baking at altitude to ensure optimal results.
Final Reflection: Scaling the Heights of Baking Success
Baking at altitude presents a unique challenge, but mastering its nuances unlocks a world of delicious possibilities. The seemingly simple act of baking a cake transforms into a delicate dance with atmospheric pressure when you're above sea level. Understanding the science behind how altitude affects ingredients – from the rising power of leavening agents to the evaporation rate of liquids – is crucial to achieving consistent, delightful results, no matter where your kitchen sits.
The impact of altitude on baking extends beyond just the technical aspects; it's a testament to the adaptability and resilience required in culinary pursuits. It's a reminder that even the most familiar recipes require adjustments to thrive in different environments. This journey of adapting recipes to higher elevations mirrors our own lives, where flexibility and problem-solving are key to navigating unexpected challenges. The only way to do great work is to love what you do.
- Steve Jobs. This quote resonates deeply because the passion for baking, even when faced with altitude's hurdles, fuels the determination to perfect the craft.
Now, armed with the knowledge gleaned from this article, I invite you to embrace the challenge. Don't let altitude limit your baking aspirations; instead, see it as an opportunity to deepen your understanding of the baking process and to hone your skills. Experiment with the adjustments outlined, adapt them to your specific altitude and recipe, and most importantly, enjoy the journey of creating delicious cakes, regardless of elevation. The perfect cake at altitude awaits – go bake it!
Unlock Your High-Altitude Baking Secrets!
Thanks for joining us on this journey to perfect high-altitude baking! You now have the tools to conquer those tricky altitude adjustments and create cakes that are light, fluffy, and utterly delicious, no matter where you bake. Ready to take your baking to new heights?
- Master the art of high-altitude baking: Try out the recipe adjustments we discussed and see the amazing difference it makes. Experiment with different recipes to perfect your technique!
- Share your baking triumphs (and challenges!): We'd love to see your high-altitude creations! Post a picture on social media and use #BakeWithEaseHighAltitude.
- Dive deeper into altitude baking techniques: Explore our other articles on high-altitude baking for more tips and tricks— we have a wealth of knowledge waiting for you!
What's the most exciting high-altitude recipe you're going to tackle next? Let us know in the comments!