
Your First High Altitude Bake: What to Expect & How to Adjust

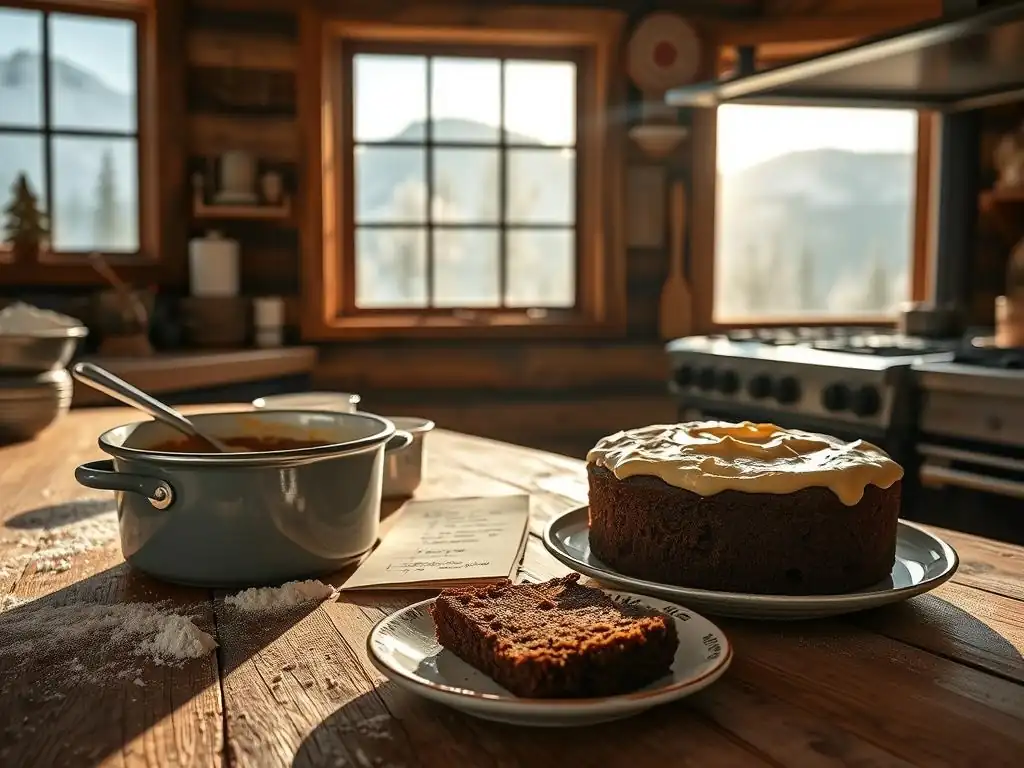
Welcome to BakeWithEase, your trusted guide to baking bliss! Ever wondered why your cakes fall flat at higher altitudes? Discover the secrets to conquering the challenges of high altitude baking in our latest article. Prepare to transform your recipes and bake with confidence, no matter how high you are! Intrigued? Let's unlock the mysteries together...
- High Altitude Baking: Mastering the Art
- Understanding High Altitude Baking
- Common Challenges & Solutions
- Essential Adjustments
- Recipe-Specific Adjustments
- Troubleshooting Common Issues
- Recipe Adaptations
- Tips for Success
- Mastering the Art
-
Frequently Asked Questions
- What is high altitude baking and why does it require adjustments?
- What are some common problems encountered when baking at high altitude?
- What are the main adjustments I should make to my recipes at high altitude?
- Where can I find reliable high altitude baking recipes or adjustment guides?
- How do I know if my high altitude baking adjustments were successful?
- Final Reflection: Scaling the Peaks of Baking Success
- Unlock Your High-Altitude Baking Secrets!
High Altitude Baking: Mastering the Art
Understanding High Altitude Baking
The Science Behind Altitude's Impact
Baking at higher elevations presents unique challenges compared to baking at sea level. The primary factors at play are lower atmospheric pressure and reduced humidity. As you ascend, the air pressure decreases. This lower pressure has a direct effect on leavening agents like baking powder, baking soda, and yeast. Gasses expand more readily at lower pressure. This means that batters and doughs rise faster and higher initially than they would at sea level. However, this rapid expansion can also cause the structure of your baked goods to overstretch and eventually collapse.
Furthermore, water boils at a lower temperature at higher altitudes. At sea level (0 feet), water boils at 212°F (100°C). At 5,000 feet, it boils at approximately 203°F (95°C), and at 10,000 feet, it boils around 194°F (90°C). This lower boiling point affects how moisture behaves during baking.
Liquids evaporate faster, and starches and proteins set at different rates because the internal temperature of your baked good won't reach the same peak as it would at sea level before moisture boils away. This often leads to dry, crumbly textures and can impact the overall structure and doneness of your bake. Understanding these scientific principles is the first step in making effective high altitude baking adjustments.
Key Differences: Sea Level vs. High Altitude
The most noticeable differences when comparing baking at sea level versus high altitude are often seen in rise, texture, and moisture. At sea level, a standard cake recipe typically rises evenly and sets with a moist, tender crumb. The leavening works efficiently but not excessively, and moisture retention is generally good. The structure develops robustly as the ingredients heat and set gradually.
In contrast, the same recipe baked at high altitude (generally considered above 3,000 feet) will likely exhibit a much faster initial rise, potentially leading to a peaked or even collapsed top. The increased evaporation means the final product is often drier and denser or, paradoxically, might have a gummy texture due to starches not setting correctly before moisture is lost. Cookies might spread excessively, and bread might rise too quickly and then fall. These distinct outcomes necessitate specific high altitude baking adjustments to achieve results comparable to those baked at lower elevations.
Common Challenges & Solutions
Addressing Dryness
Baking at high altitude often results in dry, crumbly baked goods due to increased evaporation caused by the lower boiling point of water. Moisture escapes from your batter or dough much faster during the baking process. This rapid moisture loss prevents starches and proteins from hydrating and setting properly, leaving you with a product that lacks the desired tenderness and structure.
To combat this, the primary solution involves increasing the liquid content in your recipe. This might mean adding an extra tablespoon or two of milk, water, or buttermilk per cup of flour, depending on the recipe and your specific altitude. Another strategy is to slightly decrease the baking temperature and potentially increase the baking time. A lower temperature slows down the setting process, allowing the interior more time to cook and the structure to stabilize before moisture is completely lost. These high altitude baking adjustments are crucial for maintaining a moist and tender texture.
Preventing Moisture Loss
Preventing moisture loss in high altitude baking goes beyond just adding more liquid. It also involves considering ingredients that help retain moisture. Using ingredients like brown sugar, honey, or molasses, which are more hygroscopic (attract and retain moisture) than granulated sugar, can be beneficial. Substituting some of the granulated sugar (with appropriate adjustments for sweetness and liquid) can help keep baked goods moist.
Additionally, techniques like covering the baked good loosely with foil partway through baking can help trap steam and slow down surface evaporation, particularly useful for cakes and quick breads. Ensuring your ingredients are at room temperature (unless the recipe specifies otherwise) can also contribute to better emulsification and structure, indirectly helping with moisture retention. Implementing these strategies alongside liquid adjustments forms a comprehensive approach to preventing dryness when making high altitude baking adjustments.
Preventing Collapse
The lower atmospheric pressure at high altitude causes leavening gasses to expand more rapidly and to a greater extent. This vigorous expansion can stretch the weak structure of the batter or dough beyond its capacity before it has had time to set, leading to a collapse or sunken center during or after baking. This is a common issue, especially with cakes and muffins.
To prevent this, you typically need to reduce the amount of leavening agents (baking powder, baking soda) in your recipe. A general guideline is to reduce baking powder by 1/8 to 1/4 teaspoon for every teaspoon called for at sea level, starting at altitudes around 3,000 feet and increasing the reduction for higher elevations.
For recipes using baking soda, a similar reduction might be necessary, often combined with ensuring there is enough acidic ingredient (like buttermilk or vinegar) to react with the soda. These adjustments help control the rate and extent of the rise, allowing the structure to set more gradually and robustly.
Strengthening Structure
Beyond reducing leavening, strengthening the overall structure of your baked goods is key to preventing collapse at high altitude. This often involves slightly increasing the amount of flour or adding an extra egg. Flour provides the gluten structure that holds the expanding gasses. Adding an extra tablespoon or two of flour per cup can provide more structural support. However, be cautious not to add too much, as this can lead to a dry, tough product.
Eggs contribute both protein (for structure) and fat (for tenderness) and also help with leavening and moisture. Adding an extra egg yolk can add richness and tenderness, while adding a whole extra egg can provide significant structural reinforcement. Some recipes also benefit from using a flour with a slightly higher protein content. These high altitude baking adjustments work together to create a more stable matrix that can withstand the increased pressure and rapid rise experienced at higher elevations.
Achieving Correct Consistency
The rapid evaporation and altered setting times at high altitude can make achieving the correct consistency in batters and doughs tricky. A batter that looks perfect at sea level might be too thin or too thick at altitude, impacting the final texture and rise. For instance, if you simply add more liquid without considering other factors, you might end up with a batter that's too loose, leading to excessive spread in cookies or a weak cake structure.
Adjusting liquid ratios is paramount, but it needs to be done in conjunction with other ingredient adjustments. The goal is to achieve a batter or dough consistency that feels right for the specific recipe, often slightly thicker than its sea-level counterpart to account for the faster evaporation and provide better support for leavening. This might involve adding flour, reducing liquid, or adding liquid depending on the initial observations and the type of bake. Mastering these high altitude baking adjustments requires careful observation and willingness to experiment.
Adjusting Liquid Ratios
As mentioned, increasing liquid is a common high altitude adjustment to combat dryness. However, the amount of increase is critical and varies by recipe and altitude. For quick breads and muffins at 5,000 feet, you might add 1-2 tablespoons of liquid per cup of flour. At 7,000 feet, this might increase to 2-4 tablespoons. For yeast breads, the hydration percentage might need to be slightly higher.
Conversely, in some cases, especially with cookies or certain pastries, you might need to slightly reduce the liquid (like milk or butter) to prevent excessive spread caused by the faster melting of fats and lower sugar-setting temperature. It's not just about adding liquid; it's about finding the right balance for the specific recipe and altitude. Starting with small adjustments and refining them based on results is the most effective way to make these crucial high altitude baking adjustments.
Identifying Altitude Issues
Recognizing the signs that altitude is impacting your baking is the first step toward making effective high altitude baking adjustments. Don't expect your first high-altitude bake to be perfect if you haven't made any changes to a sea-level recipe. Common indicators include cakes that dome excessively and then fall in the center, resulting in a sunken or heavy layer; muffins with large tunnels or peaked tops that overflow the pan; cookies that spread into thin, flat discs; and breads that have a tough crust or dense crumb despite appearing to rise well initially.
Other signs include baked goods that are excessively dry and crumbly, have a gummy or undercooked layer near the bottom, or brown too quickly on the outside while remaining underdone in the center. If you see these symptoms consistently when using sea-level recipes, altitude is almost certainly the culprit. Paying close attention to these visual and textural cues will guide you in determining which high altitude baking adjustments are necessary for future attempts.
Recognizing Problem Signs
Let's break down specific problem signs:
- Cakes: Sunken centers, peaked tops, dry texture, large air bubbles (tunnels), gummy layer at the bottom.
- Muffins/Quick Breads: Over-doming, cracking, tunnels, dry texture, gummy layer.
- Cookies: Excessive spreading, thinness, dry or crumbly edges, pale centers.
- Breads (Yeast): Dough rising too fast, dense crumb, tough crust, collapsing after baking, poor oven spring.
- Pies: Soggy bottom crusts, fillings bubbling over excessively.
If you notice these consistent issues, it's a clear signal that your standard recipes require high altitude baking adjustments. For example, if your chocolate chip cookies are spreading into puddles, you likely need to add a little more flour, reduce sugar slightly, or bake at a higher temperature for a shorter time. If your cake sinks, you need to reduce leavening and potentially strengthen the structure with flour or egg. Learning to read these signs is key to successful high altitude baking.
Essential Adjustments
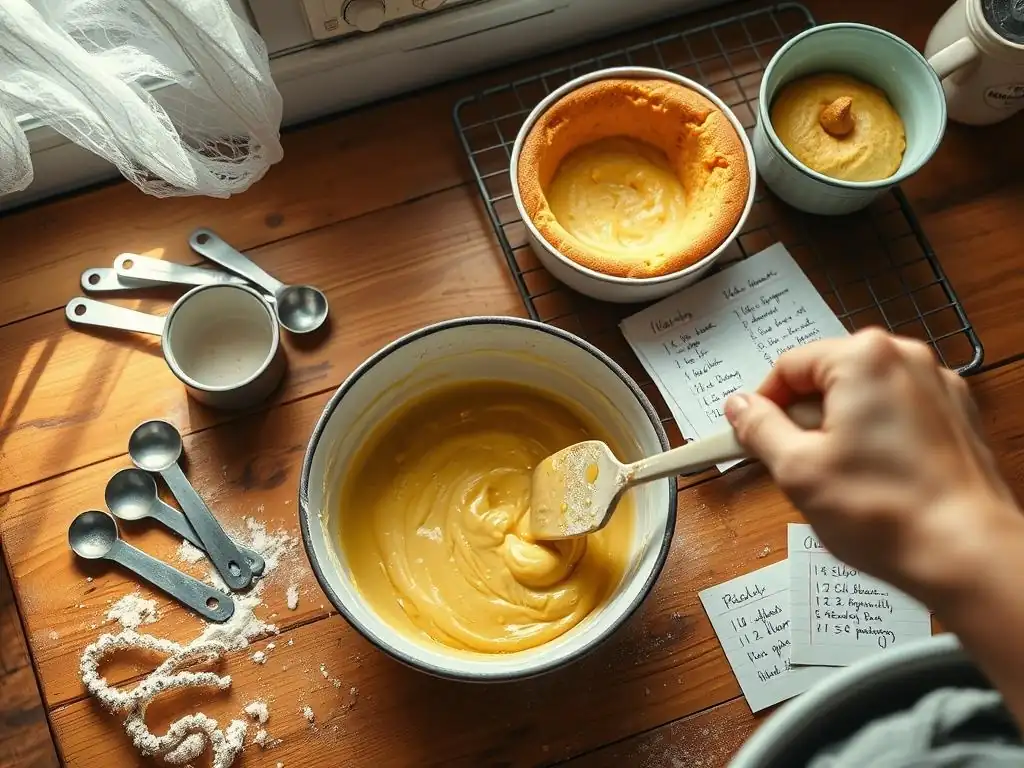
Reducing Sugar
Sugar plays several roles in baking: it sweetens, tenderizes, aids in browning, and helps retain moisture. At high altitude, the lower boiling point means sugar melts and caramelizes at a lower temperature, which can contribute to excessive spreading (especially in cookies) and darker crusts before the interior is fully cooked. Also, with faster evaporation, the concentration of sugar relative to liquid increases, which can also affect texture.
Reducing the amount of sugar is a crucial high altitude baking adjustment, particularly above 5,000 feet. This helps prevent excessive spread, reduces the risk of gummy textures, and lessens the chance of over-browning. The reduction amount varies by recipe and altitude, but a common starting point is to reduce granulated sugar by 1 to 3 tablespoons per cup called for in the sea-level recipe. For very high altitudes (above 7,000 feet), even larger reductions might be necessary. This adjustment needs to be balanced, as too little sugar can result in a dry, tough product and loss of flavor.
The Role of Sugar at Altitude
At lower pressures, sugar's tenderizing effect can become too pronounced, weakening the structure of baked goods. Its tendency to melt faster contributes to the rapid spread seen in cookies and can make cakes too delicate. The lower boiling point also means that as water evaporates quickly, the remaining liquid becomes more concentrated with sugar, potentially leading to a syrupy or gummy texture before the structure has fully set.
Consider a simple sugar cookie recipe. At sea level, the sugar melts gradually as the cookie bakes, contributing to spread and tenderness. At high altitude, the sugar melts faster and spreads more before the flour proteins and egg have time to set the structure, resulting in a very thin cookie. By reducing the sugar, you slow down this process, giving the structure time to firm up before maximum spread occurs. This highlights why sugar reduction is a fundamental high altitude baking adjustment.
Calculating Sugar Reduction
Calculating the exact sugar reduction requires some trial and error, as it depends on the specific recipe and your altitude. However, here are some general guidelines as a starting point for your high altitude baking adjustments:
- 3,000 - 5,000 feet: Consider reducing granulated sugar by 0-1 tablespoon per cup.
- 5,000 - 7,000 feet: Reduce granulated sugar by 1-3 tablespoons per cup.
- Above 7,000 feet: Reduce granulated sugar by 2-4 tablespoons per cup, or up to 1/4 of the total amount in some recipes.
For recipes high in sugar (like many cookie or bar recipes), the reduction might be closer to the higher end of the range. For less sweet items like some breads or muffins, the reduction might be minimal or unnecessary. Always start with the smaller suggested reduction and adjust in subsequent bakes based on your results. Documenting your changes is key to finding the perfect balance for your location and recipe.
Increasing Liquids
As previously discussed, increased evaporation at high altitude necessitates adding more liquid to prevent dryness and ensure proper texture. Water, milk, buttermilk, or other liquids called for in the recipe can be increased. The goal is to compensate for the faster loss of moisture during baking, allowing the starches to gelatinize and the proteins to coagulate correctly, resulting in a tender and moist final product.
Without sufficient liquid, the structure sets too quickly and becomes rigid and dry. The starches don't fully hydrate, leading to a crumbly texture. Adding liquid helps delay this setting process slightly and ensures there is enough moisture present throughout the bake. This is one of the most common and effective high altitude baking adjustments you can make, directly counteracting the effects of reduced humidity and faster evaporation.
Balancing Moisture
Balancing moisture at high altitude involves not just adding liquid, but also considering the overall hydration of the batter or dough. Too much liquid can make the structure too weak, leading to collapse or a gummy texture. Too little results in dryness. The type of liquid also matters; milk adds fat and protein, while water is pure hydration.
For instance, in a cake recipe, adding milk or buttermilk might be preferable to water as it contributes to richness and aids in browning. In a lean bread dough, increasing water is the standard approach. Pay attention to the batter or dough consistency as you mix; it should resemble the texture you'd expect at sea level, or perhaps be slightly thicker to account for rapid evaporation. This fine-tuning is part of mastering high altitude baking adjustments.
Liquid Adjustment Guidelines
Here are some general guidelines for increasing liquids in your high altitude baking adjustments:
- 3,000 - 5,000 feet: Add 1-2 tablespoons of liquid per cup of flour.
- 5,000 - 7,000 feet: Add 2-4 tablespoons of liquid per cup of flour.
- Above 7,000 feet: Add 3-5 tablespoons of liquid per cup of flour, or sometimes more in very rich or high-sugar recipes.
For recipes where precise hydration is critical, like yeast breads, you might think in terms of percentages. A standard loaf might use 60-65% hydration at sea level; at high altitude, you might increase this to 65-70% or slightly higher, depending on the flour and environment. Always incorporate the extra liquid gradually and observe the batter or dough's consistency. It's easier to add more liquid than to correct a too-wet mixture.
Strengthening Gluten
Gluten provides the structural framework in many baked goods, trapping the gasses produced by leavening agents. At high altitude, the rapid expansion of these gasses puts extra stress on the gluten structure. If the structure isn't strong enough, it can break down, leading to collapse or a coarse crumb. Strengthening the gluten helps the batter or dough withstand this increased internal pressure.
One way to strengthen gluten is by adding a small amount of extra flour. This increases the gluten-forming proteins available. Another method is to ensure adequate mixing or kneading time to properly develop the gluten network. For some recipes, particularly yeast breads, using a flour with a slightly higher protein content (like bread flour instead of all-purpose) can provide a stronger structure. These high altitude baking adjustments are vital for preventing structural failures.
Adding Flour Strategically
Adding flour to strengthen the structure must be done carefully to avoid making the baked good dry or tough. The goal is to add just enough to provide extra support without significantly altering the texture. A common guideline is to add 1-2 tablespoons of flour per cup called for in the sea-level recipe, especially for cakes, muffins, and quick breads. This extra flour absorbs some of the added liquid and contributes more protein for structure.
For recipes where gluten development is key, like yeast breads, you might add slightly more flour during kneading if the dough feels too slack after incorporating the initial ingredients and any extra liquid. The dough should feel elastic and smooth, passing the windowpane test if applicable. Strategic flour addition is a delicate high altitude baking adjustment that improves stability.
Utilizing High-Gluten Flour
For yeast breads and some richer doughs, substituting a portion of the all-purpose flour with bread flour, which has a higher protein content (typically 12-14% compared to 10-12% in all-purpose), can significantly strengthen the gluten network. This stronger structure is better equipped to handle the vigorous rise at high altitude, preventing the dough from collapsing during proofing or baking and resulting in a loaf with better volume and crumb structure.
Even in recipes like cookies or muffins where gluten development is usually minimized, adding a tablespoon or two of bread flour alongside the all-purpose flour can sometimes provide just enough extra structure to prevent excessive spread or collapse without making the product tough. Experimentation is key when incorporating high-gluten flour as part of your high altitude baking adjustments.
Adjusting Oven Temperature
Baking at a slightly higher temperature for a slightly shorter time is a common high altitude baking adjustment, particularly for cakes and quick breads. While it might seem counterintuitive given the lower boiling point and risk of dryness, increasing the oven temperature by 15-25°F (8-15°C) helps to set the structure of the baked good more quickly. This faster setting provides support for the rapidly expanding gasses before they can cause the structure to overstretch and collapse.
Think of it as a race: the structure needs to set before the leavening causes too much expansion. A slightly hotter oven helps the proteins and starches coagulate faster. However, this also increases the risk of over-browning on the outside before the inside is fully cooked. Careful monitoring and potentially covering the bake with foil are necessary when using this adjustment.
Preventing Over-Browning
Increasing oven temperature for high altitude baking adjustments can lead to the crust browning too quickly while the interior is still underdone. To prevent this, you can loosely tent the baked good with aluminum foil once the surface has reached the desired color, usually about halfway or two-thirds of the way through the baking time. The foil reflects heat away from the surface, allowing the interior to continue cooking without the crust becoming excessively dark or even burnt.
Another strategy is to place the oven rack lower in the oven. This positions the top of the baked good further from the upper heating element, which is often the primary source of radiant heat causing surface browning. Combining a slight temperature increase with foil tenting and proper rack placement helps achieve an evenly cooked product with a perfectly browned crust at high altitude.
Monitoring Internal Temperature
Regardless of altitude, using an instant-read thermometer is the most accurate way to determine if baked goods, especially cakes, quick breads, and yeast breads, are fully cooked on the inside. Relying solely on visual cues or the toothpick test can be misleading, particularly at high altitude where the outside might look done before the inside is ready.
For most cakes and quick breads, a thermometer inserted into the center should register between 200-210°F (93-99°C). Yeast breads are typically done when the internal temperature reaches 190-210°F (88-99°C), depending on whether it's a lean or enriched dough. Monitoring the internal temperature provides a reliable benchmark, ensuring your high altitude baking adjustments result in a properly cooked interior, preventing gummy layers or underdone centers.
Recipe-Specific Adjustments
High altitude baking adjustments are often tailored to the specific type of baked good because cakes, cookies, and breads behave differently. A one-size-fits-all approach won't yield the best results. For example, the primary issue with cakes is often collapse and dryness, requiring adjustments to leavening, liquid, and structure. Cookies, on the other hand, frequently suffer from excessive spread, necessitating changes to sugar, flour, and sometimes fat.
Understanding the typical problems associated with each type of bake at high altitude allows for more targeted and effective recipe modifications. While general principles apply, the magnitude and combination of adjustments will vary significantly. Let's look at some common examples of recipe-specific high altitude baking adjustments.
Cake Adjustments
Cakes are notoriously sensitive to altitude changes. The most common problems are over-rising followed by collapse, a dense or gummy layer at the bottom, and dryness. Therefore, high altitude baking adjustments for cakes typically focus on controlling the rise, strengthening the structure, and increasing moisture.
Adjustments usually include reducing baking powder/soda (e.g., by 1/4 tsp per tsp at 5,000 ft), slightly increasing flour (e.g., 1-2 tbsp per cup), adding an extra egg, increasing liquid (e.g., 2-4 tbsp per cup of flour), and potentially reducing sugar slightly. Baking temperature is often increased by 15-25°F (8-15°C) and baking time shortened, or temperature kept standard and time increased with foil tenting. It's often best to seek out recipes specifically developed and tested for high altitude.
Altitude-Specific Cake Recipes
Many experienced high-altitude bakers and cookbook authors have developed recipes specifically formulated to work well at higher elevations. These recipes have already incorporated the necessary high altitude baking adjustments, taking the guesswork out of the process. Searching for "high altitude chocolate cake recipe" or "high altitude vanilla cupcake recipe" can save considerable time and frustration compared to modifying a sea-level recipe from scratch.
These pre-adjusted recipes typically have different ratios of flour, sugar, liquid, and leavening compared to their sea-level counterparts. For instance, a high-altitude cake recipe might call for less baking powder and sugar, and slightly more flour and liquid than a standard recipe for the same cake type. Using these recipes is highly recommended when you're new to high altitude baking or tackling a particularly finicky cake.
Cookies at high altitude often suffer from excessive spreading, resulting in thin, flat, and sometimes overly crisp or dry discs. This is primarily due to the lower melting point of sugar and fat at reduced pressure, combined with faster evaporation. The structure doesn't set fast enough to hold the cookie's shape before it spreads too much.
High altitude baking adjustments for cookies usually involve reducing sugar (e.g., 1-2 tbsp per cup) to slow down spread and prevent over-browning, slightly increasing flour (e.g., 1-2 tbsp per cup) to provide more structure, and sometimes slightly reducing leavening if the cookies are spreading too much or becoming too airy. Chilling the dough thoroughly before baking is also very helpful, as it solidifies the fat and delays spread in the oven. Baking at a slightly higher temperature can also help set the edges faster.
Preventing Flat Cookies
To specifically prevent flat cookies when baking at high altitude, focus on adjustments that promote structure and control spread. Reducing sugar is key, as less sugar means less rapid melting and spreading. Increasing flour provides more structural integrity. Ensuring your butter is cold and using chilling time are also crucial techniques.
Consider a classic chocolate chip cookie recipe. If it calls for 1 cup of granulated sugar and 1 cup of butter, at 5,000 feet you might reduce the sugar to 3/4 cup and add an extra tablespoon or two of flour. Using a mix of granulated and brown sugar can also help, as brown sugar contains molasses which aids moisture retention and slightly different structure. Baking on parchment paper can also sometimes help limit spread compared to greased pans. These targeted high altitude baking adjustments make a significant difference in cookie shape and texture.
Bread Adjustments
Yeast breads at high altitude can rise too quickly during proofing, leading to over-proofing and collapse, or they might have a tough crust and dense crumb due to rapid evaporation and insufficient hydration. The rapid rise can exhaust the yeast too early or cause the gluten structure to tear.
High altitude baking adjustments for bread often involve reducing the amount of yeast slightly (e.g., by 1/4 to 1/3), decreasing the proofing time, increasing the hydration (adding more water, e.g., 1-3 tbsp per cup of flour), and sometimes increasing the salt slightly (salt helps control yeast activity and strengthens gluten). Kneading time might need to be adjusted to ensure proper gluten development with the added liquid. Baking temperature might be slightly increased to set the crust faster, or steam can be added to the oven to delay crust formation and allow for better oven spring.
Optimizing Rise and Texture
Optimizing the rise and texture of bread at high altitude requires careful attention to yeast activity, hydration, and gluten development. Reducing the yeast and watching the dough closely during proofing helps prevent over-proofing. The dough will typically rise faster than at sea level, so the "double in size" rule might happen in 30-45 minutes instead of 60-90 minutes.
Increasing hydration ensures the dough doesn't dry out too quickly during baking, contributing to a softer crumb. Using bread flour can provide a stronger structure capable of supporting the rise. Techniques like stretch-and-folds during bulk fermentation can also help develop strength. Creating steam in your oven (e.g., by placing a pan of water on the bottom rack or using a Dutch oven) is a highly effective high altitude baking adjustment for bread, promoting better oven spring and a thinner, crisper crust by keeping the surface moist longer.
Troubleshooting Common Issues
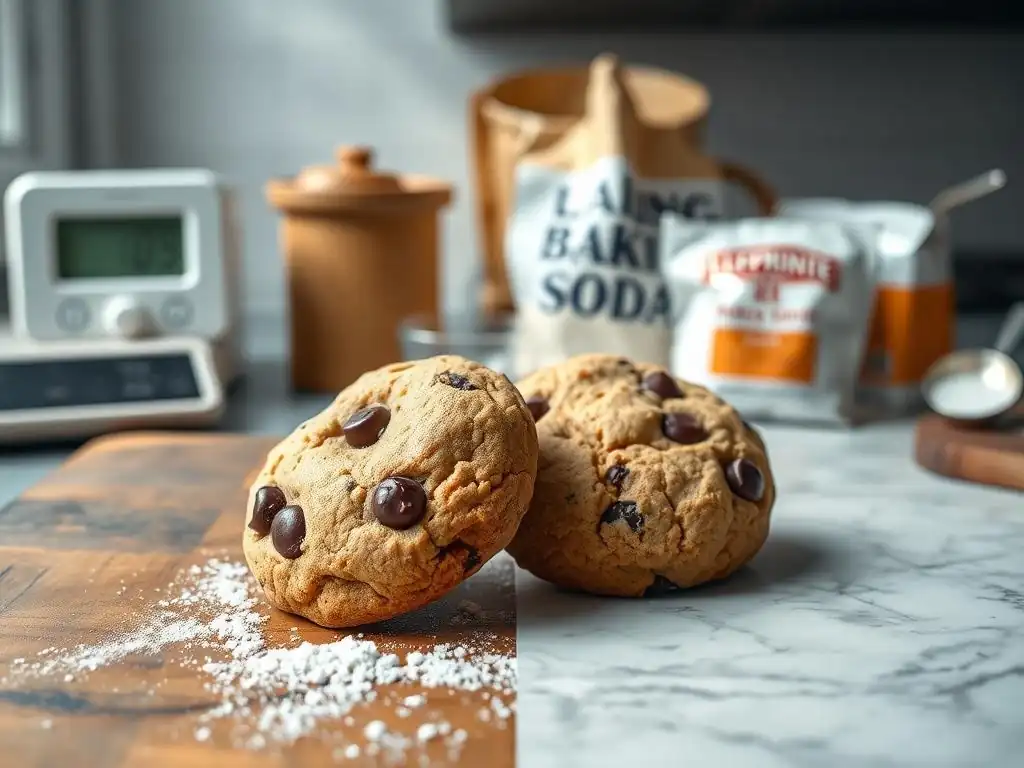
Even with adjustments, you might encounter issues in high altitude baking. Troubleshooting involves recognizing the specific problem and knowing which high altitude baking adjustments to tweak further. It's an iterative process of baking, observing, and adjusting. Don't get discouraged if your first few attempts aren't perfect; it's part of learning your specific altitude and oven.
Common problems include dryness, collapse, poor rise, excessive spread, and uneven baking. Each points to specific areas of your recipe or technique that need refinement. Keeping a baking journal to track your adjustments and results is invaluable for effective troubleshooting and improving your high altitude baking skills.
Fixing Dry and Crumbly Baked Goods
If your cakes, muffins, or cookies are consistently dry and crumbly at high altitude, the primary issue is insufficient moisture. Review your liquid adjustments. Did you add enough extra liquid? For altitudes above 5,000 feet, you likely need to add at least 2-4 tablespoons of liquid per cup of flour in cakes and quick breads.
Consider adding more liquid in your next attempt. Also, think about ingredients that retain moisture; could you use more brown sugar instead of all granulated? Is your baking time too long, or your oven temperature too high? Try reducing the oven temperature by 10-15°F (5-8°C) and increasing the baking time slightly, or tenting with foil sooner. These high altitude baking adjustments directly target moisture retention.
Addressing Collapsed Cakes and Soggy Centers
A collapsed cake or a gummy, soggy layer at the bottom often indicates that the structure wasn't strong enough to support the rapid rise, or that the inside didn't cook fully before the outside set. This points to issues with leavening, structure, or potentially baking temperature/time.
Check your leavening reduction. Did you reduce the baking powder/soda enough? Try reducing it slightly more (e.g., another 1/8 tsp). Did you strengthen the structure? Ensure you added the recommended extra flour and/or an extra egg. Is your oven temperature correct? Baking at a slightly higher temperature (increased by 15-25°F / 8-15°C) helps set the structure faster. Ensure you're baking until the internal temperature is correct (200-210°F / 93-99°C). These high altitude baking adjustments work together to build a stable cake.
Adapting to Regional Variations
High altitude isn't the only environmental factor affecting baking. Humidity levels and even regional water hardness can play a role. For example, baking in a dry climate at high altitude (like Denver, Colorado) presents different challenges than baking in a more humid high-altitude environment (less common, but think of a high-altitude location during monsoon season). Dry climates exacerbate the evaporation issue.
This means that while standard high altitude baking adjustments provide a solid starting point, you might need to fine-tune them based on your specific local conditions. A very dry climate might require adding slightly more liquid than the general guidelines suggest for your altitude. Conversely, higher humidity might mean you need slightly less extra liquid.
The Impact of Climate and Humidity
Humidity directly affects the amount of moisture already present in your flour and other dry ingredients, as well as the rate of evaporation during baking. In a very dry climate, your flour might be drier to begin with, requiring more liquid for proper hydration. The air in your kitchen also draws moisture out of doughs and batters faster during preparation and proofing.
Therefore, paying attention to the climate on baking day can inform your high altitude baking adjustments. On a particularly dry day, you might err on the side of adding a little more liquid. On a rare humid day at altitude, you might add slightly less. Observing how your dough or batter feels is key – is it drying out too quickly? Does it feel significantly stiffer than usual? These observations, combined with general altitude guidelines, help you make the most effective high altitude baking adjustments for your specific environment.
Recipe Adaptations
Applying high altitude baking adjustments to specific recipes can seem daunting at first. It's helpful to see how common recipes are typically modified. Remember, these are starting points, and further fine-tuning may be needed based on your exact altitude and oven.
High Altitude Chocolate Cake
A standard sea-level chocolate cake recipe might call for 2 cups flour, 1.5 cups sugar, 1 tsp baking soda, 1 tsp baking powder, 1 cup milk, 1/2 cup oil, 2 eggs. For high altitude baking adjustments (e.g., at 5,000-7,000 ft), you might modify it to:
- Flour: Increase to 2 cups + 2-3 tablespoons.
- Sugar: Reduce to 1.25 cups (reduction of 1/4 cup).
- Baking Soda: Reduce to 3/4 tsp (reduction of 1/4 tsp).
- Baking Powder: Reduce to 3/4 tsp (reduction of 1/4 tsp).
- Liquid (Milk): Increase to 1 cup + 3-4 tablespoons.
- Eggs: Add one extra egg.
- Baking Temperature: Increase from 350°F to 365°F (175°C to 185°C).
- Baking Time: Slightly shorter, but bake until internal temperature reaches 200-210°F (93-99°C).
These high altitude baking adjustments address leavening control, structural support, and moisture balance, leading to a more successful cake at elevation.
A standard sea-level peanut butter cookie recipe might use 1 cup butter, 1 cup peanut butter, 1 cup granulated sugar, 1 cup brown sugar, 2 eggs, 2.5 cups flour, 1 tsp baking soda, 1/2 tsp baking powder. For high altitude baking adjustments (e.g., at 5,000-7,000 ft), you might adjust:
- Granulated Sugar: Reduce to 3/4 cup.
- Brown Sugar: Keep at 1 cup (brown sugar retains moisture better).
- Flour: Increase to 2.5 cups + 2 tablespoons.
- Baking Soda: Reduce to 3/4 tsp.
- Baking Powder: Reduce to 1/4 tsp.
- Butter/Peanut Butter: Ensure cold, consider slightly reducing if spread is still excessive (e.g., 1-2 tbsp total).
- Technique: Thoroughly chill dough for at least 30-60 minutes before baking. Bake at 375°F (190°C) instead of 350°F (175°C).
These high altitude baking adjustments combat excessive spread and improve texture.
High Altitude Sourdough Bread
Adapting sourdough bread involves managing the faster fermentation and proofing due to altitude and adjusting hydration. A sea-level sourdough might use 100% hydration starter and 70% hydration for the dough. For high altitude baking adjustments (e.g., 5,000-7,000 ft):
- Starter: Might still use 100% hydration, but watch its activity closely; it will ripen faster.
- Dough Hydration: Might need to increase slightly, perhaps to 72-75% hydration, depending on flour and climate, to compensate for evaporation.
- Fermentation/Proofing: Significantly reduce bulk fermentation and proofing times. Watch the dough, not the clock. Bulk fermentation might be 2-3 hours instead of 4-5 hours. Final proof might be 1-2 hours at room temp or shorter cold proof.
- Salt: Some bakers increase salt slightly (e.g., from 2% to 2.2%) to help control yeast activity and strengthen gluten.
- Baking: Use a Dutch oven or add steam to the oven to promote good oven spring and prevent a tough crust. Bake at a standard high temperature (e.g., 450-500°F / 230-260°C).
High altitude baking adjustments for sourdough are more about timing and hydration balance than drastic changes to ingredients (besides water).
Tips for Success
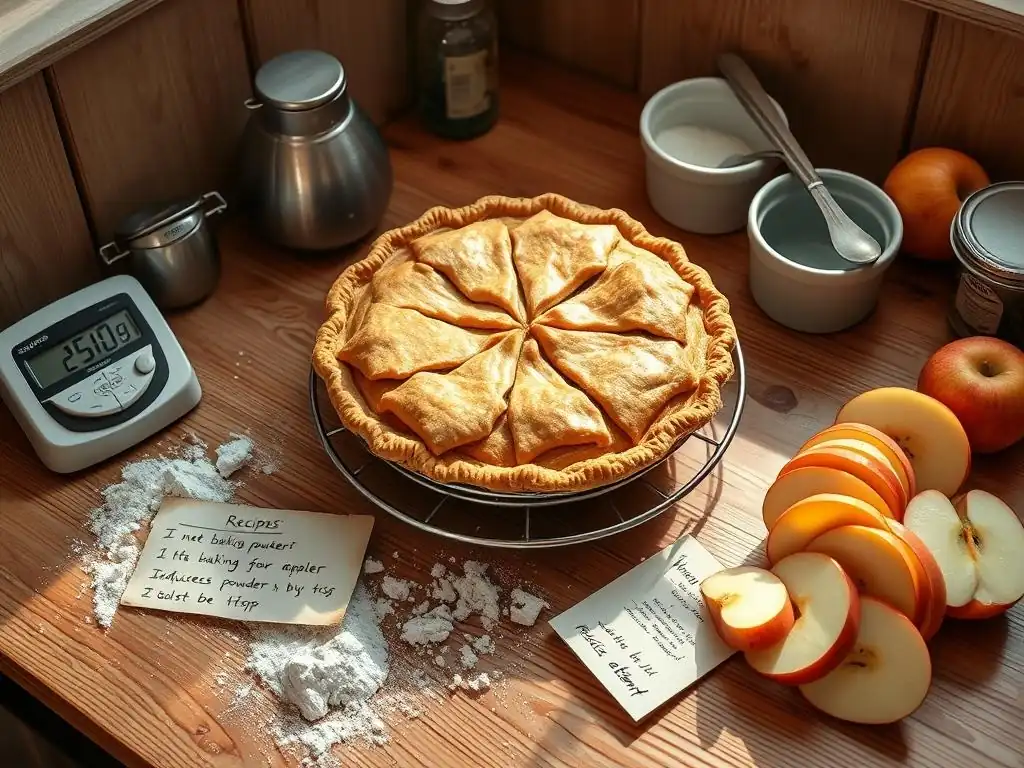
Mastering high altitude baking adjustments takes practice and patience. Here are some general tips to help you succeed in your baking journey at higher elevations.
The Importance of Accurate Temperature
Accurate oven temperature is critical at any altitude, but perhaps even more so when making high altitude baking adjustments. Because you might be adjusting oven temperature up or down, and because baking times are often shorter or longer, knowing your oven's true temperature is essential. Oven thermostats can be inaccurate by as much as 25-50°F (15-30°C).
Using an inexpensive oven thermometer placed inside your oven will show you the actual temperature, allowing you to adjust your oven dial accordingly. If your recipe calls for 365°F and your oven thermometer reads 350°F, you know to set your oven to a higher mark until the thermometer shows 365°F. This simple step ensures that your high altitude baking adjustments for temperature are applied correctly.
Using Quality Ingredients
Starting with fresh, quality ingredients is always important in baking. At high altitude, where ingredients behave differently, their quality can have an even more noticeable impact. Ensure your leavening agents (baking powder and baking soda) are fresh and active. Old leavening can lead to poor rise, making it difficult to troubleshoot whether the issue is altitude or inactive ingredients.
Using fresh flour that hasn't been sitting on the shelf for too long is also beneficial. Pay attention to the type of flour recommended; using the correct protein level can impact the structure. While high altitude baking adjustments can correct for environmental factors, they can't fix issues caused by stale or poor-quality ingredients.
Documenting Adjustments
Keeping a baking journal is one of the most valuable tools for high altitude baking. For each recipe you try, note down the original recipe, your altitude, the adjustments you made (e.g., reduced sugar by 2 tbsp, added 3 tbsp milk, baked at 375°F), the outcome (e.g., slightly dry, good rise but sank slightly, cookies spread too much), and what you plan to change next time.
This systematic approach allows you to learn from each bake and refine your high altitude baking adjustments over time. Instead of guessing, you'll have a record of what worked and what didn't for specific recipes at your location. This documentation accelerates your learning curve and helps you consistently produce successful results.
Mastering the Art
High altitude baking can feel challenging initially, but with understanding and practice, it's an art that can be mastered. Every oven and every location is slightly different, meaning even standard high altitude baking adjustments are just starting points. The key is to be observant, patient, and willing to experiment.
Embrace Experimentation
Don't be afraid to deviate from the recipe and try different high altitude baking adjustments. Baking is part science, part art, and part intuition. If your cake is still sinking slightly, try reducing the baking powder by another 1/8 teaspoon next time. If your cookies are spreading, try adding a little more flour or chilling the dough longer.
Start by making one or two adjustments at a time so you can isolate the effect of each change. Keep meticulous notes in your baking journal. Embrace the learning process, and view each bake as an opportunity to refine your technique and high altitude baking adjustments.
Building Confidence in High Altitude Baking
As you gain experience and see successful results from your high altitude baking adjustments, your confidence will grow. Start with simpler recipes like cookies or muffins before tackling more complex bakes like delicate cakes or artisan breads. Each successful bake reinforces your understanding of how ingredients behave at altitude and how to modify them.
Talk to other bakers in your area; they likely have valuable insights and tested recipes. Search for local high altitude baking groups or resources specific to your region. With practice, observation, and a willingness to adjust, you'll soon be baking delicious goods at any elevation, confidently making the necessary high altitude baking adjustments.
Frequently Asked Questions
What is high altitude baking and why does it require adjustments?
High altitude baking refers to baking at altitudes significantly above sea level. Adjustments are needed because the lower air pressure affects how leavening agents and liquids behave, leading to potential baking failures.
What are some common problems encountered when baking at high altitude?
Common issues include cakes collapsing, breads rising too quickly and then falling, and baked goods being dry. This is primarily due to faster evaporation of liquids and excessive rise from increased leavening activity.
What are the main adjustments I should make to my recipes at high altitude?
Generally, you need to reduce the amount of leavening, increase the liquid, and increase the oven temperature slightly. These adjustments counteract the effects of the lower air pressure.
Where can I find reliable high altitude baking recipes or adjustment guides?
Websites like BakeWithEase.com often have dedicated sections or articles on high altitude baking. Look for resources that provide specific adjustments based on your altitude and the type of baked good.
How do I know if my high altitude baking adjustments were successful?
A successful bake will have a stable structure, a moist crumb, and a well-developed flavor. Watch for signs like proper rise without collapsing, and even browning.
Final Reflection: Scaling the Peaks of Baking Success
High-altitude baking presents unique challenges, but mastering its nuances unlocks a world of delicious possibilities. The adjustments required aren't merely technicalities; they're key to transforming frustrating failures into consistently delightful results. This article explored the science behind altitude's impact on baking, offering practical solutions to common high-altitude baking problems. Understanding these adjustments isn't just about getting a perfectly risen cake; it's about embracing the unique environment and achieving baking success wherever you are.
The journey of conquering high-altitude baking is a testament to the power of adaptation and precision. It's a journey I've personally undertaken, filled with both triumphs and humbling setbacks. The process of learning to adjust recipes, to understand the subtle interplay of ingredients at higher elevations, has been incredibly rewarding. The best bakers are those who are not afraid to experiment and adapt.
This quote, though not specifically about high-altitude baking, perfectly encapsulates the spirit of this culinary challenge. The ongoing exploration of high-altitude baking continues to inspire innovation and creativity within the baking community, pushing boundaries and expanding the possibilities of what's achievable in the kitchen.
Now, it's your turn. Don't let the thin air intimidate you. Take the knowledge gained from this article, experiment with your favorite recipes, and embrace the unique challenges of high-altitude baking. Each successful bake, each perfectly risen loaf, will be a testament to your perseverance and a delicious reward for your efforts. The mountains may be high, but with the right adjustments and a little patience, the peaks of baking success are within your reach.
Unlock Your High-Altitude Baking Secrets!
Thanks for taking the time to explore the world of high-altitude baking with us! We hope you now feel more confident tackling those tricky altitude adjustments. Ready to put your new knowledge to the test?
- Bake your dream cake (or cookies, or bread!) today: Use the tips we've shared to adapt your favorite recipe and conquer those altitude challenges. Note any changes you make for future reference!
- Share your high-altitude baking triumphs (and even your flops – we learn from those too!) on social media using #BakeWithEaseHighAltitude. Let's build a supportive community!
- Explore our other articles for more high-altitude baking tips and tricks!
What delicious high-altitude creation are you going to bake first? Let us know in the comments below!